Este es mi reporte de la segunda semana del proyecto de ciencia ciudadana, en la cual vamos a simular colisiones como las que se producen en el Gran Colisionador de Hadrones del CERN. Para más detalles sobre el proyecto, pueden ingresar a este post de @lemouth, que es quien está liderando este experimento en Hive.
This is my report of the second week of the citizen science project, in which we are going to simulate collisions like the ones at CERN's Large Hadron Collider. For more details about the project, you can go to this post by @lemouth, who is leading this experiment at Hive.
Más allá de las tareas que teníamos que llevar a cabo esta semana, me propuse entender un poco qué es lo que estamos haciendo, así que empecé por leer algunos post indicados por @lemouth. Empecé con este post en el que se explica de manera muy clara el modelo estándar de partículas a través de su historia y con este otro post, un poco más complejo, en el que se habla de los mesones charmonia, bottomonia y toponia (spoiler: estos últimos, en realidad, no existen).
Beyond the tasks we had to carry out this week, I set out to understand a little bit what we are doing, so I started by reading some posts indicated by @lemouth. I started with this post in which the standard particle model is explained in a very clear way through its history and with this other post, a bit more complex, in which the charmonia, bottomonia and toponia mesons are discussed (spoiler: the latter, in reality, do not exist).
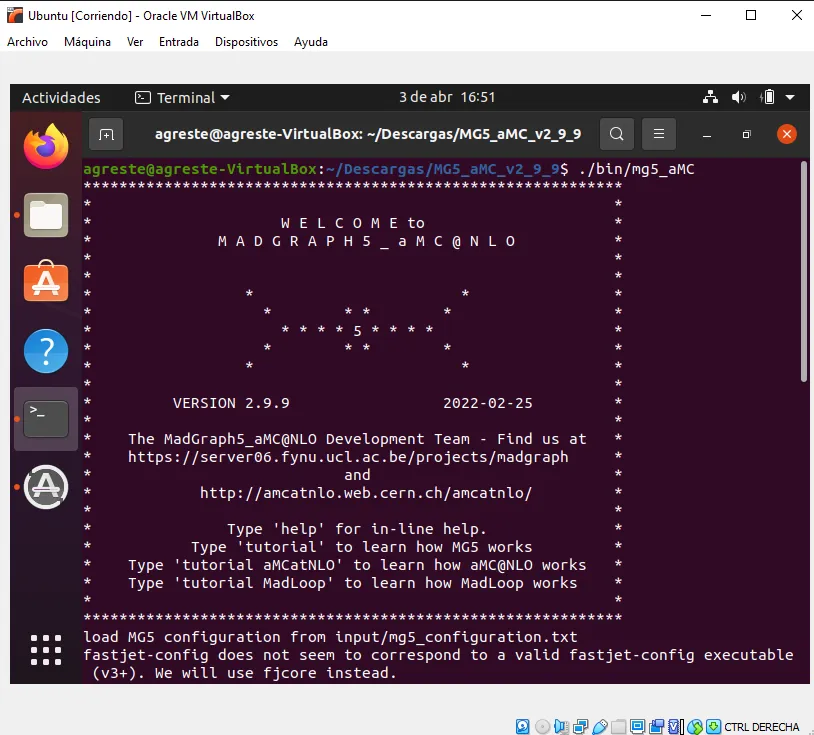
Para comenzar la tarea, encendí la máquina virtual y abrí la terminal en la carpeta en la que está instalado el software MG5aMC. Para los detalles de su instalación, pueden leer mi primer reporte o bien cualquiera de los reportes de mis compañeros de proyecto en la etiqueta #citizenscience. Una vez en la terminal, se ejecuta el software del siguiente modo:
To start the task, I turned on the virtual machine and opened the terminal in the folder where the MG5aMC software is installed. For the details of its installation, you can read my first report or any of the reports of my project partners in the #citizenscience tag. Once in the terminal, run the software as follows:
Entre la información que nos brinda el software cuando se lo ejecuta, se encuentra la composición del protón (resaltada en la captura) y todas las partículas del modelo estándar, entre las cuales resalté las que nos importan ahora: el quark top (t) y el antiquark top (t~).
Among the information provided by the software when run is the composition of the proton (highlighted in the screenshot) and all the particles of the standard model, among which I highlighted the ones that matter to us now: the top quark (t) and the top antiquark (t~).

Antes de continuar con el siguiente paso, leí este post muy interesante sobre las colisiones que tienen lugar en los colisionadores de partículas y sobre las simulaciones de esas colisiones en computadoras comunes (¡justo lo que vamos a hacer aquí!).
Before proceeding to the next step, I read this very interesting post about the collisions that take place in particle colliders and about simulations of those collisions on ordinary computers (just what we are going to do here!).
Comprendiendo un poco mejor el contexto, pasé a definir la colisiones protón-protón (p p) en el software, que producirán un par de quarks top-antitop (t t~):
Understanding the context a little better, I went on to define proton-proton collisions (p p) in software, which will produce a top-antitop quark pair (t t~):
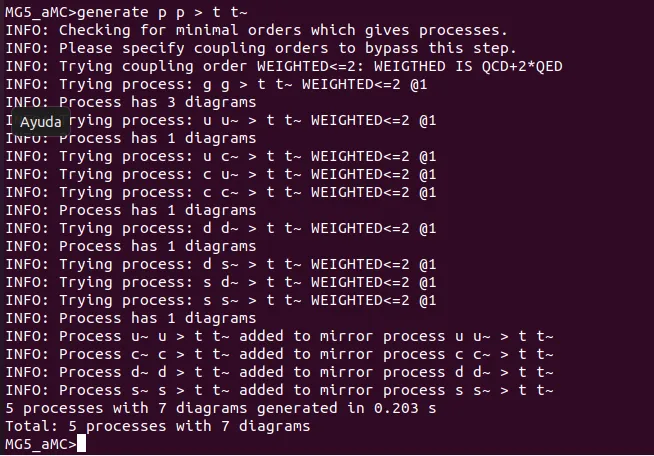
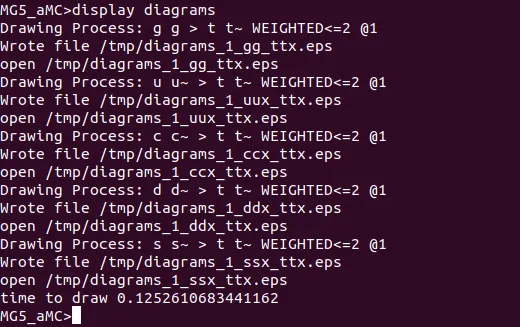
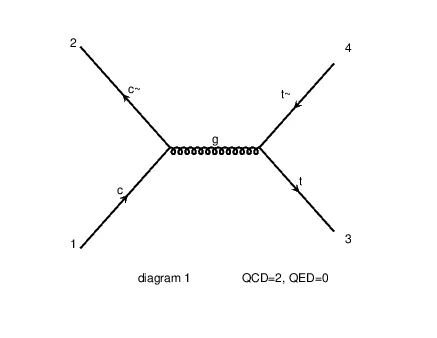
Con este comando, según entendí, el código está preparado para abordar los cálculos del proceso, que se basa en los diagramas de Feynmann, que contemplan todas las posibilidades de conectar el estado inicial del proceso con el estado final. Al escribir en la consola “display diagrams”, se generan algunos archivos .eps con los diagramas.
With this command, as I understood, the code is ready to address the calculations of the process, which is based on Feynmann diagrams, which contemplate all the possibilities to connect the initial state of the process with the final state. When typing in the console "display diagrams", some .eps files with the diagrams are generated.
El siguiente paso es, en palabras de lemouth, “ordenar al código que extraiga una ecuación de estos diagramas y la convierta en un código Fortran. A partir de esta ecuación, será posible simular las colisiones tal y como se producen en la naturaleza”. Para ello, usé el comando output y un nombre de mi agrado.
The next step is, in lemouth's words, "to instruct the code to extract an equation from these diagrams (a heavy integral) and convert it to a Fortran code. From this equation, it will then become possible to simulate collisions as they would occur in nature." To do this, I used the output command and a name of my liking.
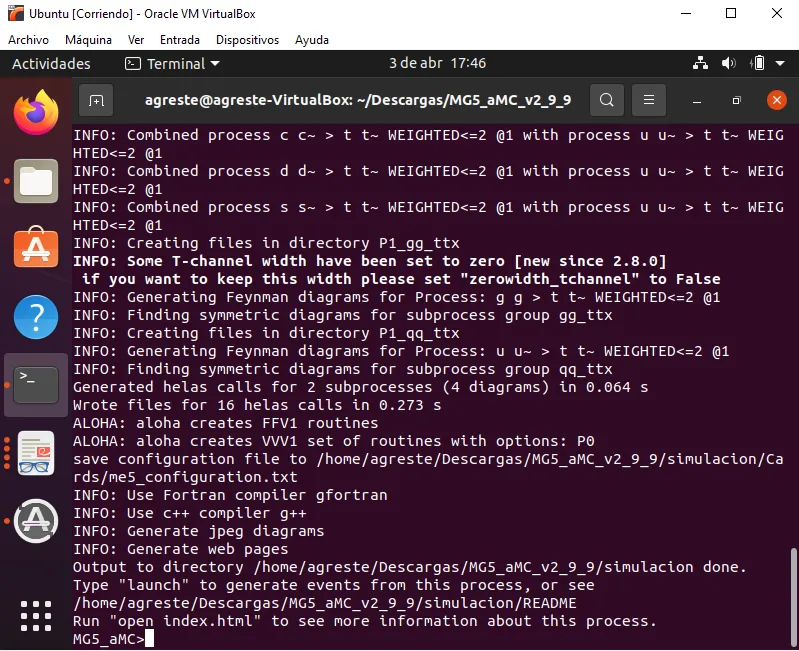
Una vez hecho esto, se puede salir del software escribiendo “exit” en la terminal y ver el contenido de la carpeta generada, en mi caso “simulacion”.
Once this is done, you can exit the software by typing "exit" in the terminal and see the content of the generated folder, in my case "simulation".
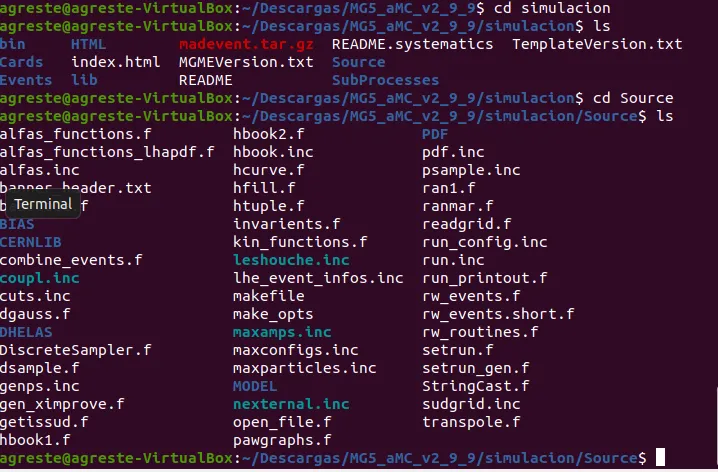
Al abrir uno de los archivos se puede “leer” algo como lo siguiente:
When you open one of the files you can "read" something like the following:
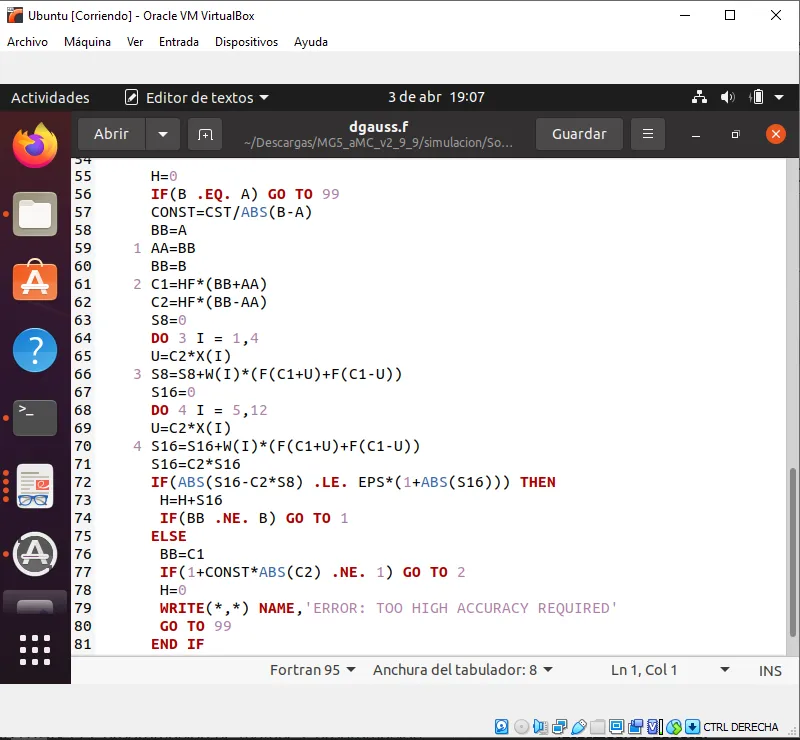
Ahora toca compilar y correr el código. Para ello, hay que iniciar de nuevo el software y usar el comando “launch”.
Now it is time to compile and run the code. To do this, start the software again and use the "launch" command.
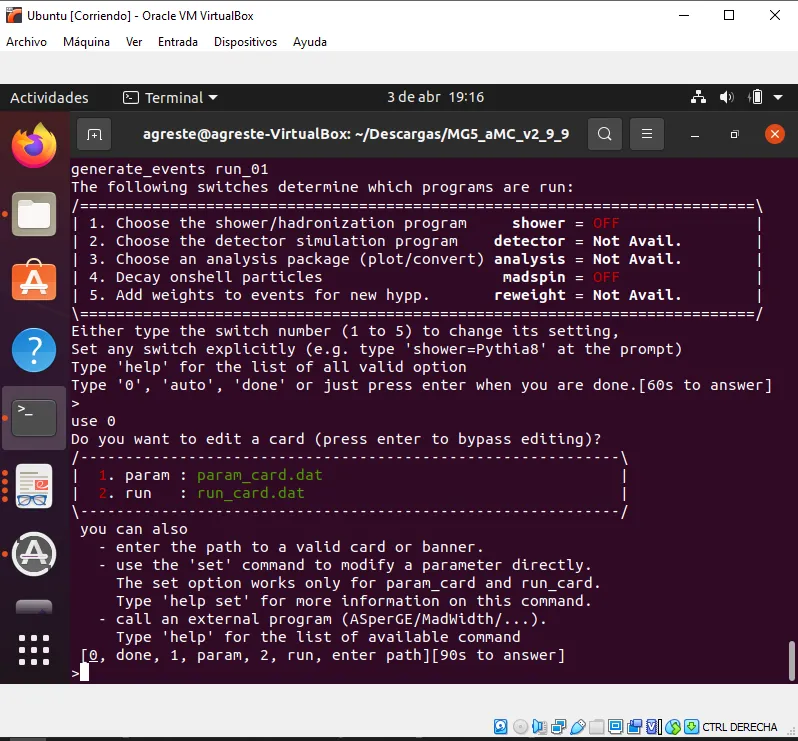
Luego, hay que activar Pythia8 y MadSpin, presionando 1 y 4 respectivamente.
Next, activate Pythia8 and MadSpin by pressing 1 and 4 respectively.
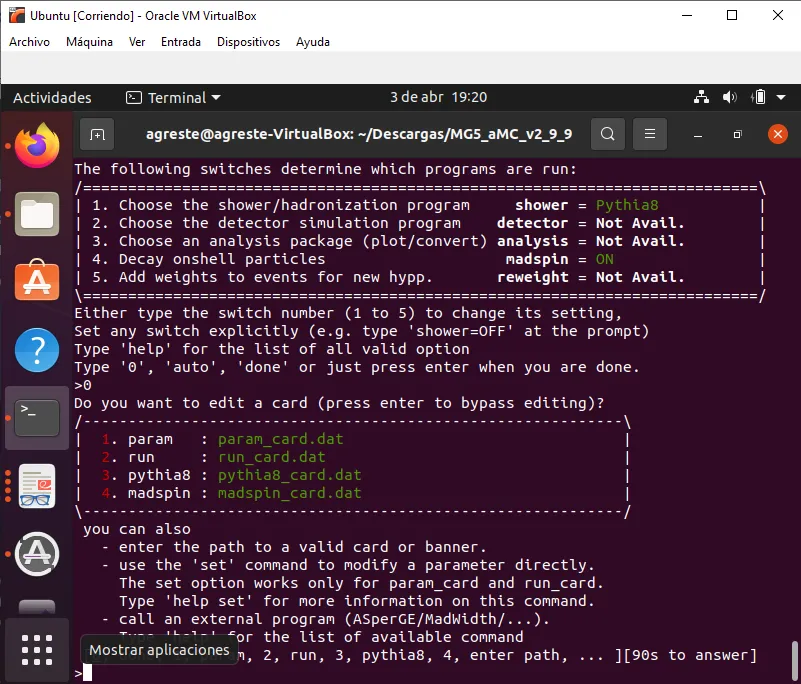
Una vez hecho esto aparecen una serie de parámetros para modificar. Solo hay 90 segundos para modificarlos, así que si, como yo, sacan capturas de pantalla del paso anterior, escriben un párrafo y leen cuál es el siguiente paso en el post de @lemouth, probablemente tengan que empezar de nuevo… El que hay que editar es el 2. Para ello hay que presionar 2 y luego editarlo en vim, lo que, si no estás acostumbrado a usarlo, no es tan fácil como parece, pero tampoco tan difícil. Con unos minutos de investigación, pude entender el funcionamiento básico y cambiar “True” por “False” en la línea 129. Una vez editado, hay que correr el código presionando Enter.
Once this is done a series of parameters appear to modify. There are only 90 seconds to modify them, so if, like me, you take screenshots of the previous step, write a paragraph and read what the next step is in @lemouth's post, you probably have to start over... The one to edit is 2. To do this you have to press 2 and then edit it in vim, which, if you are not used to using it, is not as easy as it seems, but not that difficult either. With a few minutes of research, I was able to understand the basic operation and change "True" to "False" in line 129. Once edited, you have to run the code by pressing Enter.
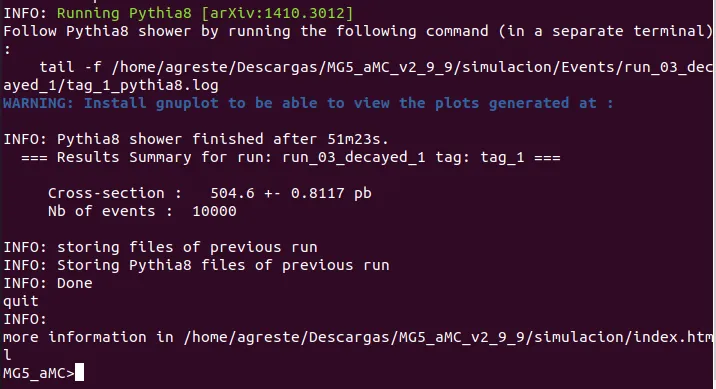
En el output, había que fijarse en el siguiente número, que indica la tasa de producción de un par top-antitop en el LHC. Mi número, como preveía @lemouth en su post, difiere apenas del suyo.
In the output, one had to look at the following number, which indicates the production rate of a top-antitop pair at the LHC. My number, as predicted by @lemouth in his post, differs only slightly from his.

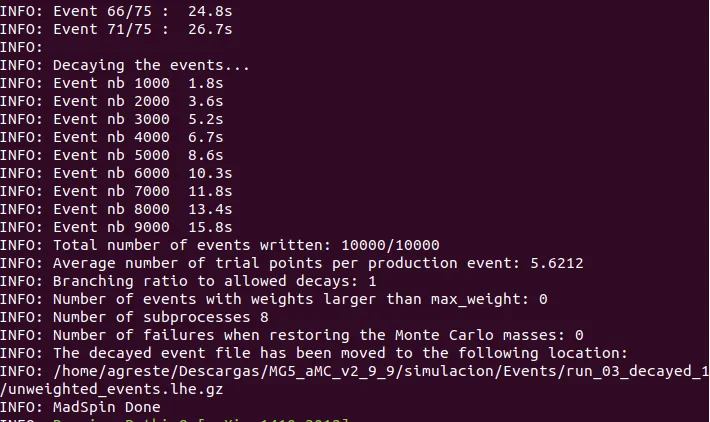
El siguiente paso era verificar en el output que MadSpin maneja el decaimiento de los quarks y antiquarks top producidos del modo esperado.
The next step was to verify on the output that MadSpin handles the decay of the produced top quarks and antiquarks as expected.
Y luego verificar también el output de Phytia8. Este proceso, en mi caso, demoró más de 50 minutos.
And then verify also the Phytia8 output. This process, in my case, took more than 50 minutes.
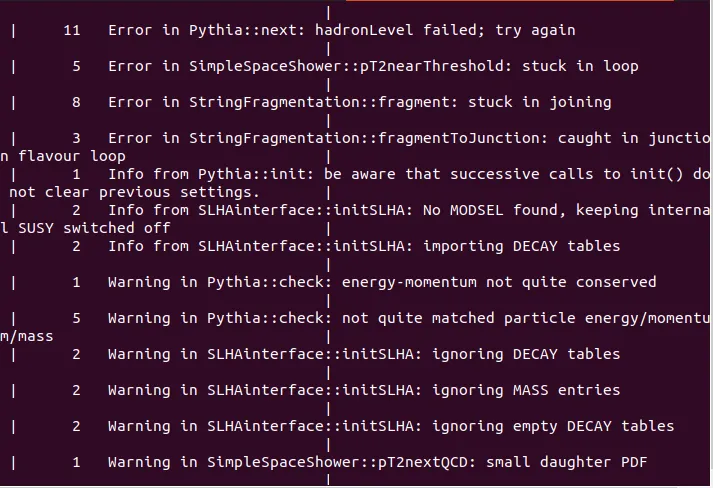
En el log del proceso encontré varios errores. No sé por qué se producen ni qué importancia tienen para el proceso.
Actualización 5/4: @lemouth hizo una revisión del log de Pythia 8 y los errores no son preocupantes. Si bien algunas configuraciones dieron error durante el proceso, el software pudo arreglar los problemas automáticamente regenerando los eventos defectuosos.
In the process log I found several errors. I don't know why they occur or how important they are for the process.
Update 5/4: @lemouth did a review of the Pythia 8 log and the bugs are not worrisome. While some configurations did error during the process, the software was able to fix the problems automatically by regenerating the faulty events.
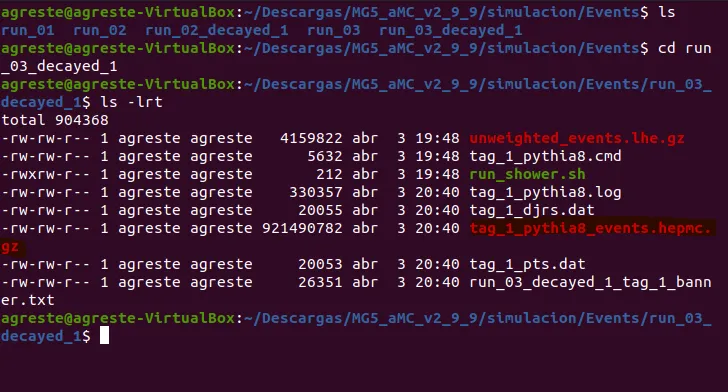
Finalmente, salí del programa con el comando “exit” y busqué el archivo tag_1_pythia8_events.hepmc.gz, que contiene la información de las colisiones. En mi caso, como me pasé del tiempo dos veces, estaba en la carpeta Events/run_03_decayed_1.
Finally, I exited the program with the "exit" command and looked for the tag_1_pythia8_events.hepmc.gz file, which contains the collisions information. In my case, since I ran over time twice, it was in the Events/run_03_decayed_1 folder.
Esto fue todo por ahora. En la próxima semana, seguramente comencemos a analizar ese archivo para tratar de comprender la física que contiene.
That's all for now. In the next week, we will surely start analyzing that file to try to understand the physics it contains.
Original en español. Traducido al inglés con Deepl.
Todas las imágenes son capturas de pantallas del proceso hechas por mí.
Original in Spanish. Translated to English with Deepl.
All images are screenshots of the process made by me.