In this tutorial, I want to show you How to Set Up Your Helium Wallet with Ledger using MacOS.
Before we start, I want to say that in crypto, everything changes very rapidly, so the method that I will show you today may not work or be needed in the future. Check the updates on the official instructions page from the Helium community: https://docs.helium.com/wallets/ledger
1. Installing Helium App on Ledger Device
Let’s begin by opening Ledger Live and connecting your actual hardware ledger. Then Go Settings -> Experimental Features -> Enable Developer mode. Once enabled, go to Manager and search Helium. Install the app.
2. Downloading the Command Line Interface (CLI) Helium App
Open the instructions from the Helium community, https://docs.helium.com/wallets/ledger. Go to the “Execute Commands section” and click on “Releases in the Github repo”. Download the latest version for MacOS.
Next, unzip the file, and inside this folder, you will see a helium executable file.
3. Moving the CLI Helium App to Root Directory
Open a New Finder Window and select Go -> Go to folder and type /usr/local/bin.
(This is to add the helium program to the native terminal environment path. Just to mention, the programs residing on your root directory have access to your drive, so be careful and don’t install any untrusted software as malicious programs may cause unrepairable damage. The helium program we just downloaded was developed by the helium community, and it is open source, so it should be safe to use.)
Copy the helium executable file to this location.
(This allows to run the file natively from the terminal. Once there is a new version of the helium executable app, just replace the old file with the new one.)
4. Running the CLI Helium App
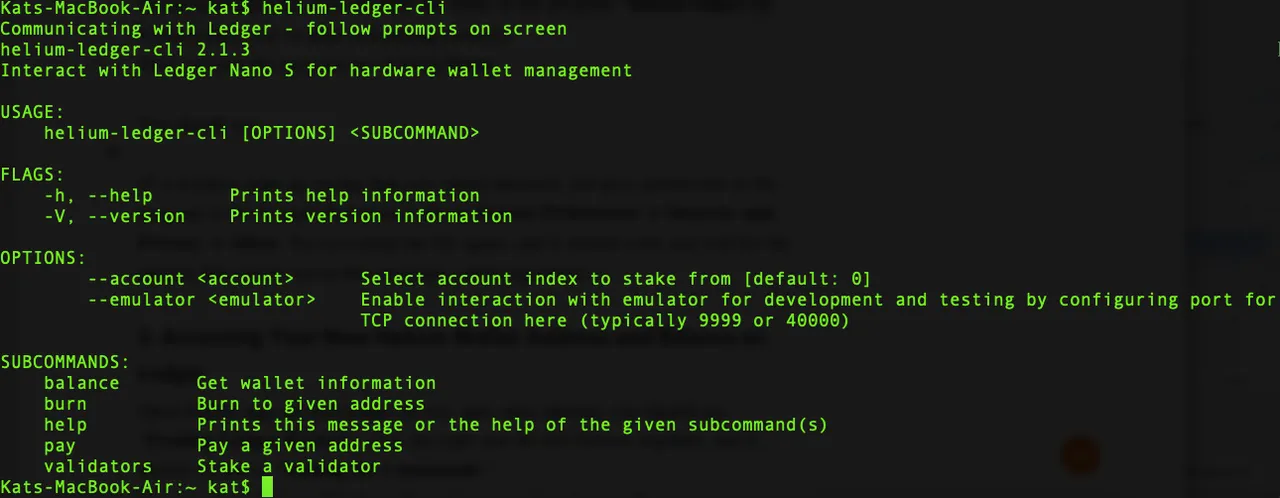
Open or restart the Terminal window and type “helium”, then press Tab, and it should automatically autocomplete the name of the program “helium-ledger-cli”, if that works, you’ve done everything correctly.
Next, execute the program by clicking Enter.
You should see:

(If a window pops up saying that you cannot proceed, just give permission to the program in the System Preferences. Go to System Preferences -> Security and Privacy -> Allow. Try executing the file again, and it should work and will list the options that can be run in this program, called arguments.)
5. Accessing Your New Helium Wallet Address and Balance on Ledger
Open helium app on your ledger device, and, once opened, you should see “Pending Ledger Review”, click the right and the left buttons together, and it should switch to “Waiting for Commands”.
Type “helium-ledger-cli balance” on the terminal, and you will see your new helium ledger wallet address and balance.
It should look like this:

If you see an error:
"Communicating with Ledger - follow prompts on screen error: Error accessing Ledger HID Device. Be sure that Ledger Live is not running."
Fix: (1) Make sure Ledger Live is closed and (2) your ledger device is plugged in, and the helium app is open.
Before sending your Helium to your new wallet address, make sure it is the same as it shows up in your Ledger device!!! When sending to the new addresses, I highly recommend sending a very small amount at first to test the transaction and the wallet to make sure you receive the funds.
Let me know in the comments below if you found it useful and want to see more crypto tutorials.
Disclaimer: This tutorial is not financial advice or security advice, and it is for education purposes only.
#helium
#heliumnetwork
#ledger
#cryptowallet
#crypto
#cryptocurrency
