good afternoon back again with me in this bright afternoon I will share the tutorial "How to cut the video with shotcut" what the heck is it shotcut? and how do i adjust the brightness video with that software? we just discussed below.
shotcut is a video editing software that has many features that can facilitate the video editing, this software is open source and free although it is free but many features that we use to edit the video.
then how to adjust the brightness of the video using the software here I will explain its step by step.
Step 1
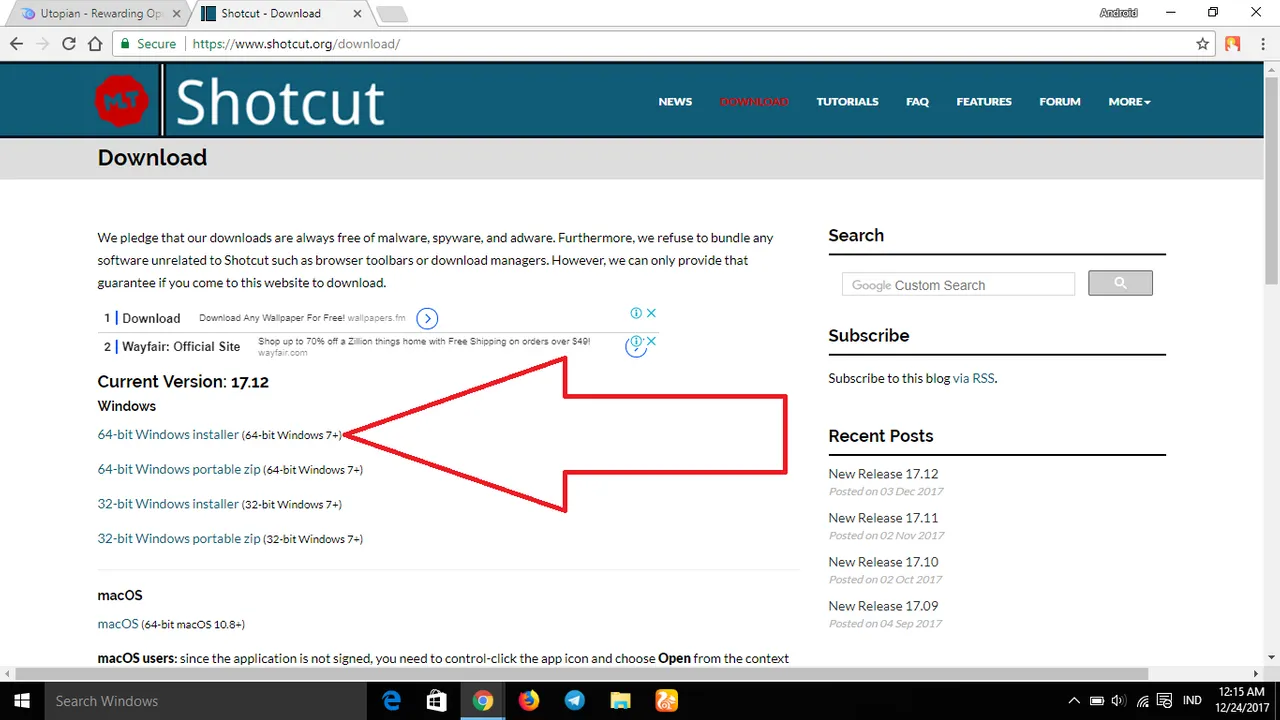
in this first step we will first download his shotcut software. we can download it for free at the official website here https://www.shotcut.org/download/
the website will look like this, and if you will download the download according to your pc specifications, like I am here using a pc that has a 64 bit windows operating system so I mendwonload a 64 bit shotcut. look at the picture below for more details.
the advantage of the process of downloading it to completion and if it is finished installah its software as usual.
Step 2
in this second step we will open the software and set it to make editing. when you open it it will look like this.
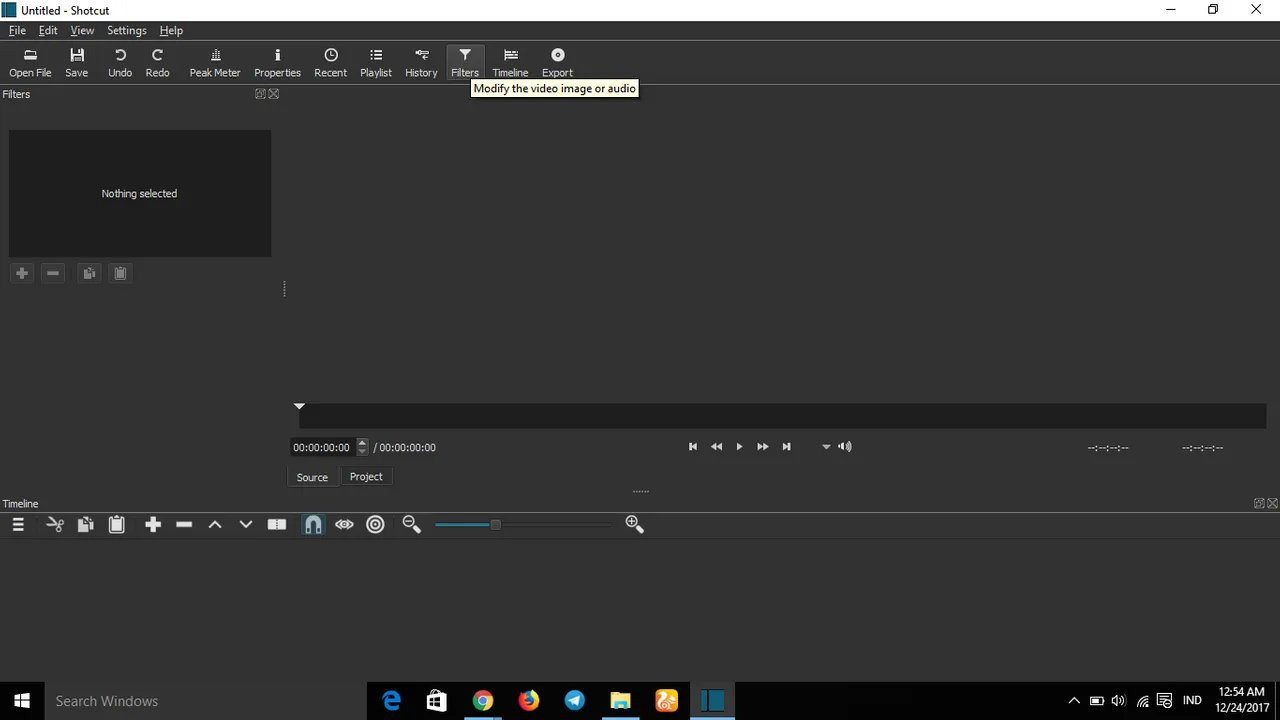
as you can see it looks empty yet no video we will edit. and for that we must enter the video we will edit.
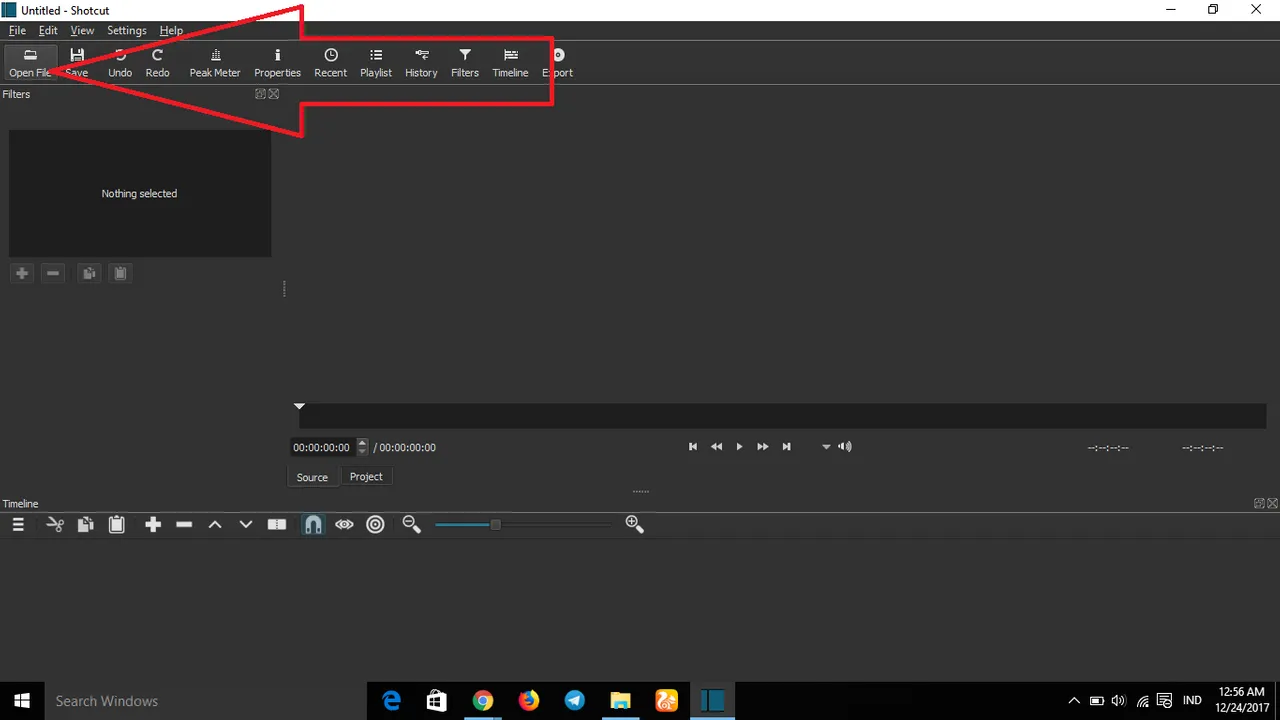
we can enter the file we will edit by pressing the "open file" in the top left corner for more details see the picture below
after you press "open file" it will pop up a new to select which file we will input to shotcut.
to select the file we can click the left mouse (mouse) once on video or audio that we will input to shotcut then press "open"
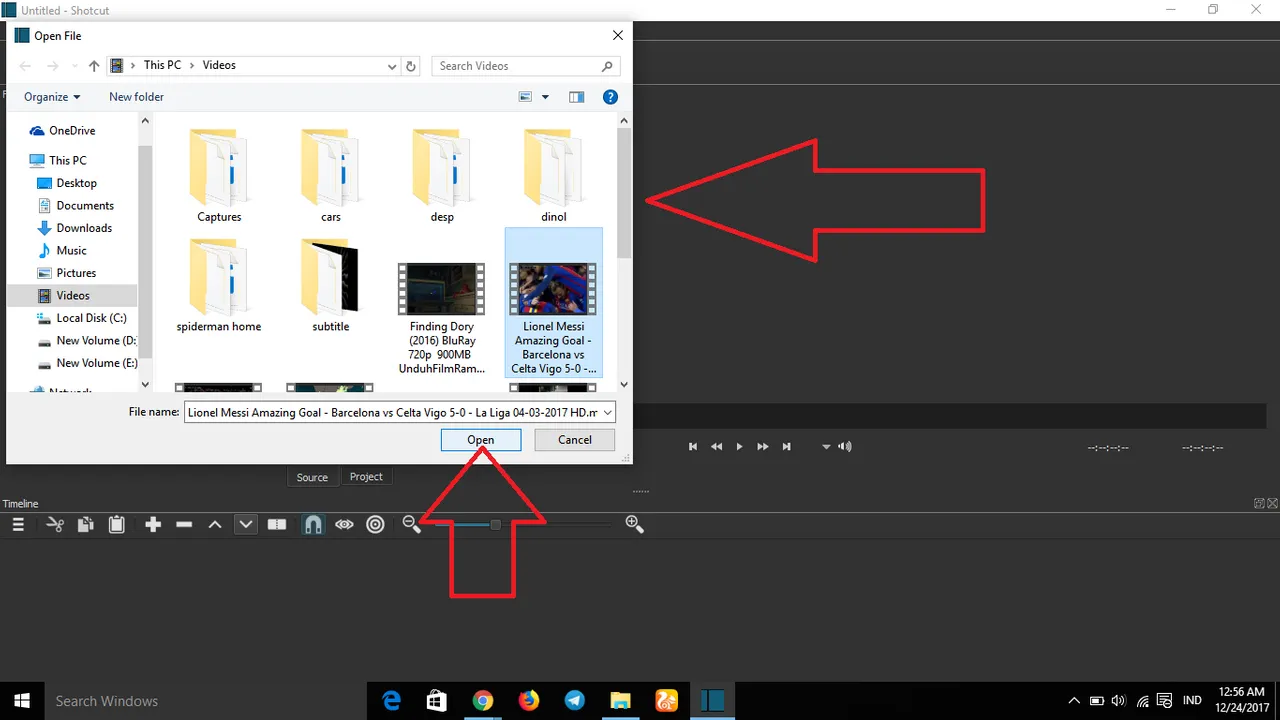
after you press open the video should already exist in the shotcut look at my picture below that's when the video has entered into the software shotcut.
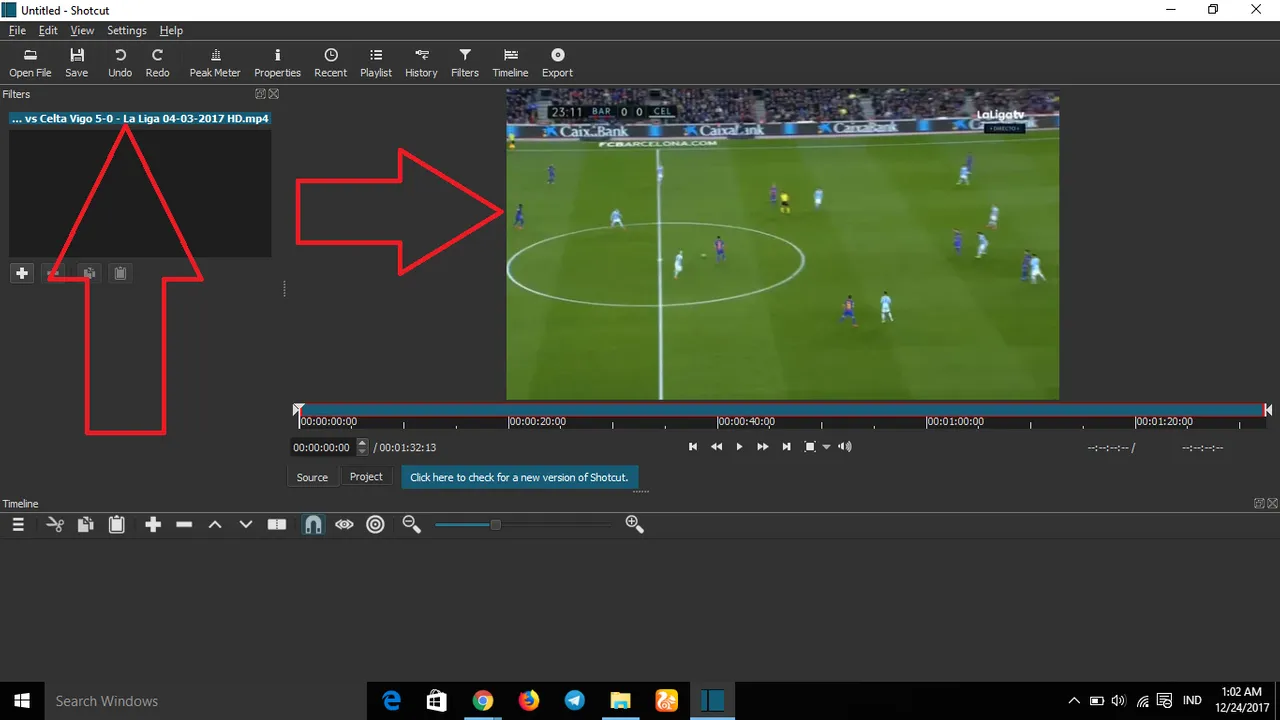
Step 3
then we go to step 3 on step 3 this time we will do the editing on video that we have input to application of shotcut earlier. how to let's see step step below.
first we have to enter the video into the track column first. to add tracks in the shortcut you can press "display a menu of additional actions" located in the left corner "timeline" for more details see the picture below
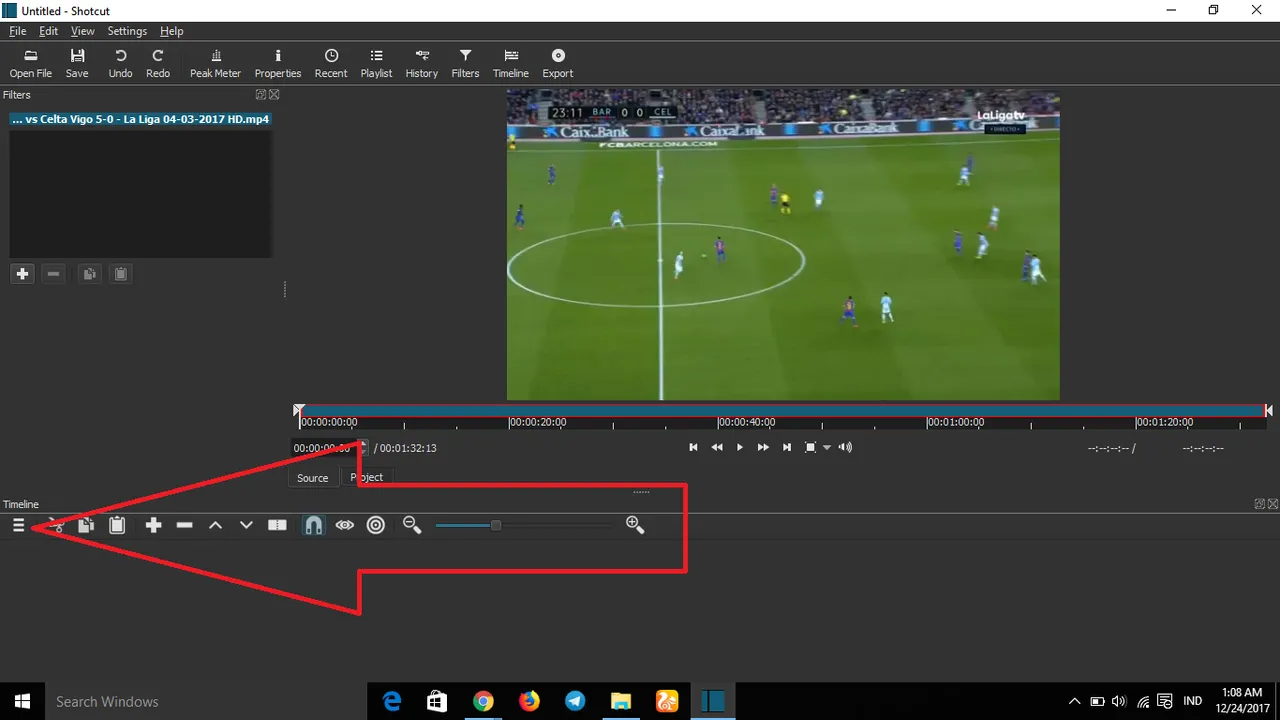
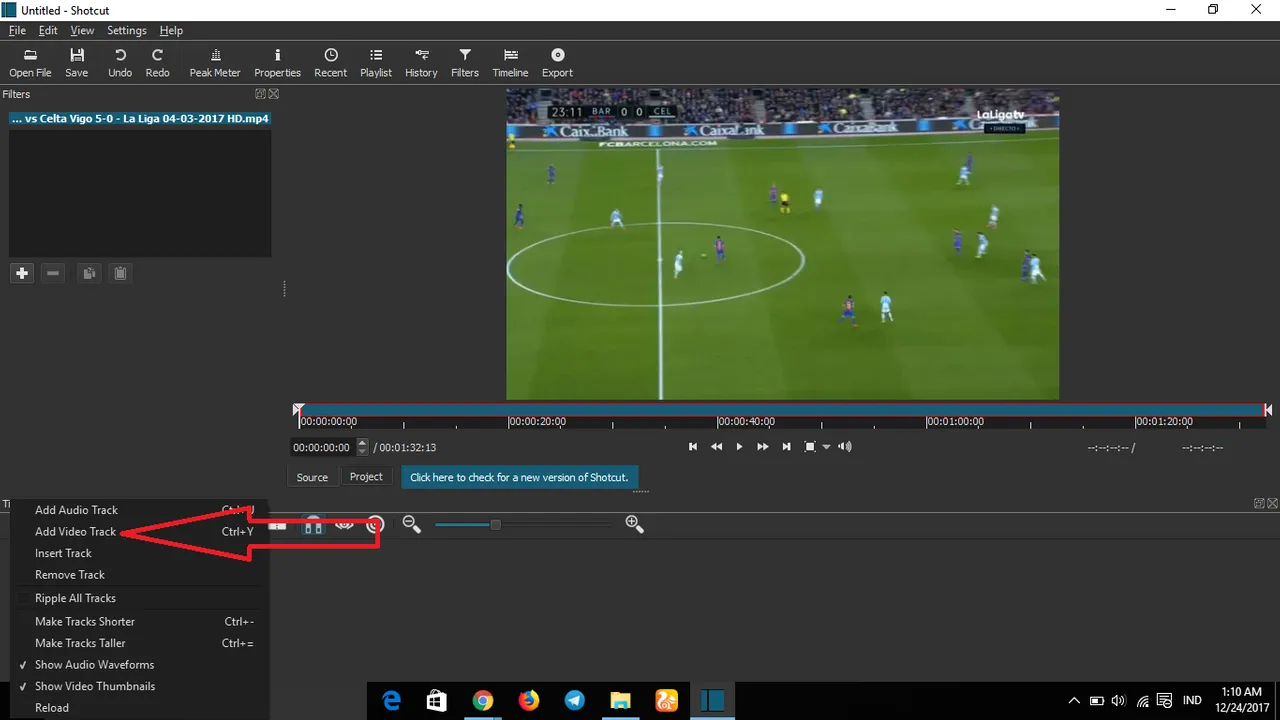
as soon as you hit "display a menu of additional actions" a popup will appear in the pop up we choose "add video track" to add the track to our video earlier. here I just add one track because I only edit one video
and survived one track has been added to the shortcut, see picture below
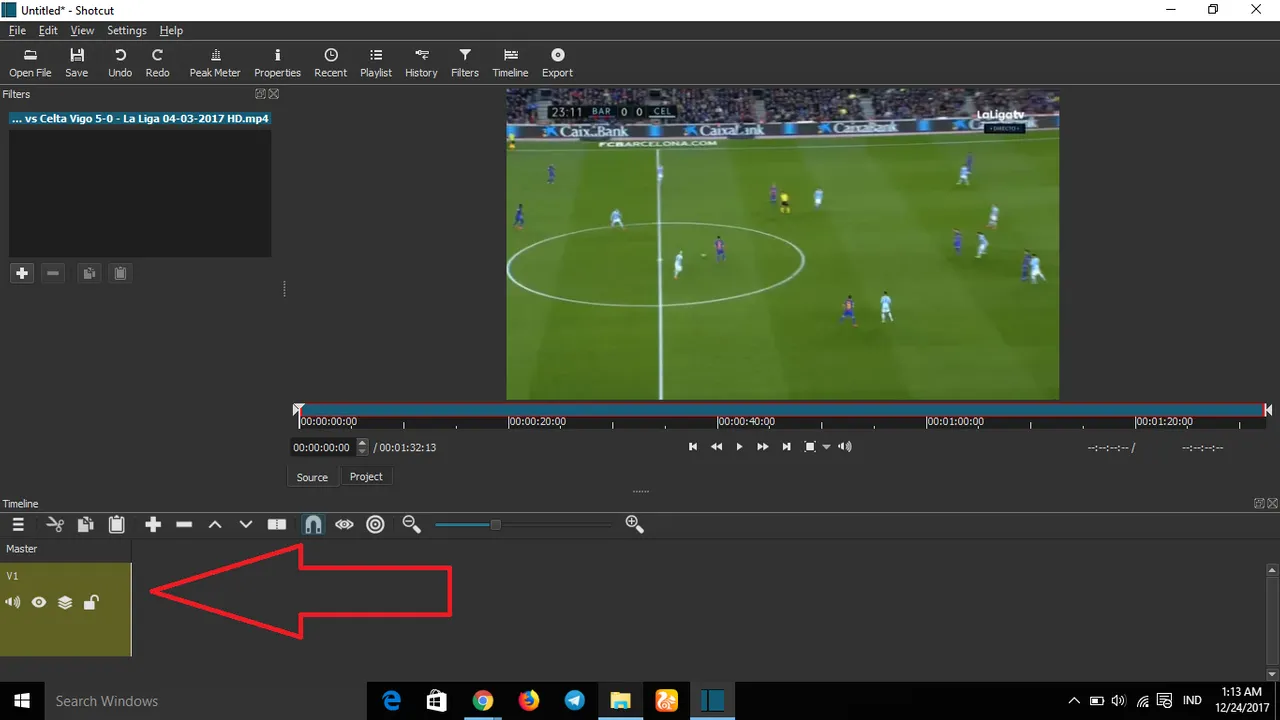
if it's after that we just need to drag the video on the main screen shotcut into the track earlier. quite easy just need to click left then hold (mouse) on vidio then drag it to the track you want.
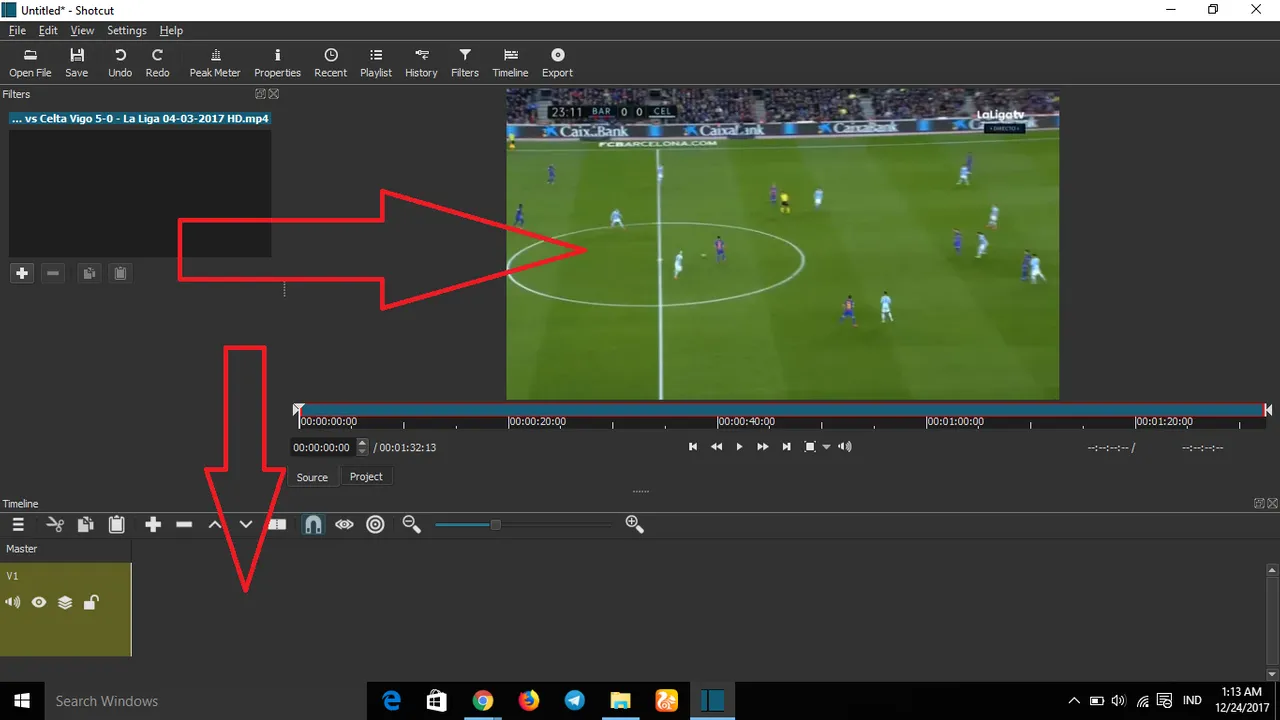
if it will be like this
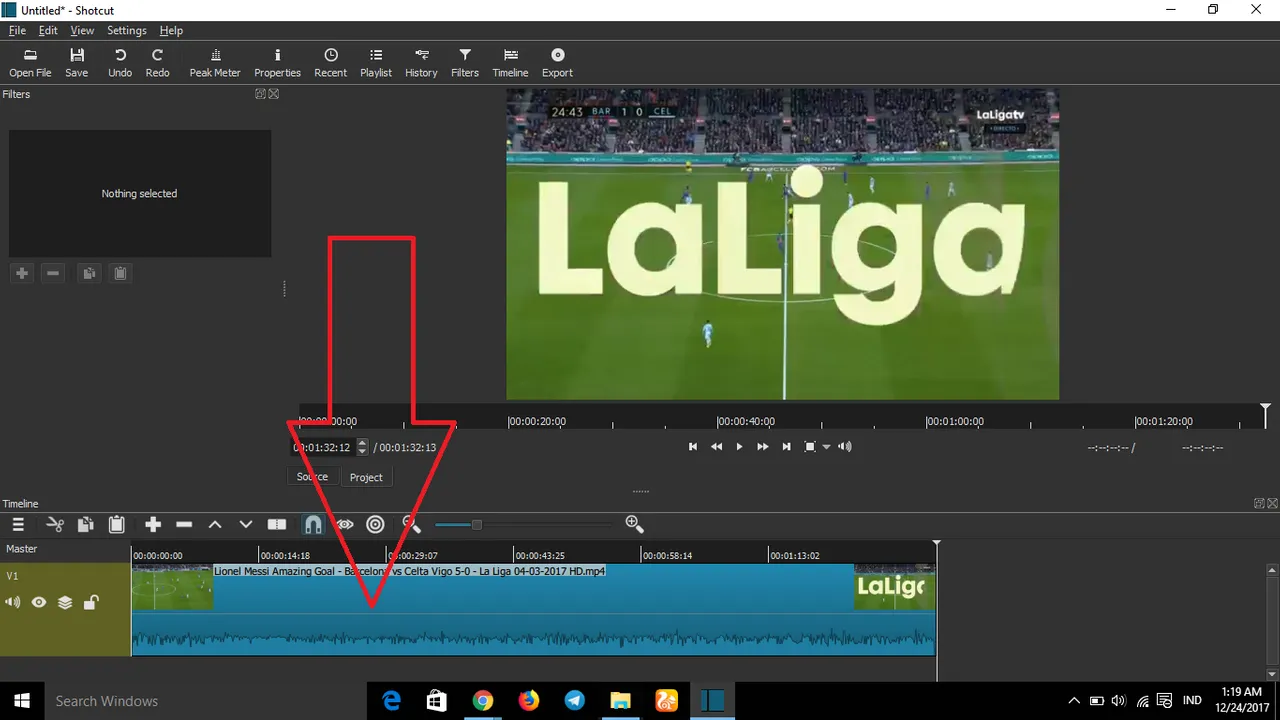
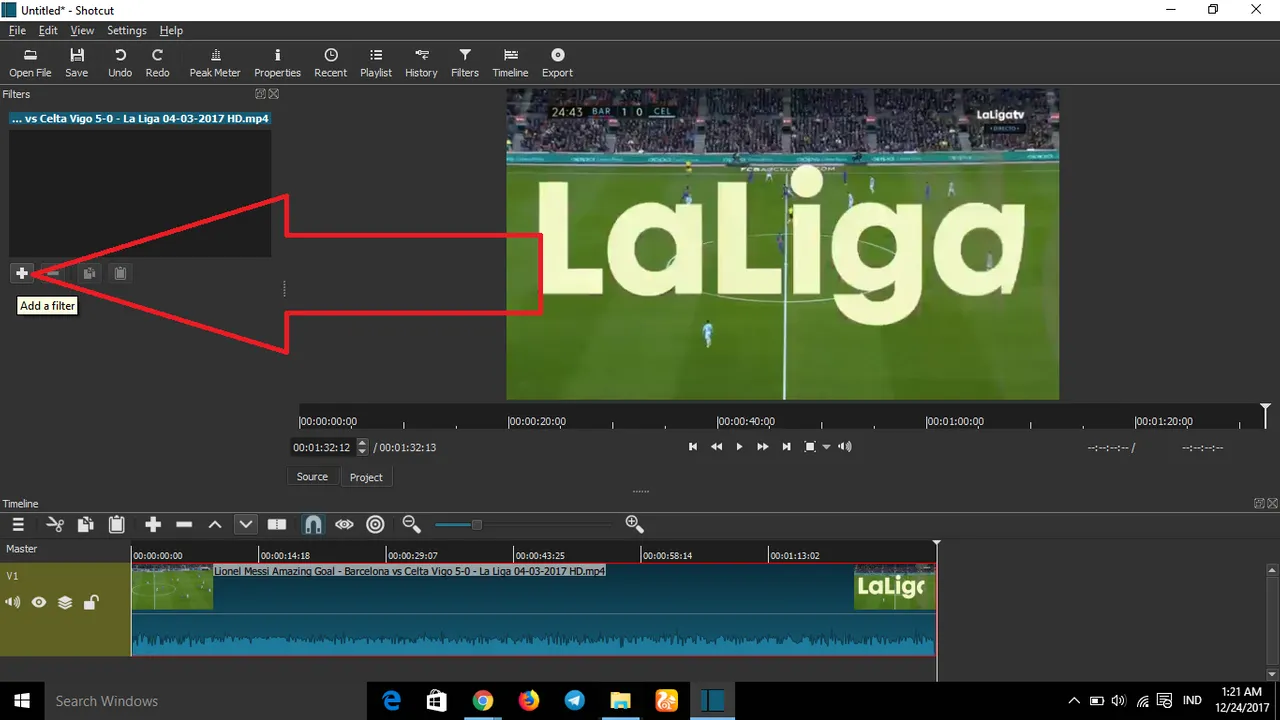
and congratulations your video is ready for editing. to change the brightness of the video we just need to go to the "filter" then we press "add filter" ask (+) under it, look at the picture below.
if you have pressed it will appear a new popup like picture below, then there we choose "brightness" for the brightness in our video earlier
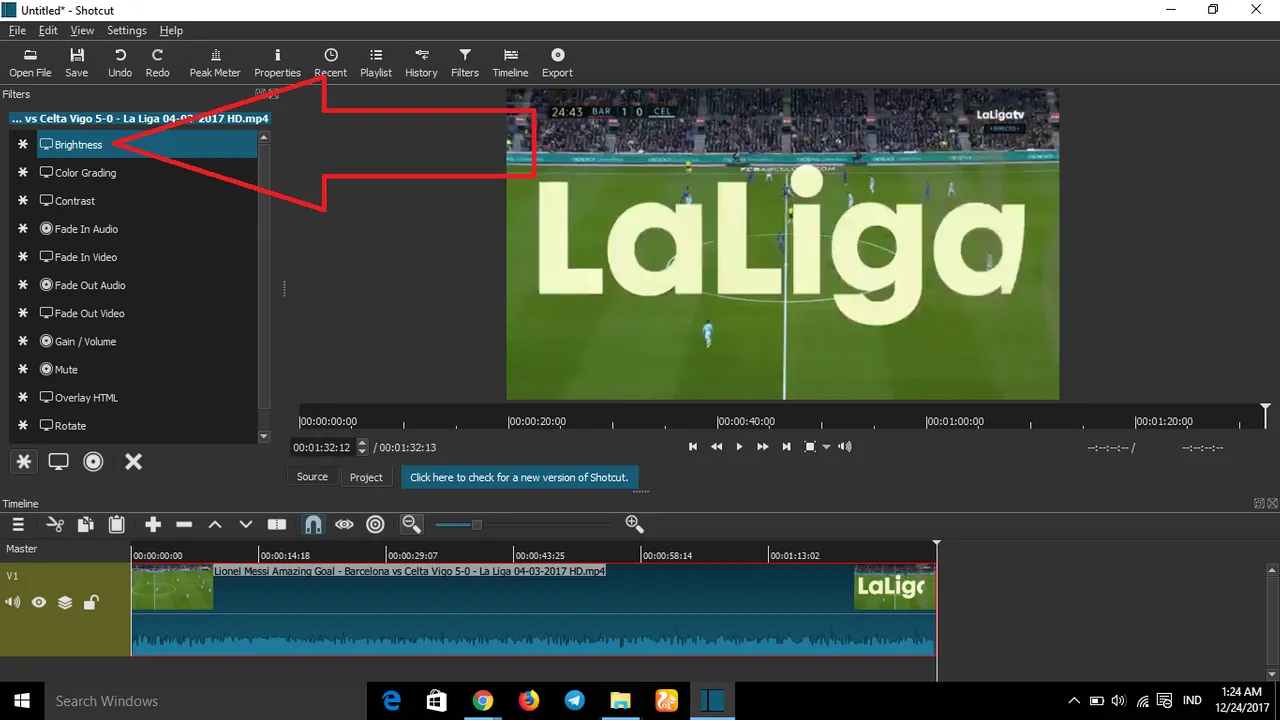
then after you hit the "brightness" will appear a new look that asks us how the percentage of brightness will be lowered or ion the rise
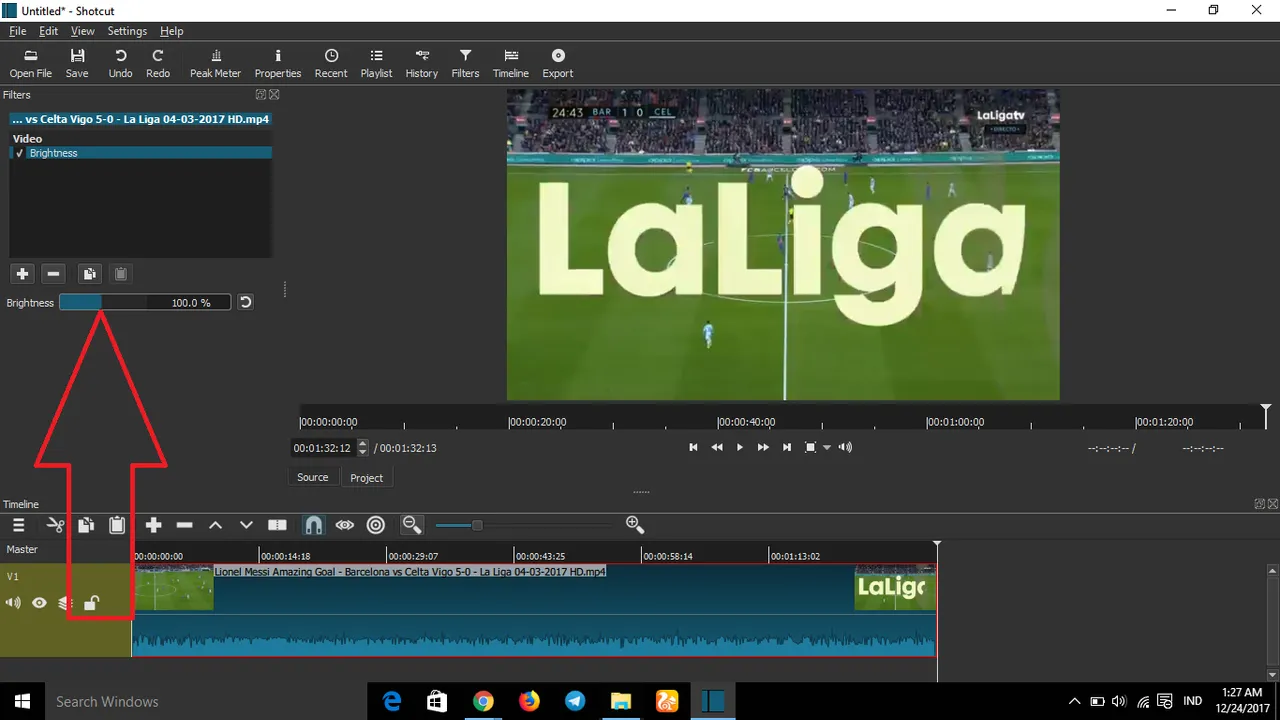
here I will raise the brightness on the video that I will edit because I think my video was less in kecerahanya so I will raise it. we just need to shift what percentage we want to add its brightness. look at the picture below I've added brightness in my video.
look at the picture below I've added my brightness to 140.2% and can be seen in his video box his brightness has been increased
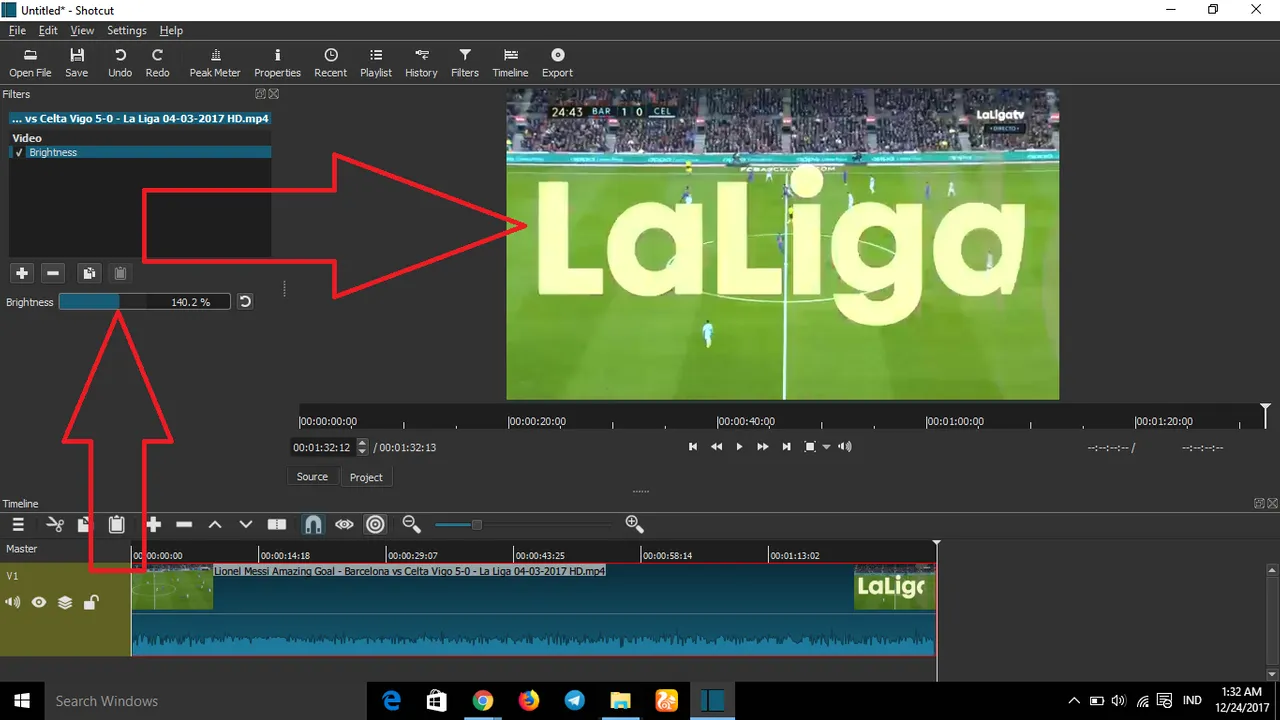
if it is and you will not add any more edits we can just save the video we have edited by pressing the "export video" above
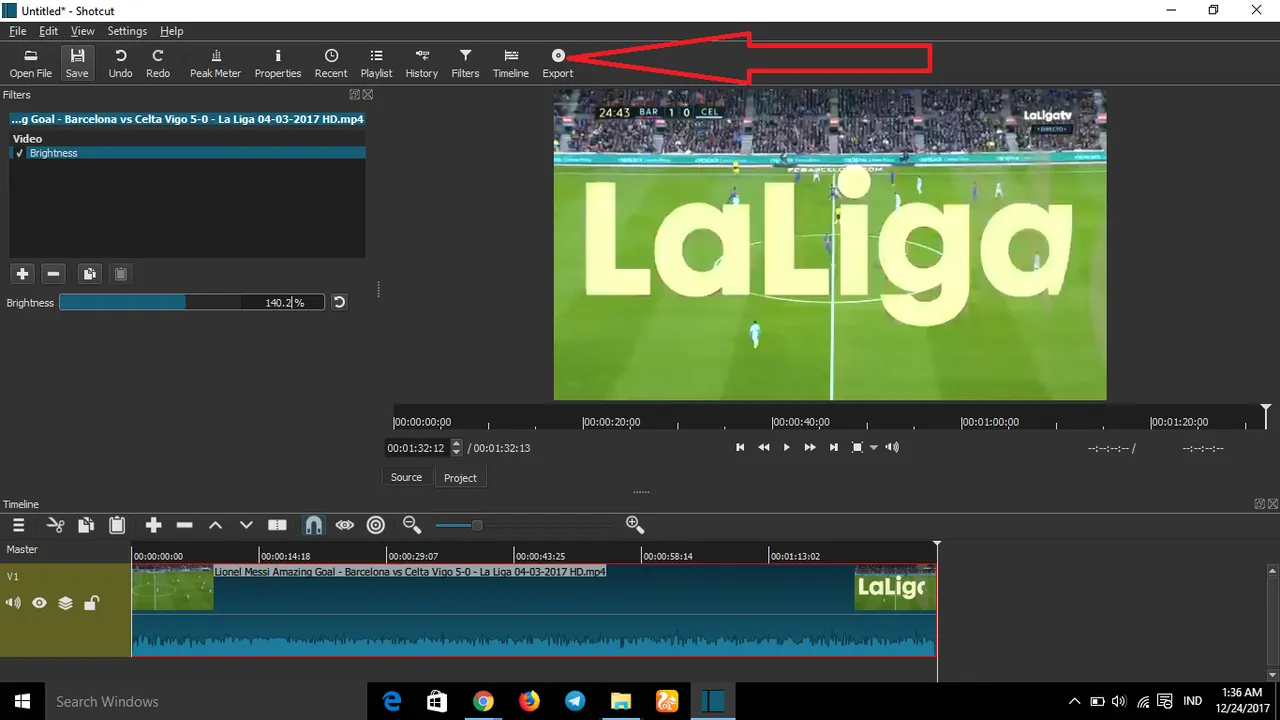
after you hit "export video" will appear a new box under the "filter" box see the picture below for more details.
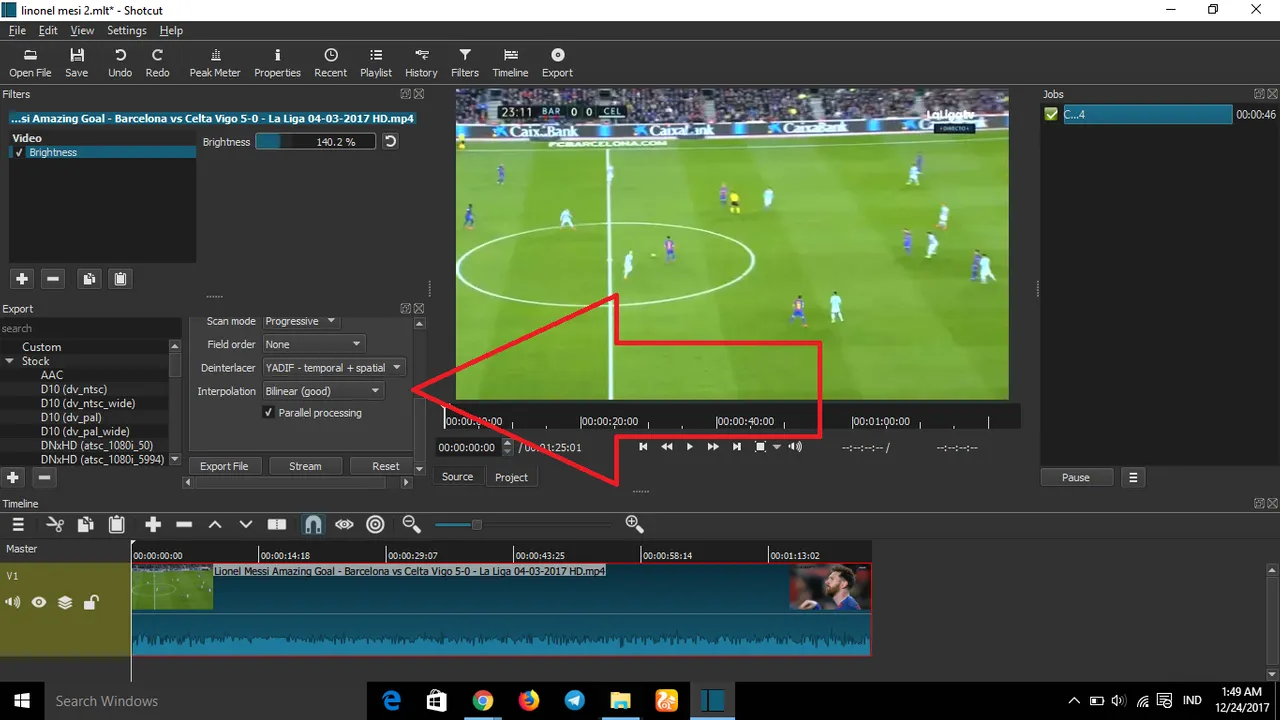
then we hit "export file" to save it.
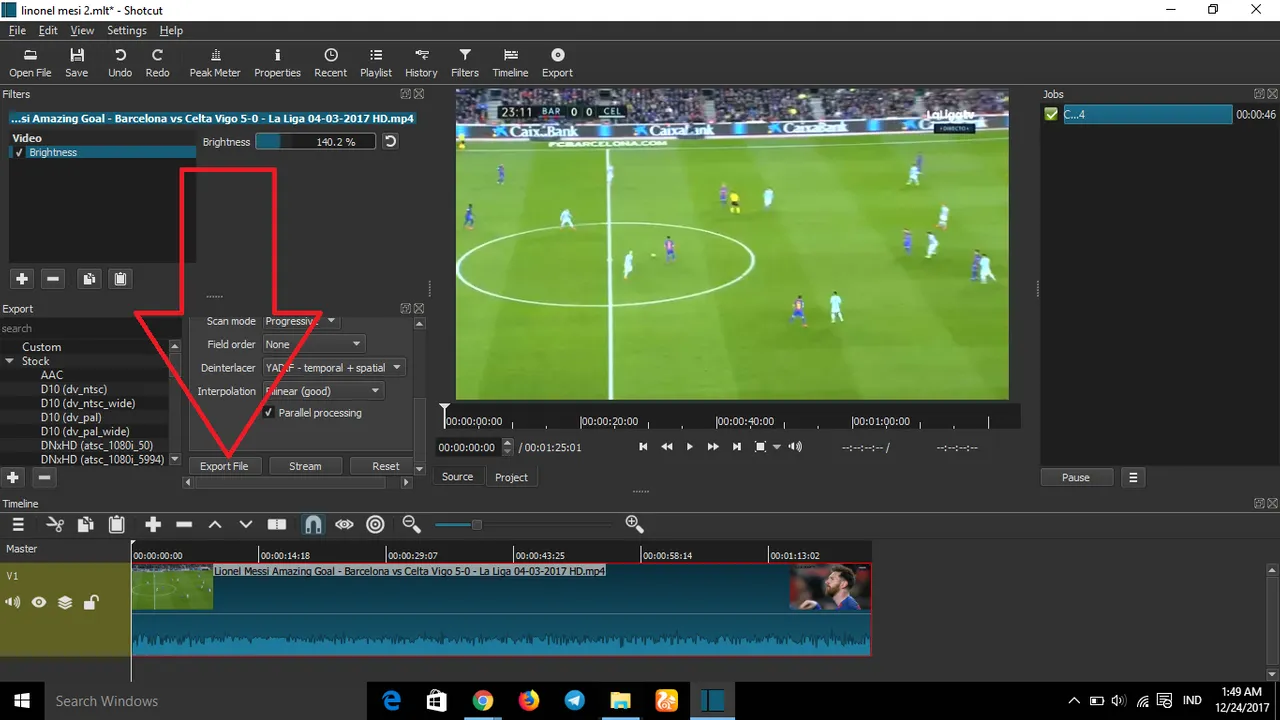
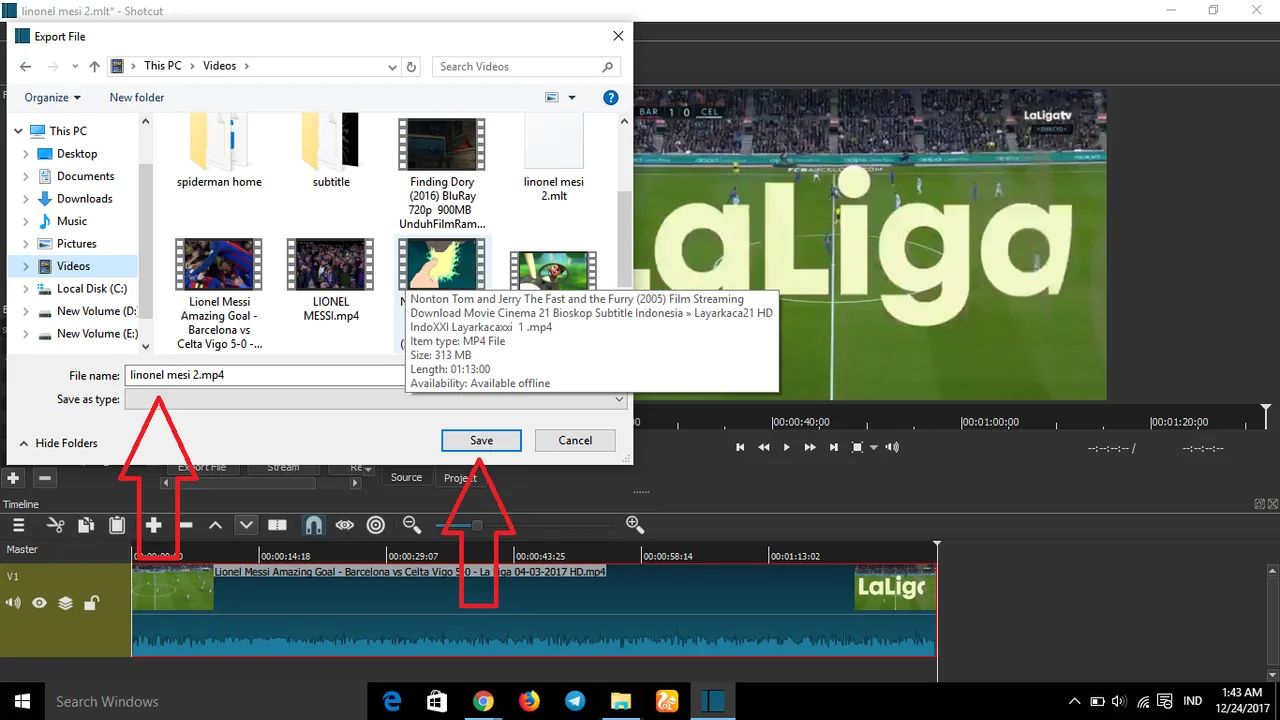
then we hit "export file" to save it. then choose where you want to save the file and name it on the file. if it is select "save"
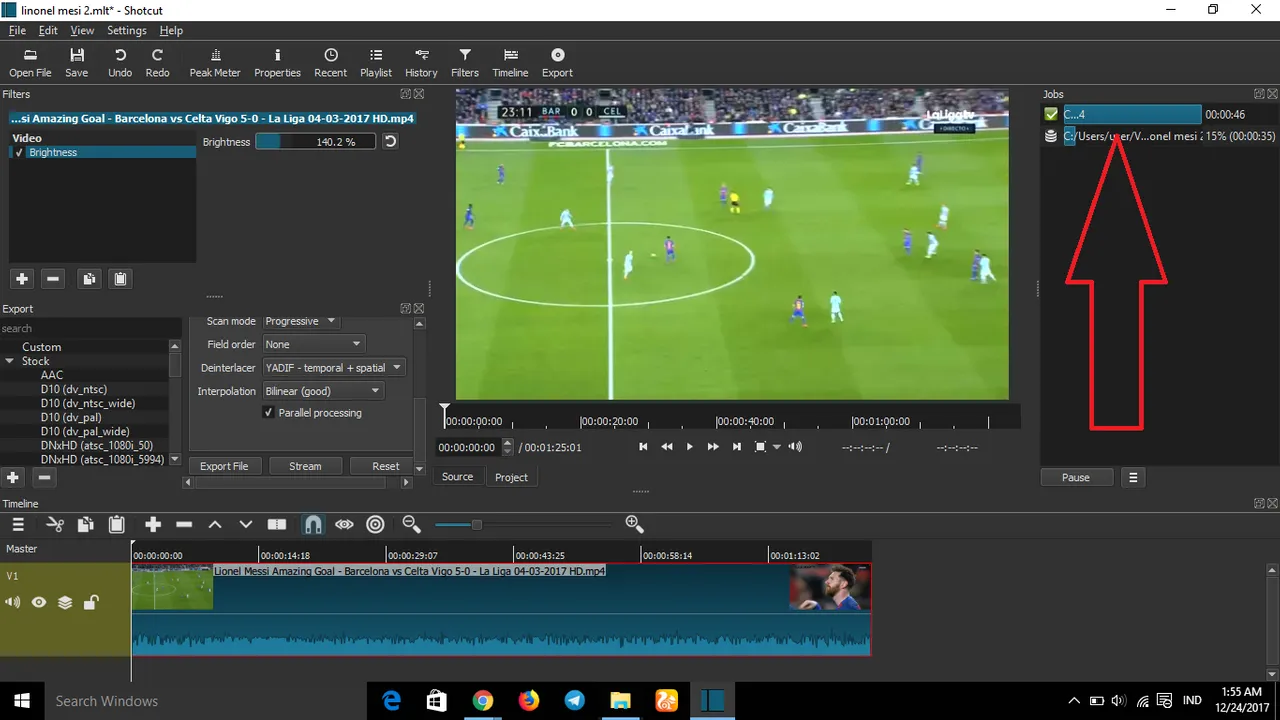
wait for the process of exporting the video to completion and when it is finished you can watch the video as you watch normally
congratulations your video can already be enjoyed.
I think it's enough for this video if there is criticism and suggestion you can comment on this post I am very grateful if you give me criticism or suggestion thank you.
Posted on Utopian.io - Rewarding Open Source Contributors