
Source
What Will I Learn?
In this tutorial, you will learn how to validate the props that your React components receive, so you can make sure that all the data received is correct.
- You will learn how to validate a component prop's type.
- You will learn how to make that a certain prop is required.
- You will learn how to set default props.
- You will learn how to render some elements conditionally.
Requirements
- NPM
create-react-appNPM module
Difficulty
- Basic
Tutorial Contents
First, we need to create a new React application. In this previous tutorial I explained how to create a React application using the NPM module 'create-react-app'. If you don't know what is create-react-app or don't know how to create a new application, check it first.
In order to explain the use of React Proptypes, we are going to create a simple application that will allow us to create a contact list.
This is the structure of the project that I will be using:

Creating our contact entry
First of all, we need to design our Contact entry module. Here, we are going to need some required information, such as first and last name, phone number, age, and some other additional information that is not mandatory, such as social networks, hobbies and gender. This is how my Contact entry file looks like:
import React from 'react';
import PropTypes from 'prop-types';
class ContactEntry extends React.Component {
  render () {
    return(
      <div>
        <h1>{this.props.first_name} {this.props.last_name}</h1>
        <p>Birthday: {this.props.birthday} - {this.props.age} years</p>
        <p>Gender: {this.props.gender}</p>
        <p>Married: {this.props.married ? "Yes" : "No"}</p>
        <p>Phone number: {this.props.phone_number}</p>
        <p>Favorite social network: {this.props.social_network}</p>
        <p>Hobbies: {this.props.hobbies}</p>
        <p>Studies:
          {this.props.college.name !== null ?
            <span>{this.props.college.name} - Starting year: {this.props.college.start} - Ending year: {this.props.college.end}</span>
              :
            "No college information"}
        </p>
      </div>
    );
  }
}
export default ContactEntry;
Checking the PropTypes
Now that we already have the skeleton of our Contact entry, it's time to start checking the information that our component will receive. Even though Javascript is not a language that is strongly typed, here in React we have the capacity to make some validations on our data. So, this is what I need my props to be like:
- First name : String (required)
- Last name : String (required)
- Age : Integer (required)
- Phone number : Number (required)
- Gender: one of ['Male', 'Female'] (required)
- Married : Boolean. Default value: False
- Favorite social network : one of ['Facebook', 'Twitter', 'Instagram', 'None']. Default value: 'None'
- Studies: {College name: String, Starting year: Integer, Ending year: Integer}
Now that we have defined our schema of data, it's time to start writing the validations. They are going to be below and outside our component class definition in a block of code like this one:
ContactEntry.propTypes = {
  // validations go here
}
Inside this block, we are going to write the name of the prop and the type of validation that we are going to make. Using the scheme defined above, these are the validations:
ContactEntry.propTypes = {
  first_name: PropTypes.string.isRequired,
  last_name: PropTypes.string.isRequired,
  phone_number: PropTypes.number.isRequired,
  gender: PropTypes.oneOf(['Male', 'Female']).isRequired,
  age: PropTypes.number,
  married: PropTypes.bool,
  social_network: PropTypes.oneOf(['Facebook', 'Twitter', 'Instagram', 'None']),
  hobbies: PropTypes.arrayOf(PropTypes.string),
  college: PropTypes.shape({
    name: PropTypes.string,
    start: PropTypes.number,
    end: PropTypes.number,
  })
}
All the prop validations follow the same format:
propName : PropTypes.options
Let's explain these possible options:
- PropTypes.type: this property is used to say that a certain prop will be of certain type, for example, a string, a number, etc. It's the most basic validation of props, and only checks type. A prop with this kind of validation can be
null(empty). These are the basic types that can be used: array, bool, func, number, object, string, symbol. For example, this is how we said that we need theageprop to be a number and themarriedprop to be boolean:
  age: PropTypes.number,
  married: PropTypes.bool,
- PropTypes.type.isRequired: used to say that a certain prop is mandatory to be passed to the component. If a prop has this validation, and we don't pass a value, our application will log an error. For example, in our scheme we said that the
last_nameandfirst_nameprops are Strings and also that they are required, we do it like this:
 first_name: PropTypes.string.isRequired,
  last_name: PropTypes.string.isRequired,
- PropTypes.oneOf: is used when we want our prop to be one option between a set of options. For example, we used this validation for the
social_networkprop, so this prop can only be 'Facebook', 'Twitter', 'Instagram' or 'None'. Any other different value will log an error:
social_network: PropTypes.oneOf(['Facebook', 'Twitter', 'Instagram', 'None']),
- PropTypes.arrayOf(PropType.type): this validation is used when we need to receive or pass an array via props, and we need the values inside this array to be consistent. We need to specify the kind of types that we are expecting inside the array by using
PropTypes.type. For example, for thehobbiesprop, we are expecting an array of string, so we validate this props like this:
hobbies: PropTypes.arrayOf(PropTypes.string),
This validation can be more complex, for example, when we want to receive a matrix of objects, that is basically an array of arrays containing objects, we can express it like this:
PropTypes.arrayOf(PropTypes.arrayOf(object)),
PropTypes.shape: this validation is used when we want to receive an object via props that fits some kind of format. When we use
ProptTypes.object, we are only saying that we are expecting an object, but it can be of any type, that is, it can have more information/fields than we need or even worse, it cannot have a certain field that we do need. In order to avoid this uncertainty, we tell React how we want our object to look like. We used the shape to describe and object that will contain the information about our college: name of the college, that must be a string, the starting year and ending year that must be numbers.Custom prop types: sometimes we need to make a validation that is not already defined in the
prop-typesmodule, for example, there is no option in the package to check whether a date is valid or not, but we can define our own validation. Let's say we want to receive a prop calledbirthdaythat will hold a date, we can check it with a regular expression just like this:
birthday: function(props, propName, componentName){
    if(!/^(0[1-9]|1[012])[- /.](0[1-9]|[12][0-9]|3[01])[- /.](19|20)\d\d$/.test(props[propName])){
      return new Error('Invalid birthday format in component ' + componentName);
    }
  },
For this validation, we define a function that will receive three parameters: the object that contains all the props, the prop name, and the component name. These should be enough to check the prop and return a good error message explaining what went wrong if something failed.
There are some other validations, but the ones mentioned above cover the ones that are used the most.
Setting default values
We have already checked the integrity of the values of our props, defined which ones are required and which are not. But we also said that some of these values have a default value. We can set default values for our props, in case that we really need them to contain a value, but maybe the user forgot to pass this value correctly (or pass it at all).
We need to add the following block of code to our component class definition, just like we did with the propTypes block:
ContactEntry.defaultProps = {
//values go here
};
So, let's set our values according to the scheme we defined at the beginning of the post:
ContactEntry.defaultProps = {
  married: false,
  social_network: 'None',
  college: {name: null, start: null, end: null}
};
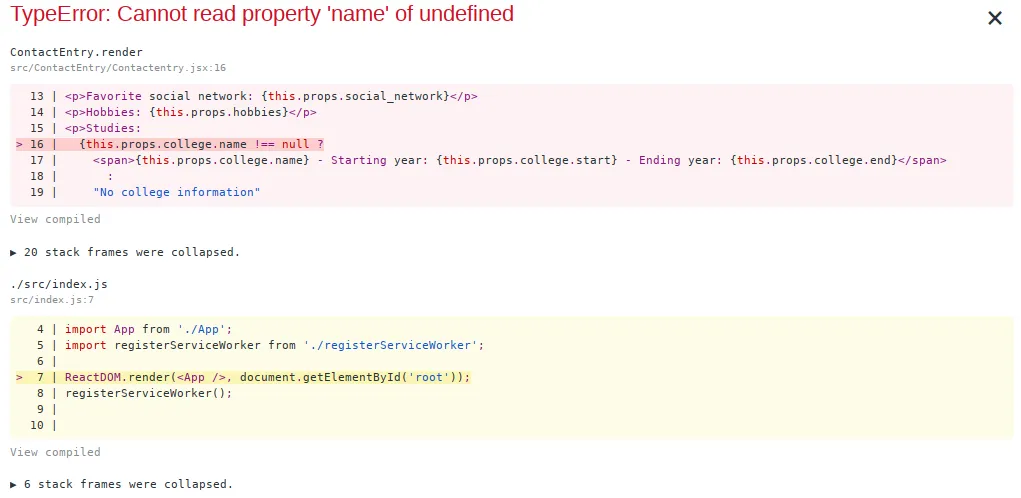
In this particular case, we need to set the values of the college prop to null, because if we don't then React will try to access some information that doesn't even exist (this.props.college.name, for example) and it will throw an error. You can try deleting the college default prop, and you will receive the following error:
Rendering the correct information
As you might have noticed, I used some new syntax inside the component, for example:
{this.props.married ? "Yes" : "No"}
This is called a conditional ternary operator. It basically consists of three parts: condition ? A : B. It evaluates condition, and if it evaluates to true, it will return A, if the condition evaluates to false, it will return B. In the example above, I checked if the married prop evaluates to true, if so, I will render in the page Yes, else, I will render No.
Same logic applies to the college prop:
{this.props.college.name !== null ?
            <span>{this.props.college.name} - Starting year: {this.props.college.start} - Ending year: {this.props.college.end}</span>
              :
            "No college information"
}
I'm checking if the college name value is different than null, that means, if I'm actually passing information to college. If I passed enough information, then the college information will be rendered, else, the message "No college information" will be rendered.
Verifying the prop types
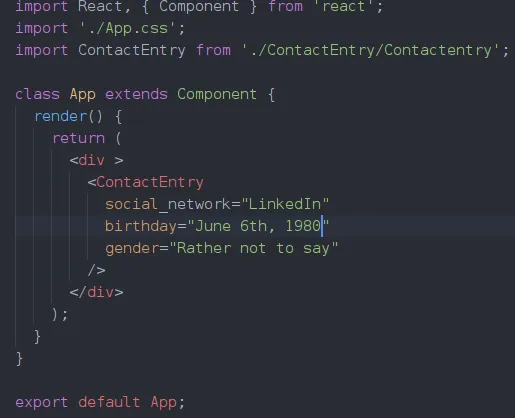
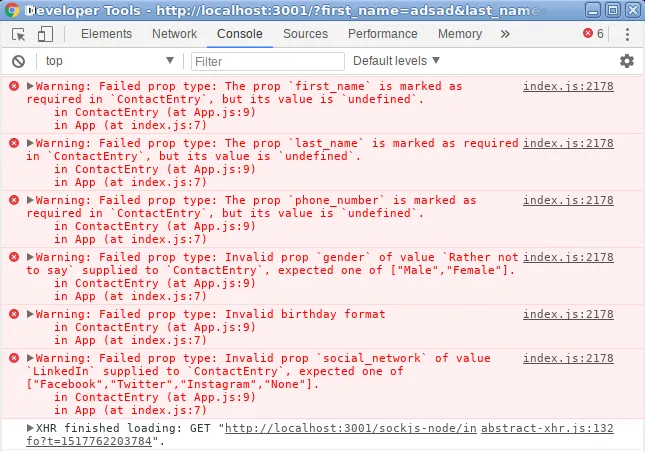
We have already set the proptypes validations for our component, and we have set the default prop values. But, what happens if we don't follow or break a certain rule of validation? What happens if , for example, we don't pass a value for the first_name prop in our component? All those errors will be logged in the Browser console. See what happens when we render <ContactEntry/> component without any prop, or with the wrong format:
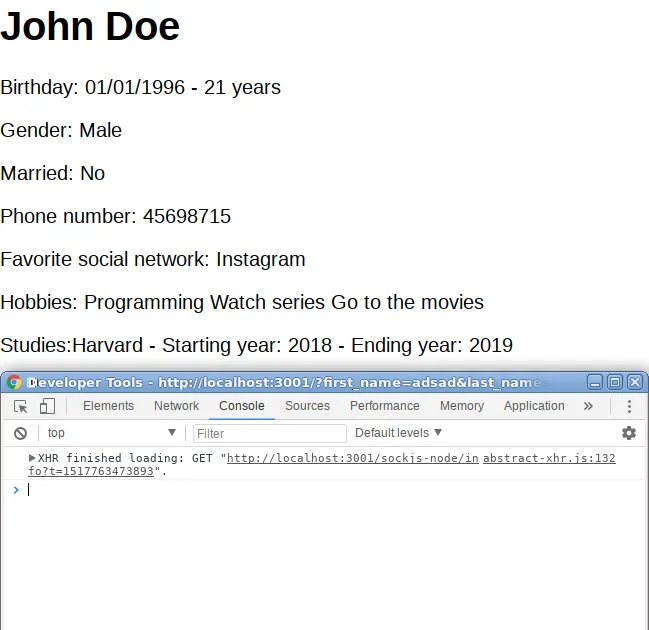
On the other hand, if we follow the rules that we established via proptypes, no error should be logged:
<ContactEntry
          first_name="John"
          last_name="Doe"
          phone_number={45698715}
          age={21}
          married={false}
          social_network="Instagram"
          birthday="01/01/1996"
          hobbies={['Programming ', 'Watch series ', 'Go to the movies ']}
          college={{name: "Harvard", start: 2018, end: 2019}}
          gender="Male"
        />
So that's it. We have learned how to check prop types in our component, make some conditional rendering inside the component, and set some default values for our props.
Any question or suggestions, feel free to let them in the comments section.
Curriculum
Posted on Utopian.io - Rewarding Open Source Contributors