Welcome to Steemit: Now what? How does it work? How do I make a post? What should I do?

I've been working with others in trying to get people with important messages that are active targets of corporate and political censorship to come over to steemit. One such person that I've spoken two twice, created an account for, and walked through changing passwords is @jeromecorsi also known as Dr. Jerome Corsi.
I told him I'd write up a post on the basics of getting started using steemit, and making a basic post, and what a person might want to consider when writing an introduceyourself post. I wanted to go ahead and write this in the form of a post as I realized what I tell him may be of value of others.
You are reading that post. Enough of the preamble, let's get down to this task.
First Things First
Familiarize yourself with the basics of steemit.

Try clicking on the steemit logo in the upper left corner.

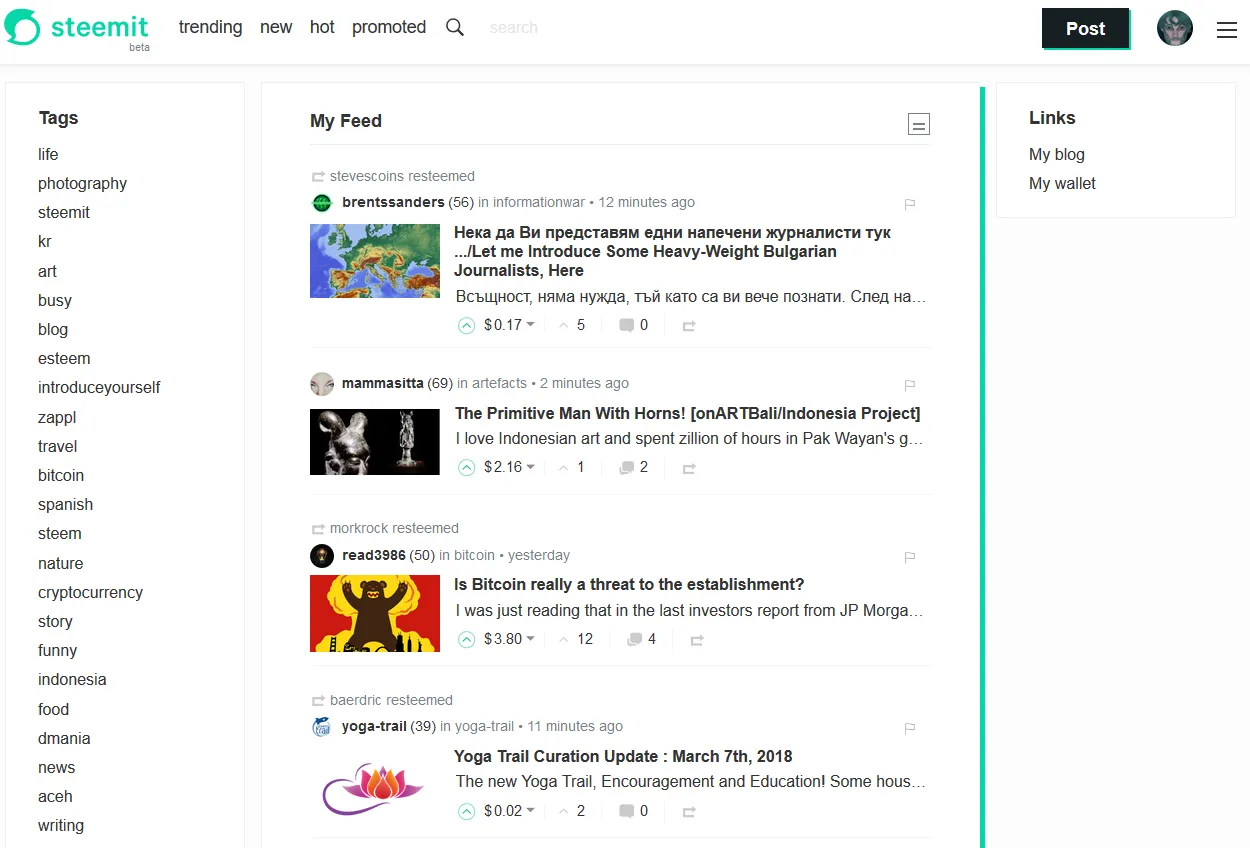
That should bring up a screen that looks a lot like this.

Wait... I bet yours looks more like this.
That is because I use what is called Night Mode.
In the menu that comes up when you click on your avatar is a choice.
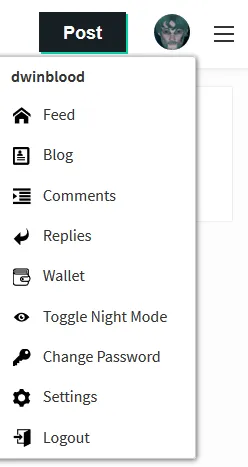
That choice is Toggle Night Mode. Use whichever mode you prefer, but at least you now know why my screenshots are dark when yours are likely white background.
Let's get back to the screen you see when you click on the steemit logo.

In this screen you see it says "My Feed". This will show me posts from the people I have chosen to follow. Yet on the left is also a list of tags. These are the tags that are currently most popular. So if you click on NEWS it will take you to the posts that are using the news tag.
Across the top are the labels trending, new, hot, and promoted.
Clicking on these will adjust the view based upon the criteria of those sections.
TRENDING tends to sort posts into those within a time frame that are the highest potential earners.
NEW will show you the new posts from most recent (could be seconds old) to the oldest. It doesn't break them down in any specific way other than chronological order.
HOT will show you posts that have had a lot of activity within a short period of time. It's results are different from Trending and not necessarily tied to how much the post is earning. This used to be one of the views I looked at the most in the past as my personal preference or new. I've never found the trending view particularly beneficial to me as a user, yet some people like it.
PROMOTED lists posts that people have chosen to pay some SBD to promote. Paying for promotion also burns that SBD and removes it from the Steem Dollar currency total in circulation. Think of it as anti-inflation with the added benefit of having the promoted queue which only shows posts that did this. They tend to be sorted based upon the amount of promotion spent on them. I have not seen any recent studies on how effective this is. I've done it quite a bit in the past, but I haven't really done so recently. It is still important to know it exists, and what it does.
My Feed
As you spend more and more time on steemit you may encounter people that you would like to keep track of. These are people you should follow. If you click on their name it will take you to their profile page.
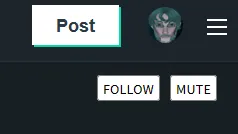
You will see a FOLLOW button. If you choose to follow them then the posts they make and resteem will become part of your MY FEED view.
There are other ways to follow people without going to their profile.

Their name will be at the end of their post. If you click on that you should see something like...

You can simply click on FOLLOW there without going to their profile if you prefer.

If you notice there is also a MUTE button. I've only used this a few times, but there are some people that really like it.
If there is someone you've decided you really don't like, or that they are trolling you, rather than entering a down vote/flagging war which can be a bad thing you can simply choose to MUTE them.
If you MUTE someone then you will no longer see their posts, their comments, etc. For all intents and purposes as far as your account is concerned that person no longer exists.
They can still comment, and people reading your posts would see it. They can still vote on your posts. Yet you don't have to see their comments, and if they make any posts of their own they will never show up in any of your feeds.
Like I said I personally only used this a few times. In my cases it was those rare cases of people clearly trolling (not simply disagreeing) following me from post to post, comment to comment whether my posts or not and replying and trolling me. It has been a long time since I encountered that. This is what I used MUTE for in my case.
There are other people that don't want to waste their time in their opinion and they may MUTE people they consider as cluttering up their experience. The good thing about MUTE is that it doesn't hurt anyone. It is voluntary and very different from a down vote. I believe myself it is preferable to a down vote.
You can unmute people by going to their profile page if you remember https://steemit.com/@theirprofilename and simply click the UNMUTE button. It can easy to forget you muted someone, and since you don't see them you're likely to not remember. However, you may see other people mention them and find out they have changed their ways, and are approaching things different and you may then want to unmute them. This is how you do that.
Your first post
Ideally your first post should be one made to the introduceyourself tag. You only should post to that tag with your actual introduction, but it is a good first step.
So what should that post be?
It should include some images related to you. It should include links to other websites and material you may want people to know about you, and it can literally be anything else you want to share about yourself.
Overall steemit responds to people that are genuine, so feel free to be as open as you want.
There are cases where the person is a celebrity or well known outside of steemit. In those cases it is generally desireable to have someone take a photo of themselves holding a sign up saying something like...
"Hi steemit... @yourhandle"
The rest of this post will focus on the basics of making a post. It will not go into a lot of detail, but it will certainly be enough to get you started.
Making Your Post
The first thing is to understand the parts of a post. The view can vary depending upon which browser you are using, but they are all fairly similar.
I will explain four important parts here.
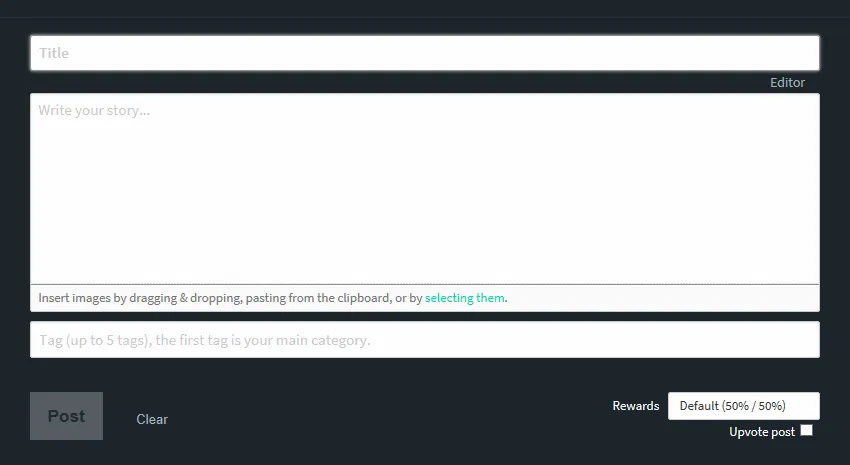
Title, Body, Tags, and Rewards.

The title should be something you feel is suitable to describe and attract attention to your post. It is essentially the headline. All headlines are not created equal, so I do wish you the best in your attempt to produce the most effective ones. I cannot give you a magic answer on that as I get a mixed bag of results myself on the titles I choose.

The Body is where the bulk of your post will be, and I will cover that in the most detail here in a moment.

The tags section is important. You can put up to five tags here and you simply separate them by spaces. Make sure the tags are actually relevant to what you are posting, as people will sometimes take offense to people using the most popular tags when those tags have nothing to do with the post. They'll likely flag your post, and you don't want that.
Tags also do not have to be existing ones. You can use whatever tags you want as long as they are a single word. If you want to start the tag with a number then try proceeding it with the hashtag symbol # and it will allow you to have a tag that starts with a number.

Here is an example of some common tags I use when putting together an @newsagg headlines post.

Tags matter. You must have at least one tag, but you can have up to five.

The final section I am going to cover here is the rewards section. This has three choices. Default 50%/50%, Decline Payout, and Power Up 100%.
If you Decline Payout there will be not rewards to you for this post. What reason you wish to do this is up to you. It can be a Public Service Announcement, it can be you pointing out someone elses work but adding nothing of value to it, or any other reason you choose not to be paid. The option is yours and voluntary.
Rewards are potential rewards. They fluctuate based upon the steem power of those that voted on you, and the market value of the cryptocurrency steem based upon a 30 day average. You will receive payment after the post has aged 7 days. So if you write an introduceyourself post today then in close to 7 days from the time you posted it you will receive payment. This gives people a week to vote on it.
25% of the rewards will go to the curators (those who up voted it) as some people spend most of their time just trying to find good content and uplift it. This is how we can keep them funded for doing that task. It incentivizes finding content that is likely to be popular. Though it is also how you support things YOU are interested in whether they are likely to be popular or not.
The other 75% goes to you the author. This is where those remaining two reward choices come in. If you are on the default 50/50 then you will receive 50% of your reward as Steem Dollars (aka Steem Backed Dollars, also known as SBD on cryptocurrency exchanges), and the other 50% in the form of Steem Power based upon how much that 50% would allow you to purchase steem for at that time.
If you choose Power Up 100% then 100% of the rewards are in the form of steem power and you get no steem dollars.
I'll do another post on the currencies here soon and how to convert them to fiat, other cryptocurrencies, spend them, etc.
For now. Steem Dollars are easy to convert to money now if you need to spend them. Steem Power is what gives your votes value. The higher your steem power the more potential rewards you give someone when you up vote. It is your STAKE (think shares) in the steem blockchain. You can convert this to spendable currency yet it intentionally slow so that people cannot easily steal your steem power if your account is compromised, and so someone cannot quickly pull a ton of steem power and sell it off and cause a crash of the currency. Mostly people focus on what it does in terms of making their votes worth more and more.
There is a checkbox below the rewards that says "Upvote post". If that box is checked you will automatically upvote your own post when you push the post button and indicate the post is ready. In the past this was checked by default.
There are some people that dislike people upvoting their own posts, there are others (myself included) that don't mind you upvoting your own posts. There is a potential if you don't upvote your own post that people who have decided they will only support posts that the creator did not upvote themselves might vote on your post. There is no guarantee of that.
The choice is up to you. You can also manually upvote your own post later without having to make that decision now.
The Body of the Post
There are a lot of things you can do to bring the body of a post alive. Writing text, putting images, and putting things like youtube videos in your post are super easy.
To put text in, just start typing.
To put an image in you can simply copy and paste, drag and drop or click the SELECTING THEM link and browse to them.
To put a youtube video in. Just copy the URL from the address bar into your body and it will automatically show the embedded version of the video.
Those are all very easy. Yet there are a few other things to know.
The body supports a markdown system which you can see by clicking the "Markdown Styling Guide" link in the upper right part of the preview of your post.

That guide will teach you ways you can alter your text, make them bold, italicized, etc. I will show you some of that here.
It also supports some basic HTML and I personally use a hybrid combination of the two. Some people may not like that but it is what I do. I've found that some things tend to work better in HTML such as trying to use other markdown within list items. I can do that easily with HTML, but I don't always get the results I want with markdown.
It is worth noting that BUSY.ORG if you choose to use it instead of steemit does have a WYSIWYG editor.
To italicize something in markdown simply enclose it inside of asterisks (*).
This is italics.

To bold something simply enclose it inside of double asterisks.
This is bold.

To do both bold and italics use three asterisks.
This is bold and italics.

You can do all three of these things with HTML as well.
This is italics.
This is bold.
This is bold and italics.

Adding images is as simple as copy and paste. It automatically generates the markdown version of referencing an image.
I also often use HTML versions if I am linking to another image that was already uploaded to steemitimages.com and I want to help keep that storage requirements from existing, or perhaps it is an image I uploaded to imgur or somewhere else. The most common thing I use it for is when embedding animated gifs from giphy.com.

That is the html for embedding an image.
Another thing I will often do using html is create clickable links.

This is also something I'll often do when using someone elses image. It is generally a good idea to cite the sources of images you yourself did not create, or do not have the rights to. If you cannot verify it is public domain it is generally a good idea to cite your sources.
I used to put an italicized text saying Source: and naming where I got it from.
These days I've begun to do something like this:

Then if people want to see where I got it from all the have to do is click on the image and it will take them to the original source.
There are some added benefits of that method. You can put a combination of images, and text between the beginning a href= and the final /a. So you can display something and make quite a few things clickable at the same time so they all lead to the same place. This can be useful for making an image, including a caption and either of them can be clicked and lead you to the same place. You can also use this to make clickable buttons if you use some button as the image.
That should be enough to get you started. I'll make some more tutorial and howto tagged steemit posts here soon.
Videos
With people coming here now in response to censorship by the big corporate social media giants there are some tips worth being aware of.
You can and should embed your youtube videos in your posts just like I said above. However, to be resilient and censorship resistant here are some tips.
You can use that html method:

To link to bitchute, d.tube, vimeo or any other videos. If you upload your videos to multiple locations and you put a link to each inside of your post then if they decide to censor one the others should still be functional.
Multiple baskets, rather than all eggs in one basket.
As to d.tube. It doesn't seem to offer long term storage at this time. So if you use it, you might want to also put those videos in other locations if you want them to be available long term.
Vimeo and youtube are well known centralized corporate video hosts.
Bitchute, d.tube, and numerous others in the works are decentralized alternatives.
To get a better feel for how those HTML clickable links work here is what those lines above look like in the editor as I wrote them:

That should be more than enough to get you started. Happy steeming. Welcome to steemit. Stick to it, and keep at it. Don't expect wonderful payouts at the beginning. Instead focus on writing and posting about what interests you. Write because you want to, not because you are trying to make a lot of money. If your works get better, and you keep at it the rewards will come. If you focus on your earnings versus what someone else is earning that simply leads to depression and frustration. Let your creativity and perseverance free... ignore envy.
Good luck.
NEXT TUTORIAL:
Welcome To Steemit: How do I get Steem Power? How Do I Buy Things and Get Money?