
Final illustration
Elaboration, editing and assembly @roybrown

Hello World!

In the eyes of evolution
The cycle of life is based on adapting and evolving to survive in a ruthless and cruel world, but at the same time, wonderful and beautiful where the strongest survives. Most of the time is a very hard concept to digest, however, the greatest example of this is found in animals, being the human being part of the animal species but with a very clear difference which makes us question many things in life , "We think ."
In the travel of life, as time passes, you cross with various problems that at the moment you find no solution or maybe yes, but it is this problem solving that makes you go evolving and be able to solve that difficulty if you re-present. Evolution makes you stronger in any area of existence, that's why you have the ability to be reading this writing right now, you're a survivor.
The illustration aims and inspires to show this change, you can see a fusion in the felines seeking to strengthen their weakness and in doing so can perceive change in all its splendor, stops having a timid and frightened look getting one that expresses Security, no longer need to hide from life, now out in search of it, grew its security, now others see it larger and with more respect.

To begin with.
-Paper.
-Flat surface to support you.
-Pencil (preferably from the B range).
-Draft.
-Fine black tip marker.
-Rule.
-The desire to draw.
If you're still here... Stay and you will see the step by step of this creation.

-The first thing is to make the outline of the drawing, position the elements that make it up, once the first step is ready, the outcome of the illustration will be easier.

-Little by little they add necessary features (silhouettes of the shadows and the melting effect that divides the drawing, in this case) remember that the strokes with the pencil should not be very strong at this stage, you always have to anticipate a mishap and when you have to delete , the pencil mark is not left.

-Now the sketch is almost ready, you only have to make the eyes, once ready with the help of a marker black tip (the brand you prefer) remark those that you had done in pencil.


-As the drawing has two parts, we will start with the largest or the one with the largest surface to fill. If you've seen any previous post you'll know what this technique, but for those who do not, the artist called Short strokes, with it will fill almost all the animal.
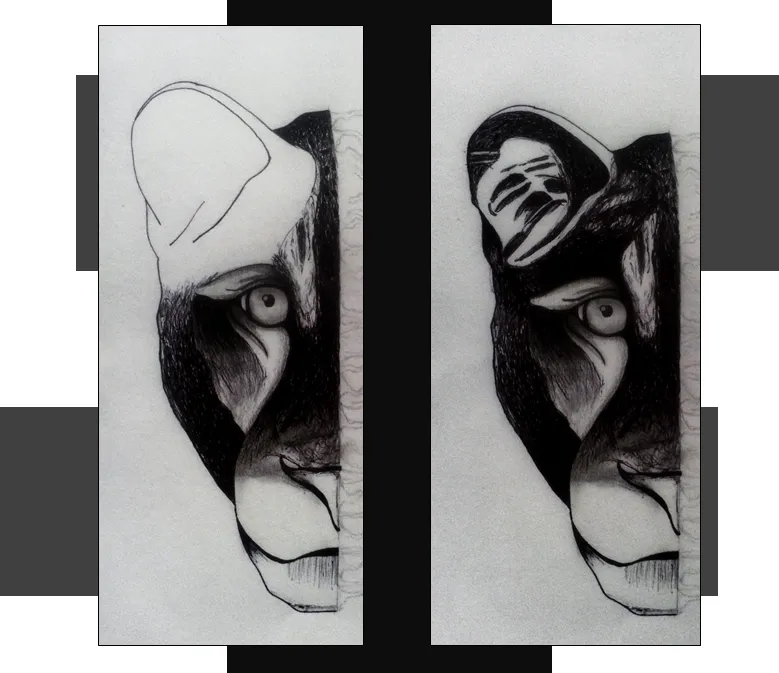
-When you're done, use the same pencil to give depth and realism to the illustration, that's the secret to a good illustration, combining techniques that will guarantee a better execution.
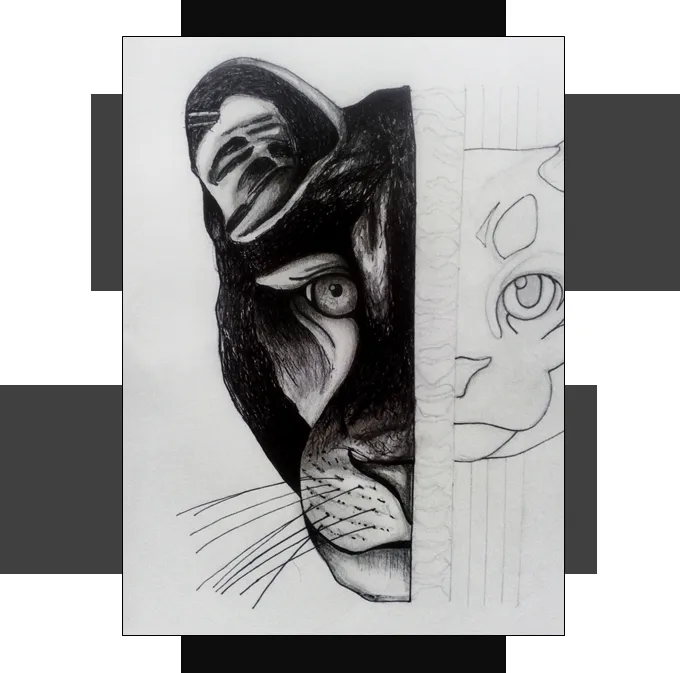
-Now we only have to darken the nose, the chin and make the whiskers to finish this stage. Did you notice it's not that hard?


-Following the same design guidelines, we darken with the help of the black marker and with short strokes some areas of the feline.

-This side of the illustration has fewer dark surfaces, when you finish them... The white parts are filled with clear strokes with the black marker, as seen in the picture.
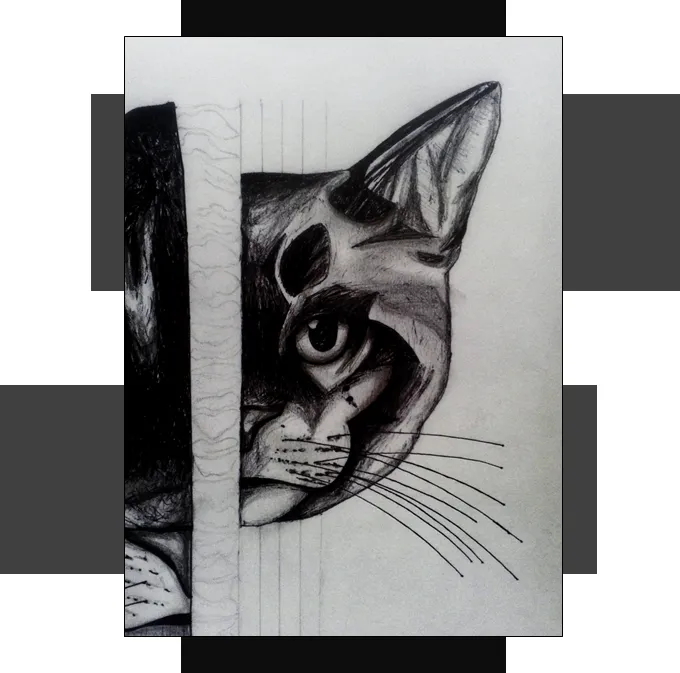
-Now we only have to darken the nose, the chin and make the whiskers and with the pencil give depth and realism.

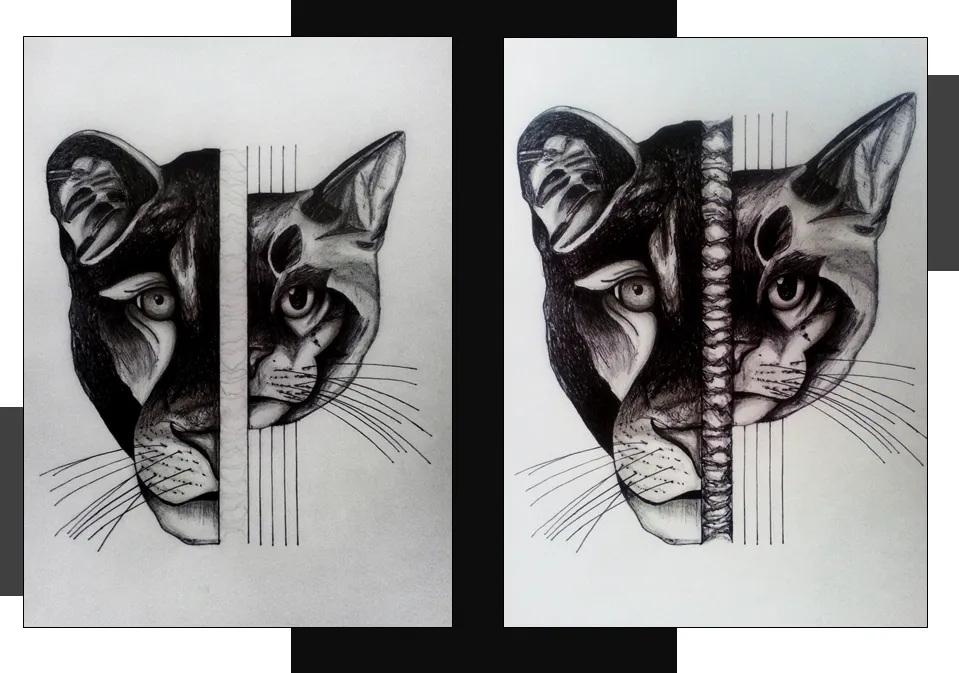
-We have the two halves ready, only the context is to be made. First with a rule preferably and the marker you will draw 5 lines in the right division and darken the fusion with the same marker and pencil.

-If you remember those lines in vertical of the previous step... Now you will perform the technique called Zentangle which consists of making different patterns in order to fill a surface (patterns can be any). They end up complementing the context with half circles to balance the illustration.
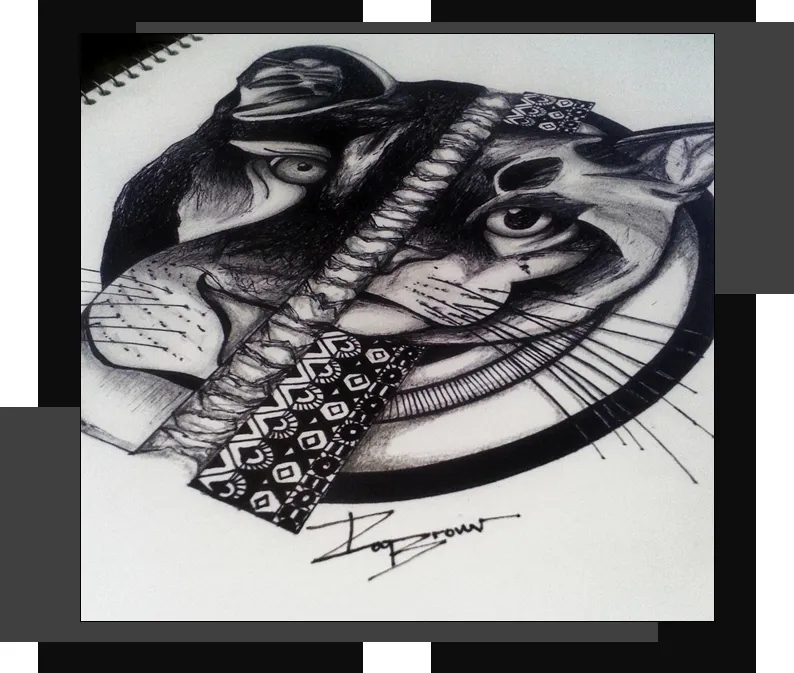
Final illustration
Elaboration, editing and assembly @roybrown

Again I want to thank you for taking a while and see this post, thanks for your constant support for this user.
Welcome to those who are coming, a hug to those who are already, greetings.
