Clive is an interactive and safety command line application for interacting with the Hive blockchain.
You can think of it as a new and easier to use version of cli_wallet.
The first release allows you to get a feel for how it works and looks by using it to create a transfer operation.
General information
To use the application, the user has to create a named profile, which allows to:
- Specify a working account (needed to perform some operations on the blockchain);
- Select a default API node used for communication (i.e. broadcast transactions);
- In the future it allows to define an optional set of accounts being observed by the user (watched accounts).
To create a profile the user should go through the onboarding process. A user will be asked to enter the profile name, password, account name, and enter a private key (it is not required, but if the key is not added, the application cannot broadcast the transaction).
The application has two modes: active and inactive. The active mode gives access to keys, therefore allowing to broadcast transactions.
The application can work as a TUI or as a command line application. The TUI application can be interacted with using a mouse and keyboard or just the keyboard.
There is a cart in Clive (like in any online shop). It allows for adding and removing operations - The operations from the cart can be broadcast as one transaction.
In the inactive mode, the user can:
- See general information about the working account and watched accounts (Dashboard)
- See the information about the node the application is connected to, its mode, block number and last block update (Dashboard)
- Prepare an operation – add it to the cart (Operations)
- Change a node (Config)
- Switch to active mode
In the active mode: - See and do everything he can see and do in inactive mode
- Create a transaction (Operations)
- Save a transaction (Operations)
- Broadcast a transaction in the following ways:
- Normal broadcast - the user sees the transaction summary and alias of the key before broadcasting the transaction. Additionally using the cart, the user may broadcast more than one operation in a single transaction.
- Fast broadcast - the user broadcasts the operation from an operation screen.
- Manage authorities (Config)
To switch from inactive to active mode a user should press F4 or choose Activate from the bottom menu. Additionally the application asks about activating the profile when the user wants to broadcast the transaction.
This version allows only the creation and broadcast of transfer transactions. Additional operations will be available in the next versions.
Clive uses the Beekeeper application to provide the safety of key management.
How to run Clive
You need Docker to run Clive.
There are two docker images in this release:
- Clive with embedded Hive testnet instance and a predefined profile and watched accounts. Provided as a demo of Clive's capabilities. Does not require access to the Hive Blockchain mainnet. Has both a TUI (text-based user interface) and a CLI (command-line interface).
- Clive for mainnet. Allows for defining a profile and making a transfer.
When you run Clive the first time, it takes time because the docker image is downloaded.
Clive TUI with embedded Hive testnet instance
You need to download the image and run Clive:
docker run -ti hiveio/clive:testnet-v1.27.5.0
Clive CLI with embedded Hive testnet instance
You need to download the image and run Clive:
docker run -ti hiveio/clive:testnet-v1.27.5.0 -cli
Clive TUI with mainnet
You need to download the image and run Clive:
docker run -ti hiveio/clive:v1.27.5.0
What the images contain
1. Clive with embedded Hive testnet instance
Clive with embedded Hive testnet instance has a predefined working account: alice (password: alice) and three watched accounts you can interact with (i.e. send a transfer to).
Using this version you can experience how Clive looks and works.
You can try to:
- Check the main information about working and watched accounts
- Make a transfer
- Make a transaction with many operations using the cart functionality
- Save a transaction
- Broadcast the transaction (Normal broadcast, Fast broadcast)
- Manage an authority
2. Clive command line with embedded Hive testnet instance
Clive command line with embedded Hive testnet instance has a predefined working account and three watched accounts (password: alice).
Using this version you can experience how the Clive Command line looks and works. The command clive -h may help you to start.
You can try to:
- List balances, keys, and nodes
- Make a transfer
3. Clive for mainnet
Clive for mainnet is ready to be used with the mainnet.
You can:
- Go through the onboarding process to create a profile
- Check the general information about working account
- Make a transfer
- Make a transaction with many operations using the cart functionality
- Save a transaction
- Broadcast the transaction (Normal broadcast, Fast broadcast)
- Manage an authority
Basic scenarios
Onboarding process using Clive TUI
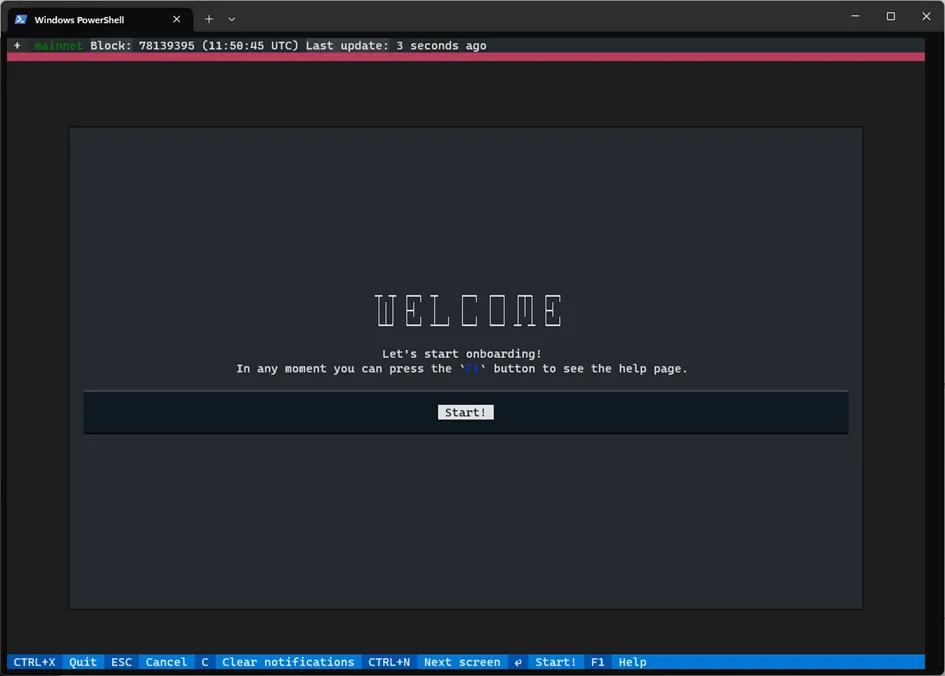
After running the Clive the first time, you will see the welcome screen.
Let’s start.
During using the clive you can use a mouse or a keyboard.
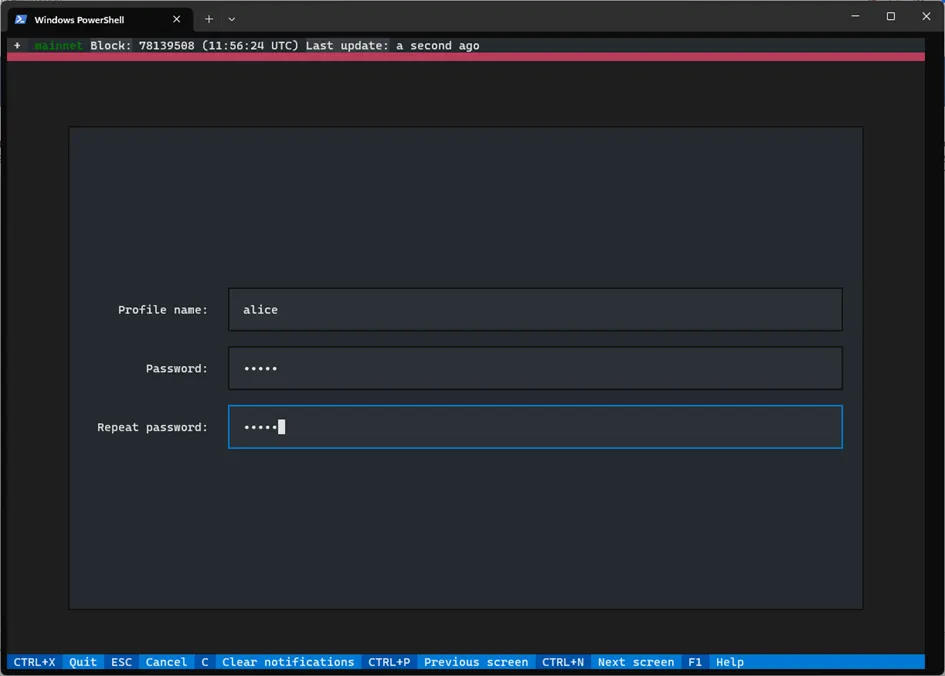
On the next screen you will see the screen that allows you to create a profile. You have to enter the Profile name and the password.
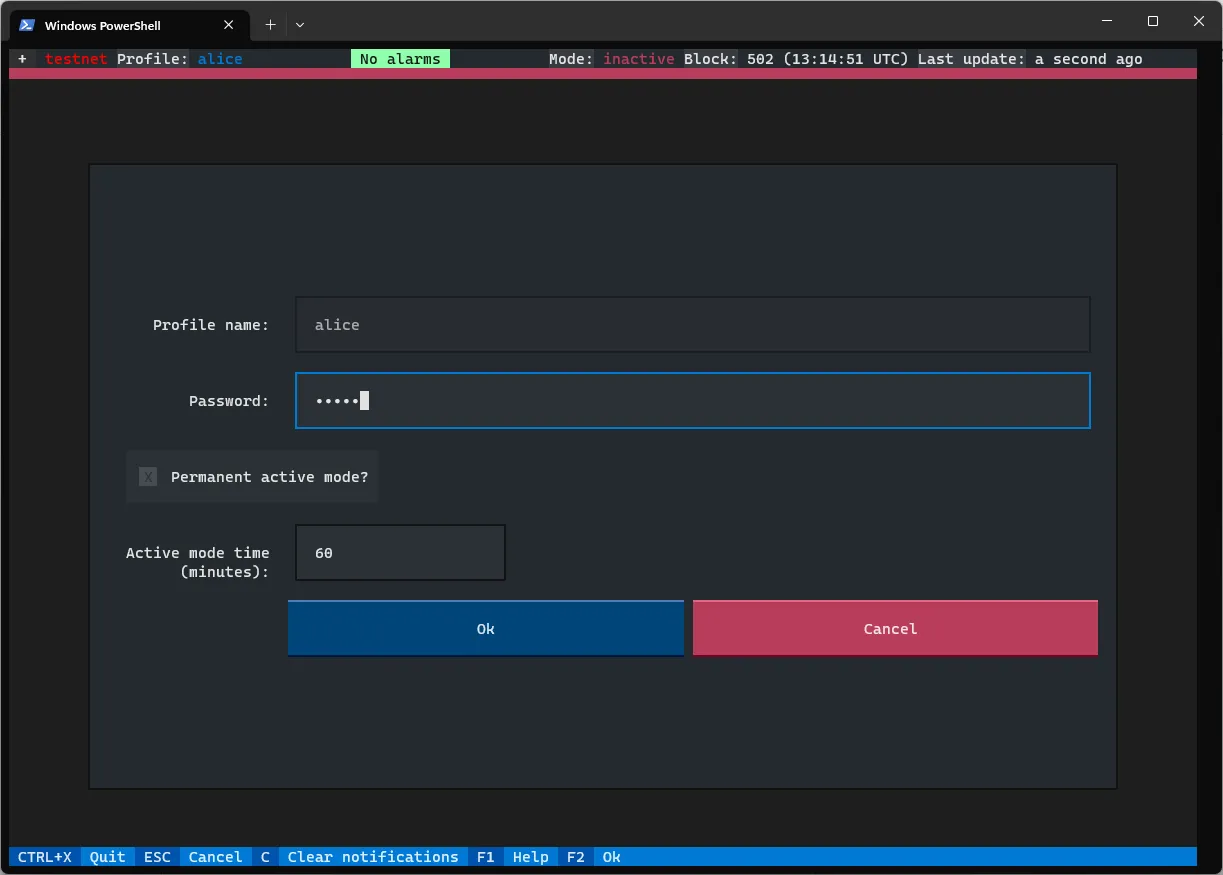
Clive will ask you about this password anytime if you want to activate the profile.
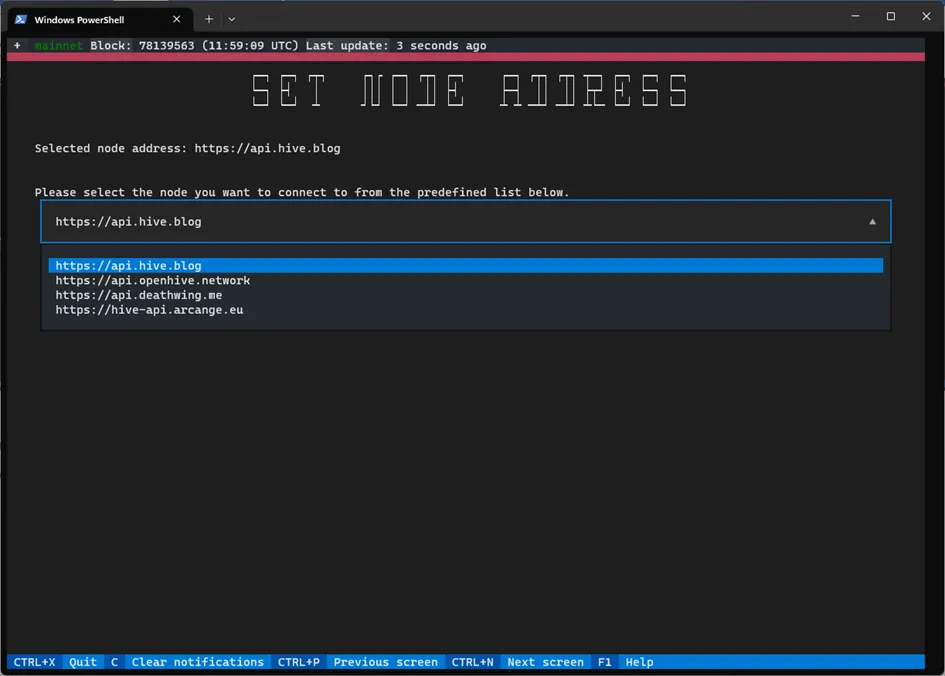
On the next screen you may choose the node that you want to be connected to.
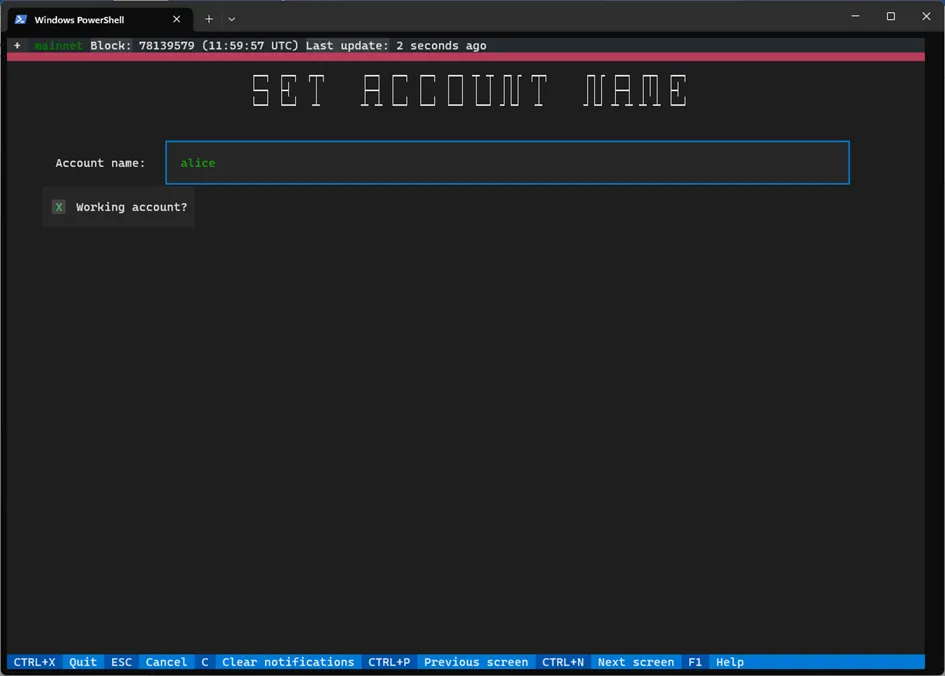
On the next screen you have to enter your account name. You may decide if it is the working account (you can broadcast the transaction) or only the watched account ( you want to check the balances, but you can’t broadcast the transaction).
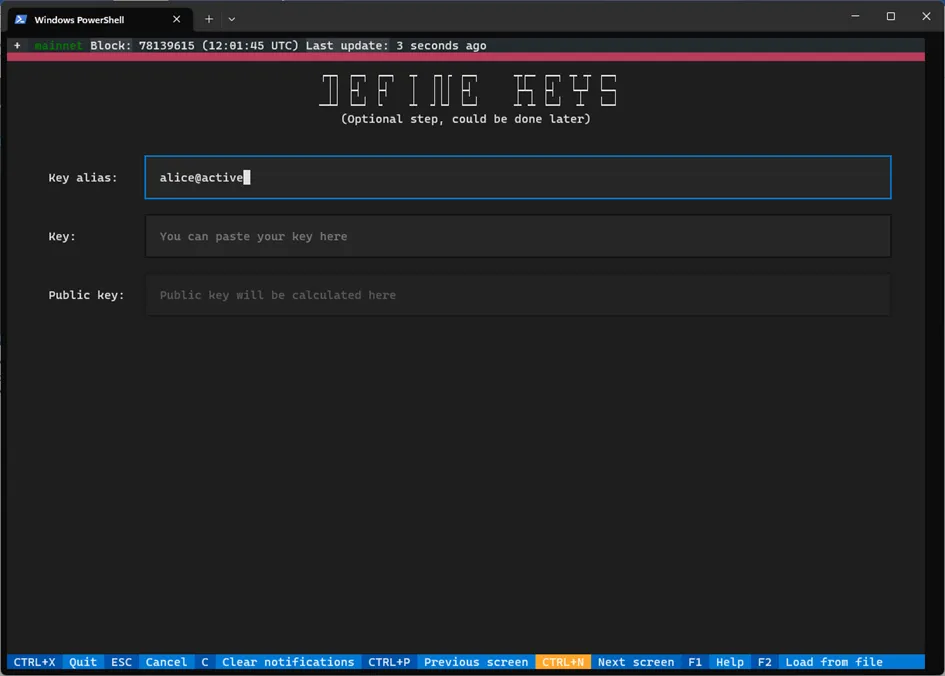
On the next screen, if you marked a working account, you can add a key. If you don’t do it during the onboarding process, you can do it later on the Manage authority screen.
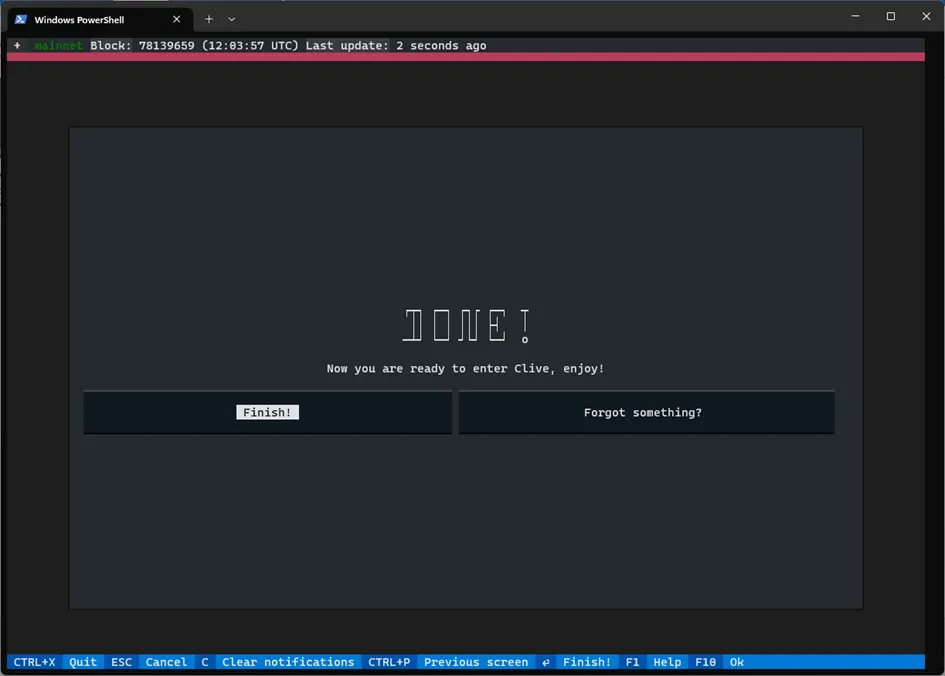
On the next screen the onboarding process finishes. Press ‘Finish;’ to start using Clive.
Broadcasting the transaction using TUI
Let’s start on the Dashboard screen.
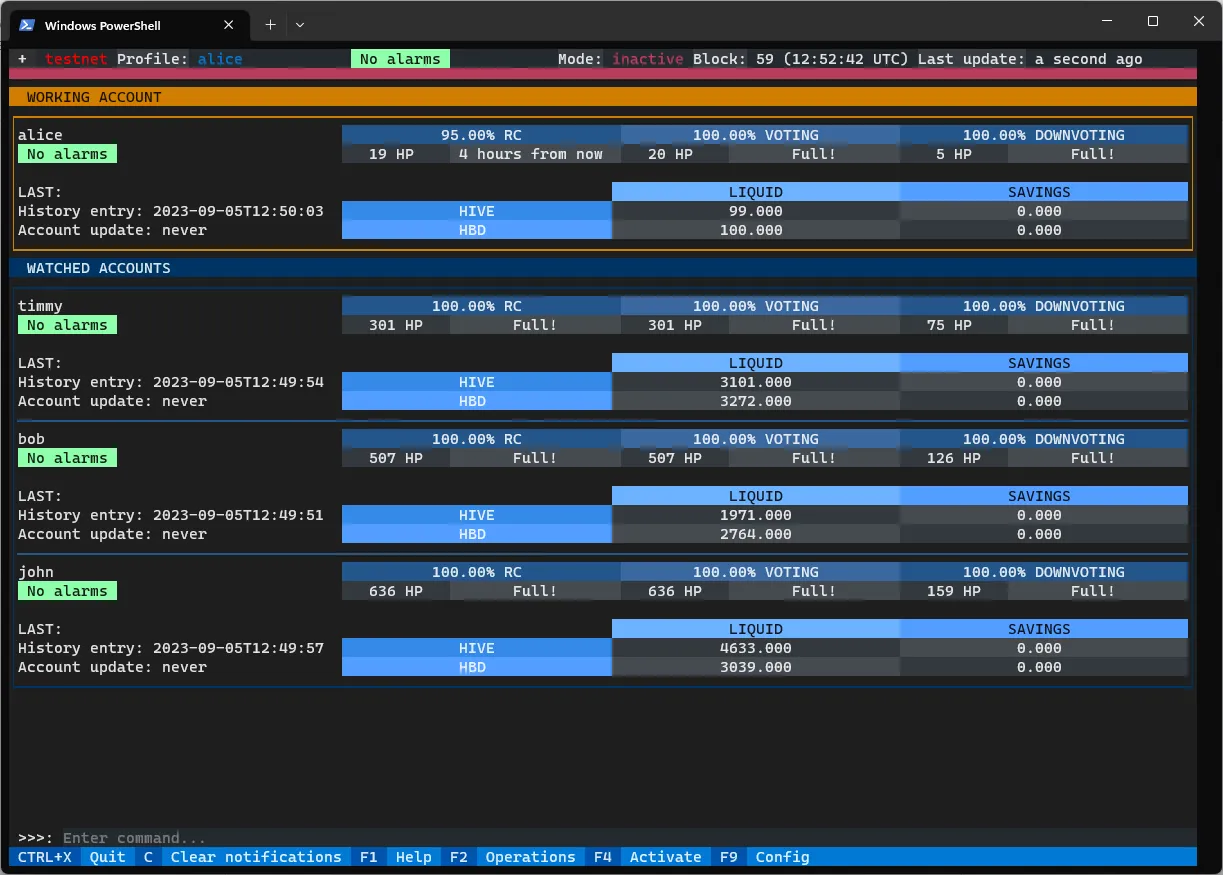
You can be in active or inactive mode. If you are in inactive mode you will be asked for password before broadcasting.
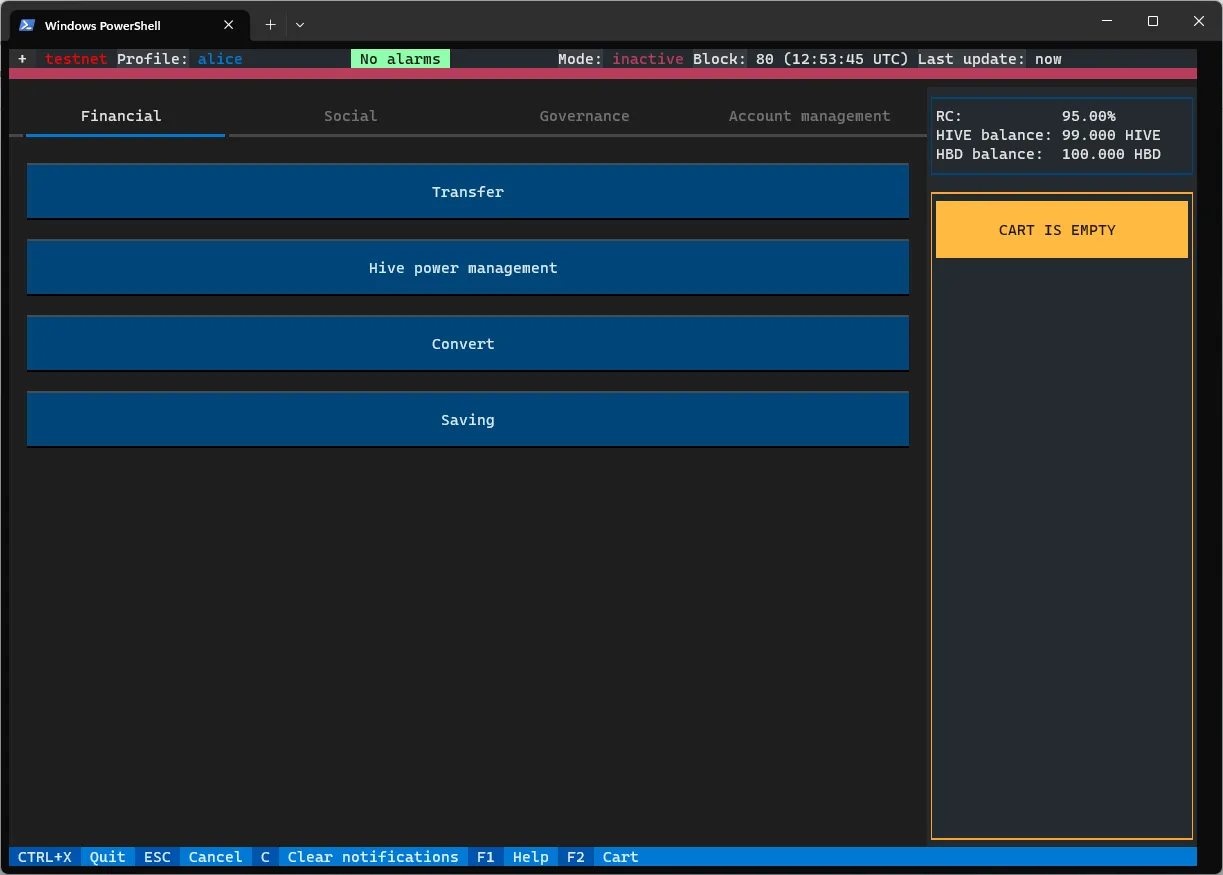
Go to the Operations.
On the Operations screen you can choose the operation that you want to create.
Only Transfer operation is implemented.
On the right side there is a cart, you can add to the cart more than one operation and then broadcast them as a one transaction.
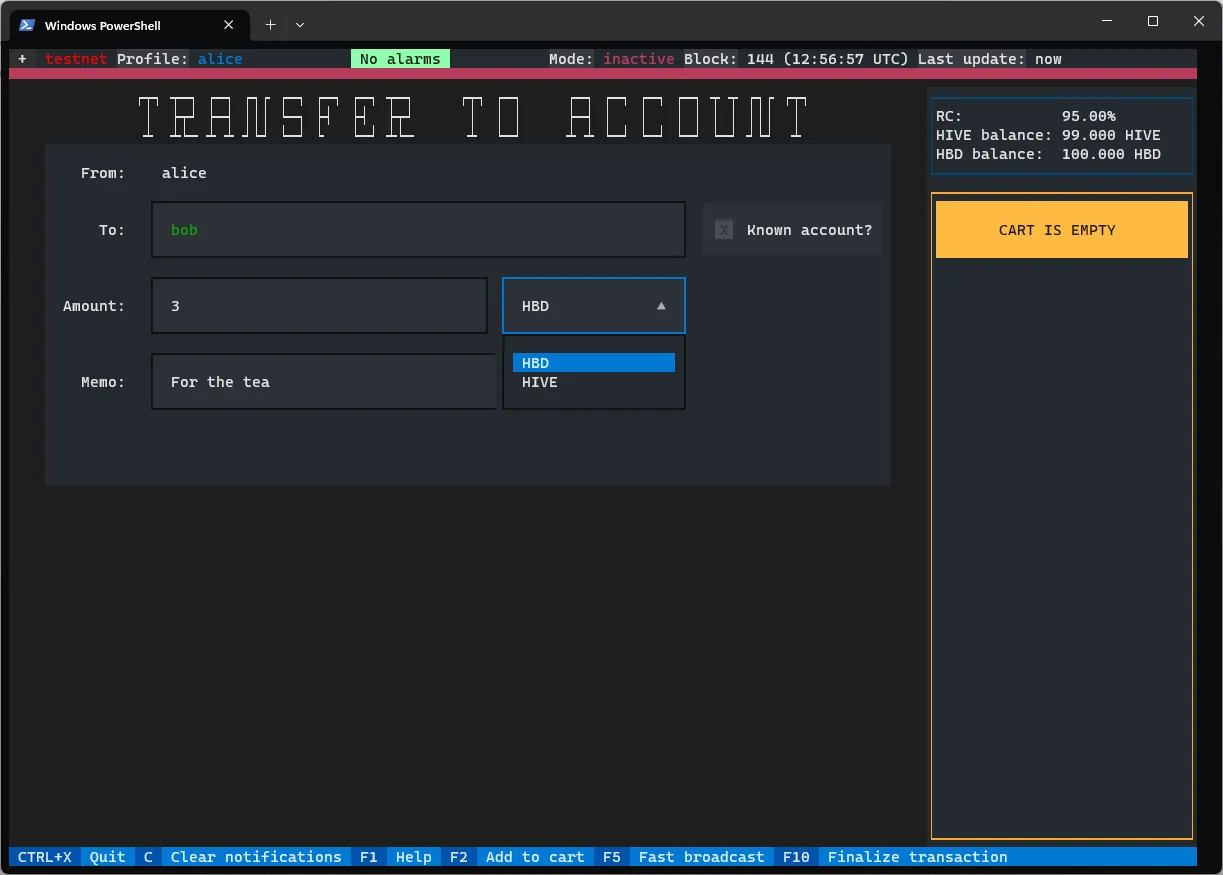
Go to the Transfer.
On the Transfer screen you can fill in the transfer data.
After that you have the following option:
- Fast broadcast - the transfer will be broadcast.
- Add to cart - and then prepare other operations to be added to the cart
- Finalize transaction - you can see the summary and choose different key (if you have more than one).
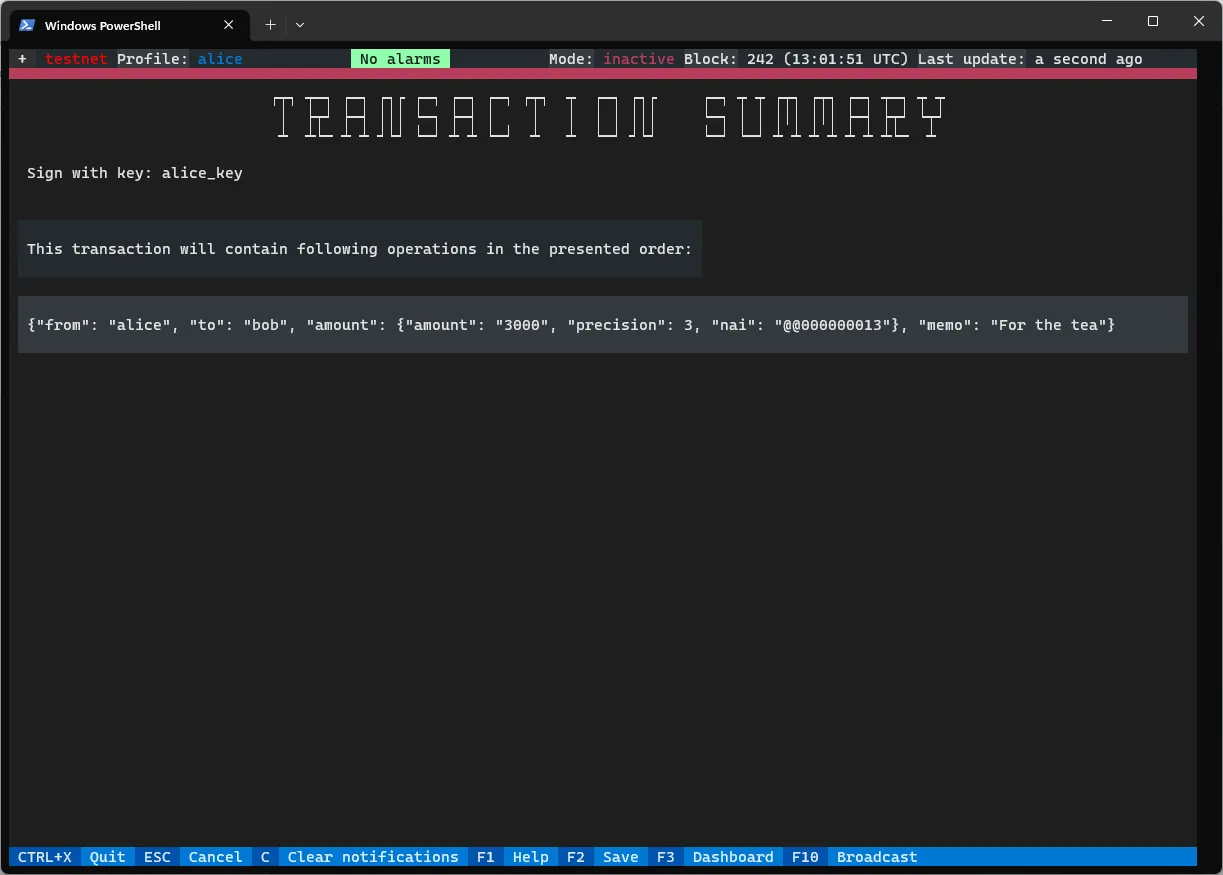
Go to the Finalize transaction.
On the Transaction summary screen you may review your transaction. You can also see which key will be used to sign the transaction.
You can broadcast the transaction or you can save it to the file.
Go to the broadcast.
If you are in inactive mode, you will be asked to enter the password.
The information about broadcasting the transaction is shown as a notification on the right side.
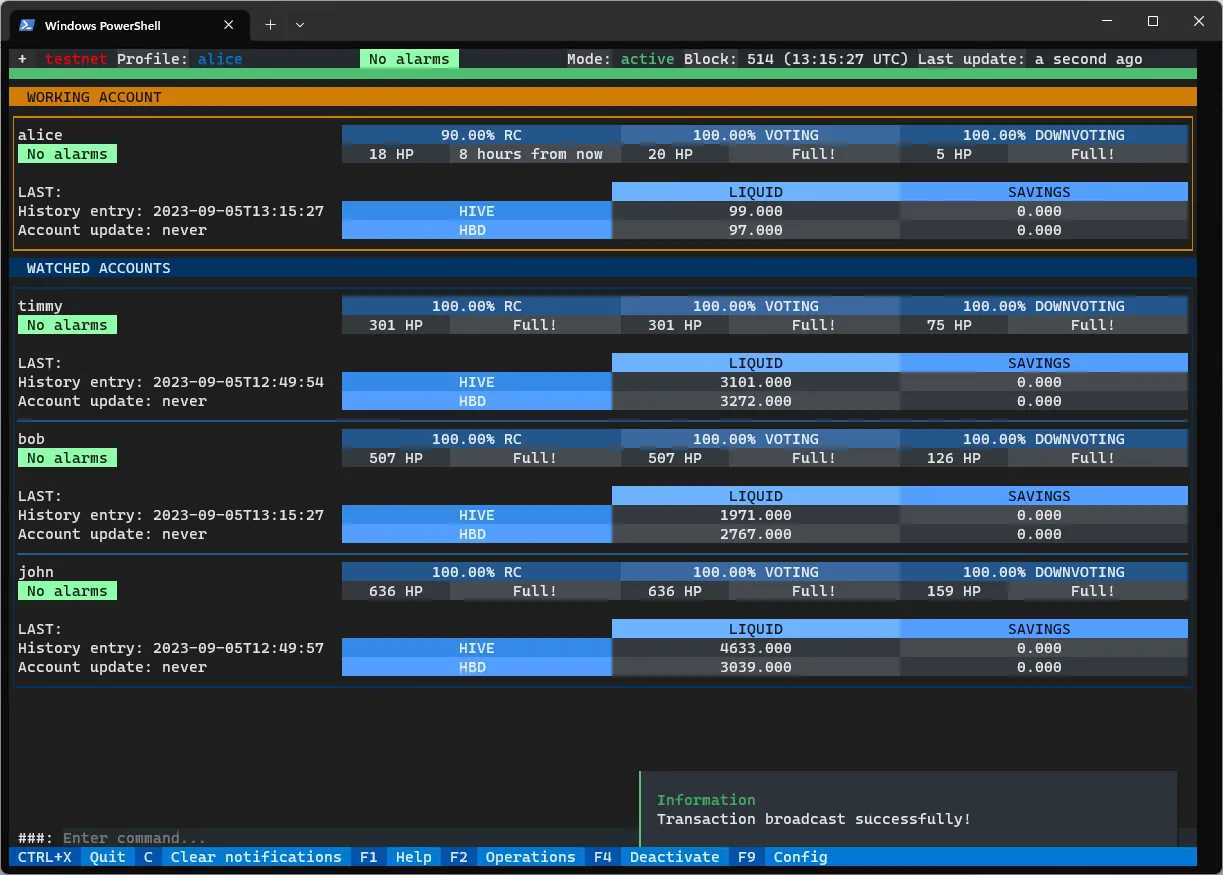
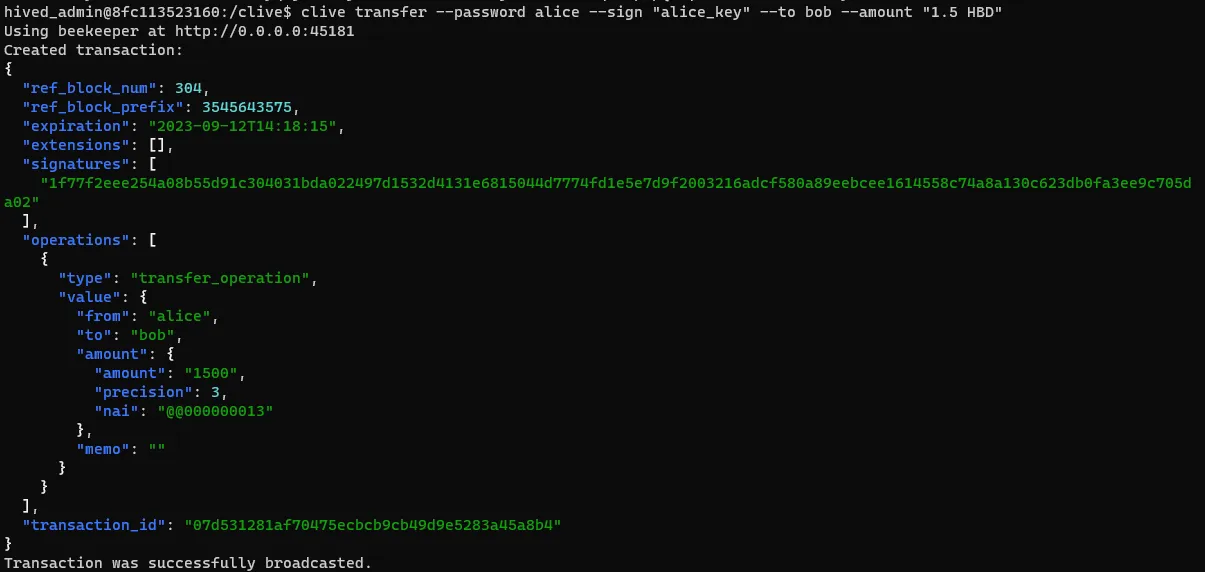
Broadcasting the transaction using CLI
Let’s check what we need to broadcast the transfer
clive transfer -h
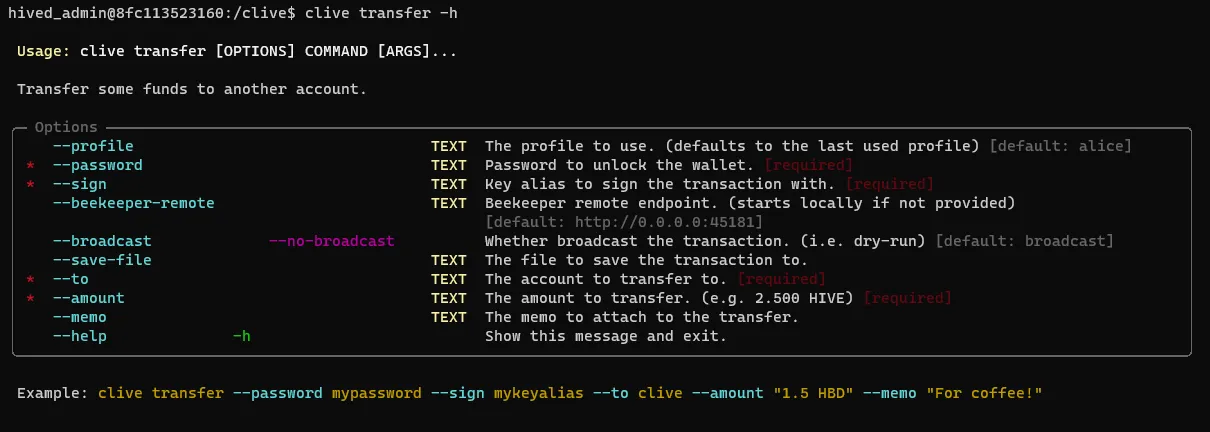
The required fields are:
- password
- sign
- to
- amount
The key alias we can check using:
clive list keys

To broadcast the transaction:
clive transfer --password alice --sign "alice_key" --to bob --amount "1.5 HBD"
