Photographing Products on White Backgrounds
A "How-To" on Achieving White Backgrounds in Camera
Okay, so you might be a product photographer or someone who has an online shop or Amazon store and you're always having to shoot products on a pure white background to meet guidelines and standards.
The problem:
Getting that pure white background in camera without compromising the light quality on your product.
Most people have a very hard time with this. They'll set up their shoot and start taking pictures and realize that the background in't bright enough to be considered pure white (RGB: 255,255,255) and if they increase the background light, they often get light spill bounding back onto their item causing it to lose contrast and have soft edges.
In this post, I'm going to outline in detail exactly how you can achieve that perfect pure white background in camera so you can save all that time and money you're spending "fixing it in Photoshop".
Here's what a product on a white background should look like:
.
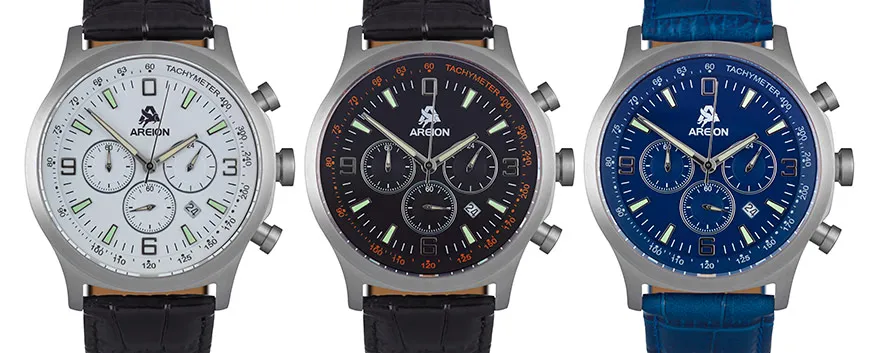
You'll notice that the background is pure white and the watches all have crisp sharp edges. This is what we want to see. Now, how do we do it?
We want to break this down into 2 very important points:
1. Light the Product & BG Separately
Its important to light each element of an image separately so that you have maximum control over your shot. You can look up the Inverse Square Law as it pertains to light falloff to figure out the best distance but trial and error works too!
2. Provide Ample Distance Between product & BG
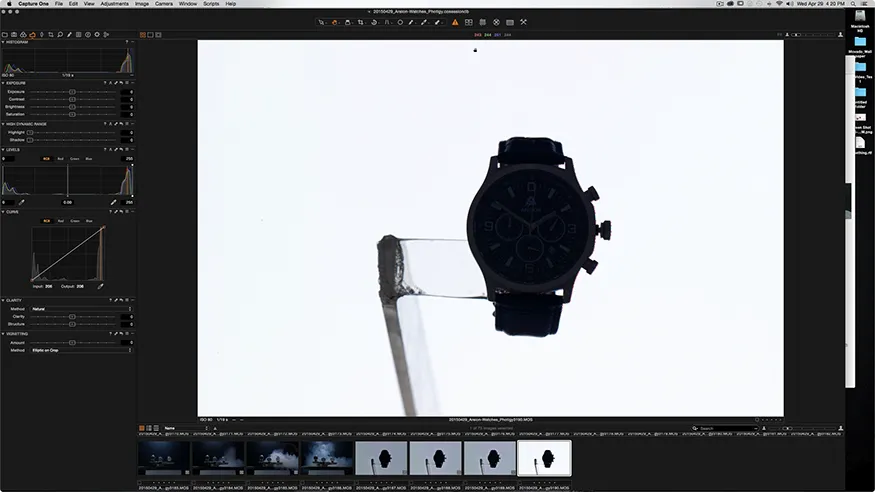
With enough space between our product and BG, we can isolate the product from the background light. This allows us to put lots of light power on the background without causing any degradation in our products light quality. We can check to make sure we've done this by confirming that our product is silhouetted when not lit.
EXAMPLE SHOT
| Photographer | @Geiger |
|---|---|
| Camera | Cambo Ultima.D w/ Leaf Aptus II-10 MFDB |
| Lens | Rodenstock Apo-Sironar Digital 180mm f/4 |
| Focal Length | 180mm |
| Shutter Speed | 1/250 |
| Aperture | f/11 |
| ISO | 50 |
| Lighting | PCB E640 w/ 10 Degree Reflectors (x3) |
Once we have our product isolated correctly from the background we just have to make sure that our background is pure white. If you're using CaptureOne or Lightroom, you can simply place your cursor over the white background and make sure the RGB values are 255,255,255 everywhere you look.
If your background isn't pure white, simply bump up the power of your lighting until you achieve the results we're after. Be sure to keep checking your product to make sure it's still completely dark. If it isn't, you'll need to move it farther away from the background.
Now that we have a white background and isolated product, we can add the light to the actual subject we shooting.
For this project, I was shooting three Areion watches which have shiny metal cases, so I had to place some diffusion material around the watch in order to achieve the light and gradients I wanted on the watch casing.
EXAMPLE SHOT
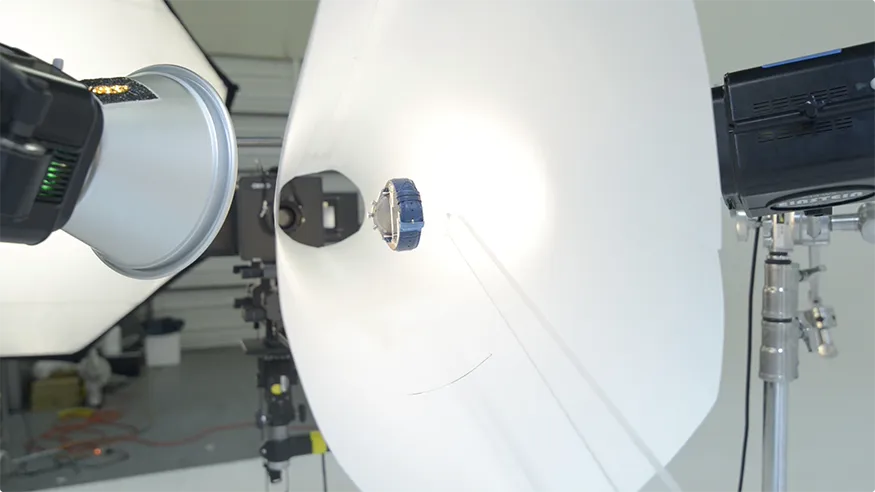
You can see that I have the watch mounted on a clear plastic arm inside of a white semi-translucent cone with two lights to the left and right of the cone lighting each side of the watch.
Once we get our subject lighting in the correct position and power settings, we just have to make sure we get out the gray card and get a quick shot with that as well. This is used for setting color balance. A very important thing when shooting products!!
EXAMPLE SHOT
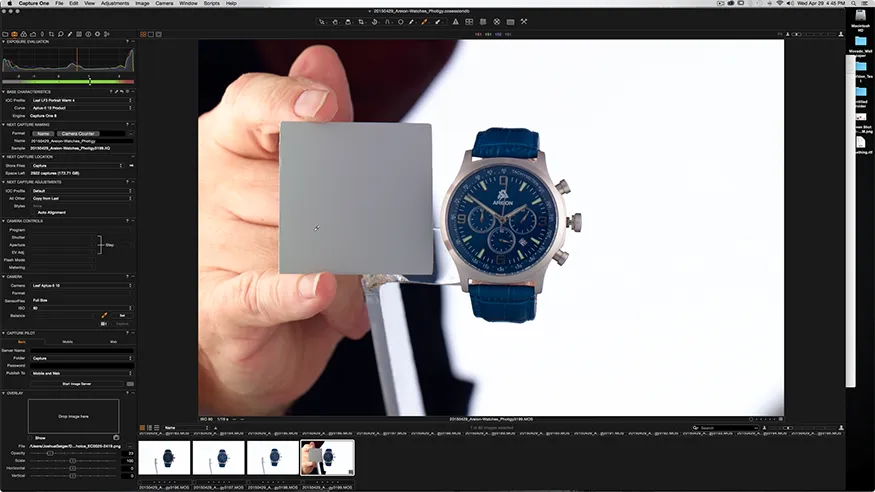
And with that, we're set up to shoot the rest of our (similar or matching) products and we don't have to waste any time in post-production dodging and clipping every picture!
What a time saver!
Close-Up Shot of the Watch.
.
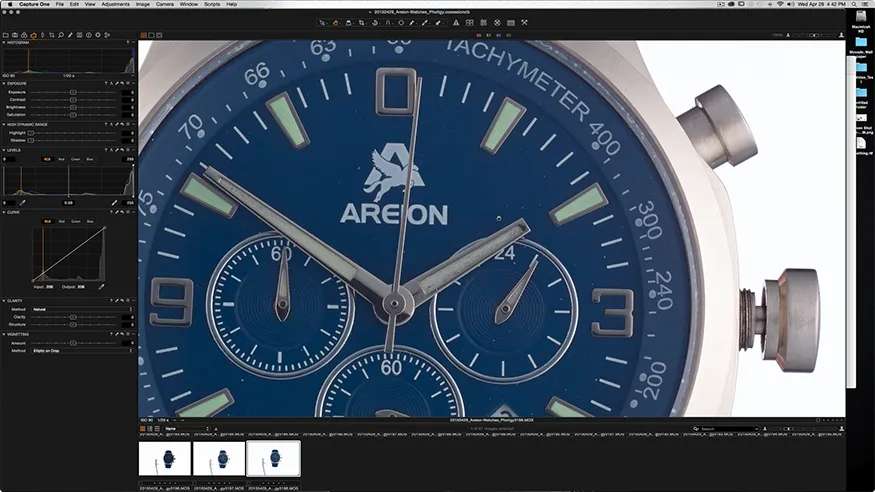
You can see that there's some color cast on the metal bits coming from the inside of the watch strap. We can't do anything about that in camera but we can desaturate it in post. And we will for sure. But you can see how crisp the edges of the watch are against that pure white background. Thats always the goal.
I Hope you Enjoyed This Tutorial!
If you're interested in seeing more tutorials like this posted from me, please feel free to vote and comment to let me know!! Also, you're welcome to provide suggestions on topics you would like to see covered. :)
Thanks!
As always... if you have questions please feel free to ask. I'm happy to help in any way I can.

PictureWax is an Image Retoucher Directory
Image Retouchers: Get Listed in the PictureWax Directory !!
Please consider voting @reggaemuffin for witness. It's clearly deserved.
Posting Schedule
Does Not Include Unscheduled Posts & Resteem
| Day | Topic |
|---|---|
| Monday | Daily Featured Photo & Lighting Set-Up |
| Tuesday | Compositing & Retouching |
| Wednesday | Daily Featured Photo & Lighting Set-Up |
| Thursday | Product Photograph Breakdown (BTS & Post-Production) |
| Friday | Daily Featured Photo & Lighting Set-Up |
