Lithophanes are backlit illuminated photos that can be easily printed with an ordinary 3d printer. I'll describe in this article how to 3d print your own, or you can win a lithophane from a picture of your choice by participating in the comments.
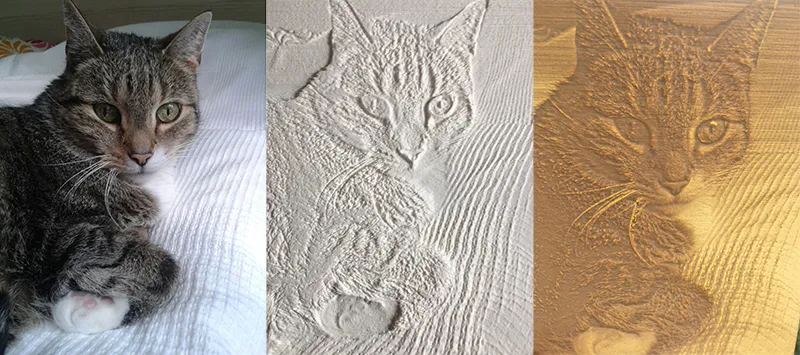
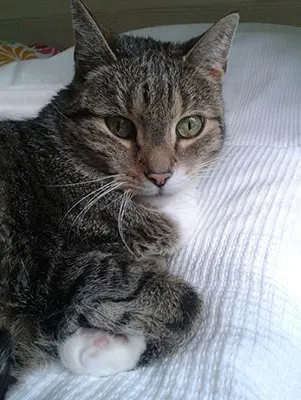
I did read the first time about lithophanes in this post by @steddyman. I immediately thought a lithophane is a perfect personal gift you can create easily and still being very special. And I was looking for an excellent gift for a friend of mine that had his 40th birthday. The picture I used was her beloved cat that just died a few weeks ago. I thought the lithophane is an excellent way to remember the cat.
We didn't have a photo with a high resolution. Fortunately, that didn't matter. Any 3dprinter resolution is most of the time a lot worse than the resolution of the small photo.
In the first step, a photo needs to be converted to a black and white picture negative. If you can't convert it with your image program, you can change the default settings in the converter for the STL model to convert the image.
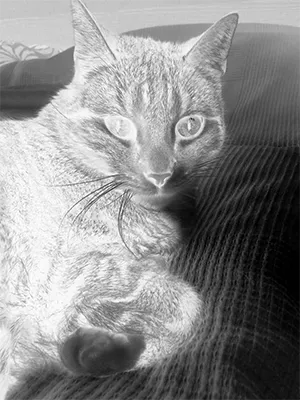
This picture can then be converted to a printable STL file with the web application http://3dp.rocks/lithophane/. Depending on the grey value of a pixel, the height of the 3d object is calculated.
My first attempt was an outer curve with a height of 10cm and with the model settings recommended by @steddyman.
Thickness 4mm
Thinnest layer 0.8
Vectors per pixel 5!
I used the standard print settings that I usually do for PLA prints (3 outer perimeters and print speed of 40mm/sec). The only exception was that I disabled the infill. With a maximum thickness of 4mm, I didn't expect much infill anyway.

As you can see, the curved variant got too thin on one of the places. My slicer (Simplify3D) could not handle the "thinnest layer 0.8" setting it seems. Although I activated all of the thin feature settings from Simplify3D. I could only fix this by raising the thinnest layer to 0.9. This is unnatural as my nozzle size is 0.4 and 0.8 should have been just 2 walls.
In my second attempt, I decided that the lithophane was best presented as a picture that you can hang inside a window so that anytime the sun shines through this window, the object changes his characteristics from a plain white sculpture to the black and white photo.
Therefore, I dropped the curved model and created it flat. In all cases, the lithophane should be printed standing upright and not flat on the print bed.
The resolution of the z-axis (Layer-height 0.1mm resolution) is a lot higher than in the x/y dimension on most printers (nozzle size 0.4mm resolution). Printing the lithophane standing upright gives the best results.
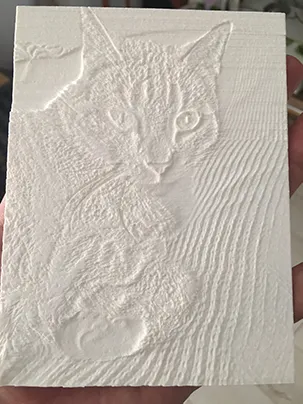
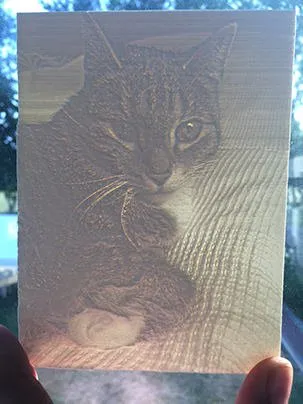
To make it easier to hang it into a window, I did glue a small metal chain to the back of the lithophane.
Where next? I think I will play around with some of the lithophane boxes I found on Thingiverse. See if I can get good results with just some LED light and a switch. This will add up the level a bit for sure.
Lithophane Lamp 1- https://www.thingiverse.com/thing:891904
Lithophane Lamp 2 - https://www.thingiverse.com/thing:1370792
Lithophane Stand - https://www.thingiverse.com/thing:303037
You don't have a 3d printer to make your own lithophane?
Post your photo in the comments and describe why the picture is essential for you. If you then resteem and follow me, I will print your photo as a lithophane and send this to you. Every comment also gets a vote just for the effort of participating.
If there are more then 5 entries, I choose a winner the following way after the seven days.
- 1 winner with the picture I personally like most
- 1 winner with the most exciting story
- the image where the comment gets the most votes (need your help to pick this one)
- 2 winners are chosen randomly from all entries
If there are less then 5 comments with images, you are guaranteed to get one.
As always I hope you enjoyed reading.
Happy Printing
Dr. Make
