It's been a month since the citizen science project was launched on Hive. From the installation of the necessary tools to reading references and blog posts by @lemouth (linked at the end part of this post), I have been enjoying my time learning about the Standard Model, the physics beyond it, and communicating with a machine (my computer 👩🏻💻). For this week, the set of tasks requires the use of a new tool that will be used to analyze the simulated of collisions of the top-antitop quarks at the LHC. MadAnalysis 5 simulates the detector effects at particle colliders and performs event reconstruction for analysis.
Download and Installation of MadAnalysis 5
Through the terminal, MadAnalysis 5 can be downloaded in Github by typing:
git clone https://github.com/MadAnalysis/madanalysis5I have set the downloaded file in the same working directory of the MG5aMC software. From there, MadAnalysis 5 can be launched using the command:
cd madanalysis5./bin/ma5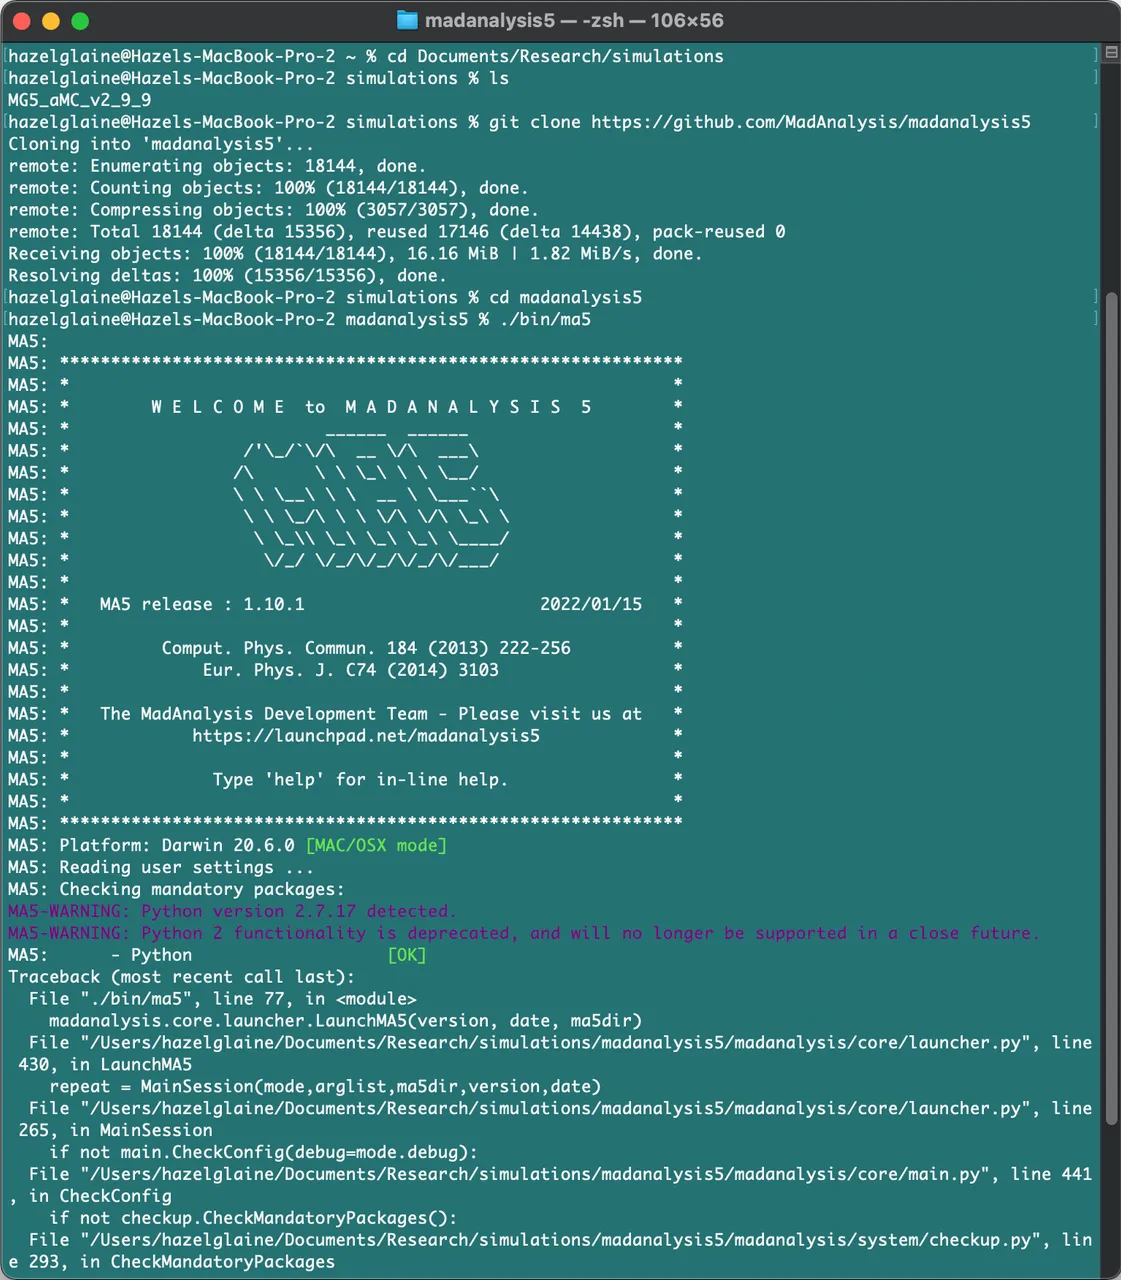
In doing this task, I encountered a problem as MadAnalysis 5 automatically checks the mandatory packages it requires. By default, Mac uses Python2 and it's what the MadAnalysis5 5 detected upon launching it. This issue was solved by setting Python3 as default, following this tutorial I saw. Since I have an installed Python3, all I have to do is set it as the version to be used by running the command:
ln -s -f /usr/local/bin/python3 /usr/local/bin/python. The current terminal above needs to be reloaded to use the Python3 version set as default.Once again, MadAnalysis 5 was launched, the panel below shows the list of mandatory packages and optional packages for data processing.
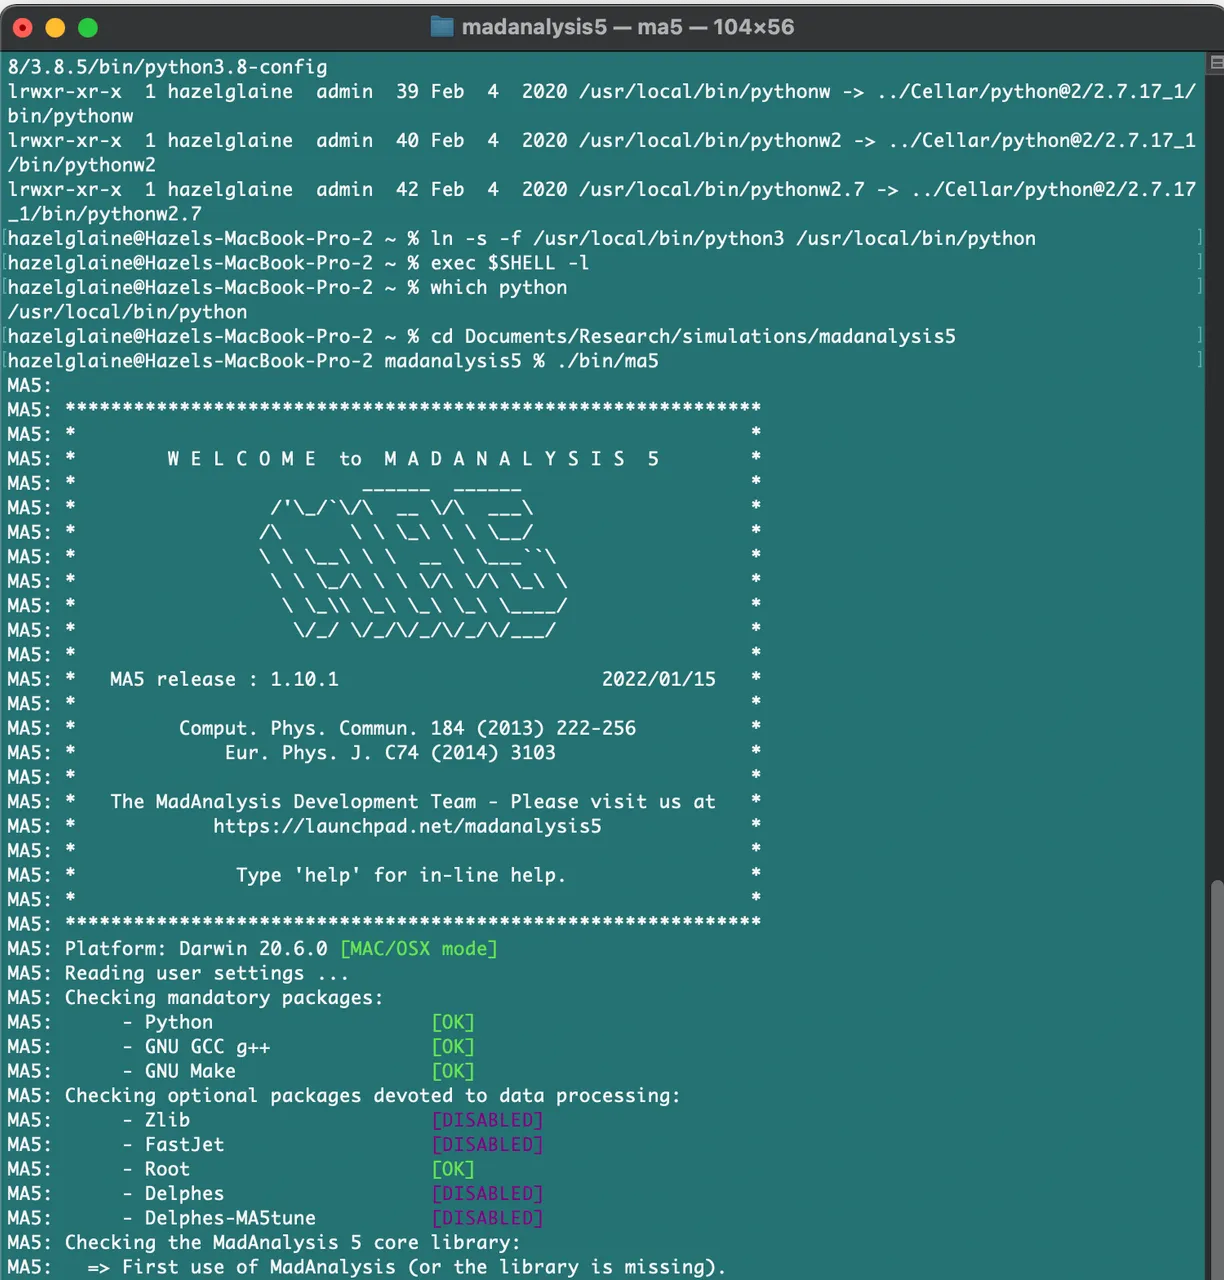
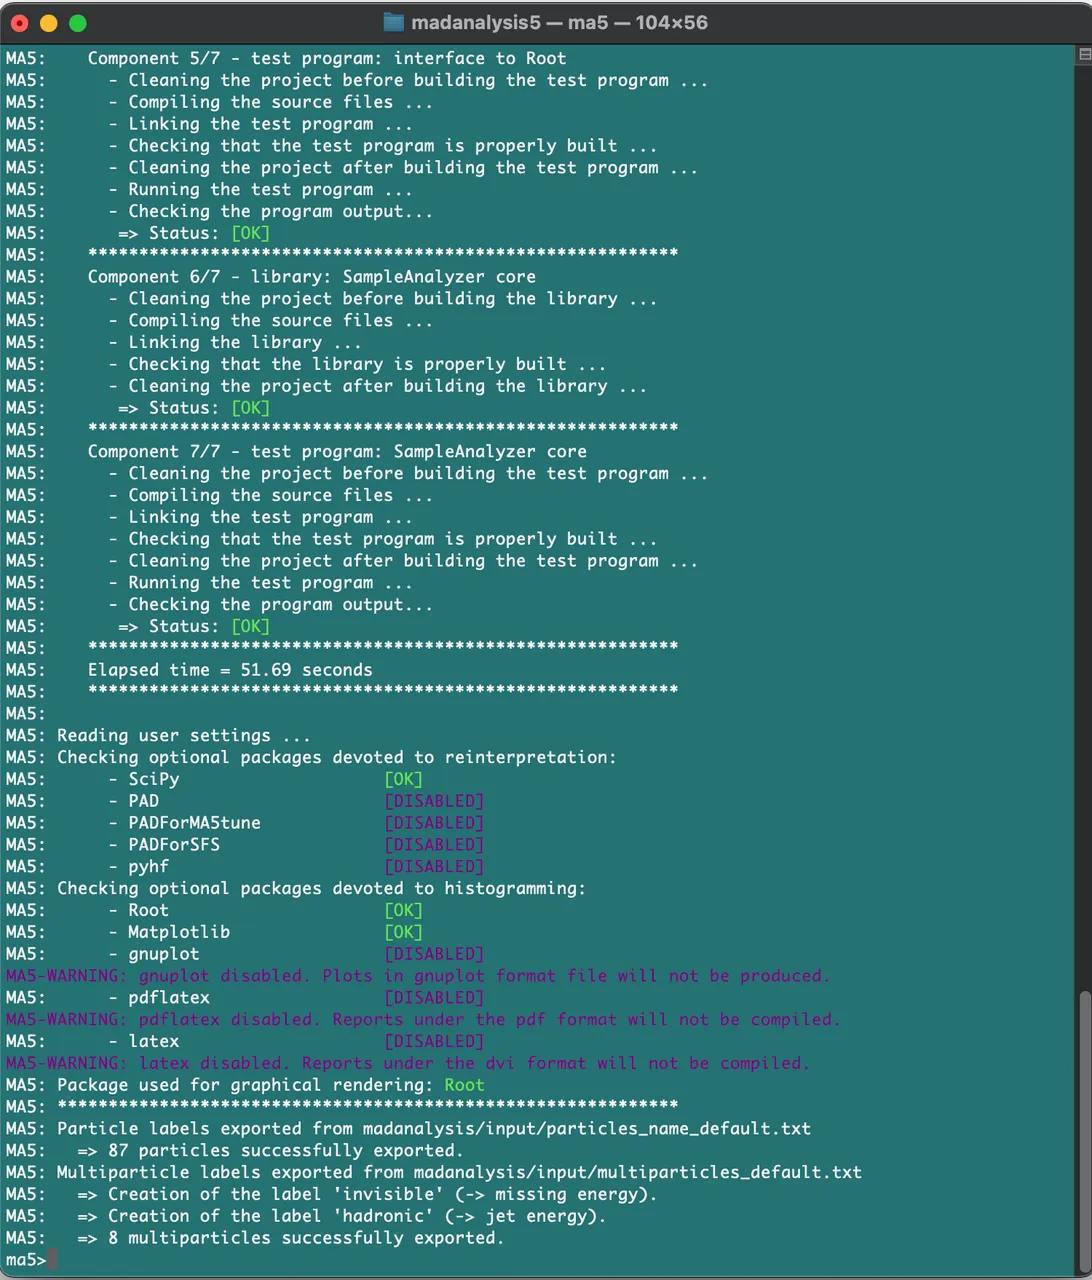
MadAnalysis 5 will proceed on compiling its C++ core which has 5 components (3 test programs and 2 libraries for compilation). This will output the external dependencies available as shown below.
Download and Installation of pdflatex and latex
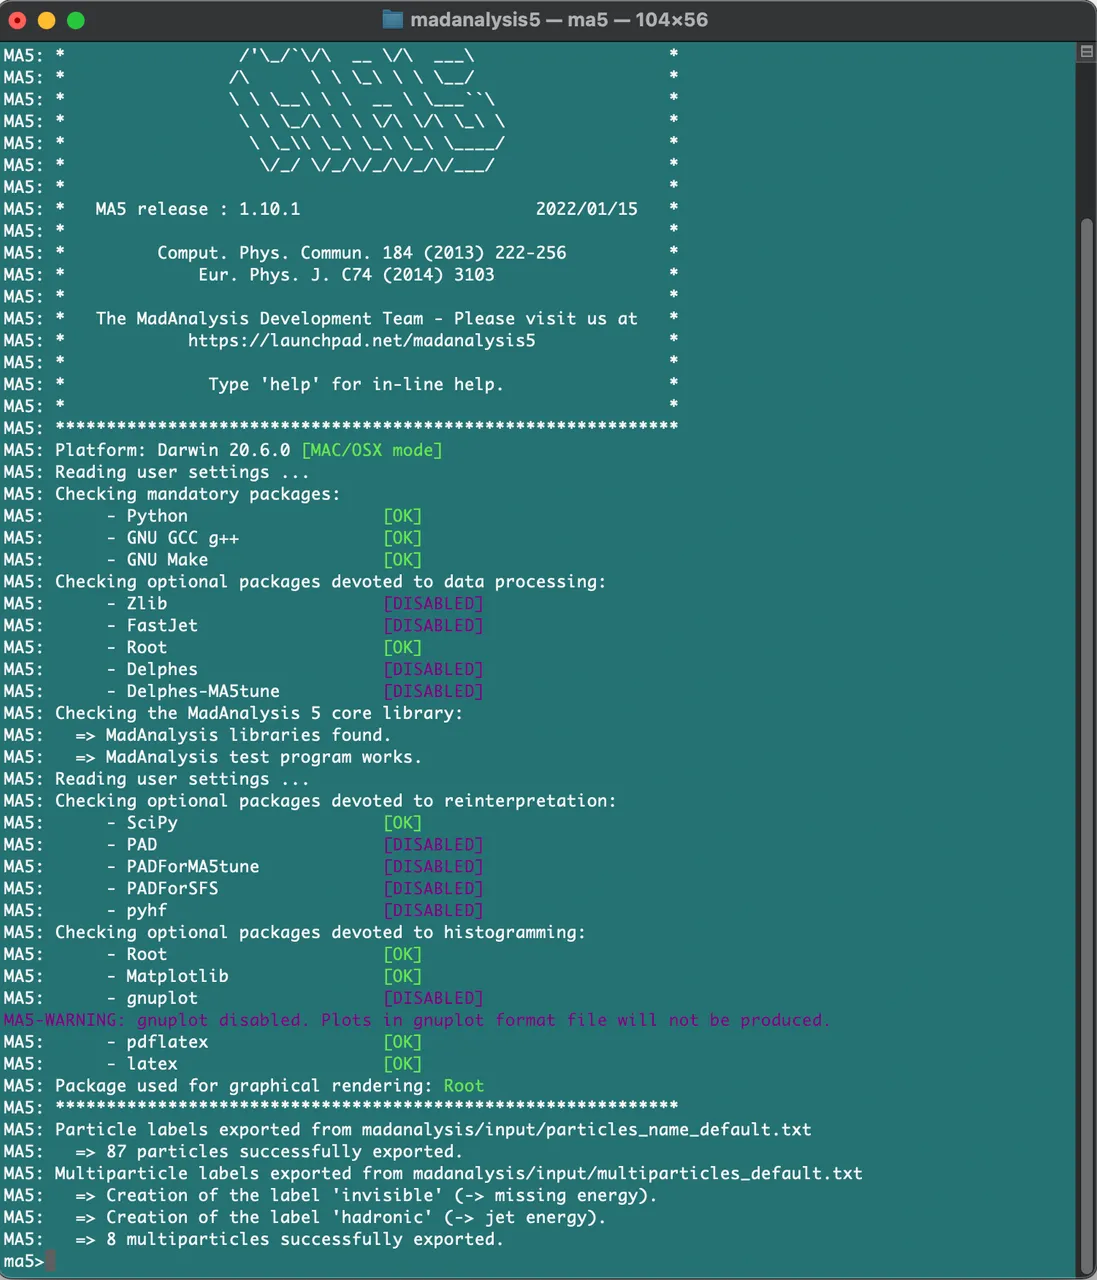
The tasks from the previous weeks cover the optional packages required in using MadAnalysis 5. What could be missing but important in using this tool are the Matplotlib package for data visualization and the pdflatex and latex compilers. In my research work when I was still a graduate student, I have used some of these packages for calculations and data visualization; hence the only packages left for me to download and install are pdflatex and latex which can be downloaded from this link.
Since I'm working on a Macbook, the MacTeX corresponds to the package needed for TeX distribution. However, MacTeX with its 4 components (TeX Live 2022, GUI Applications, Ghostscript 9.55, and Ghostscript library libgs) is large in size, amounting to 4GB. I opted to install the smaller distribution, BasicTeX, which is approximately 95MB in size. After this step, I restarted MadAnalyis 5 in the terminal shell for the installation of the additional packages.
Installation of zlib and FastJet packages
The zlib package is used for reading and writing compressed event files and the FastJet package is used for event reconstruction. The installation of these two packages takes place in the MadAnalysis 5 console. Using the command:
install zlib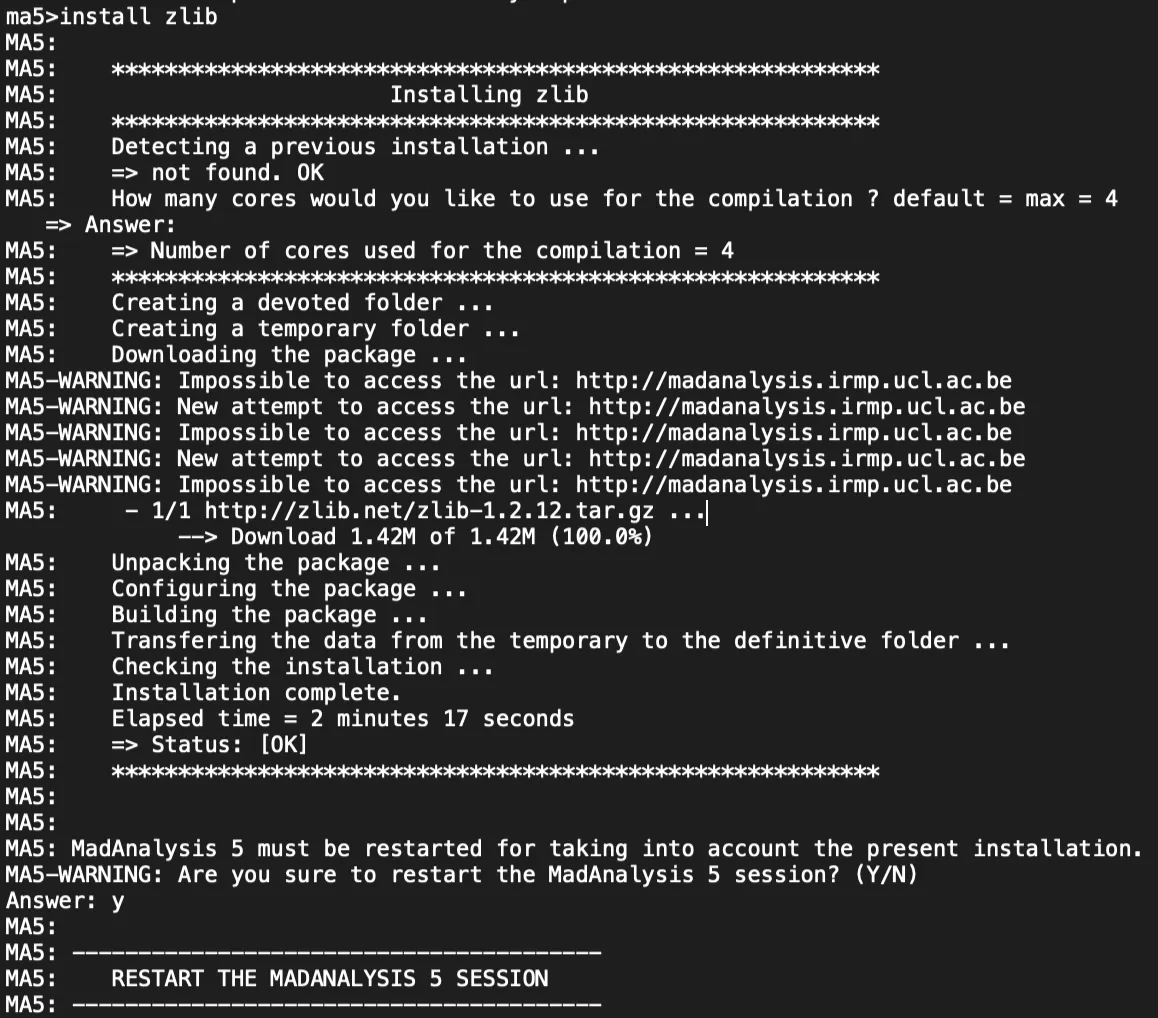
When restarting MadAnalysis 5, it will again compile its core libraries, this will take longer than the previous. The next step and last step is to install FastJet using the command:
install fastjet. Same as before, MadAnalysis will recompile its core. And...we're done with the needed installations and ready to do some physics! 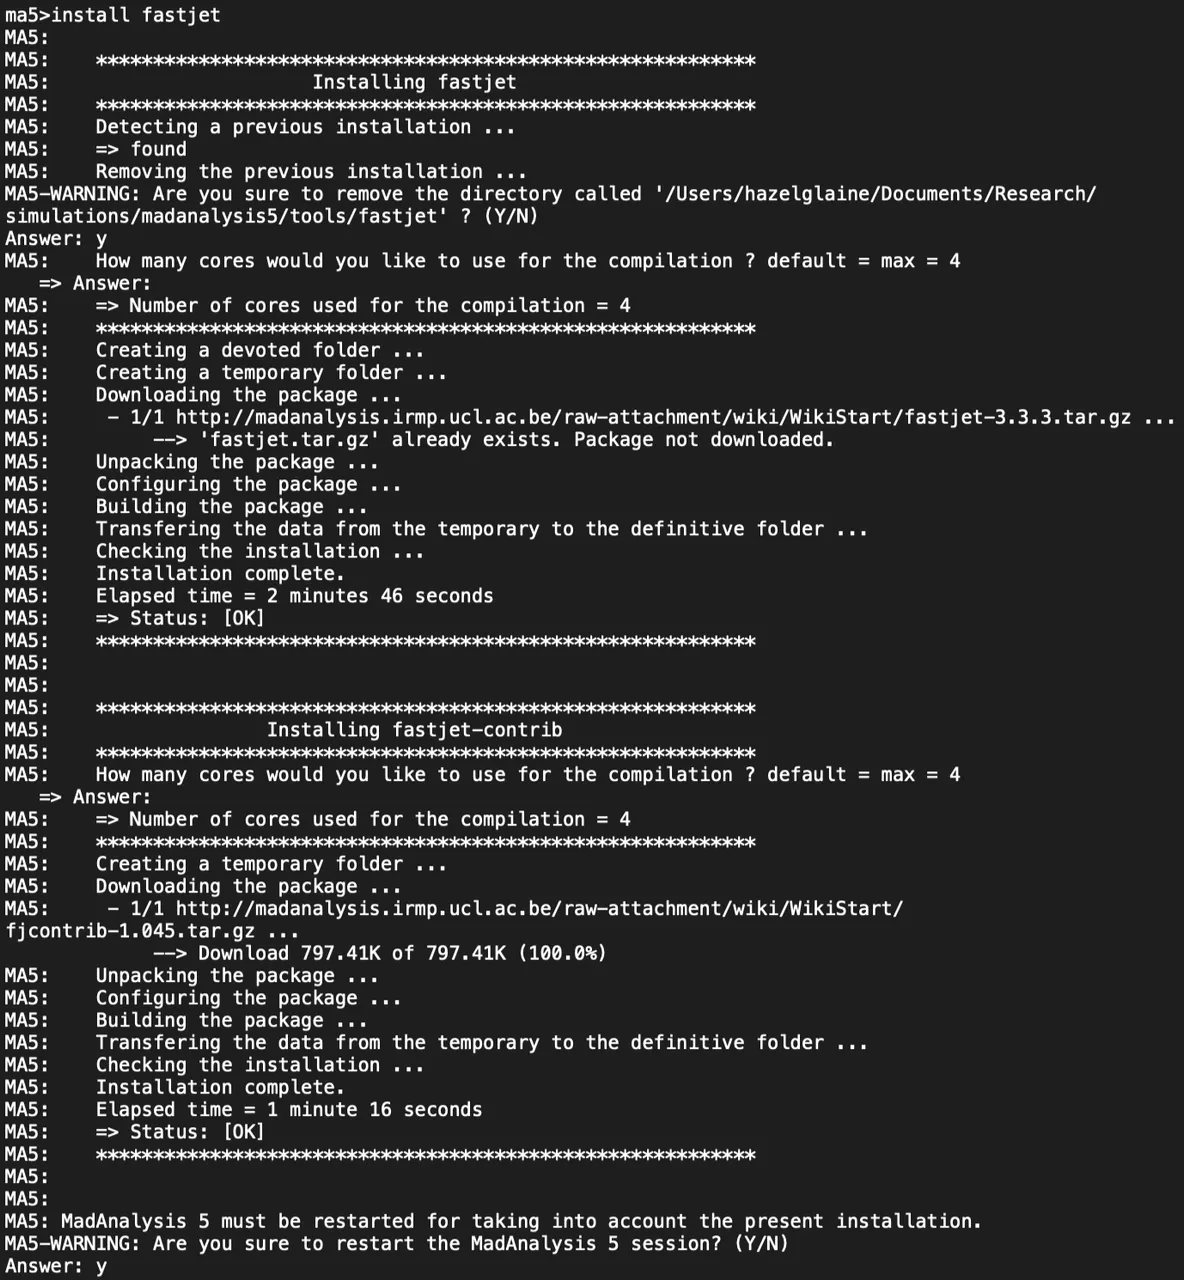
Accessing the top-antitop simulations from MG5aMC
Going back to our previous output when we simulated collision of top-antitop quarks at LHC, we need to determine the location of the generated event file in the working directory of MG5aMC. These events will be imported in MadAnalysis 5 for simulation of detector effects and event reconstruction. In the simulation we'll be performing, we considered the following detector effects: reconstruction, smearing, and identification. These effects were described in the tutorial as:
- Reconstruction: Any particle that interacts with the detector material leaves into it tracks and energy deposits that need to be converted into high-level objects (electrons, muons, photons, jets). This task is not always perfect, and this is accounted for through reconstruction efficiencies.
- Smearing: The resolution of the detector slightly degrades the estimation of any particle property. Some quantities are thus smeared (their value is modified according to some Gaussian law).
- Identification: An object of type A can always be mis-identified as an object of class B with some probability.
Simulating ATLAS detector effects and event reconstruction
After the simulation of the detector effects, MadAnalysis 5 will have an output of the reconstructed events of higher-level objects. The event files in this output contain a small number of electrons, muons, jets, photons and missing energy. To get started, MadAnalysis is launched using this command:
./bin/ma5 -R madanalysis/input/ATLAS_default.ma5In particle collider experiments like in the LHC, beams are made to collide at four locations, where the detectors are located. These detectors are the following: ATLAS, CMS, ALICE, and LHCb. The command we used above configures MadAnalysis 5 to simulate detector effects in the event reconstruction, particularly the parameters of the ATLAS detector.
Our next step is to import the generated events from MG5aMC to MadAnalysis 5 as discussed earlier, using the command:
import path-to-our-events. The path-to-our-events corresponds to the location of the simulated collision of the top-antitop quarks as determined earlier.The command:
set main.outputfile = myevents.lhe.gz indicates the name of the output file for the reconstructed events. By typing the command: submit, we instruct the program to proceed on the simulation and event reconstruction.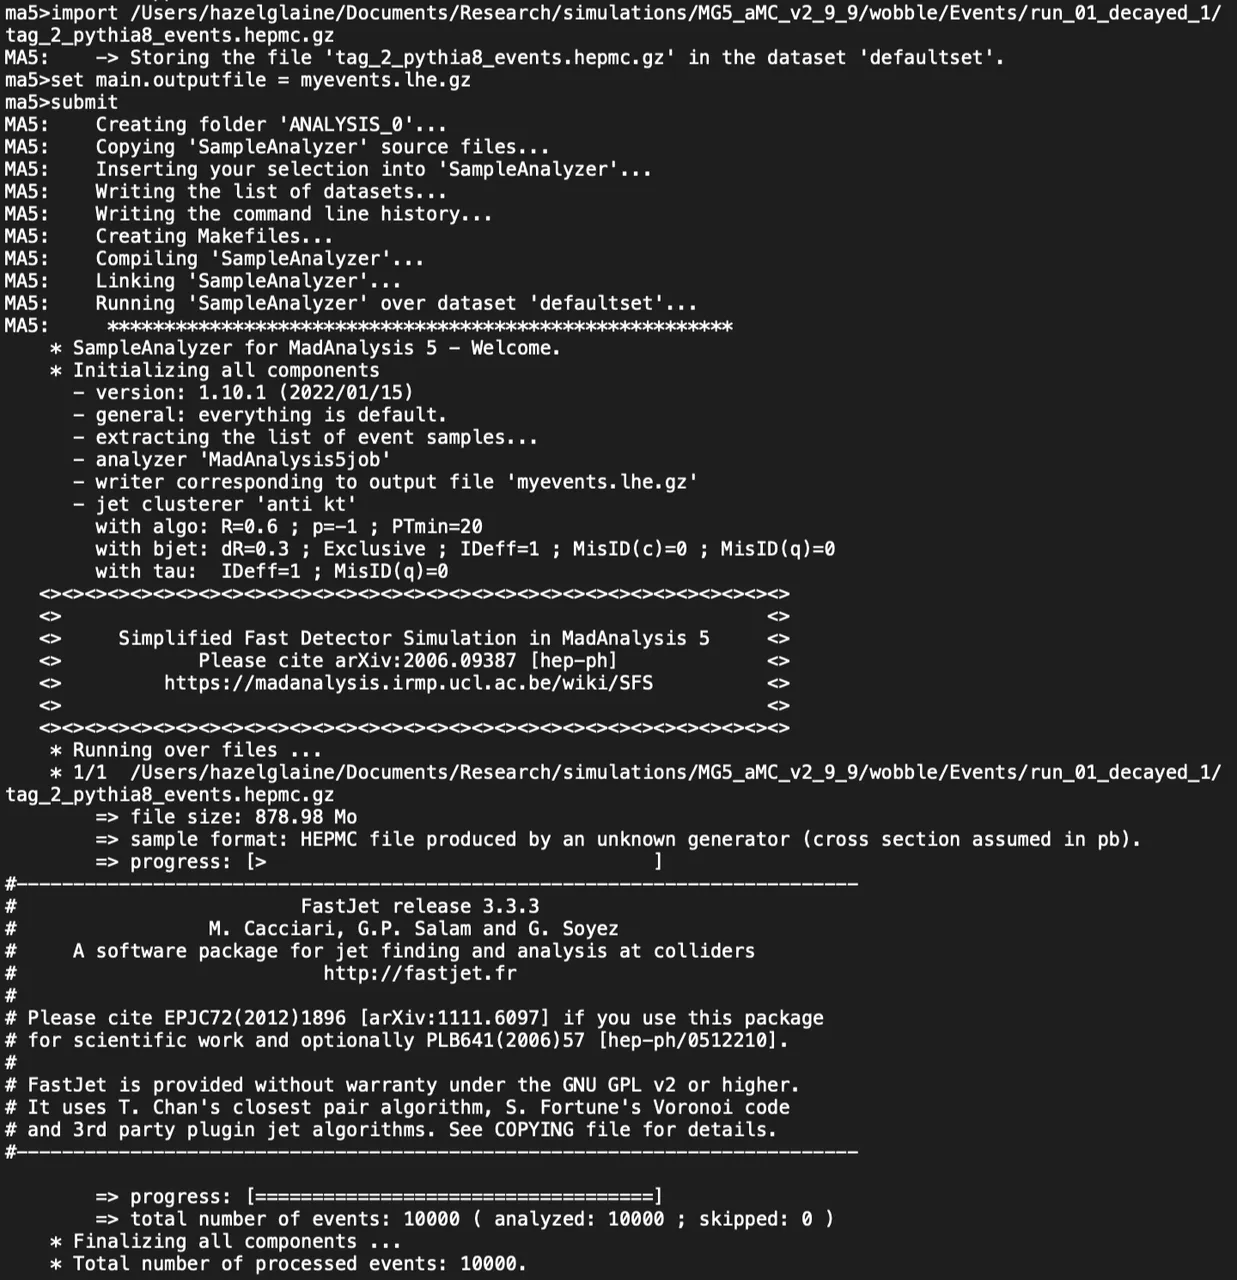
The run will take some time, once finished, we can exit the program by using the command:
exit. The output contains 10,000 events processed using MadAnalysis 5, this is smaller in size (approximately 7-8MB) compared to the generated events from MG5aMC which is around 900MB. This new output file is located in the working directory of MadAnalysis 5: ANALYSIS_0/Output/SAF/_defaultset/lheEvents0_0 and will be analyzed and investigated in terms of electrons, muons, jets, etc. To do this, we restart MadAnalysis 5 in the usual manner: ./bin/ma5The last task is done by using this series of commands:
ma5> import ANALYSIS_0/Output/SAF/_defaultset/lheEvents0_0/myevents.lhe.gz as ttbarma5> set ttbar.xsection = 505.491
ma5> plot NAPID
ma5> submit
The first line imports the generated events using Mad Analysis 5 with the label ttbar. The second line sets the production cross section associated with this event sample is 505.491 pb, which was computed from last week set of tasks. The third line, plots a histogram displaying the particle content of the events, stacking the results of every single event. The fourth line starts the calculation. After the run, we look at the results by using the command:
openThis distribution of decay products is expected from a top-antitop quark collisions. In the plot below, the columns correspond to the following decay products:
- b~/b: b-jets (jet of strongly-interacting particles originating from a b-quark)
- e+/e-: electrons
- ve~/ve: missing energy
- mu+/mu-: muons
- ta+/ta-: taus
- g: jets
- a: photons
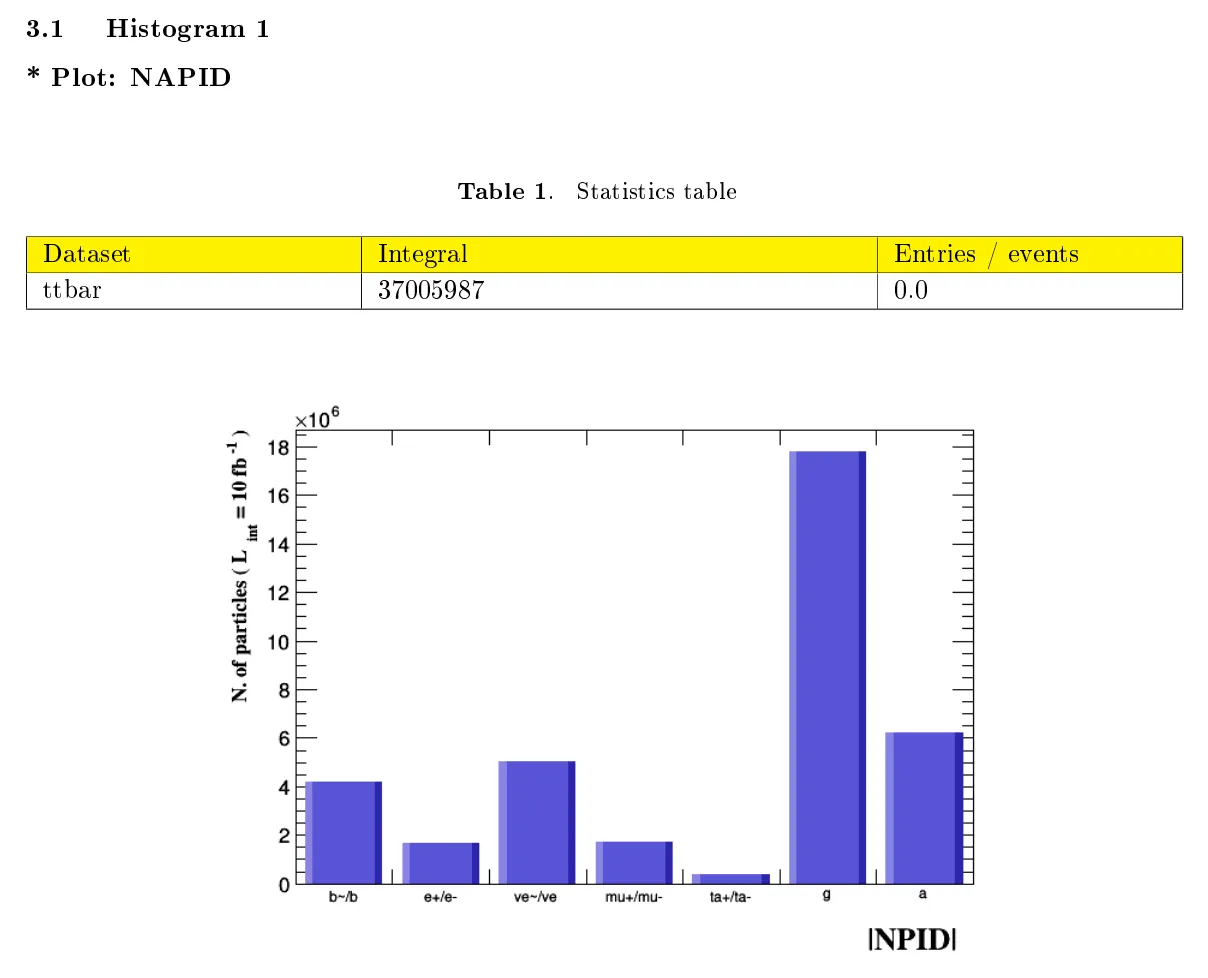
The decays from the top and antitop quarks produce a b-jet and a W boson. This W boson can further decay into any of these:
- an electron and missing energy
- a muon and missing energy
- a tau and missing energy
- two jets
The jets and photons detected comes from radiation. Getting this results really amazes me since this comes from simulations performed using my computer which utilizes only 4 cores at the maximum. The elapsed time during the runs took only a few minutes, the longest was around 4 minutes.The next tasks for Citizen Science project will be about more details and the physics about the results we produced, which is yet another exciting task to do! 🤩
References and reading materials:
- Tutorial used for this post: Citizen science on Hive - detector effects and event reconstruction
- Space chameleons or space cowboys - neutrinos and their mysteries
- Charmonia, bottomonia & toponia - the fantastic beasts of particle physics — Hive
Links of my progress reports for this project: