Better late than never, here comes my report for the second week of the Particle Physics participative project on Hive organized by @lemouth and that you can follow on #citizenscience.
As you can see, most of my colleagues have submitted their reports for this second week already, things get busy and it has not been so straight forward to achieve results this week. I will explain later where I had some problems in case it is useful for the hivers to come (I am sure more people will join us!).
The guidelines I am following come from the blog entry: Citizen science on Hive - simulating top quark production at CERN’s Large Hadron Collider
If you want to know more, you have can read the following posts from @lemouth:
- Introduction: Towards a citizen science particle physics research project on Hive
- Week 1: Installing MG5_AMC software: Citizen science particle physics project on Hive - Let’s get started!
And if you want to refer to my first report, that includes how to install a Virtual Machine on a windows PC, you can go to Citizen Science project: Week 1 - Installing Linux in a Virtual Machine + software installation
And now, let´s go for the report of my first usage of the software package MG5_aMC (MadGraph5 and aMC)
Task 1 – Top-antitop quark production
First thing, we need to run MG5_aMC (refer to my first report). When opening it already tells us all the particles that can be used in the model. As the reference post for this entry indicates, the ~ after some of them refers to their antiparticle.
We are going to generate the process that we are going to be interested in, that is proton collisions leading to top-antitop creation:
generate p p > t t~
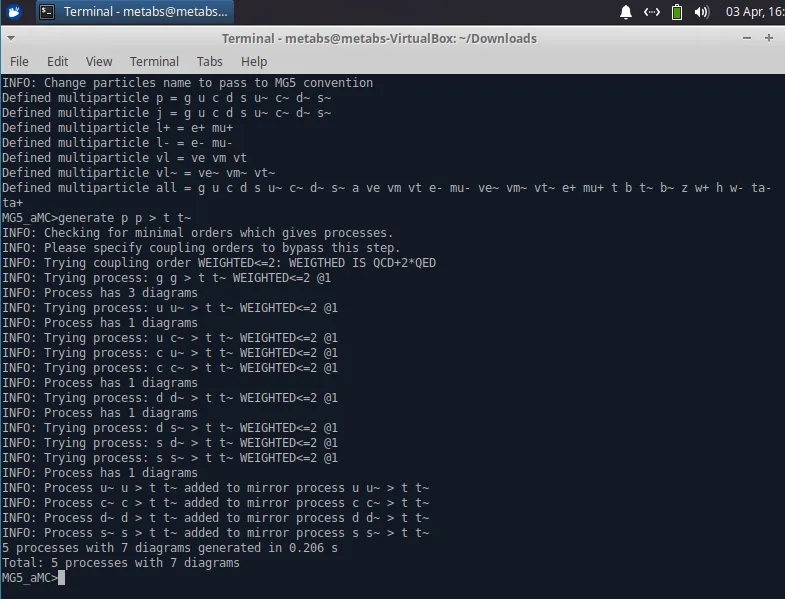
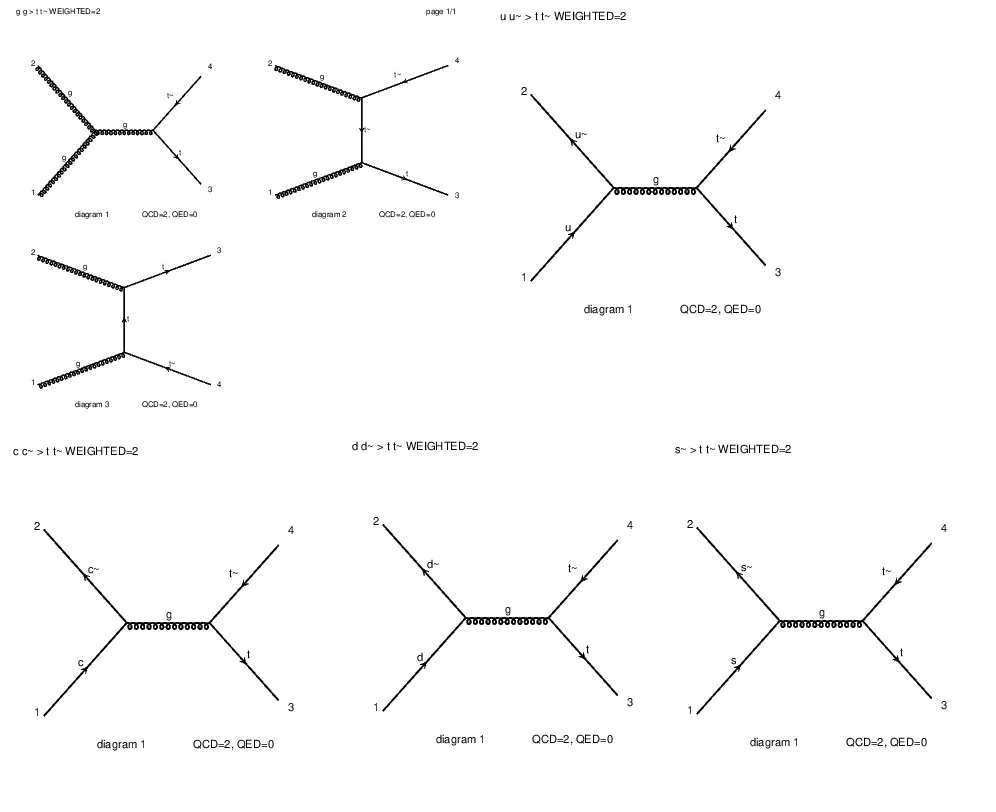
And we can see the related Feynman diagrams by typing:
display diagrams
Troubleshooting: Here I had the first of the issues I have encountered when trying to follow last week exercises. Just to remind you, I am running with Xubuntu 20.04, and I was getting the following alarm instead of any drawing:

So, apparently my computer was not finding some software important to show me what (in that moment I did not know) were postscript files. It was looking for an eps extension and... took me a while to discover what i needed.
The predefined software to open PDF and PS files in Xubuntu was not being picked by the system, so I had to navigate to the configuration file, create a backup (just in case) and modify the relevant line for *.eps files by changing None to atril (note that in other Operative Systems this will be different, in Ubuntu you will most probably use Okular by default)


Task 2 - Save our working directory
This step was straight forward, and surprisingly uneventful. I just took the name report2 for this computations -although we are going to reuse this in the future, maybe I should have been wiser! -.
output report2
And there it is, you can see it being saved in a new folder, in the same folder that hosts your MadGraph5:

Inside the Source folder you can see the Fortran code behind the diagrams we have to run, oh, this reminds me so much to the old university times 😅.
Task 3 - Computing!
We return now to MG5 and we have to launch our computations. For that we send the following commands (remember, you could have chosen a different name than report2)
launch report2

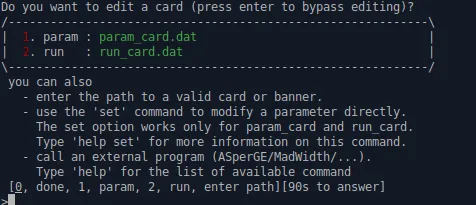
Then it is important to activate Pythia8 as a shower by typing 1 and madspin by typing 4. It is great to see how a comment by @servelle in @lemouth’s post led to an improvement of the original post. I really like this level of feedback.

And we will get the following menu. We are going to edit number 2: run_card.dat to change the collider settings (this sounds so cool). Vim opened automatically in my case. There we need to edit:
True = use_syst ! Enable systematics studies
to be
False = use_syst ! Enable systematics studies
This process takes a while, and i have been having some issues, see below in Hard disk space troubleshooting.
Tiny troubleshooting: I have been running this operation several times, which has made me to remove everything and restart for several times. If you forget to activate Pythia8 and madspin you will see what appears in the image below. The important thing is not to panic, restart and not to forget to press 1 and 4 😅.
Hard disk troubleshooting: When I was running my simulation, after more than an hour computing I was getting all the time the following message:

And, btw, if I was trying to restart the machine, it would not pass of the login menu. The solution to that problem was just to restart the machine to Xubuntu in recovery mode, open the root mode by console and delete the contents of the Event folder.
I was a bit puzzled, then I discovered that yes, the 10GB I assigned as maximum space were really over. I created my virtual disk as Dynamically allocated, but that does not mean it is infinite, you have to assign a maximum space, so guys, remember to take something bigger than 10GB.
Anyway, I thought, this may be easy, I just go to the disks properties and enlarge it to something bigger:
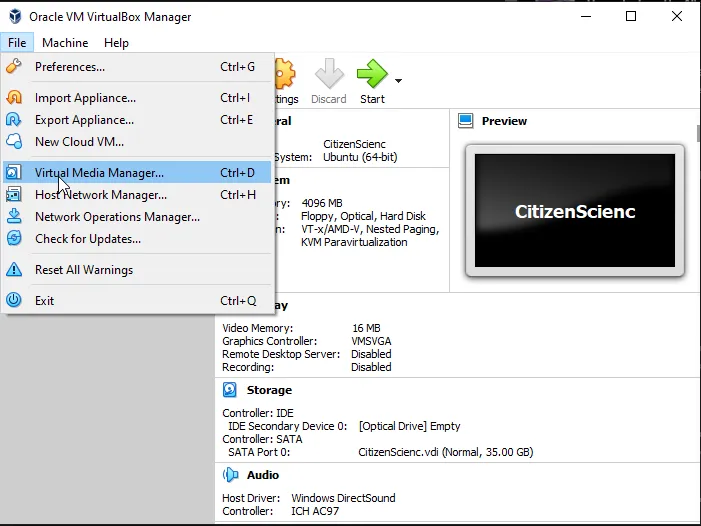
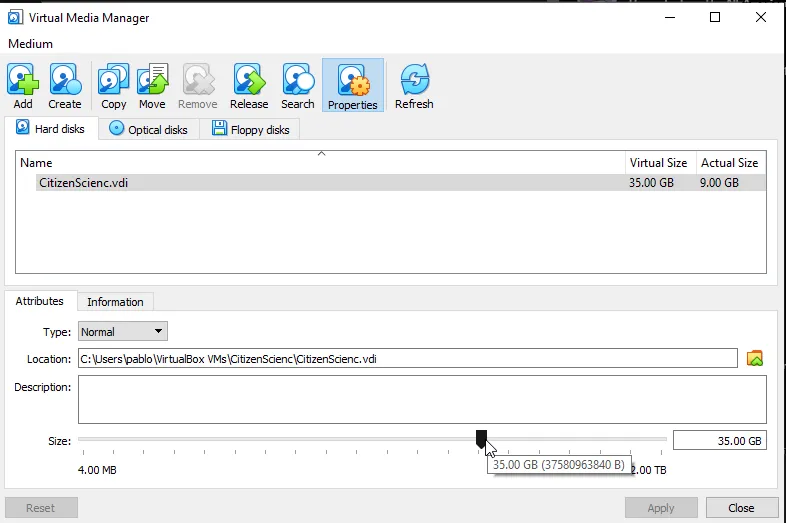
But, when running my simulations again, same problem. Still failing and telling me there is no space.
Uhm... the system was still recognizing my main partition as a 10GB disk. Now everything made sense, I may have enlarged the hard disk, but my partitions configuration was still of a partition of 10GB and probably a lot of unassigned, unformatted space. Two options were in front of me, starting from scratch and create a new Virtual Machine, running the first week report again or... try to change the configuration of my partitions. A quick check on the internet returns that if my partition and the free space are contiguous, I can risk it and enlarge my partition to the free space.
So, I did a copy of my hard disk, because remember this is just a file in our computer. Then I downloaded a bootable version of GParted. This is a software to change the size of your partitions in linux. However, you cannot change the partitions that you are running, that is why we run an external "CD" that contains a simple linux version with GParted ready to run.
You can find the bootable (this means that executes when you switch on your computer instead of your operative system) ISO image in the GParted webpage
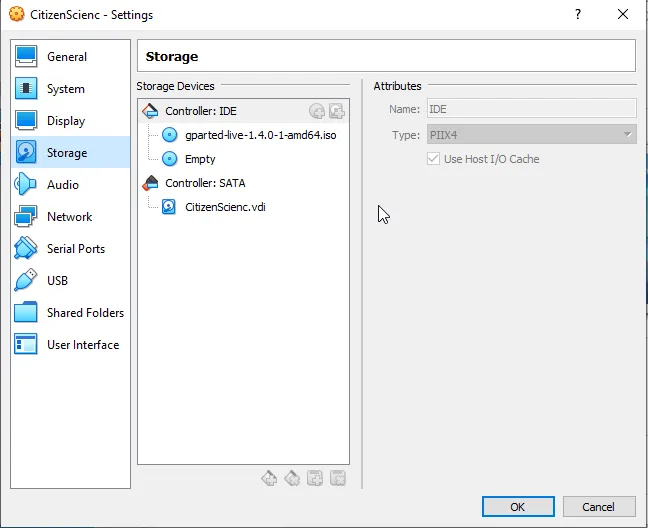
In the configuration of the virtual machine, we can simulate introducing this Disk. We have to go to the settings and select the .iso we have just downloaded:
And now, when we launch our Virtual Machine, we see how our instead of Xubuntu, the GParted disk has started:
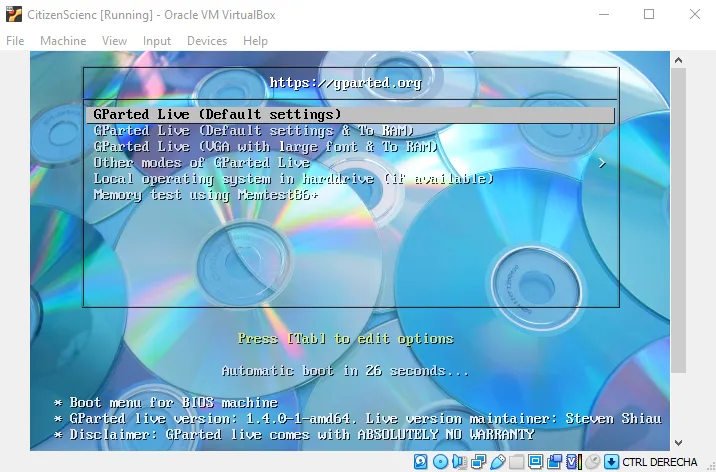
After following the start menu, selecting keyboard type and some basic questions, we can open GParted there and of course, I had a lot of empty space:

I have resized the partitions. Note you do this in two stages, first assigning the space to the partition and then enlarging the current one. You can see a good explanation on this link.
And finally, I "removed" the *.iso image and restarted my virtual machine to discover that everything looks fine there and that my hard disk has the proper size:

Process for doing this part has been fast, almost instantaneous, so I have saved a lot of time in comparison with the creation of a new VM and installing all the software. Thank you @lemouth for the support through this (normal and moral!).
Task 4 - Confirming our outputs look OK
Finally my computation finished. Feels like a great achievement after all the little steps to reach here. See that it indicates that with my resources this took around 2 hours, but I do not have a very powerful computer and I am using a virtual machine.

And in our project folder we have tag_1_pythia8_events.hepmc.gz, this file contains the information of our 10000 collisions and apparently our job will be to analyze it in the incoming weeks.
Wrap up
I started with last week assignment last Sunday and little technical problems have made this extend itself a bit more than expected. However, it has been a nice experience, like little riddles to solve. Now it is time to wait for the next instruction set to see what comes from the information we got from our collisions. Cannot wait!