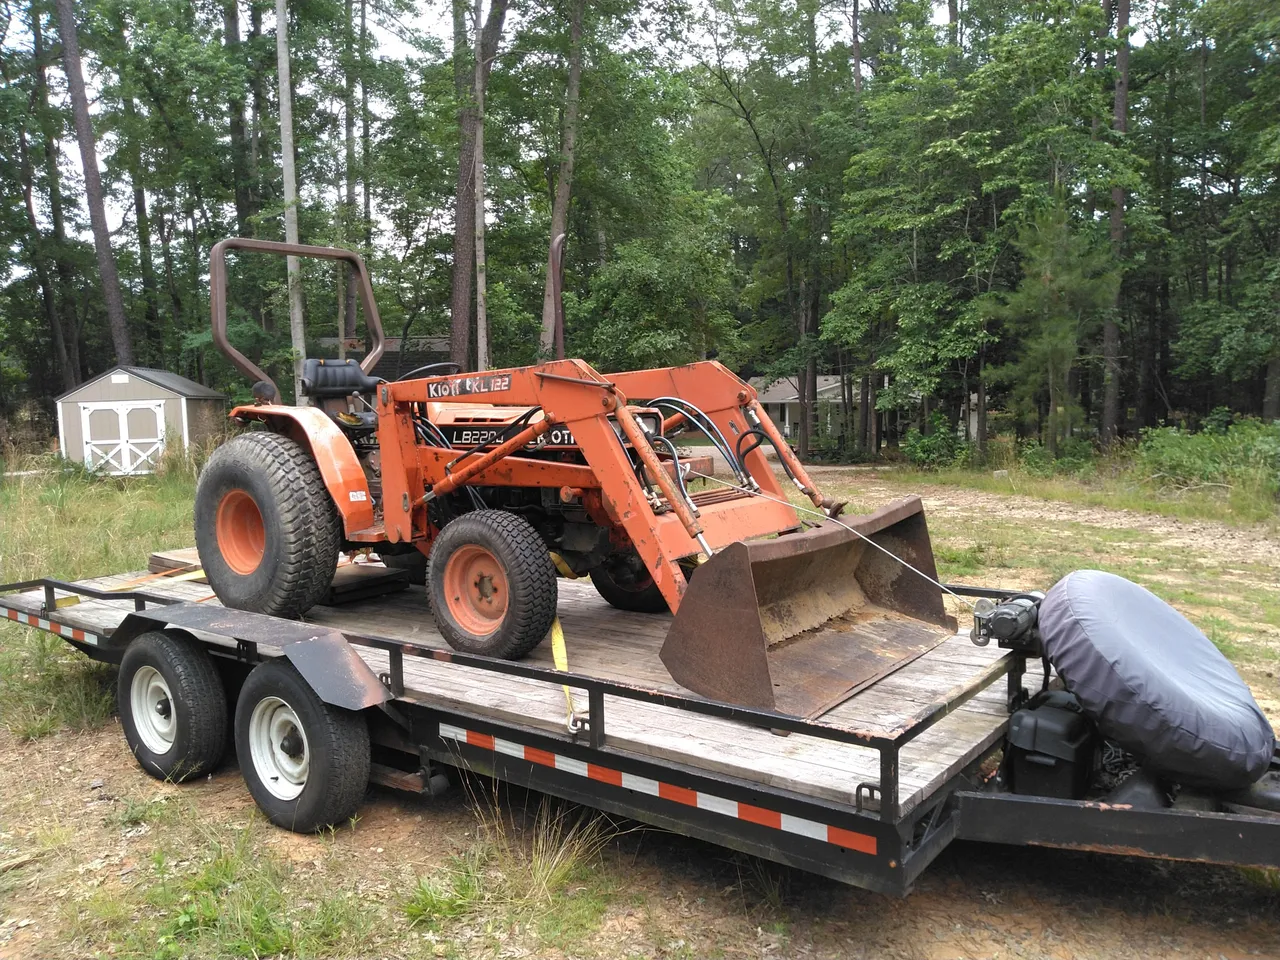
So here she is in all her glory when I brought her home last June. The trailer towed it beautifully by the way. My old Massey Ferguson 204 with a front loader, gannon box, wheel weights and tires weighted with water really stretched the limits of this setup being towed with a 3/4 ton truck, but it didn't sweat this little tractor at all. It's a Kioti LB2204 compact 4x4 tractor with a KL122 loader. This was actually Kioti's first foray into the US domestic tractor market, back before they even had an official dealer network in place. At the time, Daedong, Kioti's parent company, had a partnership with Kubota manufacturing their gearboxes and other components of the machine. I'll talk later about why this is significant.
I had been searching for a small 4x4 tractor with a loader for a couple of years since I moved to North Carolina and I came across the ad for this one. It was a good price, but more than I had to spend at the time, and I was about to go on a trip out of state at the time, so I let it go. Fast forward to a week and a half later and the ad popped up again on my feed, but the price had just dropped by a third. I just couldn't resist this time.
When I went to look at the machine it was complete with quite a few new hydraulic hoses on it and new tires on the front. He even had a new seat ready to go on it. The guy told me he got it as part of a trade and was trying to fix it up when he realized he was in over his head. Everything on the machine worked, sort of. It started, ran and drove, the loader and 3-point went up and down, 4x4 was all there and did its thing, gearbox went through all the gears in high and low range, but it had a bad miss and there was almost as much smoke coming out of the crankcase vent as the exhaust. I knew right away it needed major engine work, which is probably why the guy bailed on the project. It was a bit of a gamble on whether the engine could be repaired (these engines in new condition sell for more than this tractor was worth), but his asking price was about what a used loader for one of these would cost, so I pulled the trigger and bought it from him. I figured worst case scenario I part out what's left of the tractor and keep the loader to put on another machine.
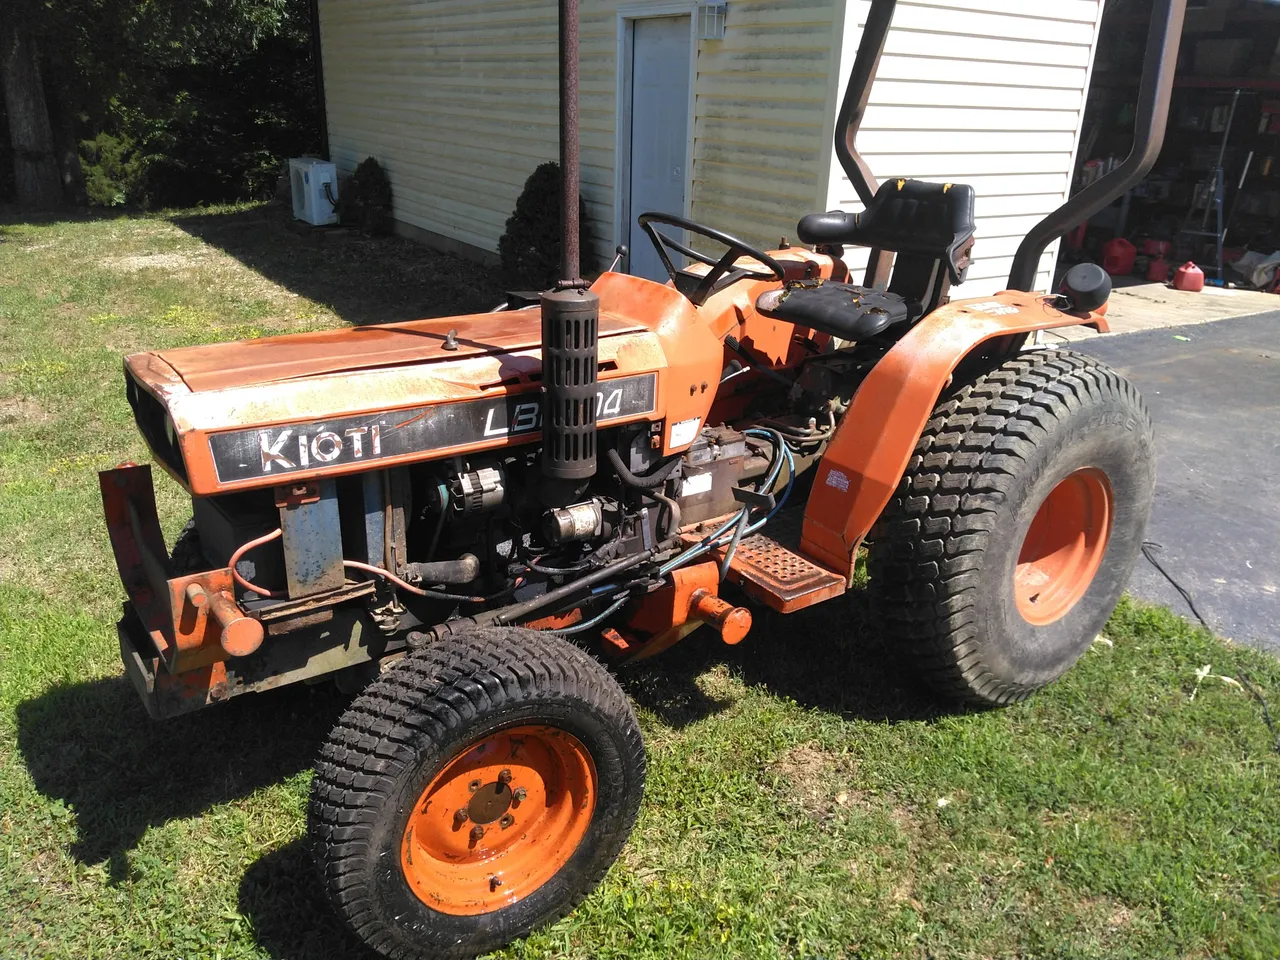
The loader had to come off to make it easier to work on. I found that the side and front panels of sheet metal had long since been removed. They were not included in the sale, so she'll have to keep rocking that old-school open-side tractor look for now. You can't really tell with the loader on anyway, so not really a big deal. the hood keeps the rain and sun off of most of it.
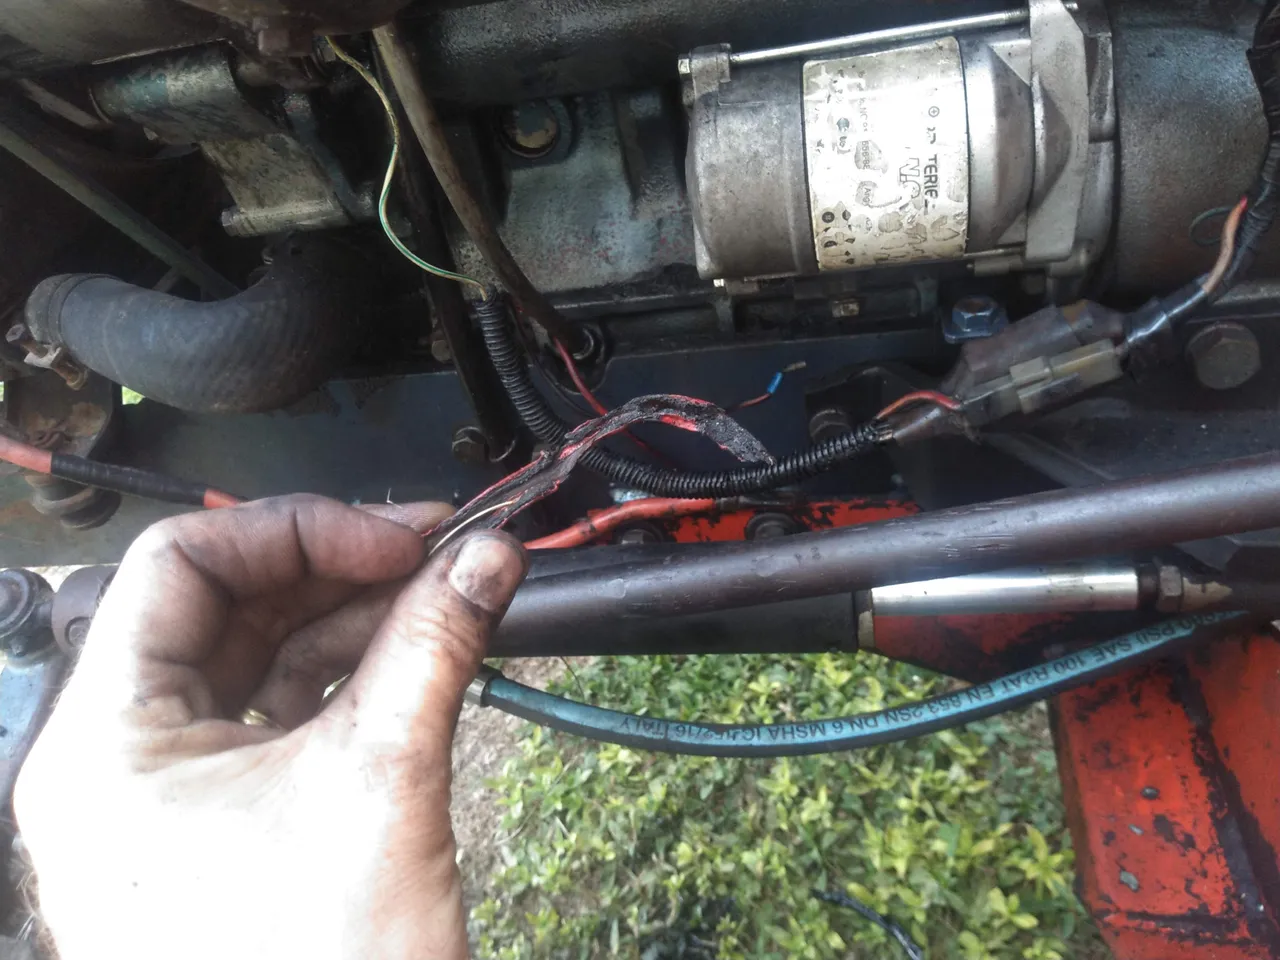
One of the first repairs I had to do. Of course it was electrical. My fault though. I was attempting to adjust the alternator belt. When I unbolted the adjustment bracket, for some reason I pushed really hard inboard and the positive terminal made contact with the engine block. This charging wire was cooked before I realized what was going on.
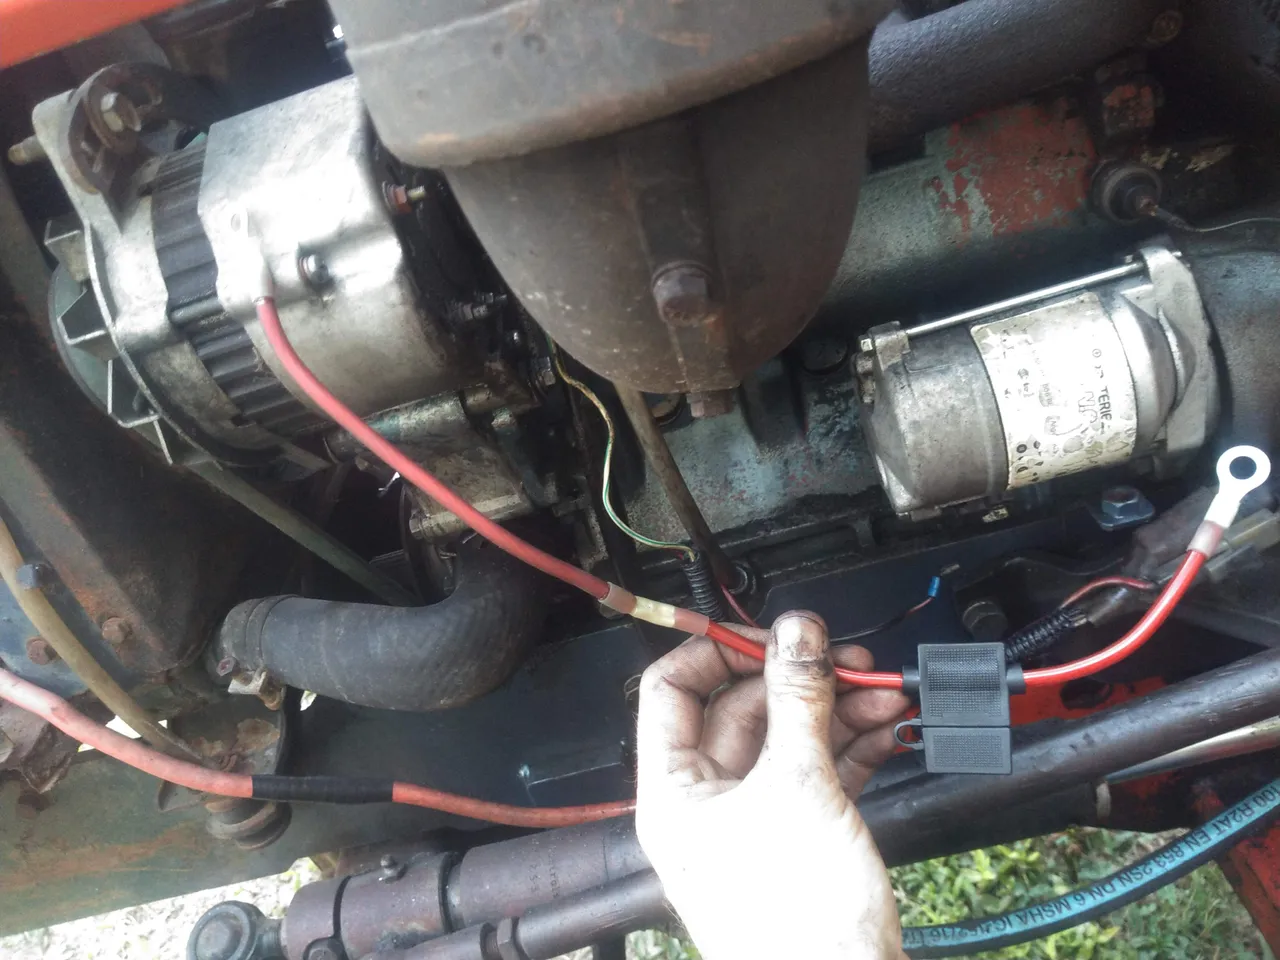
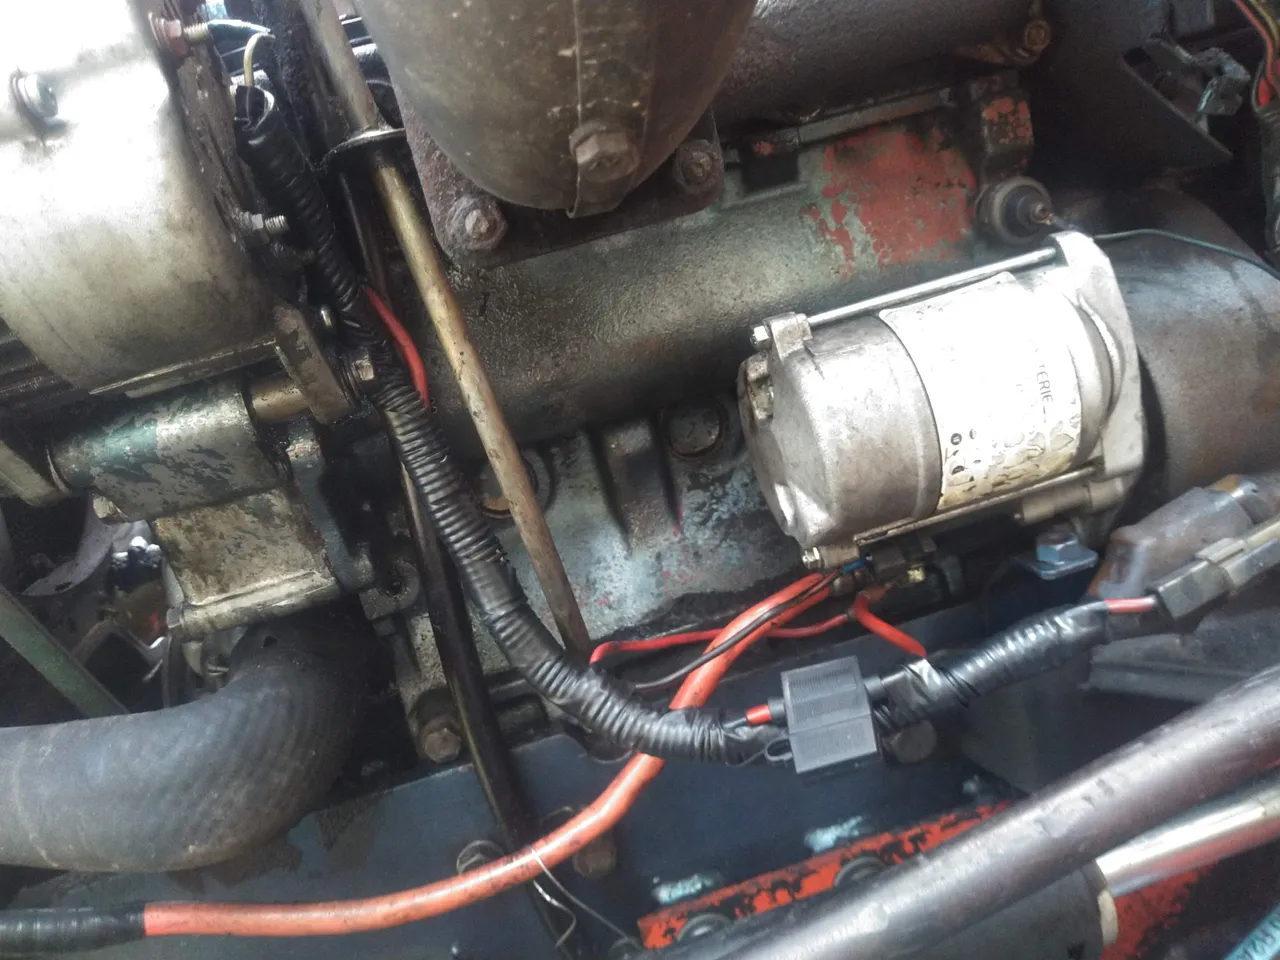
I got a lot of experience with wiring on my last tractor and the trailer build, so in spite of my lack of enthusiasm for the task, this turned out pretty good. A single 10 gauge stranded wire complete with fusible link so that if I accidentally short this thing out again I'll be replacing a little 30 amp fuse instead of the whole wire.
While I was working on the alternator I decided to check the oil before moving it into the shop. "That's funny, that's more oil than before." The engine was making oil somehow.
Two possibilities for this increase in oil quantity: 1. The hydraulic pump on these has a seal that faces the engine crankcase. The seal might be broken and dumping hydraulic oil into the engine. 2. One of the cylinders is so completely dead that all of the fuel being injected into the combustion chamber is just washing down into the crankcase and filling it up.
In the last ditch hopes that it was a simple fix and it was option 1 above, I pulled the valve cover off to adjust the valves. Turning it over by hand I could feel good compression on cylinder number 1, some compression on number 2 with a wheezing sound and just nothing at all on 3. The evidence for option 2 was mounting, but there was still hope yet.
I set the valves and they were indeed way out of spec. Apparently on diesel engines with a lot of hours, the exhaust valve seat wears faster than the linkages of the valve train and it'll actually tighten up over time, enough to hold the valve open during compression. Unfortunately after the adjustment I still felt almost no resistance at all on number 3 compression stroke. Option 2 was all but confirmed at this point. I fired it up to pull into the shop and not only was there still a miss with lots of smoke blowing out the breather like before, it was spewing oil now too. Fun!
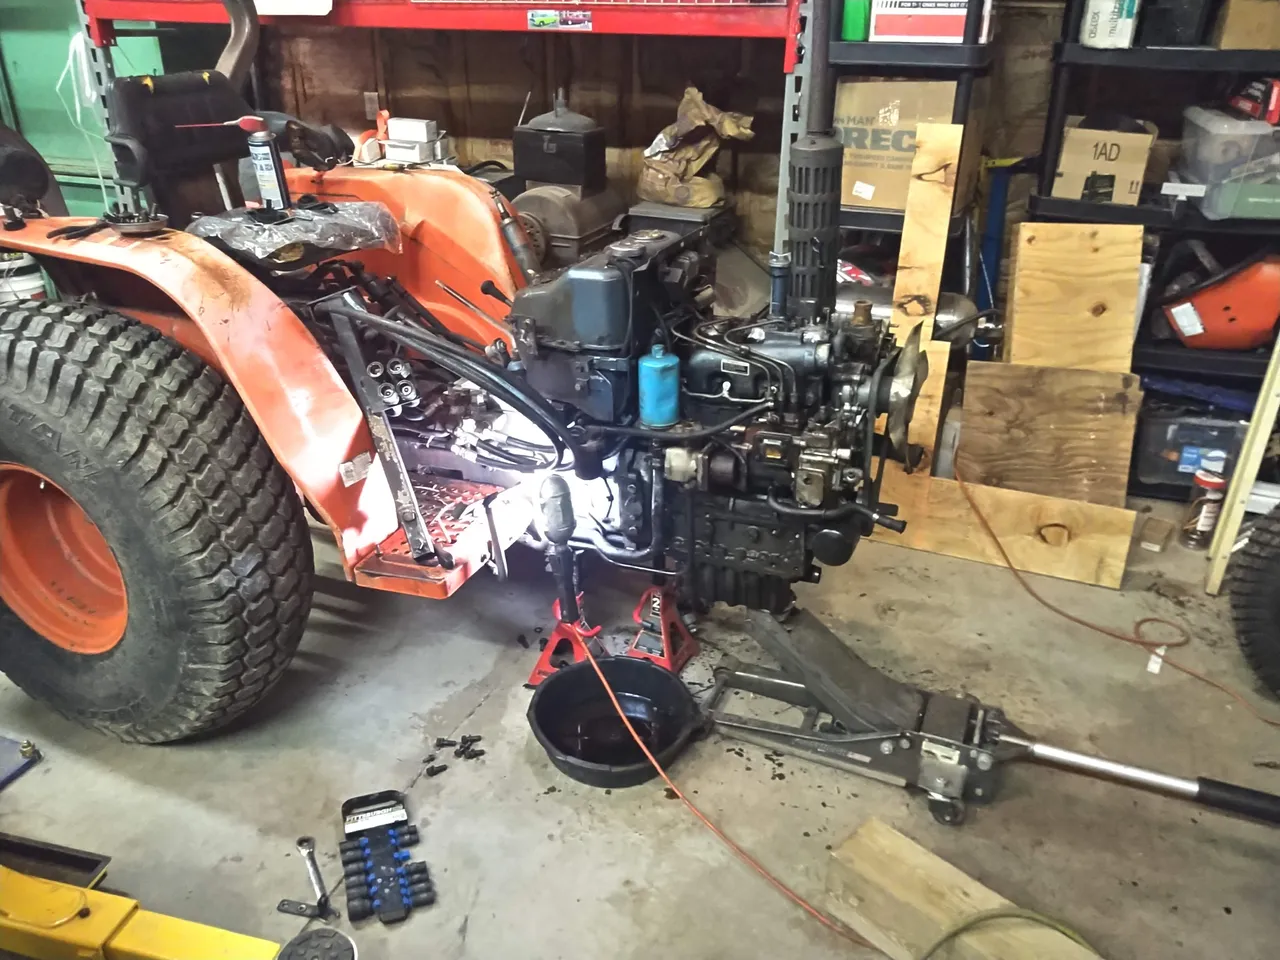
Here it is dismantling the front of the tractor to get at the engine. This is what is meant when someone says "breaking the tractor in half." You unmarry the engine and front wheels from the back half of the tractor. In this case I took the wheels off first since I'd be servicing just the engine.
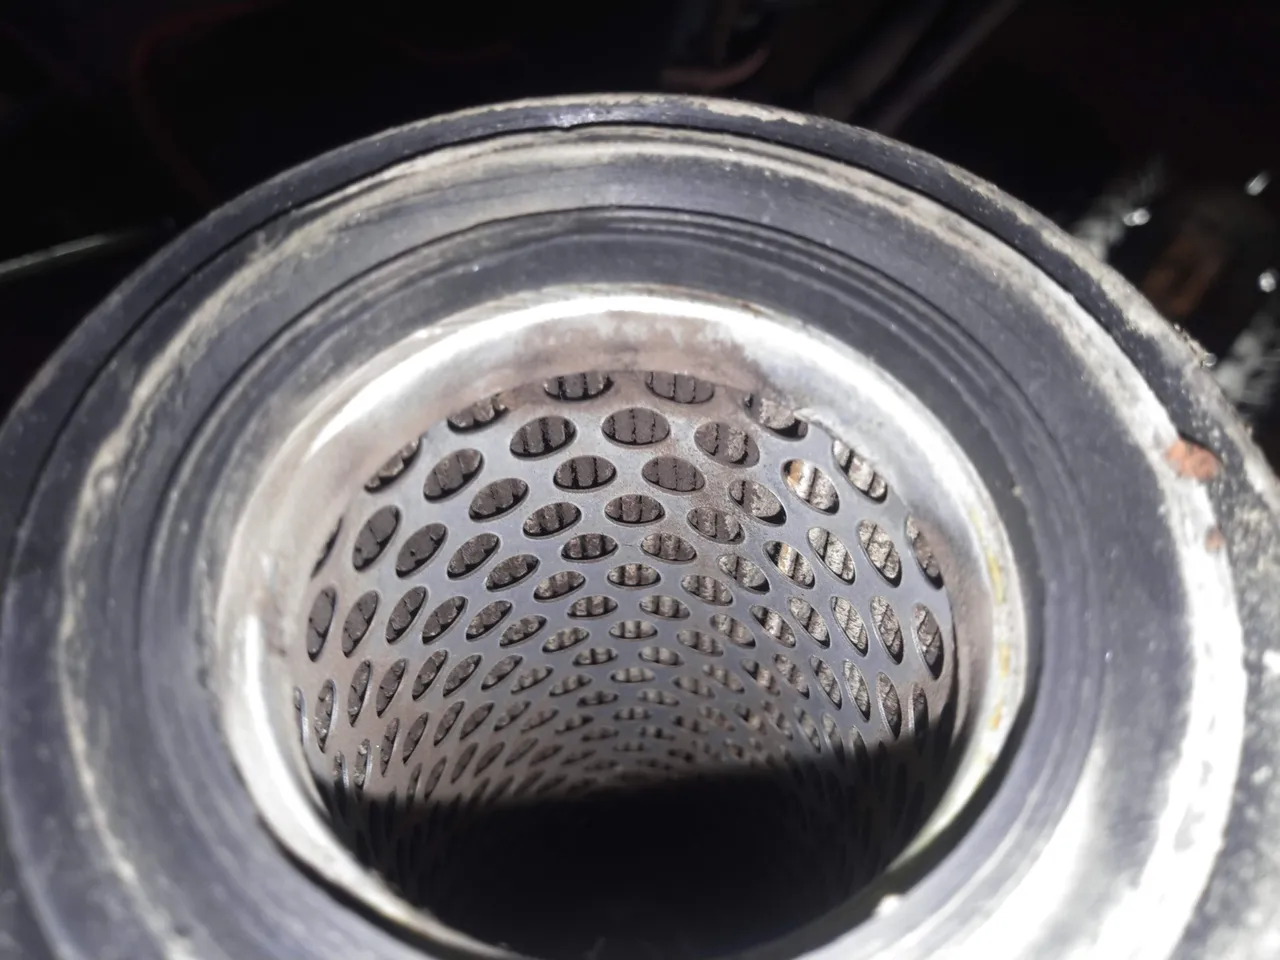
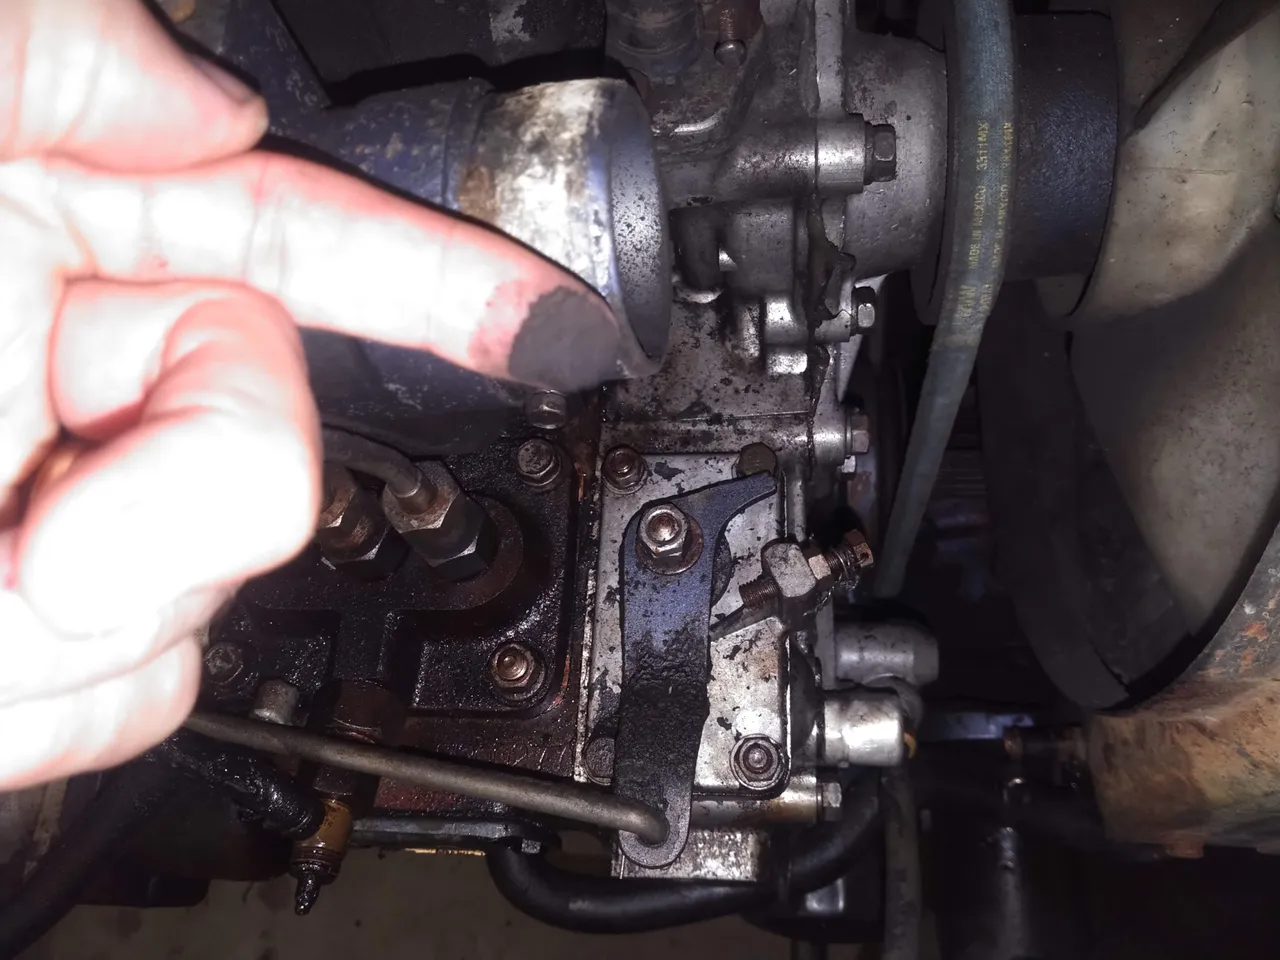
Some evidence for why the engine failed. That's the air filter, and that dust accumulation you see in there is on what's supposed to be the clean side of the filter. That dust on my finger was from the inside of the intake manifold. That's not grease, just a very fine dust. I'm not sure, but based on the insignia on this filter and the general condition of it, it looks like this might be the air cleaner it rolled off the assembly line with back in 1986. You can run an engine with no air filter for a little while without issue, but eventually what happens is that you get what they call "dusting" of the engine. The ingress of dust, which on a farm is composed of basically sand mixed with decaying organic matter, causes massive wear on the valve seats, piston rings and cylinder linings over time.
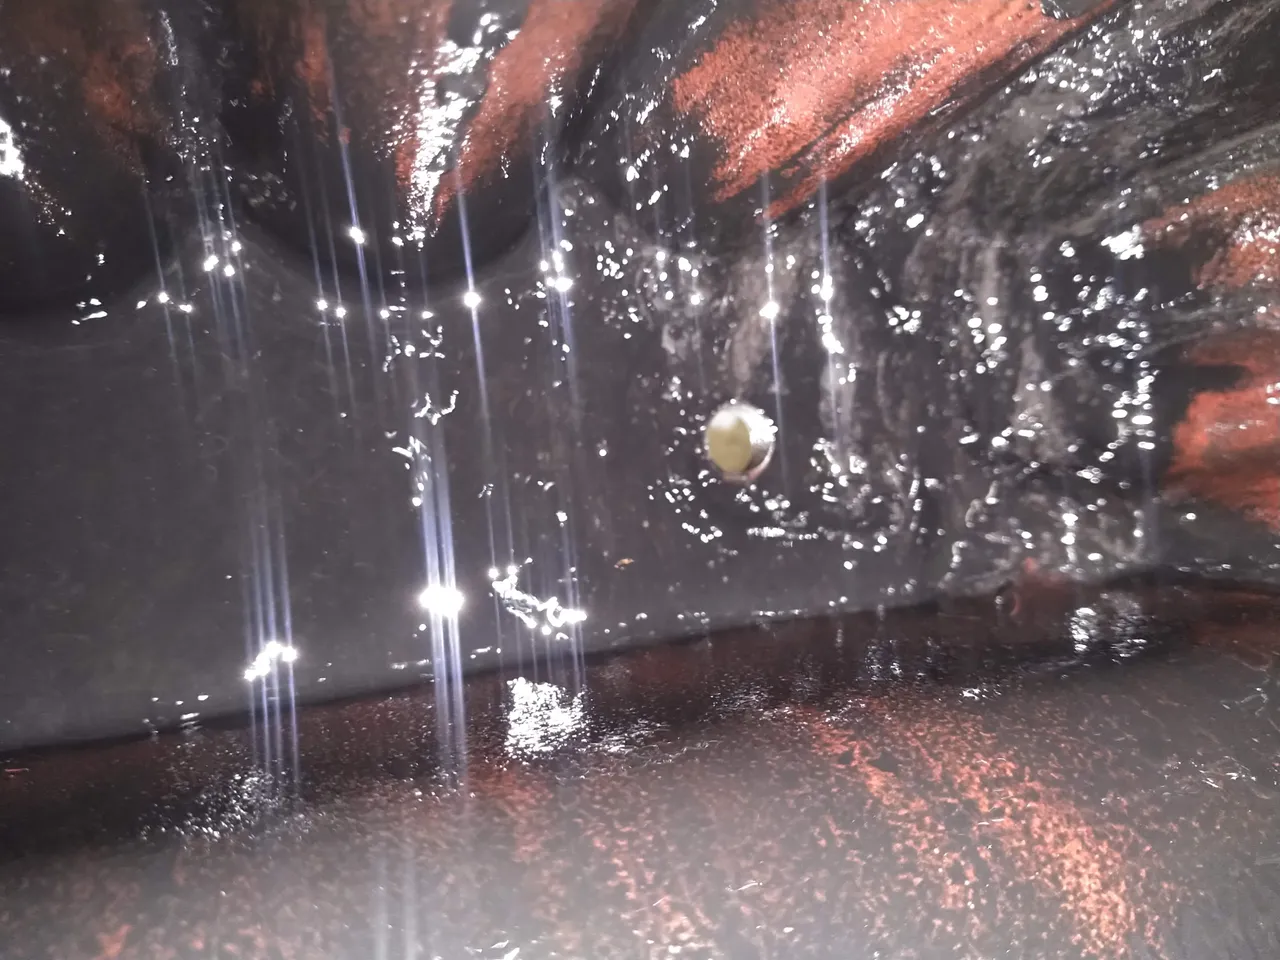
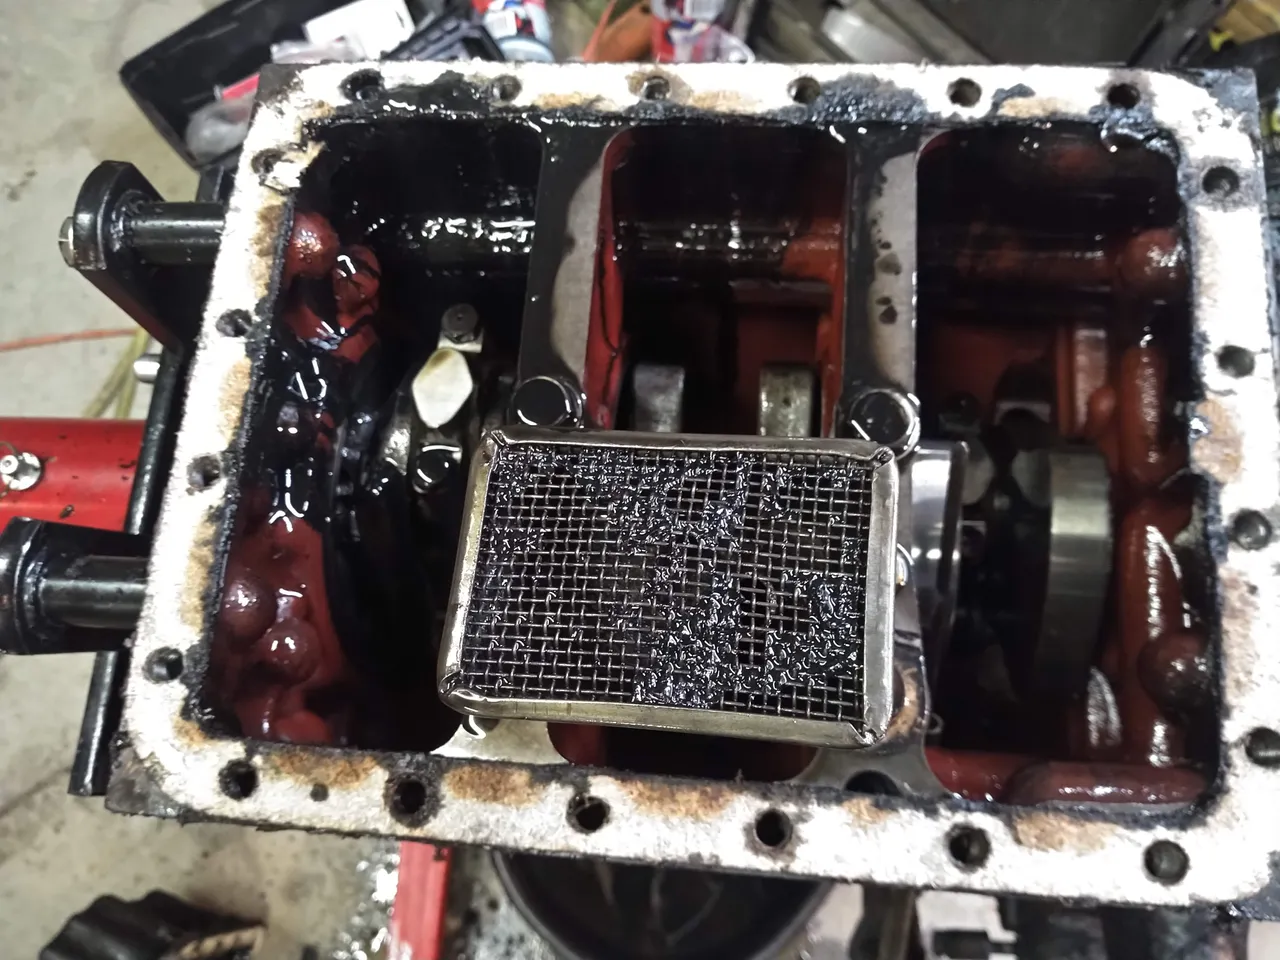
Sludge accumulation in the oil pan and pickup tube. There was a NAPA oil filter on the engine when I brought the tractor home, so I know someone changed the oil at least once, but this sludge tells me it wasn't very recently. This could also be caused by the dust ingress through the top end. Regardless, this machine wasn't well maintained, so probably just really old motor oil.
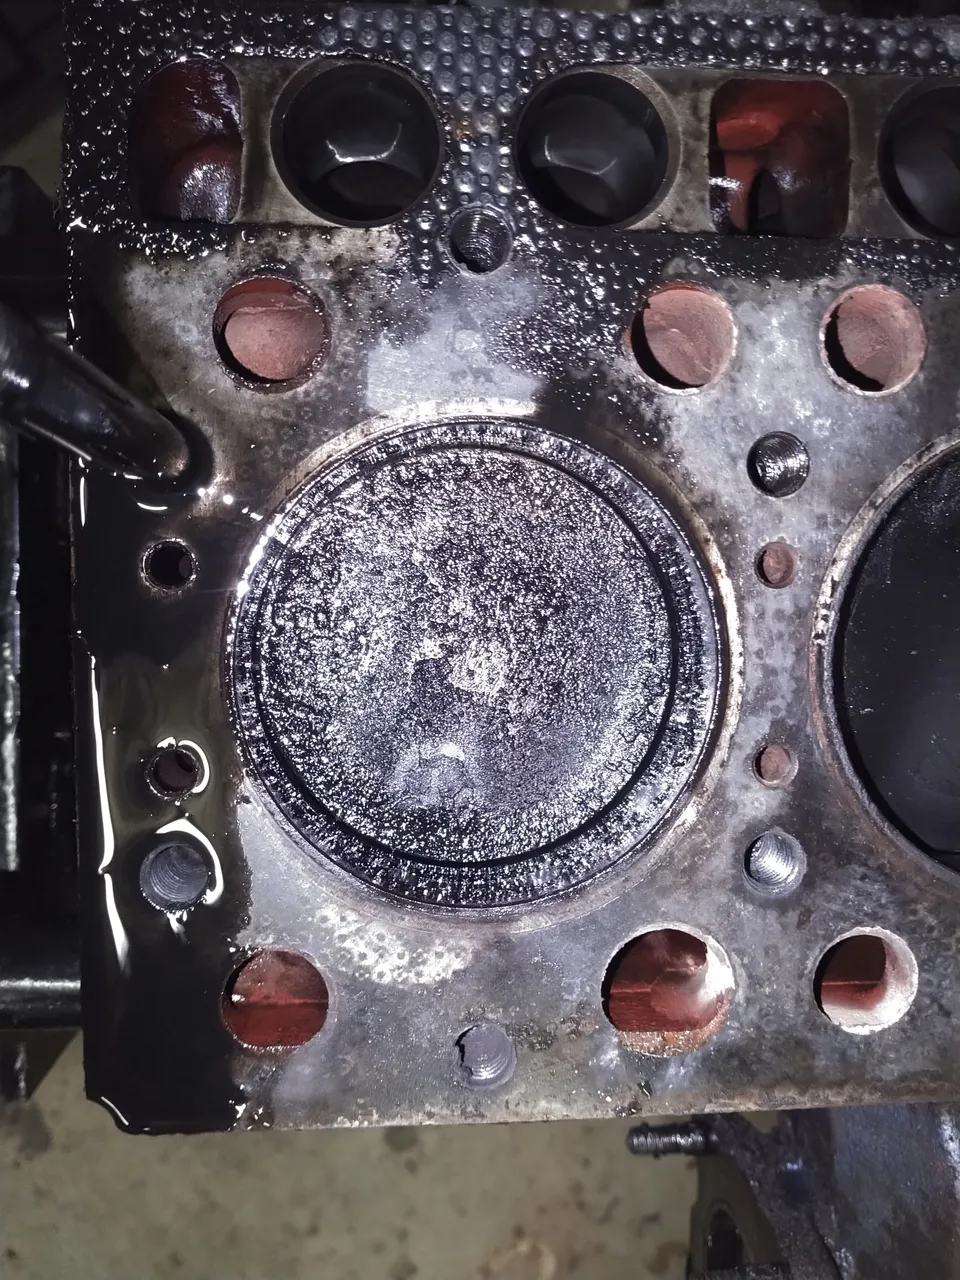
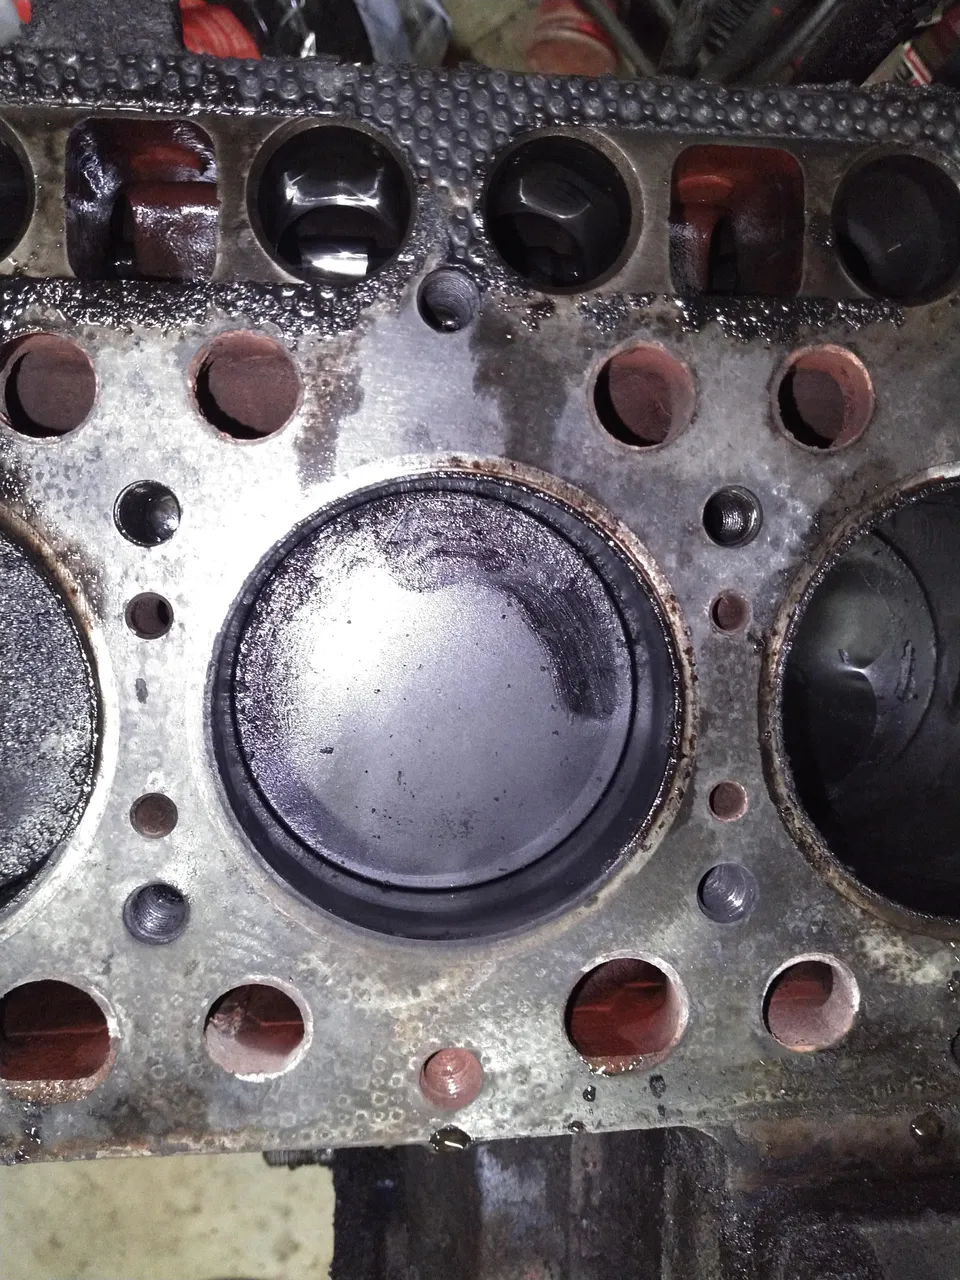
The top of the bad piston in number 3 versus number 2. Lots more carbon build up on the one with no compression.
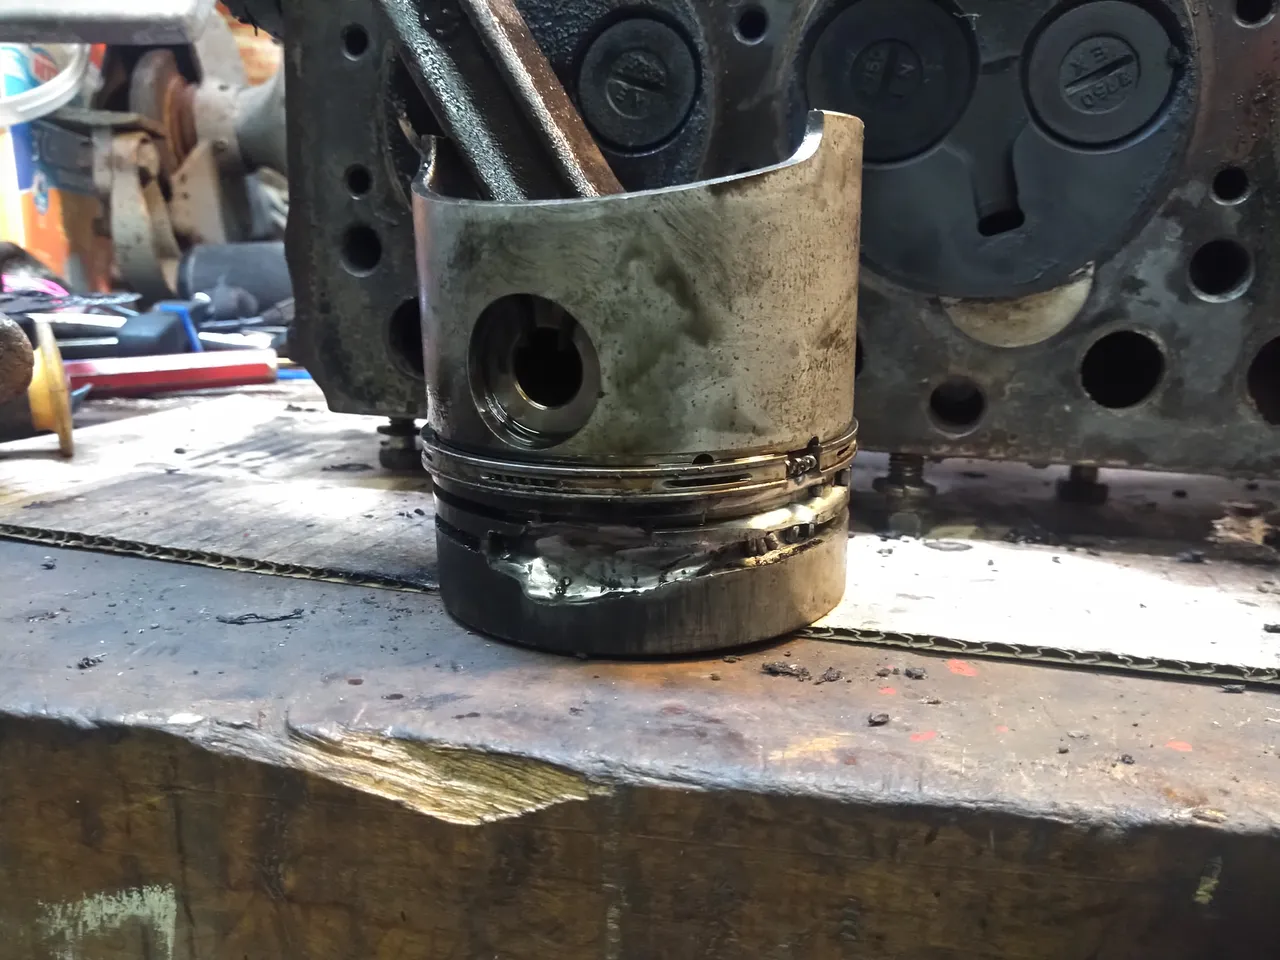
"Well there's your problem right there!" Upon further teardown, you can see the sad state of this piston. I had lots of theories as to why this happened, but I've settled on one as my favorite: This air cleaner issue effected cylinder 3 the most because of the way the intake is log-shaped. The dust particles having more dense mass and inertia than the air carrying them in would continue past the first two cylinders and crash into the back of the manifold, then drop into this cylinder. That in and of itself won't crack a piston, but it will cause massive cylinder wear and eventually blow-by, where combustion gases escape down into the crank case and oil will make its way up into the combustion chamber. This oil will then burn off and cause a build up of carbon deposits, which in turn will cause what's called hot spotting. The carbon will turn into glowing hot embers, and if you run it long and hard enough like this, they'll get hot enough to ignite unburned diesel fuel well before engine compression will. This causes massive pressure spikes in the cylinder as the piston is still trying to come up and I think that's what broke the ring lands on the piston. This was followed by many more hours of use with chunks of piston and ring grinding against the cylinder wall. Those missing chunks of piston are long since dust that's probably part of that sludge in the oil pan seen above. You can see little tiny balls of ring material still embedded in the side of the piston too. Considering the carnage embodied in this piston, the cylinder wall was not in as bad of shape as you would think. It had a ton of wear, but the actual scoring of the wall was relatively minor.
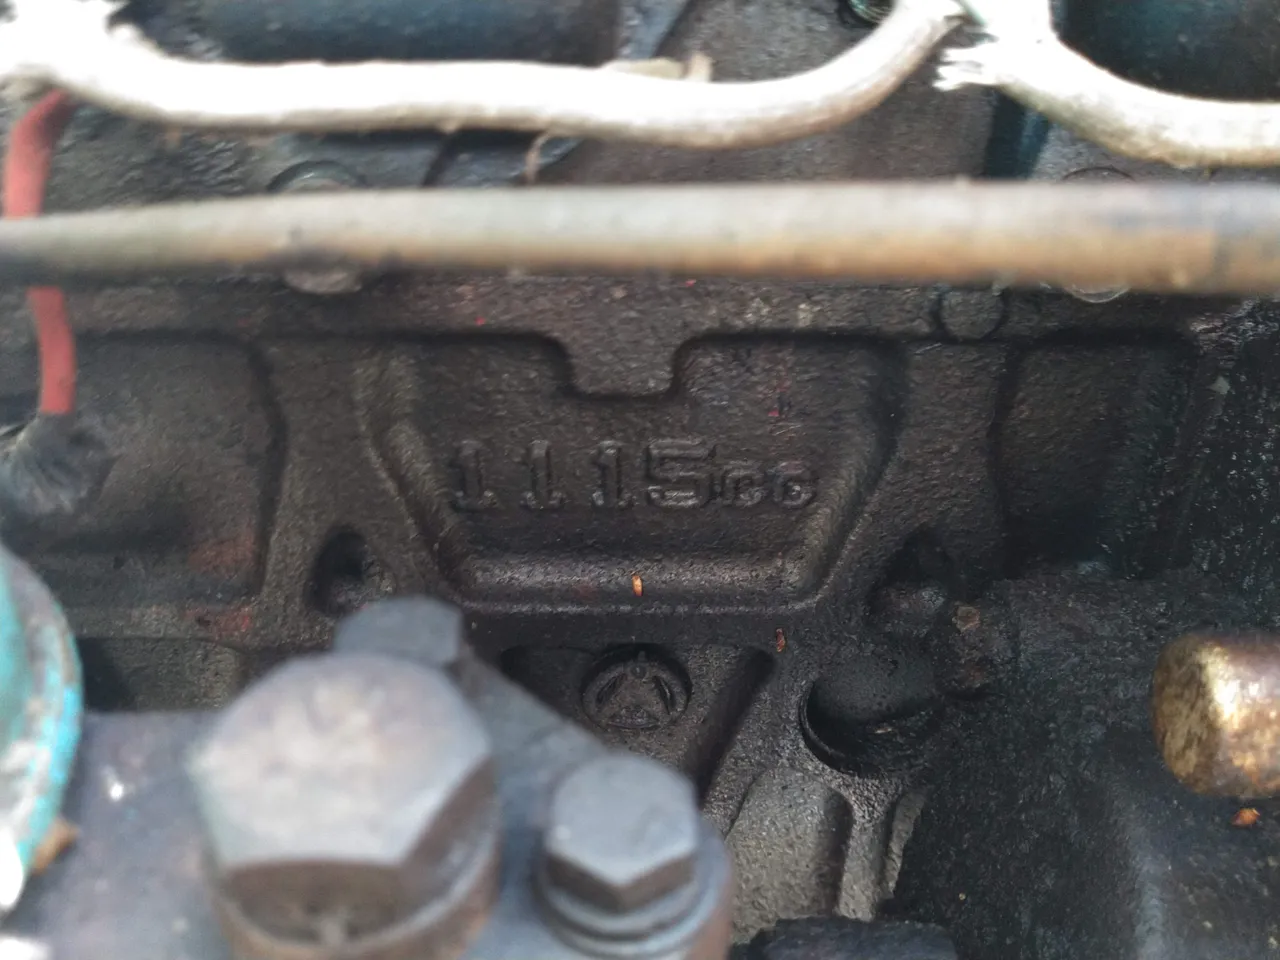
So when I called up the local Kioti dealer, who are located less than 10 miles from the North American headquarters of Kioti here in the Raleigh area, and asked them about an engine kit for my machine, they were like, "which tractor did you say you have?" Well, turns out that they didn't even have any record in their books that this tractor even existed. It was that early in Daedong's foray into North America, that it had long since been forgotten about.
Come to find out after quite a bit of sleuthing, that's for a good reason. When I was finally able to track down a copy of a parts manual for this machine from another owner on one of the tractor forums, I found that lo-and-behold all of the part numbers are the same as or very close to the same part numbers for the Kubota L245. Remember that Kubota partnership I mentioned in the beginning? This is where that comes into play. At this point I acquired shop manuals for both the Kioti LB2204 and the L245. I figured since I can't source parts for the Kioti any more, maybe I could make the Kubota stuff work. The engine specs for both tractors were identical in every single way. They even had the same engine number: DH1101. The only difference is that mine had the designation DH1101-B, the meaning of which I am unsure of on the "B" portion. These engines are so close that even the casting number in the above picture is exactly the same on both engine blocks.
So this is where the Kioti/Kubota partnership eventually ended. Daedong has been a manufacturer of diesel engines since the 1940s in South Korea. In the early '80s they wanted to get into the tractor business, so they partnered up with Kubota and started making gearboxes for some of their newer tractors. Now I'm fuzzy on where this engine was actually put together and by whom, but it really is just a Kubota engine, or an exact copy of one. Was it in Kubota's factory in Japan or in Kioti's factory in Korea? I can't be sure, but I can say one thing for sure, that the same casting mold was used for this engine block as the Kubota version of this engine, even if it was cast in a Daedong foundry. That casting number was the smoking gun so to speak. They straight up ripped off the L245 and slapped some different (albeit very similar to some of Kubota's tractors at the time) sheet metal on there. They even used the same orange and blue color scheme. It was pretty shameless to be honest.
Obviously a lawsuit followed a few years later. Kubota sued Daedong for stealing their intellectual property and selling a mechanical copies of their products, with nearly identical-looking and similar name branding, which was confusing for their customers. It was mentioned in the forums that Kioti dealers were even telling their customers that it was just a re-badged Kubota at the time. Kubota won that suit, so the LB-series of tractors died with it, along with their manufacturing partnership. The Kioti LK series was born with a new dealer network with some important distinctions that made their machines and branding just different enough that they didn't continue to run afoul of intellectual property laws here in the US, and Kioti developed a convenient amnesia for the LB. Luckily for me the mechanical similarity to the L245 means I can buy most of the parts for this off the shelf at a Kubota dealership or from aftermarket suppliers.
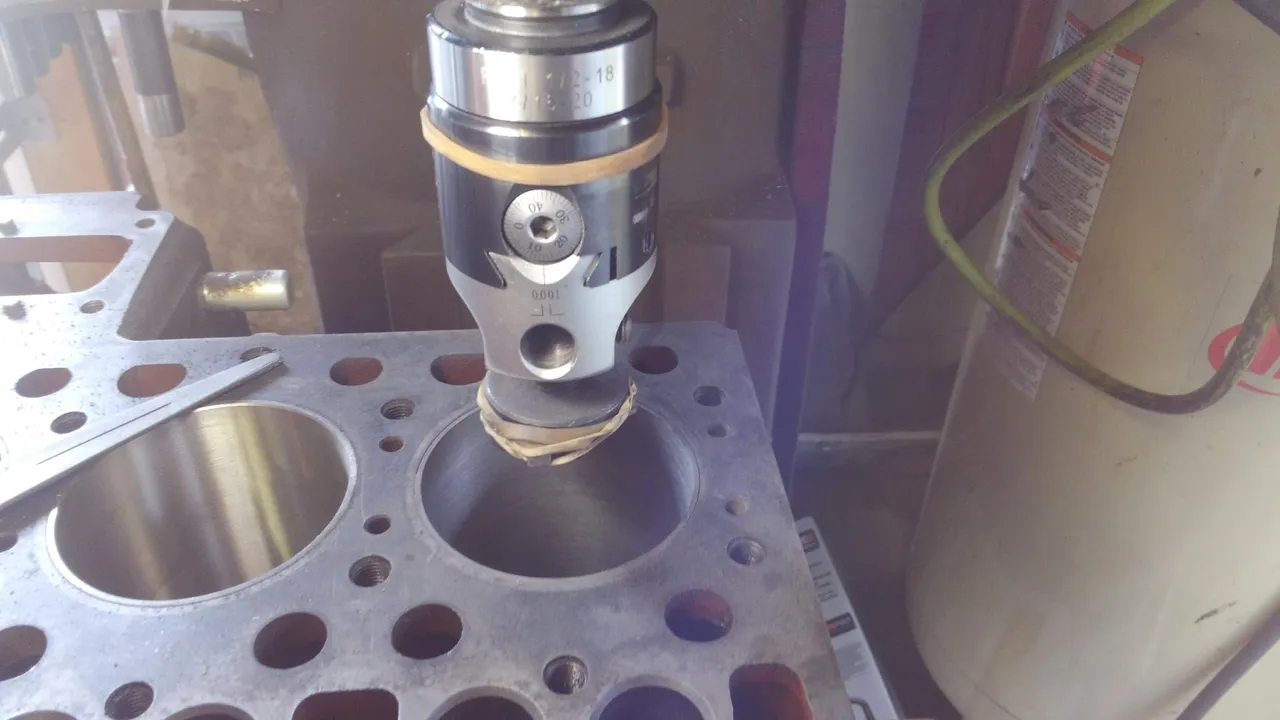
With all that fact finding out of the way, and before buying a rebuild kit, I needed to determine if the original cylinder liners were in serviceable condition. Measurement of the cylinder diameters did show barely enough material that conceivably a set of off-the-shelf 0.20" over pistons and rings could be used. Local machine shops were backed up for months and were asking silly amounts of money to work on this engine (these places don't like to work on stuff they don't know, and these are kind of unusual, so they quoted me high to drive me away). I decided to set up on my mill to do the boring operation myself. It sounds kind of funny, but ever since my dad dragged home an old Bridgeport mill and told me what it could do, it's been a childhood dream of mine to bore out my own engine and rebuild it without the assistance of an automotive machine shop. There's just something so cool about saying that I did this myself. The rest of the engine was in remarkably good condition in spite of the broken piston, with no measurable wear on any of the bearing journals, cam or other components, so all it really needed was pistons, rings and the cylinders bored to size. Without the need for any other specialized equipment, here was my chance to do just that. Unfortunately, the scratches wouldn't clean up until I bored this number 3 cylinder to 0.035" oversized, and there aren't 0.040 over pistons available, so it meant new liners were needed. I bought a kit with liners and standard sized pistons.
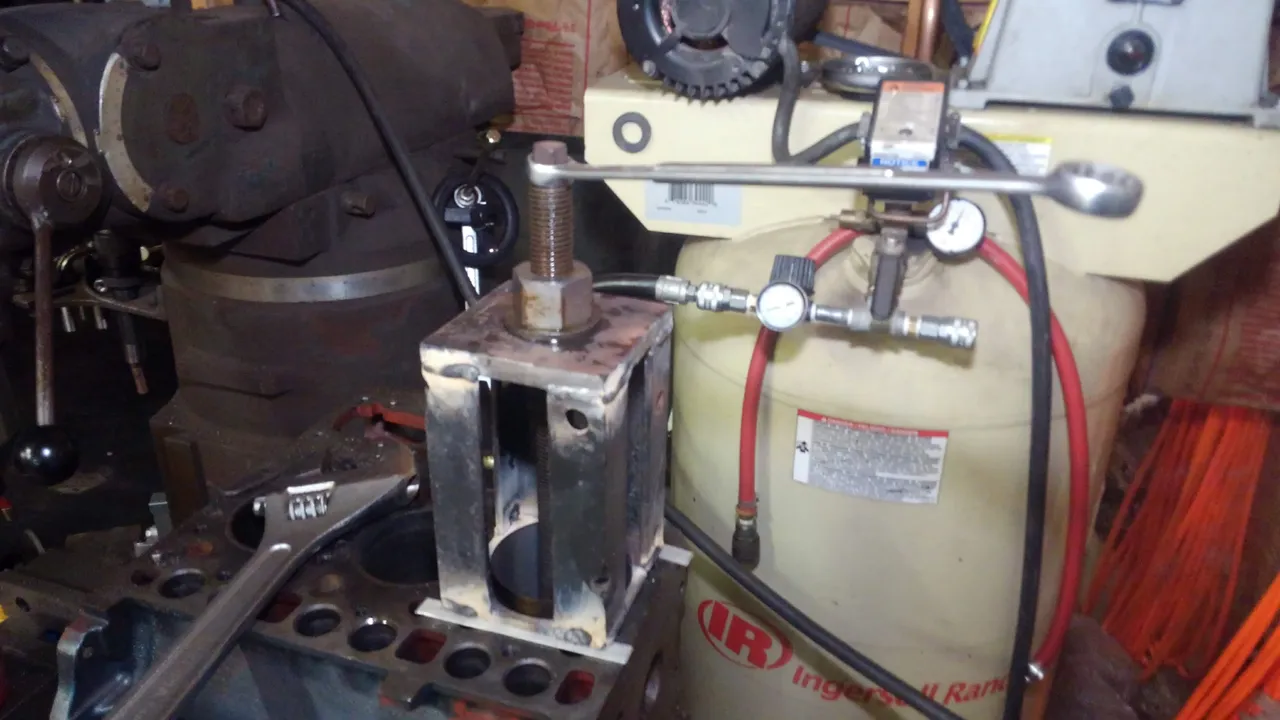
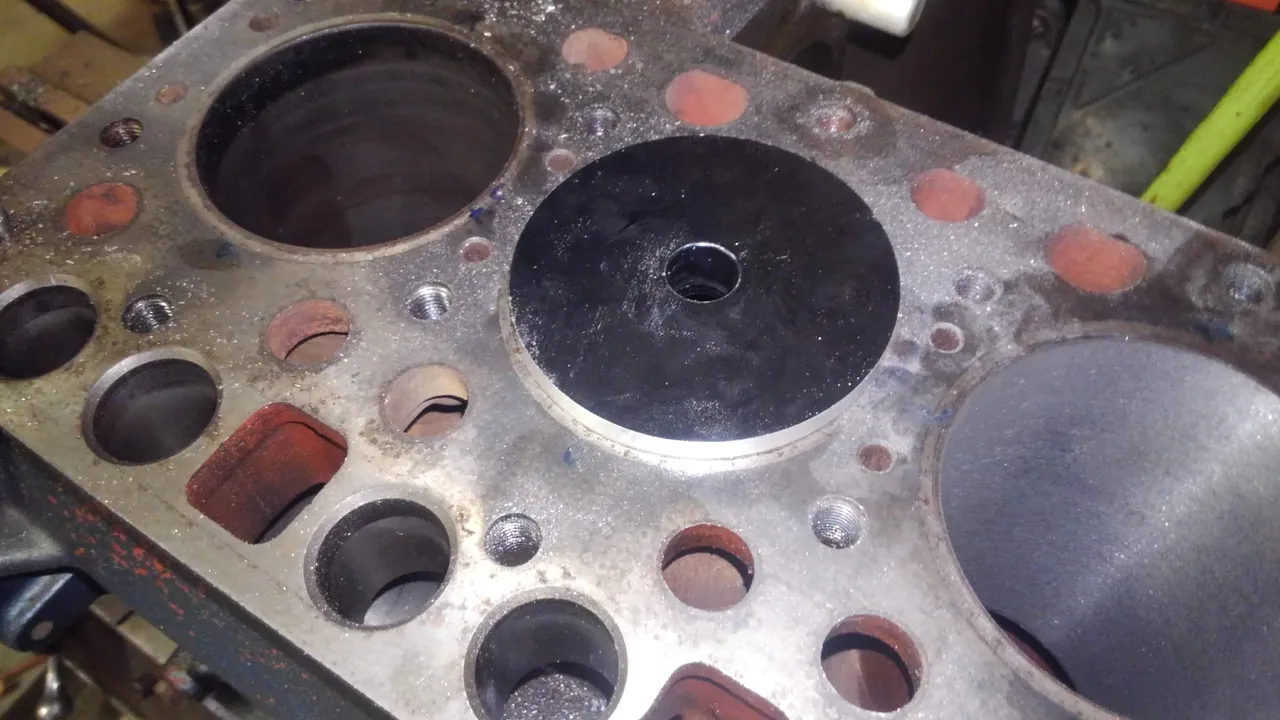
Before pressing in new liners/sleeves, the old ones need to come out. Unlike other diesels, these sleeves are only press fit in "dry" with an 0.008" interference fit. Eight thousandths of an inch doesn't sound like a lot, but the amount of force required to overcome the friction that creates is pretty next level. This is necessary so that the liner doesn't move out of position without any shoulder to hold it in place like on a wet sleeve engine. The pullers for this operation are available commercially, but because these are sort of a niche engine and not even most machine shops have them, they're mad expensive. The cheapest one I could find with the pulling plate included was a little over $700. So I did the right thing and made my own out of some scrap steel I had in the back of the shop and an aluminum plate from a seal driving kit that I have. I had to resize the plate a little but it worked great. I chose aluminum so it wouldn't score the bores that the liners are pressed into. I had to put a 3 foot cheater bar on the end of the wrench and put my foot against the mill table and push with my leg to to get each liner to break free. I don't know how many tons of force that represents being placed on the liner itself, but I know it's a lot. Let's say I put 200 lbs of force on the end of that cheater bar, that works out to about 600 ft-lbs of torque on the threaded rod. I'm not sure of the exact amount of force but an online calculator for this 3/4 rod spits out 50 tons! I think my angle iron would probably collapse or the threaded rod would fracture before that number, so it's probably a bit less than that, but given that the rod and nut are from a Snap-On puller kit, it's possible it would take that much force without breaking. Long story short, it takes a lot of force to get these things to come loose, which is why the commercial pullers are so expensive I'm sure.
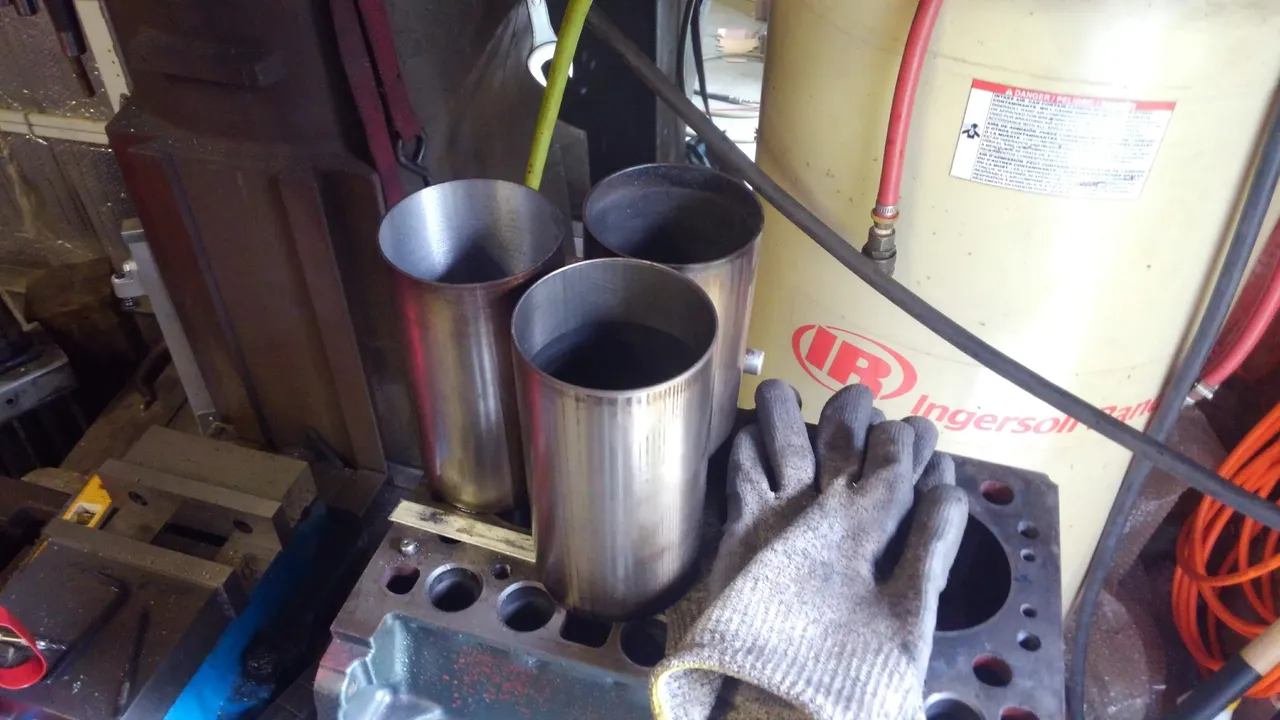
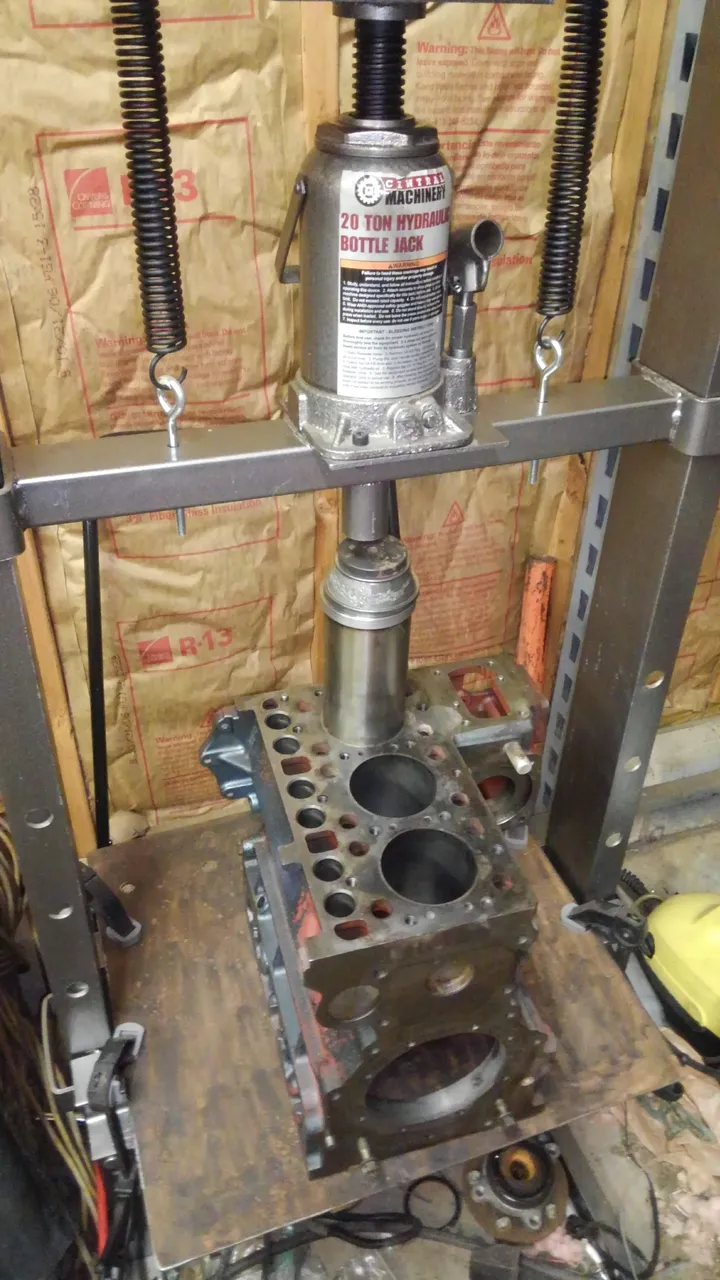

After pulling the liners I had a little mishap pressing the first new one back in. the press plate I made was sized based on the old liner. I did this forgetting that the new liners are undersized quite a bit to give room for boring them to size after they're pressed in. I machined the plate with a shoulder to register it in the center to keep the forces even. Being too large for the hole it ended up pressing itself into the liner and breaking it as I pressed it down in. Luckily it didn't damage the engine block. It was only a $35 mistake, but it cost me a couple weeks to have a replacement imported from overseas. Doh!
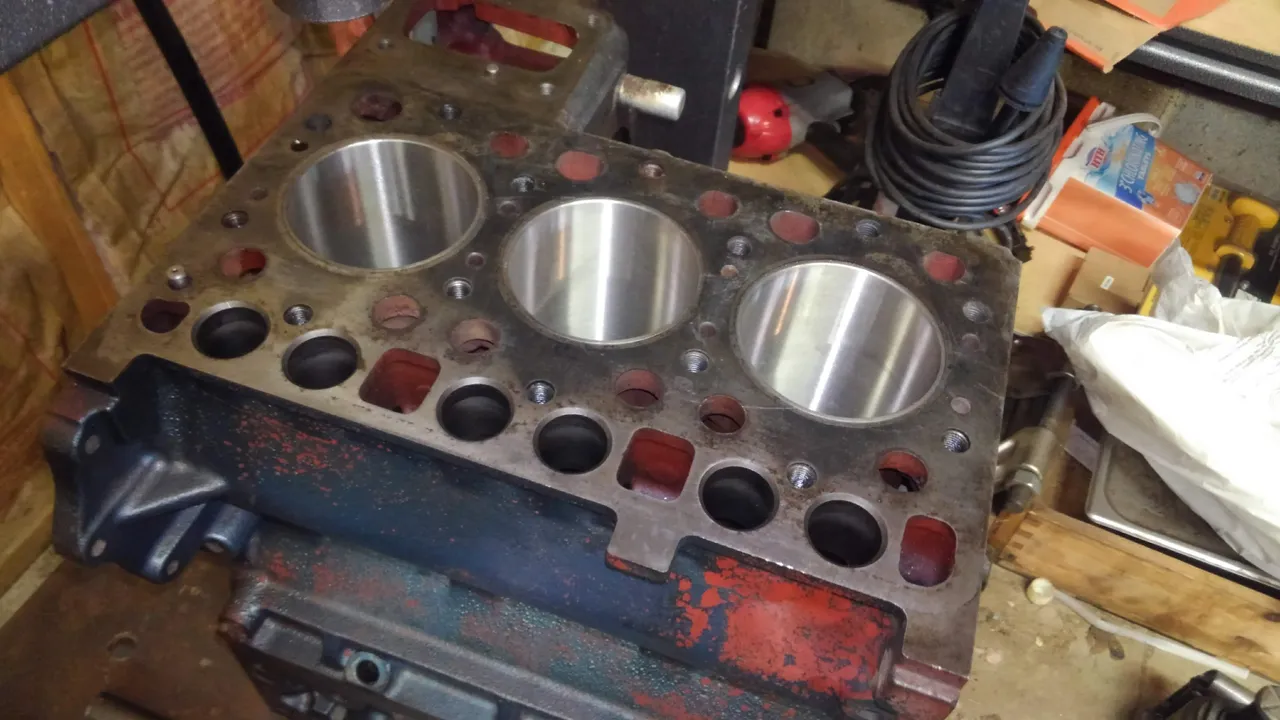

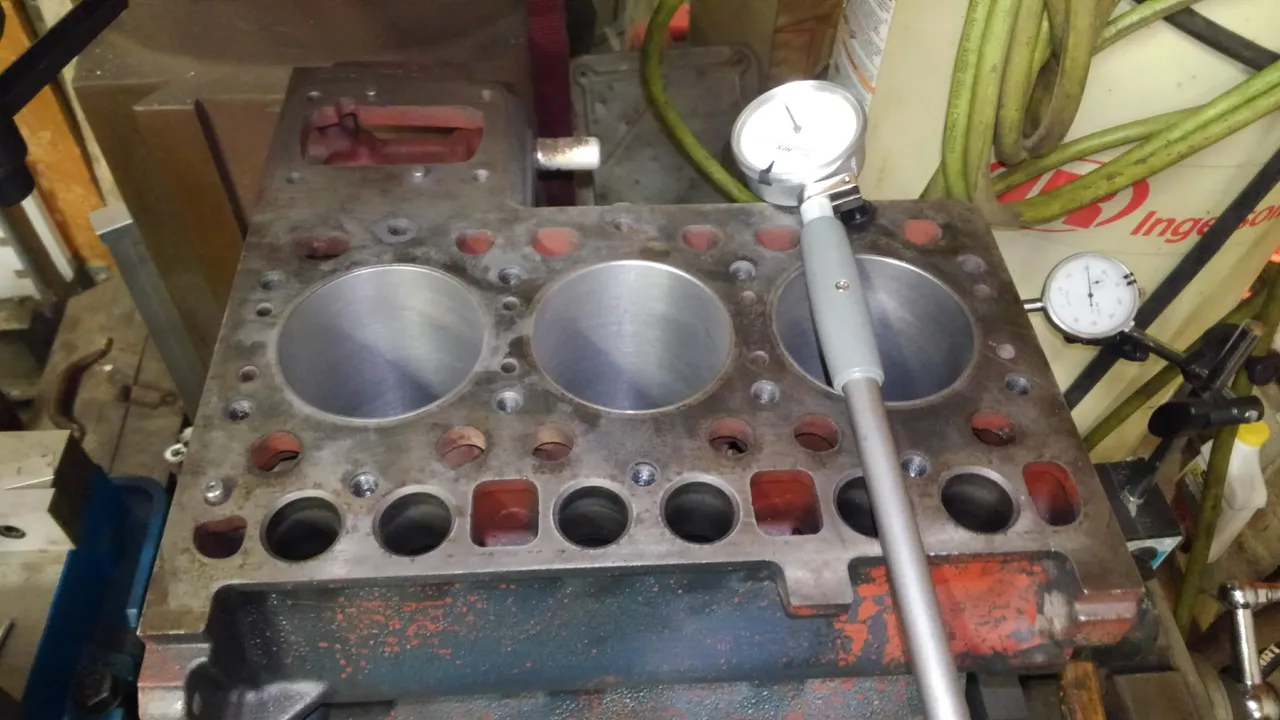
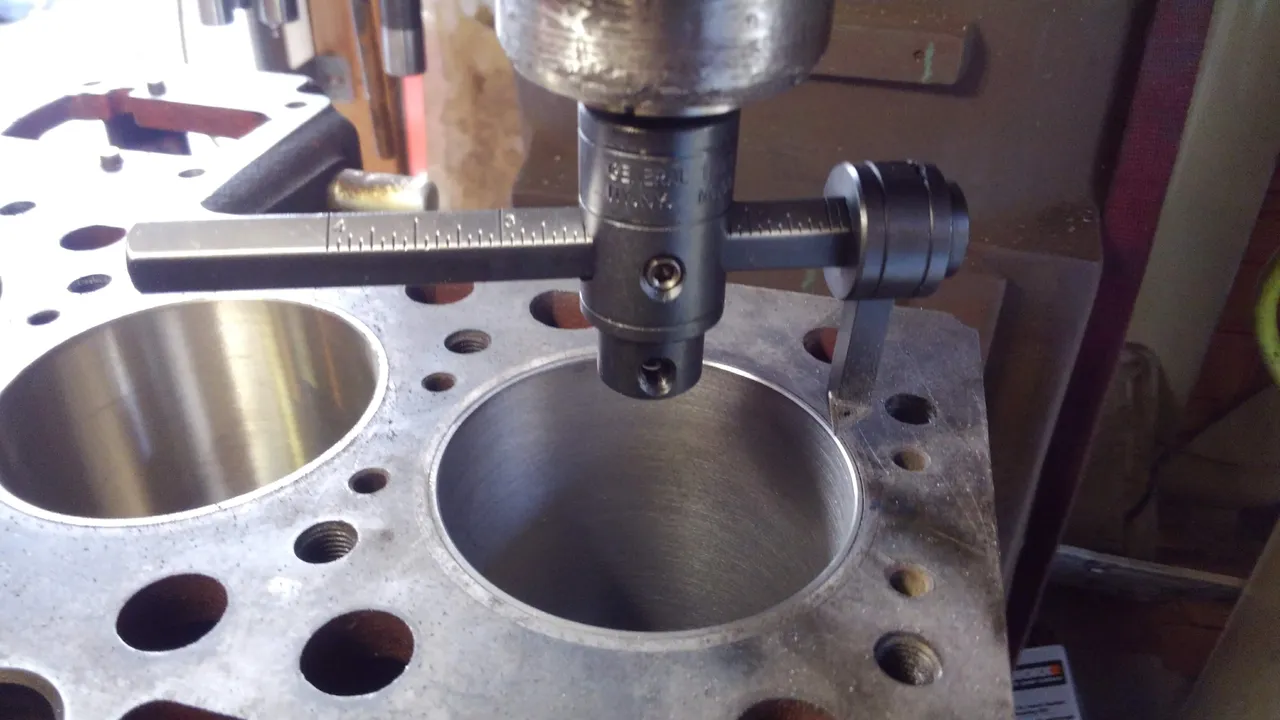
Once the replacement came and was pressed in, the liners got bored to size and chamfered, the last step before honing. They're left a few thousandths undersized at this point to allow for the honing procedure. You rough hone to just a hair undersized and then finish hone to get the proper surface finish. The trueness of the bores on these are not hyper critical because the engine redlines at only like 3000 RPM, but being someone who has built 7000 RPM race engines before, I trued them to that spec. The taper in each bore was done to less than half a thousandth, the limit of my dial bore gauge's precision. Another thing I worked on was re-lapping the valves in the head. The seats all had pitting in them, so I cleaned that up with some lapping compound and put new valve seals on as I reassembled the head. The rest was just reassembly of the engine with the new pistons and a new set of bearings. The detail on all that is a bit much for the scope of this blog post, so I'll leave it at that. I was just proud of having done the machine work myself though, so I wanted to talk about that a bit.
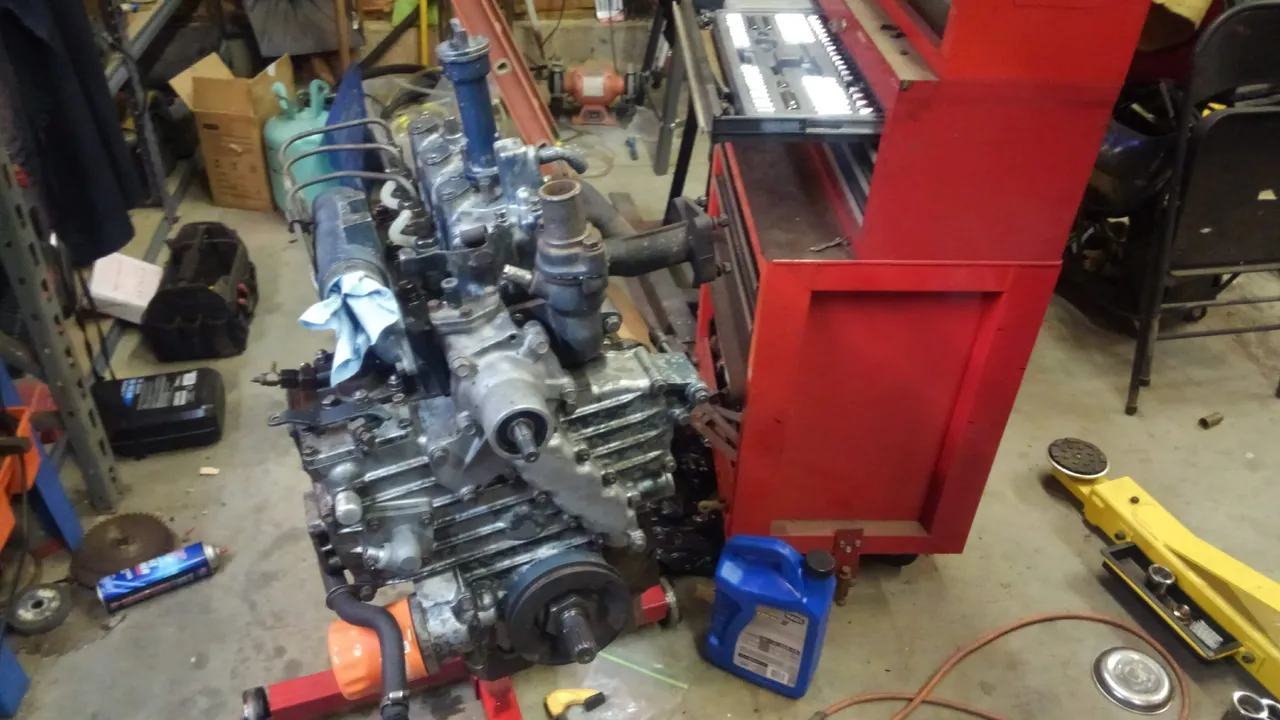
Here's the engine completely reassembled. Once I put it back in the machine I quickly found a myriad of other issues that needed to be addressed, but after 5 months of free time working on this, it was back to moving under its own power with a rebuilt engine ready to run another 5000 hours if properly maintained.
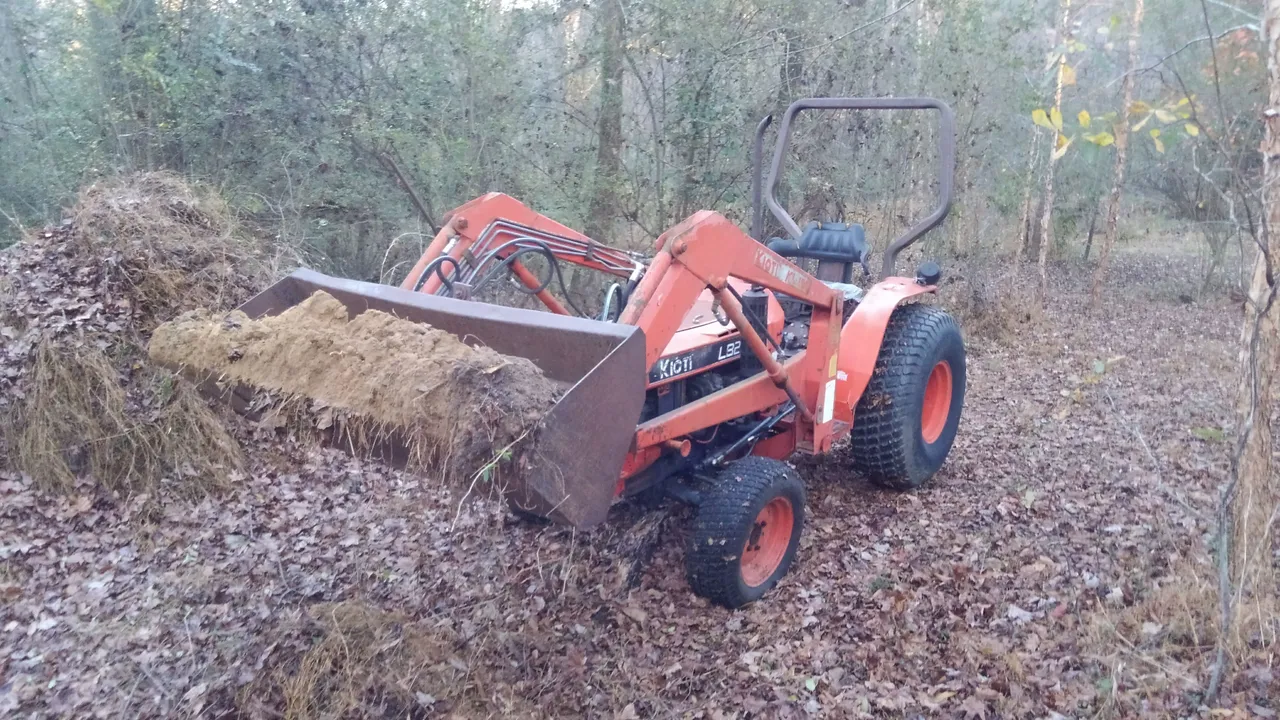
Even with all the issues, I couldn't help but go move some dirt with it once the engine was broken in. Pictured is its first bucket of dirt here after the engine rebuild. Once it was to this point, I did a bunch of work to the hydraulic system, the steering, the front axle, the rear 3-point lift, the gearbox case, the seat and the dash panel. There will be some follow-up blog posts on the trials and tribulations of getting that all sorted out. For now, thanks for reading!