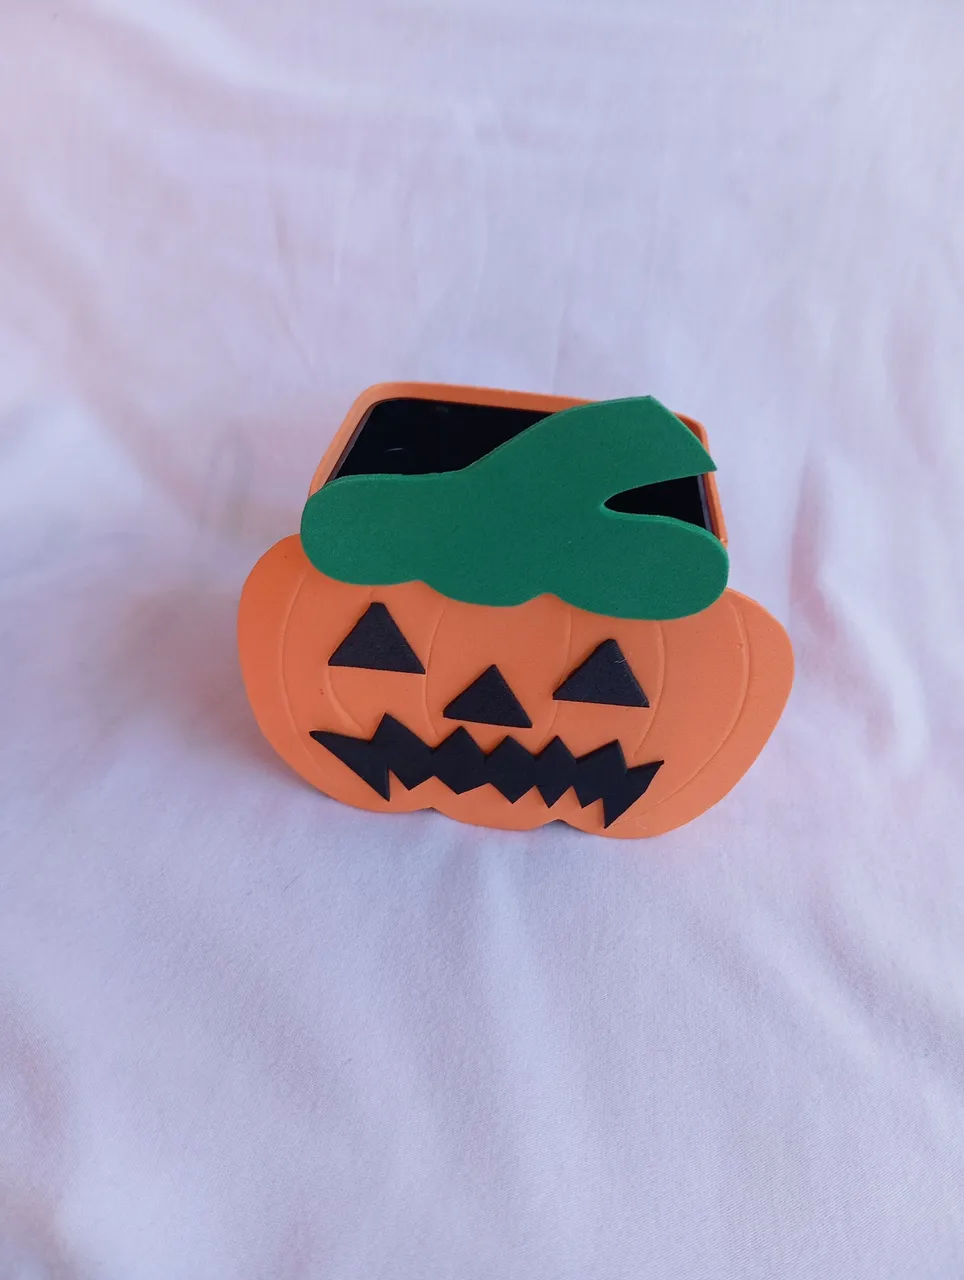
Hola buenas noches , un saludo cordial para todos los amigos presentes, la noche de hoy quiero formar parte del concurso del mes de la comunidad @Diyhub con temática del mes de halloween, a muchos nos encantan estos temas, a mí en lo particular, me gustan muchos las películas de terror, realicé un organizador con temática de calabaza , antes de continuar le hago exclusiva invitación a los amigos @emiliocabrera @lorennys @jorgelissanchez para que formen parte de este nuevo concurso y nos muestren su creatividad
Hello good evening, a warm greeting to all friends present, tonight I want to be part of the contest of the month of the community @Diyhub themed halloween month, many of us love these themes, I in particular, I like many horror movies, I made a pumpkin-themed organizer, before continuing I make exclusive invitation to friends @emiliocabrera @lorennys @jorgelissanchez to be part of this new contest and show us their creativity.
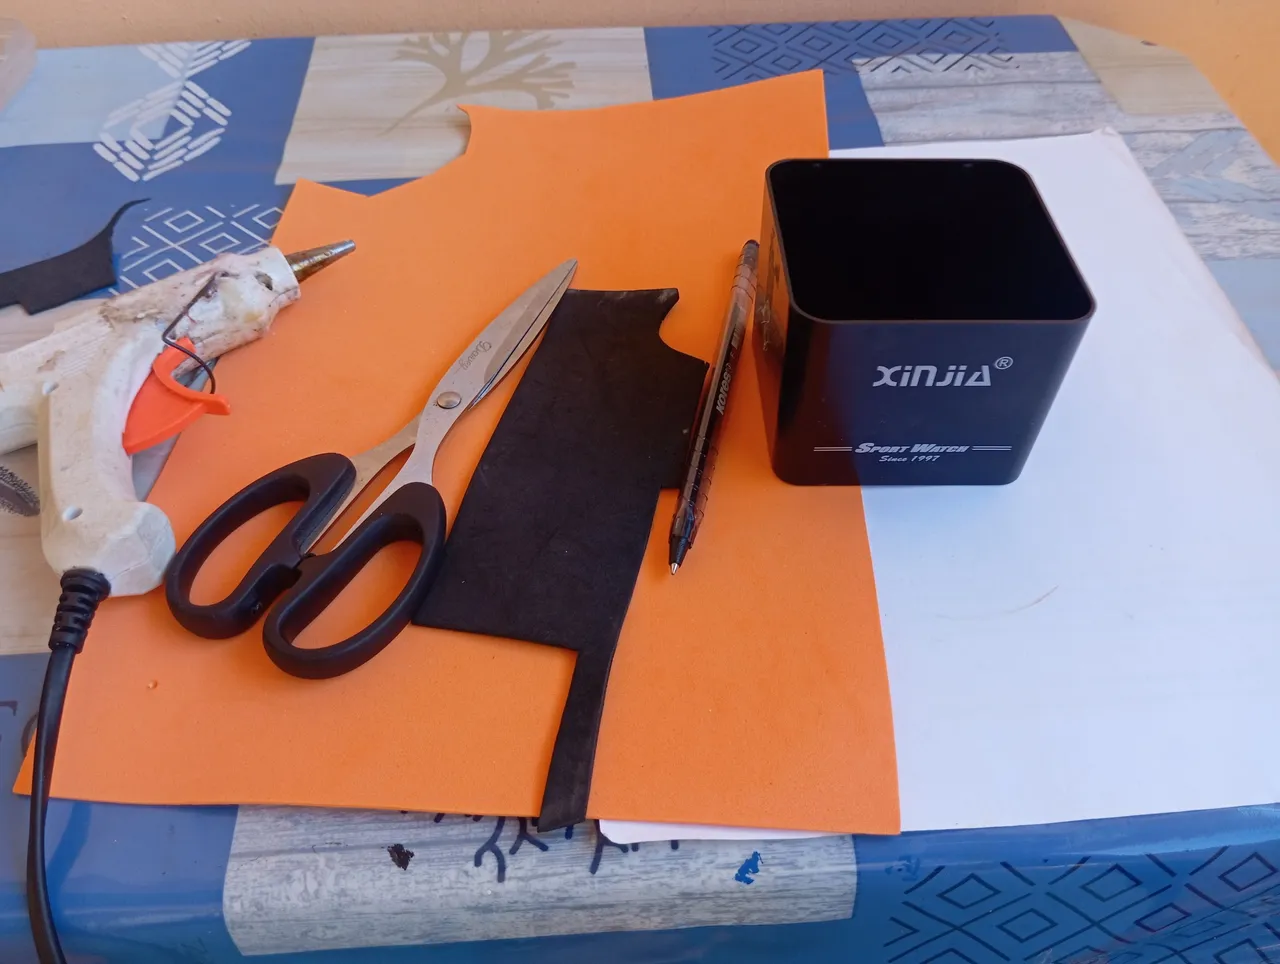
Materiales:
-Envase plástico reciclado
-Foamis
-Tijera
-Silicon
-Lapiz
-Papel
Materials:
-Recycled plastic container
-Foamis
-Scissors
-Silicon
-Pencil
-Paper
Pasos que seguir:
Comenzaremos dibujando una calabaza, la cuál será nuestro patrón, debemos asegurarnos que la calabaza sea del mismo tamaño tanto de ancho y altura del envase plástico que vamos a reutilizar para que así quede justa
Steps to follow:
We will start by drawing a pumpkin, which will be our pattern, we must make sure that the pumpkin is the same size both in width and height of the plastic container that we are going to reuse so that it is just right.
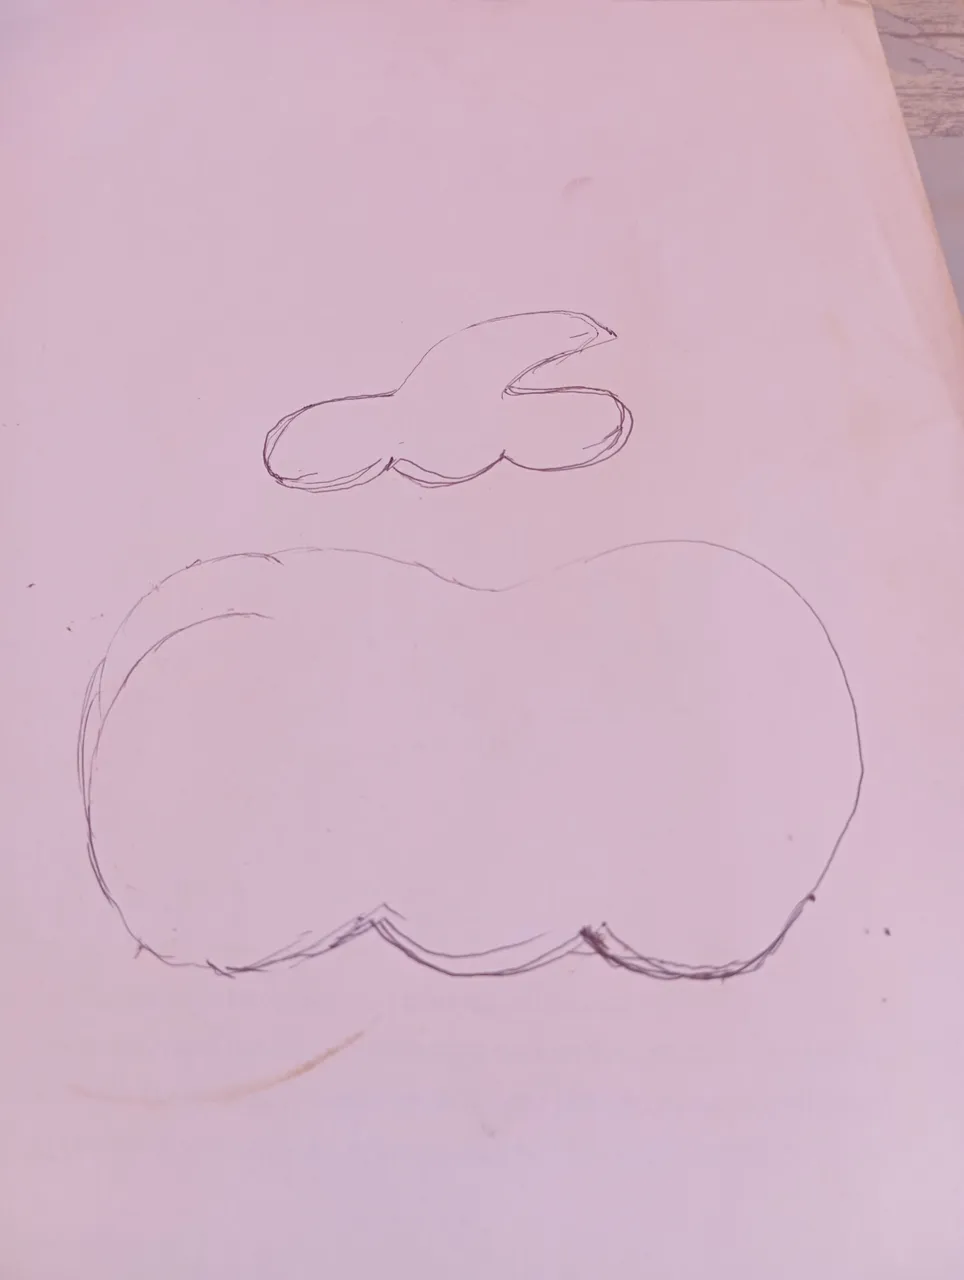
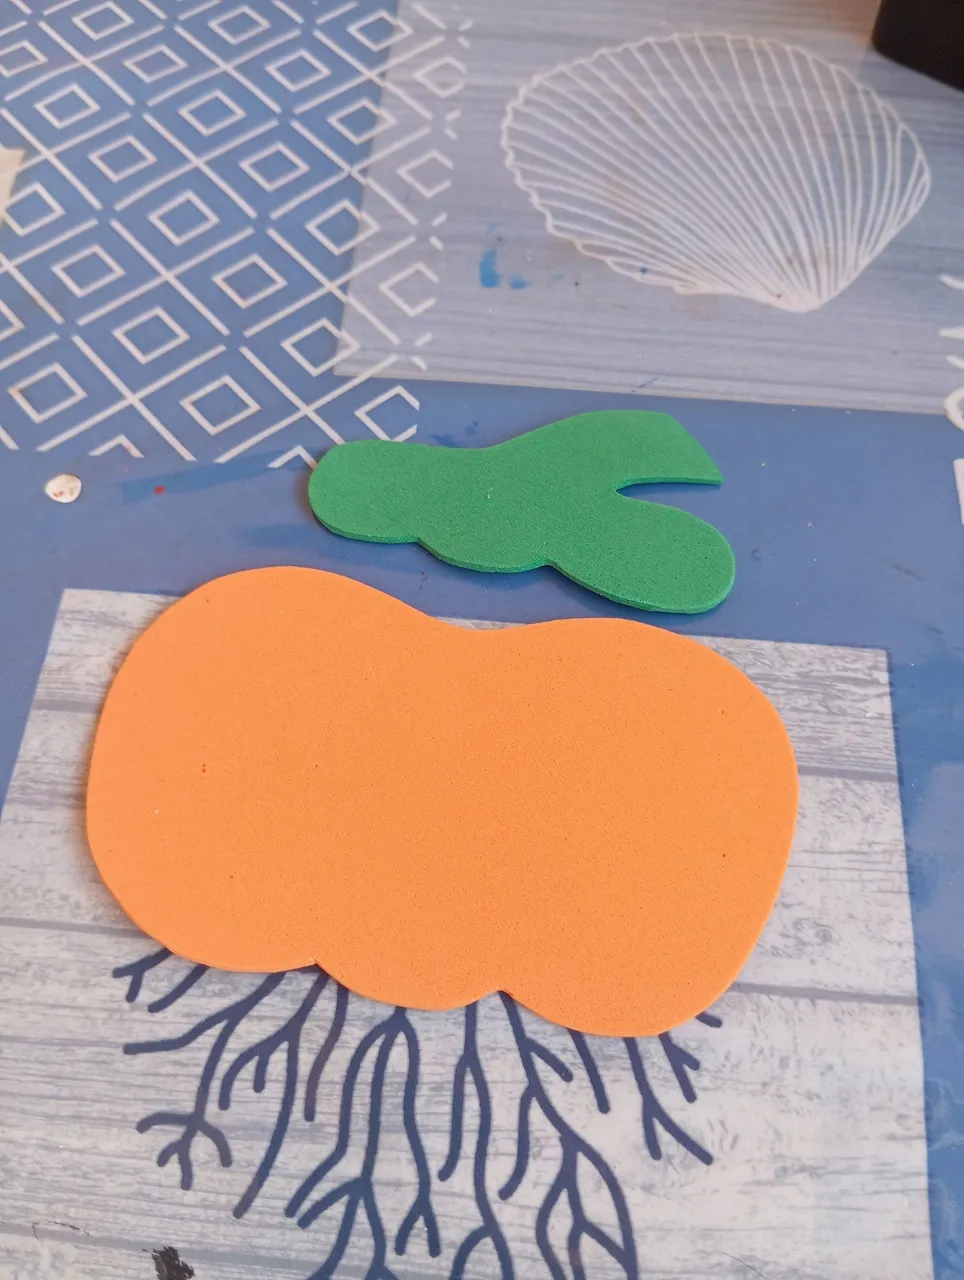
Una vez que tengamos el patrón listo vamos a comenzar marcando las siguientes piezas: naranja para la calabaza y verde para el tallo que lleva arriba
Once we have the pattern ready we will start marking the following pieces: orange for the pumpkin and green for the stem on top

Cuando se encuentren marcadas las piezas , vamos a tomar nuestra tijera o objeto más cómodo para cortar y la recortaremos con mucho cuidado siguiendo el mismo modelo
Once the pieces are marked, we are going to take our scissors or the most comfortable object to cut and we will cut it out very carefully following the same pattern.
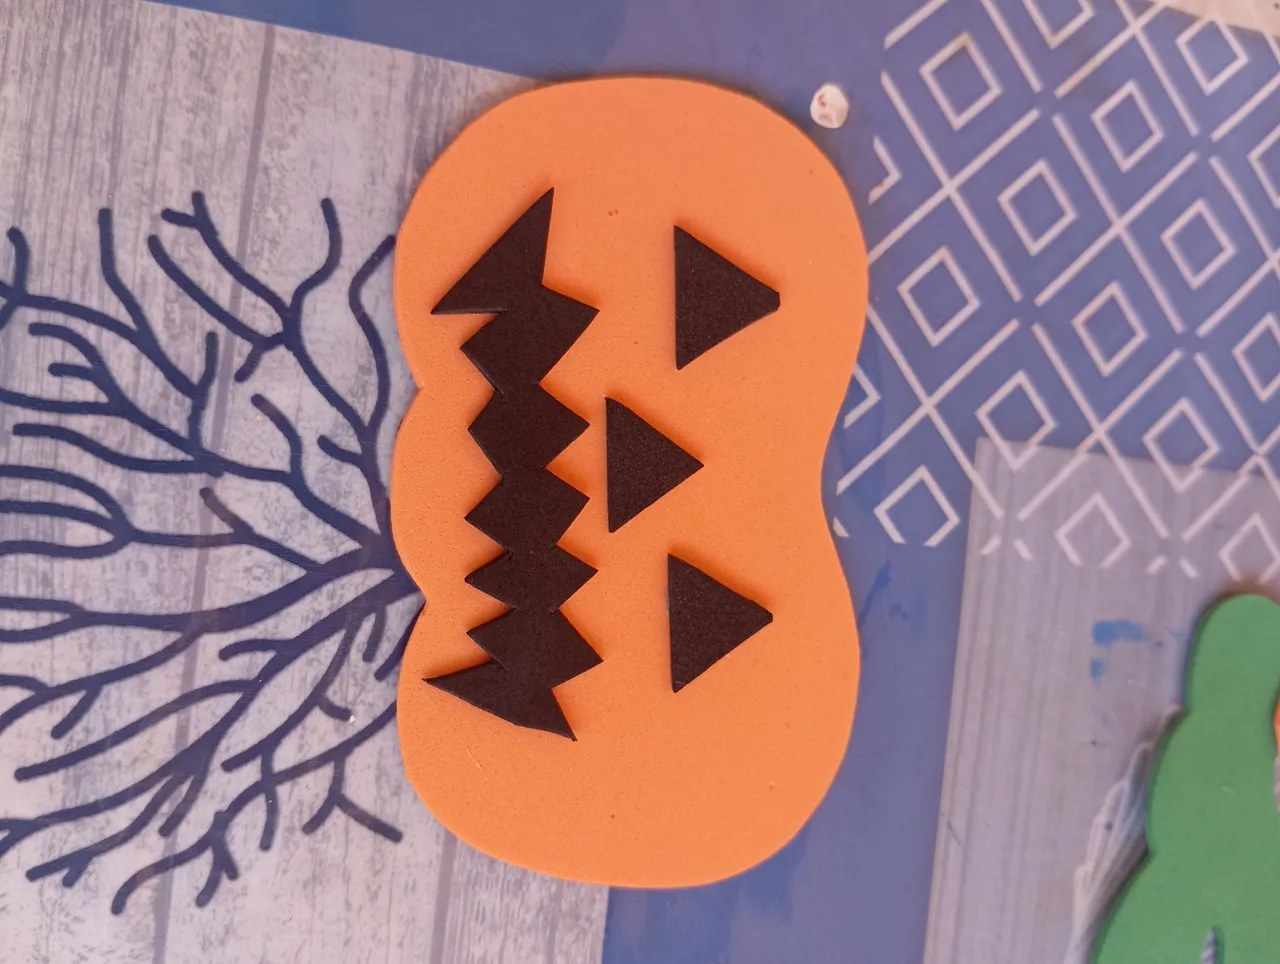
Con el foamis negro vamos a proceder recortando el rostro de la calabaza, sus ojos y nariz en forma de triángulo y su sonrisa
With the black foamis we will proceed to cut out the face of the pumpkin, its eyes and nose in the shape of a triangle and its smile.
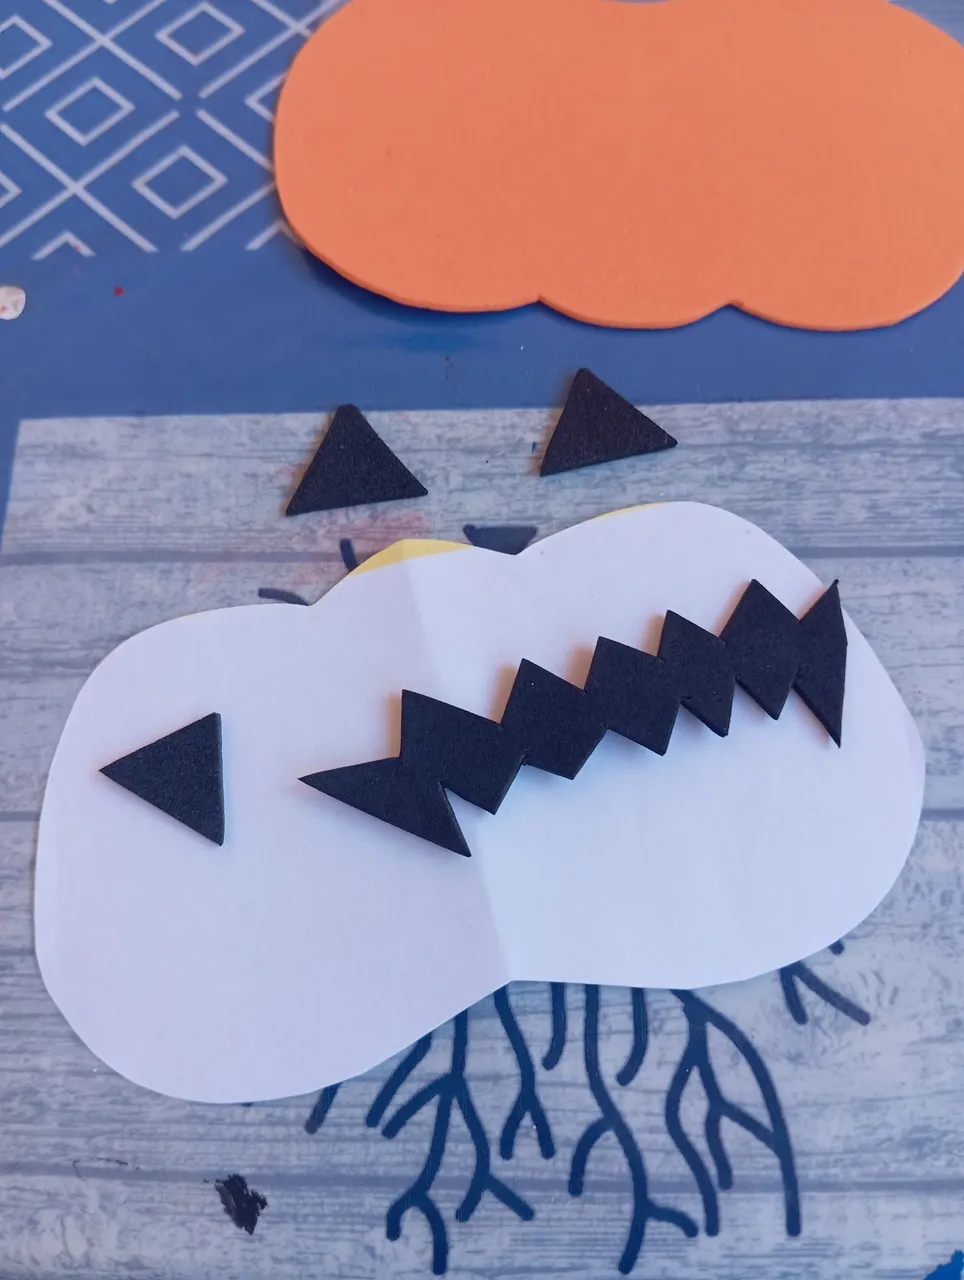
Luego vamos a continuar pegando el rostro de la calabaza, pegaremos en el centro de forma separada sus ojos , en la parte de abajo su nariz y por último su sonrisa como pueden mirar
Then we will continue gluing the face of the pumpkin, we will glue in the center separately his eyes, at the bottom his nose and finally his smile as you can see.
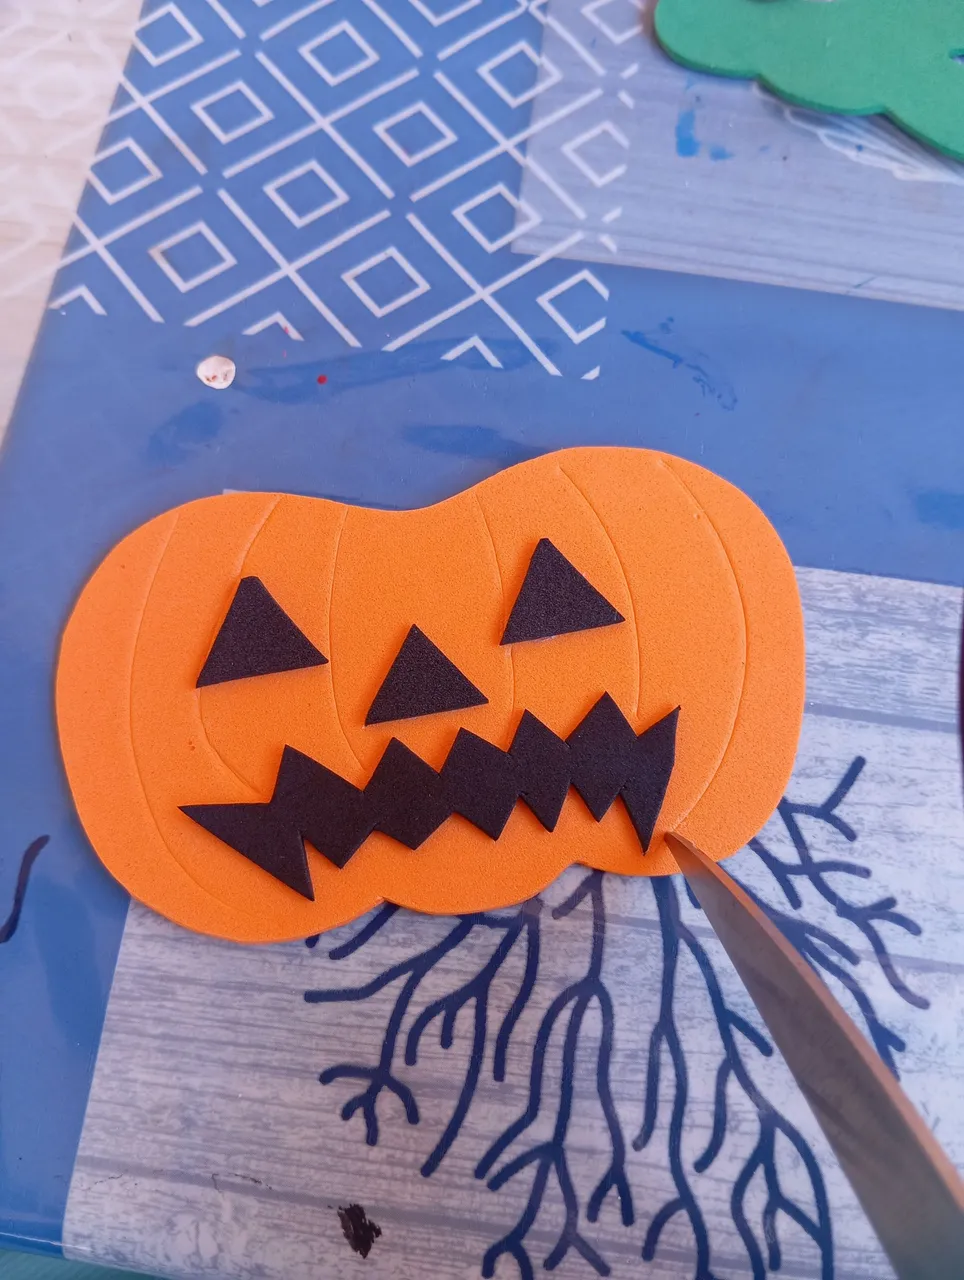
Cómo todos sabemos las calabazas tienen como zanjas o líneas verticales que es su diseño por naturaleza, estás las realicé con la ayuda de una tijera , presionando fuerte para marcar las
As we all know pumpkins have as ditches or vertical lines that is its design by nature, these I made with the help of a scissors, pressing hard to mark the lines.
Para finalizar con nuestra calabaza, vamos a continuar pegando en la parte de arriba su tallo color verde
To finish with our pumpkin, we are going to continue gluing the green stem on the top of the pumpkin.

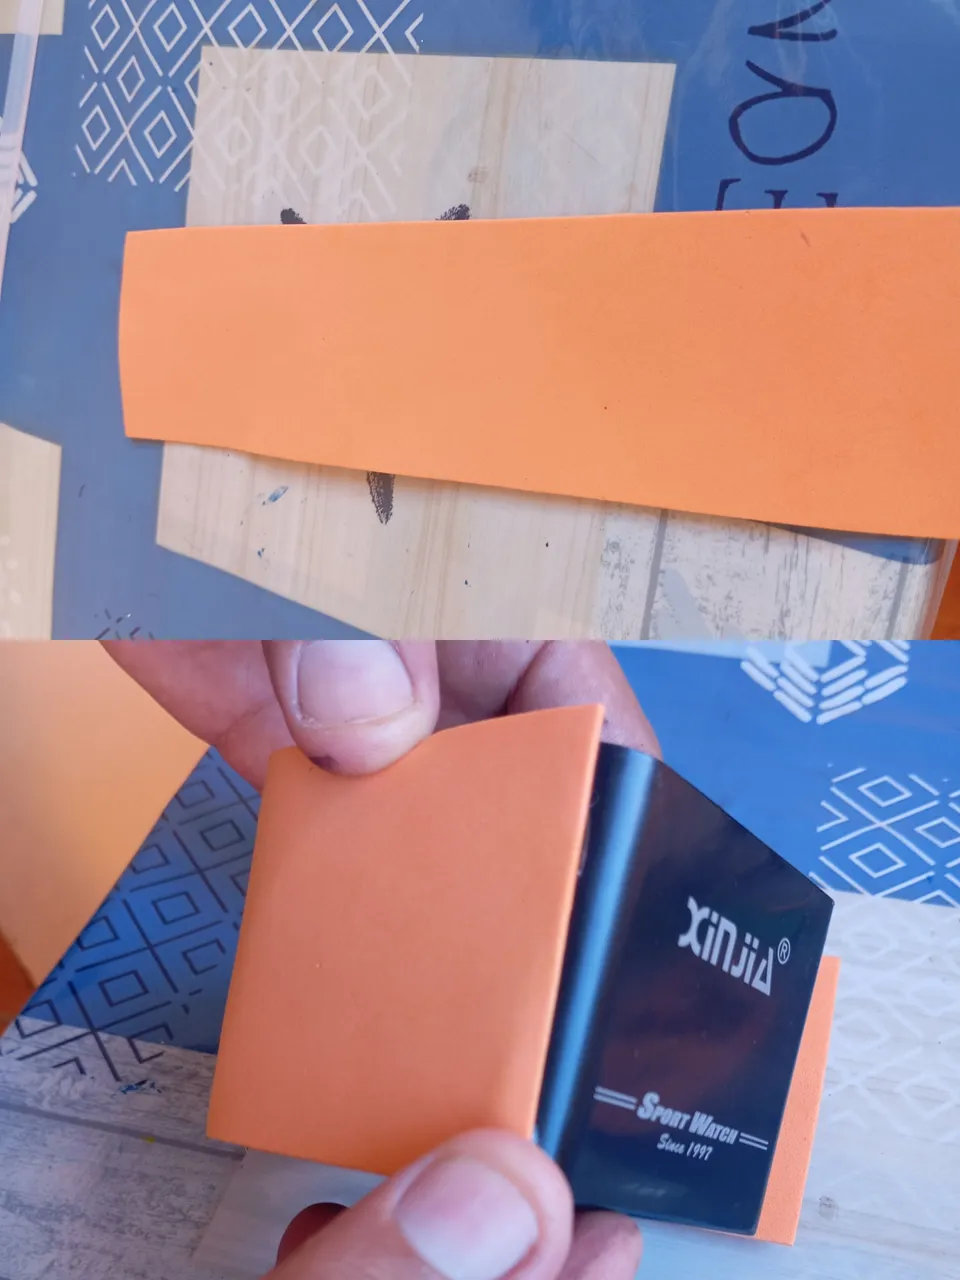
A continuación vamos a recortar una tira de foamis del mismo color de la calabaza, esta será para cubrir los lados y la parte de atrás del organizador, como les mencioné con la calabaza esta tira igual debe tener las mismas medidas de ancho y altura del envase a reutilizar, cuando tengamos lista la tira comenzaremos a pegar dejando la parte del frente libre ya que irá la calabaza ubicada
Next we will cut a strip of foamis the same color of the pumpkin, this will be to cover the sides and back of the organizer, as I mentioned with the pumpkin this strip must have the same measures of width and height of the container to reuse, when we have the strip ready we will begin to paste leaving the front free as the pumpkin will be located.
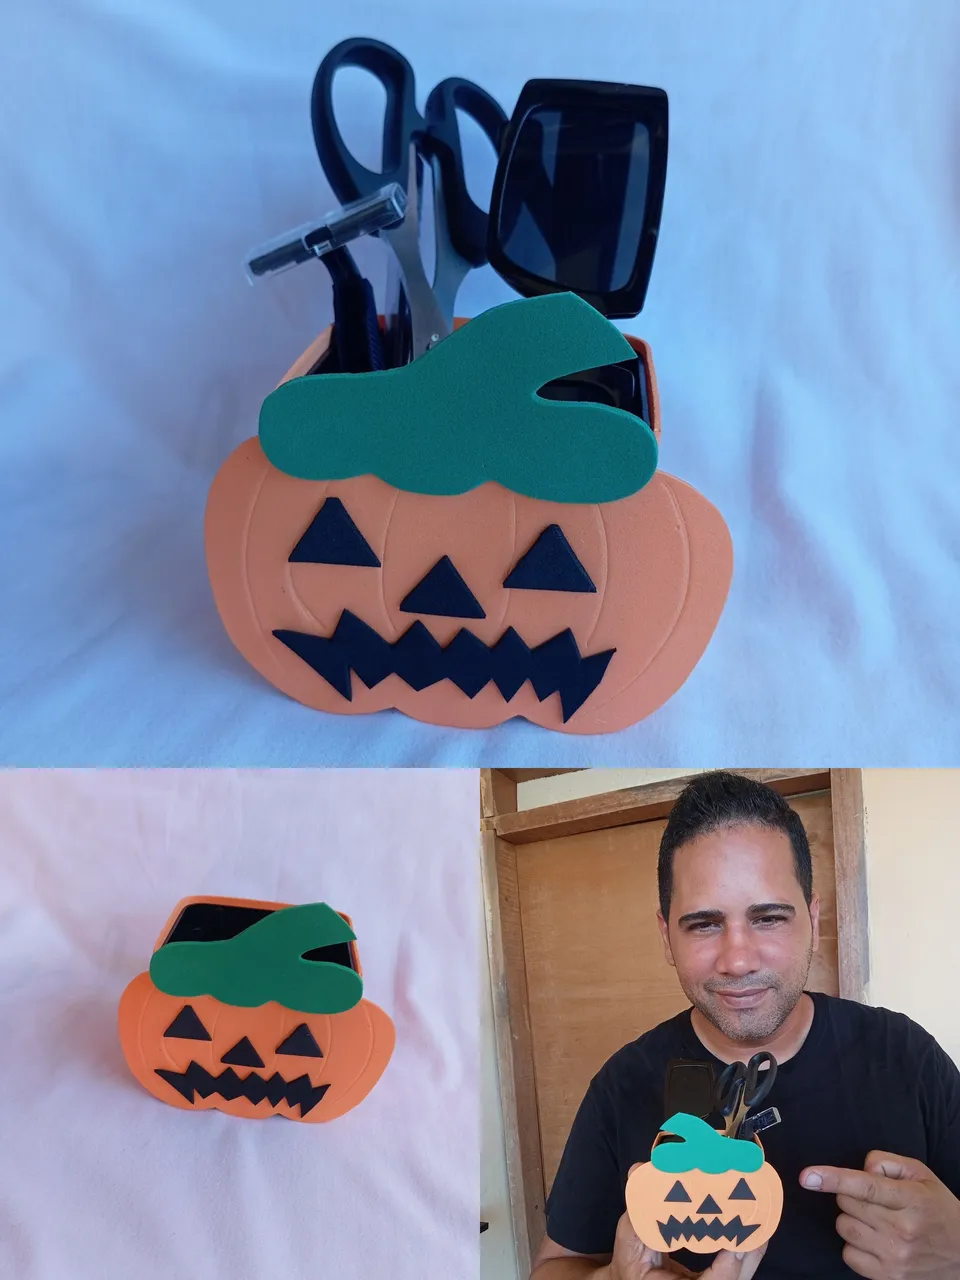
Finalmente vamos a continuar pegando la calabaza en todo el centro del organizador, terminando así nuestra manualidad.
Así fue como realicé mi organizador para el concurso del mes , una calabaza tenebrosa , espero les sea de utilidad, hasta la próxima amigos
Finally we will continue gluing the pumpkin around the center of the organizer, thus finishing our craft.
This is how I made my organizer for the contest of the month, a spooky pumpkin, I hope you find it useful, see you next time friends.