¡Bienvenidos a mi blog!
Welcome to my blog!
Hola a todos los que forman parte en esta hermosa comunbidad #diyhub, buenas noches del Domingo.
Hoy me uno al primer concurso de esta comunidad del 2024: Día mundial de la PAZ, que se celebra el 1 de Diciembre,a modo de reflexión , oremos a Dios para nos libre de tanta violencia, enfermedad y guerras. Que sea él tomando control y dominio de todo.
Hello to all who are part of this beautiful community #diyhub, good Sunday evening.
Today I join the first contest of this community of 2024: World Day of PEACE, which is celebrated on December 1, as a reflection, let us pray to God to free us from so much violence, disease and wars. May he be the one taking control and dominion of everything.
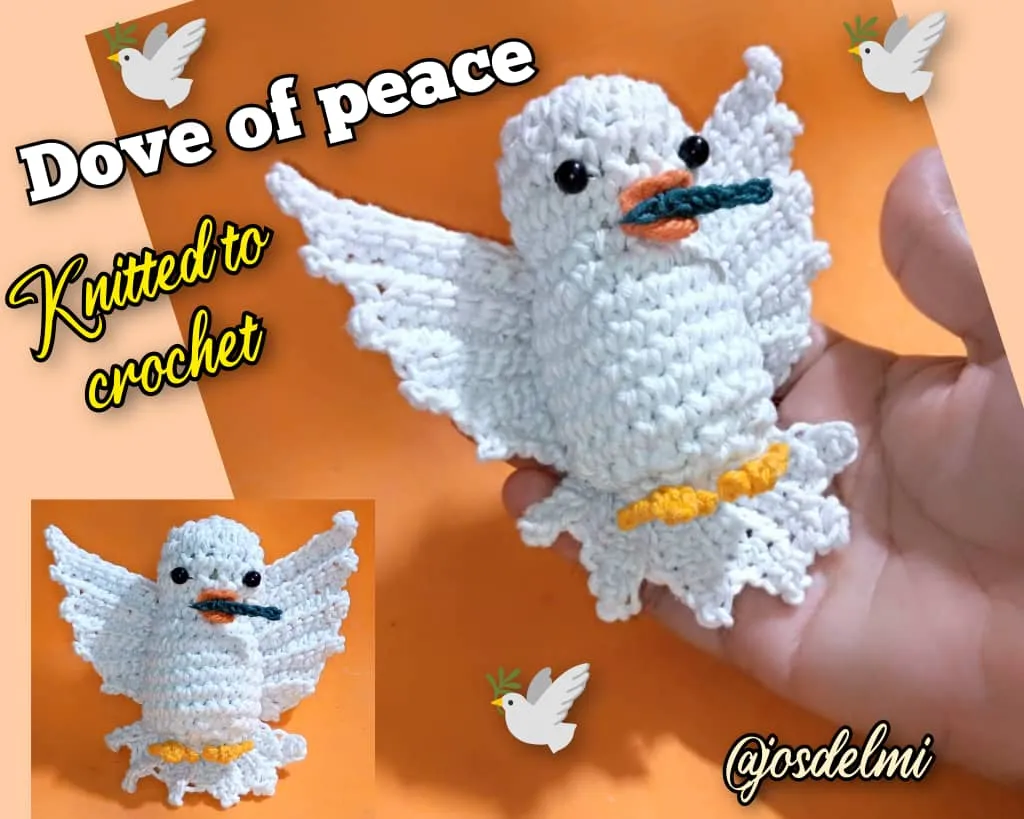
Hoy quiero mostrar a través de un tutorial como tejer una linda paloma de la paz en crochet (amigurumi), estas son especiales para recuerdos , llaveros y adornos, quiero que sigas leyendo para que veas lo fácil que es su realización.
PALOMA DE LA PAZ
Today I want to show through a tutorial how to crochet a cute peace dove (amigurumi), these are special for souvenirs, keychains and ornaments, I want you to keep reading to see how easy it is to make.
DOVE OF PEACE
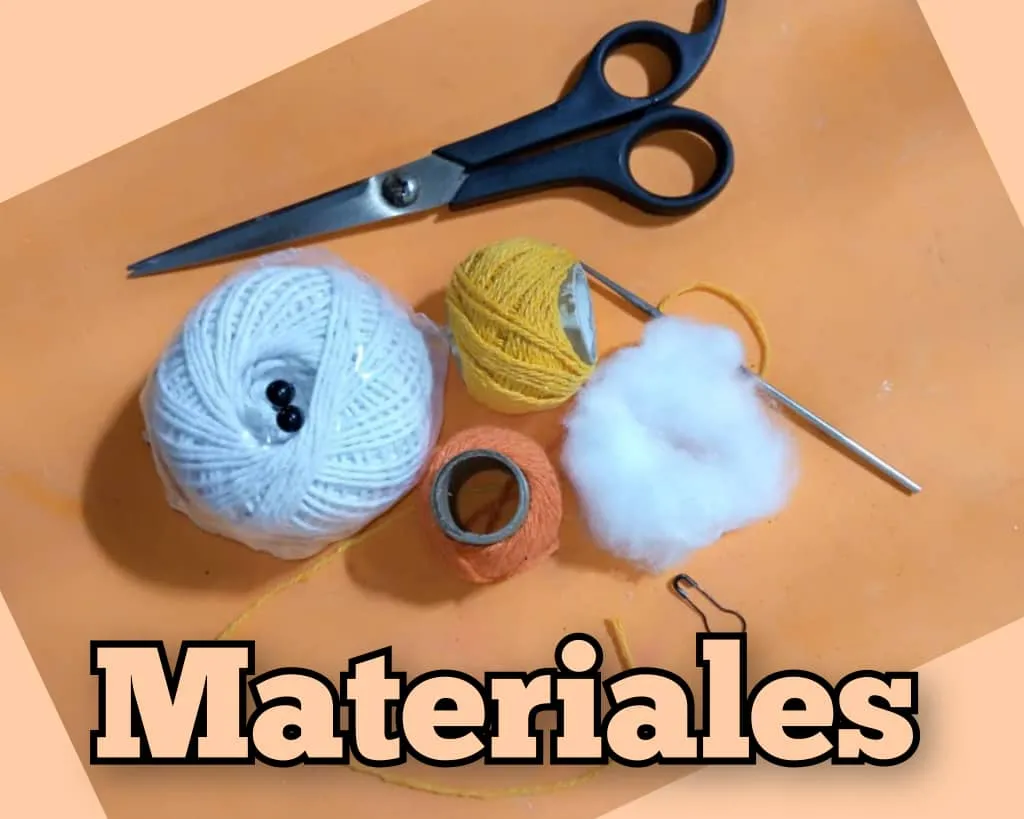
Materiales para su realización son los siguientes:
- Hilo de tejer : blanco, amarillo, anaranjado y verde.
- Aguja de tejer.
- Pedazo de algodón.
- Silicona líquida.
- Tijera.
- 2 mostacillas negras.
- 1 alfiler.
Materials for its realization are the following:
- Knitting yarn : white, yellow, orange and green.
- Knitting needle.
- Piece of cotton.
- Liquid silicone.
- Scissors.
- 2 black beads.
- 1 pin.
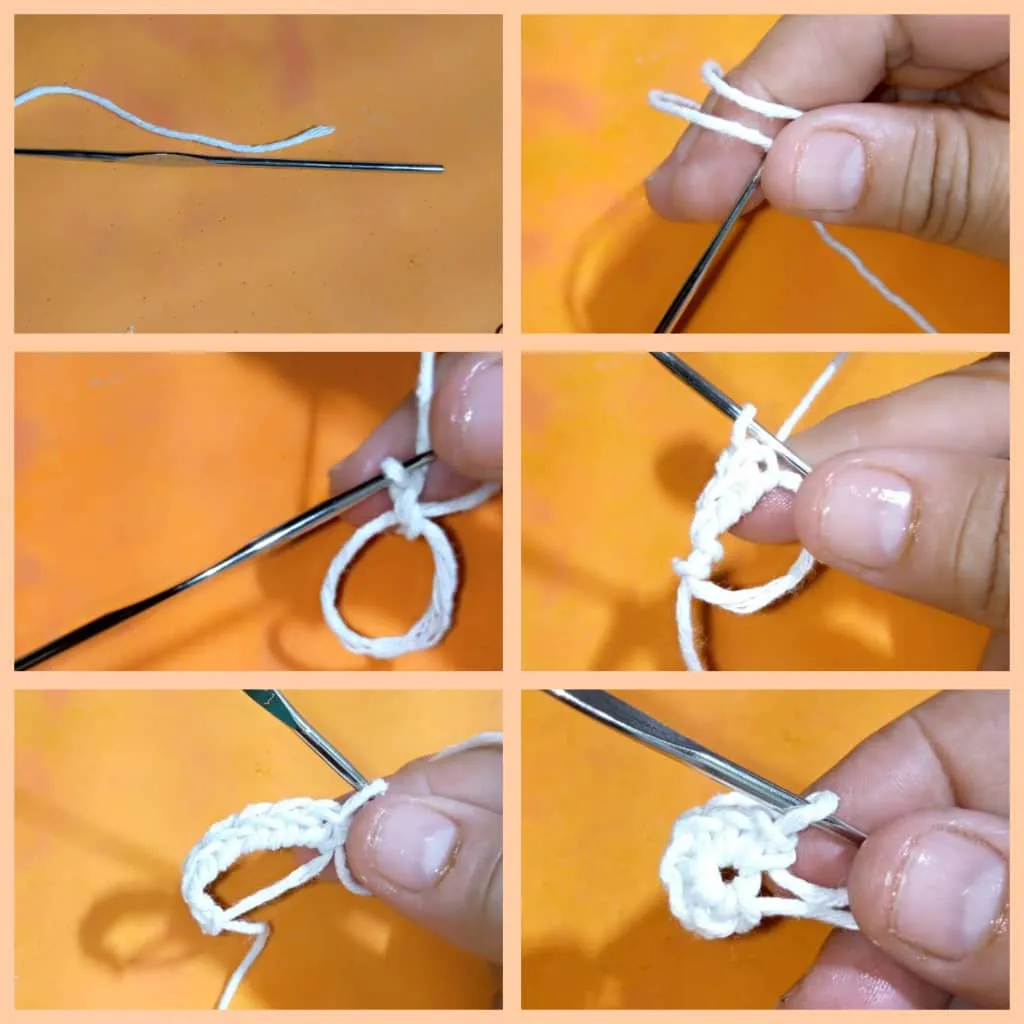
Paso a paso para la realización de la paloma de la paz:
- Tomamos el hilo blanco para hacer la paloma, hacemos un anillo mágico, tejemos 6 puntos o cadenetas, halamos el hilo y cerramos con un punto deslizados, esta sería la primera vuelta.
- Segunda vuelta: 2 puntos bajos en un mismo punto. (12puntos)
- Tercera vuelta: 1 punto bajo y un aumento ( 2 en un punto) 18 puntos.
Step by step for the realization of the dove of peace:
- We take the white yarn to make the dove, we make a magic ring, we knit 6 stitches or chain stitches, we pull the yarn and close with a slip stitch, this would be the first round.
- Second row: 2 single crochets in the same stitch (12 stitches).
- Third row: 1 single crochet and an increase (2 in one stitch) 18 stitches.
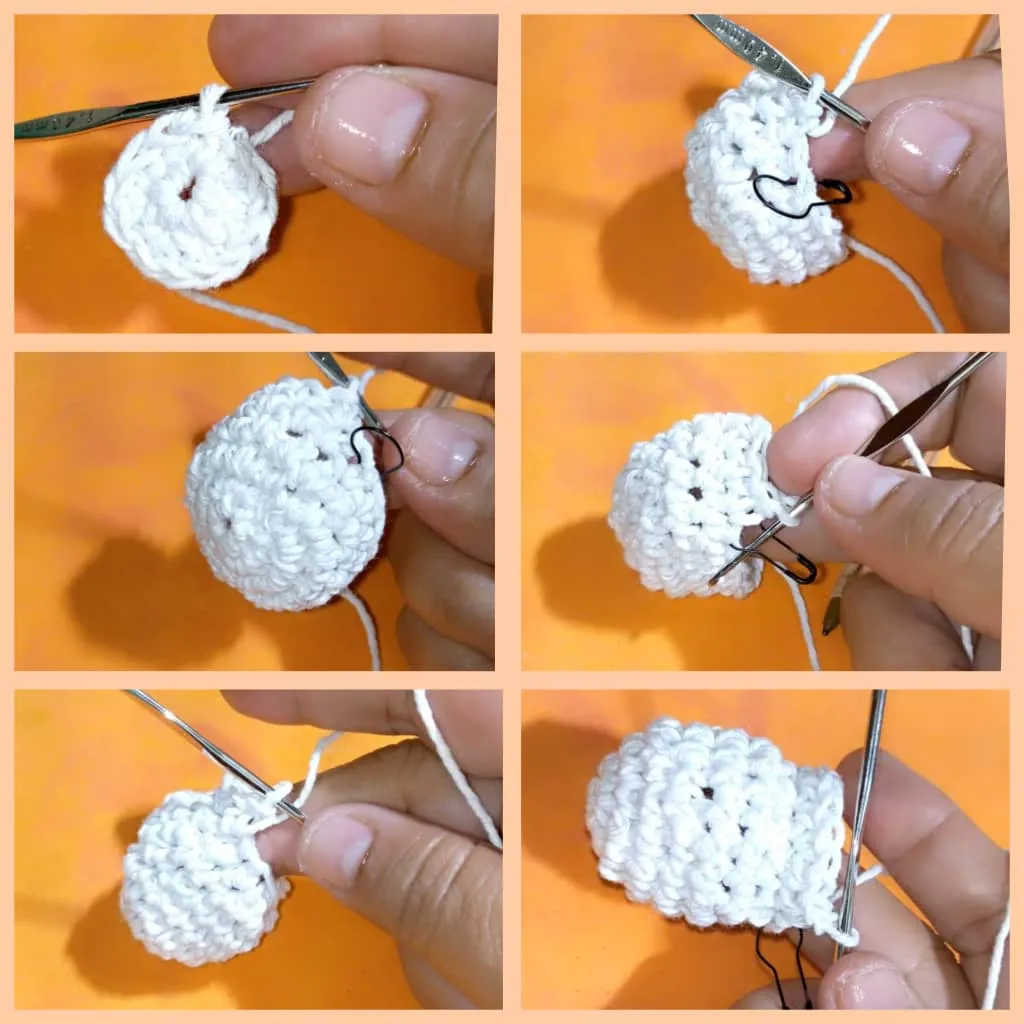
- Desde la vuelta 4 hasta la 7 , un punto bajo en cada punto, total 18 puntos.
- Vuelta 8 , un punto bajo y una disminución, debe haber 12 punto.
Vuelta 9 , un punto bajo y un aumento.Debe tener 18 puntos.
Nota : colocar el alfiler para ir marcando en donde termina la vuelta.
- From row 4 to row 7 , one single crochet in each stitch, total 18 stitches.
- Row 8 , one single crochet and one decrease, there should be 12 stitches.
Row 9 , one single crochet and one increase, there should be 18 stitches.
Note: place the pin to mark where the row ends.
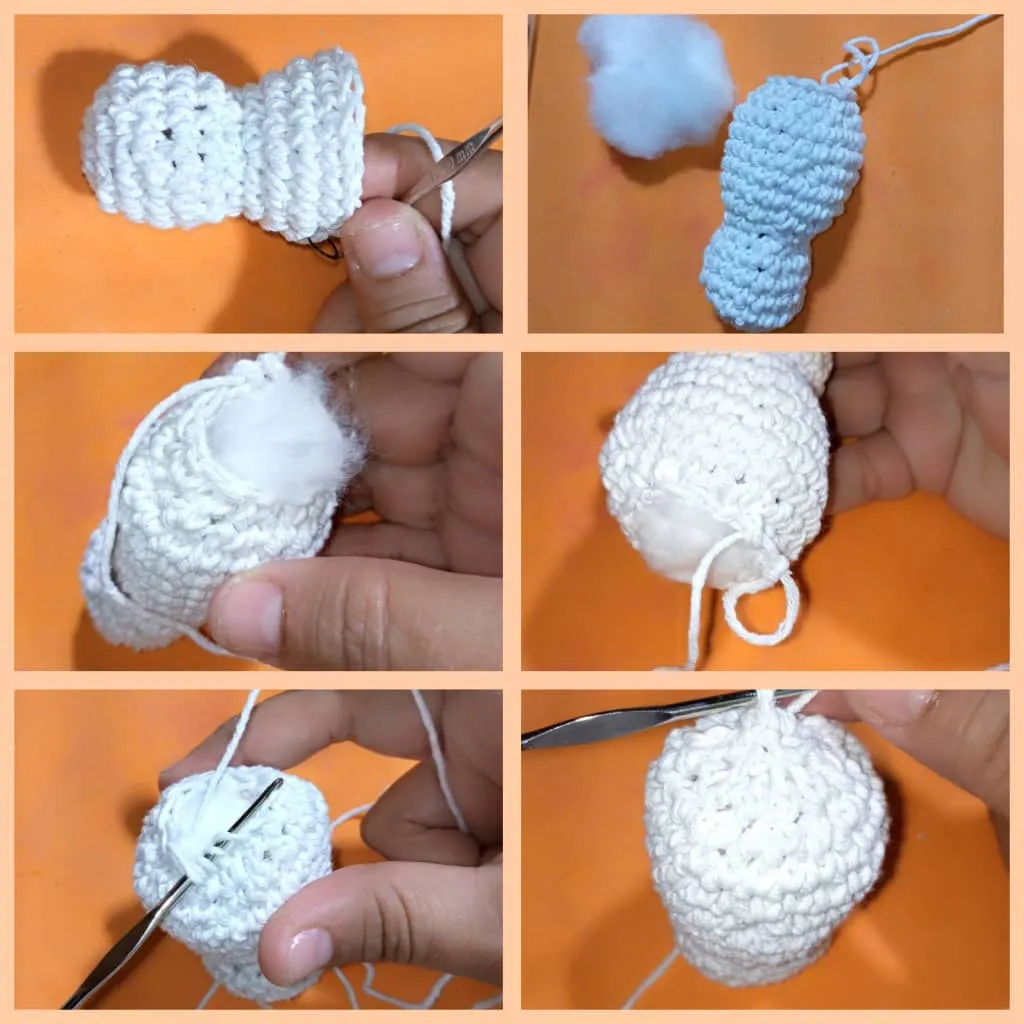
- Vuelta 10 : dos puntos y un aumento, debe tener 24 `puntos.
- Desde la 11 a la 15 , un punto bajo por cada punto.
- Vuelta 16:dos puntos y una disminución. debe quedar 18 puntos
- Vuelta 17: dos puntos bajos y una disminución. queda 12 puntos.
- Ahora rellenar la paloma con el algodón y tejer con hilo blanco por debajo y cerrar.
- Row 10: two stitches and one increase, you must have 24 `stitches.
- From 11 to 15, one single crochet for each stitch.
- Row 16: two single crochets and a decrease. 18 stitches should remain.
- Row 17: two single crochets and a decrease. 12 stitches remain.
- Now fill the dove with the cotton and knit with white yarn underneath and close.
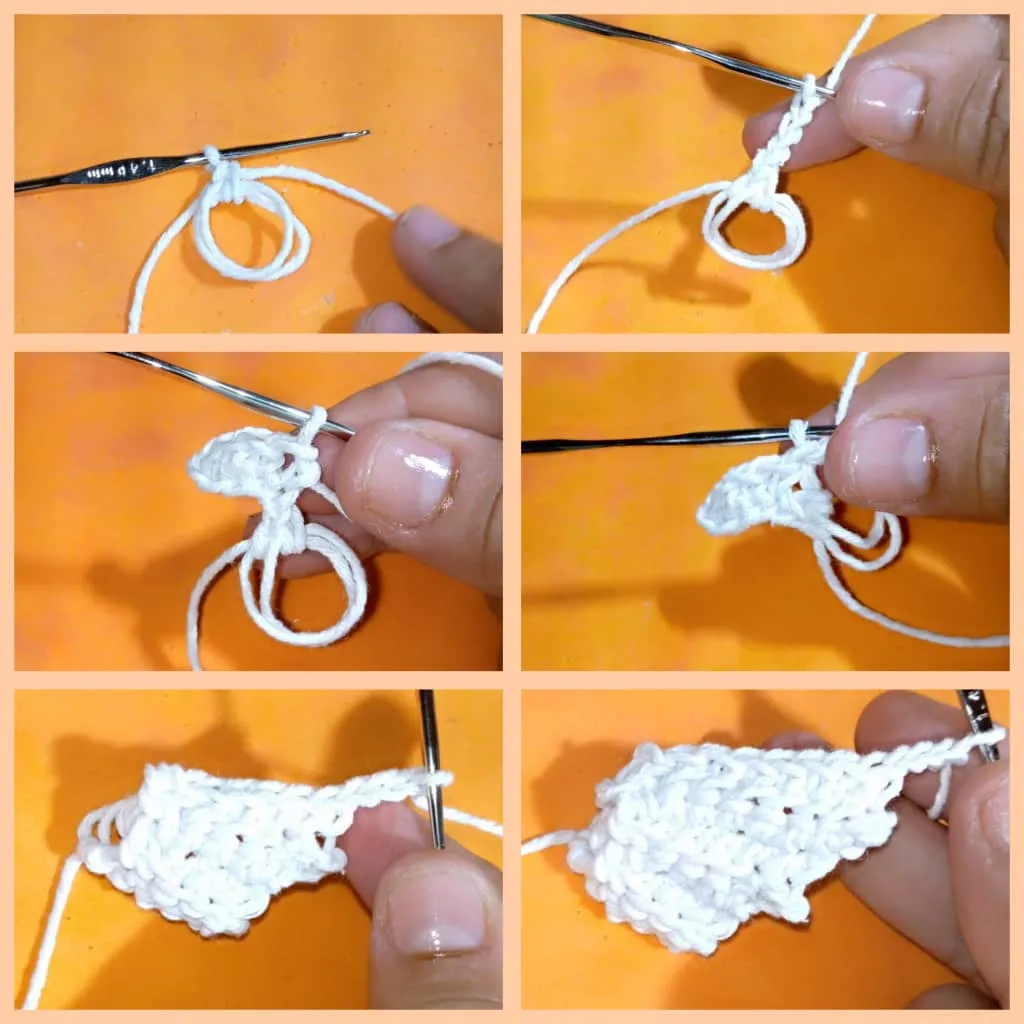
- Ya listo el cuerpo de la paloma, ahora tejemos las alas.
- Hacer un anillo mágico, levantamos cuatro cadenas , subimos una cadena mas, hacer cada punto en la cadeneta de 4 . Cerrar dentro del aro con un punto deslizado, hacemos cuatro puntos , ahora hacemos tres cadenetas , en cada vuelta aumentar tres puntos y así hacemos hasta llegar a la 6 partes del ala, cerramos con puntos deslizados.De la misma hacemos la otra ala.
- The body of the dove is ready, now we knit the wings.
- Make a magic ring, we raise four chains, we raise one more chain, make each stitch in the chain of 4 . Close inside the ring with a slip stitch, make four stitches, now we make three chain stitches, in each row increase three stitches and so we do until we reach the 6 parts of the wing, close with slip stitches, from the same we make the other wing.
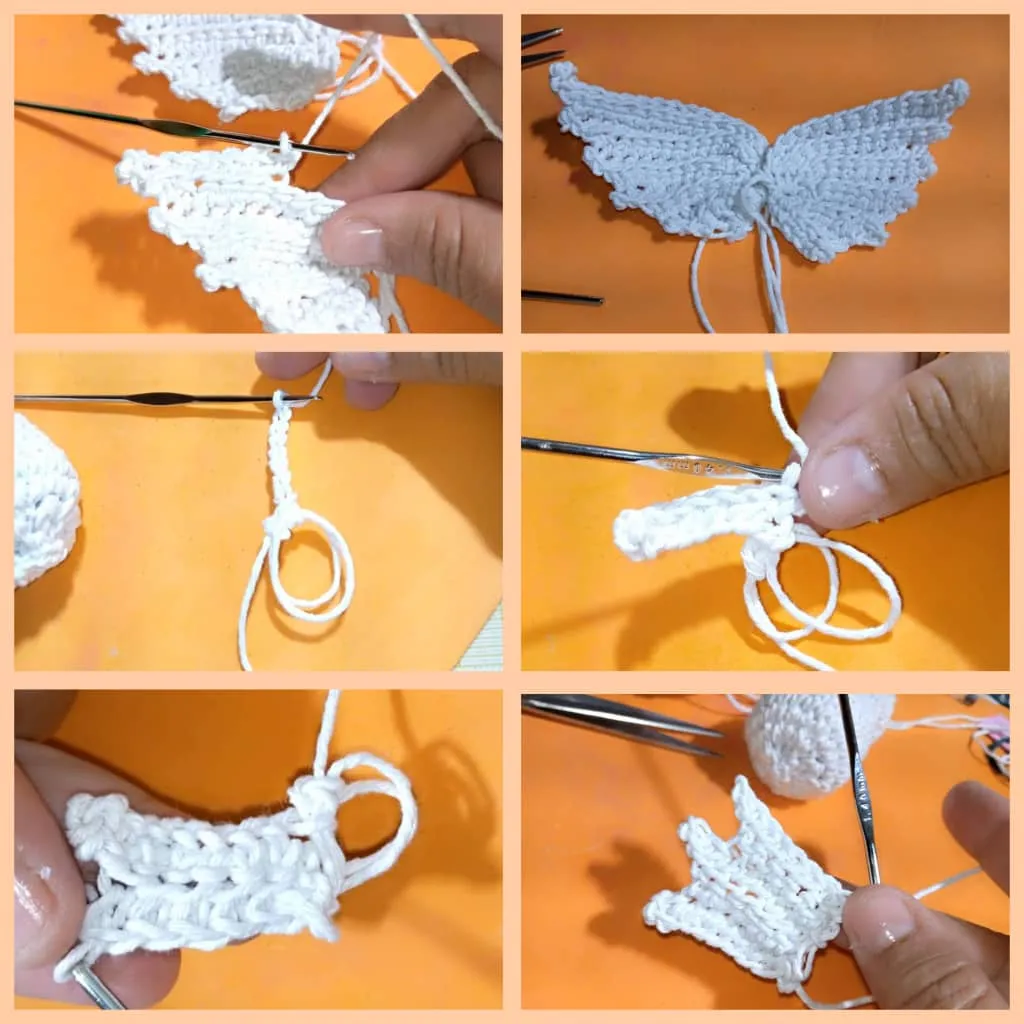
- Para hacer la cola , hacemos un anillo, subir 8 cadenetas, subimos una más, comenzamos a realizar 8 puntos bajos, cerrar con un punto deslizado. En los 8 puntos hacer 6 puntos bajos, repetimos lo mismo hasta lo que deseamos que quede la cola.Cerramos con punto deslizados.
- To make the tail, we make a ring, go up 8 chain stitches, go up one more chain stitch, start knitting 8 single crochets, close with a slip stitch, then knit 6 single crochets, repeat the same until we want the tail to be. In the 8 stitches make 6 single crochets, repeat the same until we want to make the tail, close with a slip stitch.
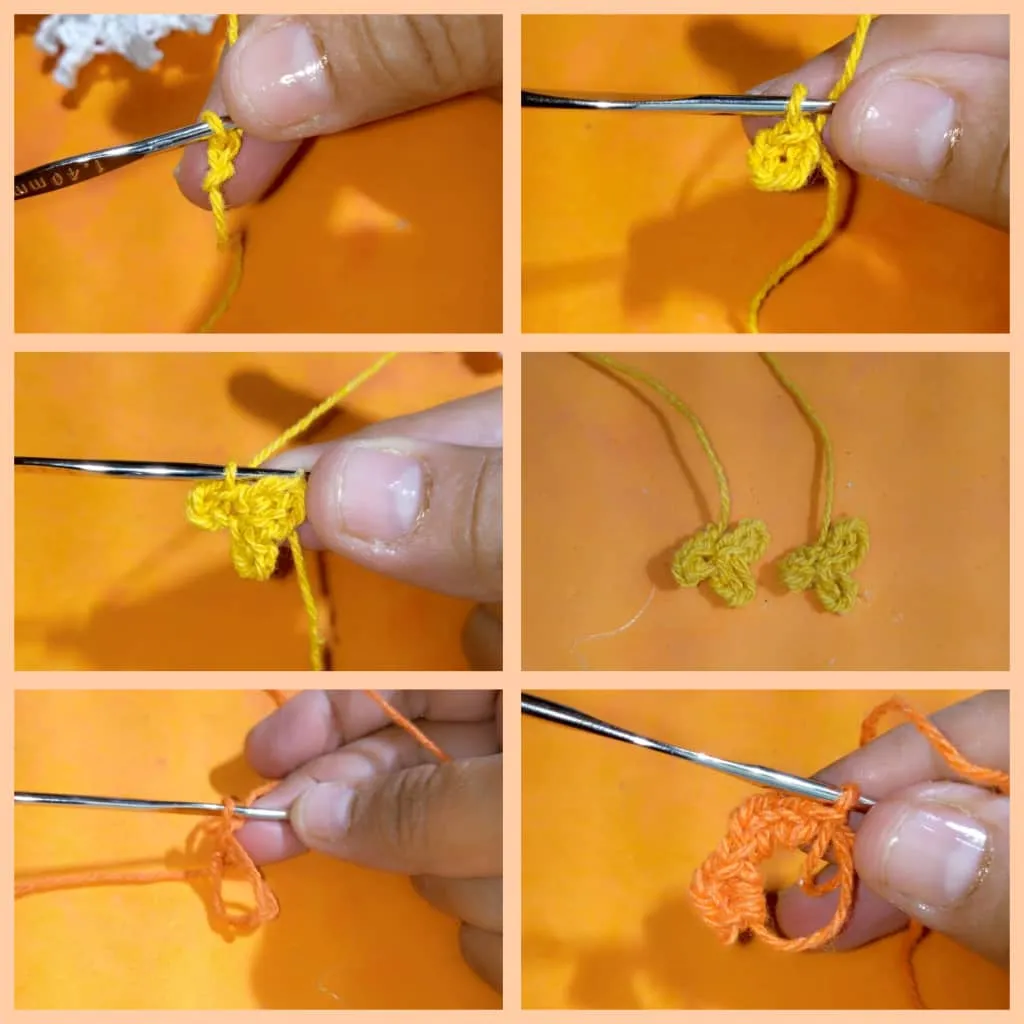
- Para hacer el pico, hacemos un anillo , hacemos tres puntos bajos ,uno deslizado, tres puntos bajos mas y uno deslizados,apretamos el hilo y cortamos con las tijeras.Luego lo doblamos.
- Para hacer las patas : levantamos 4 cadenetas y colocamos un punto en la cuarta cadeneta, hacemos 4 cadenetas más y la metemos en el punto 4 , nuevamente 4 cadenetas y metemos un punto en el cuarto punto. jalamos el hilo y recortar con las tijeras. De las patas se hace 2.
- To make the beak, we make a ring, we make three slip stitches, one slip stitch, three more slip stitches and one more slip stitch, we tighten the yarn and cut it with the scissors, then we fold it.
- To make the legs: we pick up 4 chains and place a stitch in the fourth chain, we make 4 more chains and put it in stitch 4, again 4 chains and put a stitch in the fourth stitch. we pull the thread and cut with scissors. From the legs we make 2.
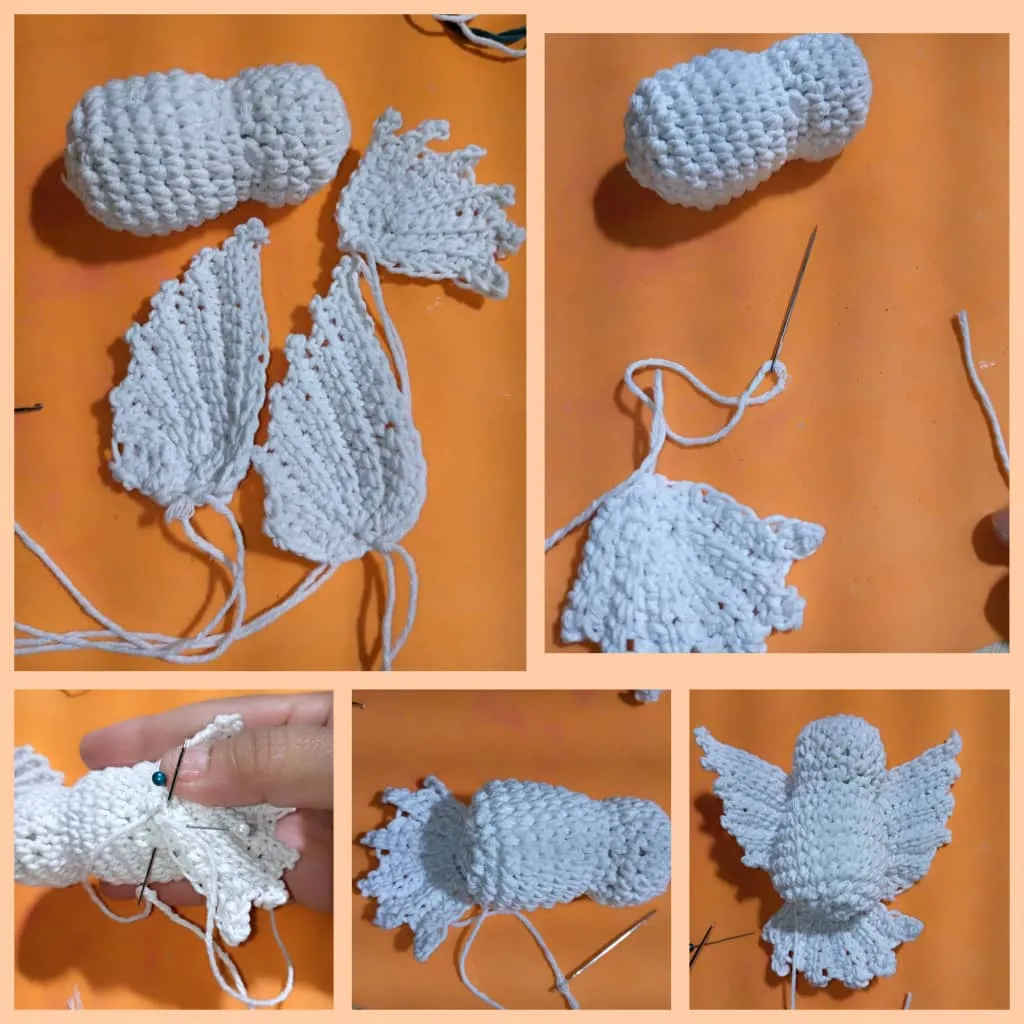
- Teniendo todo listo, colocar hilo en una aguja para colocar: los ojos, las alas y la cola.
- Y la ramita, pico y patas pegar con silicona líquido .
- Having everything ready, place thread in a needle to place: the eyes, wings and tail.
- And the twig, beak and legs glue with liquid silicone.
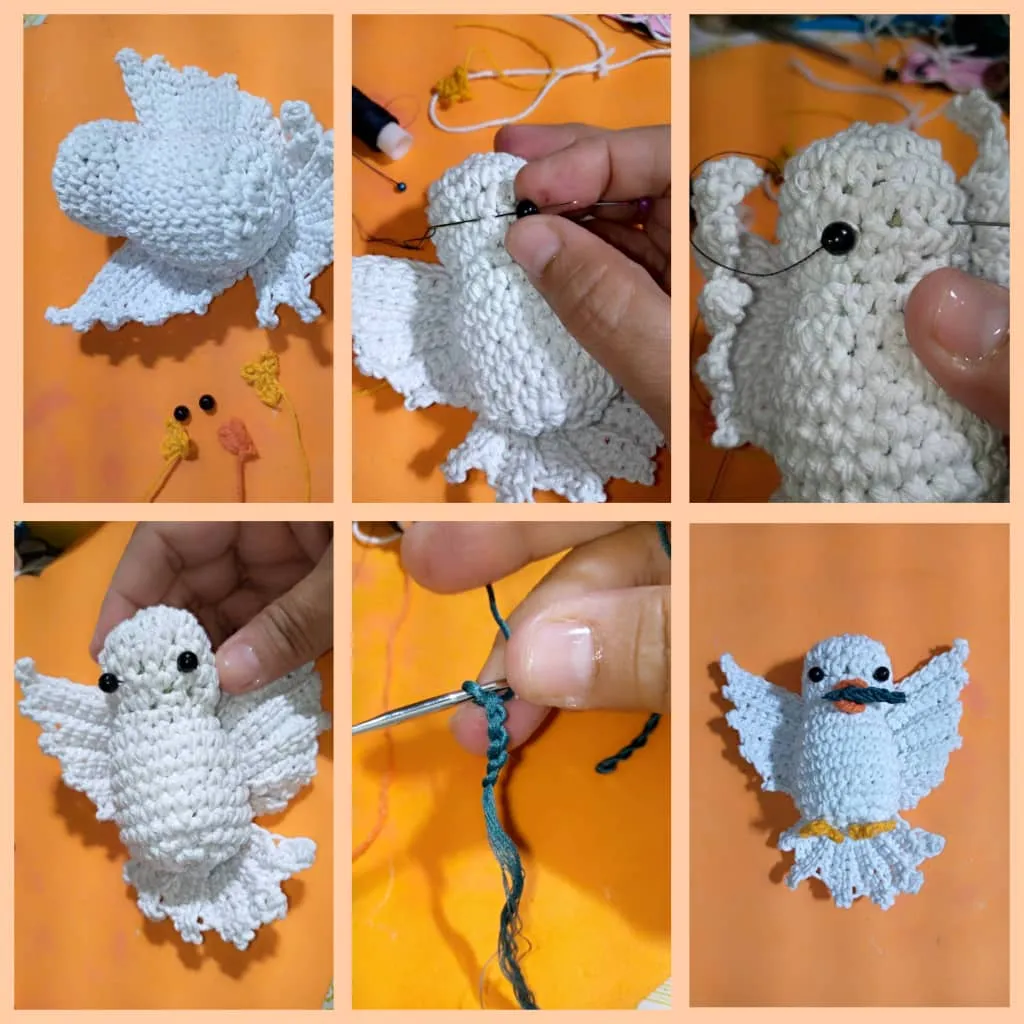
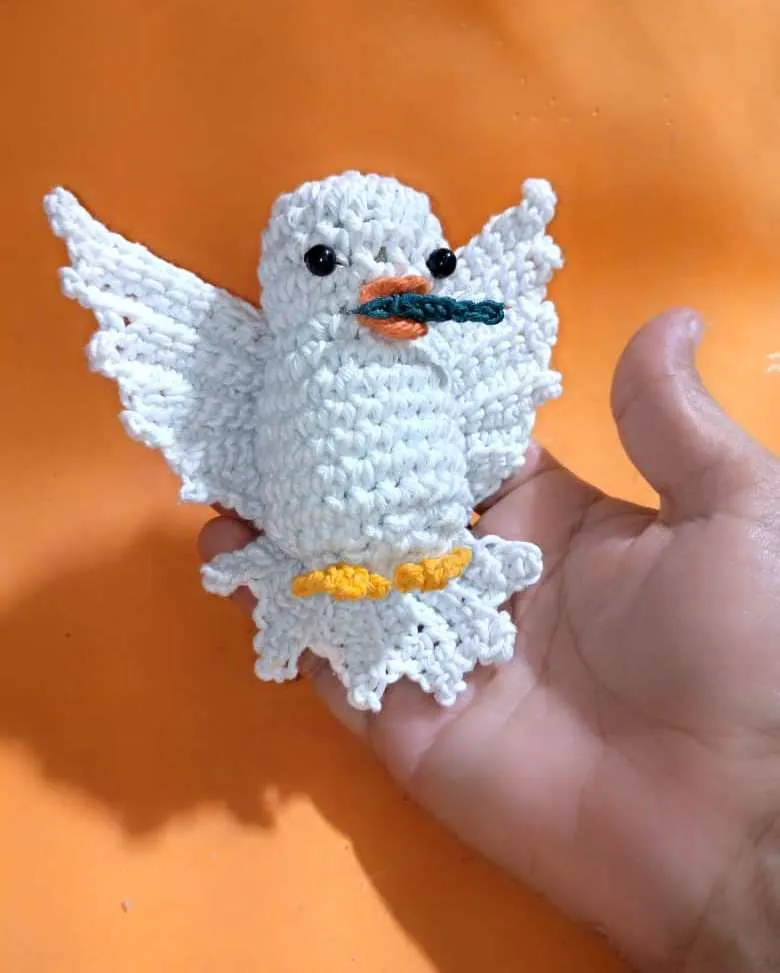
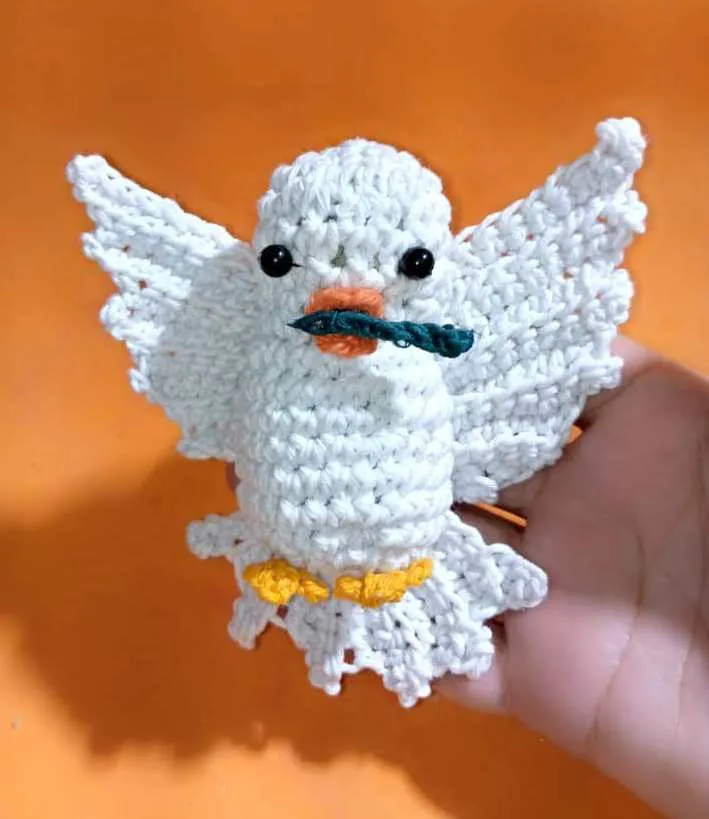
Aquí podemos observar el resultado final de la paloma de la PAZ, miren lo hermosa que quedó.
Here we can see the final result of the dove of PEACE, look how beautiful it was.
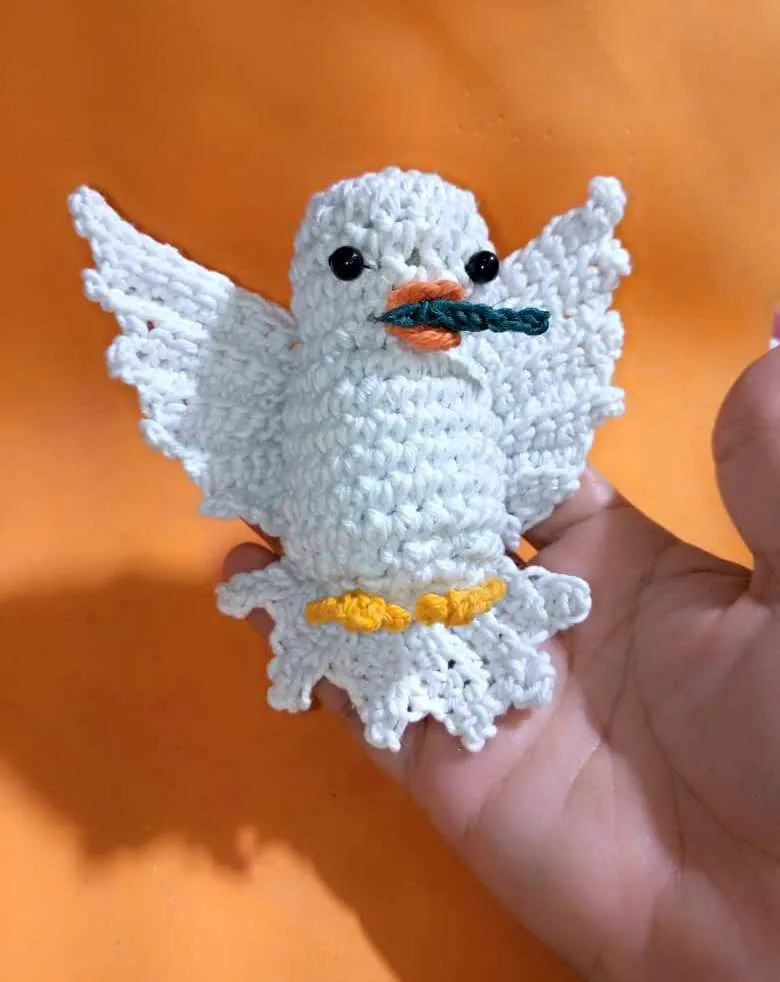
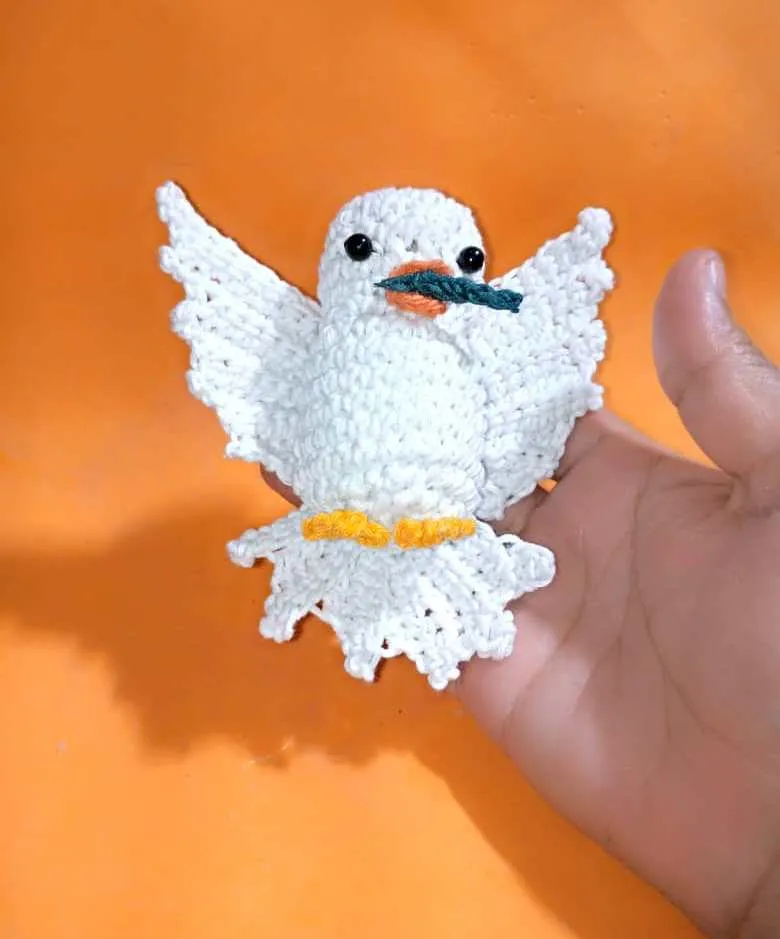
Gracias por leer y comentar mi post, muchas bendiciones , hasta la próxima.
Las fotos son mías , tomadas con teléfono Infinix, editadas con incollage y traducidas con DEEPL.
Thank you for reading and commenting on my post, many blessings, see you next time.
The photos are mine, taken with Infinix phone, edited with incollage and translated with DEEPL.
