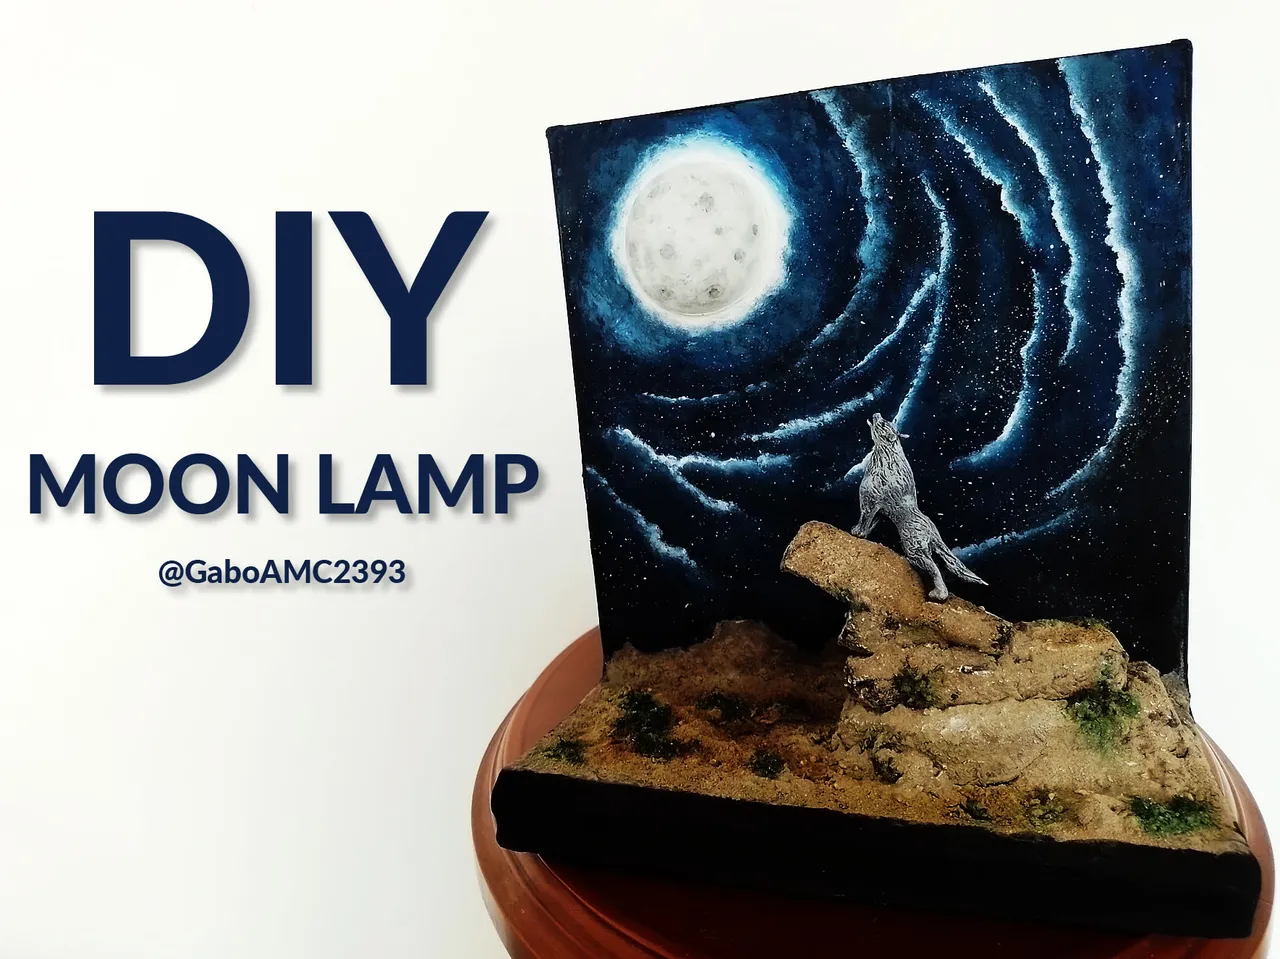

English
Greetings to all, fellow creatives. It's been a while since I've participated in a craft contest. In the ones I have participated in I have created some pretty interesting things, like Thanos, a Mechagodzilla or a King Ghidorah.
I love these contests, because they make us think about what interesting things we could do and encourage us to be creative, to exploit that quality to the maximum. Well, in order to make the most of my creativity, I decided to participate in this monthly contest of the DIYHub community.
You can read more about the contest by following this link:
@diyhub/diyhub-monthly-contest-moon-in-collaboration-with-3speak
In a contest in collaboration with 3speak, so I thought it was a good idea to participate through a video. It's only in Spanish, but you can read below the post completely translated in English, with captures of the video.
Without further ado, I present this DIY of a moon lamp.
Español
Saludos a todos, compañeros creativos. Desde hace un tiempo que no participaba en un concurso de manualidades. En los que he participado he creado cosas bastante interesantes, como a Thanos, un Mechagodzilla o un King Ghidorah.
Me encantan estos concursos, porque nos hacen pensar en qué cosas interesantes podríamos hacer y nos animan a ser creativos, a explotar al máximo esa cualidad. Pues bien, con el objetivo de explotar al máximo mi creatividad, me propuse a participar en este concurso mensual de la comunidad DIYHub.
Pueden leer más del concurso siguiendo este enlace:
@diyhub/diyhub-monthly-contest-moon-in-collaboration-with-3speak
En un concurso en colaboración con 3speak, así que me pareció buena idea participar a través de un video. Está solo en español, pero pueden leer más abajo la publicación completamente traducida en inglés, con captures del video.
Sin más dilación, les presento este DIY de una lámpara lunar.

Step by Step
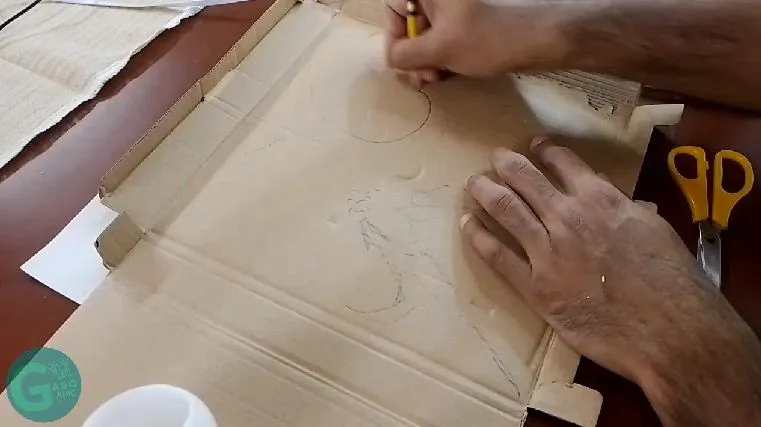
Like all craft work, one always needs a blueprint or something to tell you what you are going to do. In my case, I was planning to make a lamp in a small cardboard box, with circuitry inside, so I had to draw a plan on the box itself.
Since it was something that would be on the back of the box, I had to make the drawing upside down, as shown in the picture:
Paso a paso
Como todo trabajo de manualidad, uno siempre necesita un plano o algo que le indique qué es lo que va a hacer. En mi caso, yo planeaba hacer una lámpara en una pequeña caja de cartón, con circuitos adentro, así que debía hacer un plano en la propia caja.
Al ser algo que estaría en el reverso de la caja, tuve que hacer el dibujo al revés, tal como se observa en la imagen:
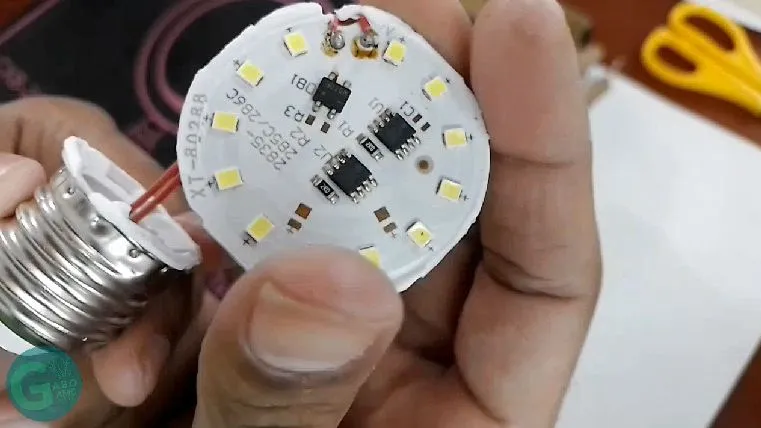
Once my plan was ready, I began to look for the electrical components that my circuit would have. I only used recycled materials.
I used a bulb that was damaged, but I repaired the circuit and used its components, since it is an LED bulb. I also used an old socket I had in storage and the protective cover of the same LED bulb.
Una vez listo mi plano, comencé a buscar los componentes eléctricos que tendría mi circuito. Solo usé materiales reciclados.
Usé un bombillo que estaba dañado, pero le reparé el circuito y usé sus componentes, ya que es un bombillo LED. Usé también un viejo sócate que tenía guardado y la cubierta protectora del mismo combillo LED.
 |  |
|---|
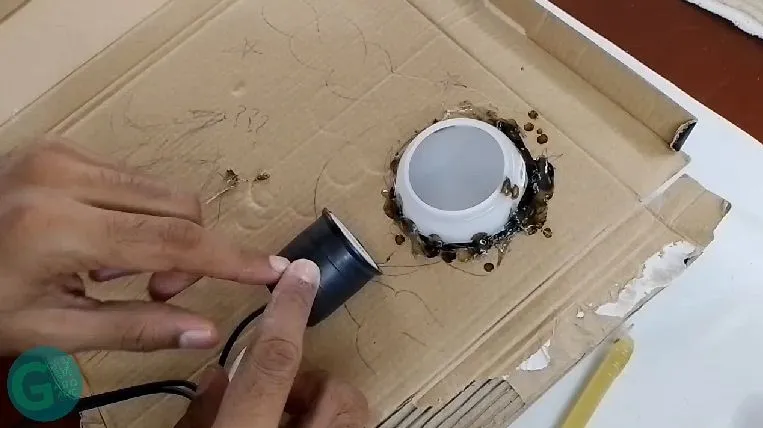
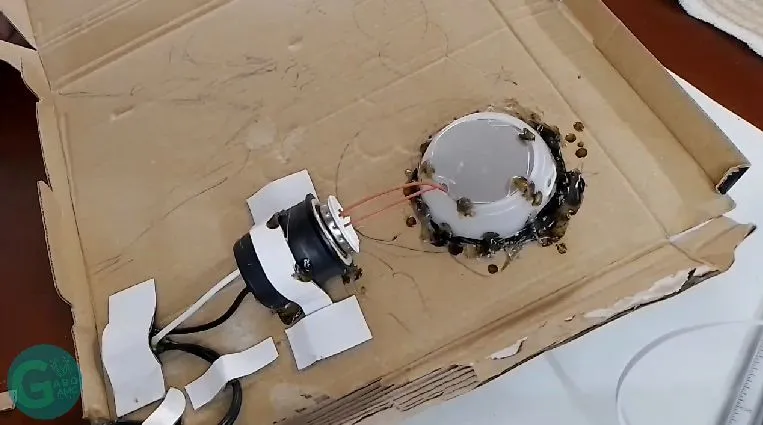
Below you can see how the entire circuit was installed in place, with cardboard pieces holding everything in place, in case the hot silicone failed.
A continuación pueden ver cómo quedó todo el circuido una vez instalado en su lugar, con piezas de cartón sujetando todo, en caso de que la silicón caliente fallara.
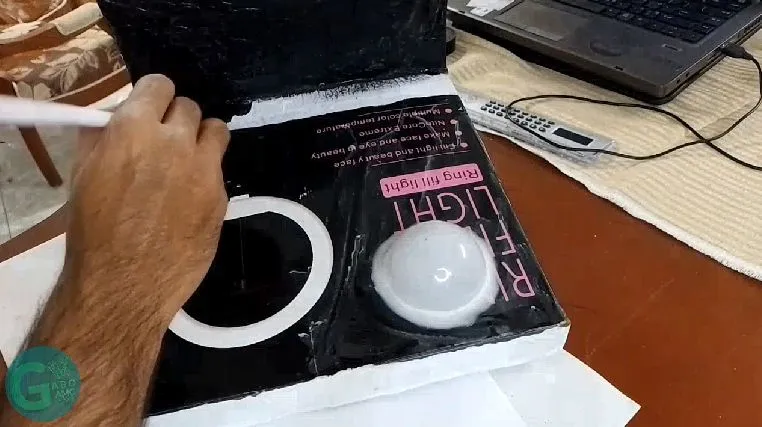
This is a two-piece lamp, the base and the lamp itself. The base is on the left, a small wooden box that I cut in half; the lamp on the right, is the one with the circuits that I already showed you.
To join both pieces I used silicone, glue and cardboard pieces as support.
Esta es una lámpara de dos piezas, la base y la propia lámpara. La base está a la izquierda, una pequeña caja de madera que corté a la mitad; la lámpara a la derecha, es la que tiene los circuitos que ya les mostré.
Para unir ambas piezas usé silicón, pegamento y piezas de cartón como soporte.
 |  |
|---|
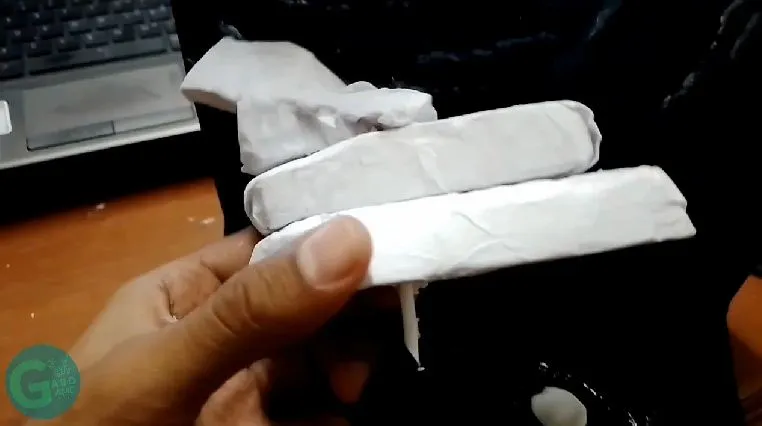
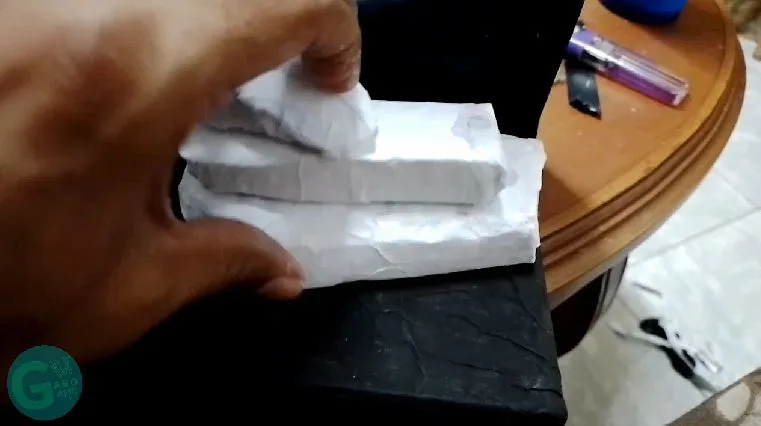
I also used paper and glue to reinforce the joints. This mixture, believe it or not, can be really strong in this type of work, especially if you use several layers of paper and glue, one on top of the other.
También usé papel y pegamento para reforzar las uniones. Esta mezcla, aunque no lo crean, puede ser realmente resistente en este tipo de trabajos, sobre todo si se usan varias capas de papel y pegamento, una encima de la otra.
 |  |
|---|
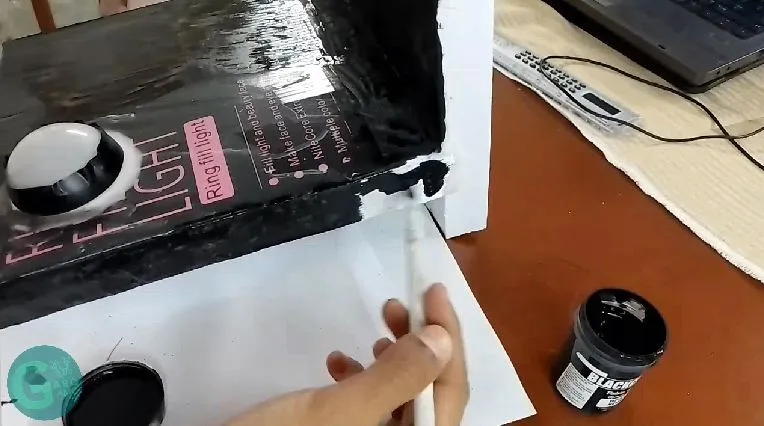
Once the glue was dry, and the paper hardened, I began to paint. I used black paint for the base, because it is a night sky that I am going to draw.
I painted the whole lamp with this paint, which, being covered with paper and glue, made the painting job easier. If I had not done it, I would have spent more paint, because the material of the boxes makes it difficult for the paint to adhere.
Una vez seco el pegamento, y endurecido el papel, comencé a pintar. Usé pintura negra para la base, pues es un cielo nocturno el que voy a dibujar.
Toda la lámpara la pinté con esta pintura, que al estar cubierta con papel y pegamento, facilitó el trabajo de pintura. Si no lo hubiese hecho, habría gastado más pintura, porque el material de las cajas dificulta que la pintura de adhiera.
 |  |
|---|
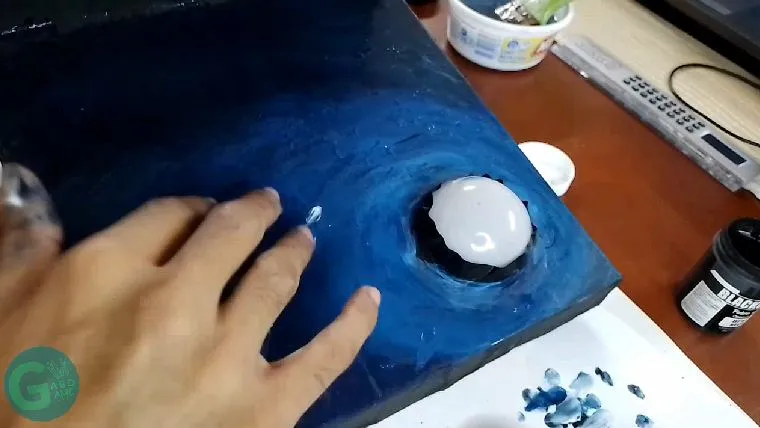
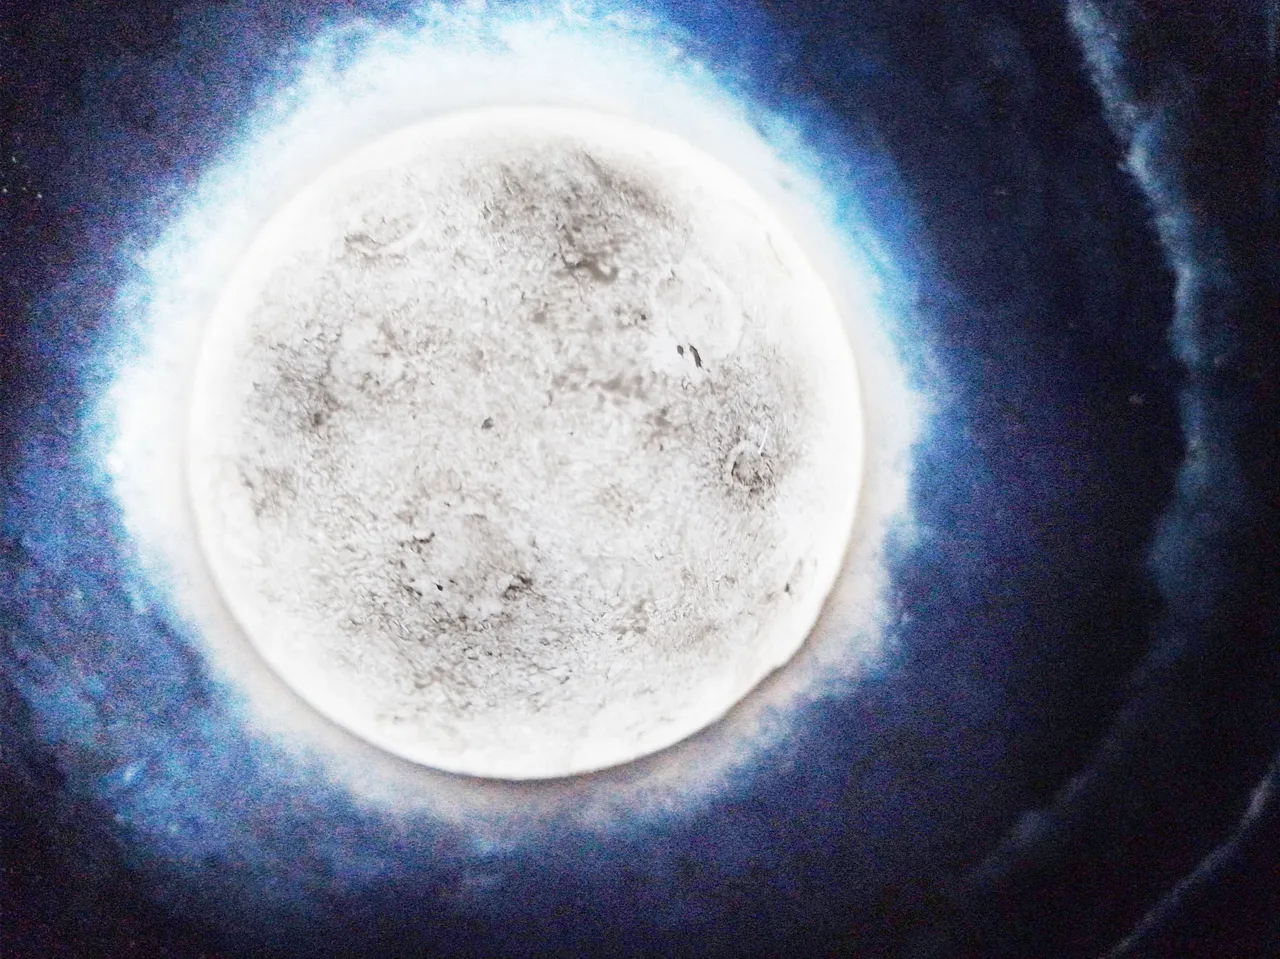
I also covered the bulb bulb, because this, in addition to illuminate, will be the moon of my diorama.
También cubrí el foco del bombillo, pues este, además de iluminar, será la luna de mi diorama.
 |  |  |
|---|
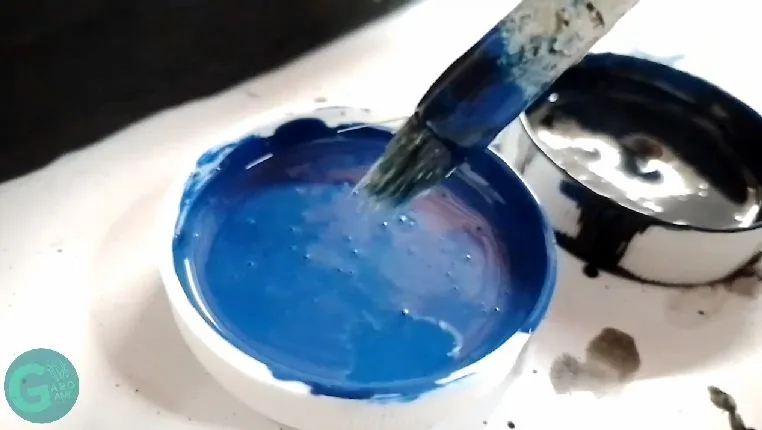
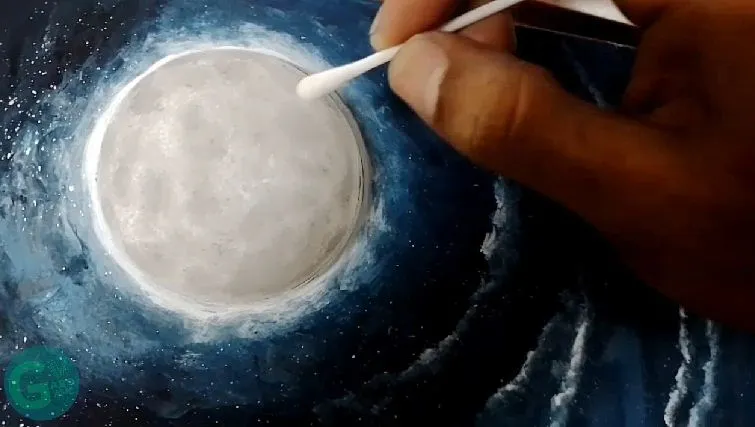
Once the black color was dry, I started using blue and other scales of blue and white, to paint the night sky that will accompany the moon. You can see this complete process in the video, starting at minute 03:50.
Una vez seco el color negro, comencé a usar azul y otras escalas de azul y blanco, para pintar el cielo nocturno que acompañará la luna. Pueden ver este proceso completo en el video, a partir del minuto 03:50.
 |  |  |
|---|
I made a piece of anime (polystyrene) covered with paper. I glued all the pieces with silicone and attached them to the front base of the lamp, as these will be the rocks on which the wolf of the diorama will stand.
Fabriqué una pieza de anime (poliestireno) cubierta de papel. Pequé todas las piezas con silicón y las fije en la base frontal de la lámpara, pues estas serán las rocas sobre las que estará el lobo del diorama.
 |  |
|---|
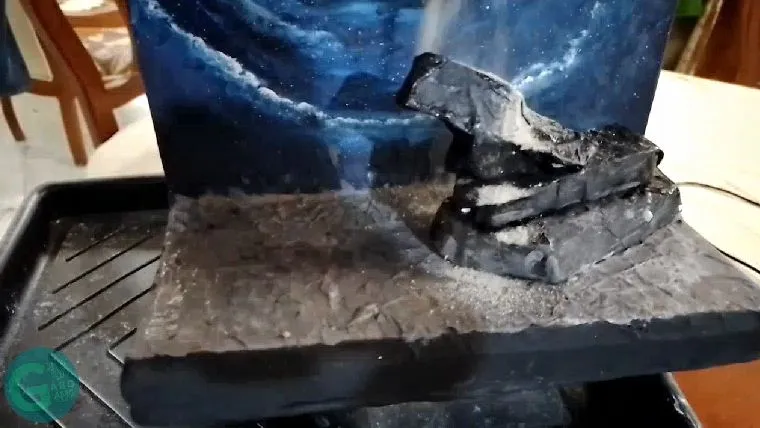
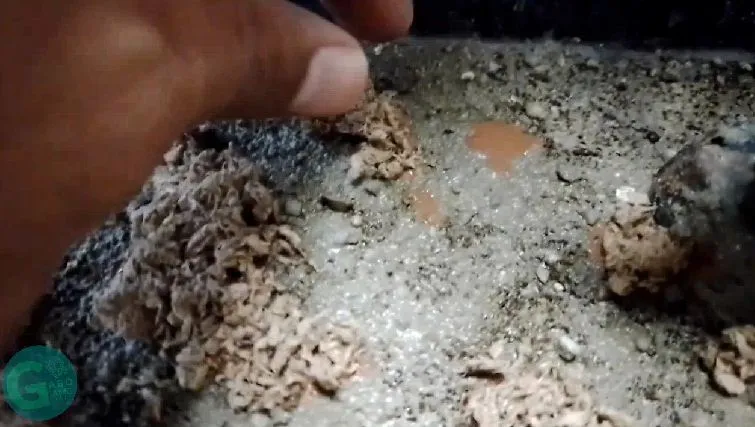
To give it that rustic effect, similar to a real stone, I covered them with paint mixed with glue and then added a material that is used to smooth exterior walls.
With the humidity of the paint, this material will dry and act as soil, like very fine sand. You can see this entire process at minute 05:53 of the video.
Para darle ese efecto rústico, parecido a una piedra real, las cubrí con pintura mezclada con pegamento y luego agregué un material que se usa para frisar paredes exteriores.
Con la humedad de la pintura, este material se secará y actuará como tierra, como arena muy fina. Pueden ver este proceso completo en el minuto 05:53 del video.
 |  |
|---|
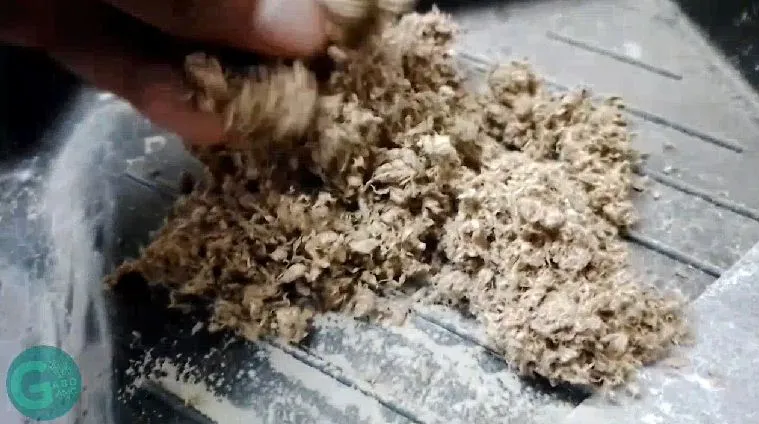
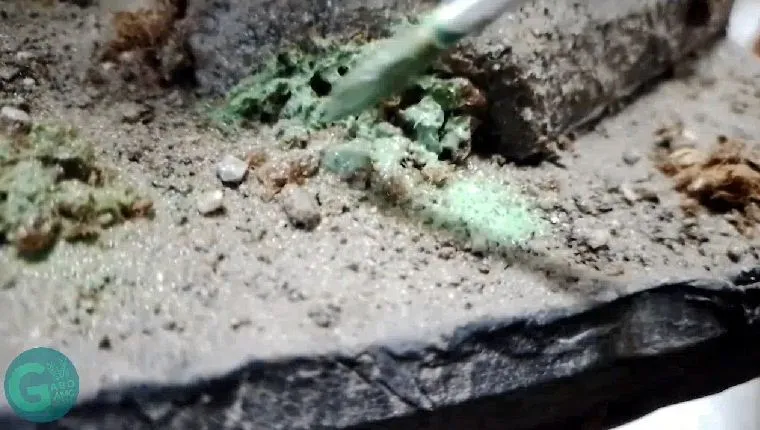
I used shredded cardboard to create grass. I took piles of the cardboard and glued it onto the rustic surface of the base using paint mixed with glue.
Usé cartón molido para crear pasto. Tomé montones del cartón molido y lo pequé sobre la superficie rústica de la base usando pintura mezclada con pegamento.
 |  |
|---|
Once the glue was dry, I used very diluted green paint to give color to the ground cardboard. You can see this process at minute 06:35 of the video.
Una vez seco el pegamento, usé pintura verde muy diluida para darle color al cartón molido. Pueden ver este proceso en el minuto 06:35 del video.
 |  |
|---|
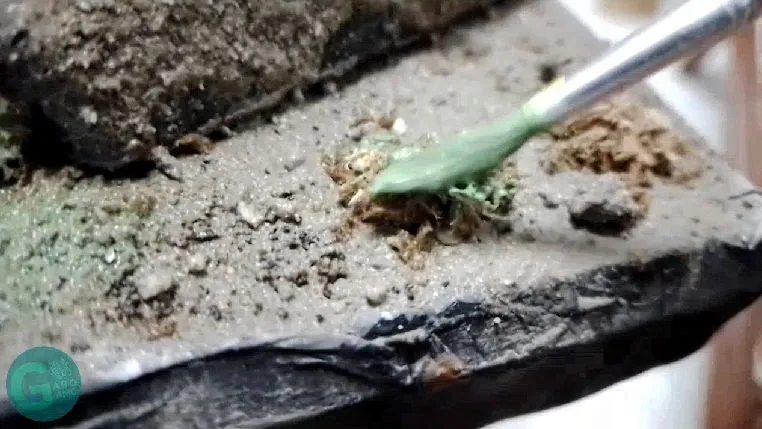
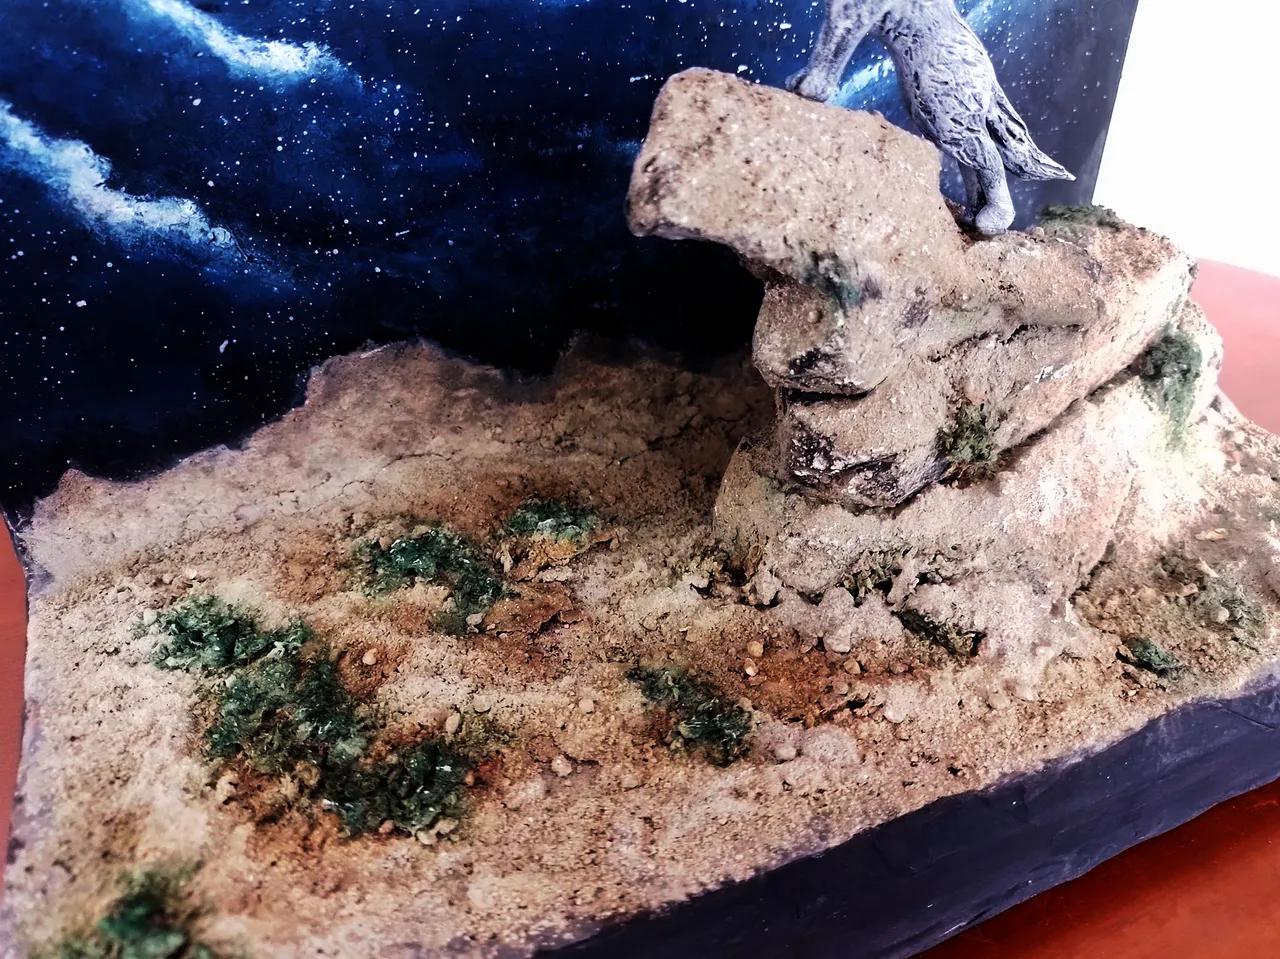
This is what the diorama looked like once all the materials had dried.
Así quedó todo el diorama una vez que todos los materiales secaron.

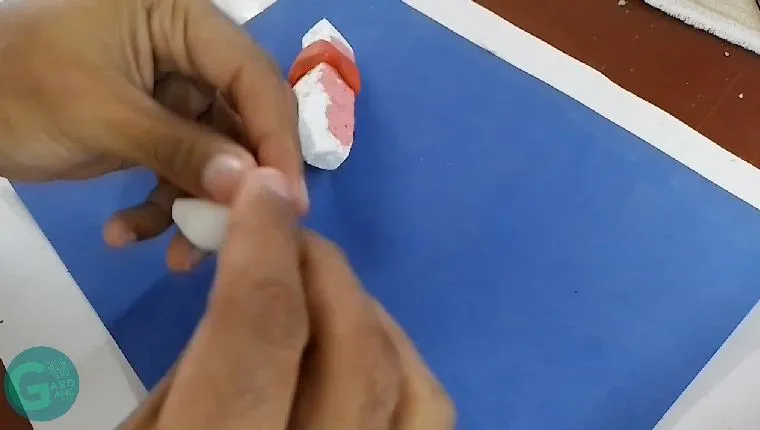
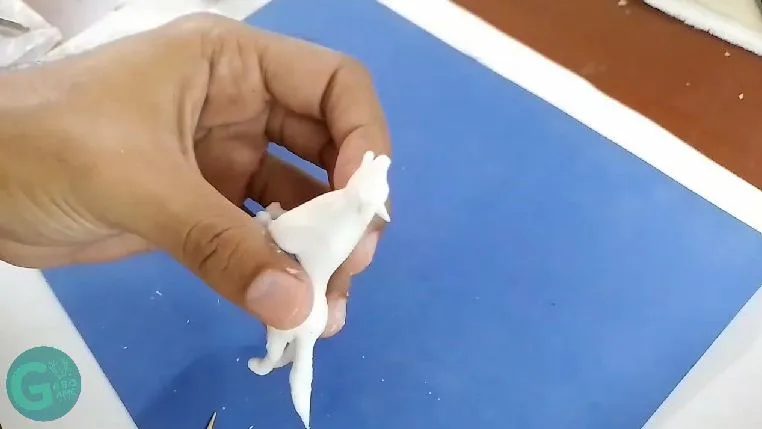
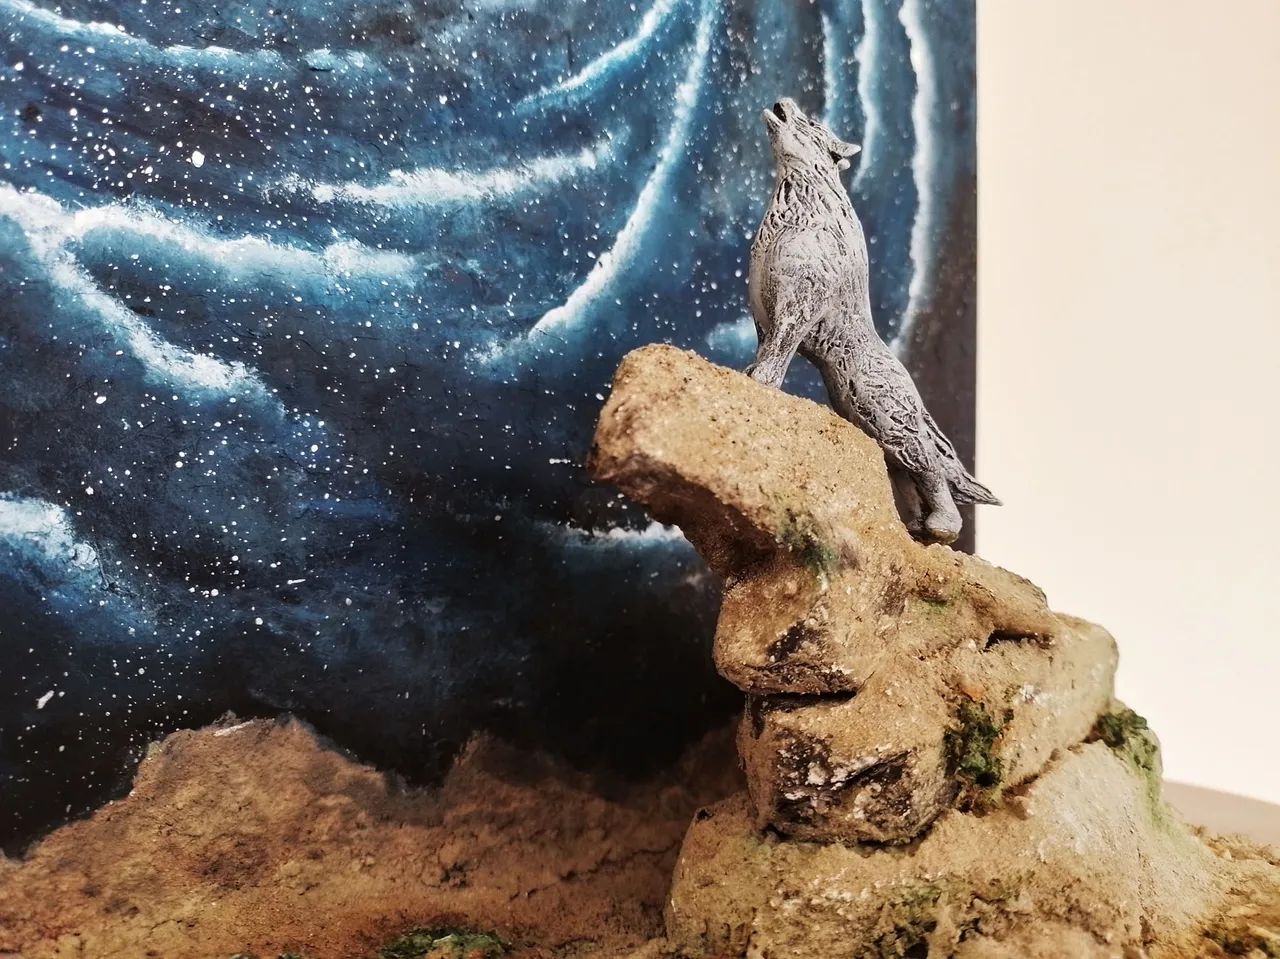
The last thing I made was the wolf. For this wolf I used flexible dough. I don't normally use flexible dough to make things in hive, but I bought some and I'll tell you more about it later...
As I told you, I used this material to make the wolf. You can see the complete process of molding the wolf at minute 07:17 of the video.
Lo último que hice fue el lobo. Para este lobo usé masa flexible. Normalmente no uso masa flexible para hacer cosas en hive, pero compré un poco y ya les hablaré de eso más adelante...
Como les dije, usé este material para hacer el lobo. Pueden ver el proceso completo de moldeado del lobo en el minuto 07:17 del video.
 |  |
|---|
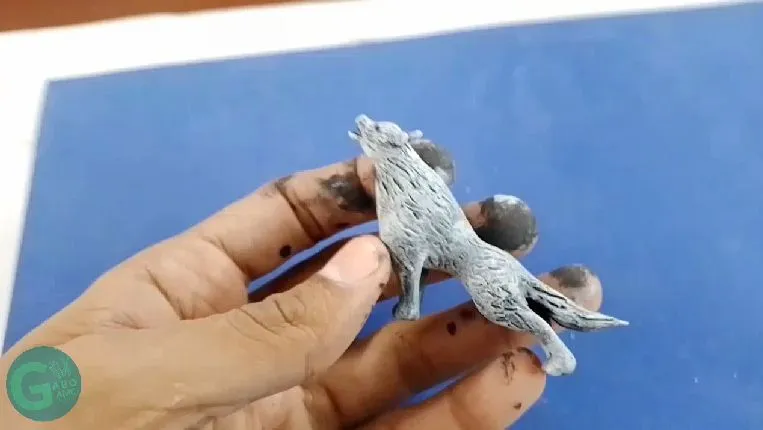
Once the wolf was ready, with all the molding and painting work finished, I placed it on the tip of the stone that was up to the top and glued its legs with hot silicone.
Una vez listo el lobo, con todo el trabajo de moldeado y pintado terminado, lo coloqué en la punta de la piedra que estaba hasta el tope y pequé sus patas con silicón caliente.
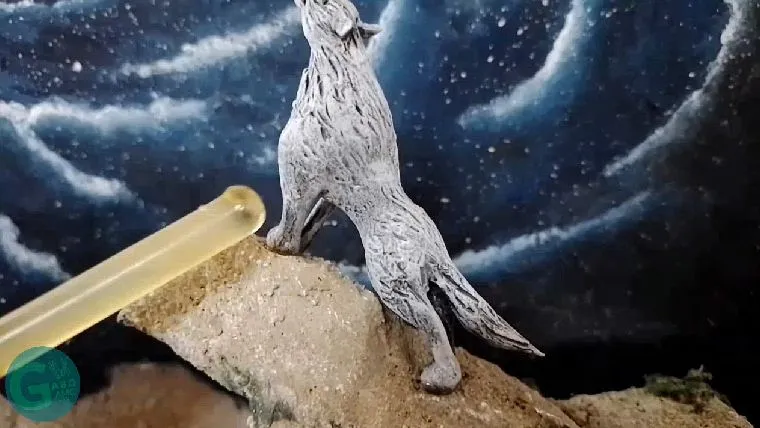
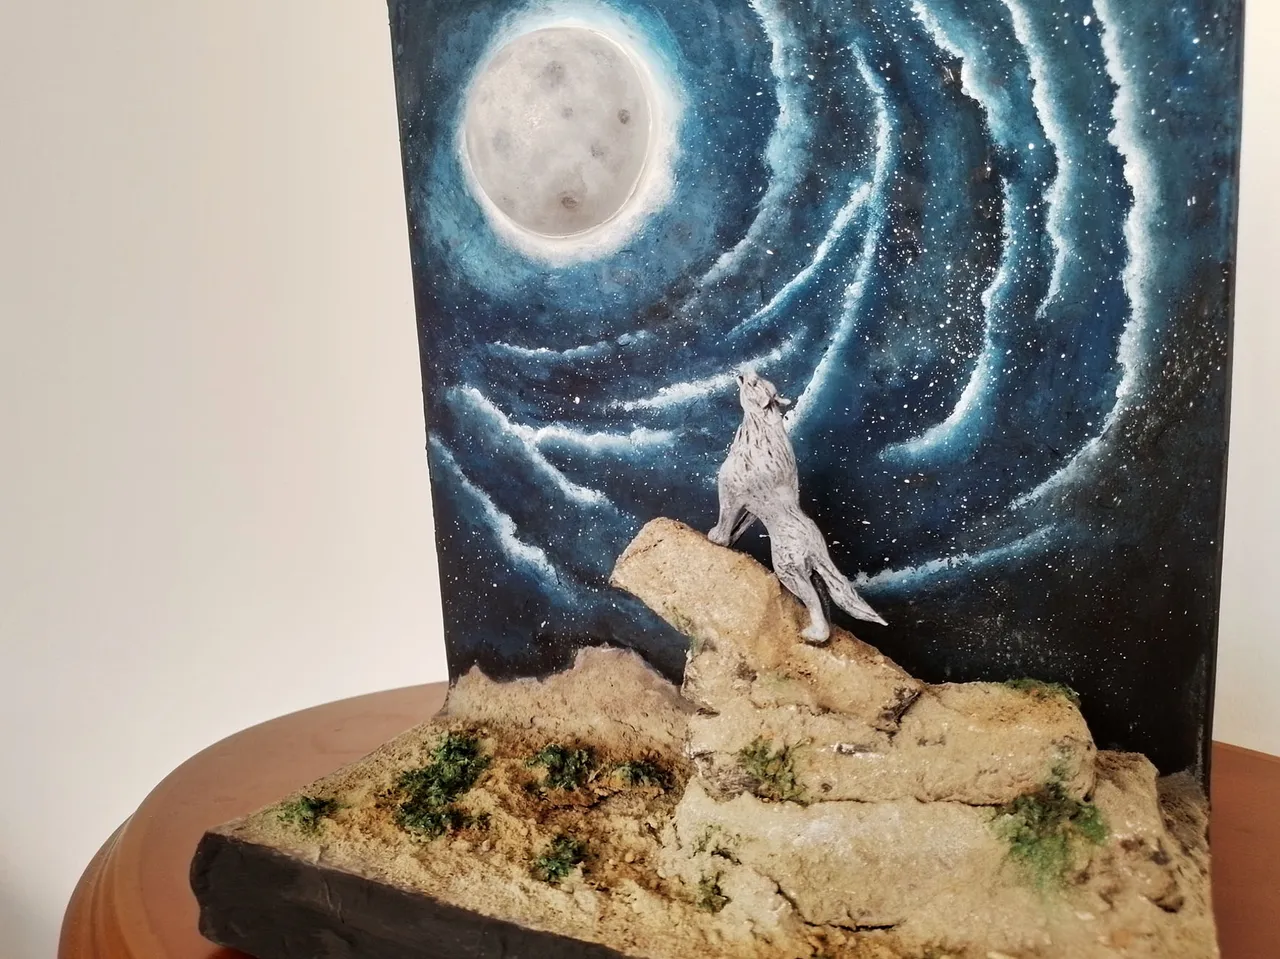
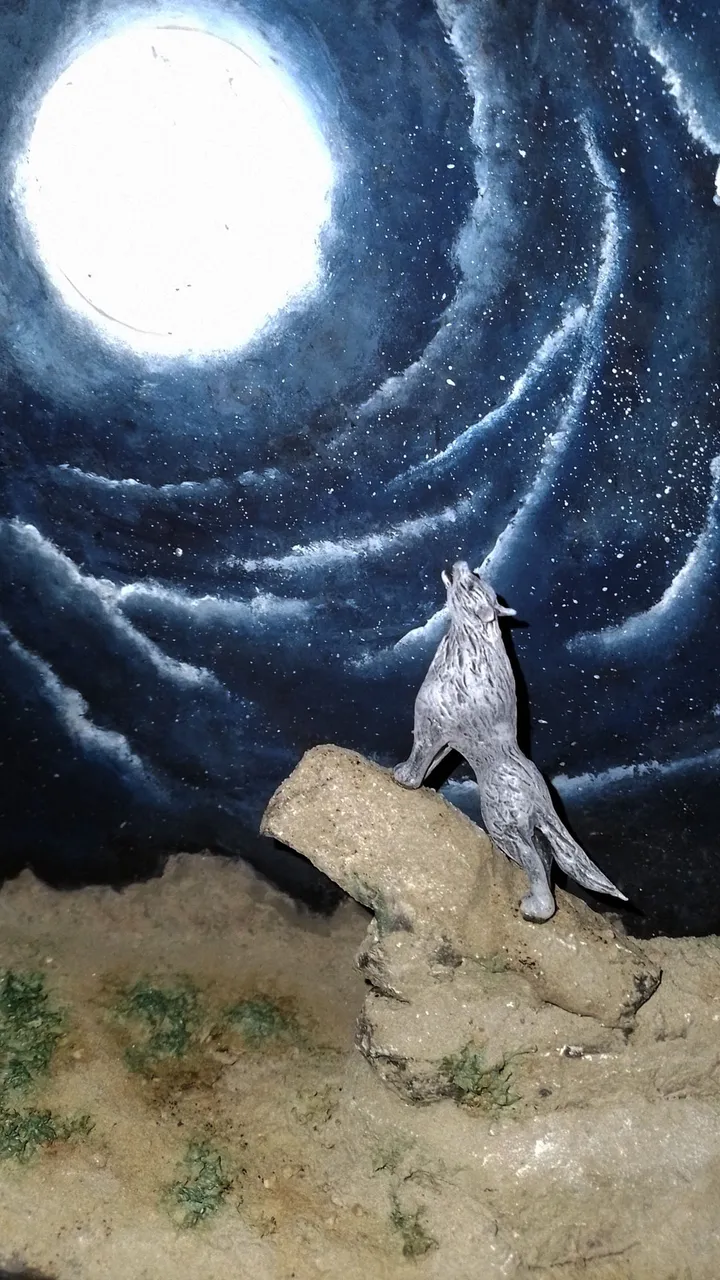
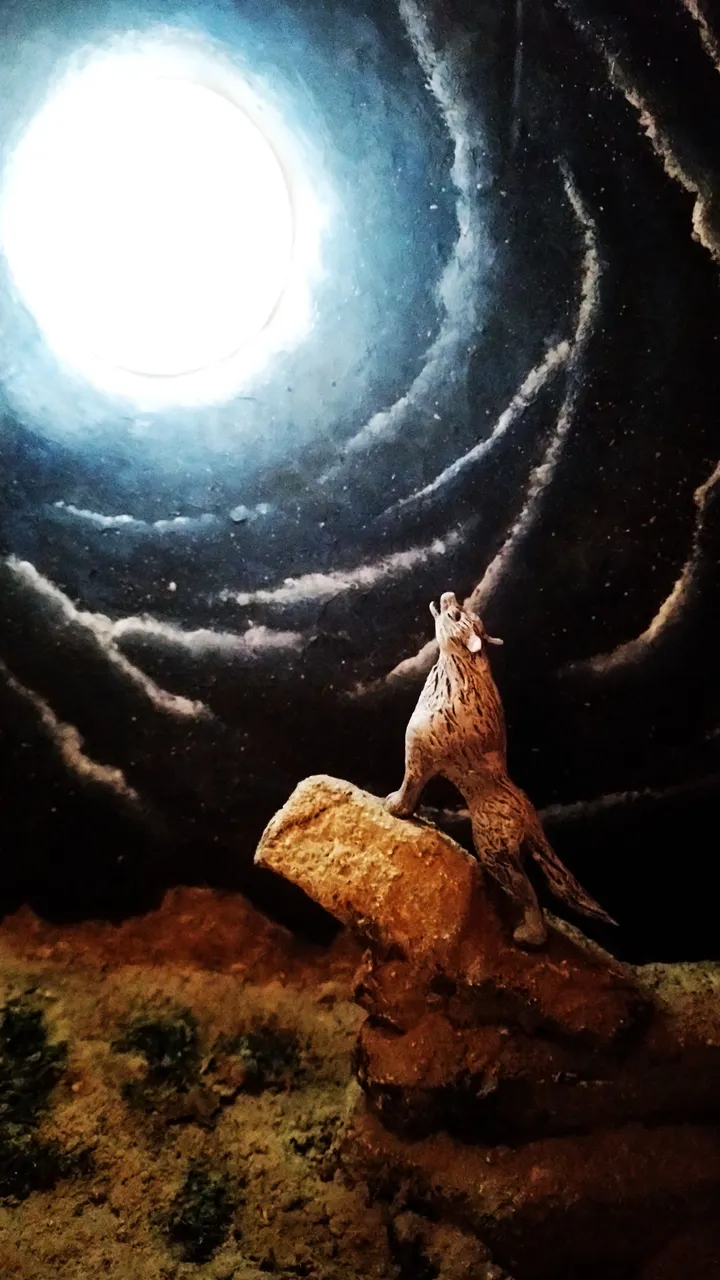
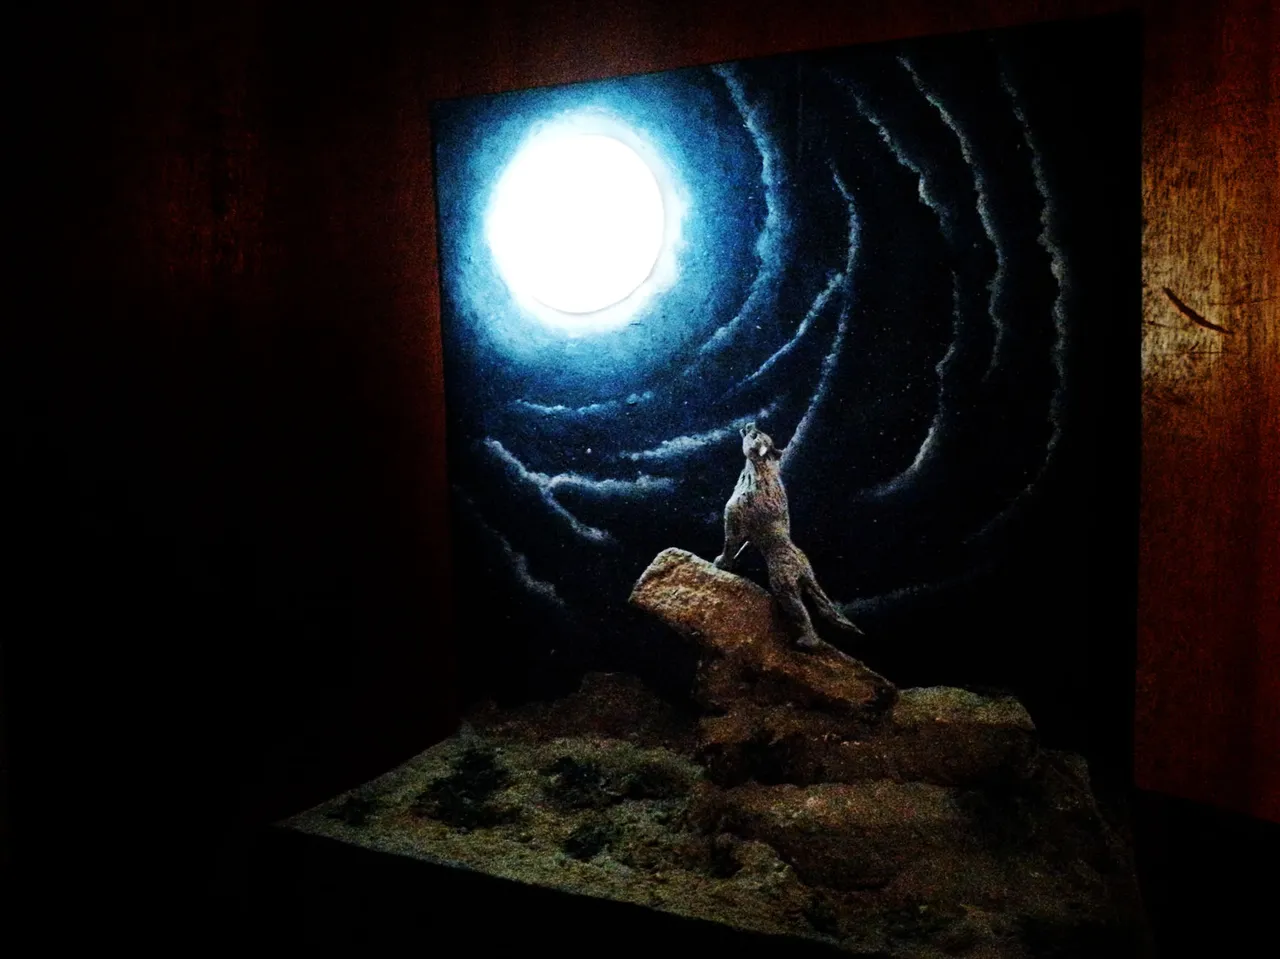
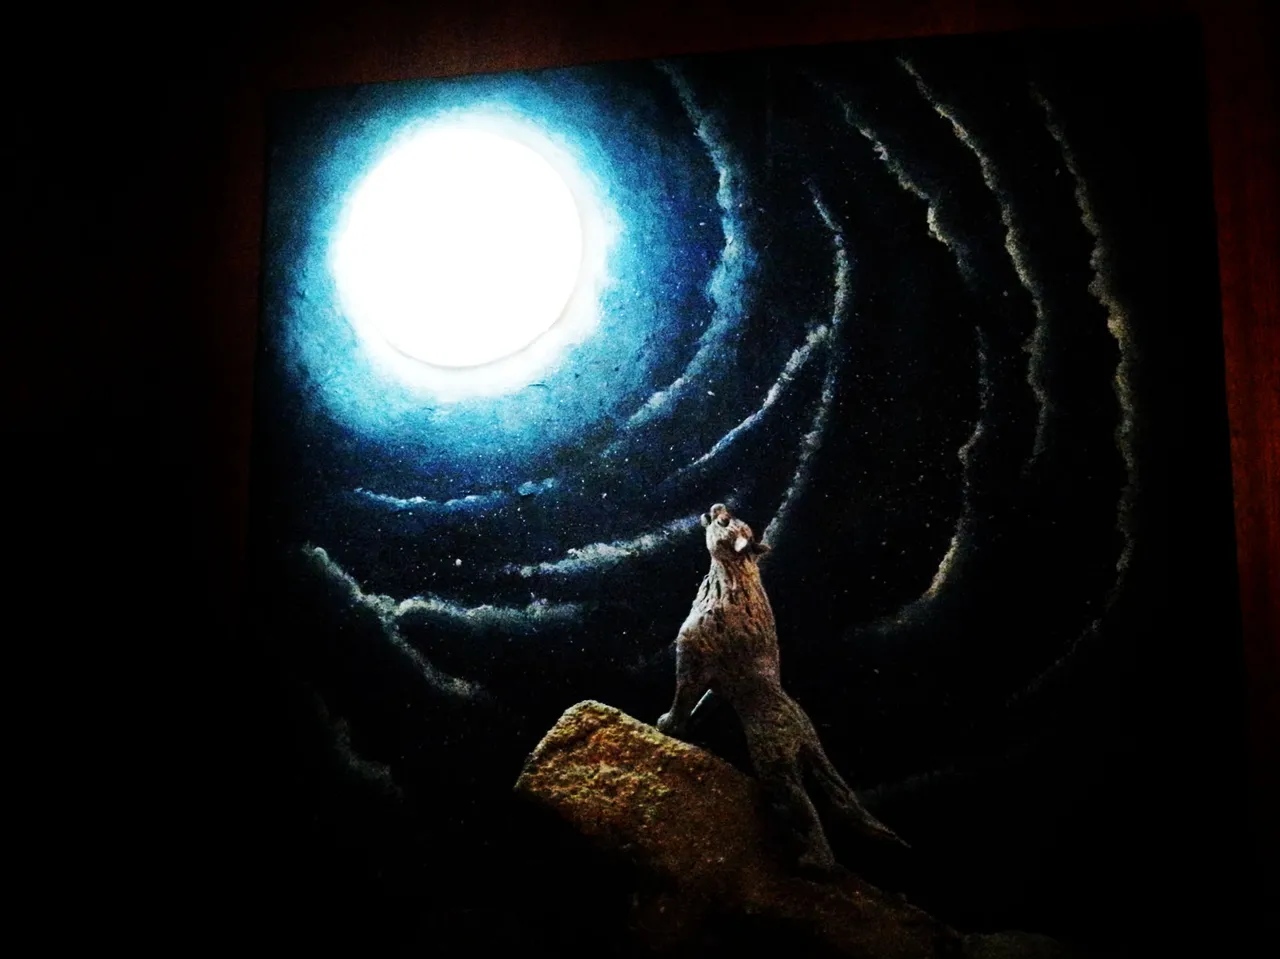
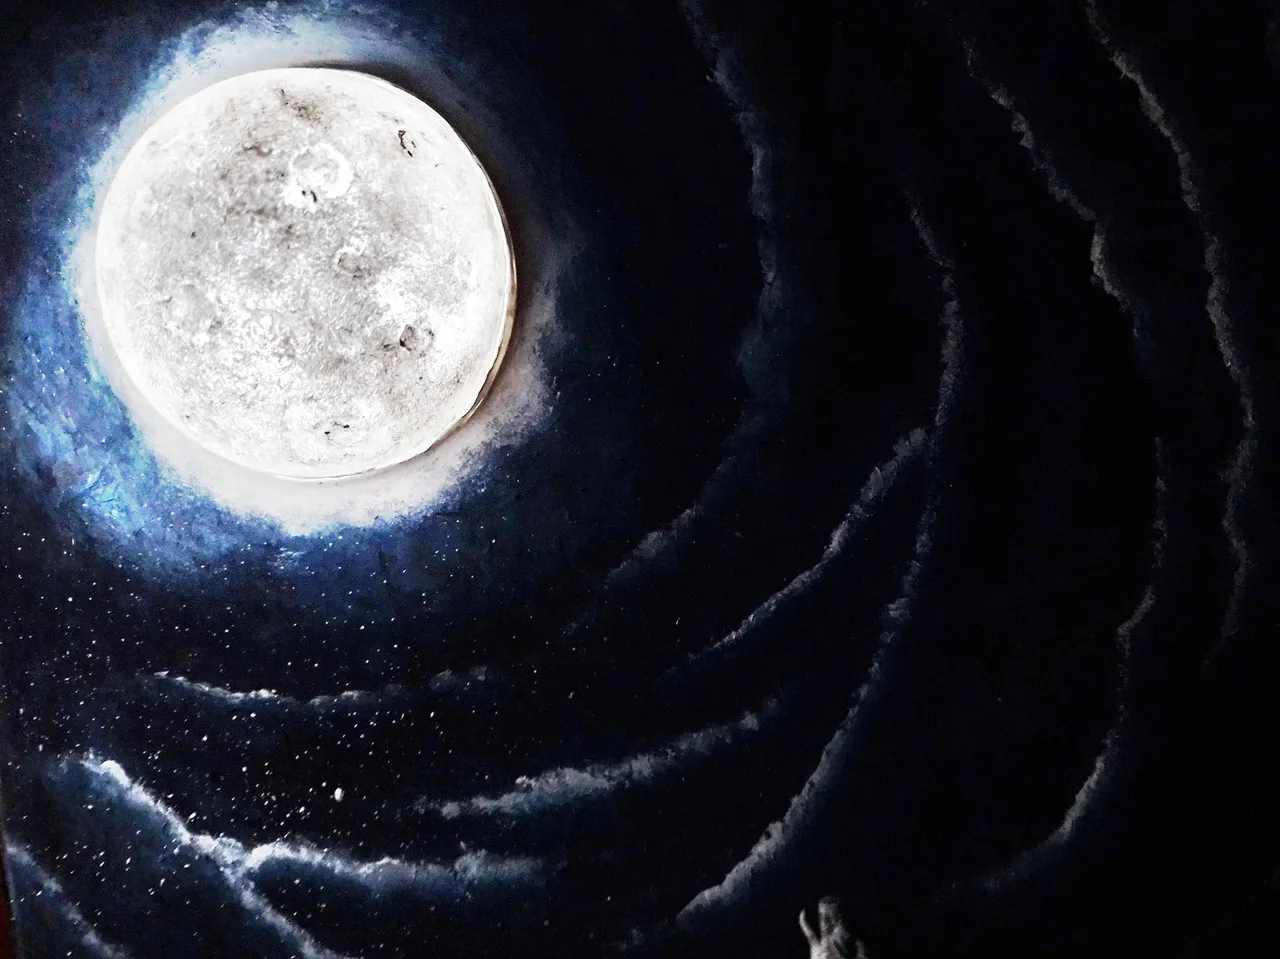
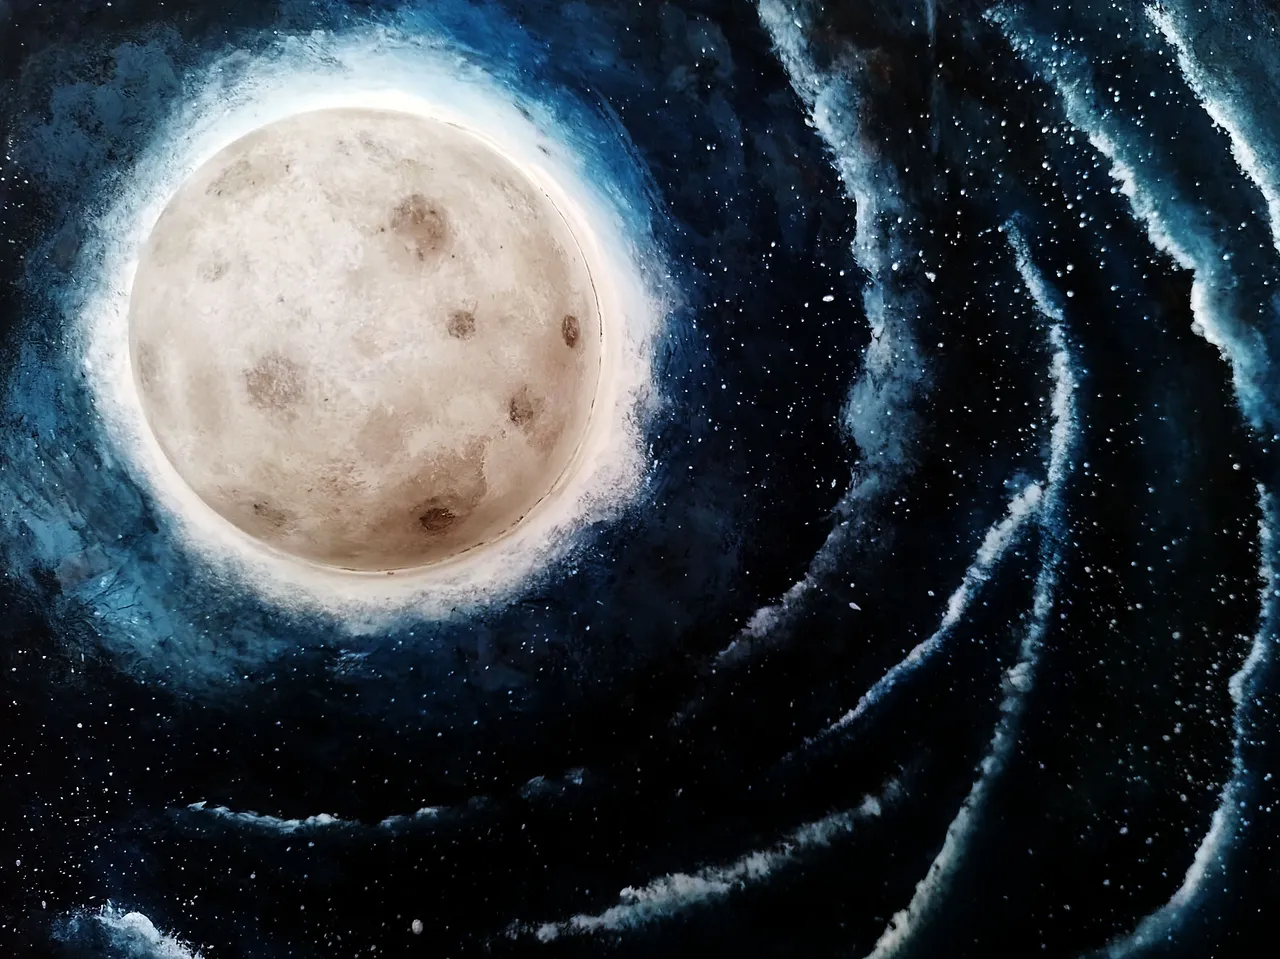
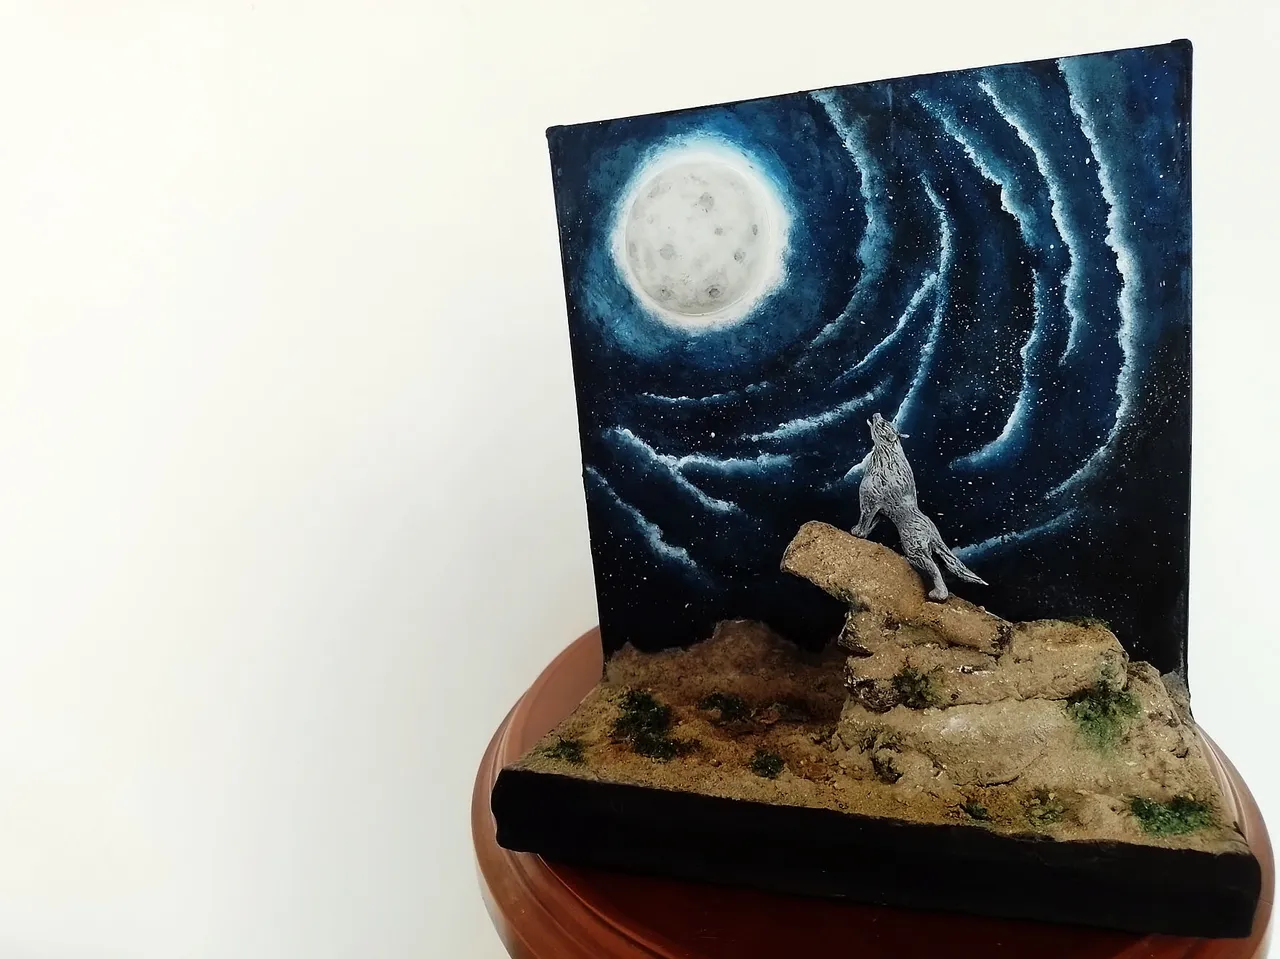
In this way the diorama of my lamp was completely finished, giving by finalized this work.
Below I leave a series of photographs of the final result:
De esta manera el diorama de mi lámpara quedó completamente terminado, dando por finalizado este trabajo.
A continuación les dejo una serie de fotografías del resultado final:
 |  |

Well friends, that's all for now. For me it has been a pleasure to have shared with you all this work that took me several days to complete.
I hope you liked it, I invite you to leave your opinions below in the comments, as always I will be happy to read them.
Without further ado, I'll say goodbye then....
See you next time!
Bien amigos, esto ha sido todo por ahora. Para mi ha sido un placer haber compartido con ustedes todo este trabajo que me llevó varios días completar.
Espero que les haya gustado, los invito a dejar sus opiniones abajo en los comentarios, como siempre estaré encantado de leerlos.
Sin más que agregar, me despido entonces...
¡Hasta la próxima!
Fuente de la música / Music Source
Obra: Cuento de Hadas
https://www.fiftysounds.com/es/musica-libre-de-derechos/cuento-de-hadas.html
Obra: Buenas Vibraciones
https://www.fiftysounds.com/es/musica-libre-de-derechos/buenas-vibraciones.html
Obra: Haz Que Pase
https://www.fiftysounds.com/es/musica-libre-de-derechos/haz-que-pase.html
Música de https://www.fiftysounds.com/es/
▶️ 3Speak