
Have a beautiful and warm day my friends, at least here in my town, I hope you are doing great today, I am back with you showing you a nice detail that I have wanted to do for days now because I was inspired by many beautiful images on Instagram regarding making this type of roses.
Although they are pink, well the images I saw were encapsulated within a very beautiful glass-type base and with little lights, but the truth is I did not have these materials so I made it with half a plastic bottle as a centerpiece decorated with a nice black lace to give it a dark touch.
It was a nice experience making this eternal rose with black fabric since this color is not very common but I feel that these roses are also very pretty, very aesthetic and somewhat gothic and I like these little things that are uncommon for decoration, I think I will put it on my dressing table and if I have the opportunity I will add some lights because if I feel that way it would look prettier, so here I will show you how I made it, I know you will love this tutorial a lot, a tutorial that can be useful to you to make details and centerpieces for a party, so let's go with the materials and the process.
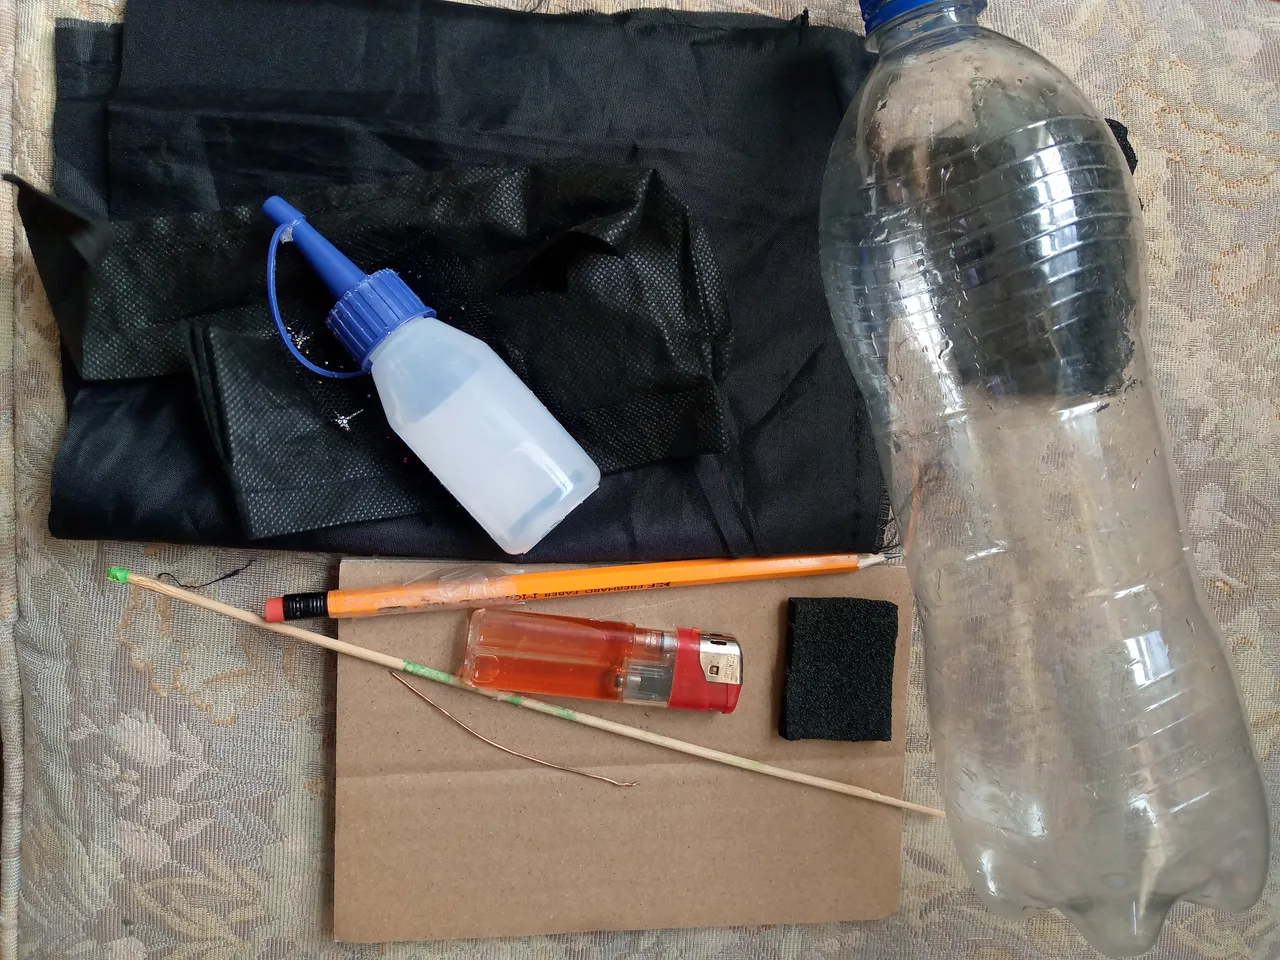
Materiales que usé:
Materials i used:
- Tela negra o tela pop negra,tela de tul
- Silicón
- Trozo de cartón
- Lápiz
- Trozo pequeño de alambre
- Palo de madera
- Vela y encendedor
- Botella de refresco mediana
- Encajes
- Tijera
- Trozo de esponja
- Black fabric or black pop fabric, tulle fabric
- Silicone
- Piece of cardboard
- Pencil
- Small piece of wire
- Wooden stick
- Candle and lighter
- Medium soda bottle
- Lace
- Scissors
- Piece of sponge
Pasos a seguir:
Steps to follow:
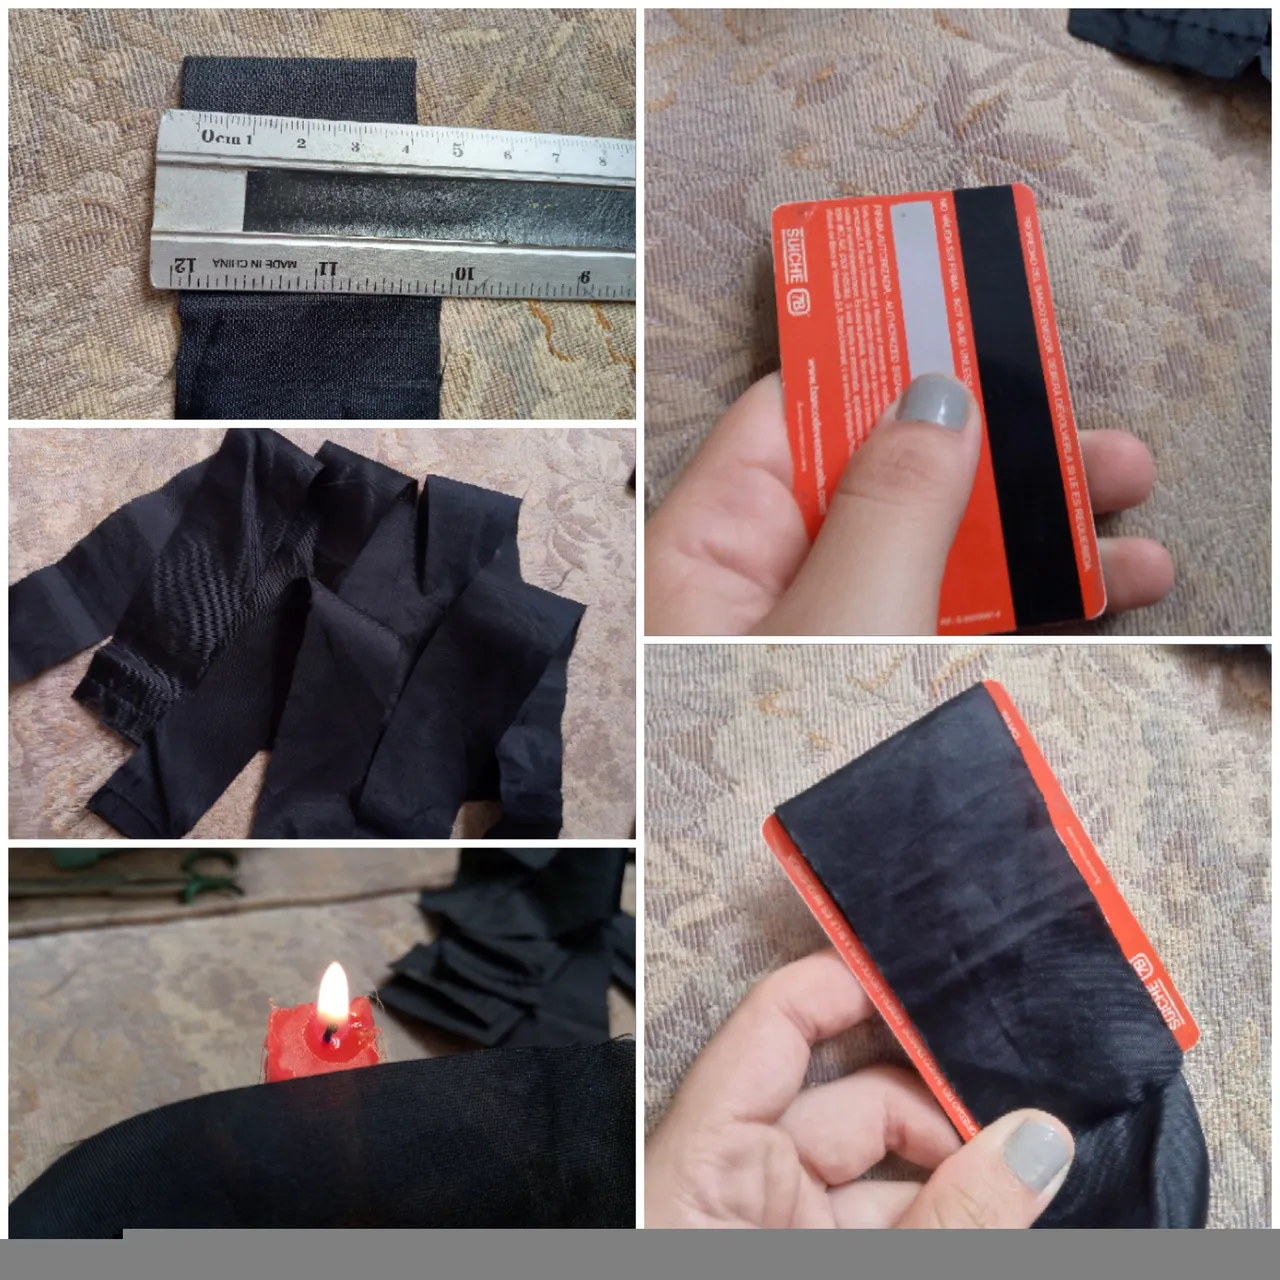
Paso 01
Step 01
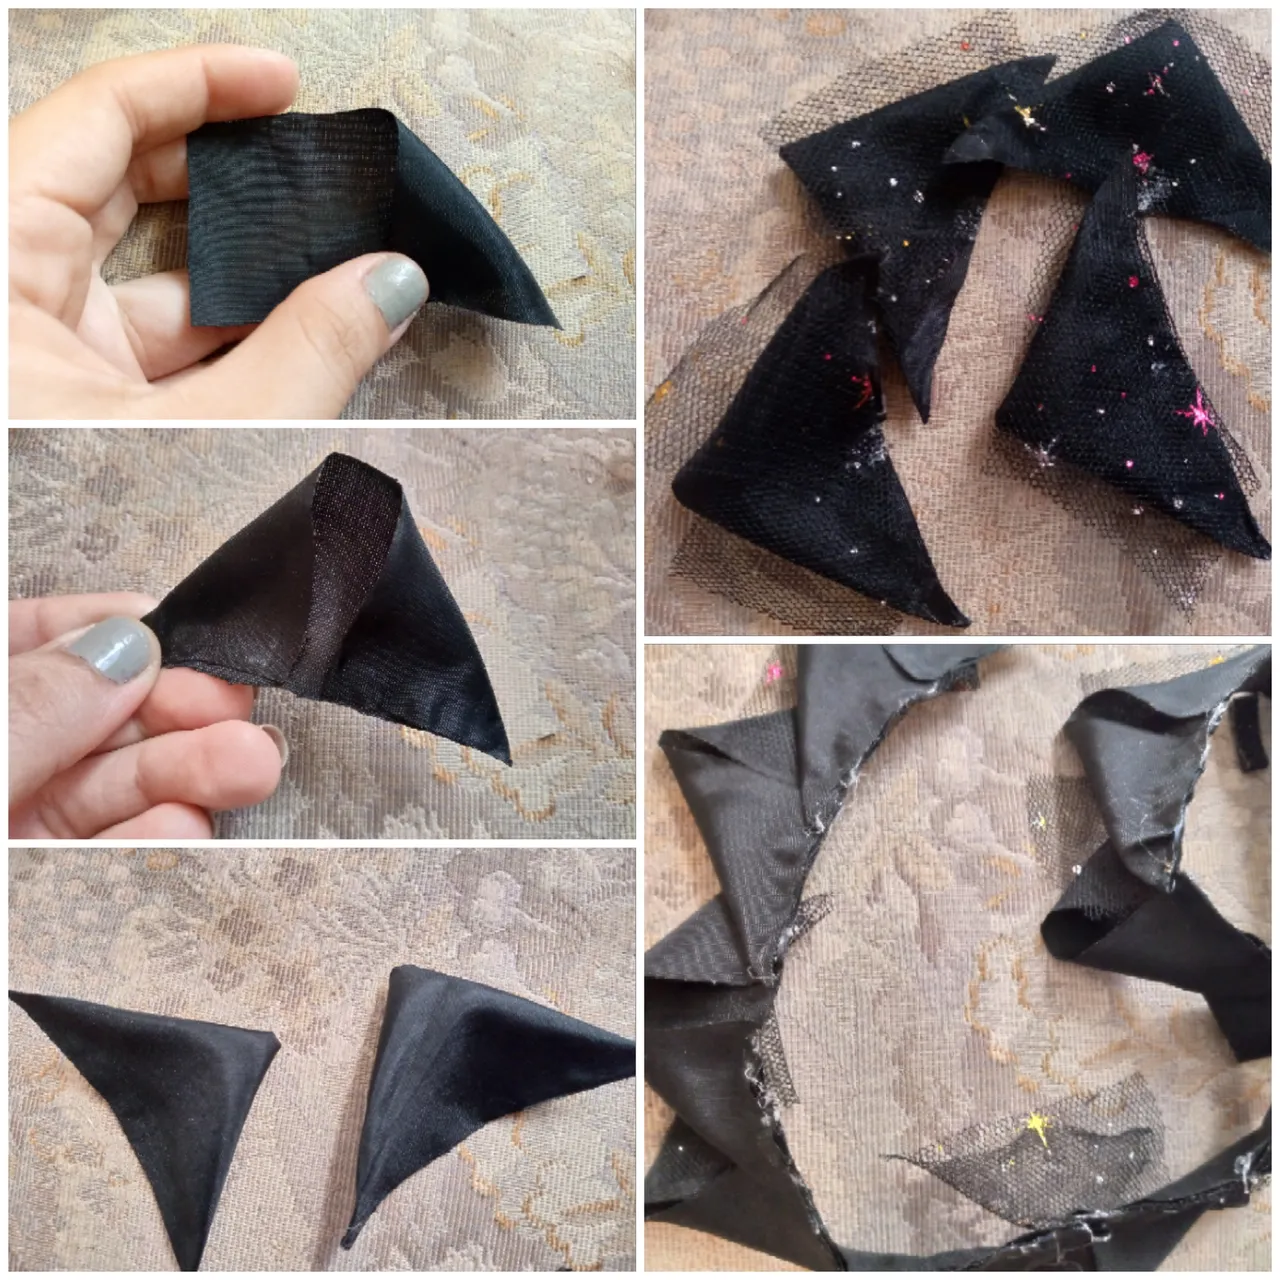
We start with our tutorial by counting strips of fabric 4 cm wide for the exact length of the petals of the eternal rose. Use a card that you have and we will be measuring our strips by its length and we will cut 15 rectangles that we will use to assemble the flower. If you want to make a flower fuller of petals, I recommend cutting 20 petals so we will get a larger flower. Once I cut the petals with the help of my cels I burned the edges of the petals so that the petals would not fray.
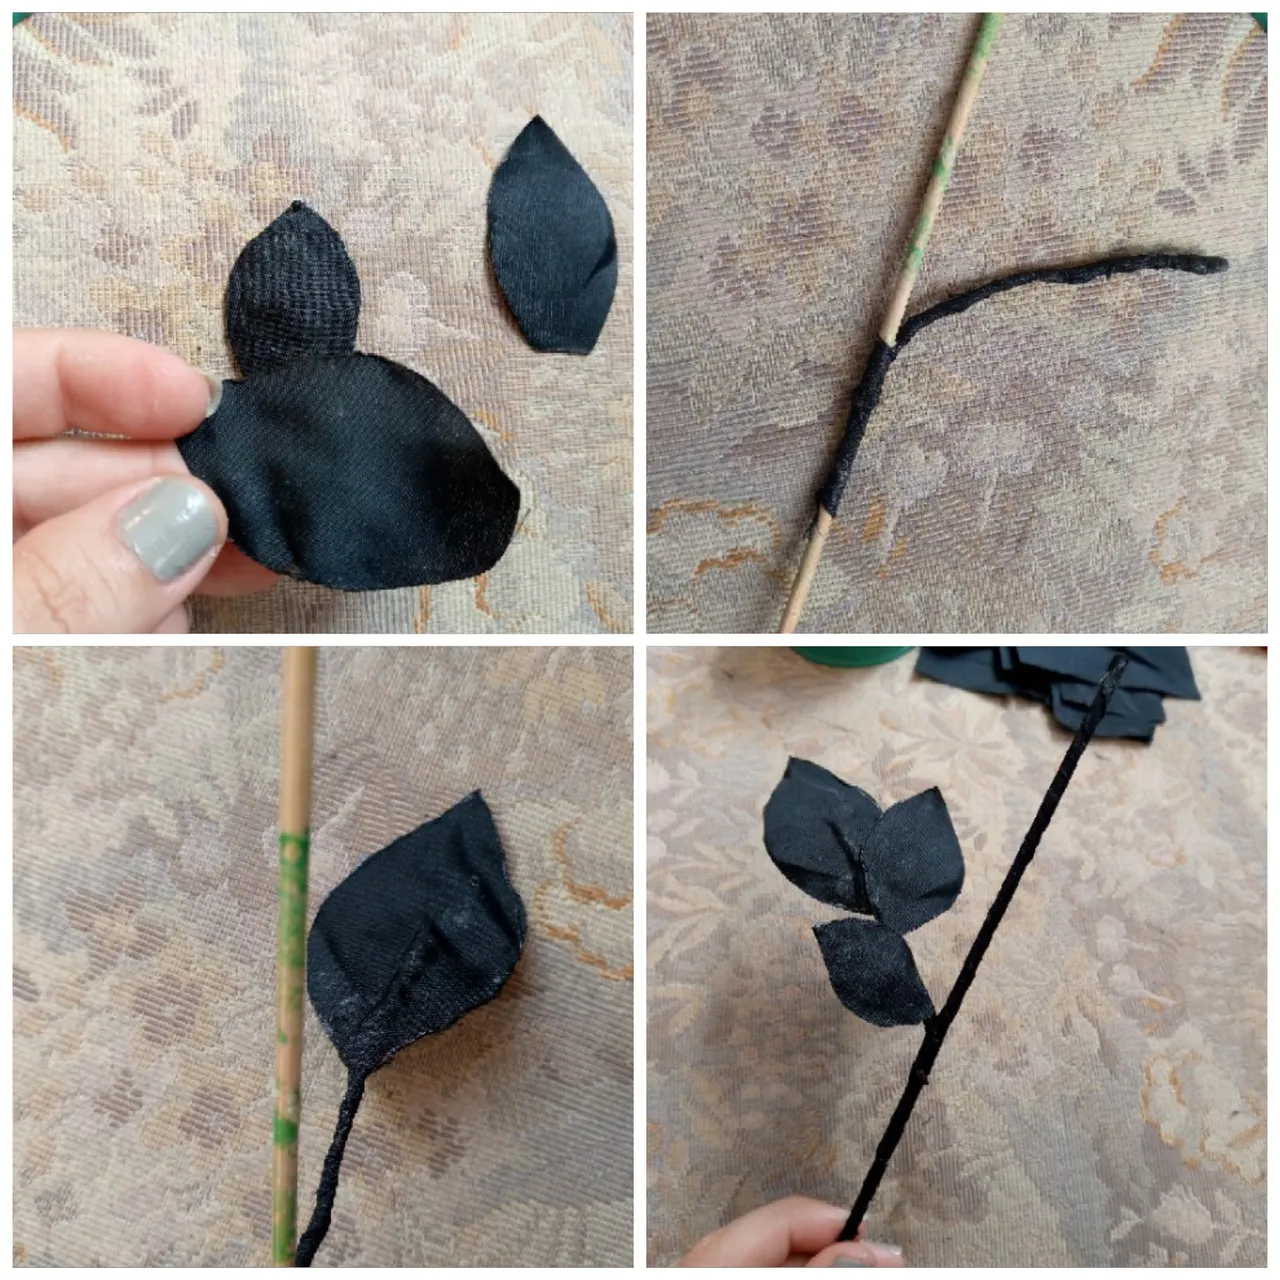
Paso 02
Step 02
I'm also going to cut out some leaves to place on the stem. I'm going to burn the edges of them as well and proceed to wrap my wire with strips of the same black fabric to cover it and glue the leaves. I'm going to glue the small twig and its leaves to the stem. Remember to glue the branch well to the stem and then we'll cover the entire stem with strips of the same fabric.
Paso 03
Step 03
To form my petals I will be taking a rectangle and I will fold one corner of it forming a small pyramid and I will glue it to the bottom. I will be doing the same with the other corner to form a triangle and I will be gluing each petal on top of the other on the bottom side forming a chain. Finally I placed triangles that I cut out of tulle or mesh fabric on top of the petals to better decorate the rose.
Paso 04
Step 04
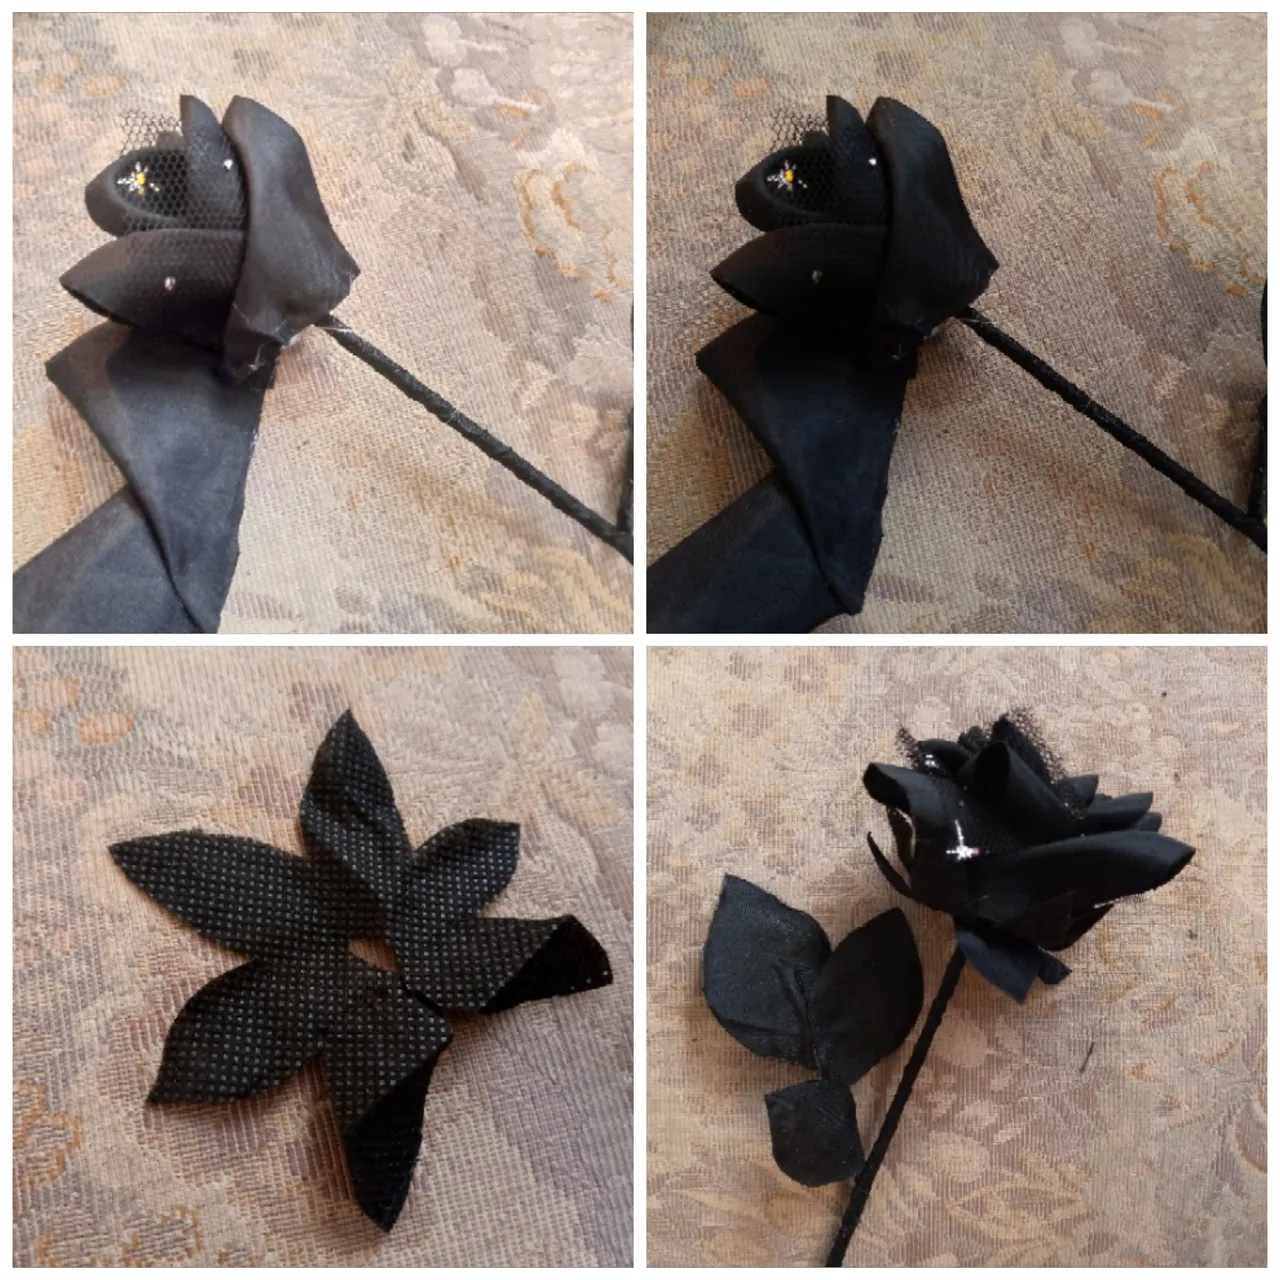
Here I forgot to capture how I placed the sponge on top of the stem, but this is to make the bud. You are going to glue a small piece up there and from there we are going to roll up our petals. From the top side, we roll them up and glue them, we finish and glue the last petal. I made some complete leaves with pop fabric and at the base of the rose I glued it together with other leaves of the fabric and I proceed to glue them, that is how we form this rose.
Paso 05
Step 05
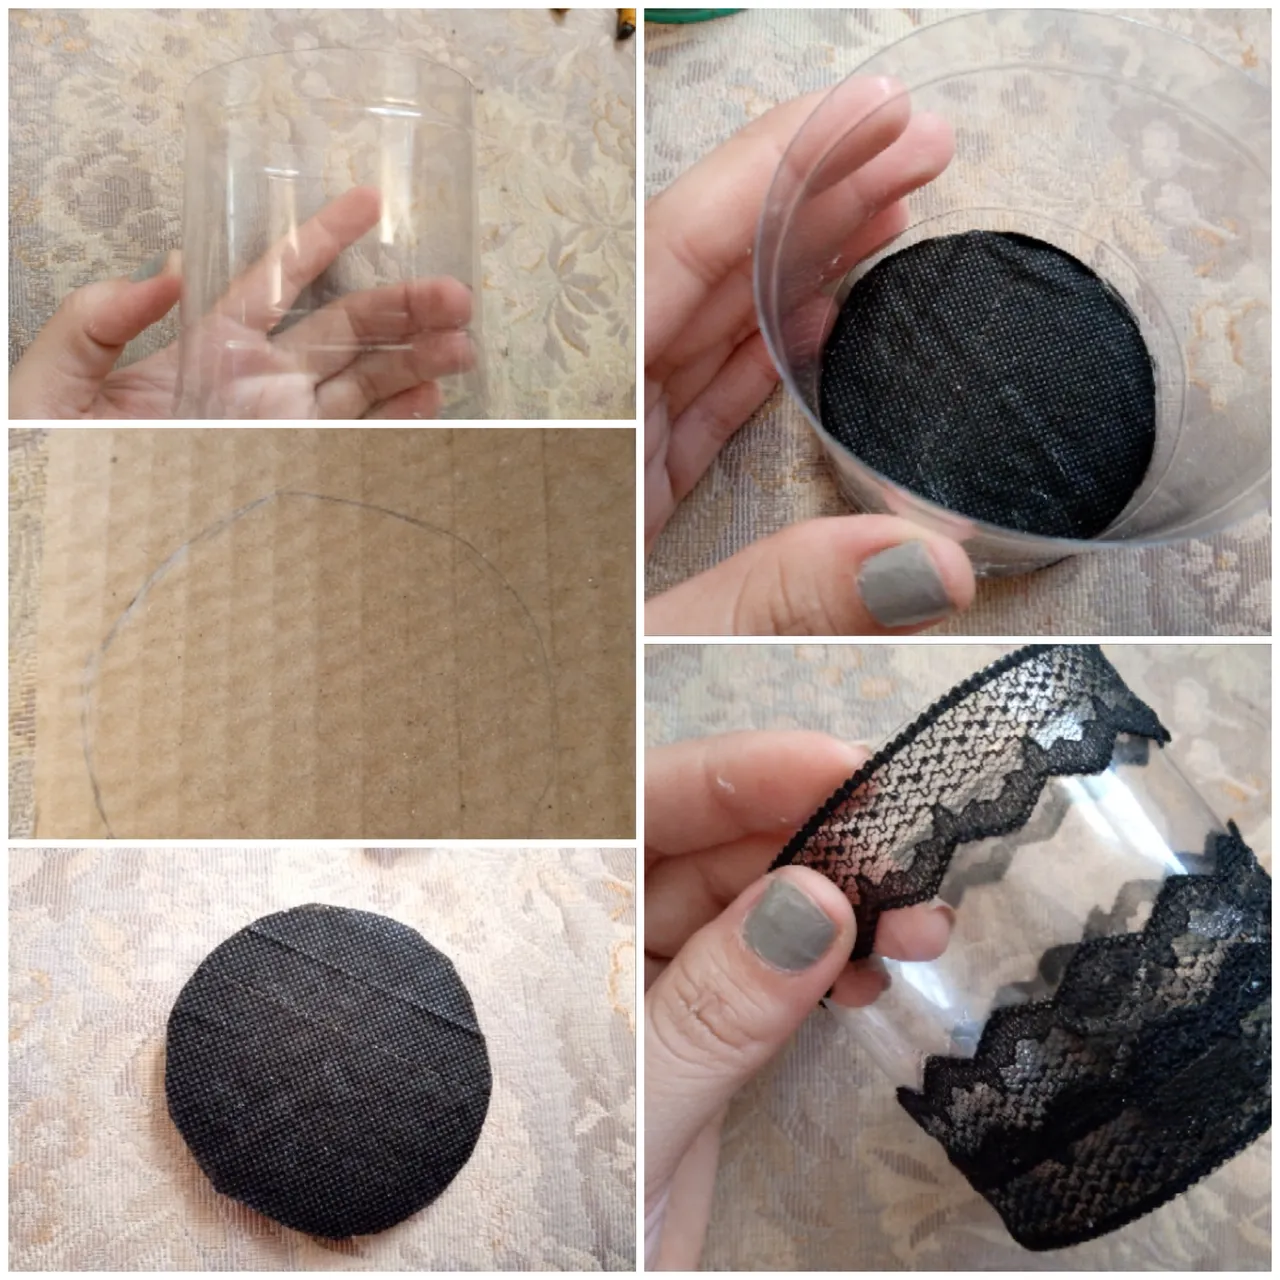
We make the base where we will put this rose, for this we cut the center of the plastic bottle and with our piece of cardboard I will draw a circle of the same diameter as the bottle, I will cover this piece with pop fabric and I will glue it to the bottom of the bottle and design it with lace around the edges to decorate them how we want this pretty arrangement to look.
Paso 06
Step 06
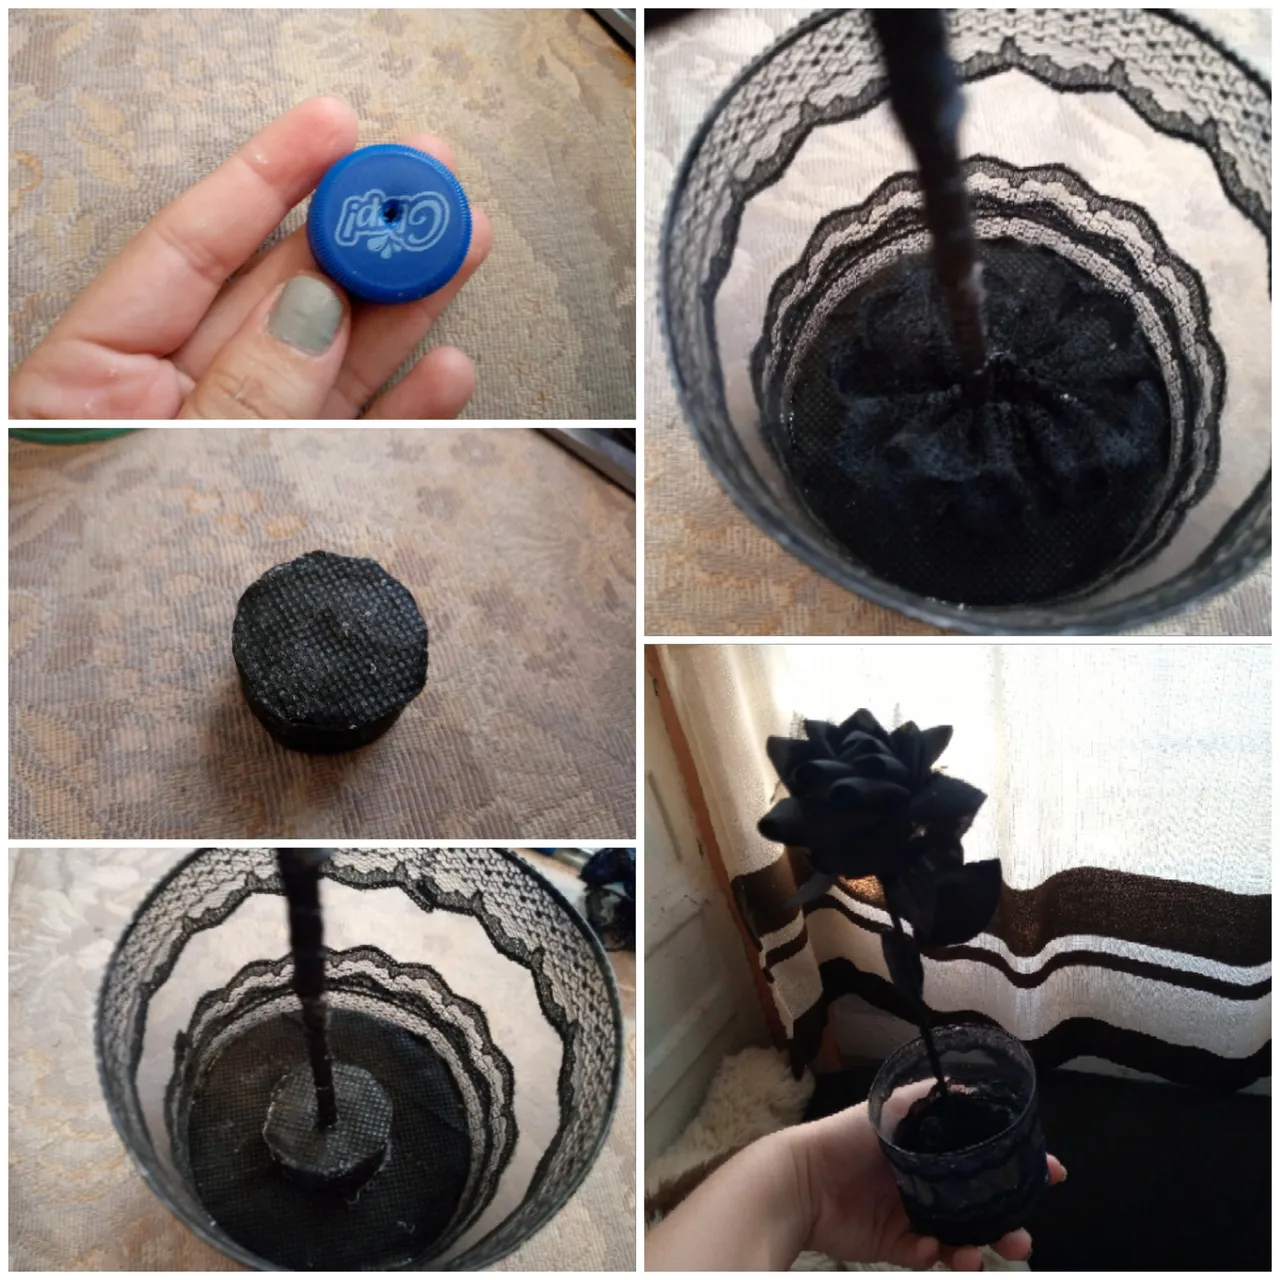
We will be using the lid to hold the rose in the arrangement and I will just make a small hole in the center with the same tip of the scissors and carefully, I will cover it with fabric and insert the stem of my rose through the hole and add a little silicone so it adheres better, I will glue it to the base of the arrangement and that's it, that's how I have put together this centerpiece.
Resultado:
Result:
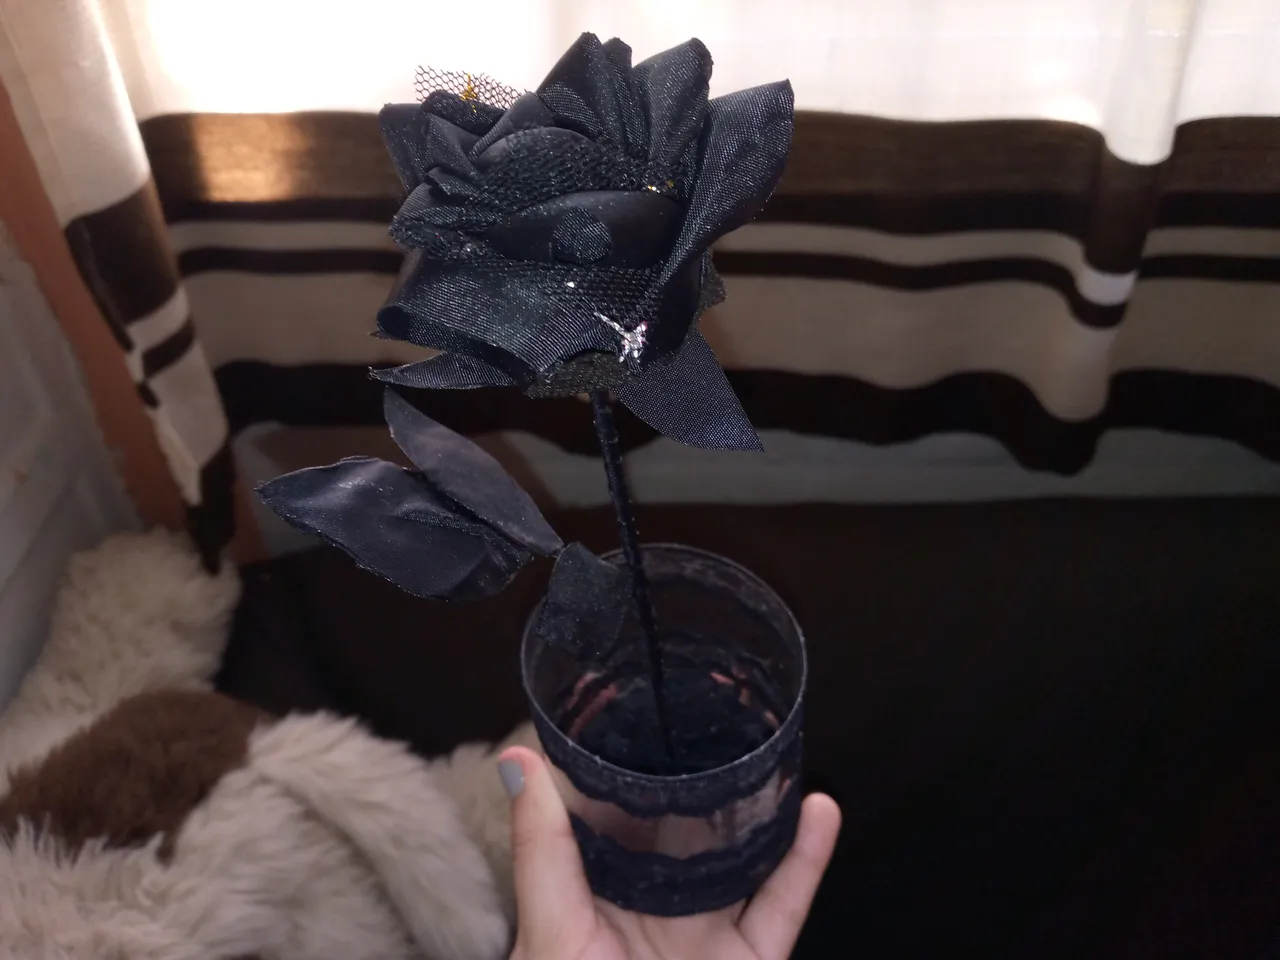
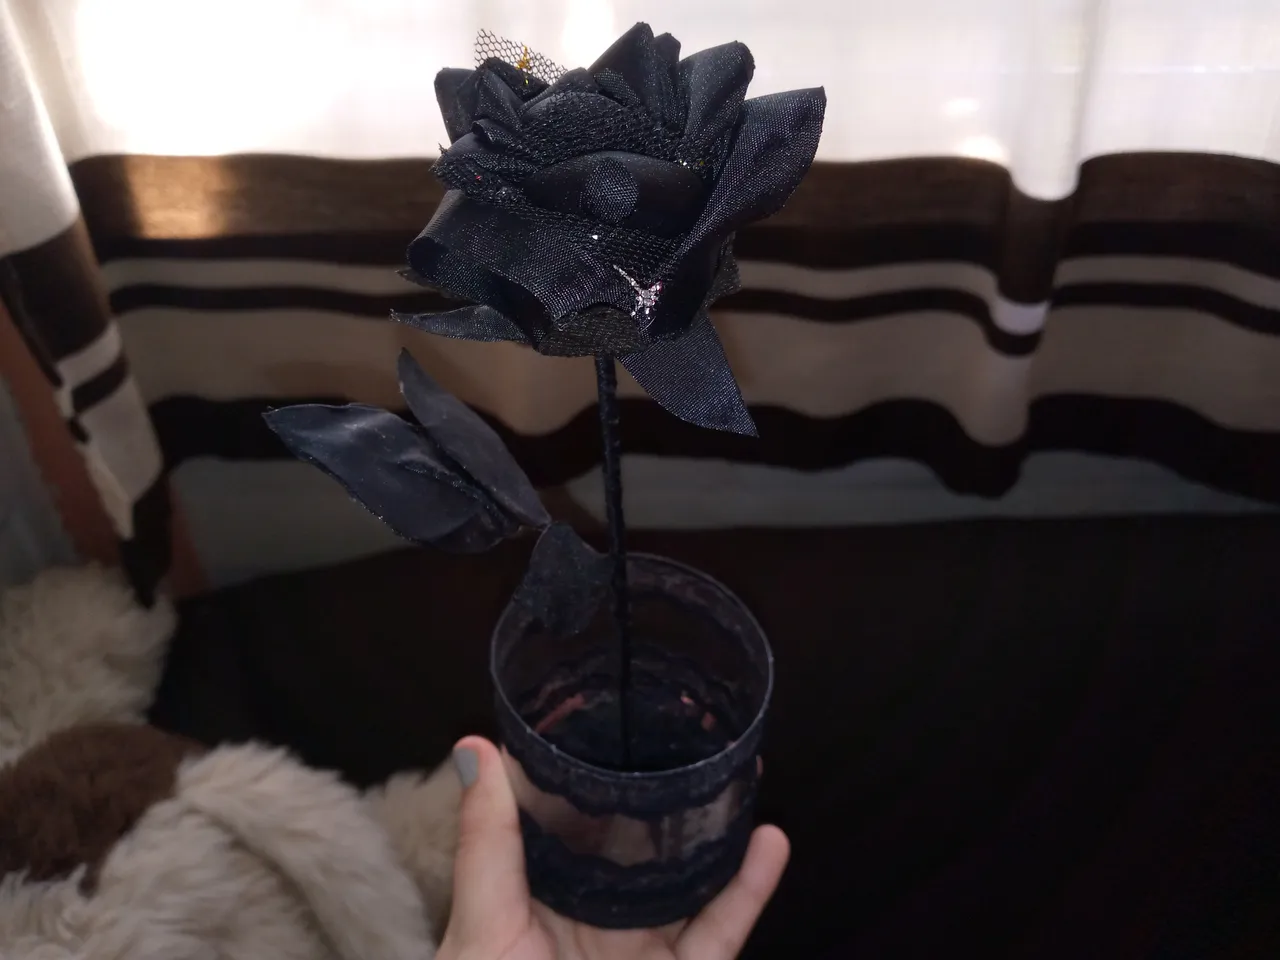
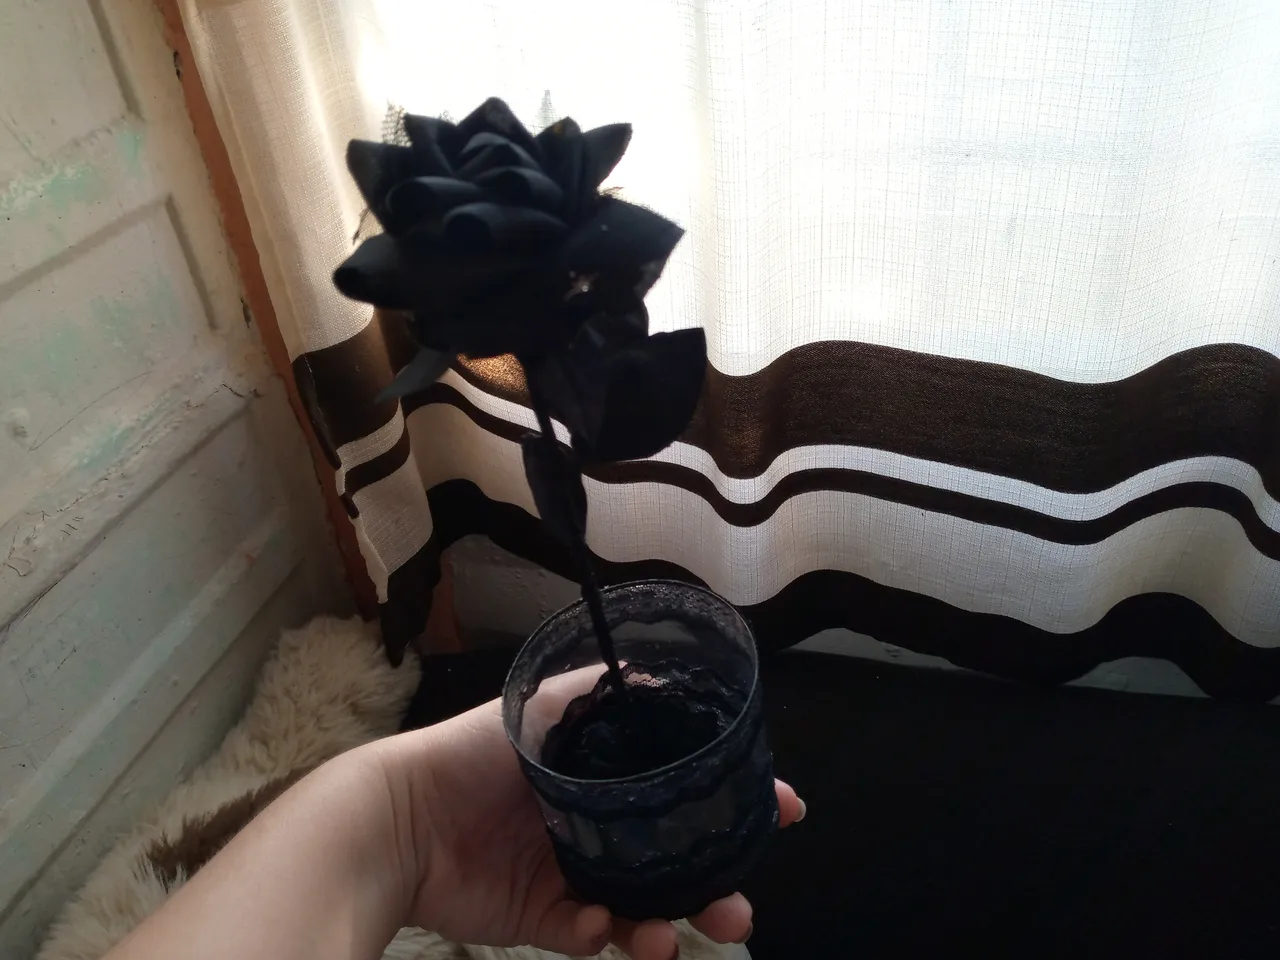
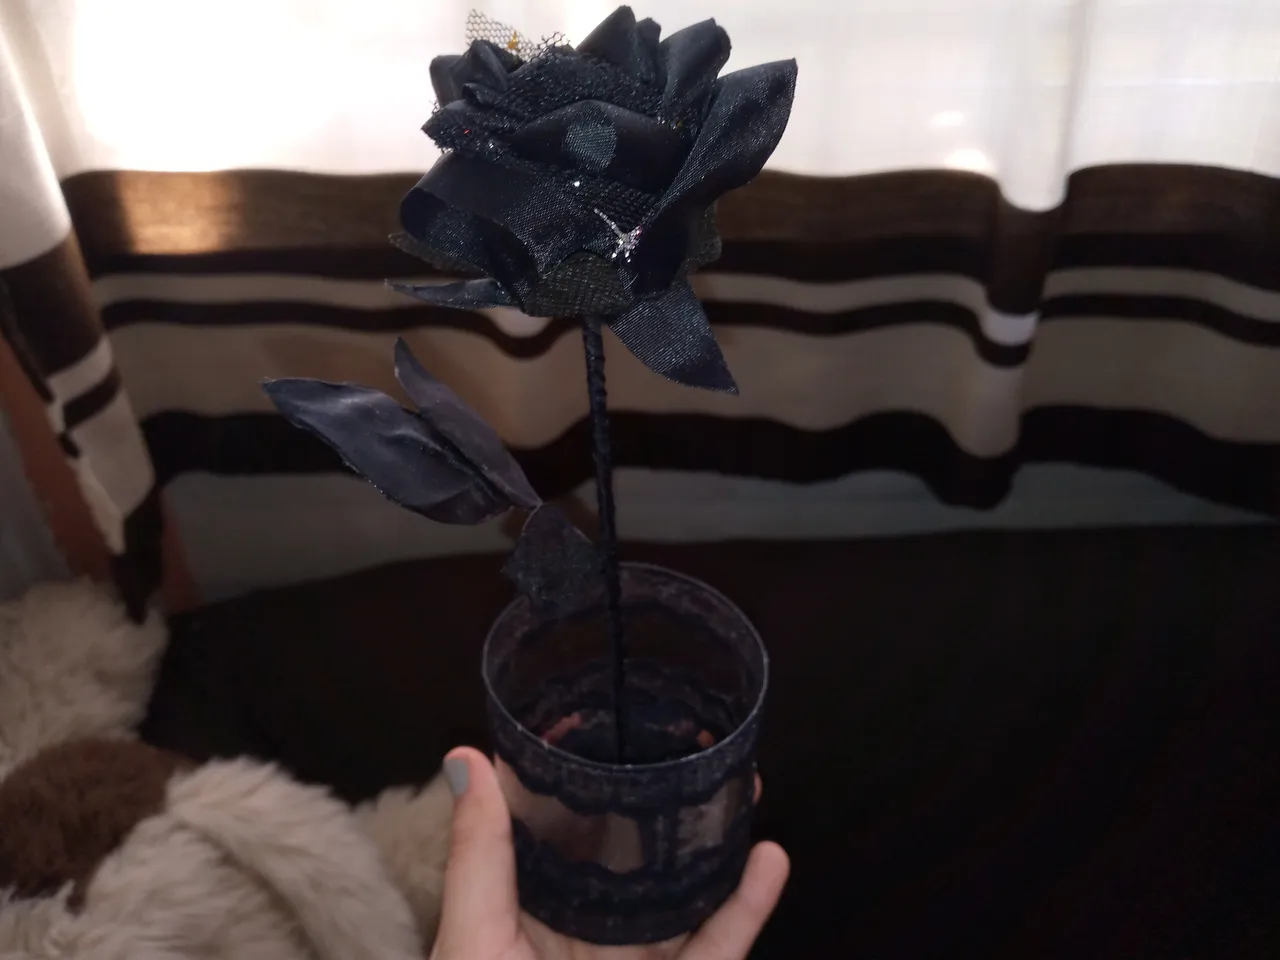
With these beautiful photos of the result I show you how you can make this cute arrangement that can become a nice detail for that person who loves these black roses like me 🤭🥰🖤🌹 I hope you like it and that you liked this tutorial, thank you for taking your time to read my blog 🥺♥️ and I wish you a happy day, blessings for you, I love you very much, see you another time.