
Hello to everyone in this community. I hope everybody is doing great i hope 2024 brings us all joy and our heart wishes. Today being Friday(creative Friday) I thought about sharing another amazing bracelet tutorial. Last week Friday, I shared one with you guys and today I’m here to do the same.
Hola a todos en esta comunidad. Espero que a todos les vaya muy bien. Espero que el 2024 nos traiga a todos alegría y nuestros mejores deseos. Hoy, siendo viernes (viernes creativo), pensé en compartir otro increíble tutorial de pulsera. El viernes de la semana pasada, compartí uno con ustedes y hoy estoy aquí para hacer lo mismo.
After performing our mandatory Friday prayers, I set out to the market to buy some beads that I will be using to make the bracelets. Just like the other bracelet I made the last time, I saw different kinds of beads the black bigger beads, the small shiny ones and the flat beads. So I bought them and a rope. Below are the list of material you will need.
Después de realizar nuestras oraciones obligatorias del viernes, salí al mercado a comprar algunas cuentas que usaré para hacer las pulseras. Al igual que la otra pulsera que hice la última vez, vi diferentes tipos de cuentas, las negras más grandes, las pequeñas brillantes y las cuentas planas. Entonces los compré y una cuerda. A continuación se muestra la lista de materiales que necesitará.
Material needed for this tutorial
- Black Bigger beads or any other color you get your hands on
- Thing beads
- Flat beads(preferably different colors to add more beauty to the beads)
- Cuentas negras más grandes o de cualquier otro color que tengas en tus manos.
- Cuentas de cosas
- Cuentas planas (preferiblemente de diferentes colores para agregar más belleza a las cuentas)

Tutorial
You know I like to keep my bracket tutorial very simple so that you can follow at home. I will say again, once we have established the pattern, everything is just on repeat. First, we start by creating the base of the bracelet. For this I decided to start with two small gold beads, followed by three black beads. Like the image below.
Sabes que me gusta que mi tutorial de brackets sea muy simple para que puedas seguirlo en casa. Lo diré nuevamente: una vez que hayamos establecido el patrón, todo se repetirá. Primero comenzamos creando la base de la pulsera. Para ello decidí comenzar con dos pequeñas cuentas doradas, seguidas de tres cuentas negras. Como la imagen de abajo.

In continuation, I decided to introduce or add another two small shiny beads. And then top it off with three bigger black beads to end that cycle. Below is how it looks like.
A continuación, decidí introducir o añadir otras dos pequeñas cuentas brillantes. Y luego rellénalo con tres cuentas negras más grandes para finalizar ese ciclo. A continuación se muestra cómo se ve.

Next up, is to kind of continue and repeat that pattern, that is you add the three black beads after every two smaller beads and make sure you end that cycle with another set of smaller beads. Below is an image of what I’m talking about.
El siguiente paso es continuar y repetir ese patrón, es decir, agregar las tres cuentas negras después de cada dos cuentas más pequeñas y asegurarse de terminar ese ciclo con otro conjunto de cuentas más pequeñas. A continuación se muestra una imagen de lo que estoy hablando.

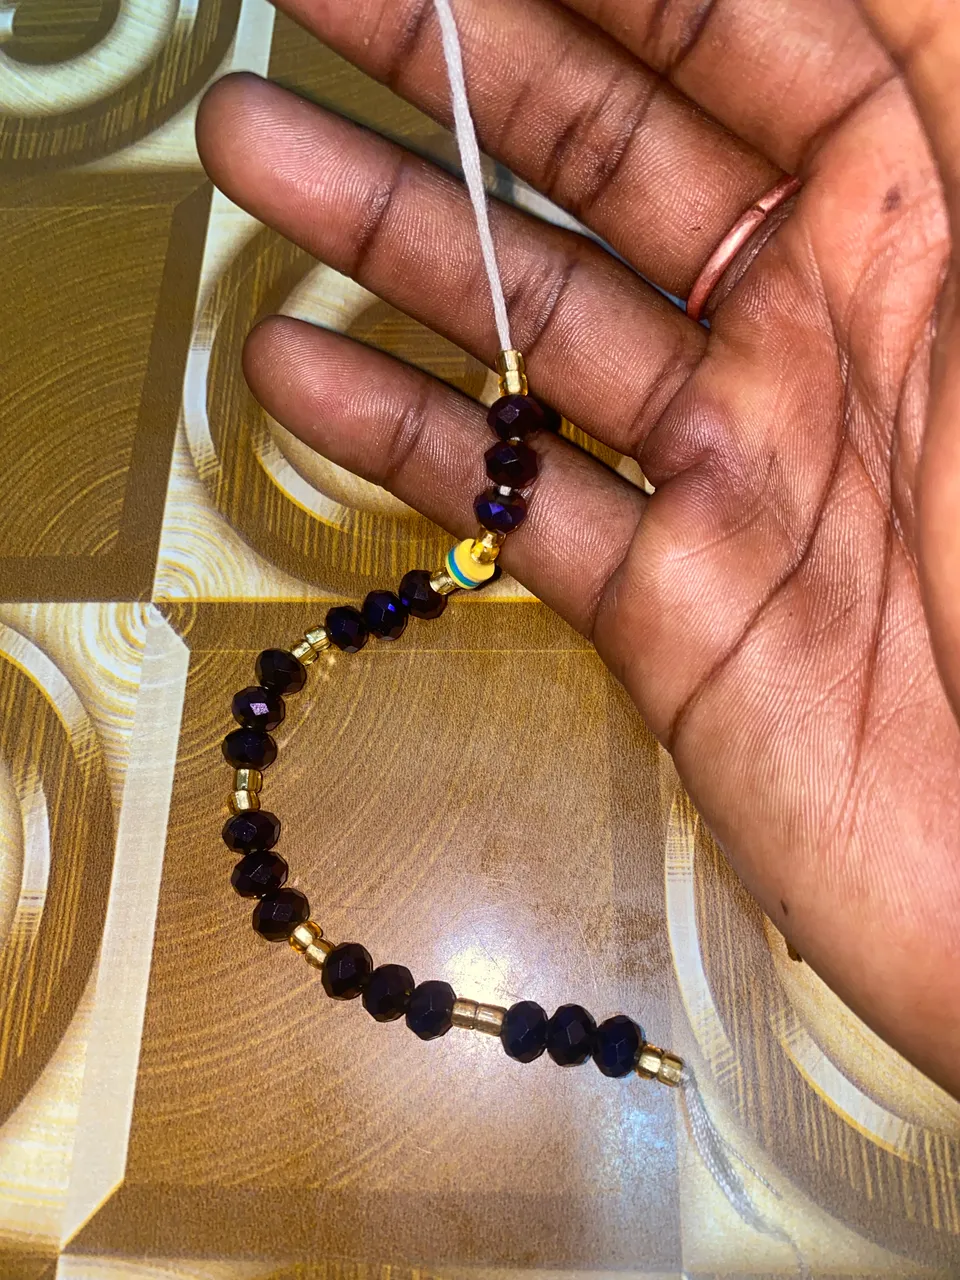
When you repeat this for about four sets of the black beads, we can now introduce or insert the flat beads. So like the flat beads will kind of be in the middle of the bracket. Like the image below.
Cuando repita esto durante unos cuatro juegos de cuentas negras, ya podemos introducir o insertar las cuentas planas. Entonces, las cuentas planas estarán en el medio del soporte. Como la imagen de abajo.

Now again, you have to close the flat beads with two smaller beads and repeat the whole process from the beginning and stop when you have a desired size. But remember you won’t add any more flat beads.
Ahora nuevamente, debes cerrar las cuentas planas con dos cuentas más pequeñas y repetir todo el proceso desde el principio y detenerte cuando tengas el tamaño deseado. Pero recuerda que no añadirás más cuentas planas.
I have reached the wrist size that will fit me so, I will have to stop here and then tie the two end’s together. Make sure you tie it properly to avoid any future problems. If possible use fire lighter to burn the end’s together.
He alcanzado el tamaño de muñeca que me queda bien, así que tendré que detenerme aquí y luego atar los dos extremos. Asegúrate de atarlo correctamente para evitar problemas futuros. Si es posible, utilice un encendedor para quemar los extremos juntos.

And wow, I’m done with the bracelet and I’m loving it. Tell me how does it look? Will you love to make some for yourself?
Y vaya, ya terminé con la pulsera y me encanta. Dime ¿cómo te parece? ¿Te encantará hacer algunos para ti o para?
I decided to wear the two bracelets together. And I think they look really nice. What do you think?……see you soon.

Decidí usar las dos pulseras juntas. Y creo que se ven muy bien. ¿Qué opinas?……hasta pronto.
