While I was away, I tried to study a few basics in crypto trading. I also tried to explore blockchain technology while we were brainstorming for our Capstone project because I wanted to connect our IoT-based Capstone project to blockchain technology, but sadly, we only had a limited time to study and work on our project.
To cut the story short, while I was in the middle of studying blockchain technology and the process of trading, @cthings recommended a post about this tutorial regarding the conversion of HIVE TOKEN to DOGE COIN, until it became real cash. So, we would like to recognize @tpkidkai as he is the first one to discover this process. Glad that I learned something from your post.
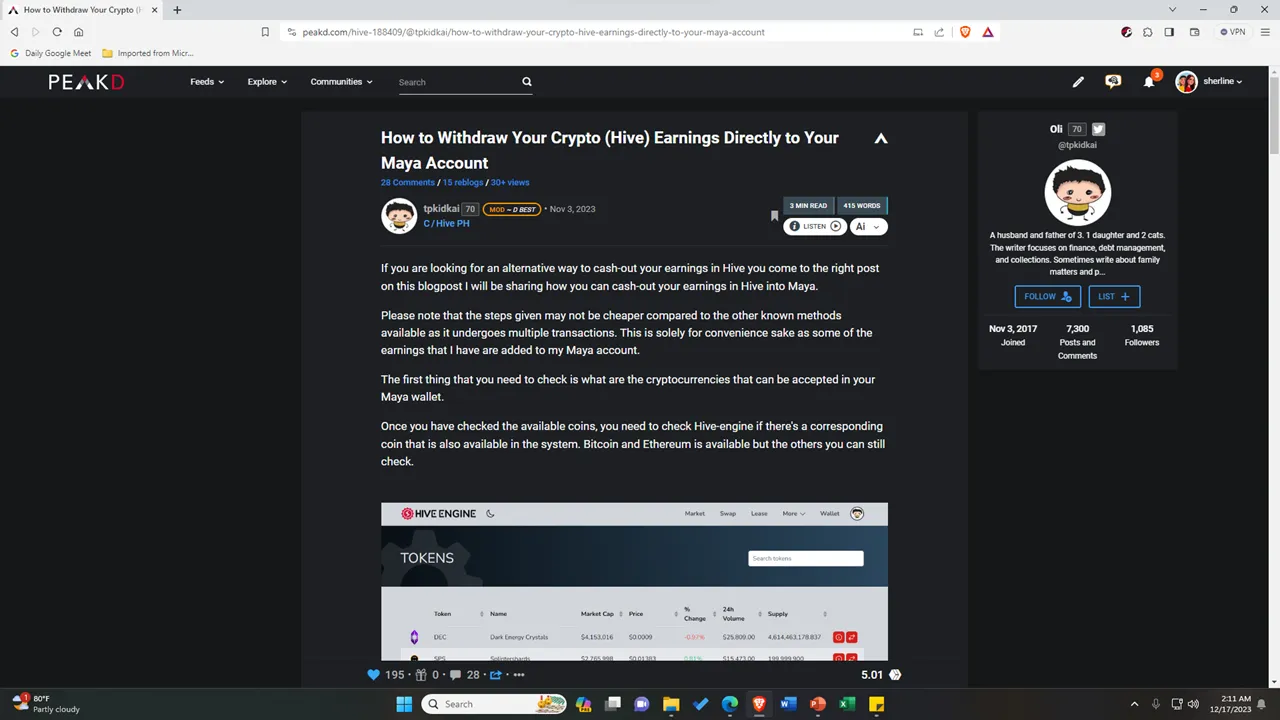
Anyway, while I was reading his post, at first, I didn’t know where to go and where to start since I’m still not familiar with the technicalities and settings of the Peakd platform. Although I followed procedures correctly, I still got lost on some parts because apart from following the directions, I also tried to study the whole process.
I had these questions like, “Is this legit?”, “am I doing the right thing?”, “where to go next?”... Glad that I knew already about converting HBD (Hive Backed Dollars) to HIVE Tokens. But if you still don’t know about the procedures for converting HIVE to HBD, I will also teach you the procedures then.
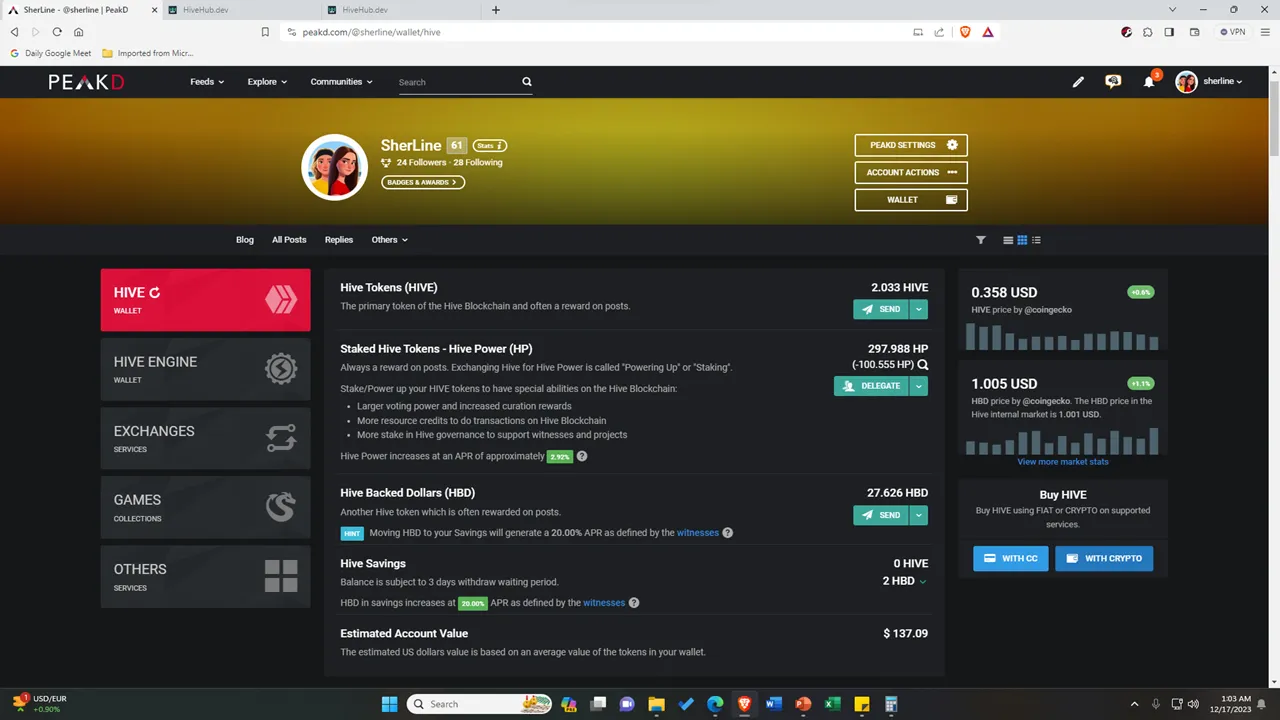
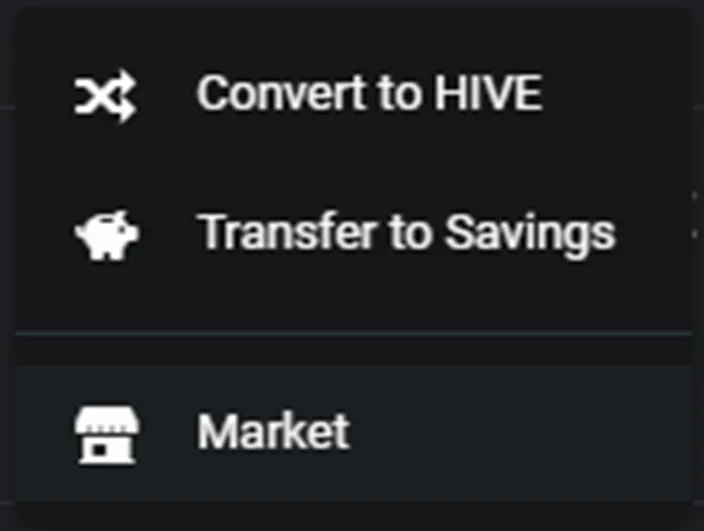
First things first, you must convert the HBD into HIVE. If you convert it directly in the Peakd platform, you will receive the HIVE tokens after 3.5 days. So, if you urgently need to convert the HBD. Click the button that will direct you to the “Market”.
Swapping HBD into HIVE in HiveHub Dev
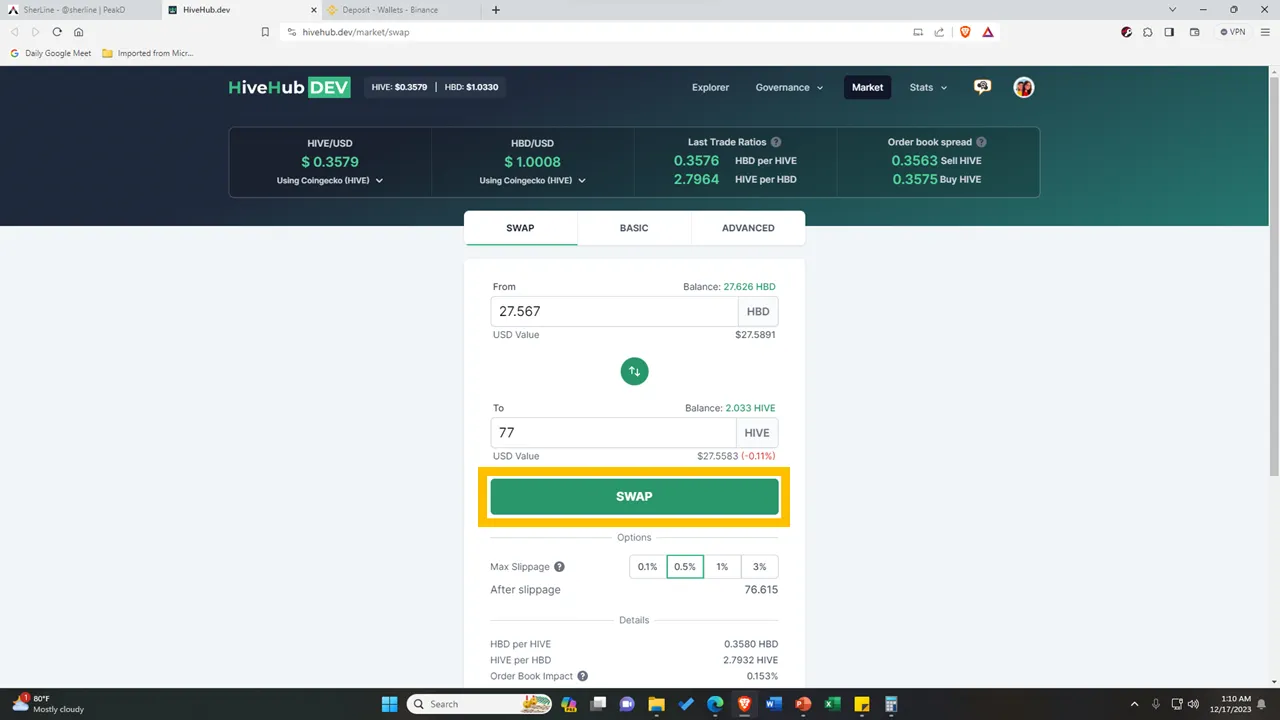
So, after clicking the “Market”, it will direct you to the HiveHub Dev Market page. This website is a platform where you can easily convert a HIVE to HBD or vice versa. Then, in just a minute it will reflect it right away in your wallet.
I needed 77 HIVE tokens, so I swapped an amount of 27.567 HBD into HIVE tokens. I just clicked the “Swap” button, then it directed to my Hive Keychain.
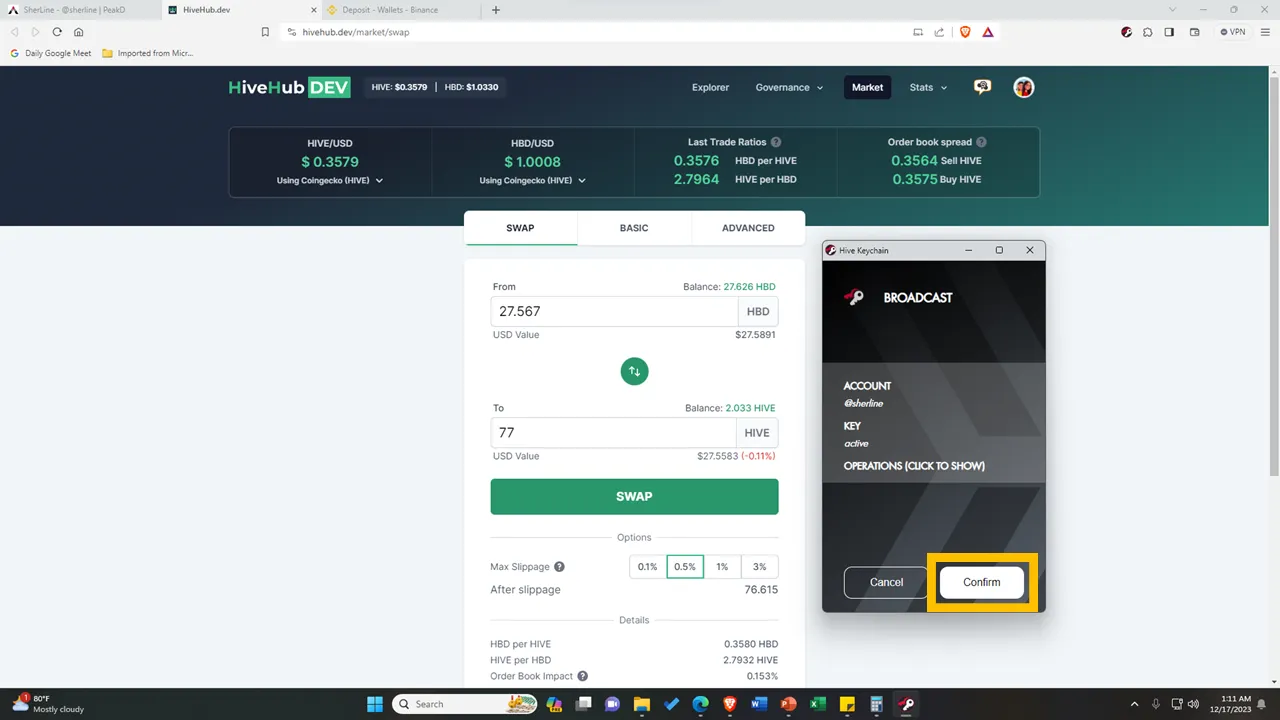
Of course, if you confirm this transaction, you just have to click the “Confirm” button.
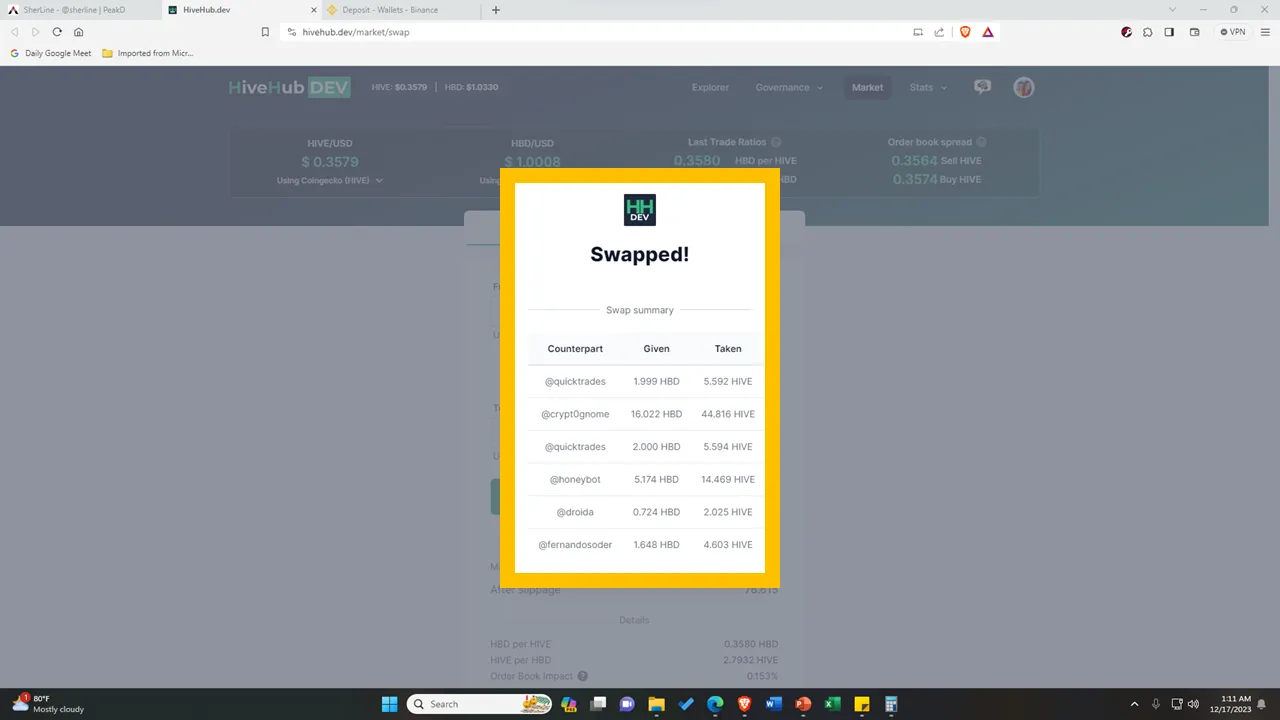
Then after that, you will see a summary of your swapped HBD and HIVE, wherein you will see your counterparts, the amount of HBD given, and the amount of HIVE taken.
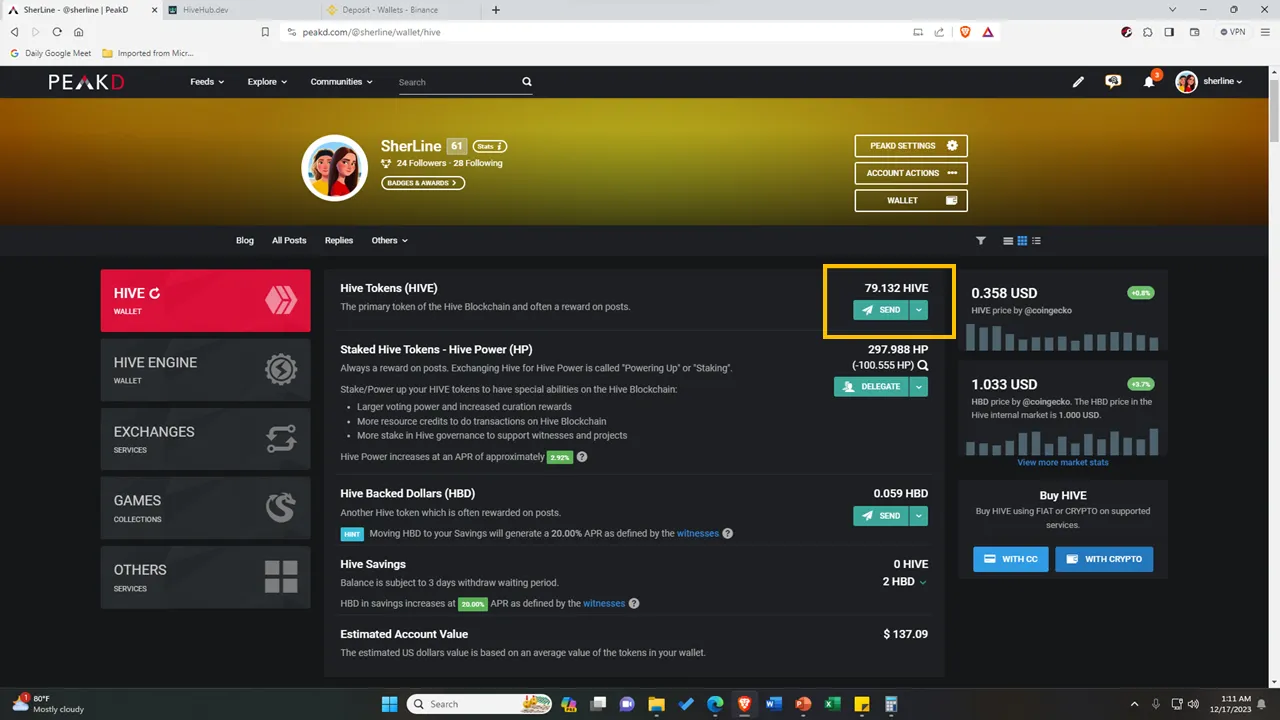
After that, go back to your Hive Wallet to see if you have received the Hive tokens that you swapped.
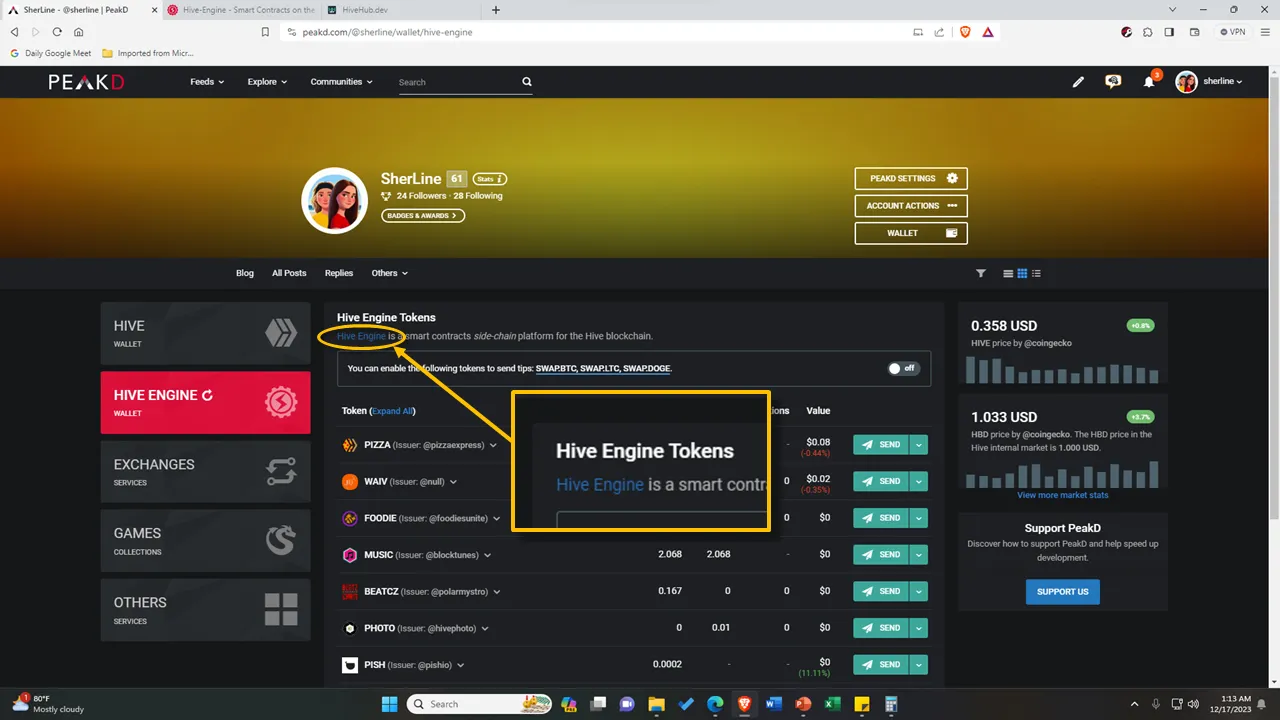
Next step, you go to the Hive Engine. You may either go straight to the Hive Engine page or just simply type this URL: https://www.hive-engine.com.
Swapping HIVE into DOGE in Hive Engine
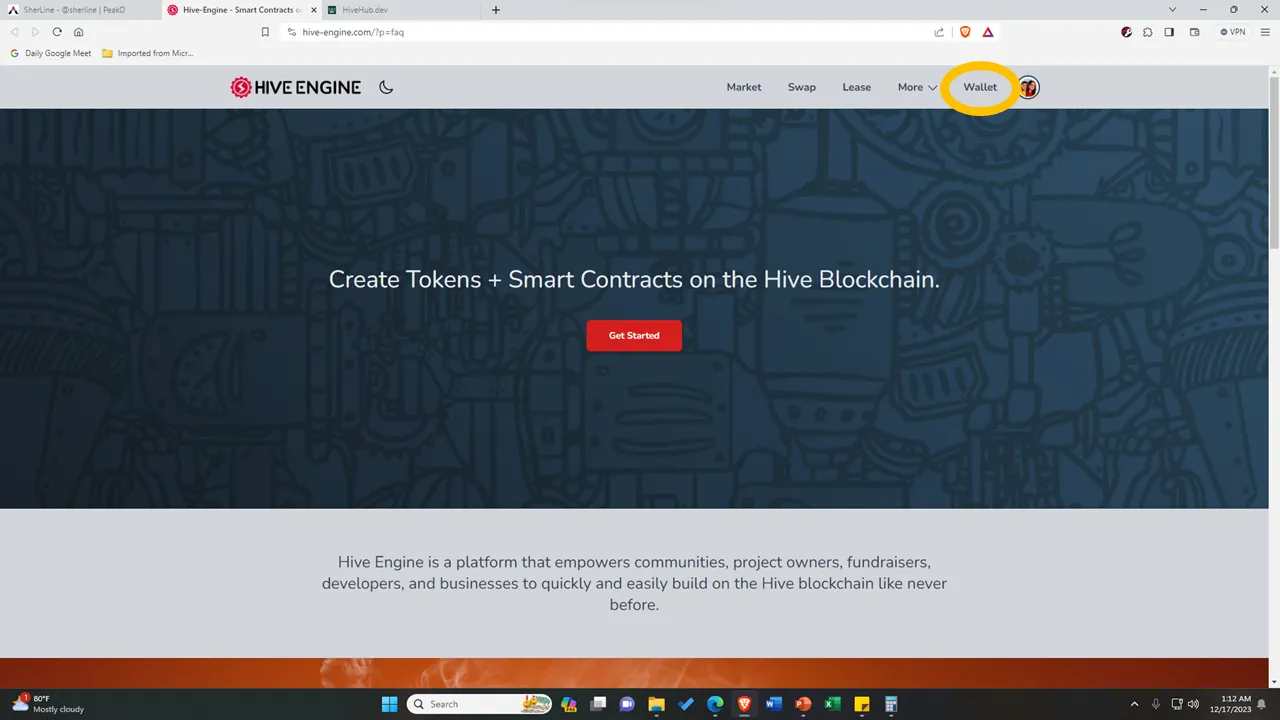
Then before you proceed with the next step, log in to your account first in Hive Engine. Once logged in, click the “Wallet” at the top navigation bar.
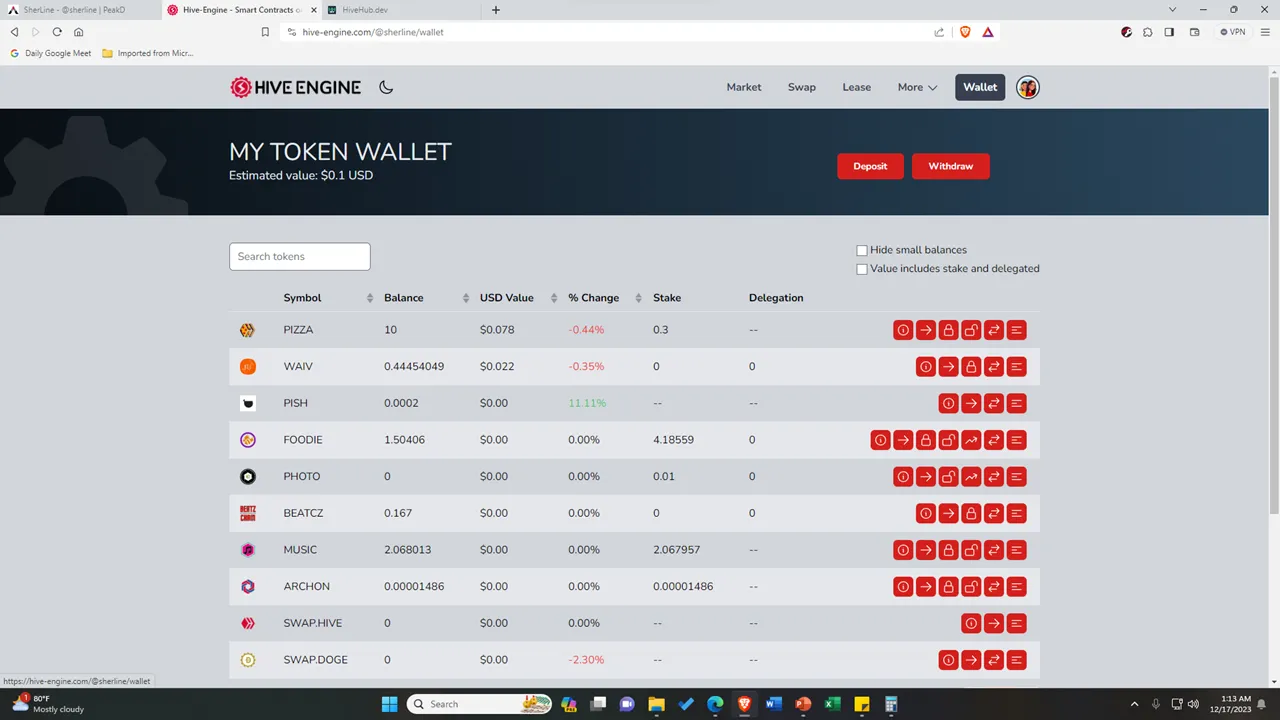
After that, it will direct you to your token wallet. As you can see, this is where you can see the different tokens that you have including their USD value. These tokens we have came from the games that we participated in, and some of them came from those who voted in our posts.
So, the next step is you need to deposit the Hive tokens that you would like to swap into a DOGE coin. Based on @tpkidkai’s post, he chose the DOGE because of its low-value cost. Although you could try other cryptocurrencies aside from DOGE, if I were to ask, I prefer DOGE considering its fast processing and ratifying of new blocks on the DOGE coin blockchain, and of course its low-value cost.
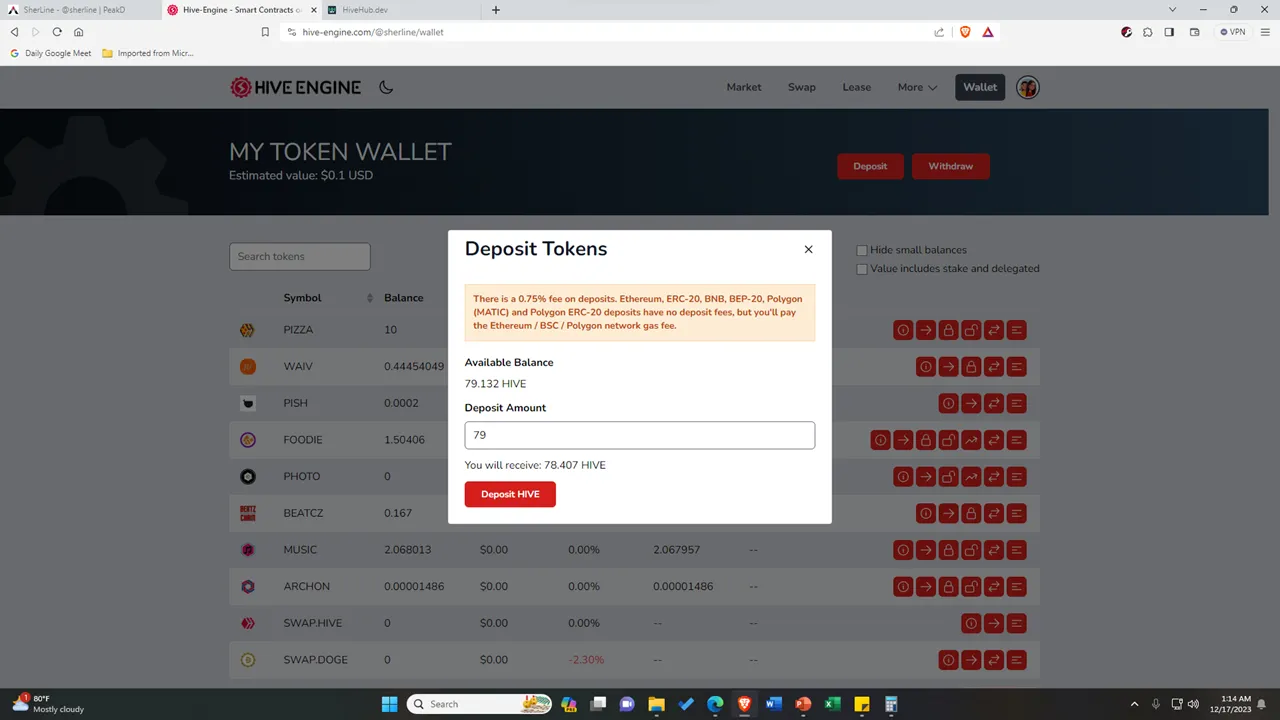
So, going back, I deposited an amount of 79 HIVE tokens in my Hive Engine wallet. For the procedure, I just input the amount and then I clicked the “Deposit HIVE” button. Then after that, the HIVE tokens that you deposited will be added to your SWAP.HIVE tokens.
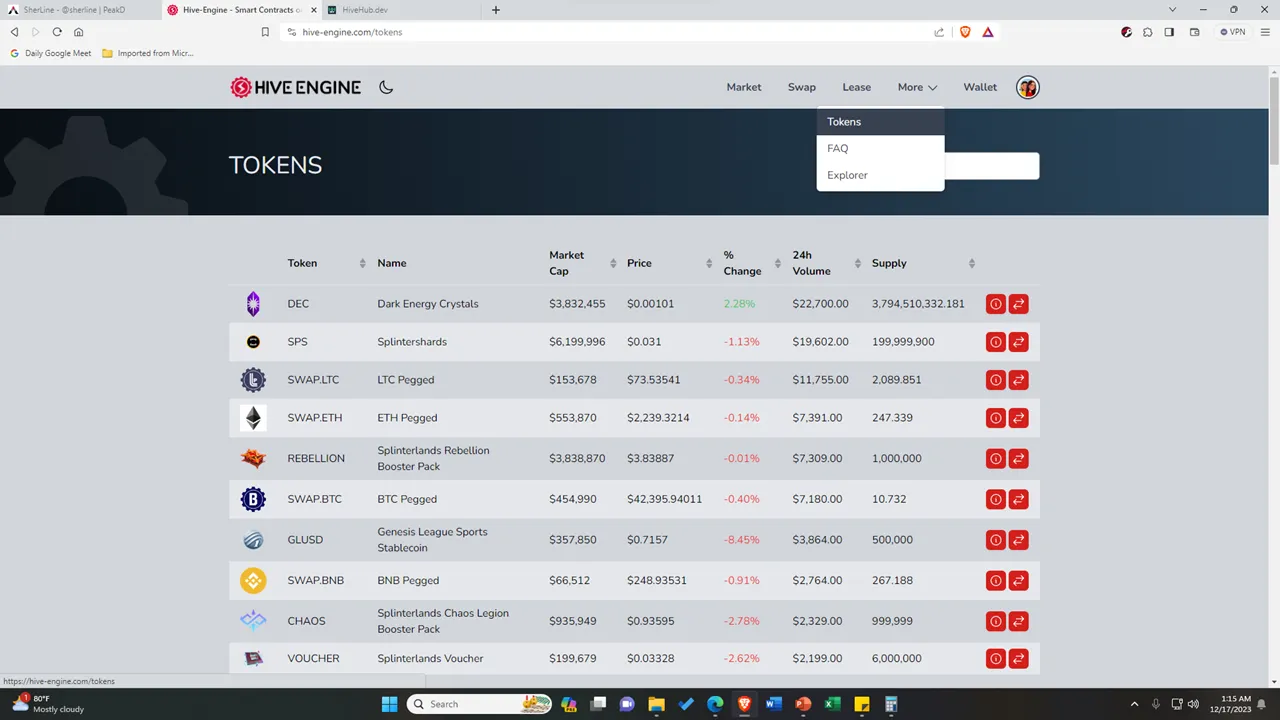
After depositing your HIVE tokens, click the drop-down button beside “More”, and then you will see the “Tokens”. Once you click it, you will see the other tokens and its price cost.
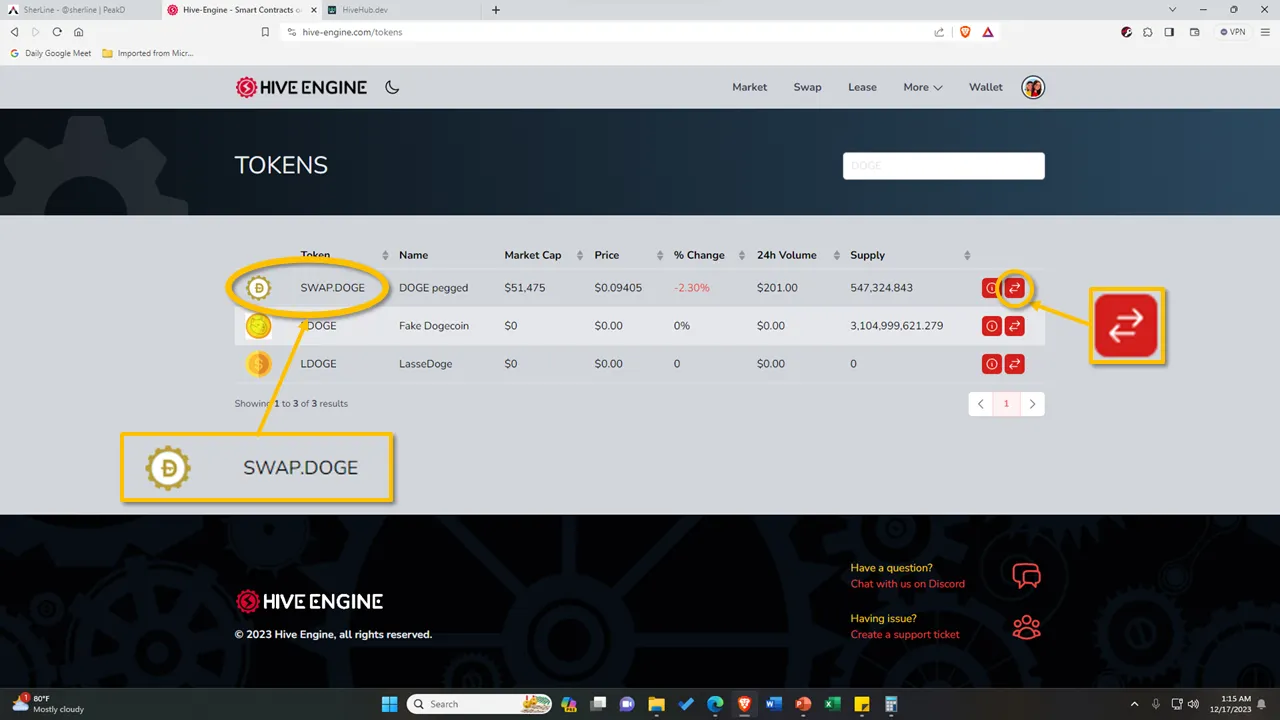
In the search bar, type the word “DOGE”, and then you will see the tokens with a DOGE word. The token that I used is the “SWAP.DOGE”. The next thing to do is to click the button with a swap icon on it to direct you to the page where you can swap your HIVE into DOGE.
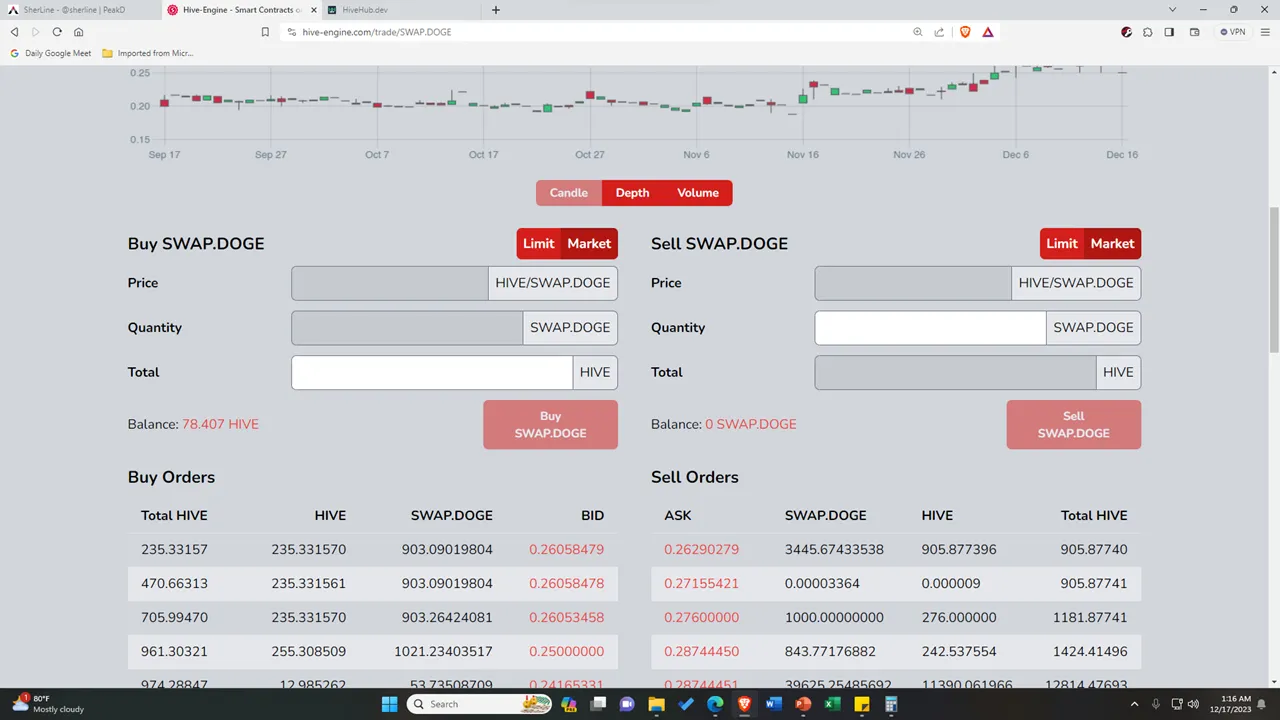
The next step is to buy a SWAP.DOGE token with the amount of HIVE tokens that you have. If you do not know that much about trading, you may click the “Market” button so that you will only add an input aligned with the total of HIVE.
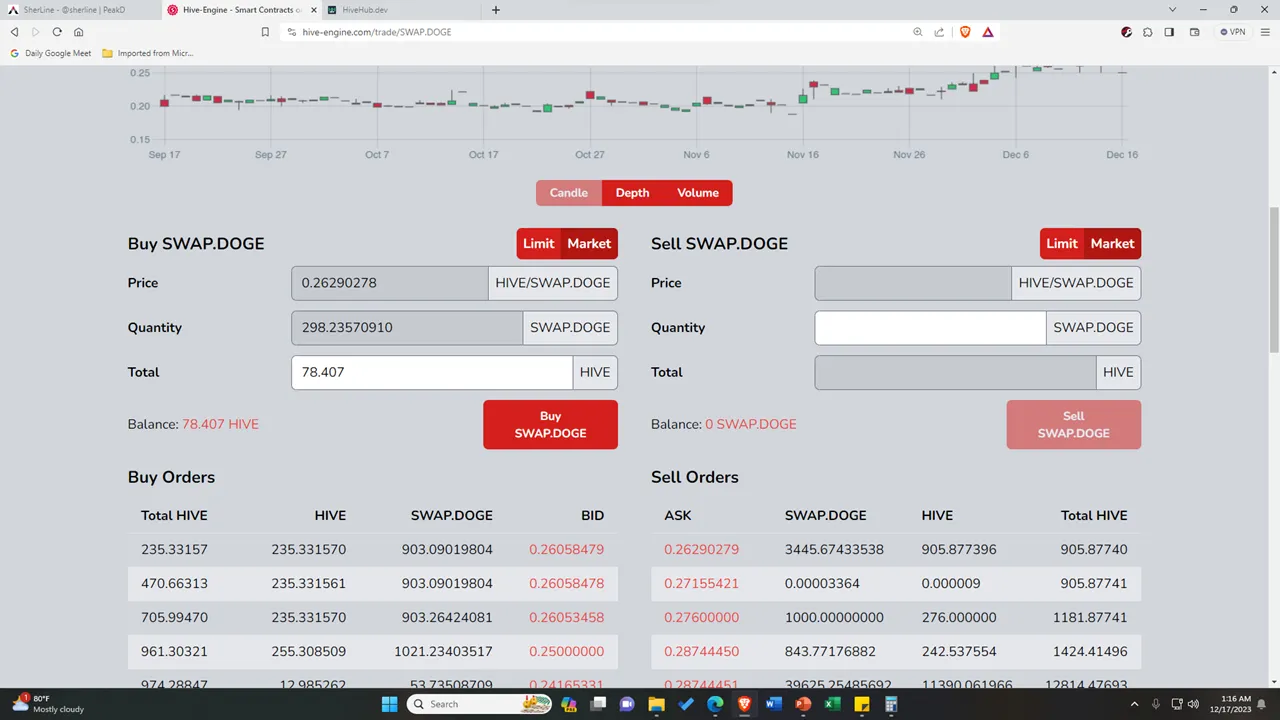
If you want to swap all HIVE tokens that you have, you may click the amount stated beside the “Balance: “, and then it will automatically reflect on the total. The price and quantity will also be filled out after you input an amount in the total. Then after that, click the “Buy SWAP.DOGE” button. Then a confirmation will prompt again in your Hive Keychain to confirm the transaction.
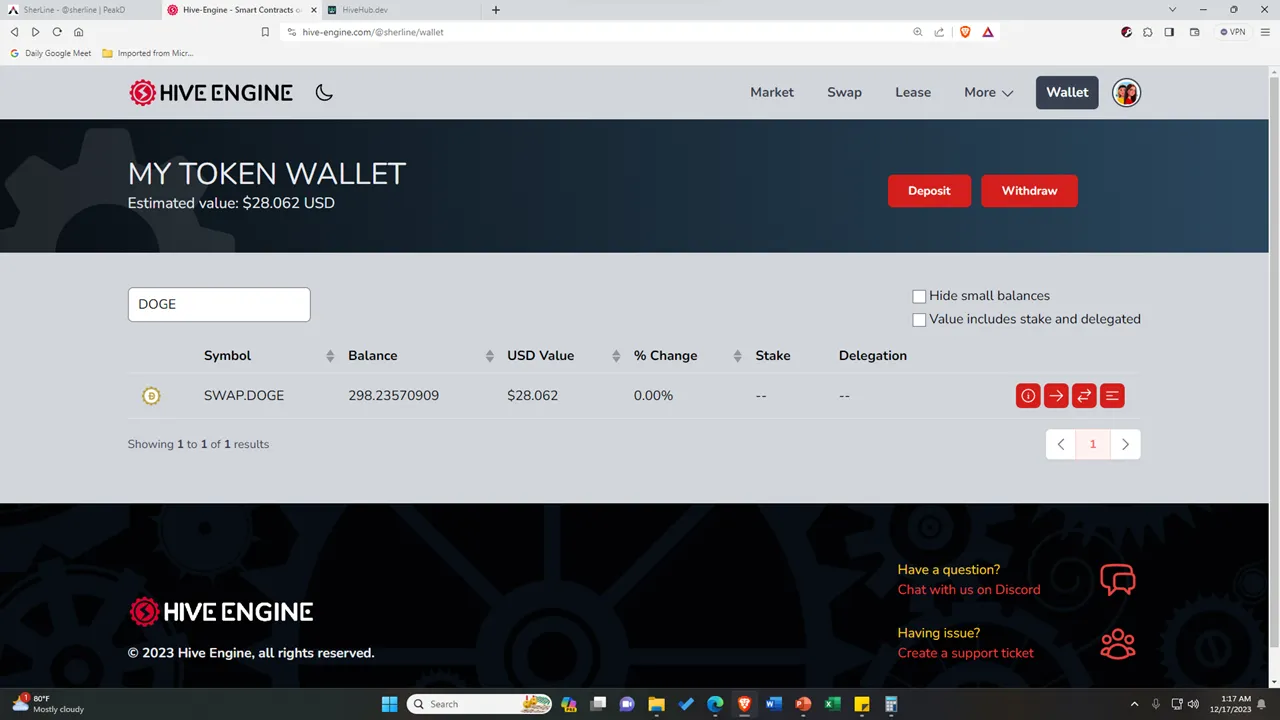
After that, go back to your wallet to see if the DOGE has been reflected already. As you can see, after I swapped the 78.407 HIVE tokens that I have, I received a 298.23570909 SWAP.DOGE has a USD value of $28.062. But that’s not how the procedure stops. The next thing that I did is that I withdraw the DOGE that I have.
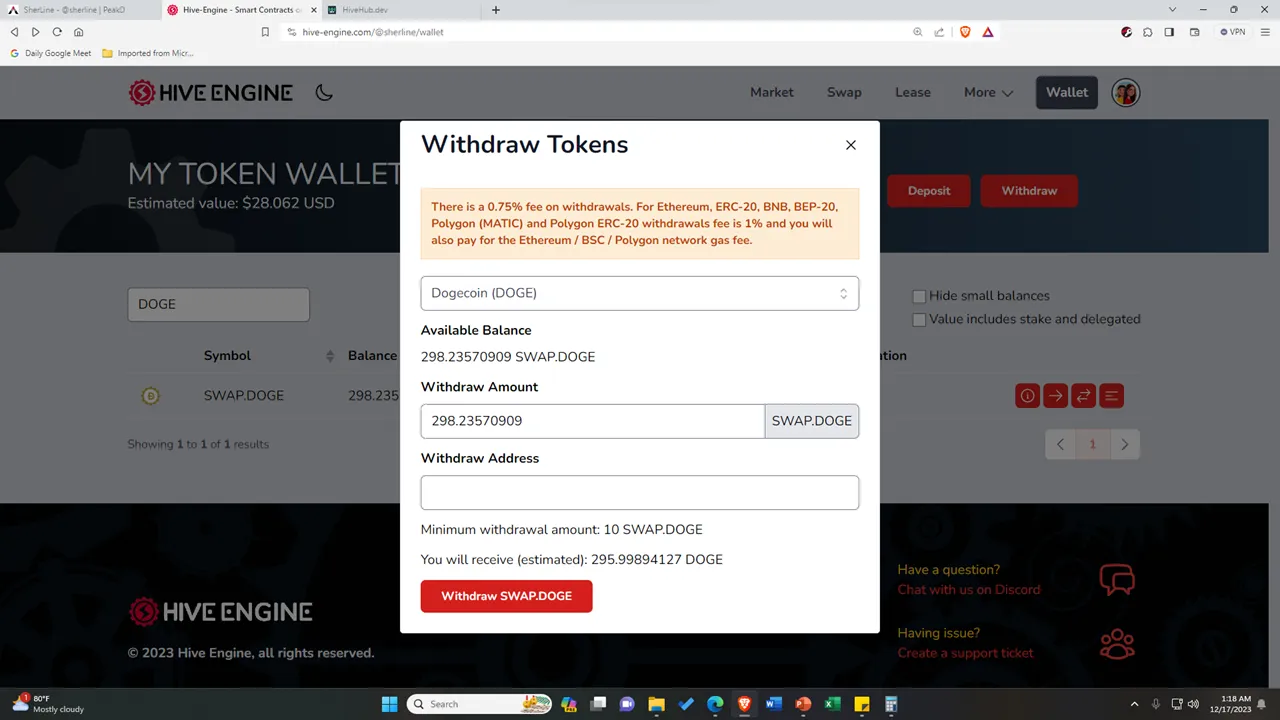
For this step, you will just need to click the “Withdraw” button, and then this will prompt on your screen. And again, to automatically input the amount, you may click the amount below the ‘Available Balance’. Then for the Withdraw Address, this will come from your Maya app.
Selling your crypto in Maya
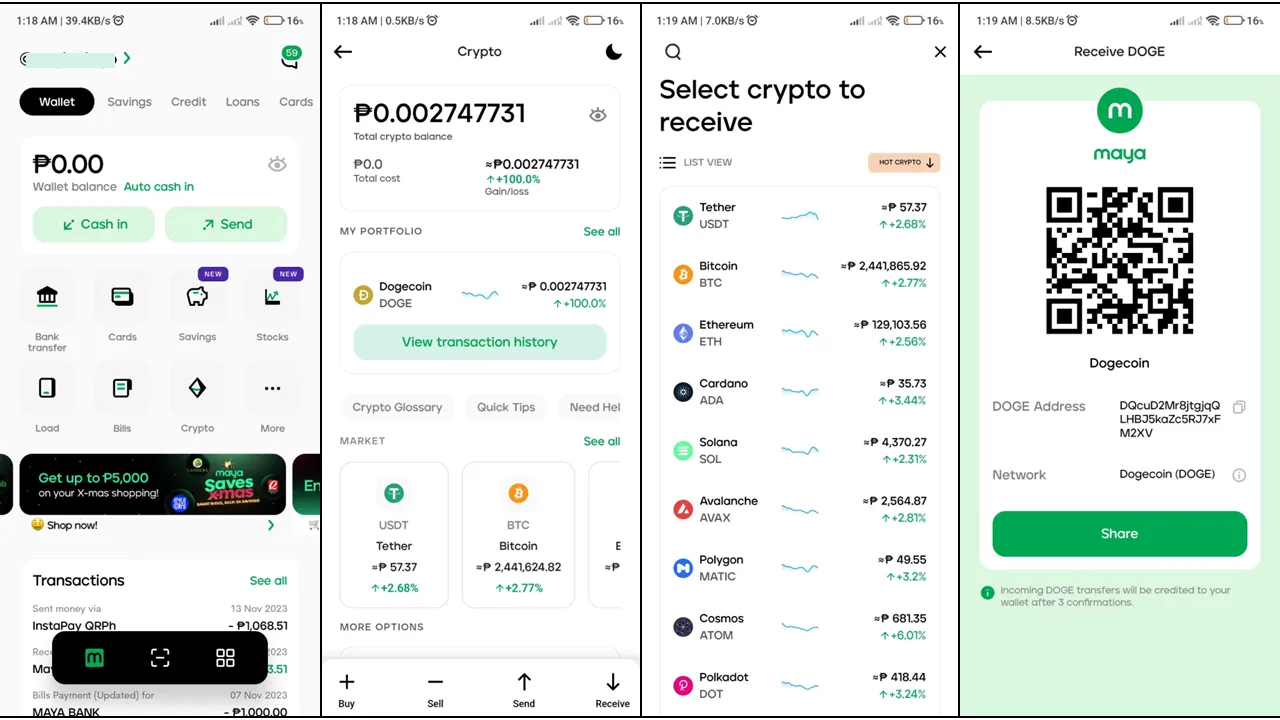
So, for this procedure, you have to log in to your Maya account and make sure it is fully verified. The next thing that you need to do is to go to the “Crypto”. Then as you can see, I was directed to the Crypto page. It shows my crypto balance, my portfolio, the market, and the buttons where I can buy, sell, send, and receive crypto. So, for me to receive my DOGE, I clicked the “Receive” button and then I searched for “DOGE”. After that, a generated QR code and DOGE address were given to me to receive a DOGE. I copied the DOGE Address and return to the Hive Engine.
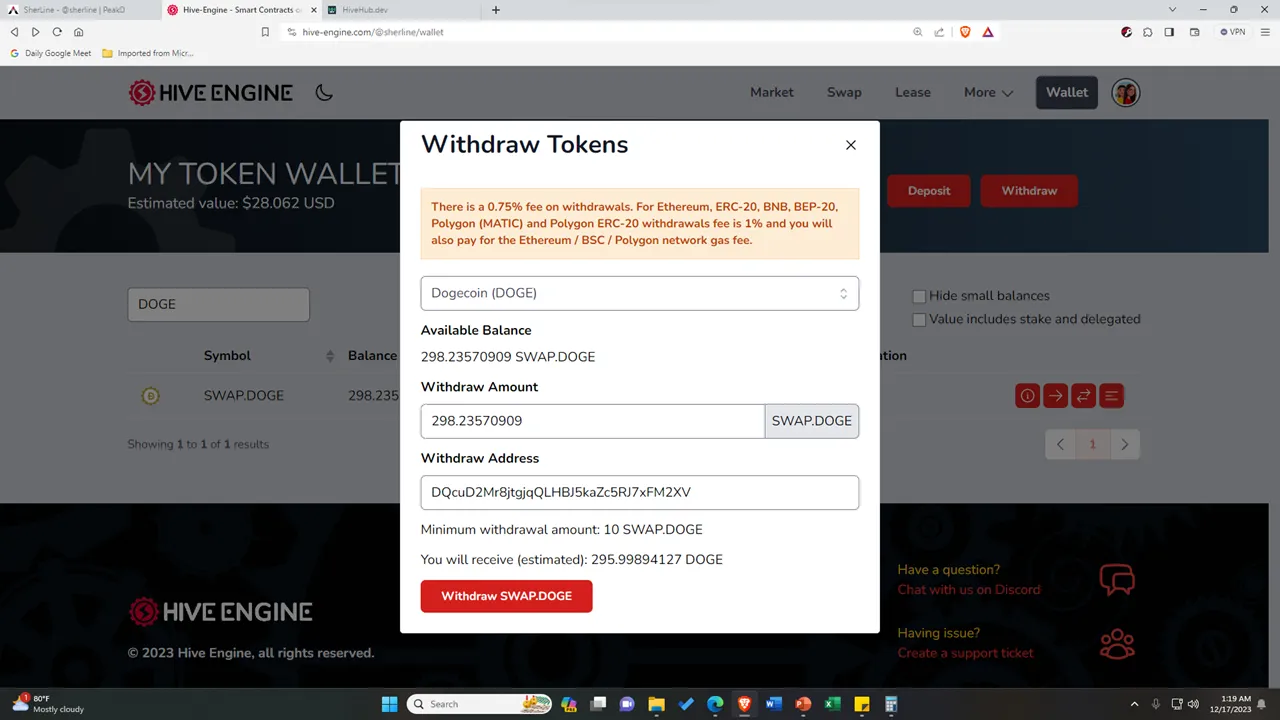
Then I pasted the DOGE Address in the Withdraw Address. After that, I just simply clicked the “Withdraw SWAP.DOGE” button and confirmed my transaction. And that’s it!
The next thing that you need to do is wait for the notification that you have received your crypto. Usually, I wait 10-15 minutes before I can finally receive it in my Maya e-wallet.
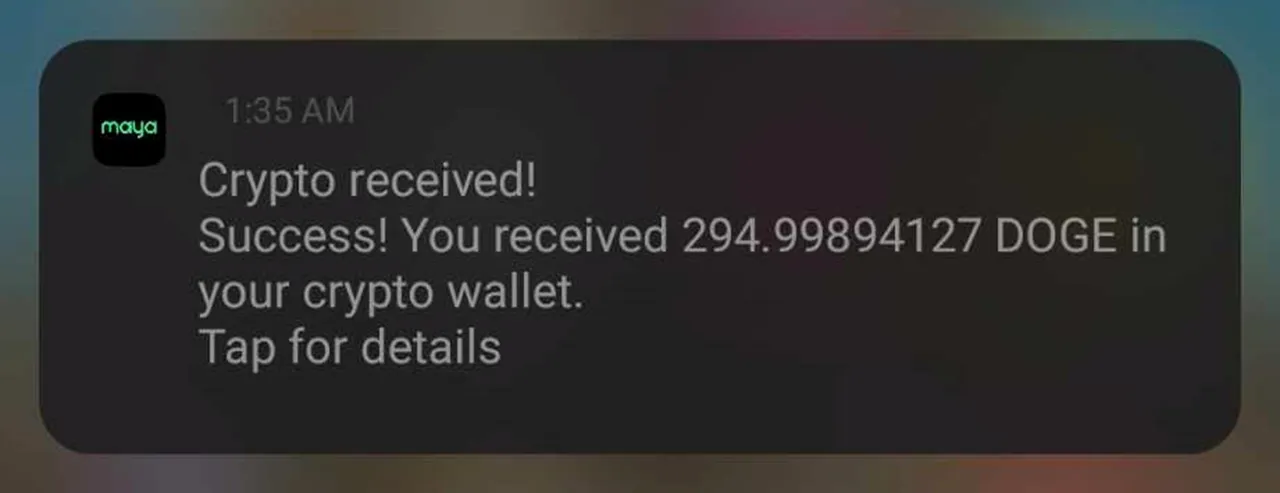
But in this transaction, I waited only 6 minutes before I received my crypto.
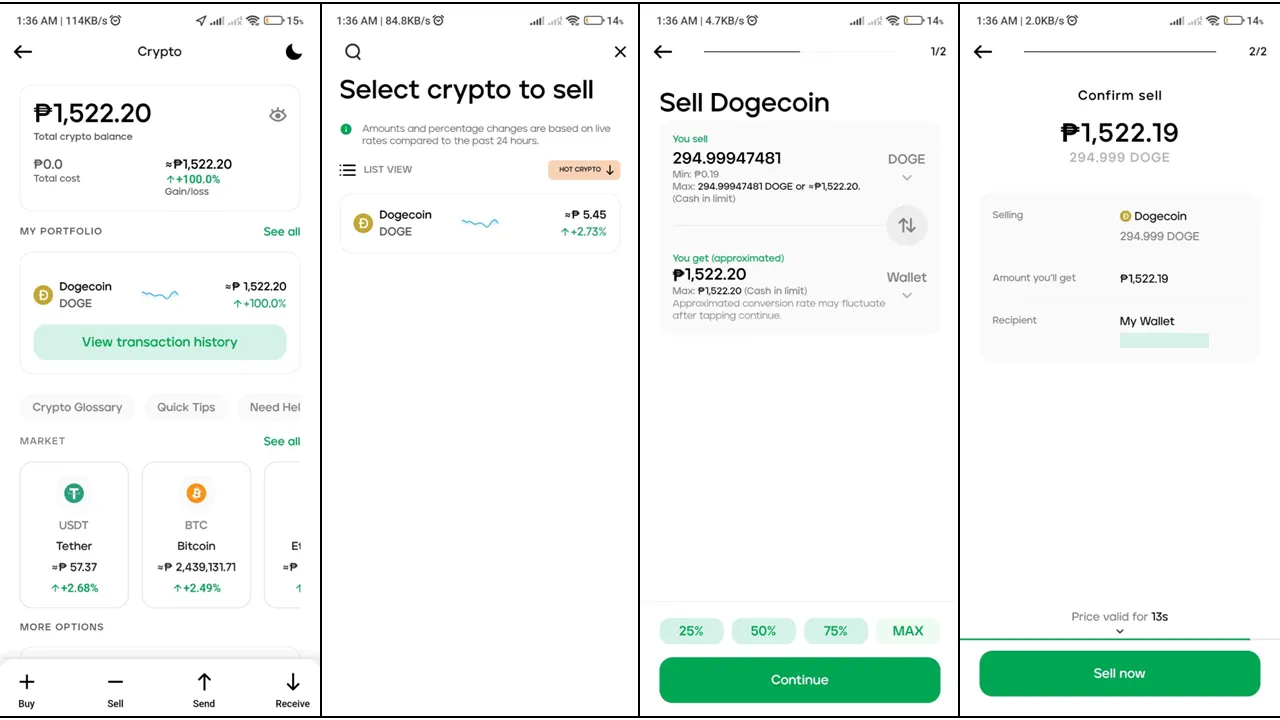
So, as you can see, here is the exact value in peso of my 294.99894127 DOGE. Expect that during the process of trading your crypto will increase a small amount. Like, a while ago, I had a 298.23570909 DOGE, and then when I withdrew the DOGE from my Hive Engine wallet, it notified me that I would be only receiving an amount of 295.99894127 DOGE. Then based on my Maya app, I only received an amount of 294.99894127 DOGE.
I haven’t studied about this yet, but I hope to share it with you someday. But I think the reason for this inconsistency of the value is because of the values in the trade market. I hope someone can enlighten us about this hehehe. 😅
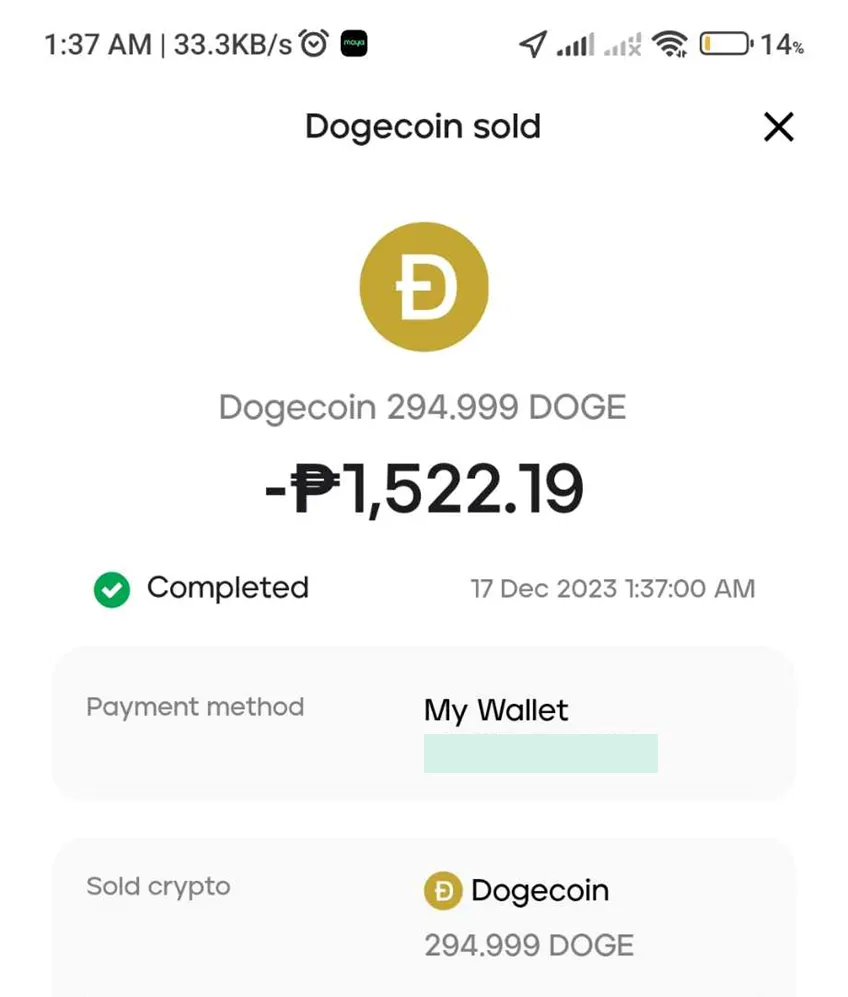
So, going back, in able for me to withdraw the DOGE into PHP currency, I sold my Dogecoin and received an amount of Php 1,522.19. Then if you confirm the transaction, just click the “Sell now” button and then... Voila! Your Dogecoin is sold and you have received your crypto in peso.
Summary
To sum it all up, here are the procedures that you need to remember.
- Go to the Market (HiveHub Dev) to swap your HBD into HIVE tokens.
- Go to Hive Engine and deposit your HIVE tokens in your token wallet.
- In Hive Engine, go to Tokens to Buy SWAP.DOGE using your HIVE tokens.
- Withdraw your SWAP.DOGE in Hive Engine by entering the amount and the withdraw address.
- To get the address, Log in your Maya e-wallet and go to Crypto page.
- Click "receive" and look for Dogecoin.
- Copy the DOGE address and paste it in the withdraw address.
- Click the withdraw button to proceed. Then wait the notification from Maya.
- Once received, go back to your Maya e-wallet then go to Crypto page.
- Sell your Dogecoin in Maya Crypto, and you will get your Hive earnings into peso.
I guess it was a long process to look at, but once you become familiar with these procedures, this will be much easier for you next time.
I hope you learned something from this tutorial! Again, thank you to @tpkidkai, as he is the first one to discover this process. We just elaborated the whole process for those who are new to this one. 😊
We are open to all of your feedback, comments, and suggestions about this tutorial. Thank you! 💖
All screenshots taken are mine unless stated otherwise.