Heeeyho Readers! Do you change your bicycle chain when it wears out?
It's about time to get a new chain for the bicycle. Twice a year tends to be my average, depending on how much I cycle and weather conditions. And how inspired I am to clean the drive-train after cycling. Keeping the drive-train in order is crucial to extract more kilometers off our chains, so much as a lot of other variables — let's spare the boring tech stuff for later. Shall we?
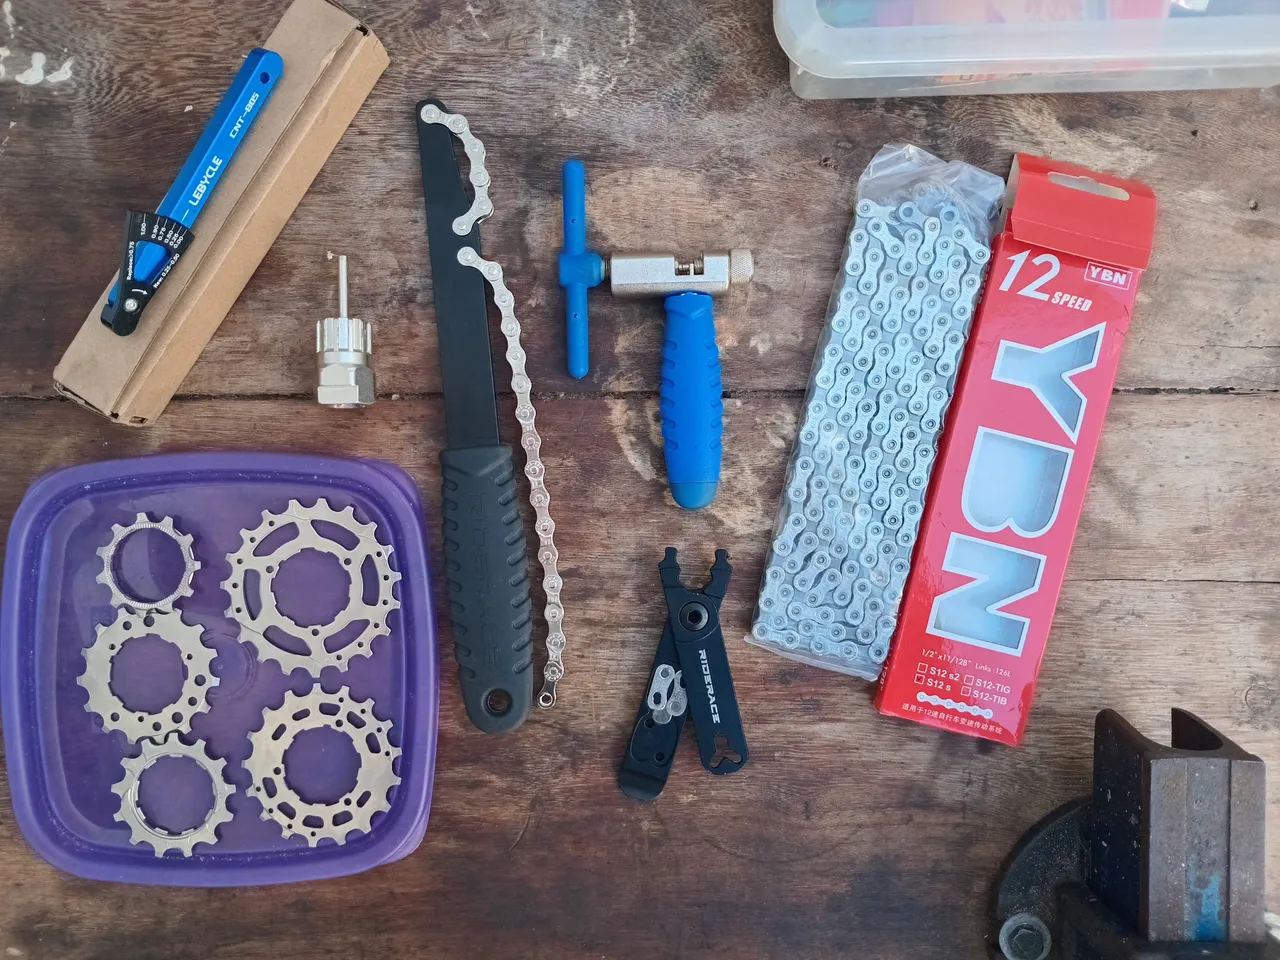
This post needs to be quick and easy for those mango locos who like to inspect/service their bicycles at home.
Step number uno
Did you know chains need to be replaced? Yup, bad news. Chains wear out, along with chainrings and cassette sprockets. In essence, they elongate as the pins and rollers wear out. If the chain becomes way too tired, it'll start to jump over the teeth at the drive-train and miss gears. You may have heard that 'trrr trrr' sound when you tried to cycle away from that mad dog trying to chew your legs on the ride at the park — that's your chain asking to be swapped.
Explanation given, how do you know your chain needs to be replaced? Certainly before it starts to jump, you pervert. The best way is to have a cheap chain checker so to measure chain wear from time to time.
- 50% wear (be careful)
- 75% wear (new chain is due)
- 100% wear (full pervert)
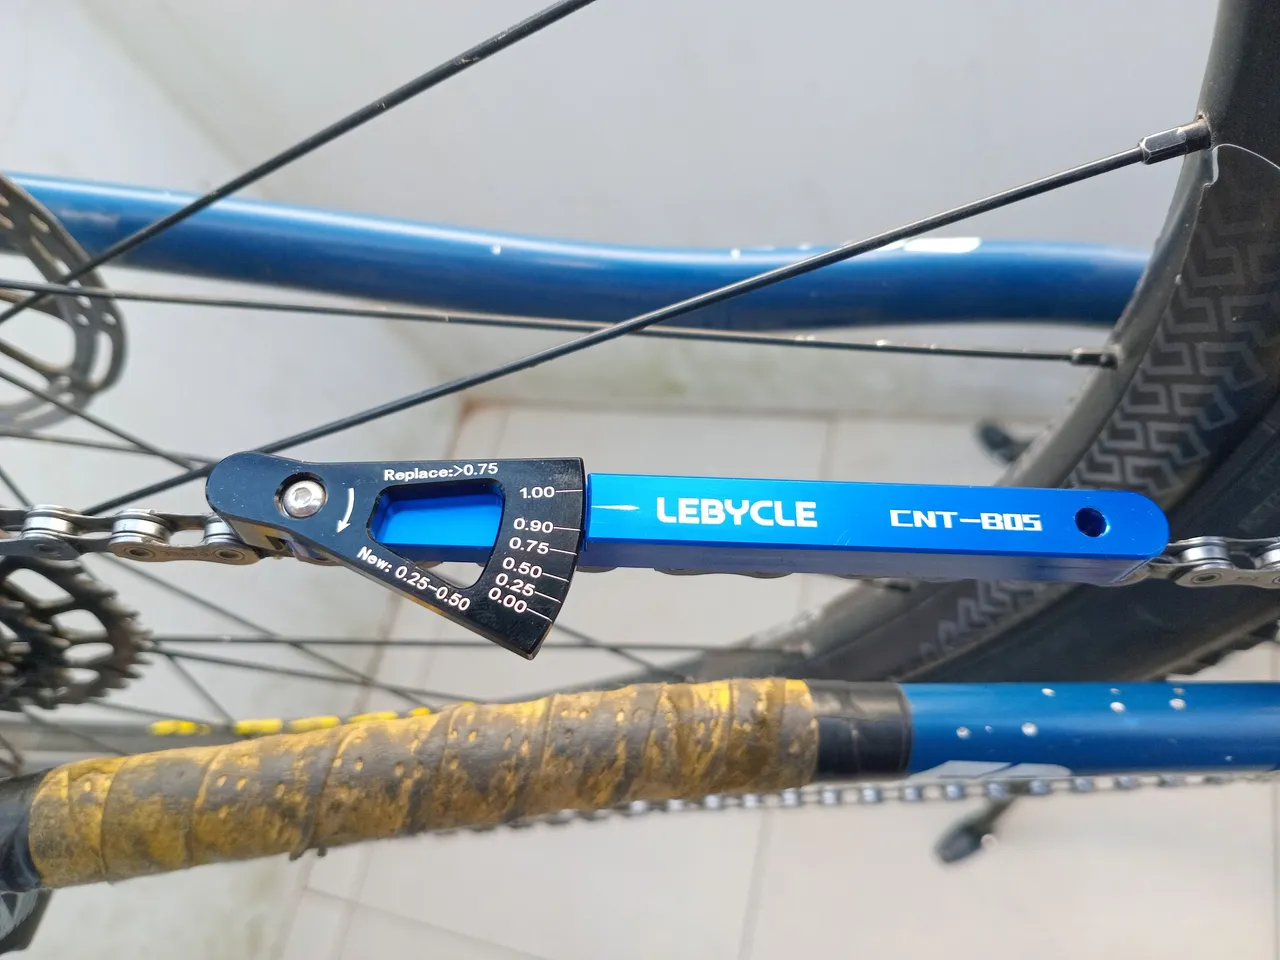
As you can see, my chain is nearing full pervert mode at 100% wear. Hold on! I know using a chain for that long is highly inadvisable, but it's an experiment I'm running and shall not be repeated at home (won't explain that now unless asked in the comments).
The point is: a new chain is due. What's next?
Step number uno dos
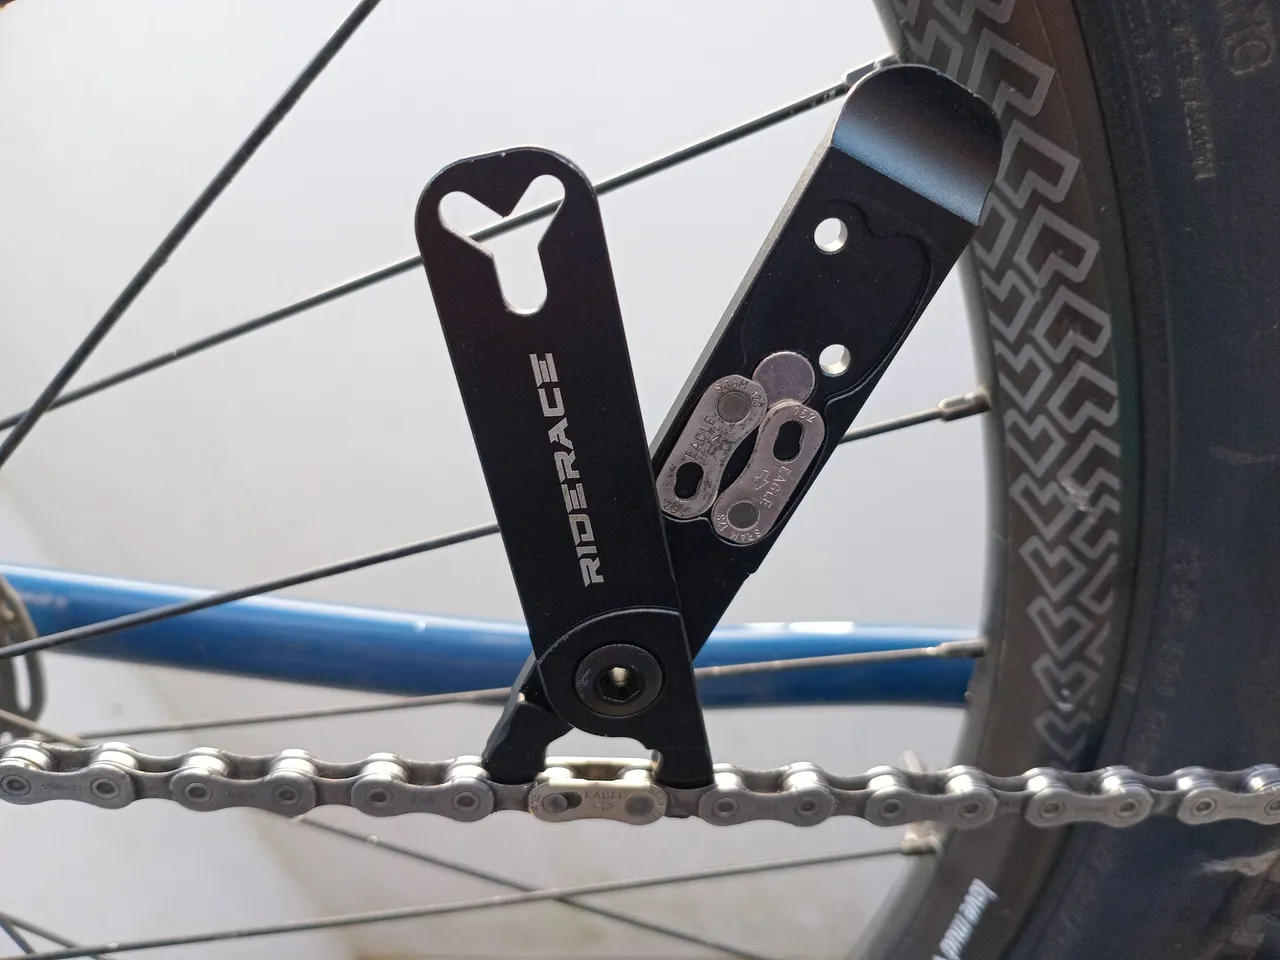
If your chain has a master link/quick link, grab a master link tool to open the chain. No master link tool? Needle nose pliers will do it. No? Wrap some thin chord around the pins and pull them hard (as if tying a knot). Pimba! Master link opened, we can remove the worn out chain from the bicycle. Obs.: Some chains don't use a master link, so you'll need a chain breaker (see step 3).
Step number tres
Chains come in standard lengths that often don't match what's installed on our bicycle. Don't panic! Count the links on the old chain and cut the new one to size. If new one is shorter than old one, then panic. The tool for the job is called a chain cutter or chain breaker and should be in any cyclist's basic tool kit.

Beautiful! Now that our new chain is cut to length we can go ahead and install it on the bicycle.
Tech addendum
Sometimes a brand new chain won't match worn out chainrings and cassette. Often, a new chain will settle after two or three rides; you might still feel it jump, especially under load, until it stops. If it doesn't stop, that means your chainrings and cassette are also toasted and need replacement. One can determine cassette wear visually or measuring.
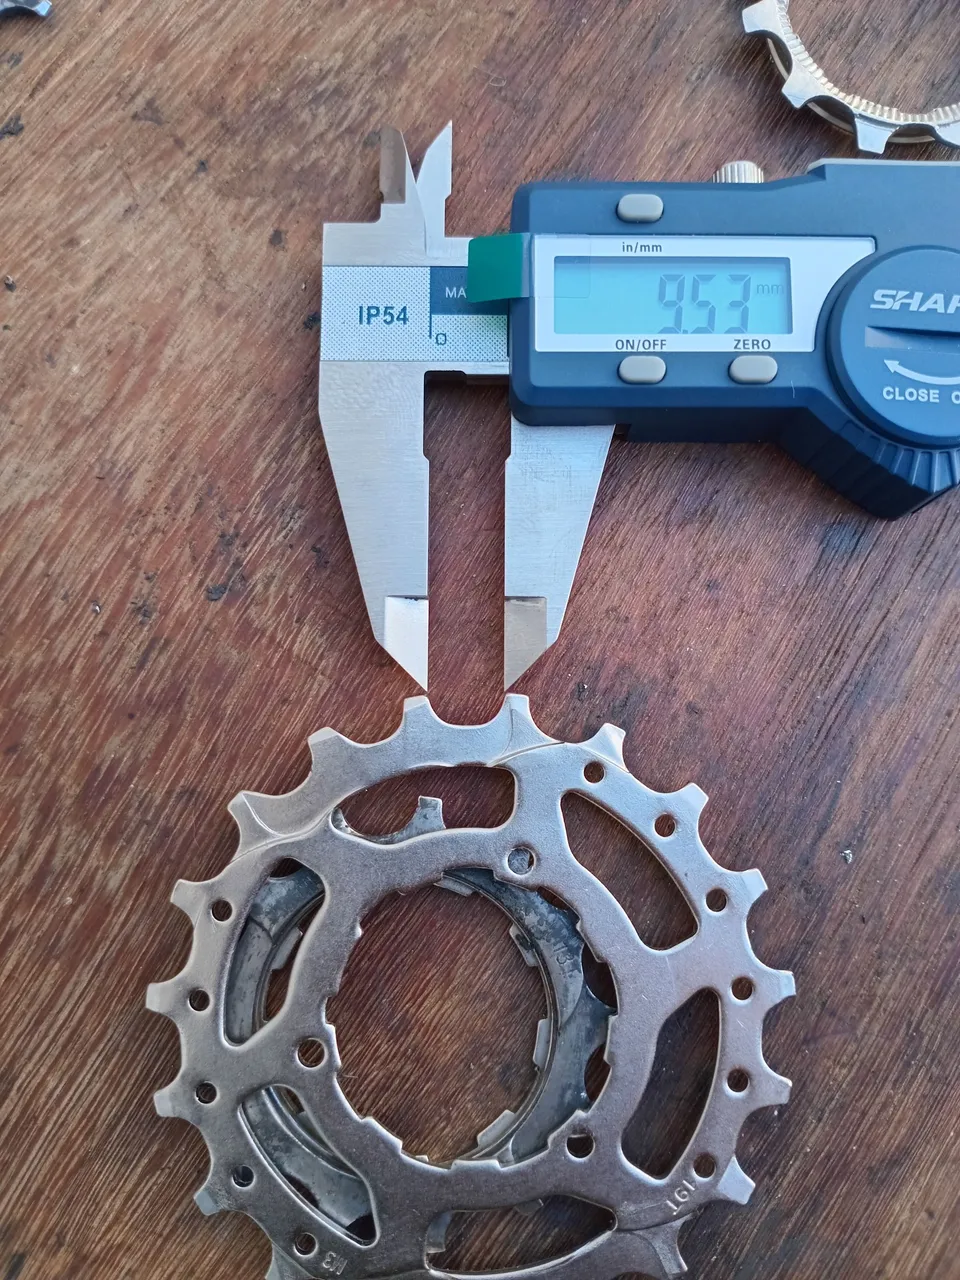
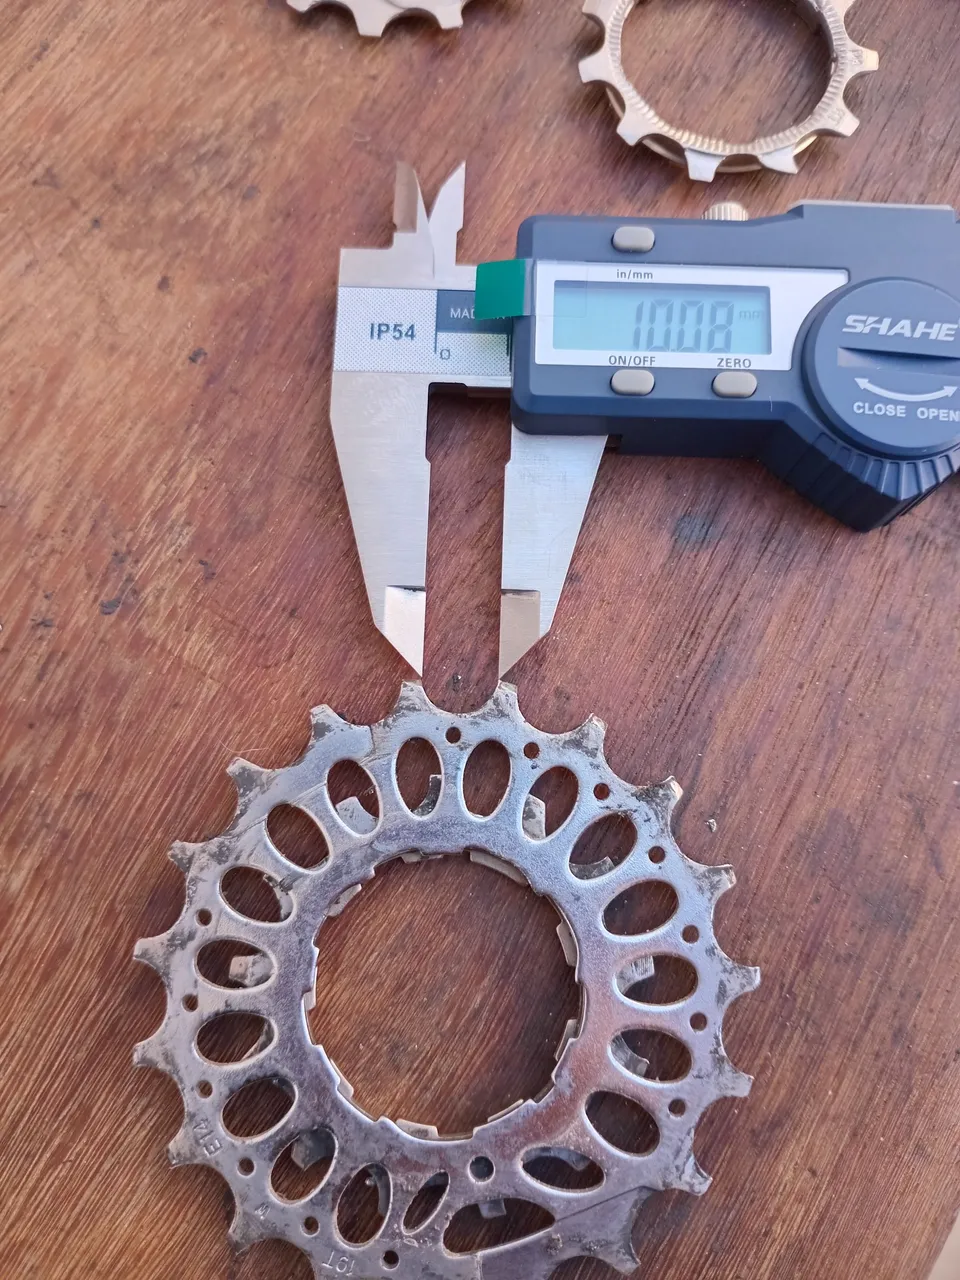
According to Zero Friction Cycling, 9,55 mm from teeth to teeth is standard for a new cassette sprockets. Anything between 9,7 - 9,8 (depending on your power output) may start to jump. Over 10 mm is totally toasted and will definitely jump on a new chain.
Replacing sprockets individually or an entire cassette is subject for another post.
Tech addendum closed
Step numero four
New shiny chain on hand. Make sure to pass it through the derailleur pulleys correctly! You forgot to pay attention to that before removing, right? I did that on my first time too. Remember: in front of the upper pulley, behind the lower pulley. Pimba! Most chains don't have sides (read instructions on your chain package).
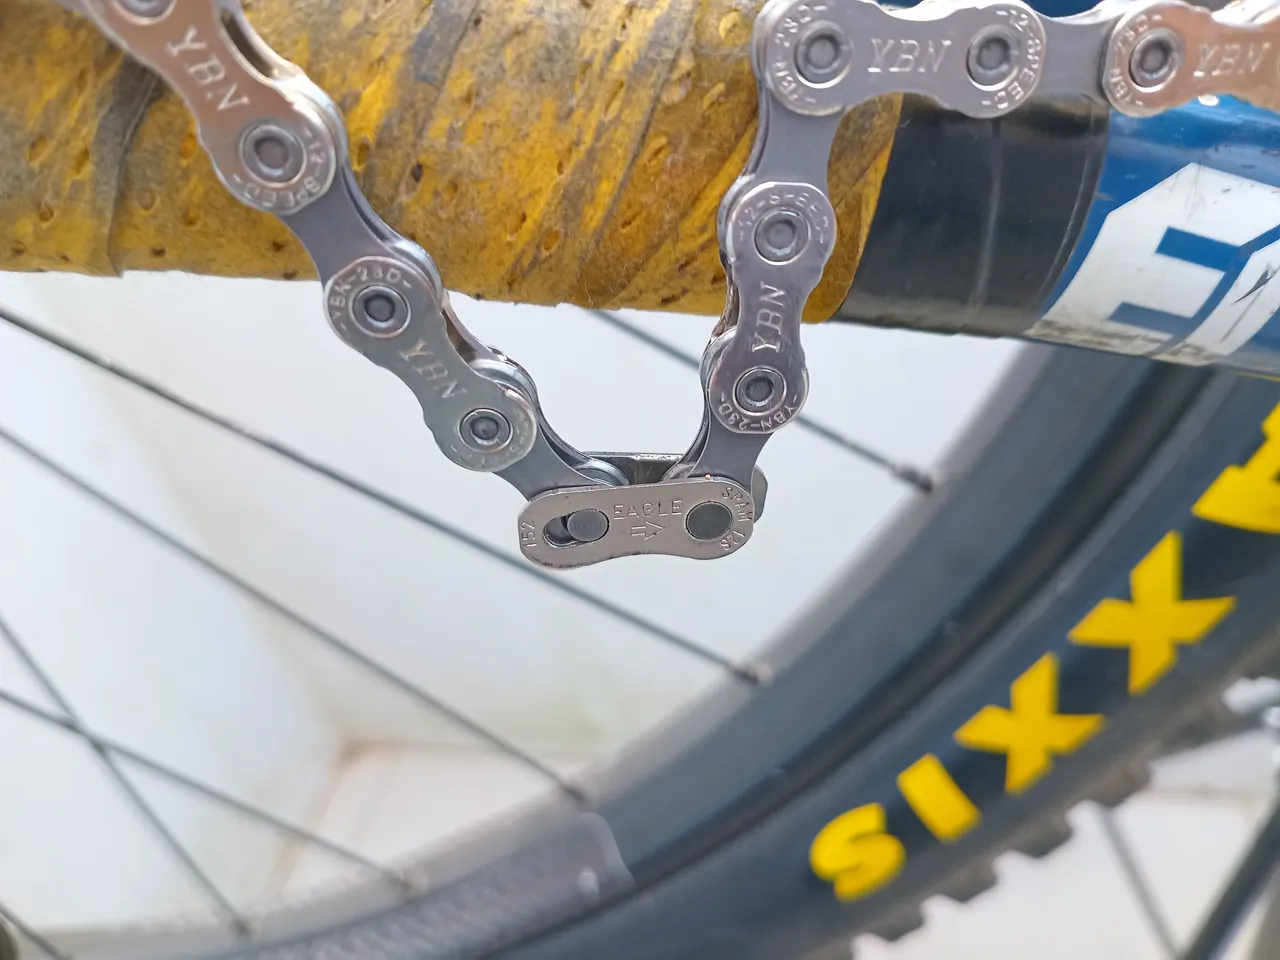
Oukey, install the master link and close it down. No tool? Give the crank arm a good whack and the link will close. (It's best to watch a YT video just in case).
Ready to go
Uff! It's a lot harder to spend money on a new chain than replacing the damn thing. It's also important, since a worn out chain may break while cycling and cause an accident. Also, if you go way into pervert mode and wear that chain to the last breath, you may damage the entire drive-train, which will be a hella costly. *Your drive-train will wear out eventually, but it generally accepts three or four chain swaps before dying.
Anyways, this post was more of a jocose way to inspire readers to take care and maintain their (your) chains. Chain swap is part of owning a bicycle as much as changing oil in our cars.
Chains are subject to endless discussions regarding wear, lubrication, care, brands, etc etc. Let's skip all that. All we want is to keep our bikes in order without unwanted noises.
I hope that you've enjoyed.
Peace.
If you enjoyed this post consider leaving your upvote for a hot coffee.
Find me on Twitter: https://twitter.com/mrprofessor_
~Love ya all,
Disclaimer: The author of this post is a convict broke backpacker, who has travelled more than 10.000 km hitchhiking and more than 5.000 km cycling. Following him may cause severe problems of wanderlust and inquietud. You've been warned.