❤️❤️🍹🎃🎃🎃🎁🎁🎀🎊🎄🎄🎄🎉🎈🎉🎗🎋🎋🎍
Hello, my dear friends, this time I have made a pumpkin. If you want to make it with very simple and inexpensive tools, I will teach it in this post. Required materials: newspaper, paper towels, plastic bag, thread, wood glue, and paint.
🎃🎃🎃🎃🎃
Hallo, meine lieben Freunde, dieses Mal habe ich einen Kürbis gemacht. Wenn Sie ihn mit sehr einfachen und kostengünstigen Werkzeugen herstellen möchten, werde ich ihn in diesem Beitrag beibringen. Benötigte Materialien: Zeitungspapier, Papiertücher, Plastiktüte, Faden, Holzleim , und malen.
🎃🎃🎃🎃🎃
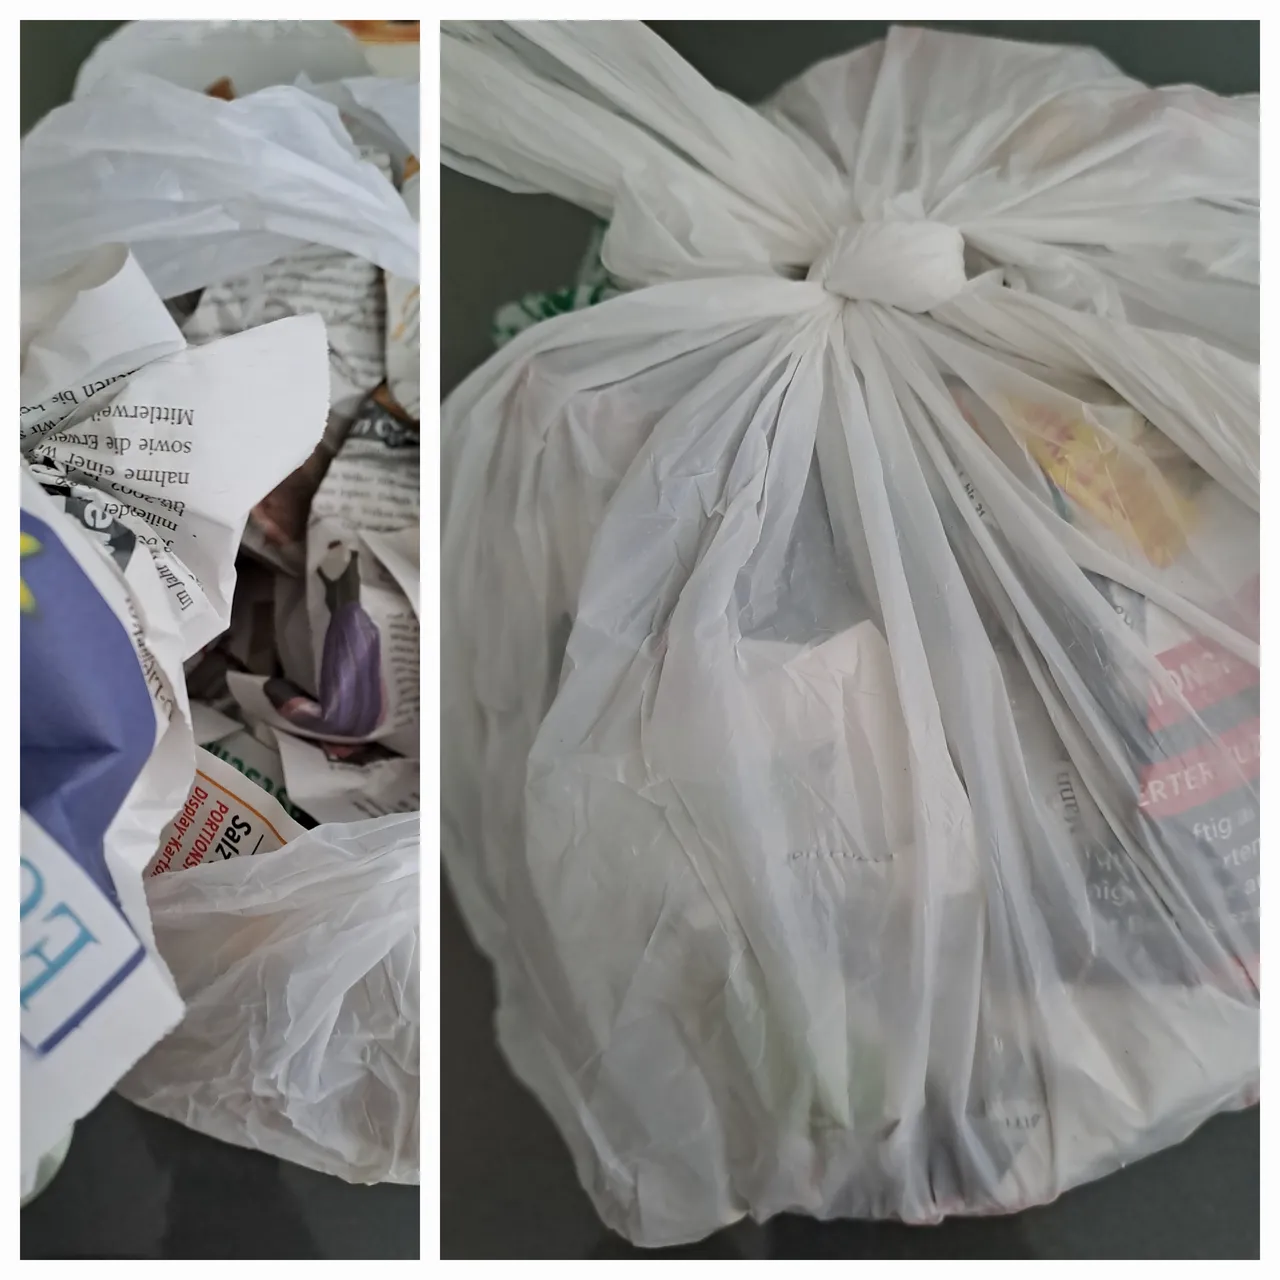
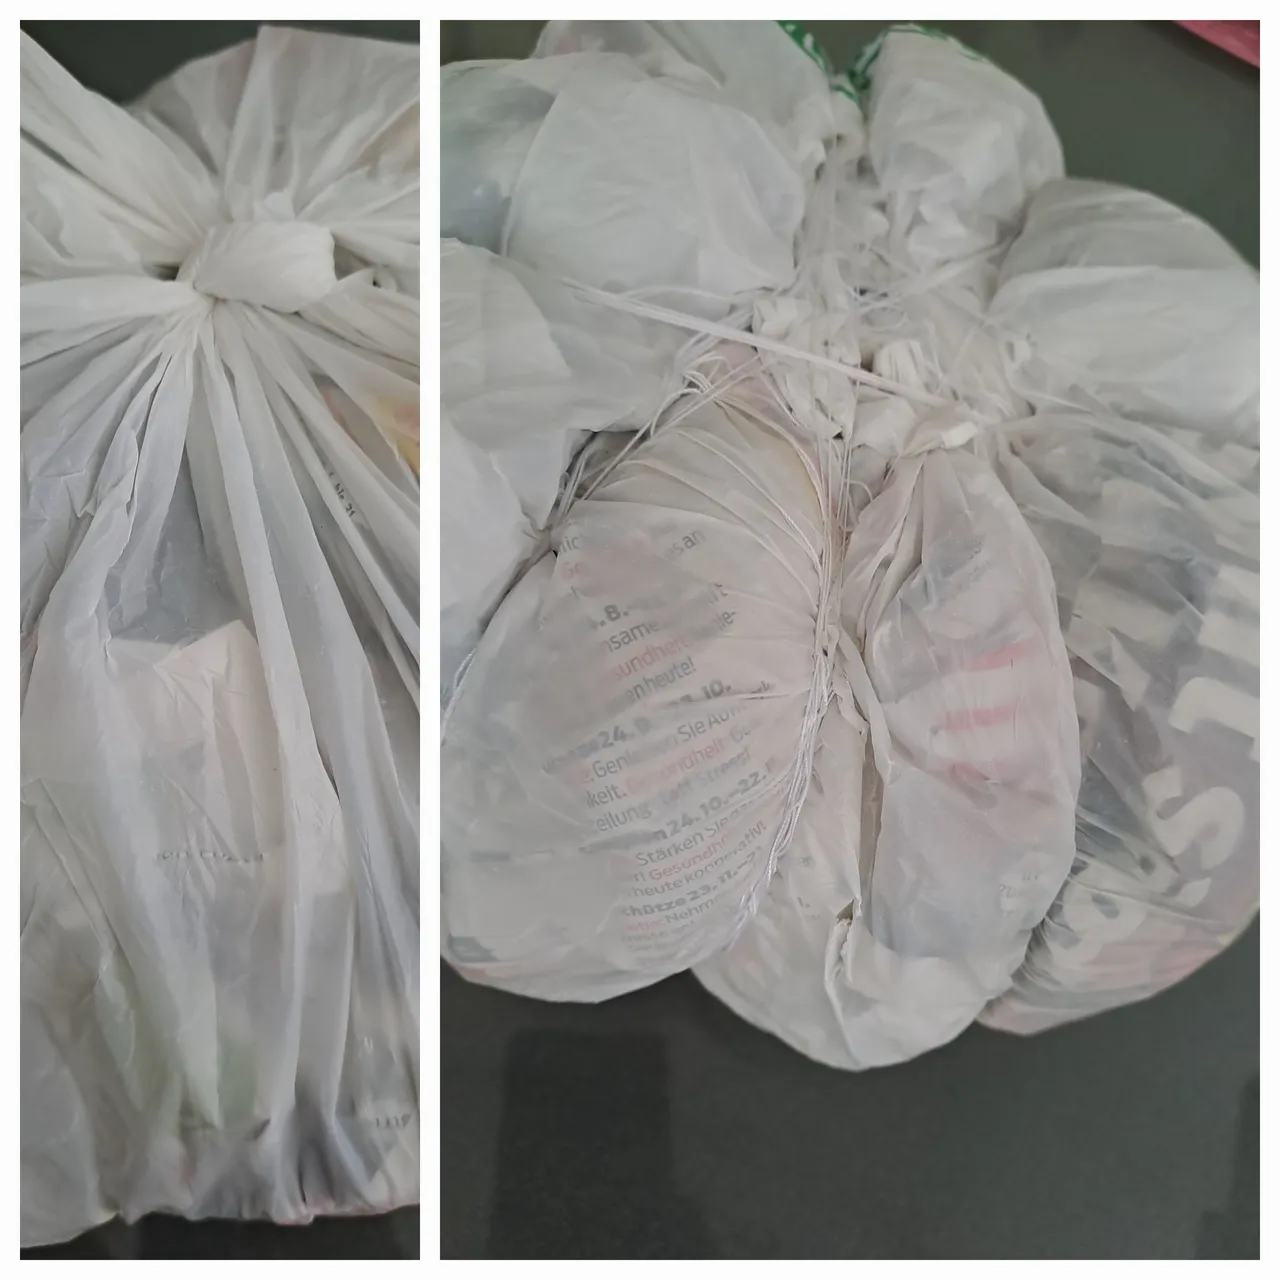
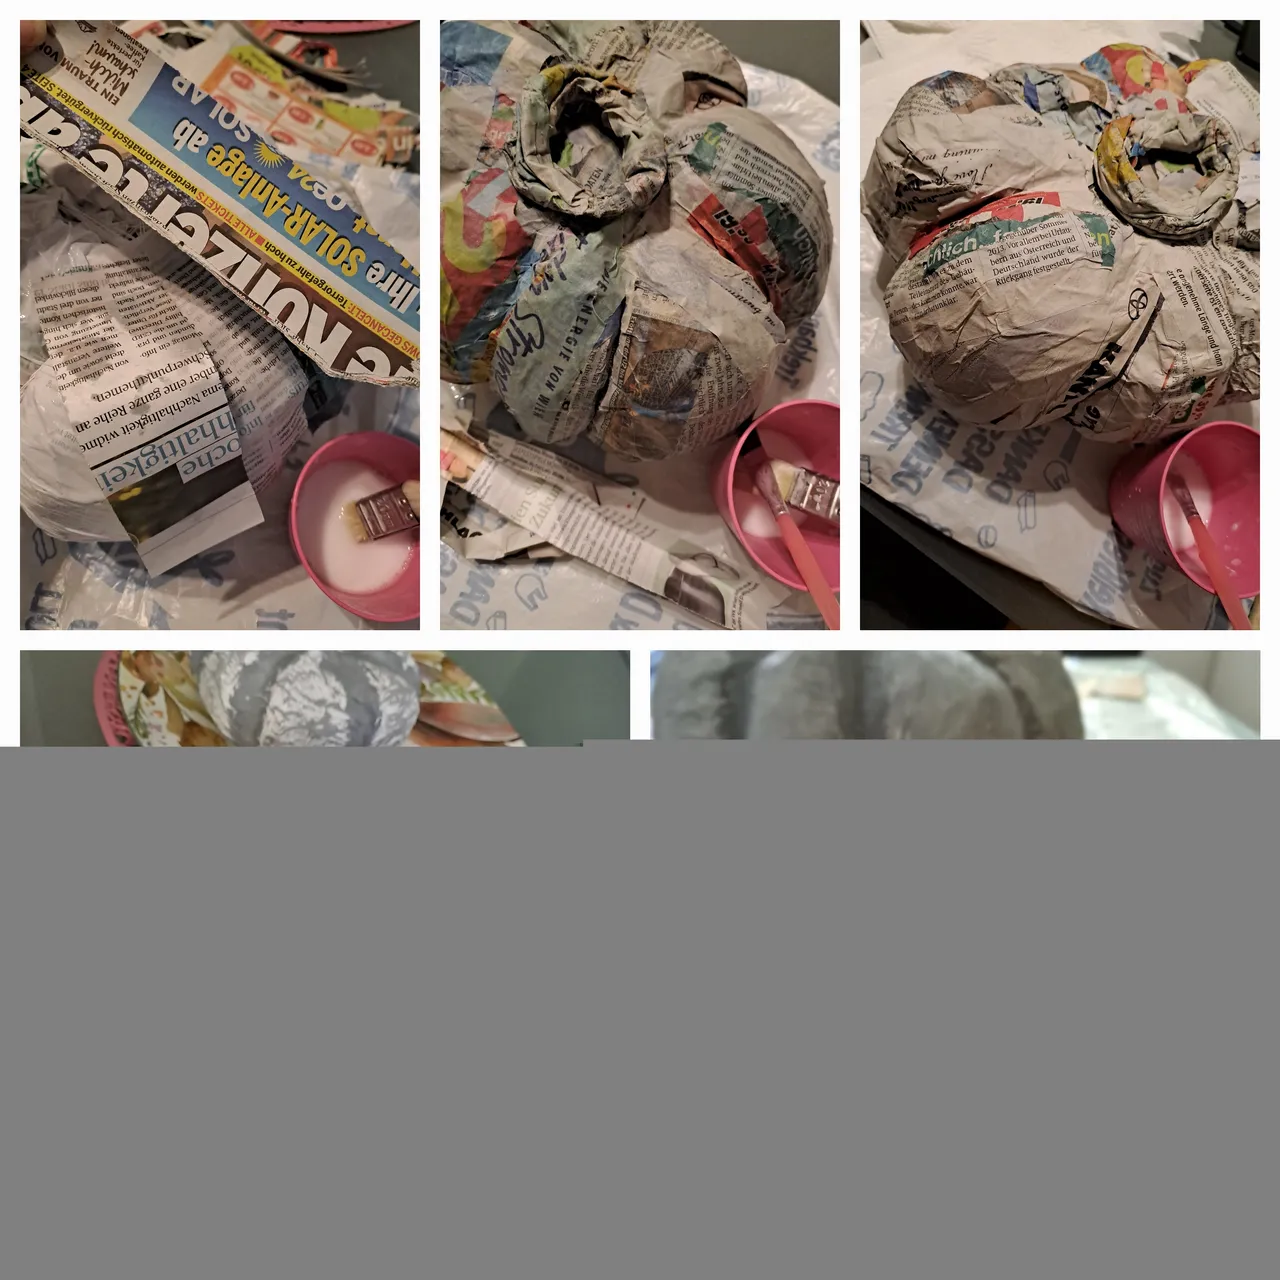
First, we take a plastic bag and fill it with newspapers that we cut three centimeters wide and tie the end of the plastic, then we wrap the thread around the bag in such a way that it divides it into eight parts. We divide and divide each part into two parts, please see in the figure
🎃🎃🎃🎃🎄🎄🎄🎄
Zuerst nehmen wir eine Plastiktüte und füllen sie mit Zeitungspapier, das wir drei Zentimeter breit zuschneiden, und binden das Ende der Plastiktüte fest. Dann wickeln wir den Faden so um die Tüte, dass sie in acht Teile geteilt wird Jeder Teil ist in zwei Teile unterteilt, siehe Abbildung
🎊🎋🎋🎊🎃🎃🎃🎊🎄🎄🎄🎃🎊
🎃🎃🎃🎄🎄🎄🎄

🎃🎃🎃🎃🎃🎃🎃🎀🎁🎁🎁🎁🎁🎁
After tying the threads and dividing the pumpkin replica into eight parts, we cut strips of newspaper with a width of three centimeters with scissors and put one tablespoon of wood glue and fifteen tablespoons of cold water in a container and mix until it is uniform. We carefully apply this substance with our hands or with a brush and put it on the pumpkin and repeat this ten times until the entire surface of the pumpkin is covered with ten rows of paper. If it is not very regular, there is no problem.
🎃🎃🎃🎄🎄🎊🎊🎊🎊🎊
Nachdem wir die Fäden zusammengebunden und die Kürbis-Nachbildung in acht Teile geteilt haben, schneiden wir mit einer Schere drei Zentimeter breite Zeitungsstreifen ab und geben einen Esslöffel Holzleim und fünfzehn Esslöffel kaltes Wasser in ein Gefäß und vermischen es, bis es gleichmäßig ist Tragen Sie diese Substanz vorsichtig mit unseren Händen oder mit einem Pinsel auf, geben Sie sie auf den Kürbis und wiederholen Sie dies zehnmal, bis die gesamte Oberfläche des Kürbises mit zehn Reihen Papier bedeckt ist. Wenn es nicht sehr gleichmäßig ist, ist das kein Problem.
🎃🎃🎃🎄🎄🎄🎄🎄🎄🎊🎊🎊🎊


🎃🎃🎃🎃
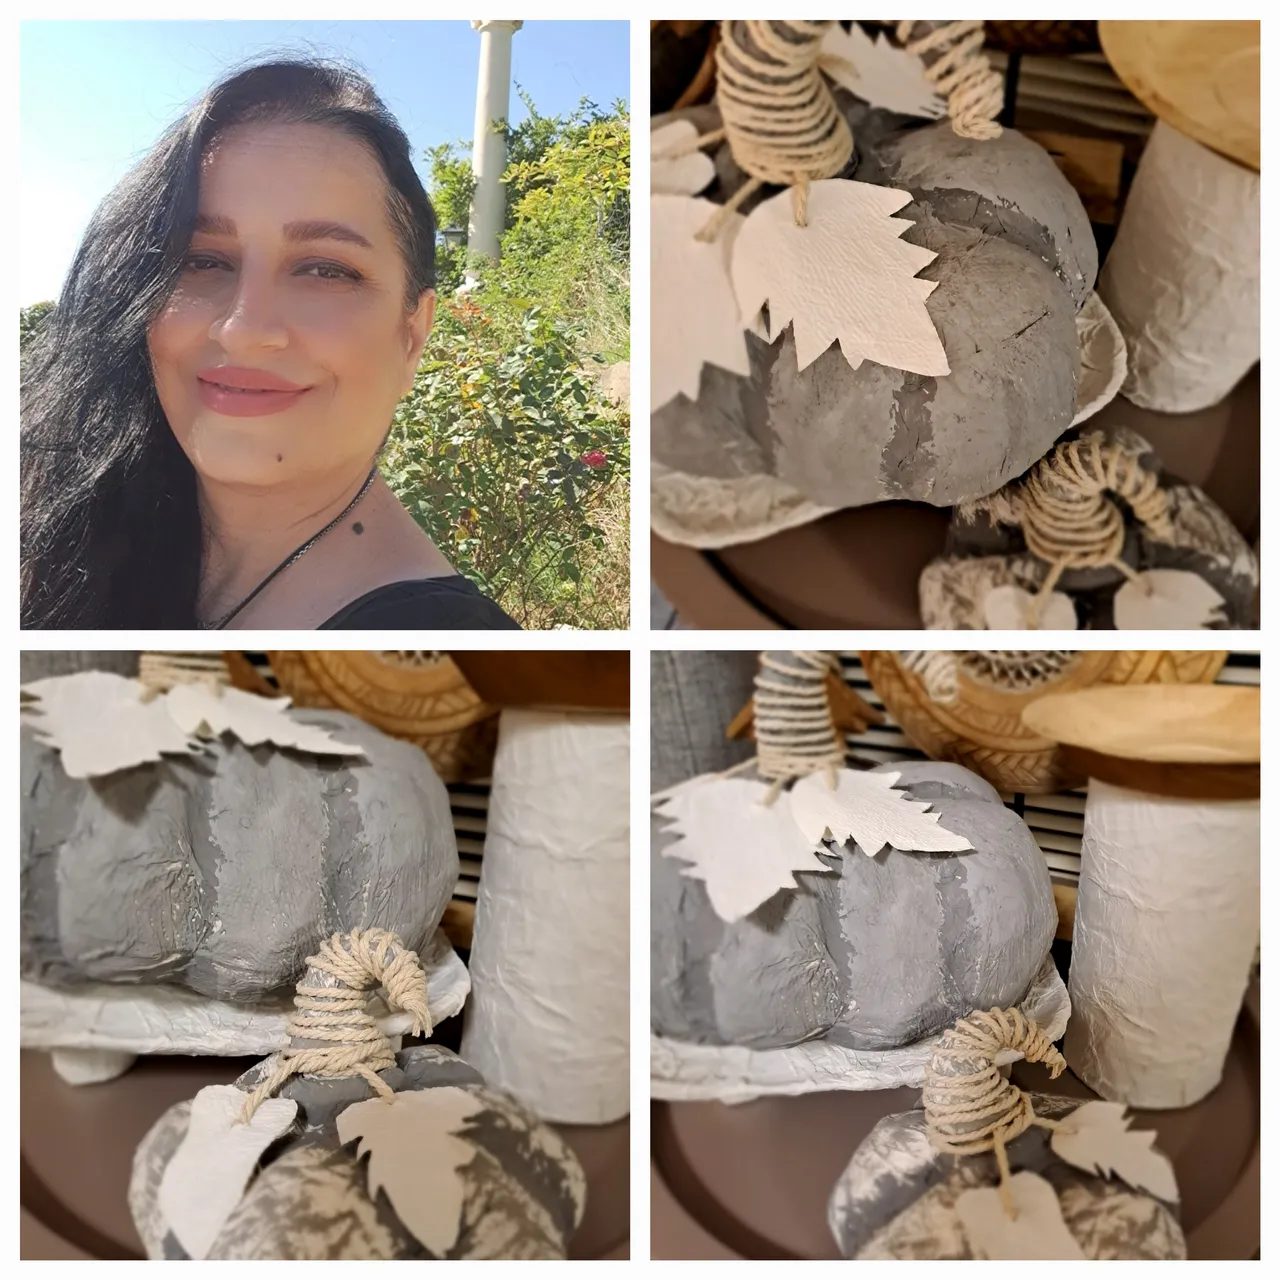
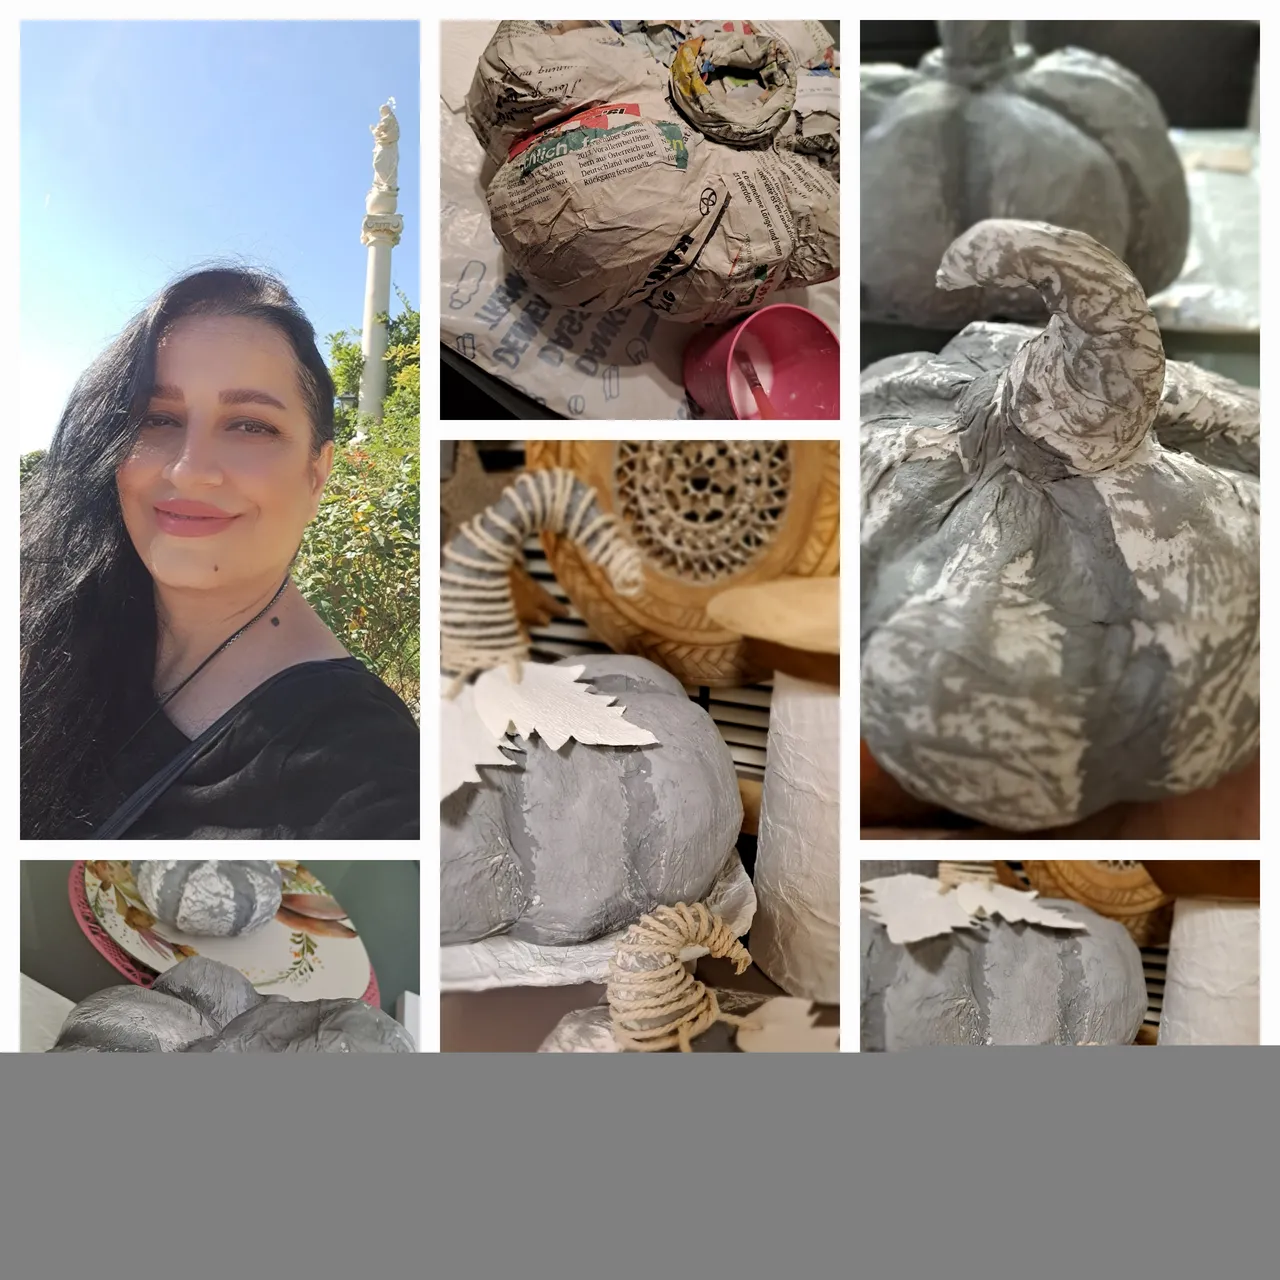
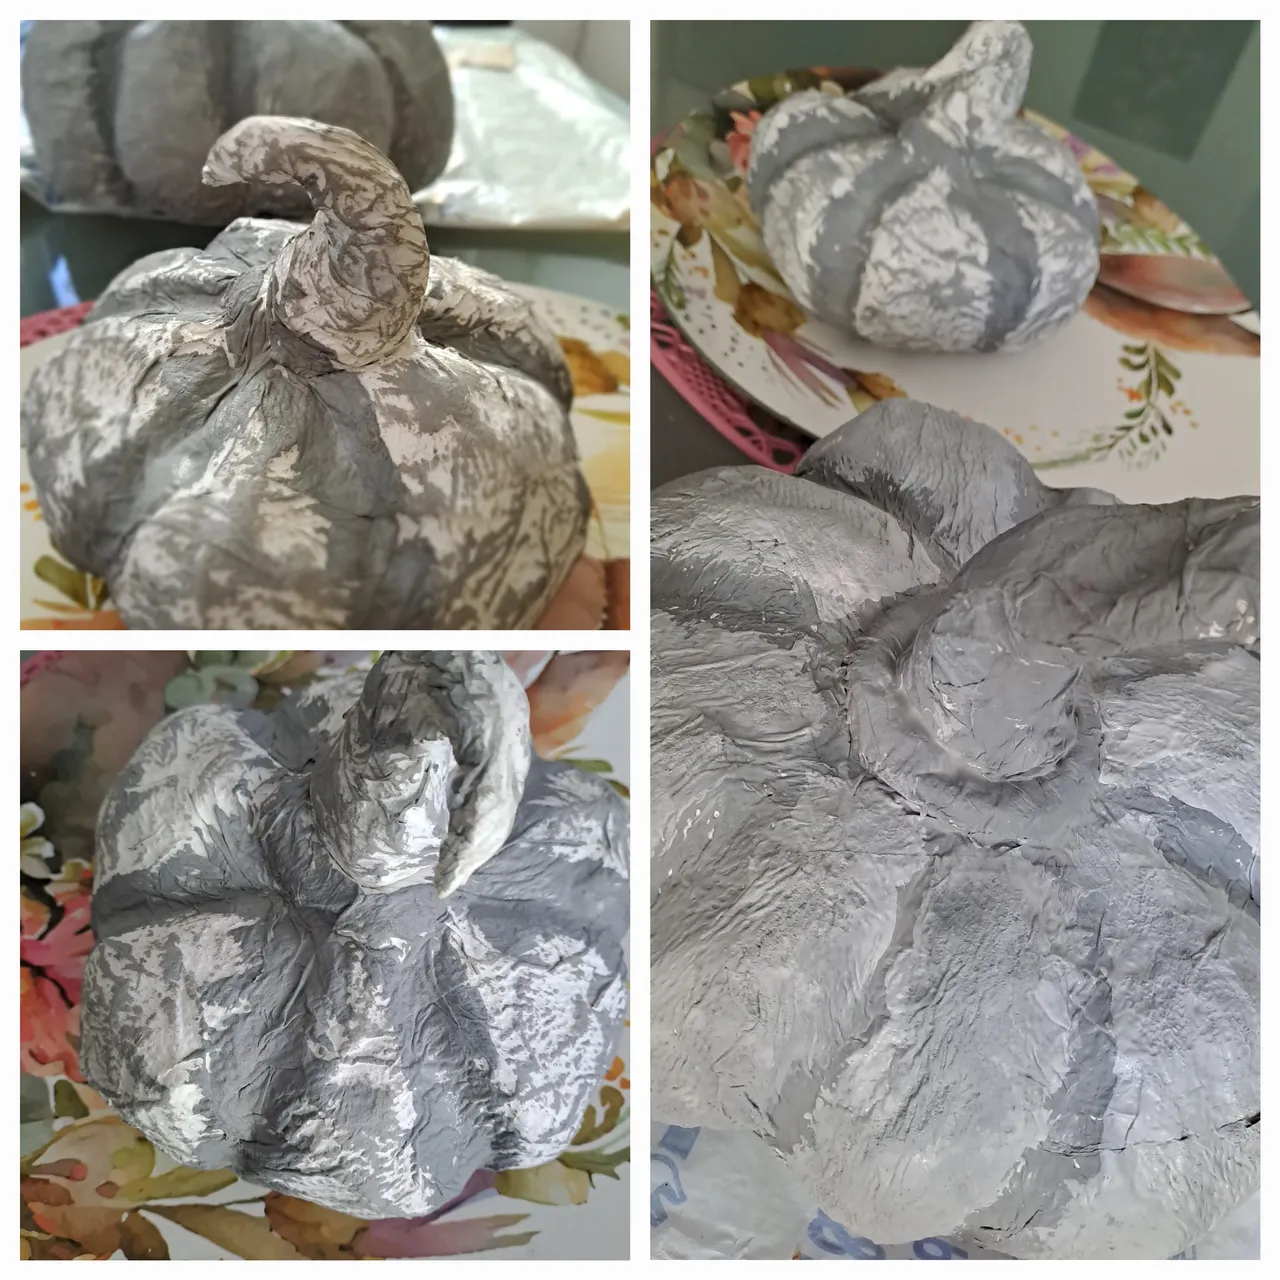
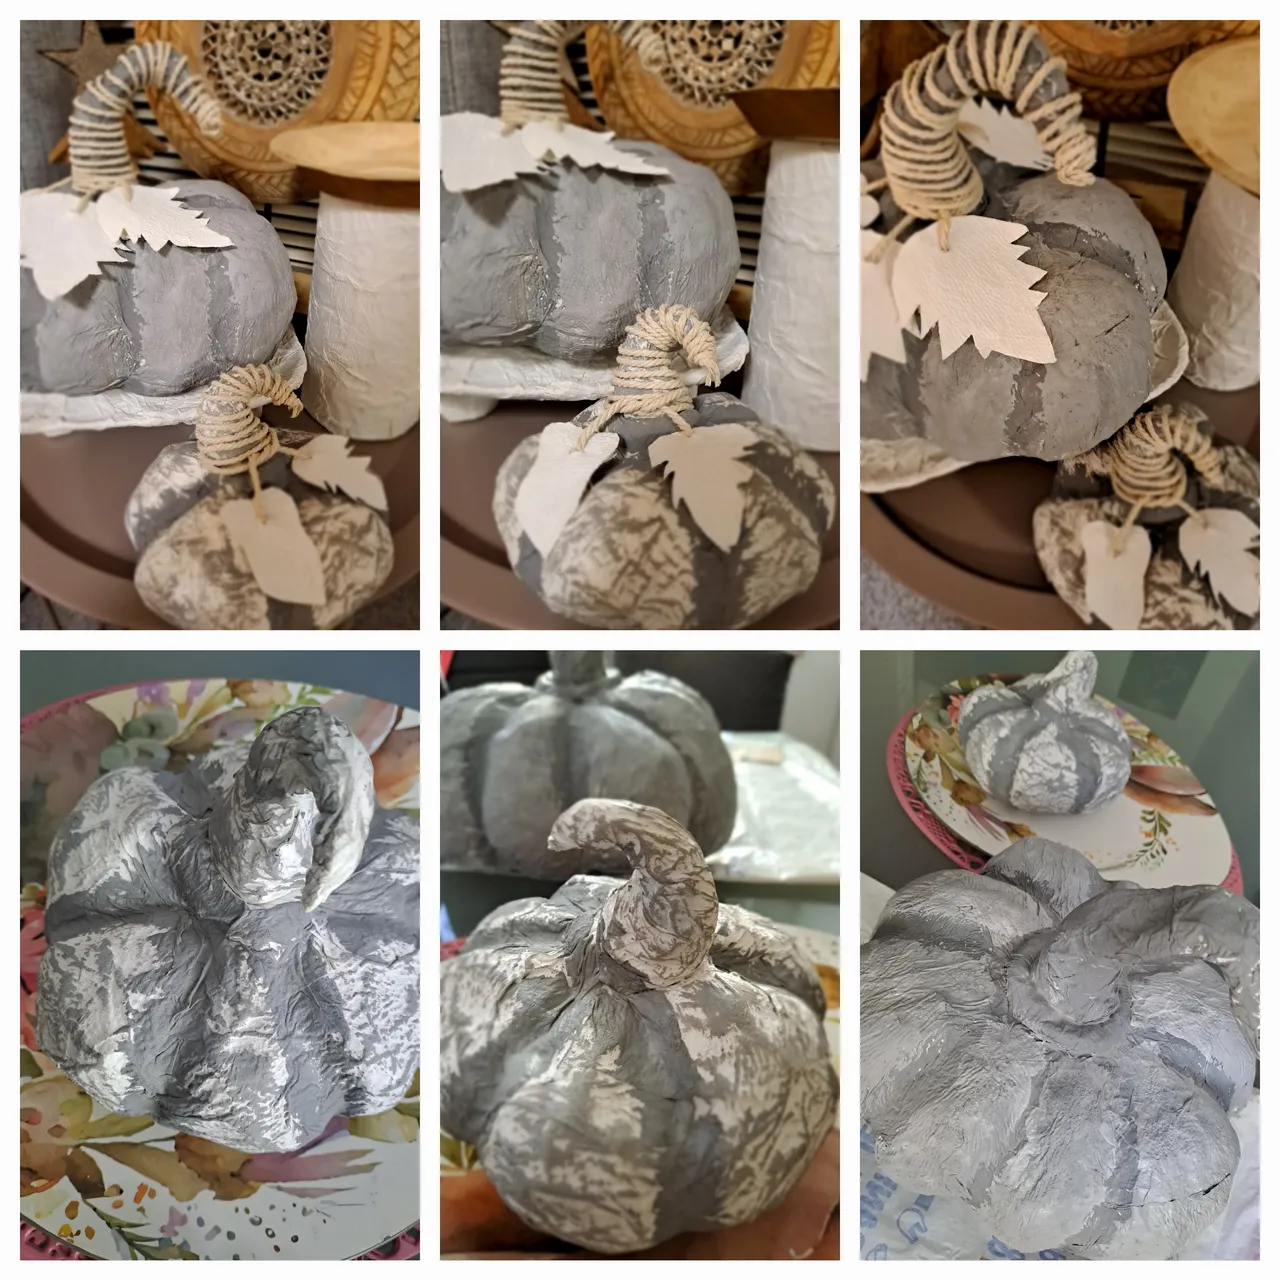
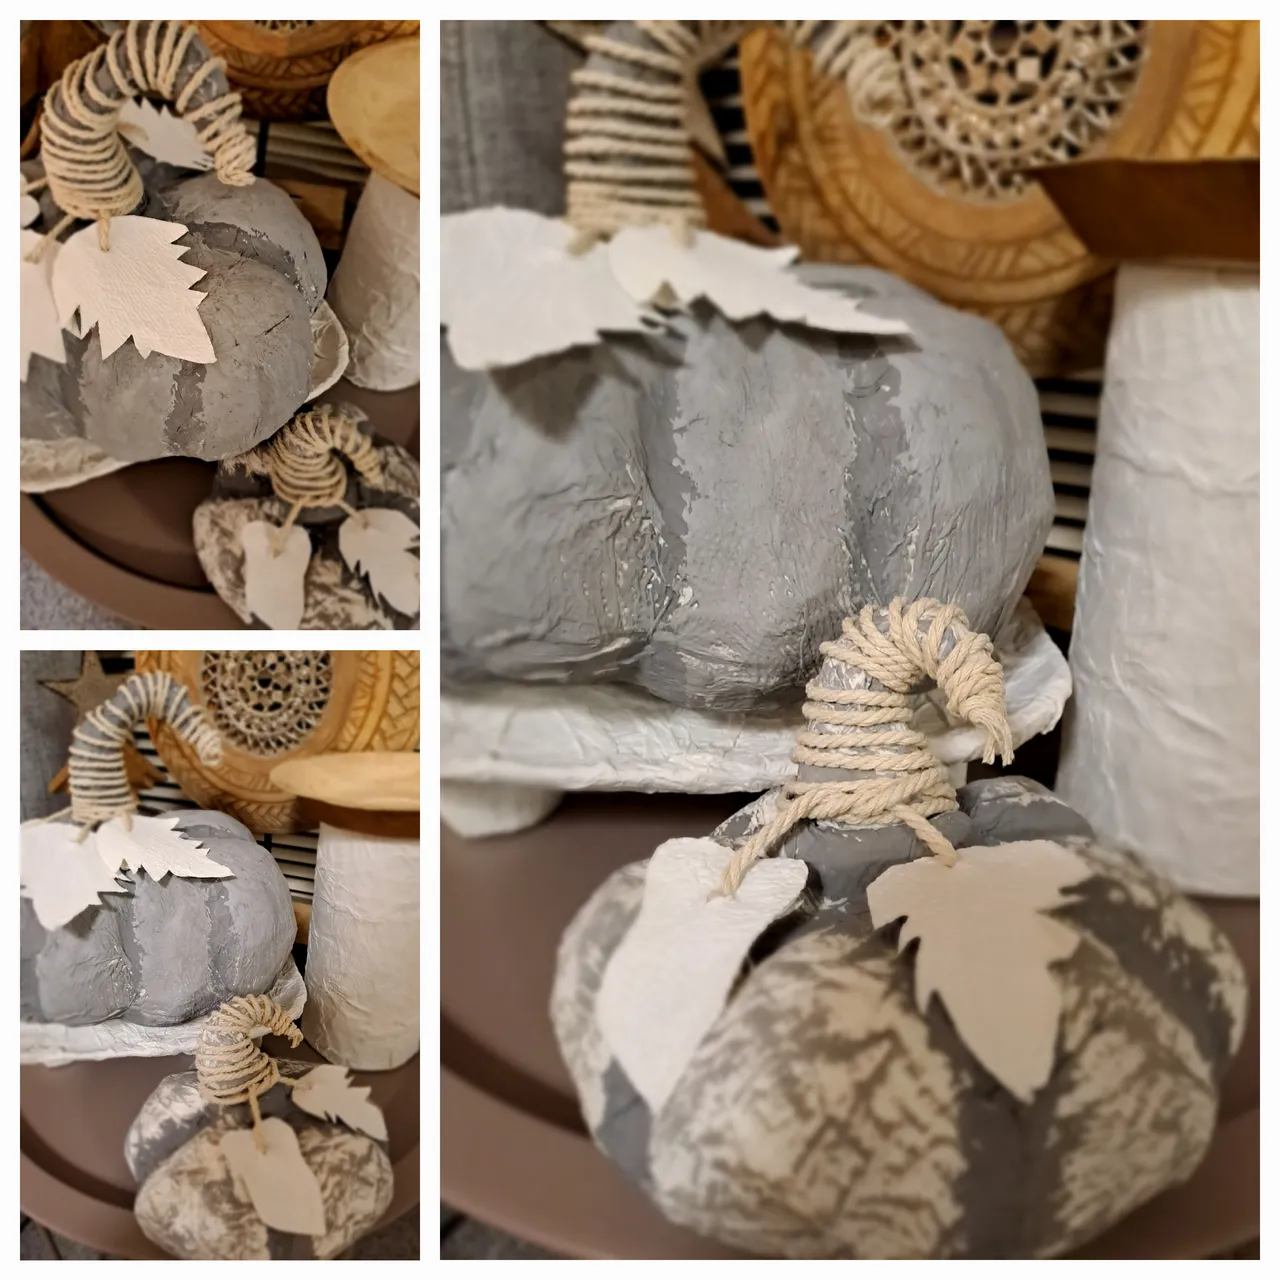
We also shape the head of the pumpkin with newspaper by hand and stick it with wood glue. It takes about three days to dry. After drying, this time we cover the pumpkins with wood glue and water as much as I said. Dry the paper towel that covers the entire surface of the pumpkin. Paint the pumpkins with any color you like. I wish you the best
Den Kopf des Kürbisses formen wir ebenfalls von Hand und kleben ihn mit Holzleim fest. Nach dem Trocknen bedecken wir die Kürbisse mit Holzleim und trocknen das Papier Bemalen Sie die Kürbisse mit einer beliebigen Farbe, die Ihnen gefällt
🎍🎍🎍🎍🎄🎄🎃🎃🎃🎃🎃

🎃🎃🎃🎃🎄🎄🎄🎄🎄🎈🎉🎉✨️✨️✨️🎋🎋🎊🎊🎍🎍🎍🎁🎀🎀🎗🎗🎗
Thank you dear friends 🧡