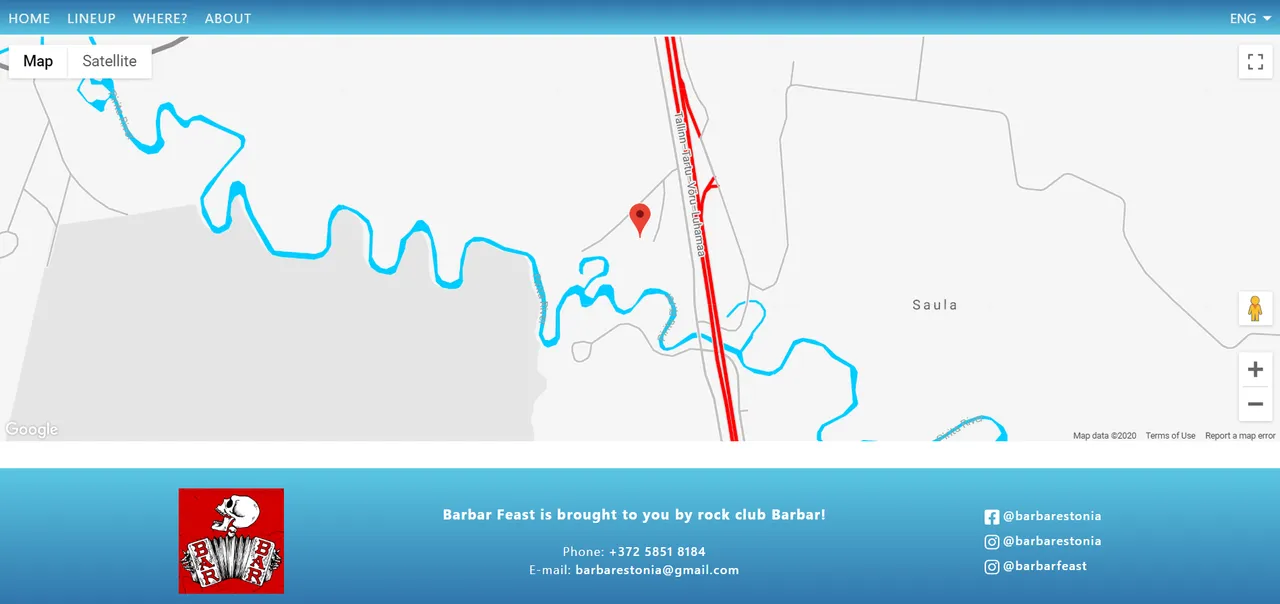
Last time I promised to be back with the series once I add something big and new to the project. I'm not sure how big of a thing it is but I spent a whole week making my brains boil and emit smoke to implement a custom styled Google map to the site.
Information overflow & Errors
When I started working on the project I knew I didn't just want to use the default Google Map, as it'd look a bit weird comparing to the overall color scheme of the site. I also took into account that it wouldn't be as easy as just embedding the thing from maps.google.com. Since the whole website is based on Vue, the map would have to be a Vue component.
I went through many different documentation and tutorial pages and was overflown with all kind of different information so at one point it was difficult to orientate in what I've learnt. I decided to try out a few of the tutorials - I got to implementing a Google Map that was centered where I wanted it to be centered and had a marker at the same place, but I failed to add my styles to it. By the way, to create my styles I use the Google Maps Styling Wizard. The styles come out as a JSON array.
During the trial-and-error period I got several different Errors in the console like ''markers is undefined'' or ''markers is defined but not used'', but most errors I got were API related. In the beginning I didn't restrict using the API to my IP only at the Google Cloud Platform Console - the map worked but I soon got a warning email saying since I pushed commit in a public repo on GitHub, my API key (which wasn't restricted) could be used by anyone. And how Google APIs work is that they give you (I can't remember if it was exactly...) $300 worth of credit for free use of the API. (When your site reaches a certain number of people that have used the map API for example, you'd have to pay for the extra usecases).
Another API related error I encountered was because of a bug that my laptop gets several times a day - I keep getting disconnected from WiFi (not just my network but WiFi in general). A simple Troubleshooting usually fixes it. I've looked for other fixes like updating my WiFi driver or uninstalling it and letting it reinstall itself or installing another driver but it still keeps doing it. And sometimes (but not always) when I get disconnected, the last numbers of my IP address change. So once that happens I have to change the IP address I have under my API restrictions for the map to keep working while I still develop the site.
SO how did I get the map to work as I wanted it to?
After five or six days of struggling with the different docs and tutorials, I decided to once again ask for some guidance from the teacher of the Vue course I attended last month. He gave me a link and code to a project he had worked on a long time ago, which wasn't made with Vue, but had a working custom styled Google Map in it. I then also found this GitHub repository by GitHub user smallpaes from the depths of Google (like on the third or fourth page under search results). It's a Google Maps API practice map built with Vue.
It's definitely not the best practice of implementing a Google Map to a Vue project but I ended up using both my teacher's given code and smallpaes's repository as a guidance.
So, how did I do it?
First, I added a script tag with the Google API link (and API key which I got from the Google Cloud Platform Console) to the index.html file in the project's /public folder:
<script src="https://maps.googleapis.com/maps/api/js?key=API_KEY"></script>
I then created a GoogleMap.vue file in the /src/components folder. The template consisted of one empty div with the class "google-map" and the ID "map".
I didn't think of a particular order of which part of code to write first, etc, I just went through from the top to bottom following what smallpaes had in his file, excluding the parts that didn't matter to me (like some information about restaraunts that he had in his practice map). I also didn't just copy-paste the code, I typed it out myself and put some thought in it to understand how things are connected (that's how we learn, right?).
So, between the script tags we don't import anything but we export default { a lot of code } starting with a props object that has several other objects inside of it. For each object inside of the props object, we have a type property and a default property.

Here we have an object named ''center'' which has the type of an Object and a default that's a function which returns another object with the properties ''lat'' and ''lng'' (latitude and longitude). These coordinates lead straight to the place that the festival takes place in. I got them by looking for the place on Google Maps, right-clicking the marker and clicking on ''What's here?''
After ''center'' I have ''zoom'' which has the type Number and default: 15. Google Maps zoom levels are usually somewhere between 0 and 20(+?) where 0 means the map is zoomed out the most (that is the whole world is seen), 5 is landmass / continent level, 10 is city level, 15 is streets level and 20 is buildings level.
Then come streetViewControl, mapTypeControl, fullScreenControl and zoomControl which all have the type of a Boolean and default: true.
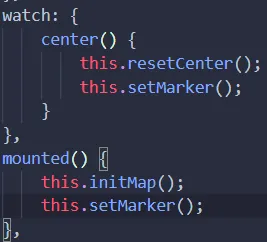
That's it for the props. Coming up next we have the data function which returns an object with the properties map, infowindow and markers. Map and infowindow are both ''null'' and markers is an empty array. I'm not completely sure I need an array since I only need one marker on my map so I'll probably make some changes in the code later.
We move on to the watch object and the mounted function. Watch has a function named center that calls out two other functions - resetCenter and setMarker, while mounted has initMap and setMarker.
Now it's getting fun, as we get to the methods.
First we have the most important function: initMap.
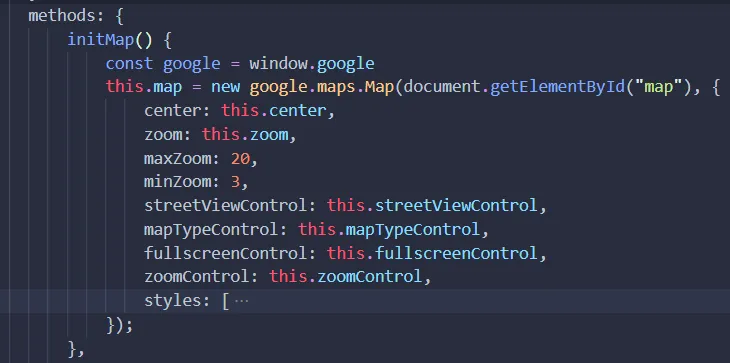
This is the function that creates the map. It takes the props I had in the beginning of the code and uses them as properties of the map. This is also where I added my styles JSON array (compressed on the image).

We then have resetCenter that pans the map to the center. This function is used under ''watch''. clearMarkers also does exactly what the name suggests. It clears all existing markers. This is used in the next function: setMarker.
setMarker first creates a constant named ''google'' that's equal to windows.google. Then it calls this.clearMarkers() to clear the map from any other irrelevant markers it might have on it.
Next it creates a constant ''marker'':
const marker = new google.maps.Marker({
    position: { lat: this.center.lat, lng: this.center.lng },
    map: this.map
});
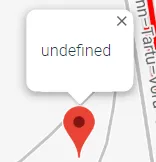
It uses the latitude and longitude of where we set the map center to be for its position. Then we push the marker to the markers array with this.markers.push(marker);.
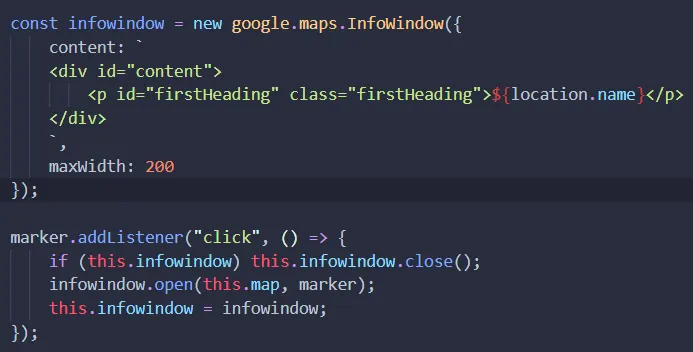
Coming up next (still inside the setMarker function) I have the last part of the script which creates an InfoWindow and displays it once you click on a marker:
That sums up the GoogleMap.vue component file. Only thing left to do is use the map somewhere on the site. I use it in the Home view of my site, in a section with the ID of ''location''.
For that I first import GoogleMap from "@/components/GoogleMap.vue";, then add GoogleMap into the components object in the export part of Home's script, and lastly add a <GoogleMap /> element to the HTML.
At first even after doing all this, my map didn't appear. I had no errors in the console - it seemed to be working but I didn't see the map. Why? Because I forgot to give the map a width and height! So the actual last thing I did was add a style tag in the GoogleMap component file where I gave the #map a height of 30rem and a width of 100%.
What was the last thing that made you frustrated for days? Did you overcome it? How?