Hive is the blockchain I love and it's also my main social home.
There are so many beautiful and useful DAPPs on Hive that I use on a daily basis:
To read, comment and vote on posts I use:
To transfer and stake my tokens I use:
To securely access Hive I use:
- Hive Keychain (my preferred login method).
- Hivesigner
To monitor my activity on Hive I use:
To play games I use:
PeakD
I love writing on Hive and PeakD is absolutely the Dapp I use the most.
In my opinion it's also the most complete and easy-to-use Dapp to write and publish your own posts and in general to interact with the Hive blockchain.
In this post I'm going to show some useful features of PeakD that I use frequently and that maybe not everyone knows especially new Hive users.
Editor
The PeakD editor is the most used on Hive because it is much more "user-friendly" than other editors such as the hive.blog editor.
For example, if in the editor of Hive.blog I want to insert a text link to a post that I have written previously I have to write the following code:

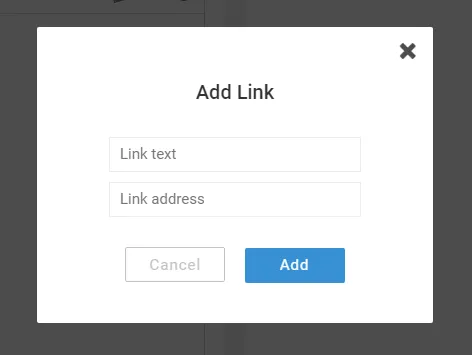
In the PeakD editor I have to click on the button indicated by the arrow in the following image:

Alternatively I can press the key combination (Ctrl + i)
This will open a window with two fields and a button that makes it much easier to insert a link into a post even for those who are writing their first post.
In both cases the result is the same: Tutorial For Beginners: "Registration" but the operation is much more simple and immediate if performed by PeakD.
Below I show you some useful features that PeakD has that not all other editors have:
Undo and Redo

The functionality to undo and redo previously performed operations is a very important and very useful feature.
If I use an editor that doesn't have the Undo and Redo features and I select a part of a text and by mistake I press the delete key I have practically lost all my work.
With the Undo and Redo functionality I can recover my mistake.
Hive.blog and Ecency editors do not have this functionality.
Snippets

Snippets are a very useful feature in the PeakD editor.
They are code fragments that you can save and reuse by simply copying and pasting.
They are useful because they save time when writing text that is frequently used.
For example, when I write a post in two languages (English and Italian) I divide the English part from the Italian one by the following image

I saved the code of the image link in a snippet.
Instead of performing at least 4 operations
- click on Upload Image
- Image Search (2 or more clicks)
- Image Selection
- Click on Open/Add button
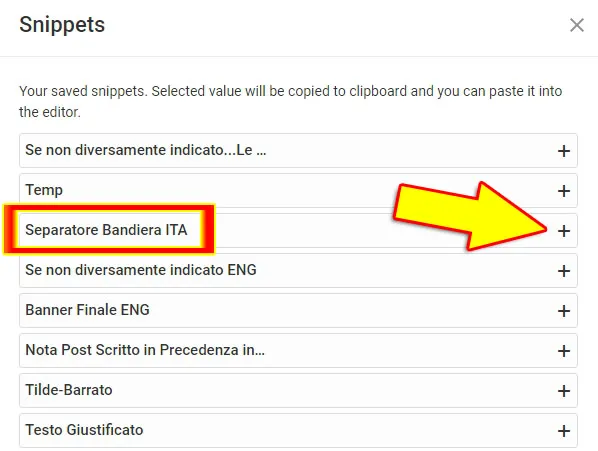
I just have to click on the symbol
and copy the code I saved earlier ;)
Templates
If my post has a recurring structure (separators, final banner...) I can use another useful feature of the PeakD editor: the Templates.
After writing the recurring structure of the post you can save it as a Template by clicking on the up-arrow symbol next to the SAVED or SAVED DRAFT button (bottom right) and then on the Save as Template as indicated by the arrows in the following image.

Templates are very useful because they save a lot of time and avoid having to write repetitive text.
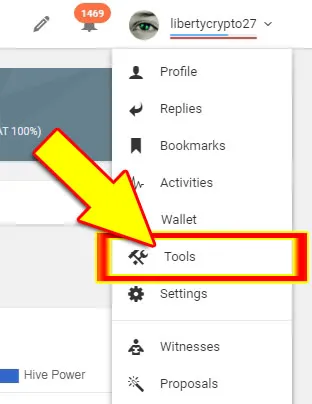
To view or edit previously saved "Templates" go to the Tools section of PeakD as indicated by the arrow in the next image.
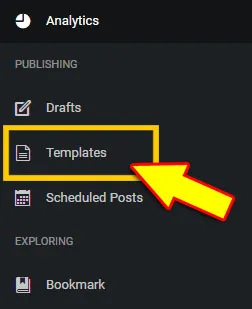
Inside the Tools section there is the subsection Templates
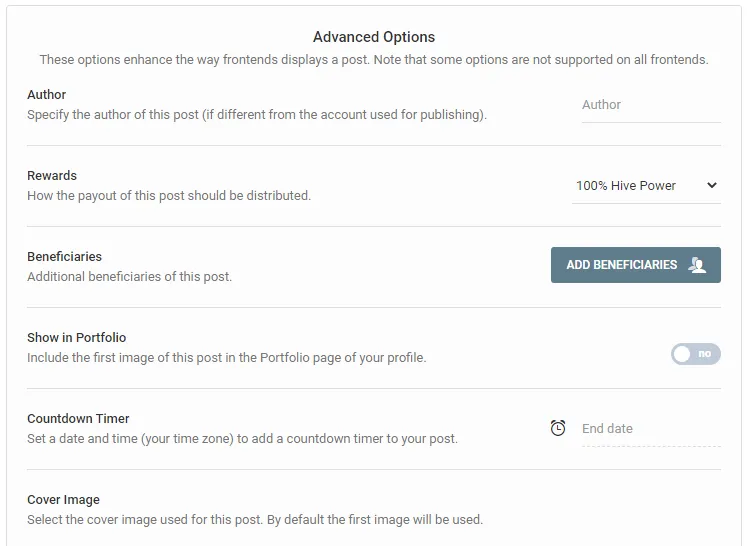
Advanced

In the Advanced section you can easily select some advanced options, for example you can select a cover image different from the first image of the post (default) or you can select some beneficiaries to whom a part of the rewards of your post will go...
Schedule

By clicking on the SCHEDULE button you can decide the time when the post should be published and you don't need to be in front of the computer and press the PUBLISH button.
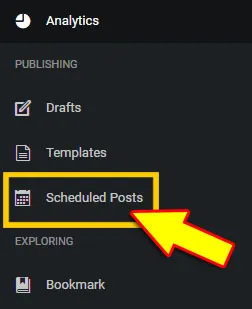
To view or edit previously saved Scheduled posts go to the Tools section of PeakD as indicated by the arrow in the next image.

Inside the Tools section there is a subsection Scheduled Posts.
Choose the community in which to publish
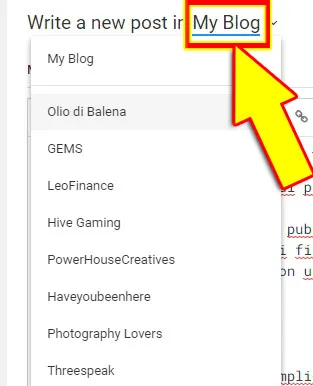
Choosing the community in which to publish your post is extremely easy.
If you click on the small arrow next to the writing My Blog you can choose the community in which to publish your post with a simple click and without having to enter tags (hive-xxxx) difficult to remember.
Add to Blog
This is a simple but very useful feature.
In fact when we write a post and we publish it inside a community our post is visible only in the Posts section of our blog:
The Add to Blog feature allows you to display a post published within a community also in the Blog section.
The process is very simple.
When you write a post via the PeakD editor.
1. After selecting the community within which you want to publish the post.
2. You have to click on the little button next to the writing: Include also in my blog

3. Finally you have to click on the Publish button as indicated by the arrow in the following image.

In practice the operation performed is an auto-reblog of the post in the Blog section.
Note: you cannot run this feature in conjunction with PeakD's Schedule feature.
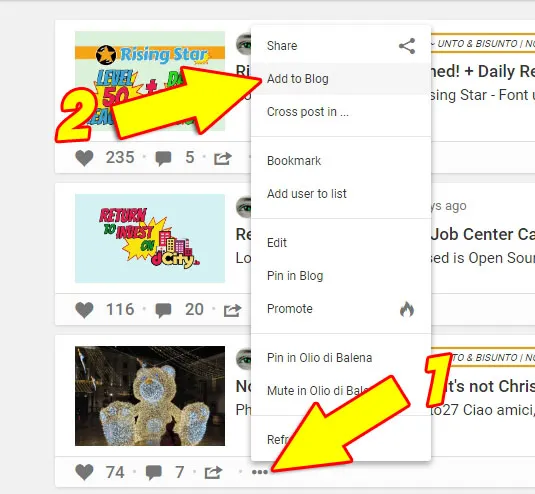
If instead you have already published a post that you want to make visible in the Blog section you have to go in the Posts section of your blog and follow the indications of the arrows in the following image.
Other useful features
PeakD is much more than just an editor, and the editor is only one part of PeakD.
There are many other sections and tools that make PeakD a really useful Dapp.
Explore
If you click on Explore as indicated by the arrow in the next image

You can explore all the content published on Hive.
You can add a tag to your favorites list.
If within a post you click on a specific tag PeakD will show you all posts with that tag and you can sort them by different types of sorting such as Recent:
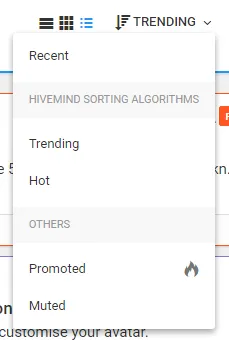
For example, if you click on the tag hive you will see all posts with that tag.
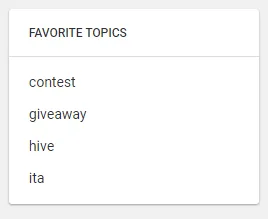
If from the same screen you click on the star symbol at the top as indicated by the arrow in the following image you will add the hive tag to the list of your favorite tags

Now all you have to do is click on the tag in the box on the left to display with a single click all the posts that have the tag you are interested in.
You can also create lists and sublists of authors and editors.
Very useful isn't it?
Account information
If you want to see the main and synthetic information of your account or of another account you simply have to go to the profile page of the account you are interested in and place the mouse pointer on the symbol i as displayed in the following image:
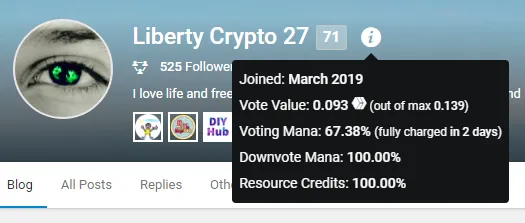
In-depth information about an Account
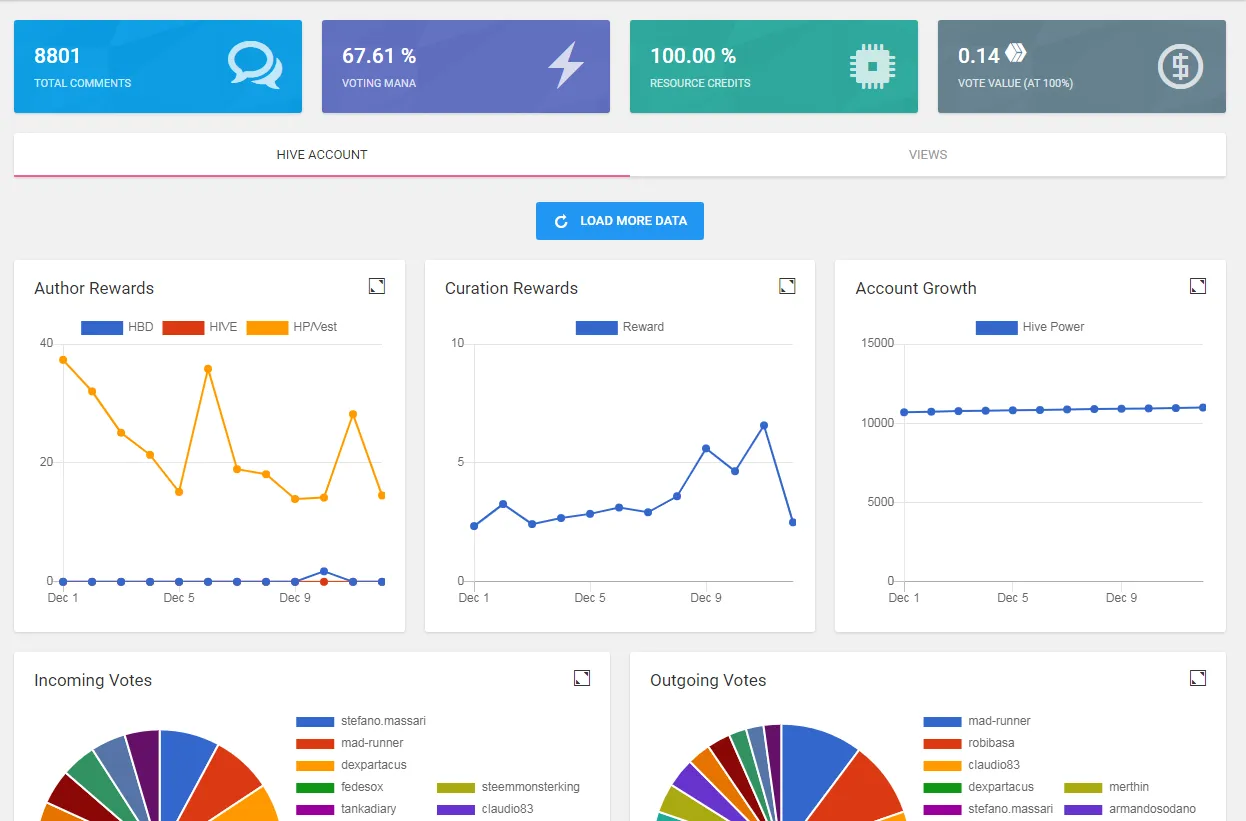
For more in-depth information there is the Dashboard section
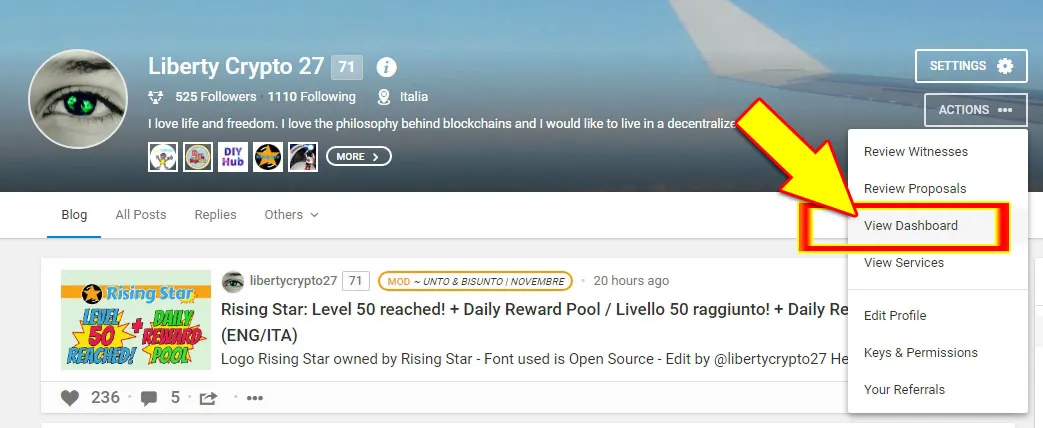
Within the Dashboard section you will find detailed information and charts about your account activity such as:
- Author Rewards
- Curation Rewards
- Incoming Votes
- ...
- ...
Wallet
The Wallet section of the PeakD site is another very useful and well built section.
To access the Wallet section you need to click on the Wallet sign as indicated by the arrow in the next image
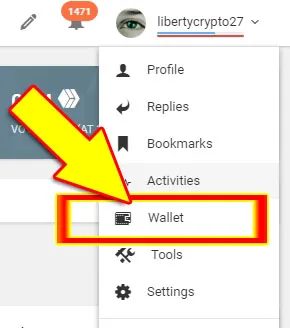
Here you will find all the information about your Wallet (HIVE, HP, HBD) and you can perform many actions:
- Delegate HP or cancel a previously set delegation
- Transfer HIVE or HBD to another account.
- Do Power Up or Power Down
- Convert HBD to HIVE.
- ...
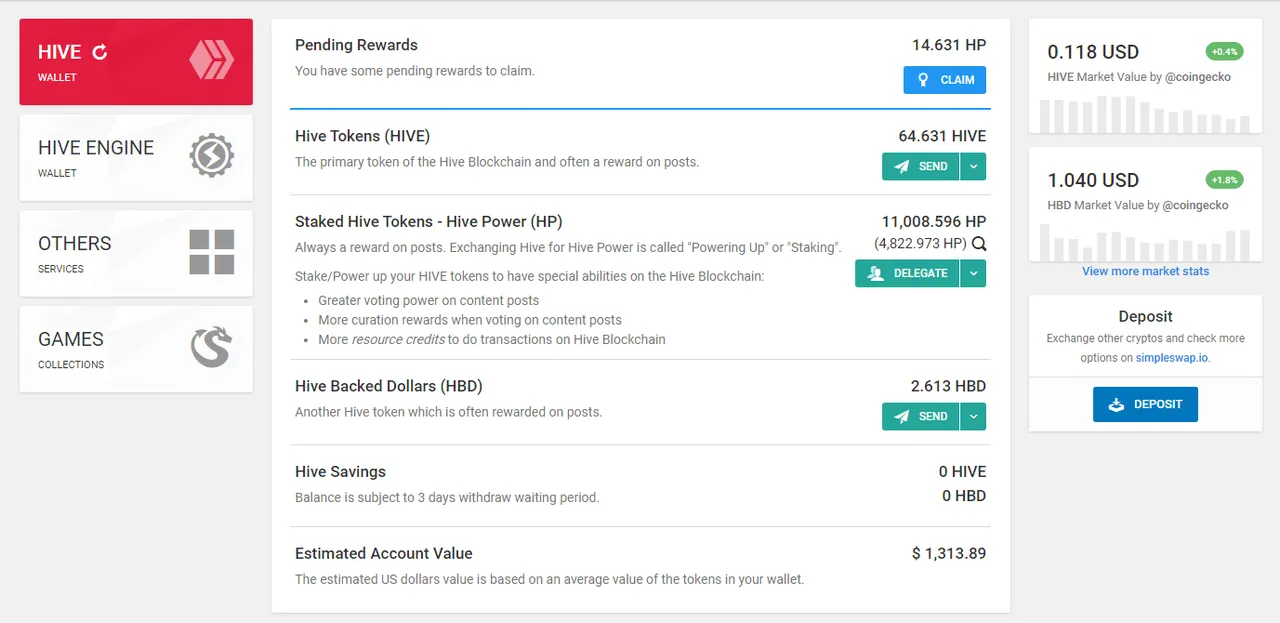
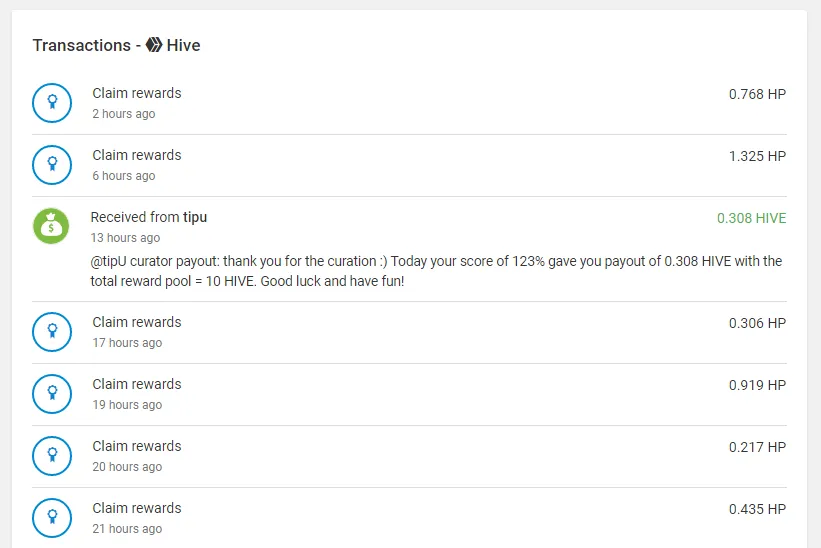
You can view all Outgoing and incoming transactions.
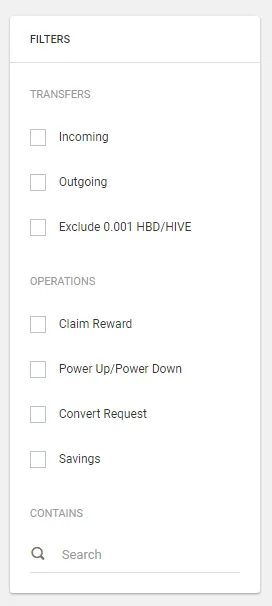
You can apply search filters to narrow down your searches.
This is a very useful feature indeed.
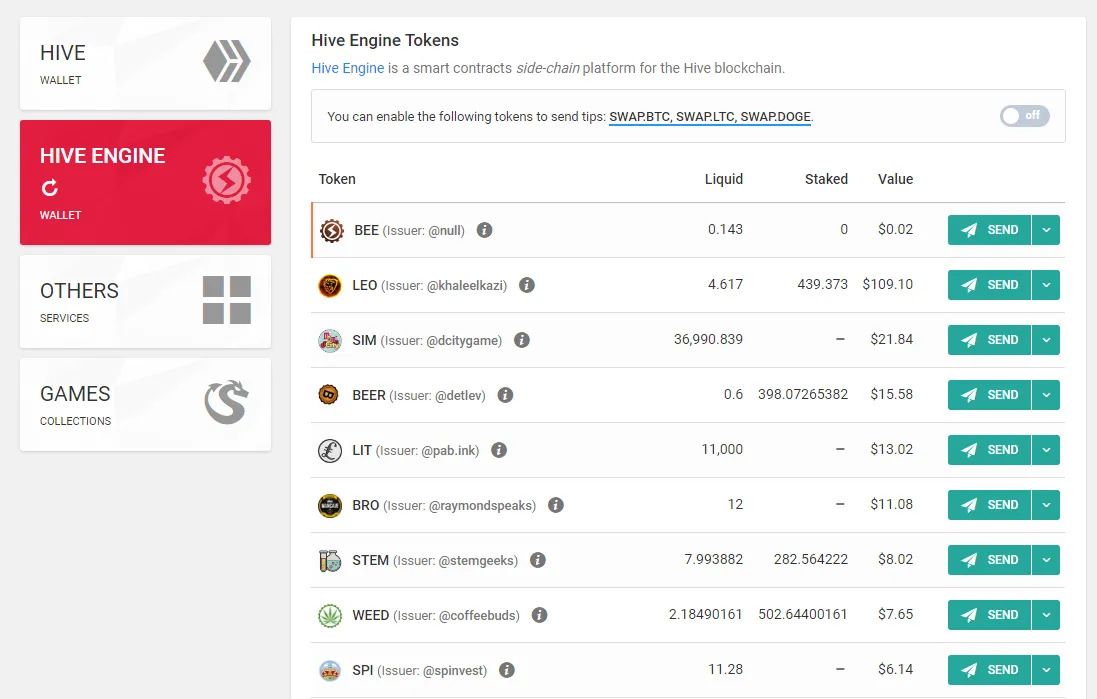
You can also view the contents of your wallet on Hive Engine and view and filter all transactions.
Key & Permission
The Key & Permission section is a very useful section of PeakD because it allows you to perform important operations very easily.
To access the Key & Permission section you have to click on the ACTIONS button that is located in your profile page as indicated by the arrows in the following image.
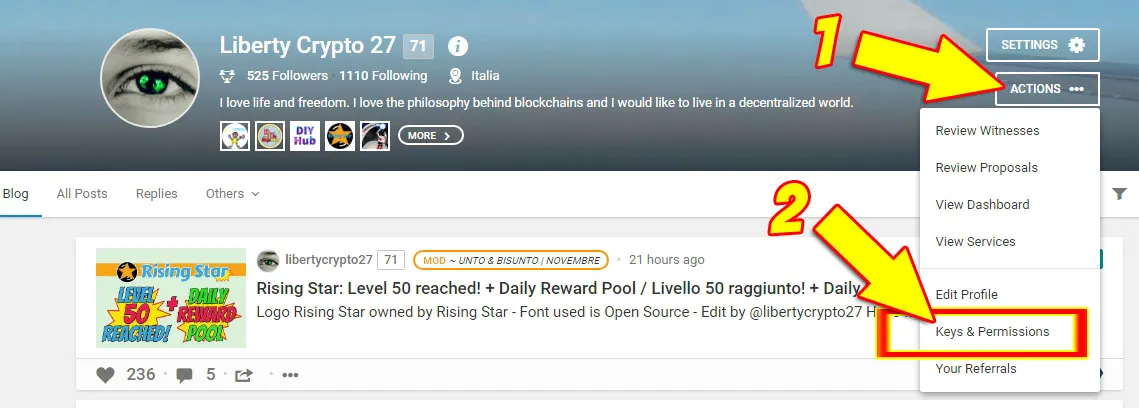
There are 4 sub-sections:
Account Keys
You can view public and private keys of your account
Authorities
You can view the permissions you have given to the DAPPs you use and un-authorize the DAPPs you no longer use.
Change Password
You can change your master password and your account keys.
For example if you were registered on Steem before the birth of Hive you have the same access keys for both Hive and Steem (which I now call SunBook) and it would be a good idea to think about changing your keys on Hive.
Recovery Account
In this section you can choose to change your recovery account.
The recovery account is a trusted account that will be able to help you recover your account in case it gets compromised or stolen.
Those who have registered directly with Hive have a reputable and secure revovery account.
Those who came from Steem and never changed their recovery account have a problem to solve.
In fact many Hive users, even if they have left Steem, still have the following recovery account: 
It's definitely worth to change it!
It's more probable to have dinner with Tony Stark from the Avengers than simply imagine that Sun will help you to recover the Hive account in case it was compromised.
If you still have as recovery account steem can read this post of mine that will guide you step by step in changing your recovery account ;)

Conclusion
With this post I participate in the nice initiative of @theycallmedan proposed by @yonilkar.
I like to write tutorials and guides especially to help new Hive users who, freed from the oppressive chains of centralization, may have some little difficulty to take their first steps in the beautiful free and decentralized world of Hive.
I hope that there will be more and more initiatives of this type because those who write tutorials on Hive and Dapp I noticed that usually is not very rewarded ...
I've read tutorials very well done but they have received little consideration ...
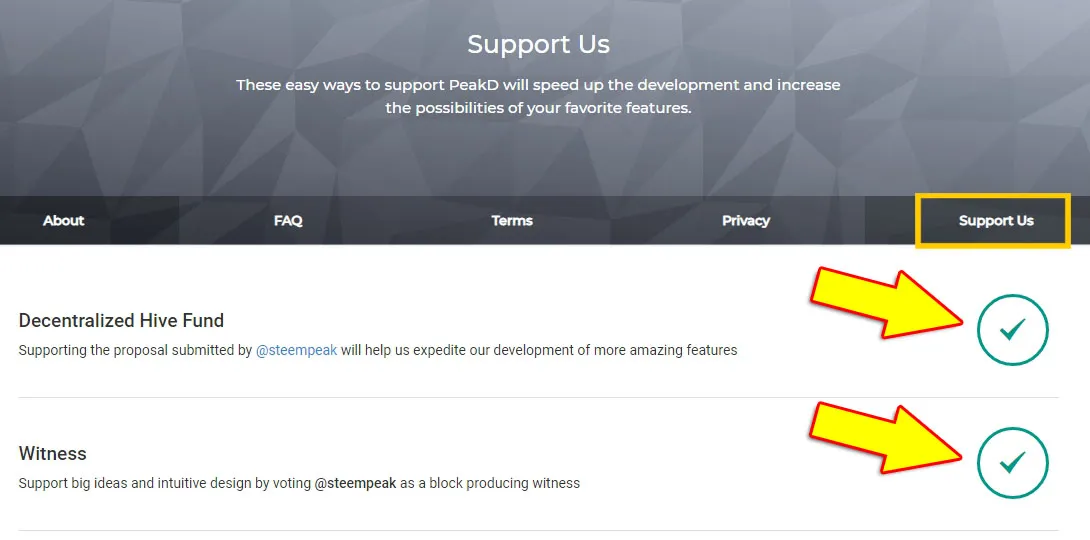
Reflections aside... I hope you liked my post and that it will be useful to you and if you also use PeakD and appreciate the great work of its developers I invite you to support PeakD as I did.
Go to the following page: https://peakd.com/about/support-us
- support the PeakD team proposal
- vote PeakD as a witness
