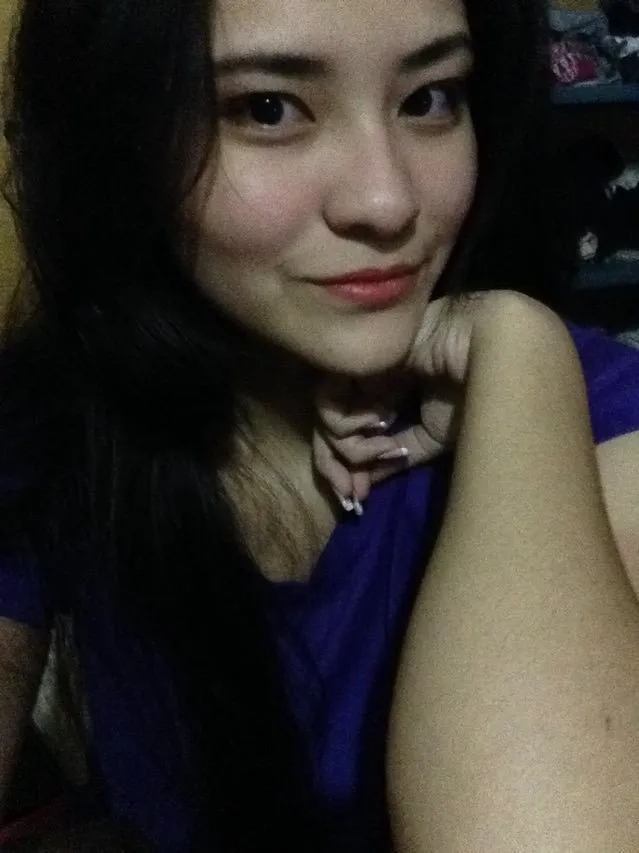
¿Te ha pasado que quieres capturar un momento especial y tomas tu smartphone y disparas la foto? ¡Plas! Quedo oscura y casi se ve pixelada.
Has it happened to you that you want to capture a special moment and take your smartphone
and you shoot the photo? Plas! It is dark and almost looks pixelated.
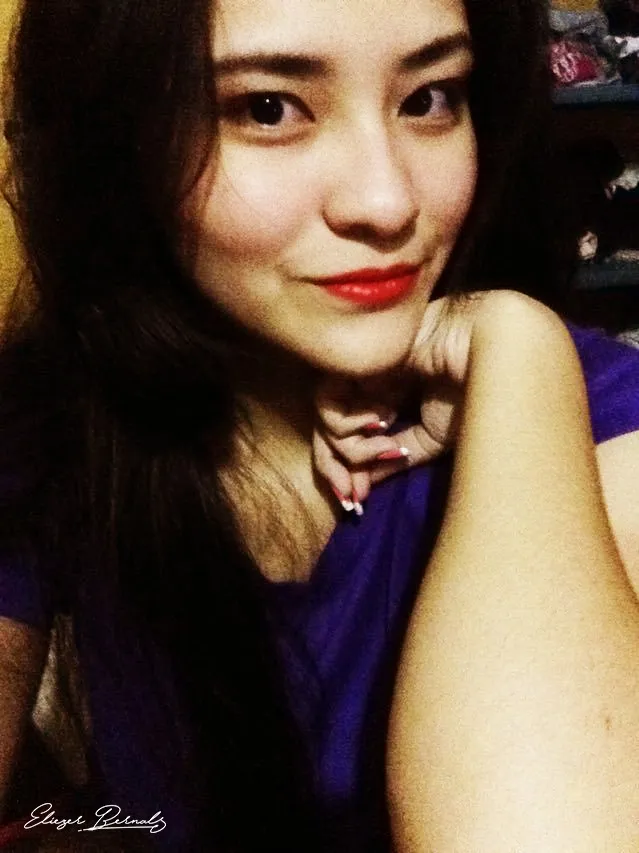
Pues con este post te tengo la solución, es muy sencillo, solo necesitas tener Photoshop (cualquier versión sirve) y listo, puedes hacer la magia.
Well, with this post I have the solution for you, it is very simple, you just need to have Photoshop
(any version works) and voila, you can do the magic.
Empecemos:
Let us begin:
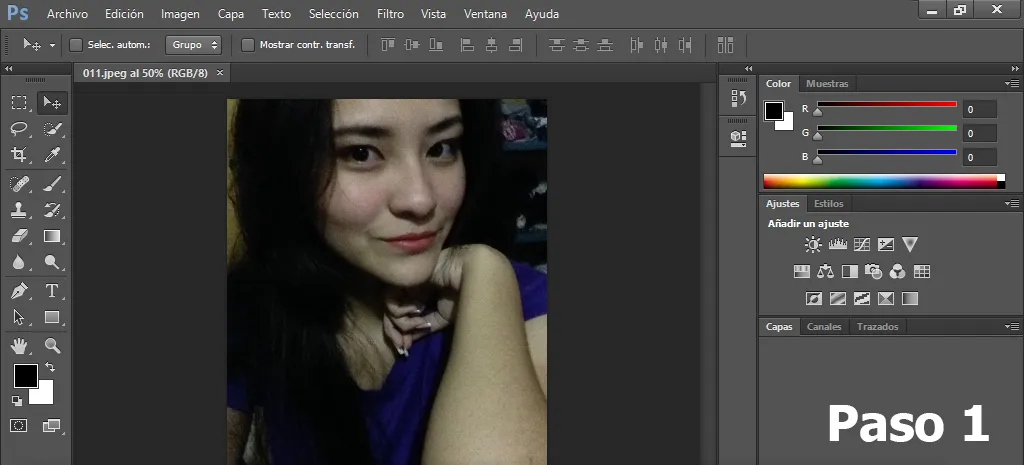
a) En primer lugar cargamos photoshop y abrimos la foto (Ctrl+O)
a) First of all we load photoshop and open the photo (Ctrl+O)
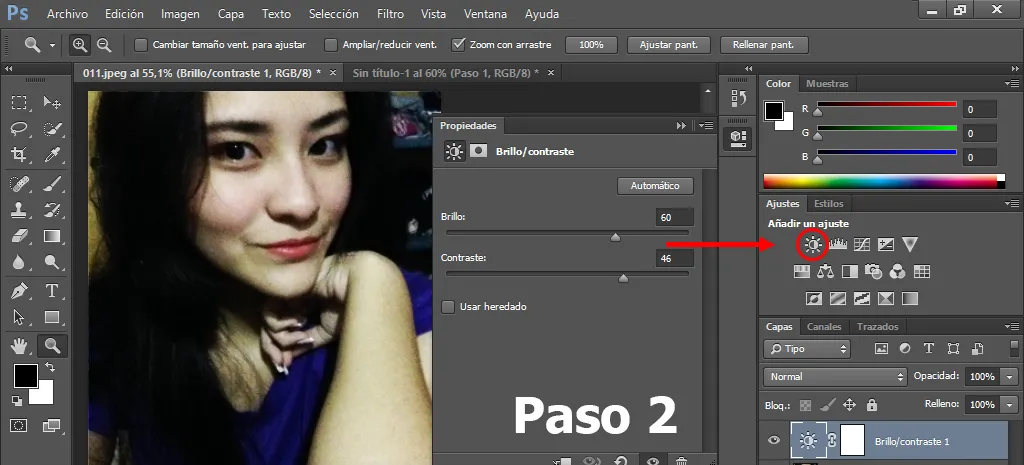
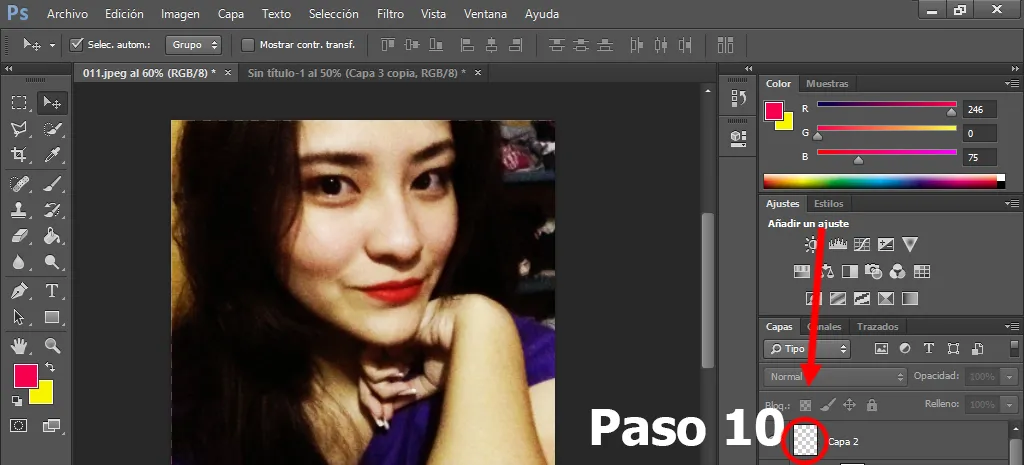
b) Nos ubicamos en la ventanas de "Capa" y en parte baja trabajamos con capa fusión. Recomiendo esta técnica ya que al cerrar el programa normalmente no se puede modificar, pero en capa fusión se puede editar nuevamente los valores si así lo deseamos.
b) We are located in the "Layer" windows and in the lower part we work with a fusion layer. I recommend this technique since when closing the normalemte program it cannot be modified, but in the fusion layer you can edit the values again if you wish.
Elegimos en primer lugar la opción de "BRILLO/CONTRASTE" y ajustamos a como deseemos la claridad de la foto.
First we choose the option of "BRIGHTNESS / CONTRAST" and we adjust to how we want the clarity of the photo.
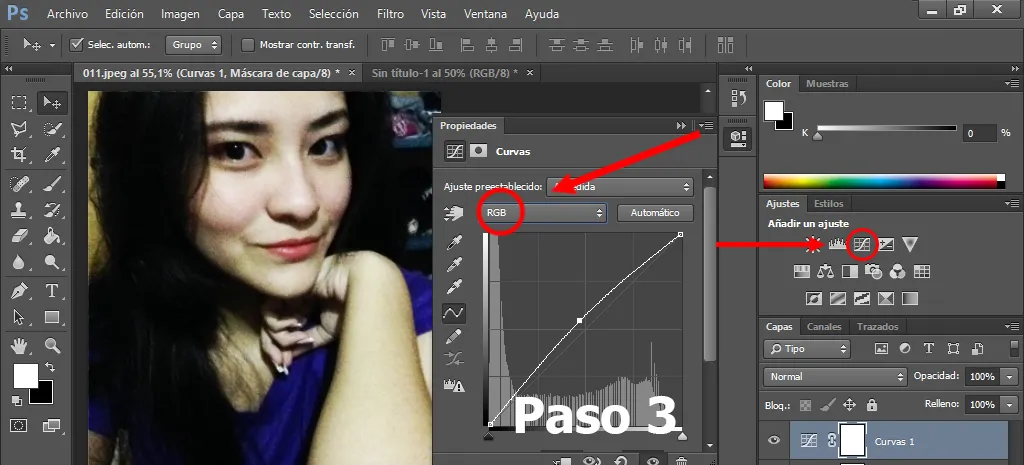
c) Elegimos "CURVAS" y así como en el paso anterior, jugamos con los valores. Si eres de los que le gusta la fidelidad en los colores, debes elegir en la casilla "RGB" las 3 opciones e ir probando a ver que resultado obtienes.
c) We choose "CURVES" and as in the previous step, we play with the values. If you are from those who like fidelity in colors, you must choose in the "RGB" box the 3 options and try to see what result you get.
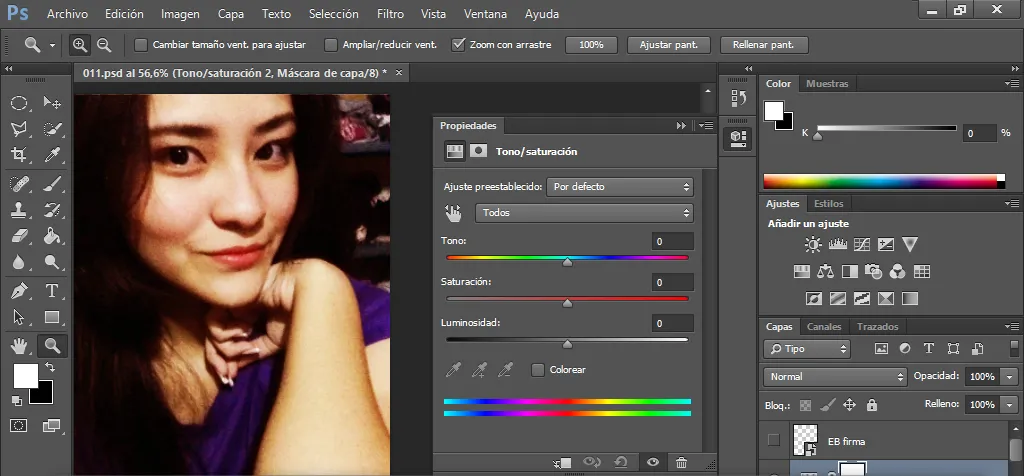
d) El siguiente paso es elegir "EQUILIBRIO DE COLOR" y al igual que en el paso anterior jugamos con los valores en la selección de las 3 barras de colores que esta opción nos da.
d) The next step is to choose "COLOR BALANCE" and like in the previous step we play with the values in the selection of the 3 color bars that this option gives us.
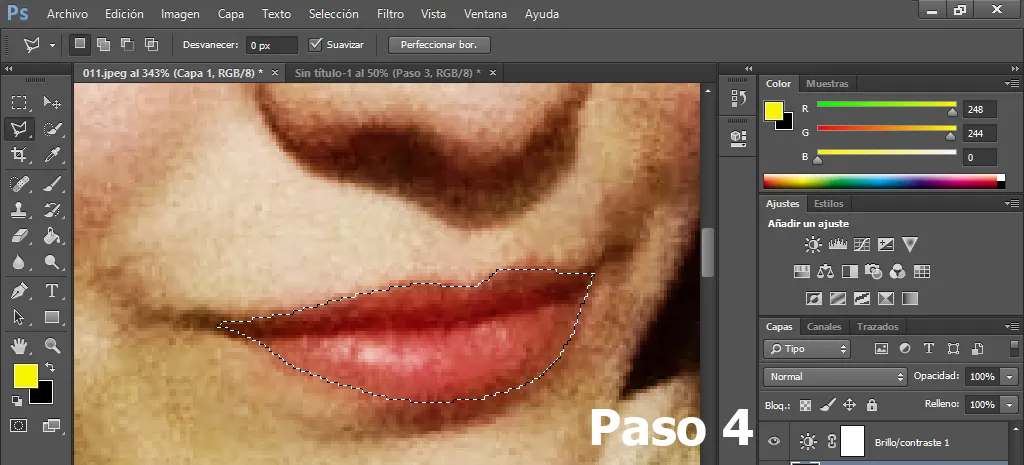
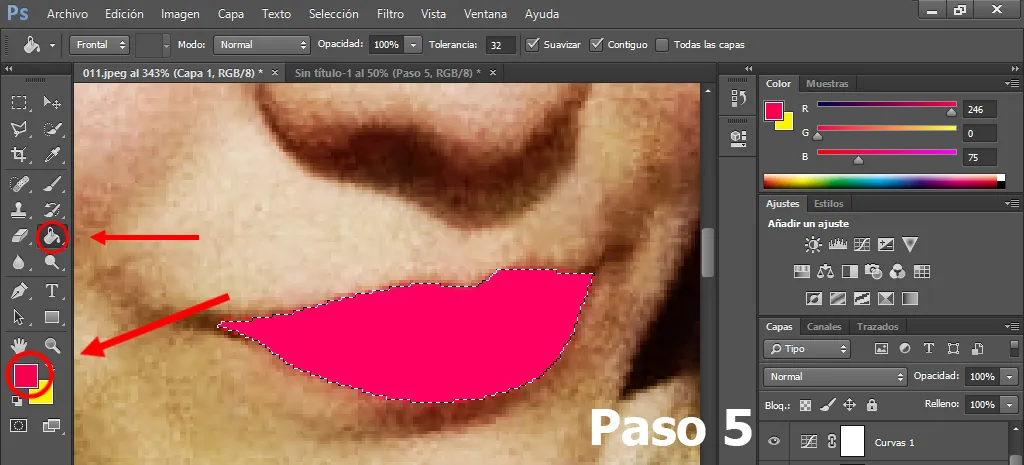
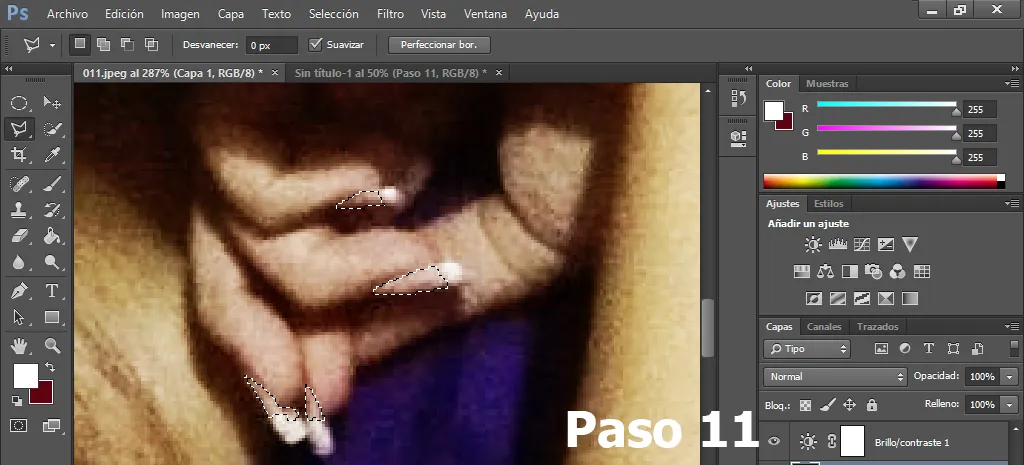
e) Luego de ajustar los colores y nitidez de la foto, creamos una capa nueva y en la barra de herramientas, elegimos la opción de "Lazo Poligonal" y delineamos el contorno de los labios.
e) After adjusting the colors and sharpness of the photo, we create a new layer and in the toolbar, we choose the "Polygonal Lasso" option and we outline the outline of the lips.
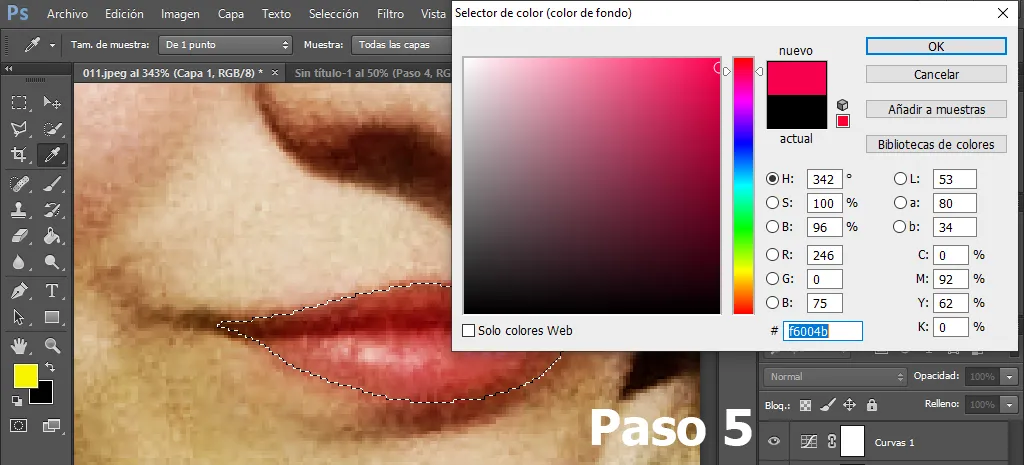
f) Vamos a la parte baja de la barra de herramientas, le damos doble click a color superior para elegir el color del labial, luego damos click en aceptar.
f) We go to the bottom of the toolbar, double click on the top color to choose the color of the lipstick, then click on accept.
g) Con el botón de "bote de Pintura" hacemos click sobre la selección en los labios pintadolos con el color deseado. Seguidamente le damos "Ctrl+D" para quitar la selección
de los labios.
g) With the "Paint pot" button we click on the selection on the lips, painting them with the desired color. Then we give "Ctrl + D" to remove the selection
from the lips.
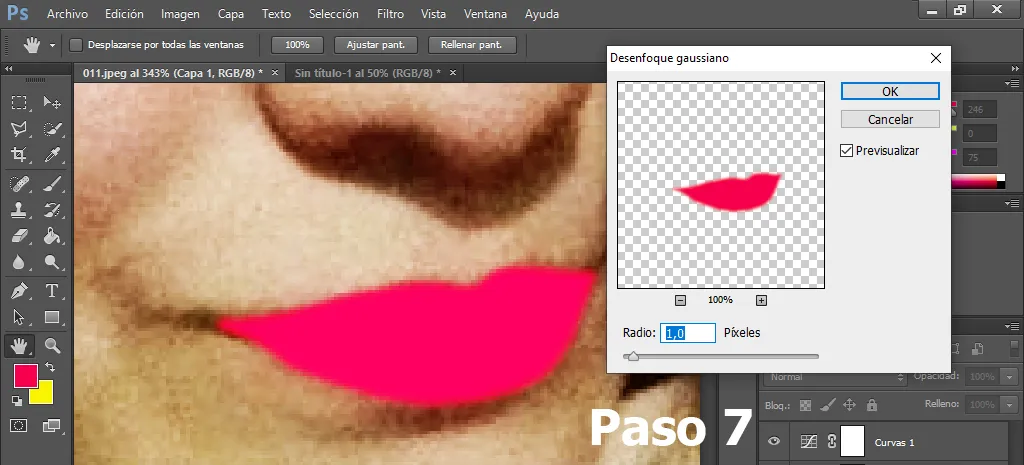
h) En la barra de Menú vamos a "FILTRO+DESENFOQUE+DESENFOQUE GAUSSEANO" para desenfocar el borde parcialmente el color de los labios pintados.
h) In the Menu bar we go to "FILTER + BLANK + GAUSSEAN BLANK" to partially blur the edge of the lipstick color.
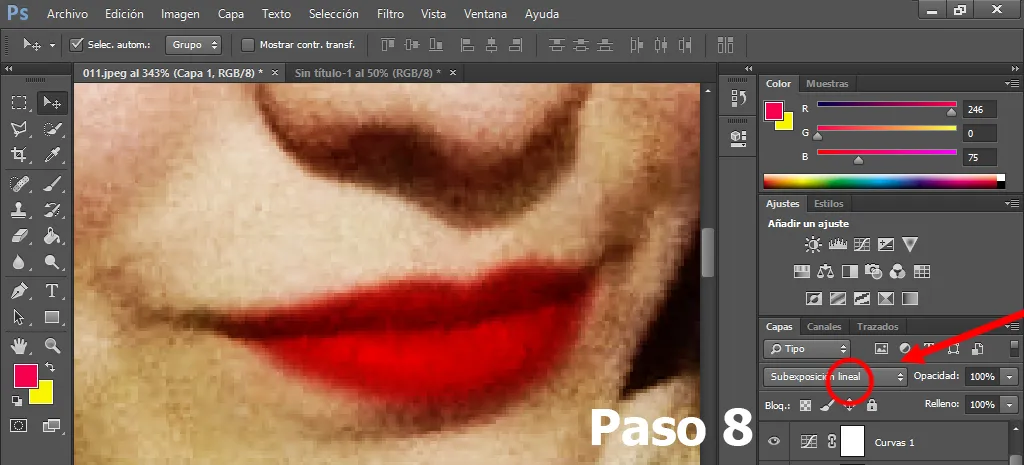
i) Para darle más realismo, en la ventanda de capas elegimos la opción "Sobreexposición Lineal" causando un efecto de transparencia y resaltado los labios, en mi caso no quiero que tengan mucha intensidad, le doy "50% de Opacidad".
i) To give it more realism, in the layer window we choose the option "Dodge Linear "causing a transparency effect and highlighting the lips, in my case I don't want that have a lot of intensity, I give it "50% Opacity".
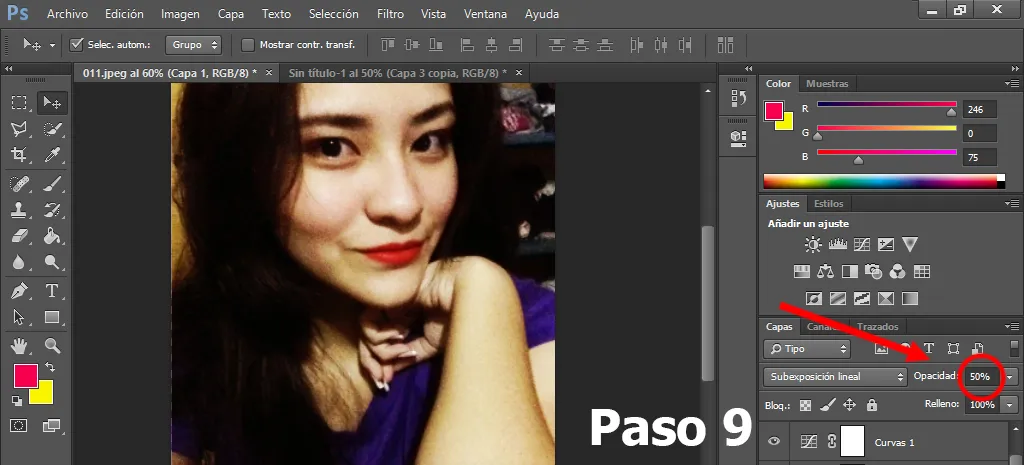
j) Creo una capa nueva y en esta ocación, trabajaremos en la parte de las uñas. Aplicamos nuevamente los pasos 5 al 8, pero sobre las uñas.
j) I create a new layer and on this occasion, we will work on the nail part. We apply steps 5 to 8 again, but on the nails.
k) Hasta este punto en vez de aplicar capa fusión, sencillamente le damos "45% de Opacidad"
k) Up to this point instead of applying a fusion layer, we simply give it "45% Opacity"
Como ves, es muy sencillo que tu mismo podrías hacerlo sin ningún problema.
As you can see, it is very simple that you could do it yourself without any problem.
Gracias a Alejandra Rojas por servir como modelo para este Post.
Thanks to Alejandra Rojas for serving as a model for this Post.
https://www.facebook.com/profile.php?id=100010275520053
Si quieres ver más trabajos similares, sígueme en @eliezer_bernal en Instagram.
If you want to see more similar works, follow me on @eliezer_bernal on Instagram.