¡Saludos 👋Queridos 💞 Amigos de #HiveDiy 😘! // Greetings 👋Dear 💞 Friends of #HiveDiy 😘!
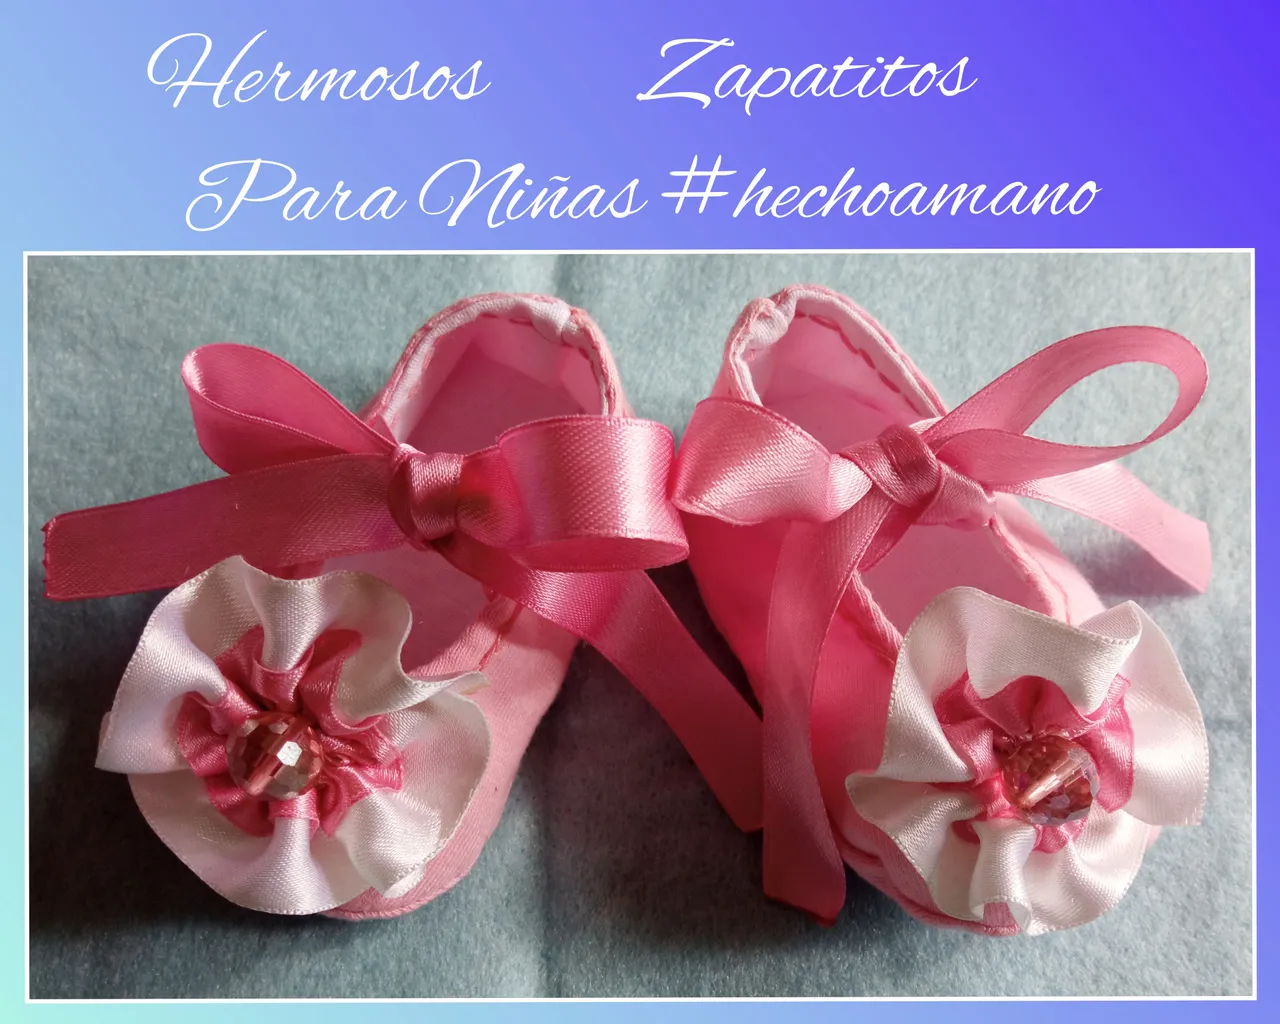
Hermosos Zapatitos 🌸 de Niñas #hechoamano // Beautiful 🌸 Girls 🌸 Shoes #hechoamano
Una vez más me encuentro por aquí como siempre muy contenta y animada de enseñarles el arte de la costura a mano, está vez le voy a compartir un tutorial 😃 muy hermoso 😍 en dónde paso a paso les voy a mostrar cómo hacer unos hermosos zapatitos 🌸 para niñas, como les comenté en un post anterior mi sobrina dará a luz una hermosa 😍 niña y le he estado haciendo muchas cosas hermosas entre ella zapatitos 🌸 jejeje! La familia está muy ilusionada con su llegada a este mundo.
Once again I am here as always very happy and excited to teach you the art of hand sewing, this time I am going to share a very beautiful 😃 tutorial 😍 where step by step I will show you how to make beautiful little 🌸 shoes for girls, as I told you in a previous post my niece will give birth to a beautiful 😍 girl and I have been making her many beautiful things including little 🌸 shoes hehehehe! The family is very excited about her arrival into this world.
Para elaborar estos zapatitos 🌸 solo basta usar retazos de tela del color que deseen, además son muy fáciles de hacer, solo debemos usar un poco la imaginación y hacerles algún detalle llamativo para que se vean hermosos 😍. Hay quienes los cosen a máquina de coser, pero yo lo coso a mano ya que disfrutó hacerlo.
To make these little shoes 🌸 just use scraps of fabric in the color you want, they are very easy to make, we just need to use a little imagination and make some eye-catching details to make them look beautiful 😍. Some people sew them with a sewing machine, but I sew them by hand because I enjoy doing it.
Para comenzar con este tutorial 😃 les voy a detallar todos los materiales que utilice.
To start with this tutorial 😃 I am going to detail all the materials I used.
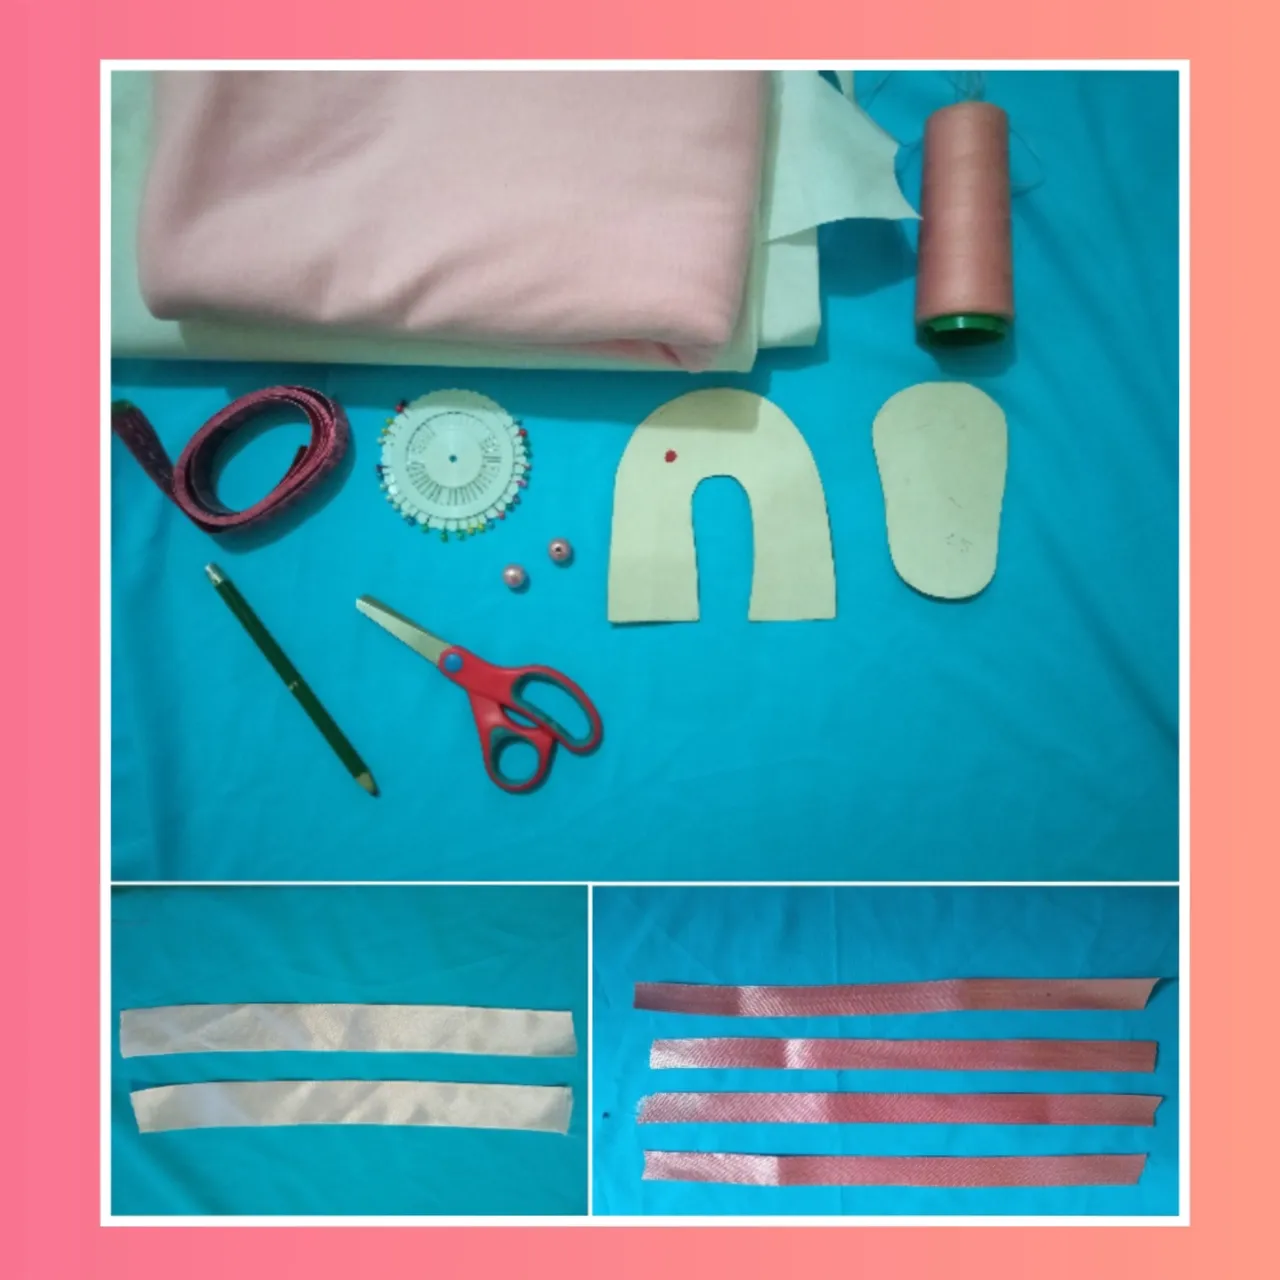
🌸 Materiales:🌸
- Tela de color rosado.
- Tela de color blanco.
- Cinta de color rosado.
- Cinta de color beige claro.
- Dos perlas rosadas.
- Hilo de color rosado.
- Alfileres.
- Agujas.
- Una hoja blanca para dibujar los patrones.
- Tijera.
- Cinta métrica.
🌸 Materials:🌸
- Pink fabric.
- White fabric.
- Pink ribbon.
- Light beige ribbon.
- Two pink pearls.
- Pink thread.
- Pins.
- Needles.
- A white sheet to draw the patterns.
- Scissors.
- Tape measure.
🌸 Elaboración:🌸 // 🌸 Elaboration:🌸
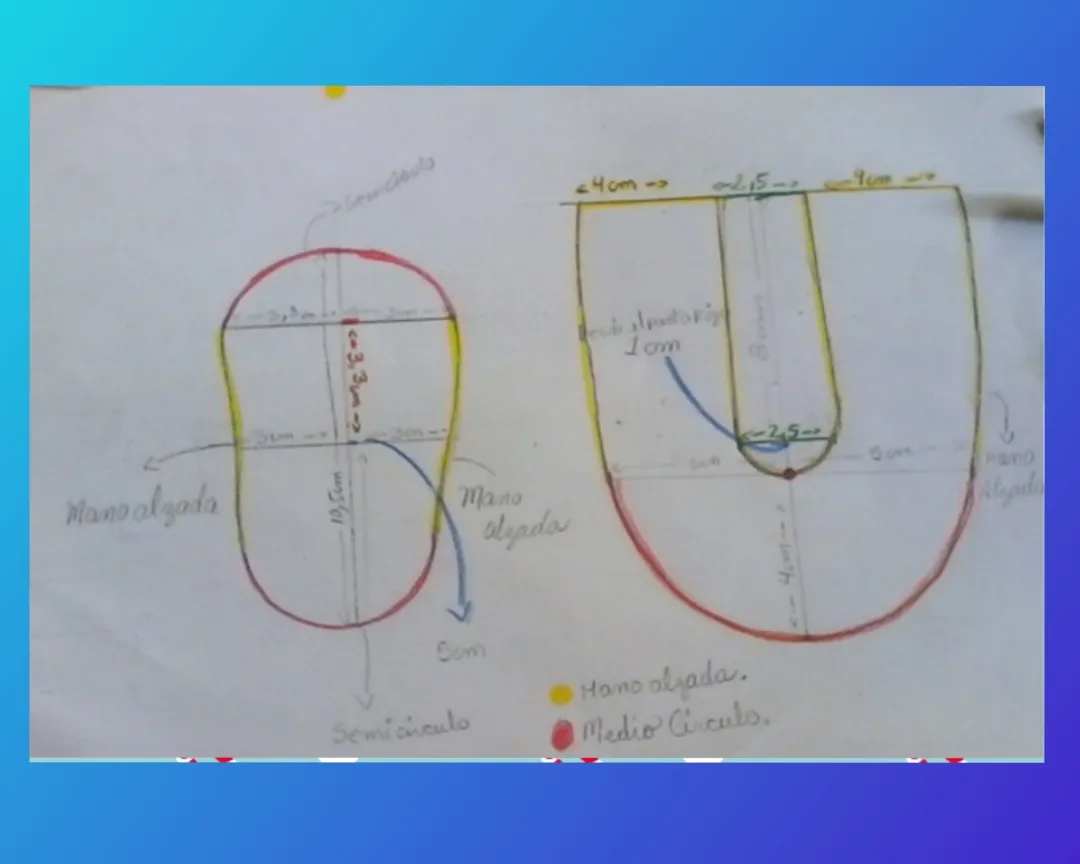
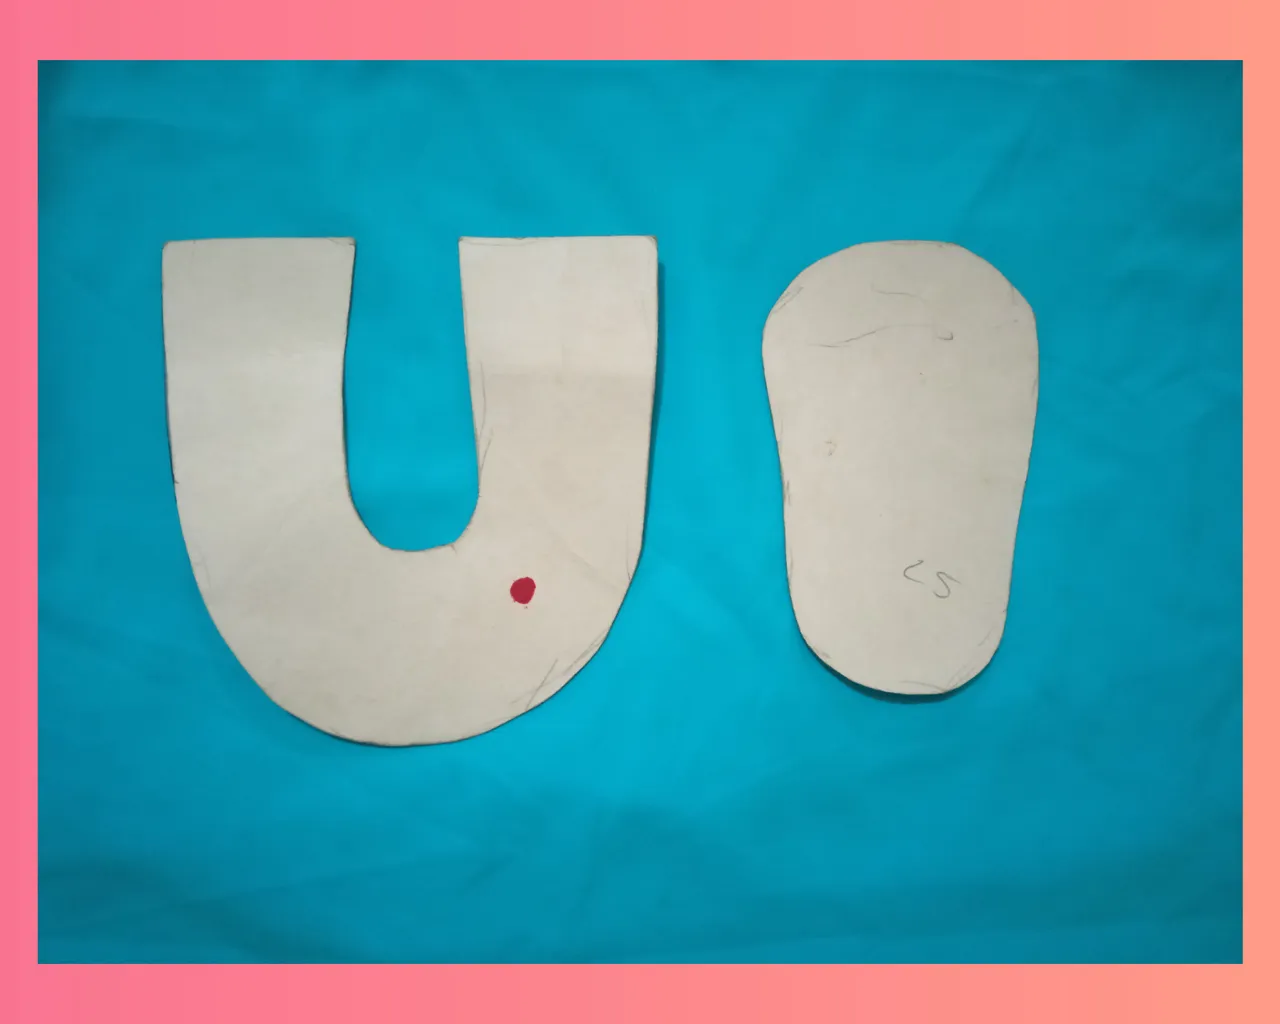
Paso 1:
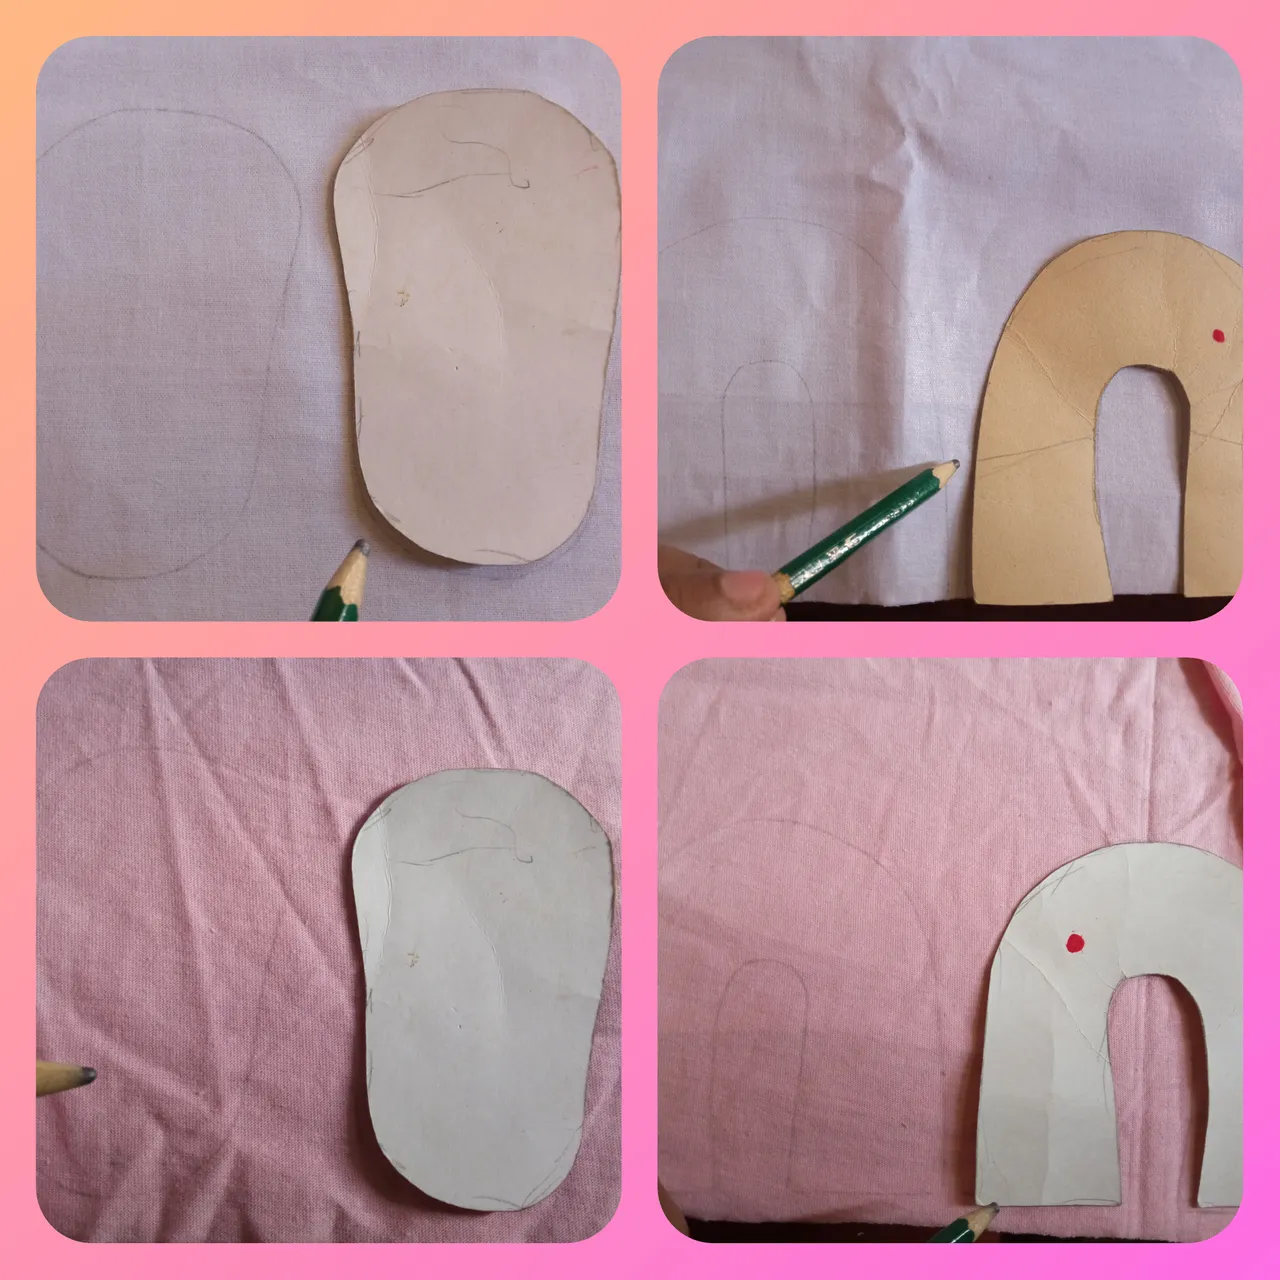
Para comenzar dibuje el patrón del zapatito 🌸 para un bebé de 0 a 2 meses, si desean hacerlo más grande solo deben sumarle 1cm al patrón. Luego saque el patrón en una cartulina para luego usarlo más adelante.
Step 1:
To start, draw the pattern of the 🌸 slipper for a baby from 0 to 2 months, if you want to make it bigger, just add 1cm to the pattern. Then draw the pattern on a cardboard for later use.
Paso 2:
Tome tanto el patrón de la plantilla y la base superior del zapatito y lo marqué en la tela blanca dos piezas de cada uno igual en la tela rosada. Luego corte cada pieza quedando así como ven en la imagen.
Step 2:
Take both the template pattern and the upper base of the shoe and mark on the white fabric two pieces of each the same on the pink fabric. Then cut out each piece as you can see in the picture.

Paso 3:
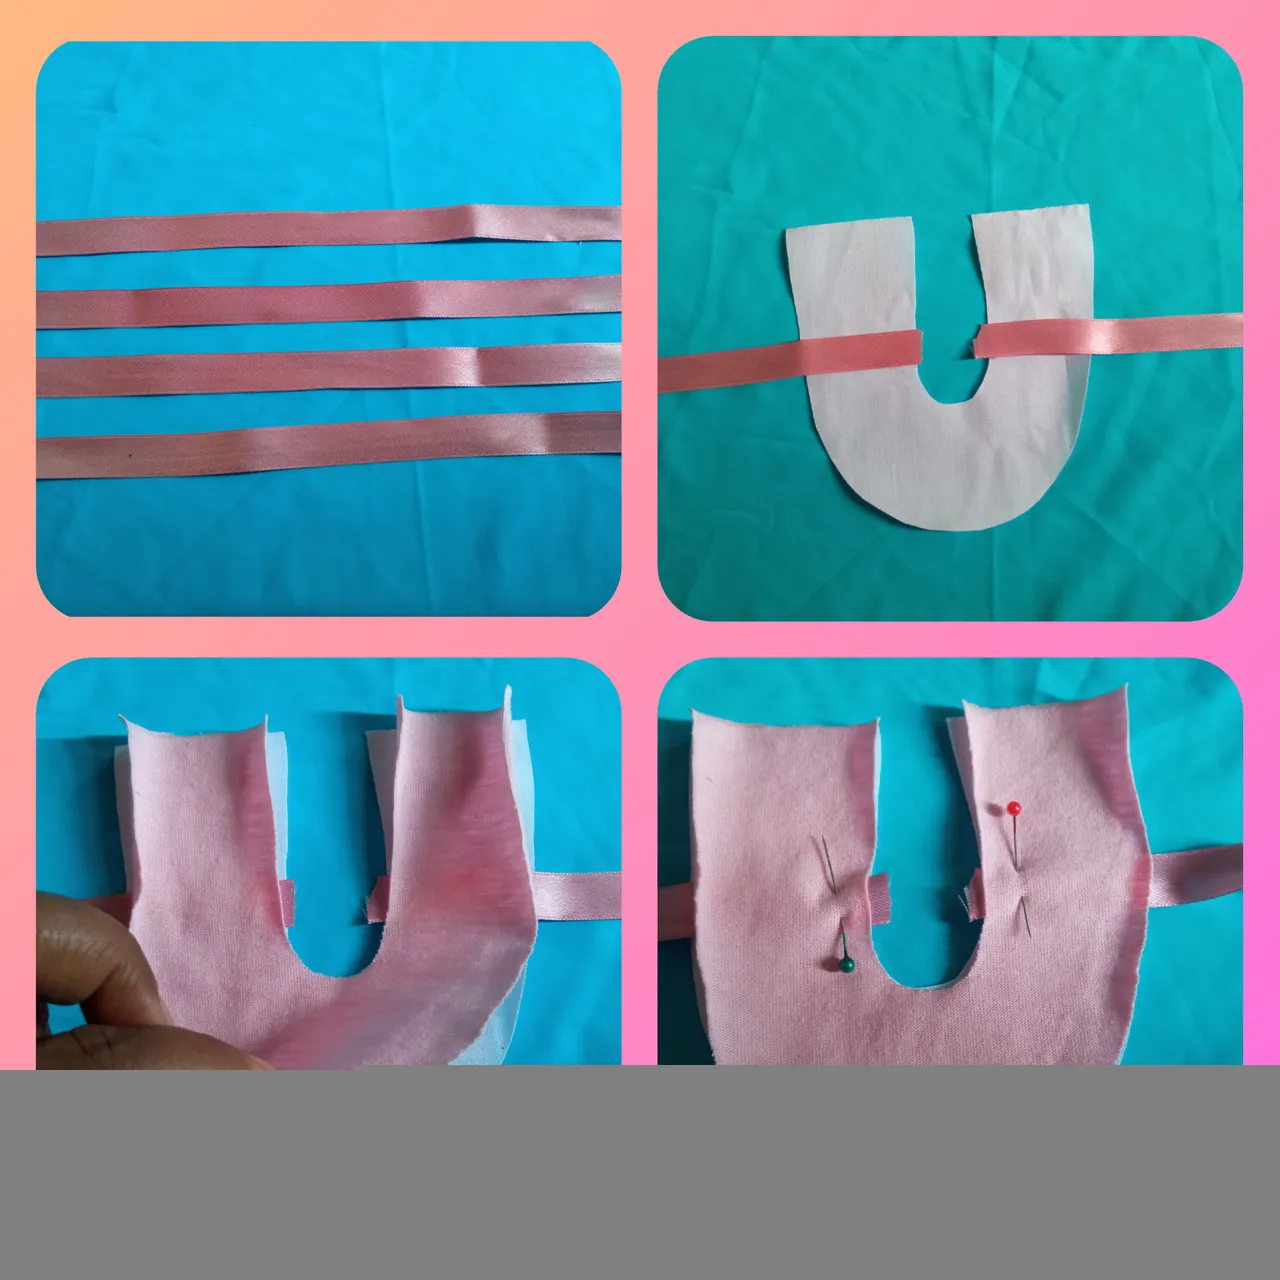
Ahora tomamos la cinta rosada y cortamos 4 trozos de 25cm de largo, luego la colocamos a los lados de la base superior blanca del zapatito, después montamos la base superior rosada del zapatito con el derecho de frente hacia dentro y fijamos las cintas con afileres para que no se mueva.
Step 3:
Now we take the pink ribbon and cut 4 pieces of 25cm long, then we place it on the sides of the white upper base of the slipper, then we assemble the pink upper base of the slipper with the right side facing inwards and we fix the ribbons with pins so that it does not move.
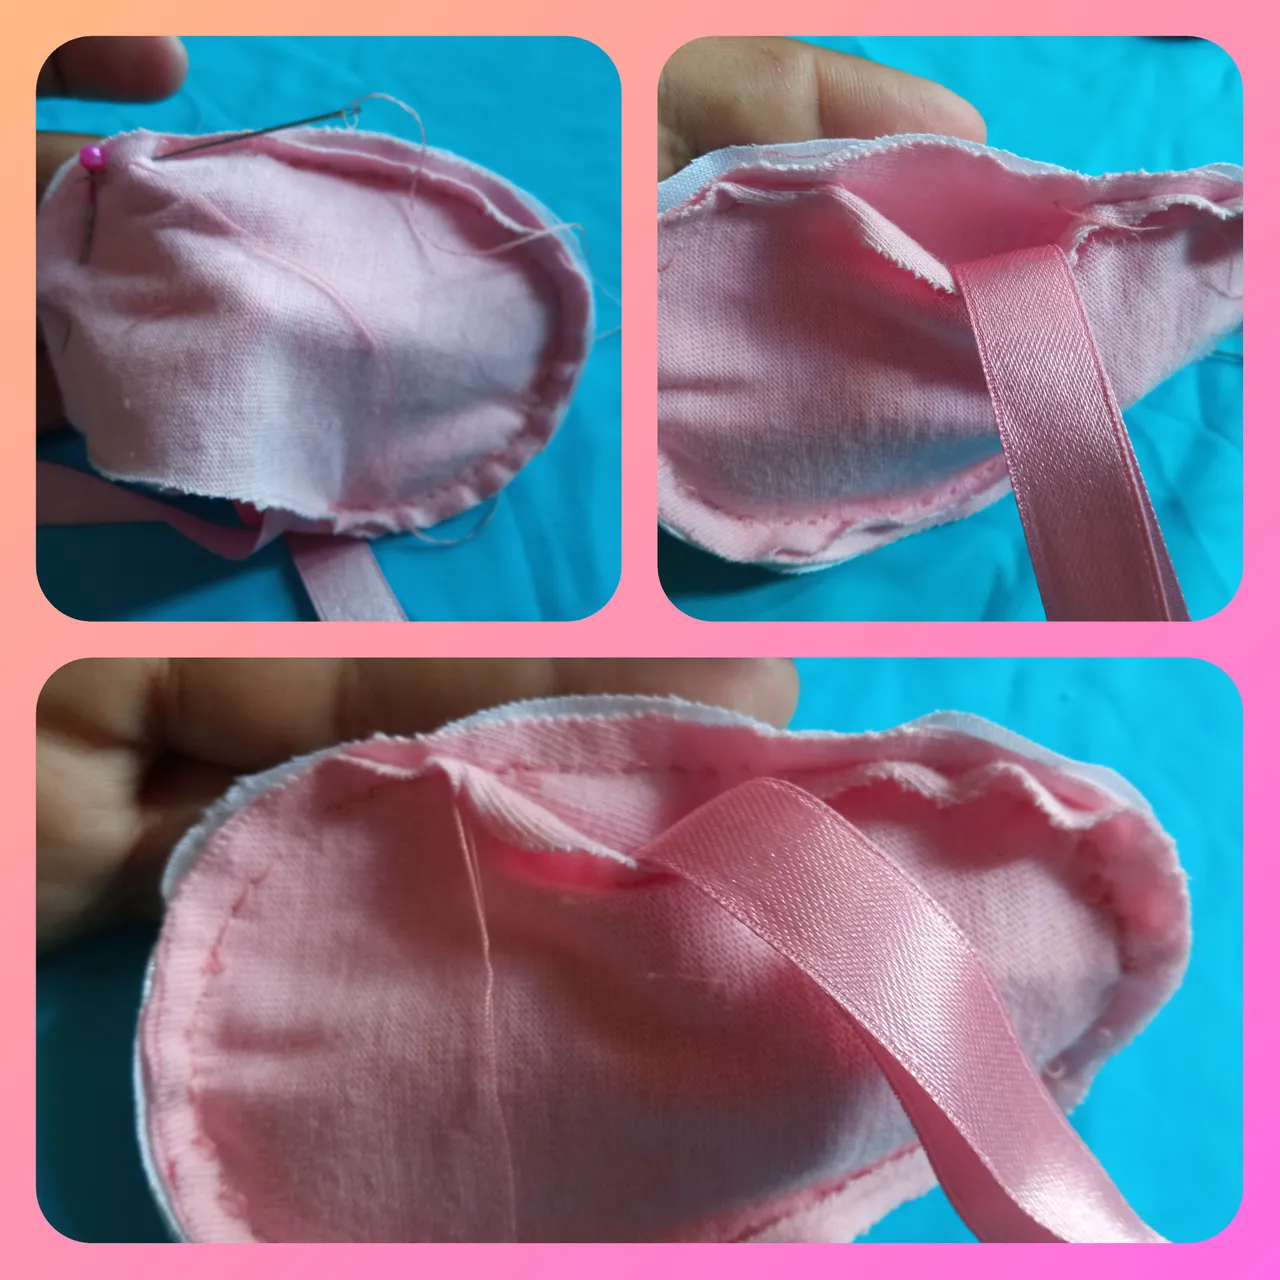
Paso 4:
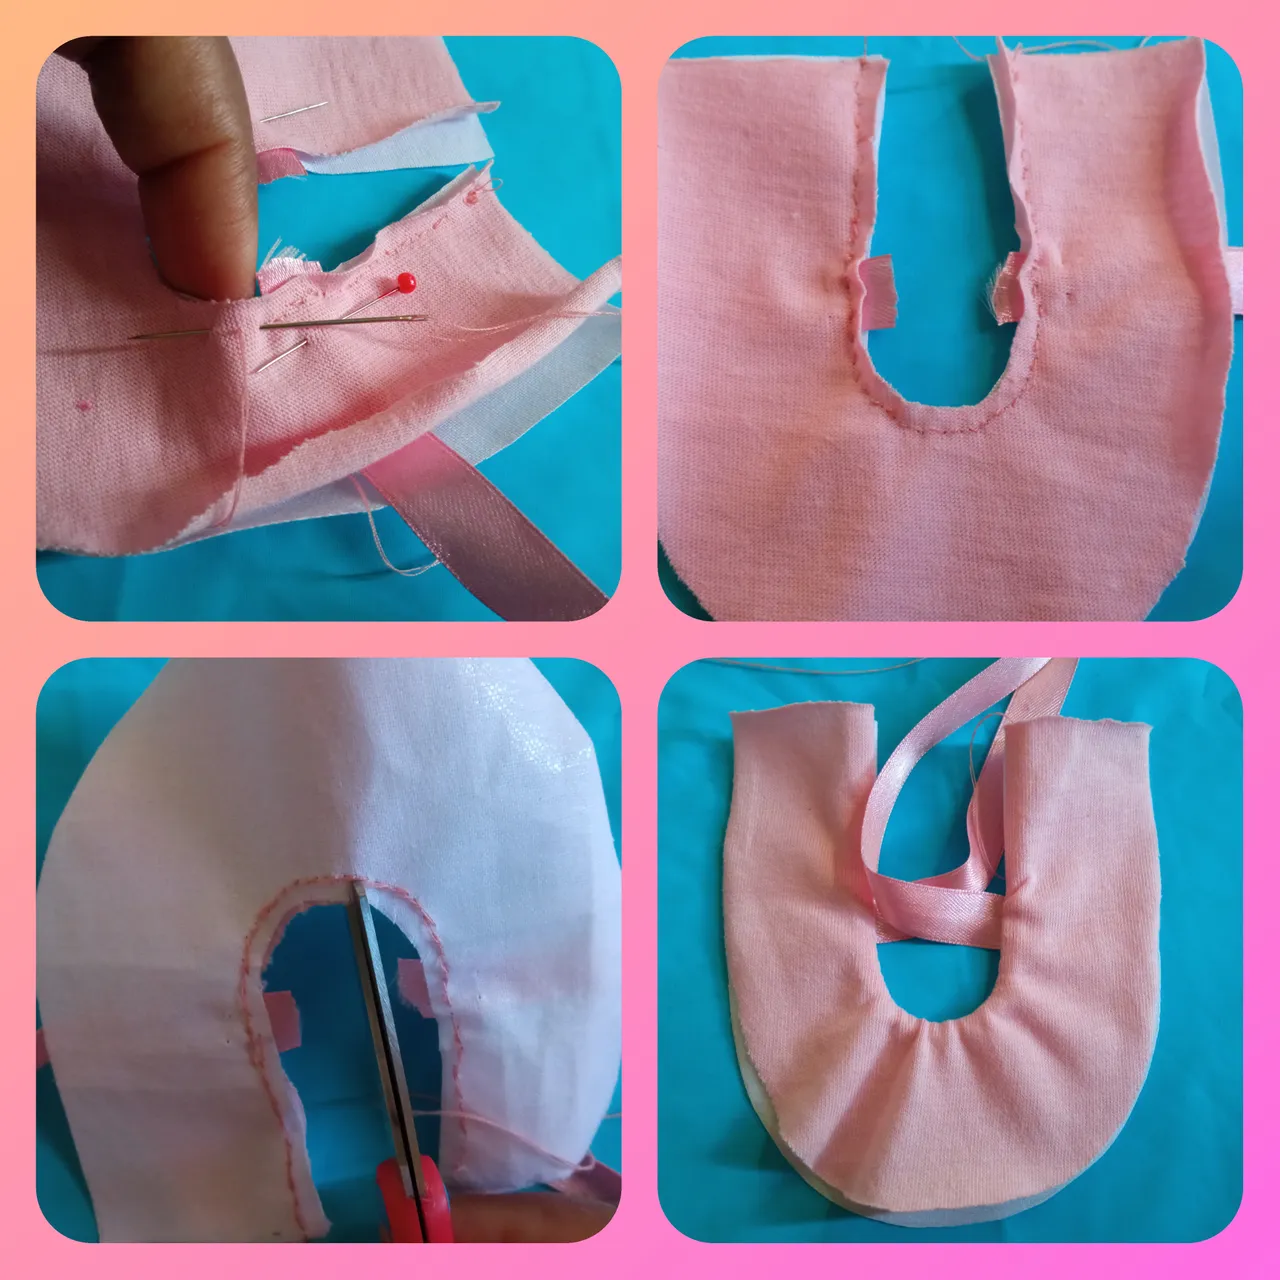
Ahora cosemos con hilo rosado de extremo a extremo como ven en la imagen, luego hacemos piquetes solo en la parte circular después volteamos hacia atrás la base rosada.
Step 4:
Now we sew with pink thread from end to end as you can see in the image, then we make picks only in the circular part and then we turn back the pink base.
Paso 5:
Debemos abrir las bases unimos y cosemos con punto atrás al terminar cortamos pegado a la costura luego coso con punto ojal.
Step 5:
We must open the bases, join and sew with back stitch, then cut the seam and sew with buttonhole stitch.
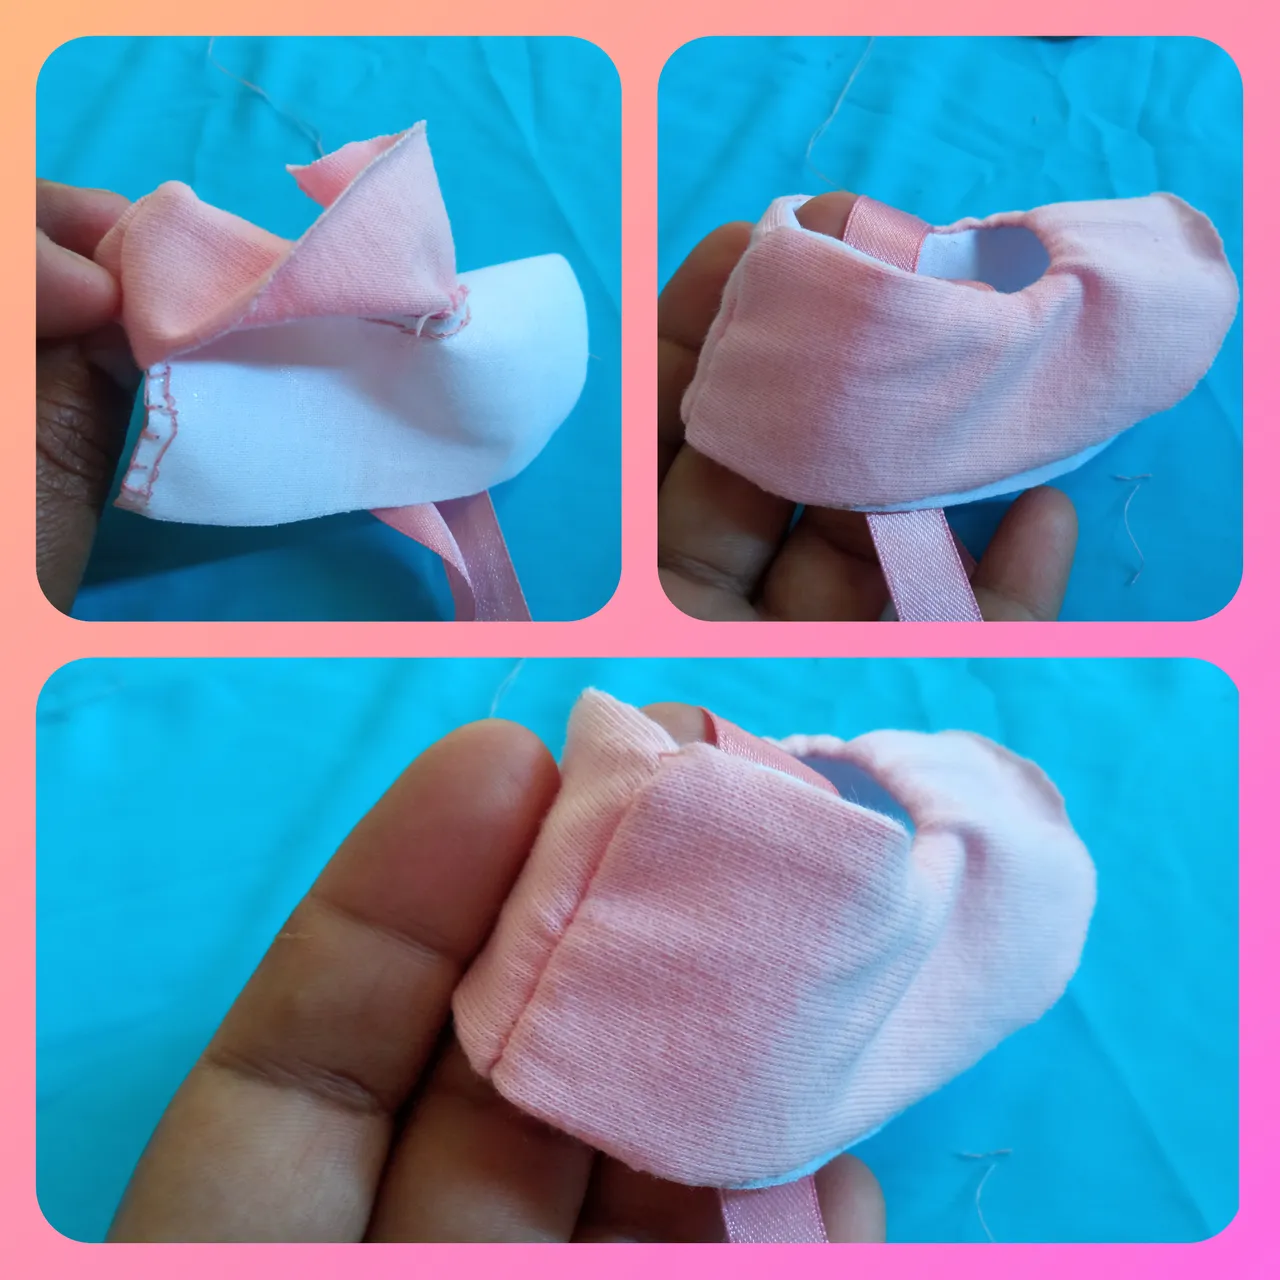
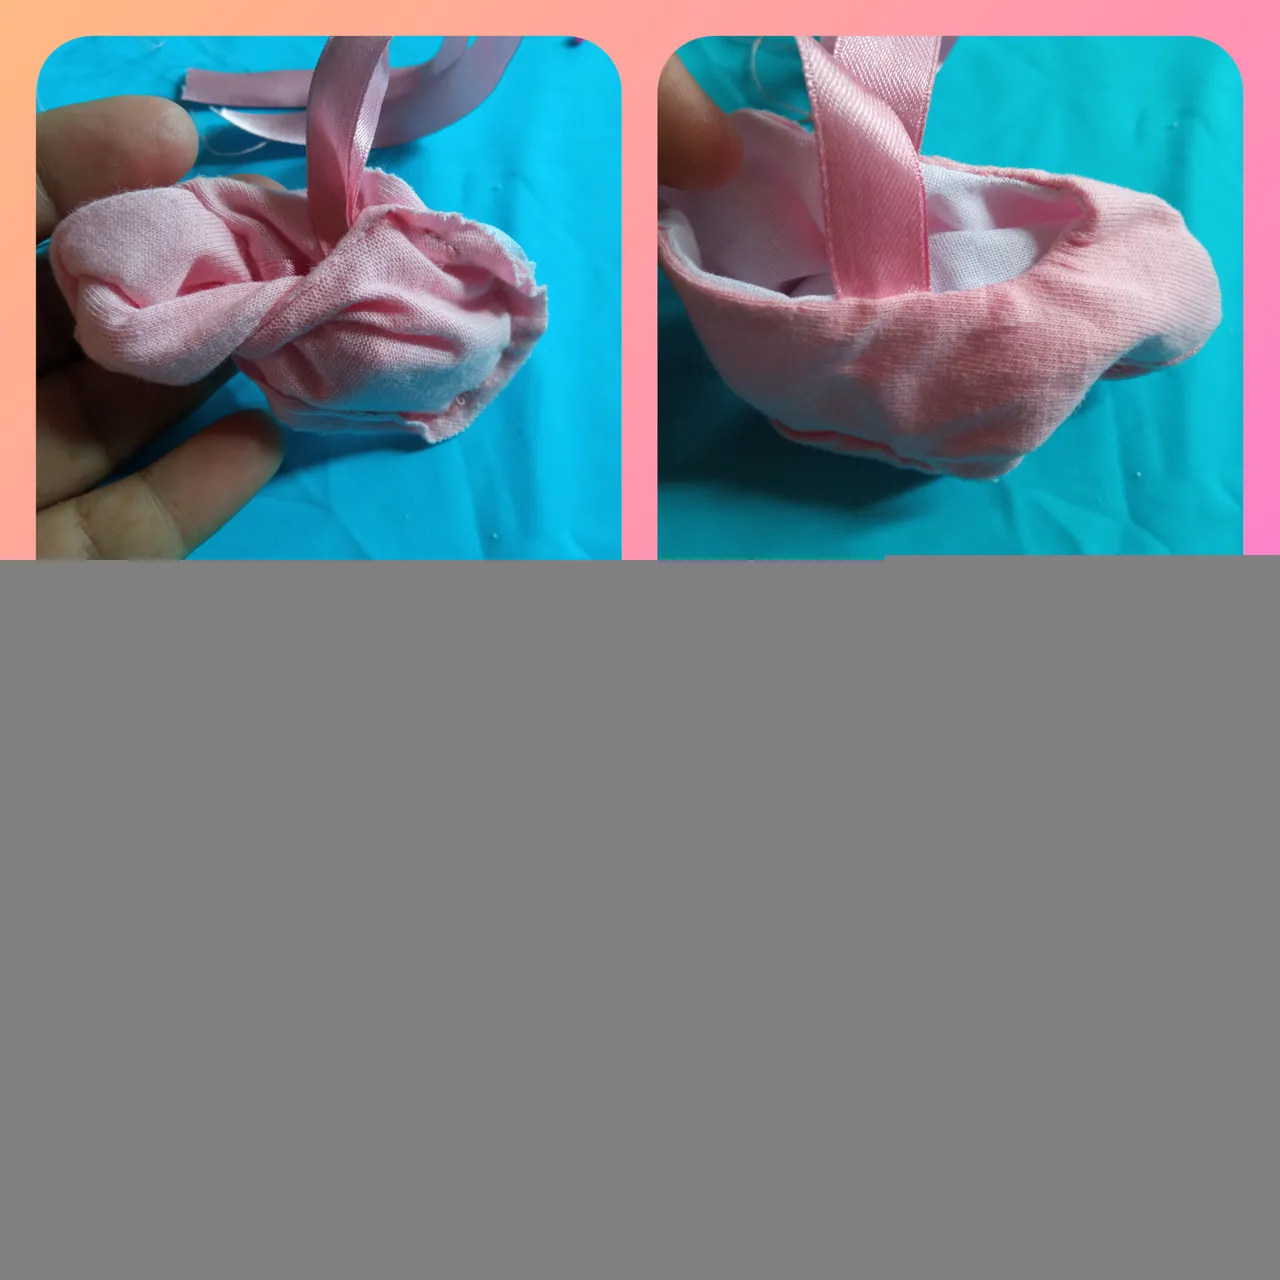
Paso 6:
Ahora bajamos la base superior rosada y quedará como les muestro en la fotos 😃.
Step 6:
Now we lower the upper pink base and it will look like I show you in the pictures 😃.
Paso 7:
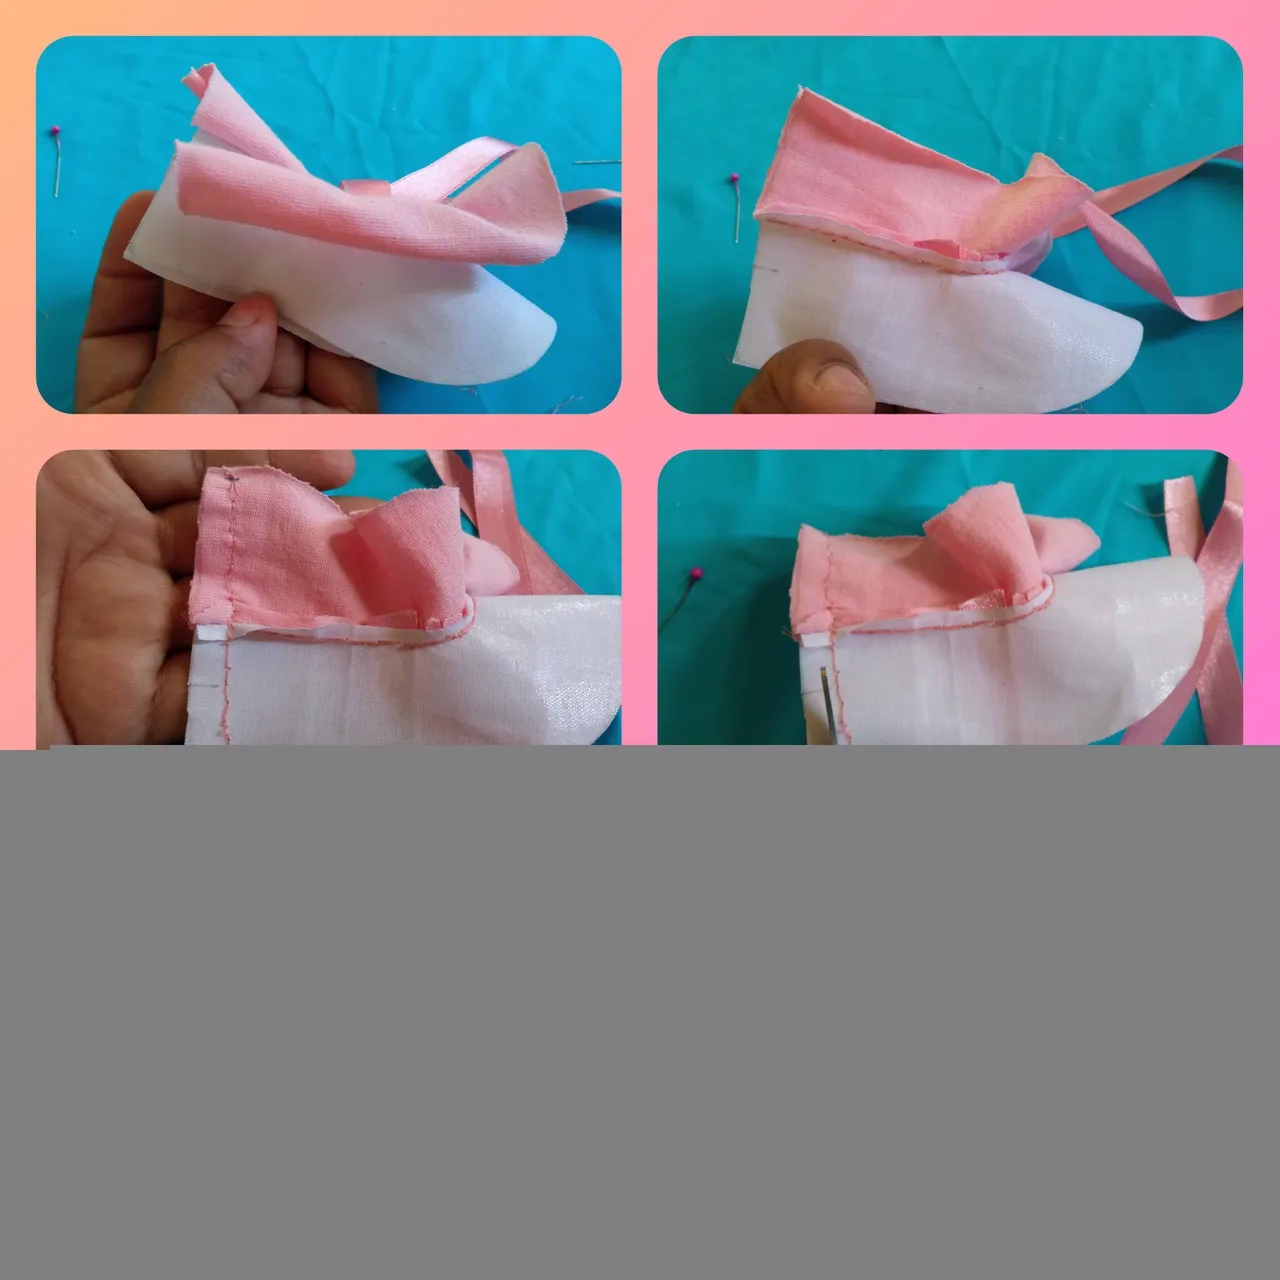
Tomamos las plantillas blancas y rosadas y marcamos con un lápiz la mitad luego tomamos la base superior y también marcamos la mitad, luego unimos la plantilla blanca en la parte de abajo uniendo los puntos marcados y colocamos un alfiler.
Step 7:
We take the white and pink templates and mark with a pencil the middle, then we take the upper base and also mark the middle, then we join the white template at the bottom joining the marked points and place a pin.
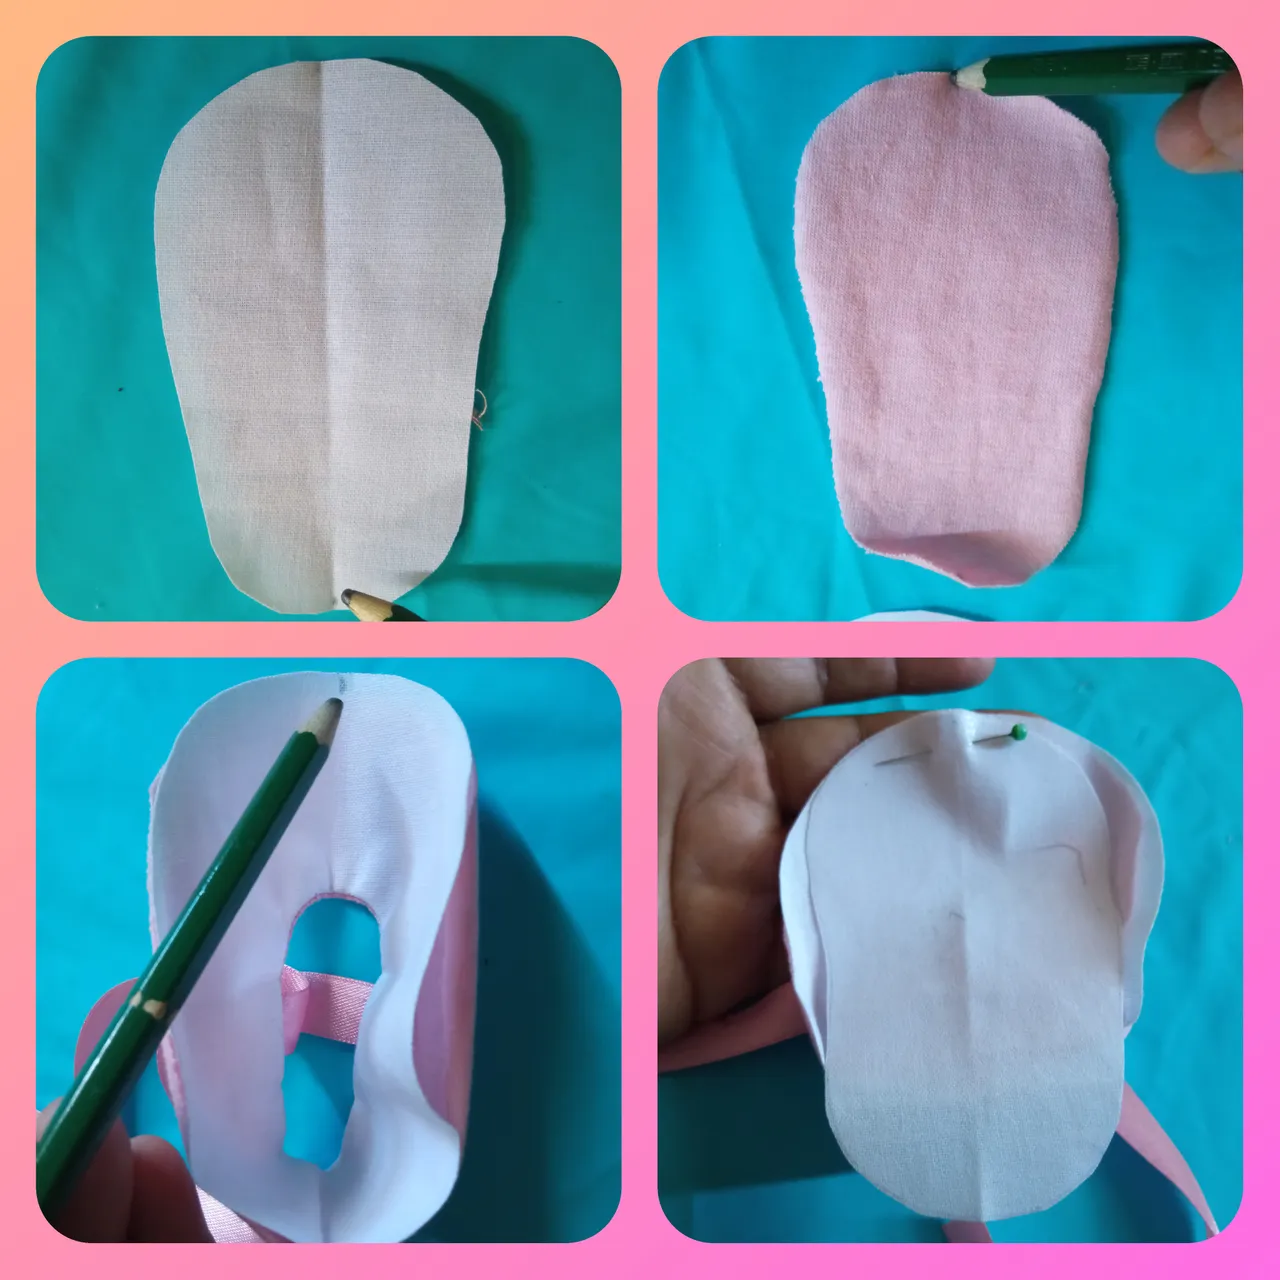
Paso 8:
Ahora montamos la plantilla rosada encima del zapatito de igual manera uniendo los puntos marcados y sujetamos con un alfiler en la punta y en la parte trasera.
Step 8:
Now we mount the pink insole on top of the shoe in the same way, joining the marked points and fasten with a pin at the tip and at the back.
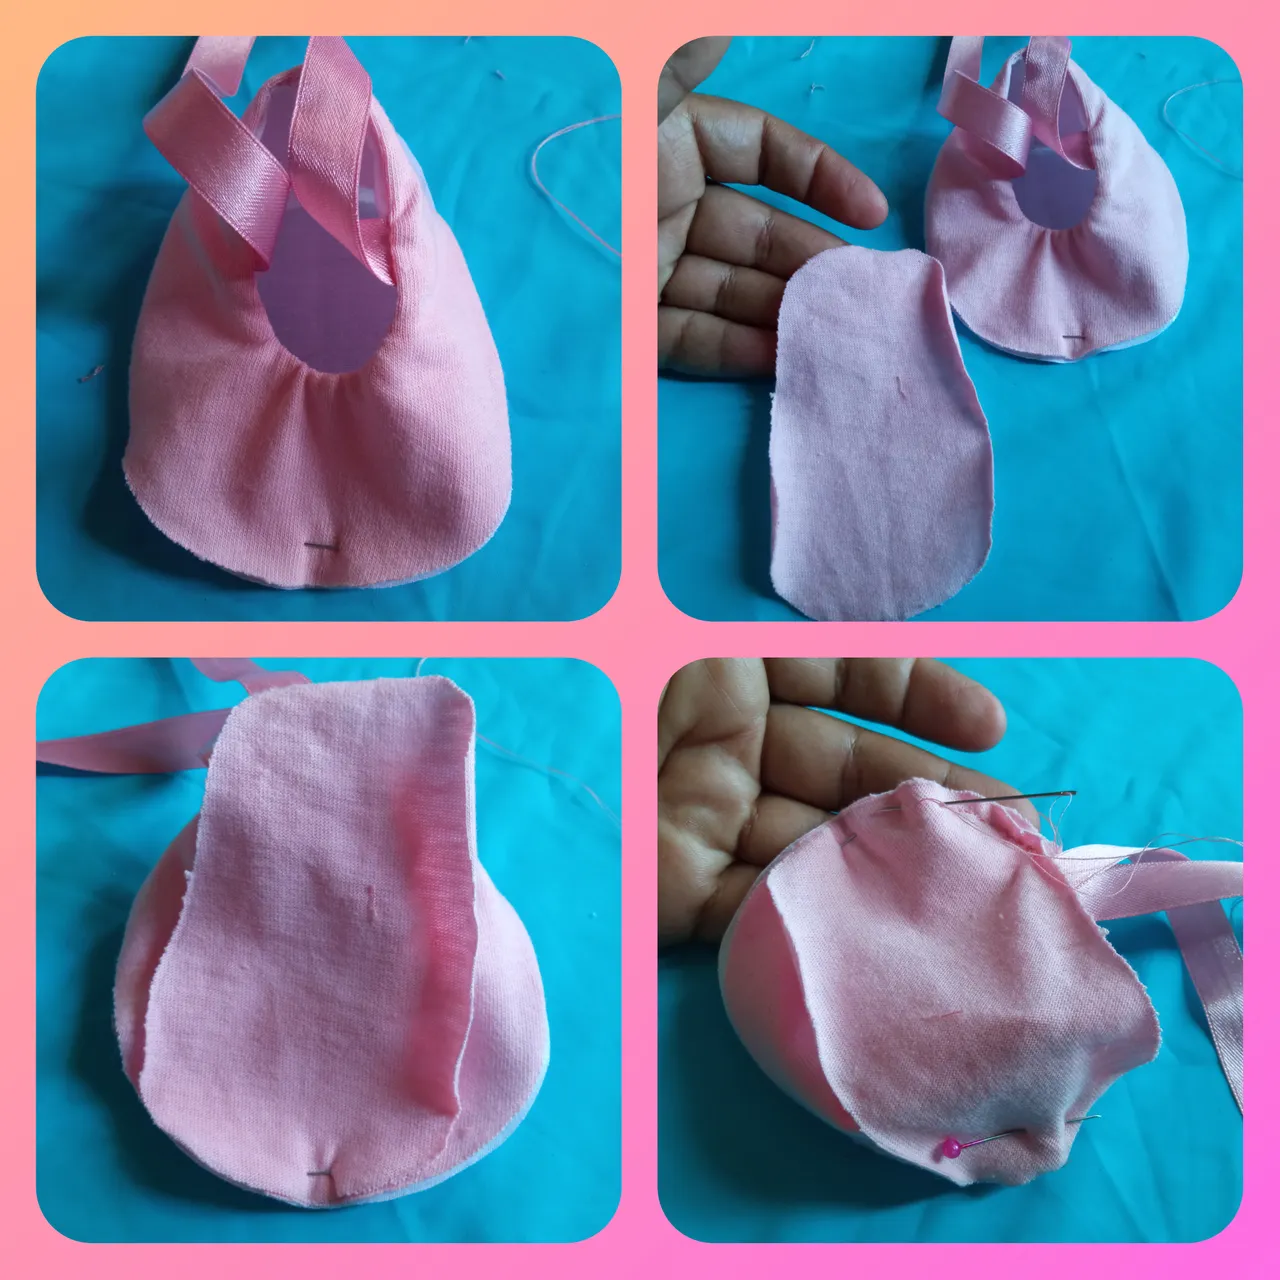
Paso 9:
Ahora comenzamos a coser con hilo rosado punto atrás por todo el alrededor del zapato luego dejamos un agujero en la parte superior de la plantilla rosada y seguimos cociendo la plantilla blanca hasta terminar.
Step 9:
Now we start stitching with pink thread back stitch all around the shoe then we leave a hole in the top of the pink insole and continue stitching the white insole until we finish.
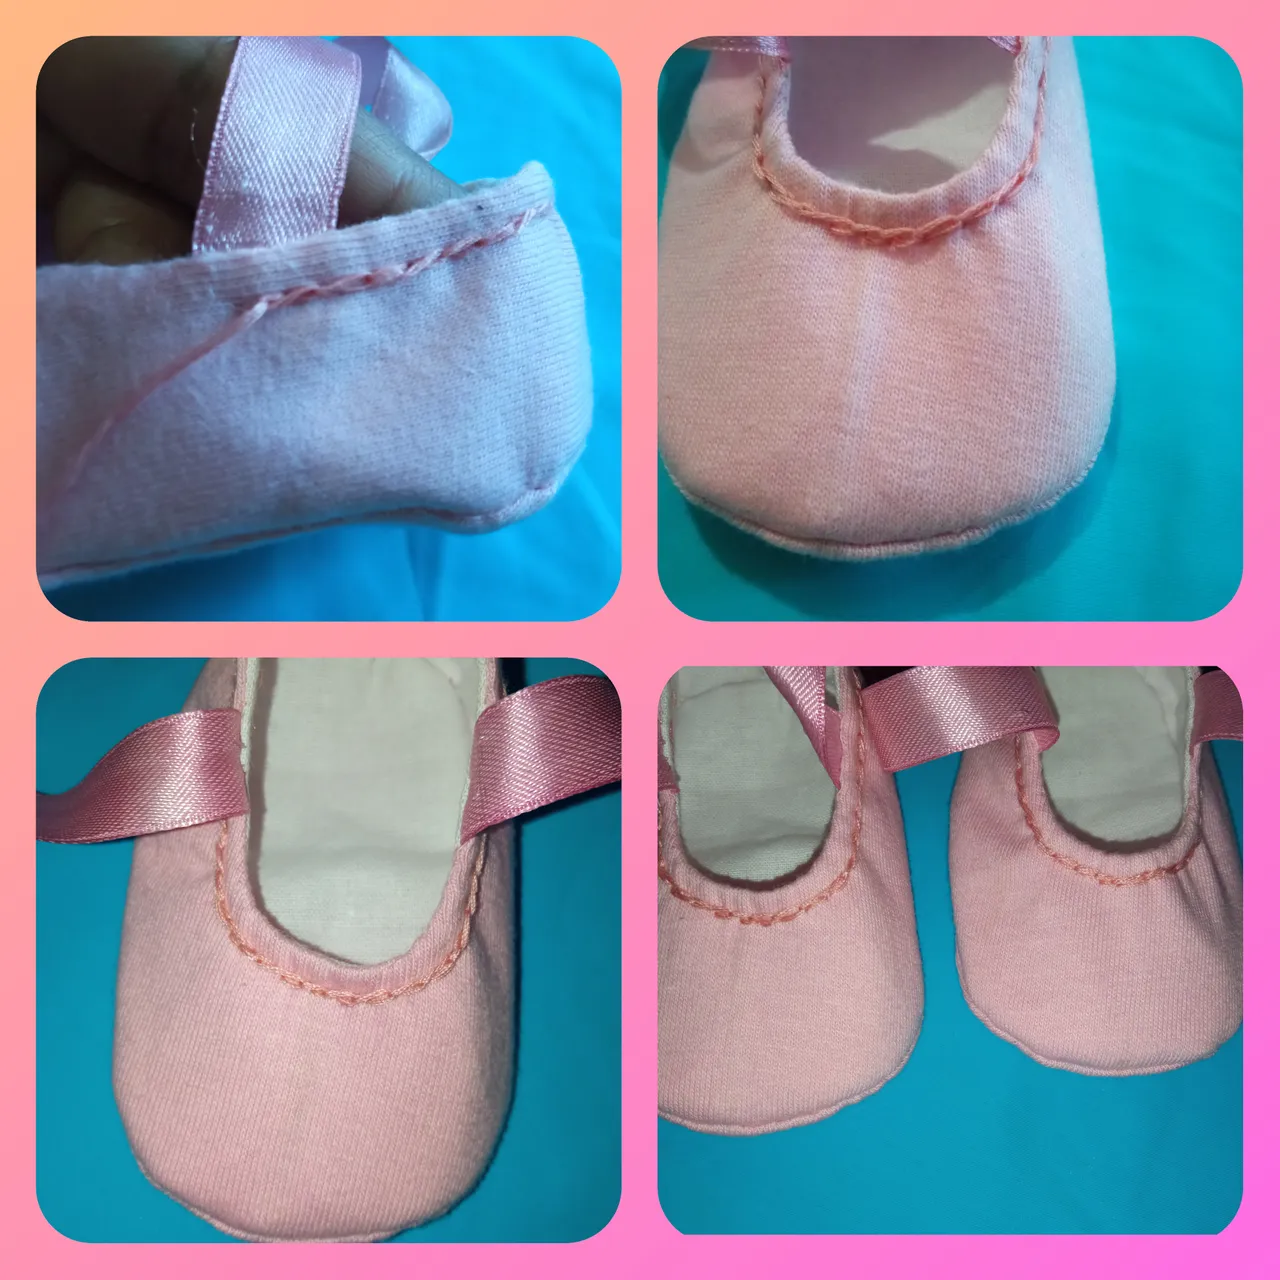
Paso 10:
Por el agujero que dejamos vamos a voltear el zapatito luego cosemos el agujero con puntadas pequeñas de manera que no se note así como les muestro en la foto.
Step 10:
Through the hole we left we are going to turn the shoe over, then we sew the hole with small stitches so that it is not noticeable, as shown in the photo.
Paso 11:
A mí me encanta hacerle un bordado al zapatito por todo el contorno así como les muestro en la foto, siempre se lo hago con hilo del color de zapato, si desean se lo pueden hacer, si no desean hacerlo lo pueden dejar si, de igual manera quedara hermoso 🤩.
Step 11:
I love to embroider the shoe all around the shoe as I show you in the picture, I always do it with thread of the color of the shoe, if you want you can do it, if you do not want to do it you can leave it, it will be beautiful 🤩.
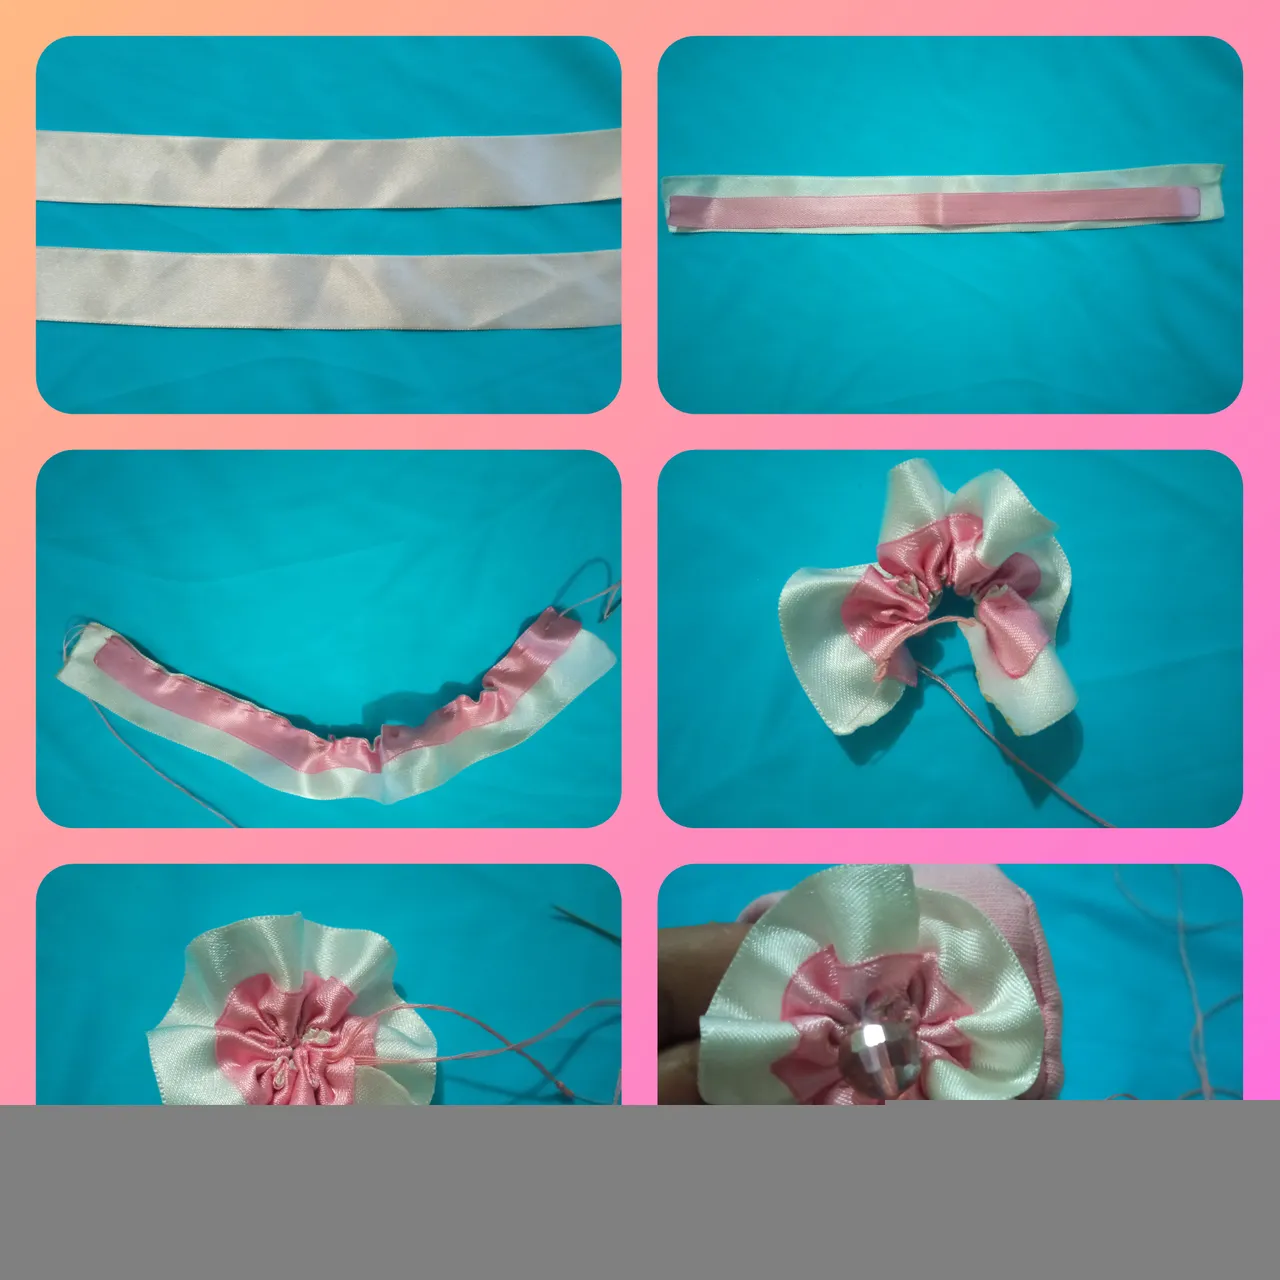
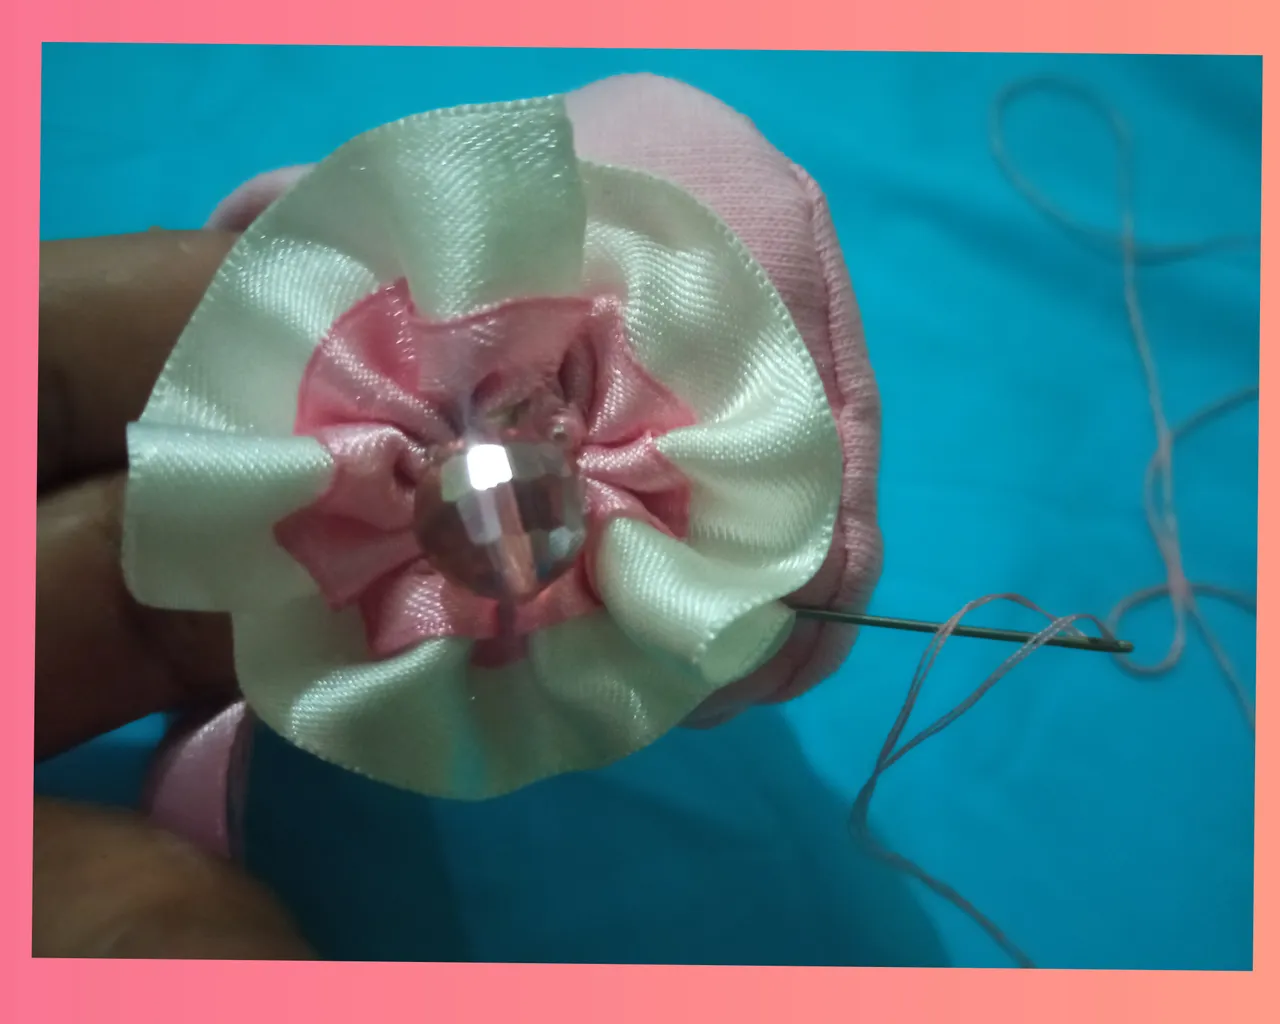
Paso 12:
Ahora haré una flor para adornar el zapato, cortamos un trozo de cinta rosada y beige de 26 cm, luego colocamos la cinta rosada encima de la beige y cosemos por toda la orilla de extremo a extremo al finalizar jalamos el hilo arruchando haciendo una flor luego amarramos y le cosemos en el centro la perla.
Step 12:
Now I will make a flower to decorate the shoe, cut a piece of pink and beige ribbon of 26 cm, then place the pink ribbon on top of the beige and sew along the entire edge from end to end at the end we pull the thread making a flower then tie and sew in the center of the pearl.
<center
Paso 13:
Ahora tomamos la flor y la cosemos en la parte del frente de mi zapatito haciendo una costura delicada sin nudos para que no sea molesta para el bebé.
Step 13:
Now we take the flower and sew it on the front part of my slipper making a delicate seam without knots so that it is not uncomfortable for the baby.
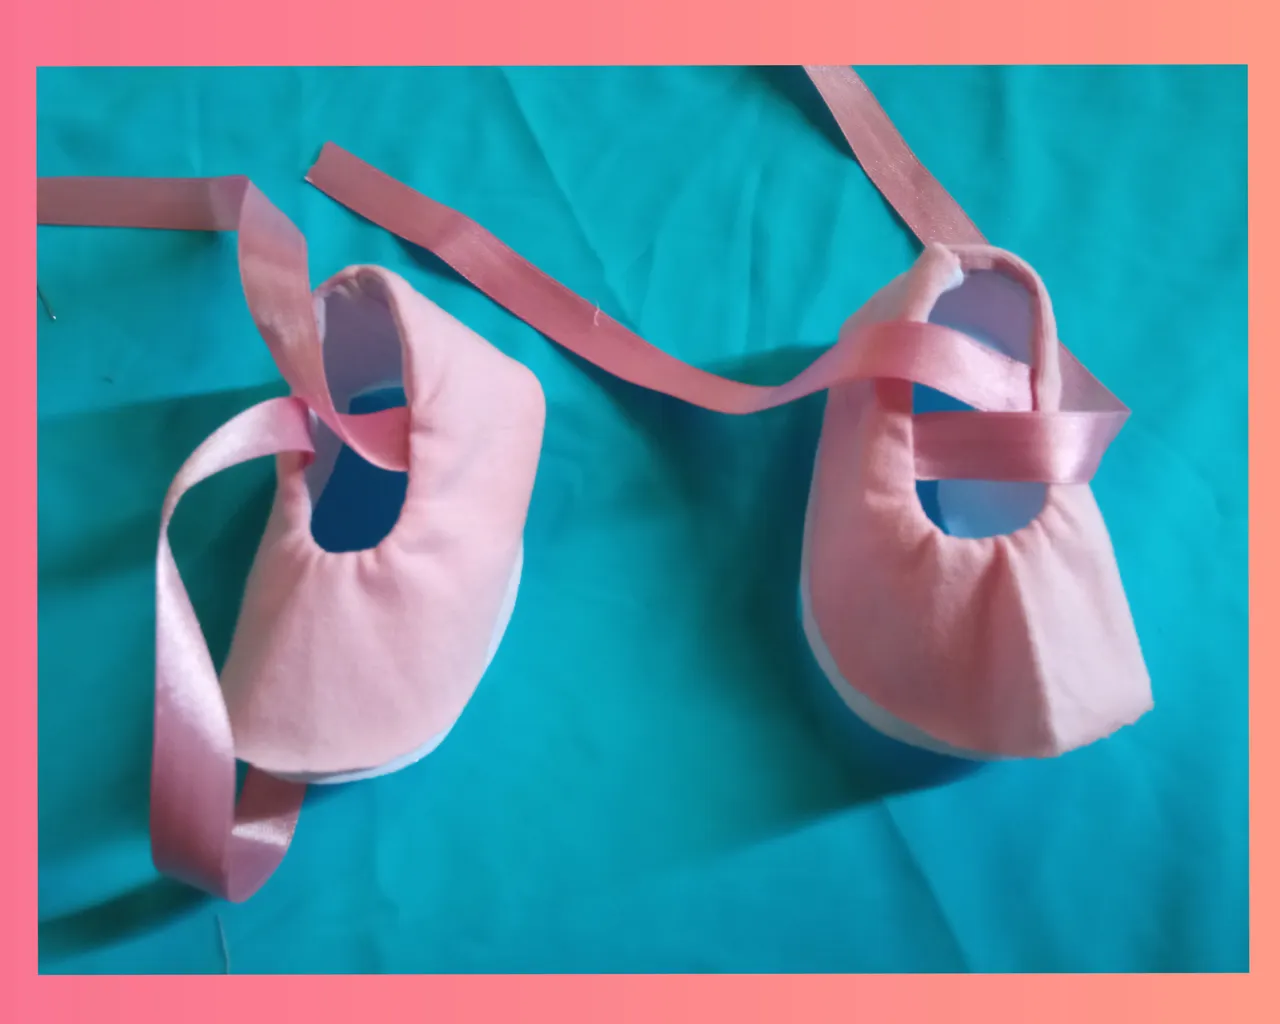
¡Ya mi Hermoso 😍 Zapatitos 🌸 está Terminando! // Already my Beautiful 😍 Zapatitos 🌸 is Finishing!
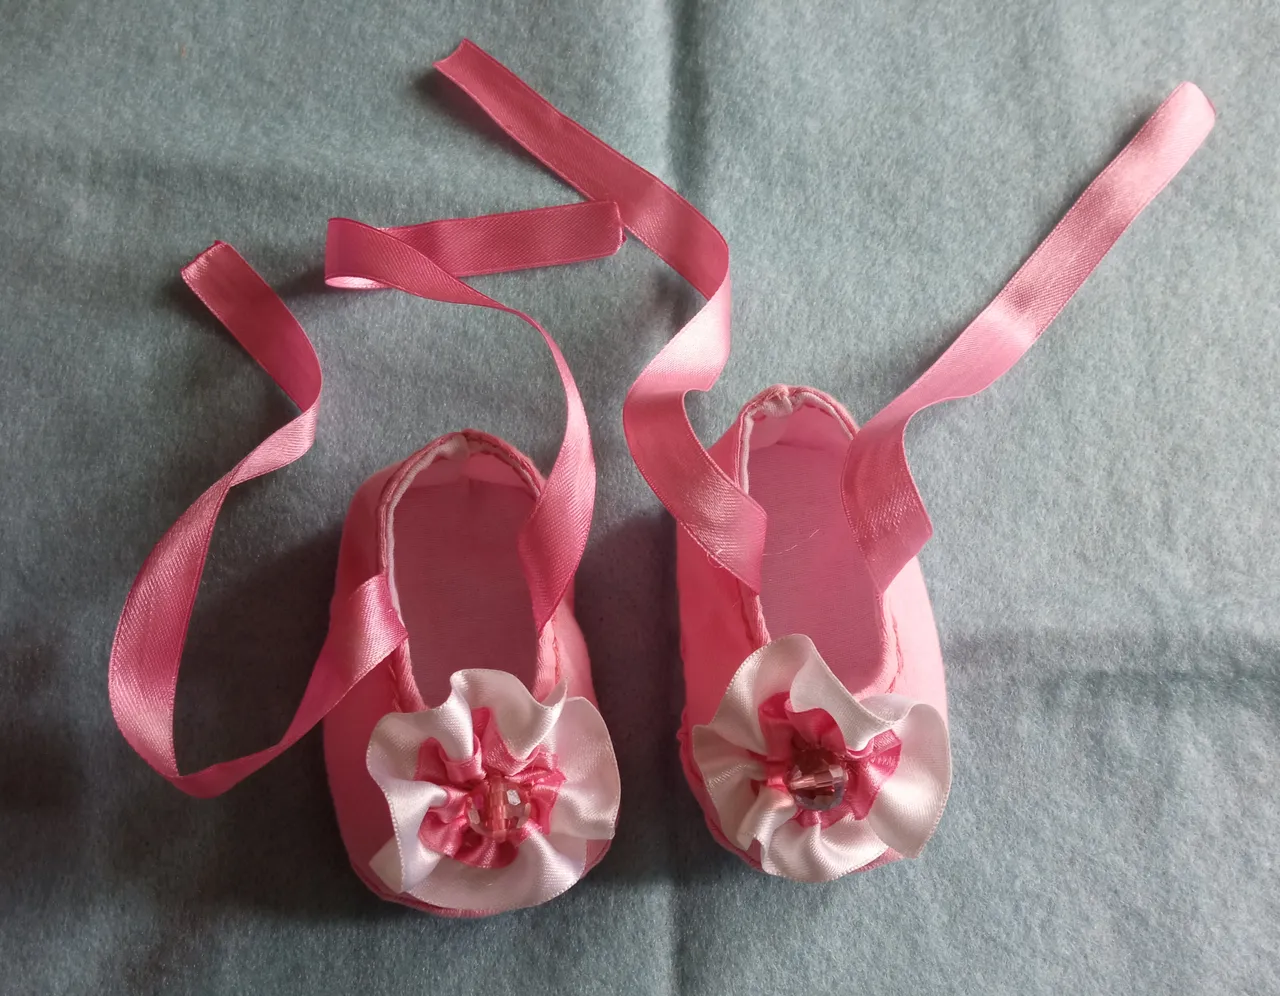
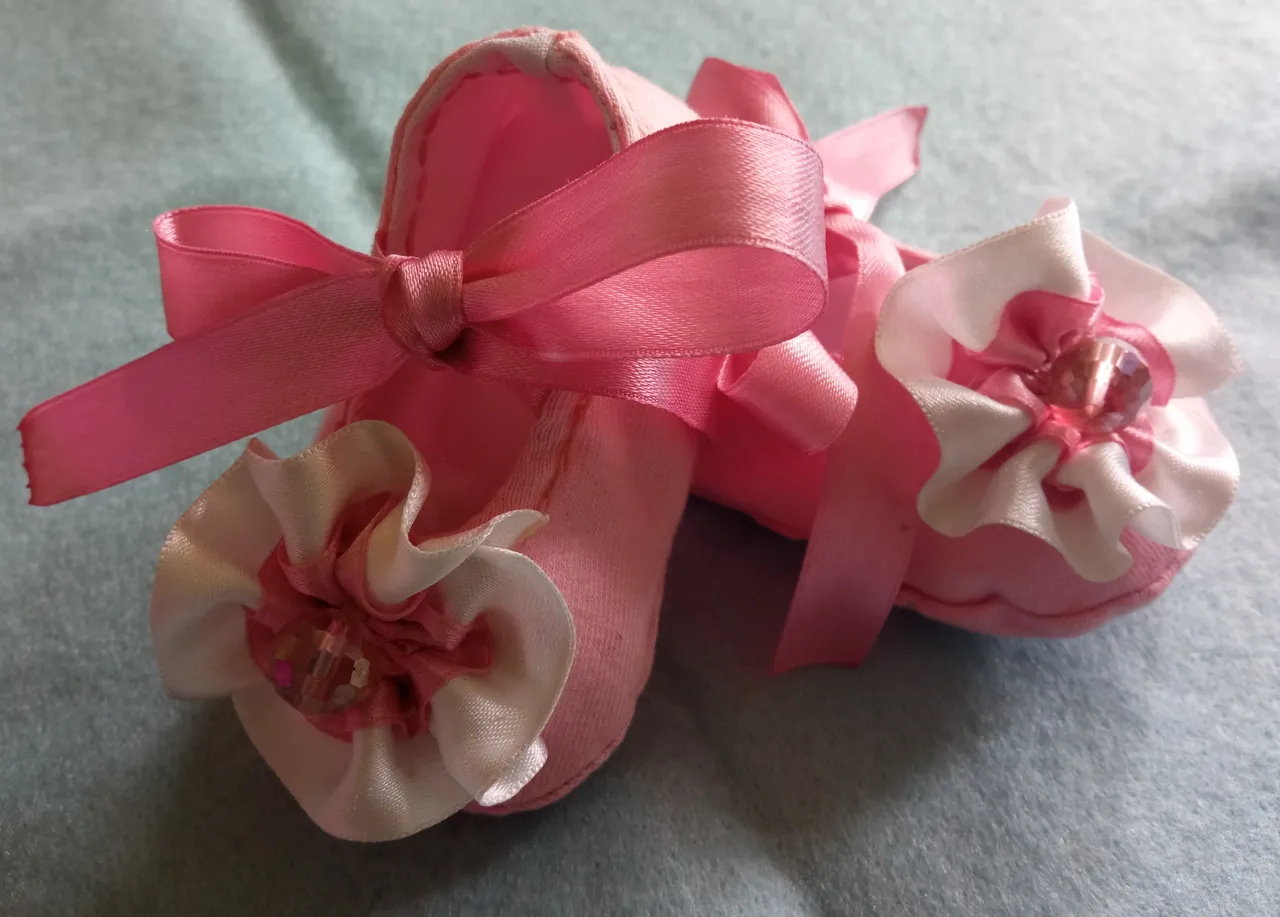
Hasta aquí llego este tutorial 😃, espero les haya gustado como quedaron estos hermosos 😍 zapatitos 🌸 de niñas y se animen en hacerlos.
So much for this tutorial 😃, I hope you liked how these beautiful 😍 little 🌸 girls' shoes 😍 turned out 🌸 and I encourage you to make them.
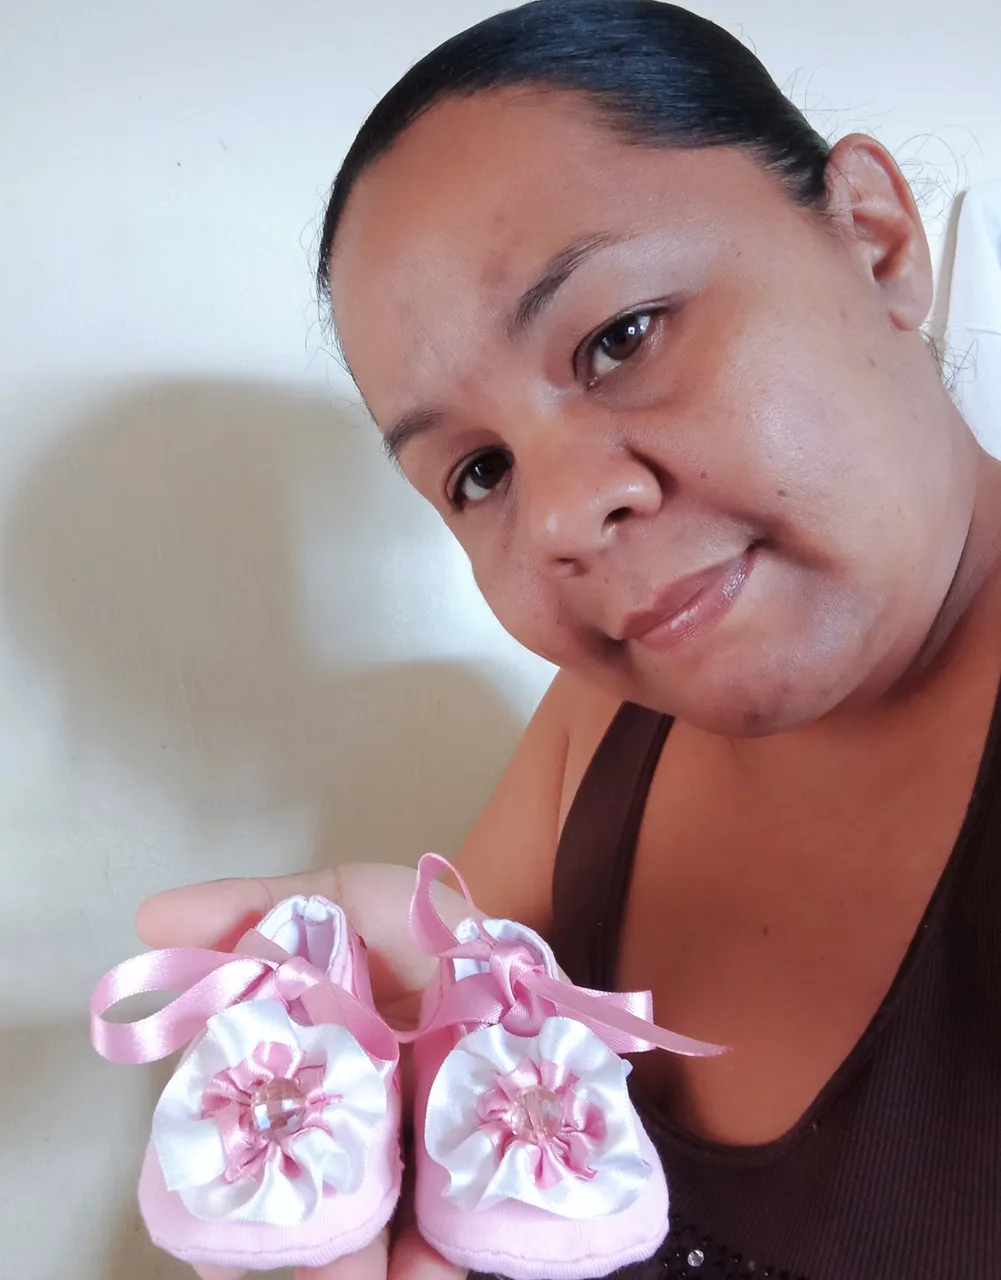
Como siempre agradecida con esta maravillosa comunidad 😊 y con la familia #hive por brindarme su apoyo en cada publicación que comparto con ustedes.
As always grateful to this wonderful community 😊 and to the #hive family for giving me their support in every post I share with you.