¡Saludos 👋 Queridos 💞 Amigos de #HiveDiy😘! // Greetings 👋 Dear 💞 Friends of #HiveDiy😘!
Hola! Espero se encuentren muy bien por aquí, hoy paso por esta maravillosa comunidad para mostrarle un tutorial que prepare con mucho cariño para mostrarle el paso a paso de cómo elaborar un turbante para niñas.
Hello! I hope you are very well here, today I come to this wonderful community to show you a tutorial that I prepared with love to show you step by step how to make a turban for girls.
Aprovechando que tengo muchos retazos de tela algunas que me quedaron de unos trabajos que realice y otros que me regalaron de un fábrica de franela, así que quise hacer uso de ellos e inventarme cosas útiles que pudieran usar, es por ello que pensé en hacer un turbante para mi sobrina que tiene 5 meses.
Taking advantage of the fact that I have many scraps of fabric, some that I had left over from some work I did and others that were given to me from a flannel factory, so I wanted to make use of them and invent useful things that could be used, that's why I thought of making a turban for my niece who is 5 months old.
Como los retazos de tela eran un poco pequeño me dije que solo haría un turbante que no usará tanta tela así que pensé en sacar mi propio patrón usando las medidas de un bebé de 3 a 6 meses, la mayoría hacen un cuadro luego lo doblan dos veces y cortan para hacer el turbante, este proceso lleva mucha tela, yo quise que fuera más sencillo usando poca tela.
Since the fabric scraps were a bit small I told myself I would just make a turban that wouldn't use so much fabric so I thought I would make my own pattern using the measurements of a 3 to 6 month old baby, most people make a square then fold it twice and cut it to make the turban, this process takes a lot of fabric, I wanted to keep it simple by using little fabric.
Entonces antes de comenzar le voy a detallar los materiales que utilicé para la elaboración de este hermoso trabajo 👏.
So before we begin I will detail the materials I used to make this beautiful work 👏.

🎀 Materiales:🎀
- Retazos de telas del color deseado 🟦⬜.
- Hilos🧵.
- Aguja de coser📍.
- Tijera ✂️.
- Cartulina.
- Lápiz ✏️.
- Recla 📐.
🎀 Materials:🎀
- Fabric scraps of the desired color 🟦⬜.
- Thread🧵.
- Sewing needle📍.
- Scissors ✂️.
- Cardboard.
- Pencil ✏️.
- Recla 📐.
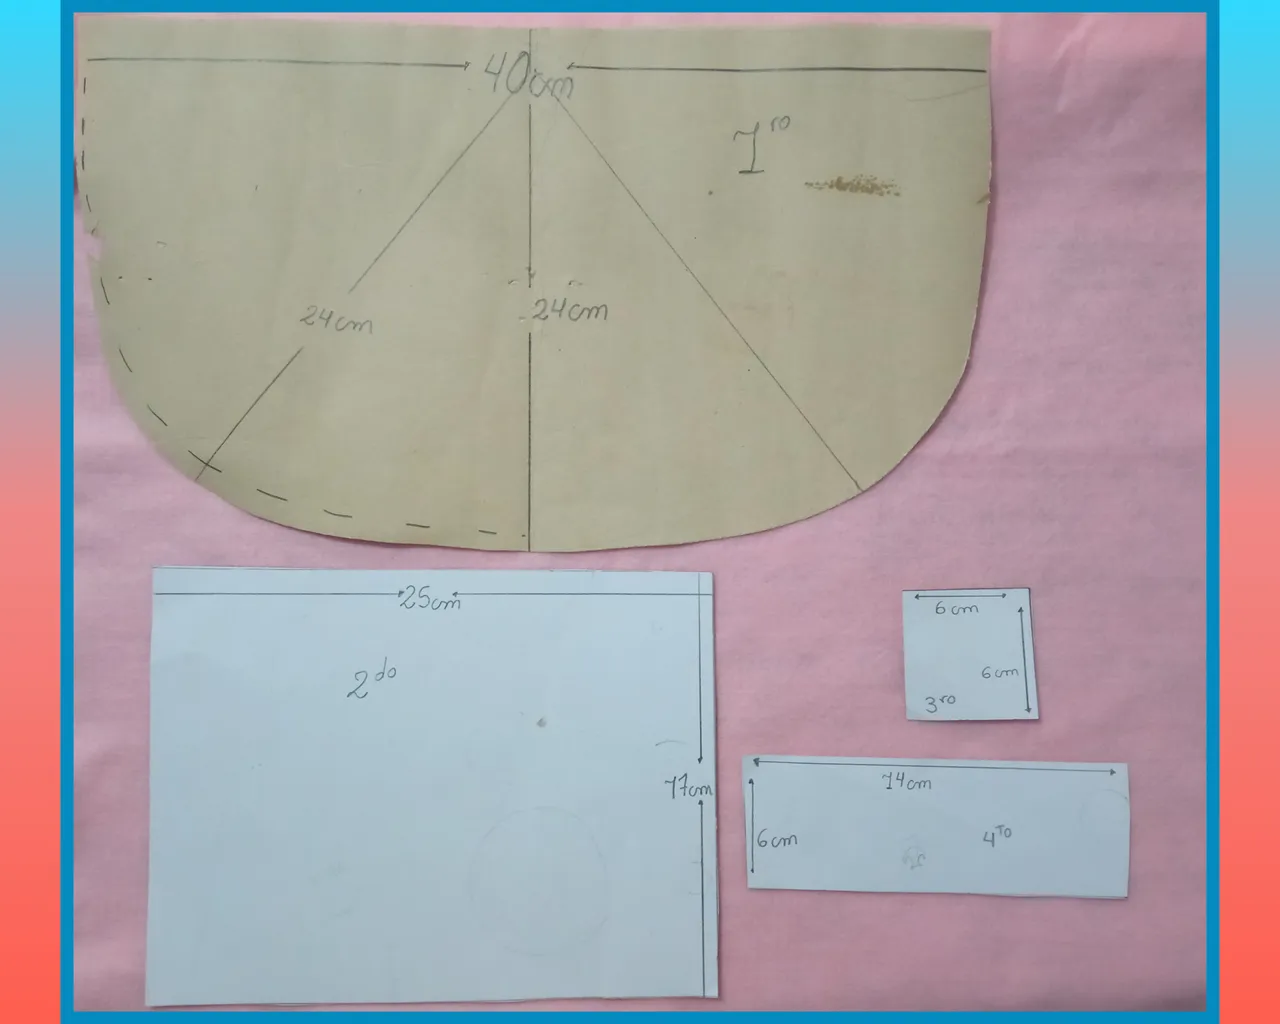
🎀 Patrón:🎀 // 🎀 Pattern:🎀
A continuación les adjunto el patrón con las medidas que elaboré para una bebé de 3 a 6 meses incluye también las medidas del lazo que vamos a colocar al turbante.
Below I attach the pattern with the measurements I made for a baby from 3 to 6 months old, it also includes the measurements of the bow that we are going to put on the turban.
🎀 Elaboración:🎀 // 🎀 Elaboration:🎀
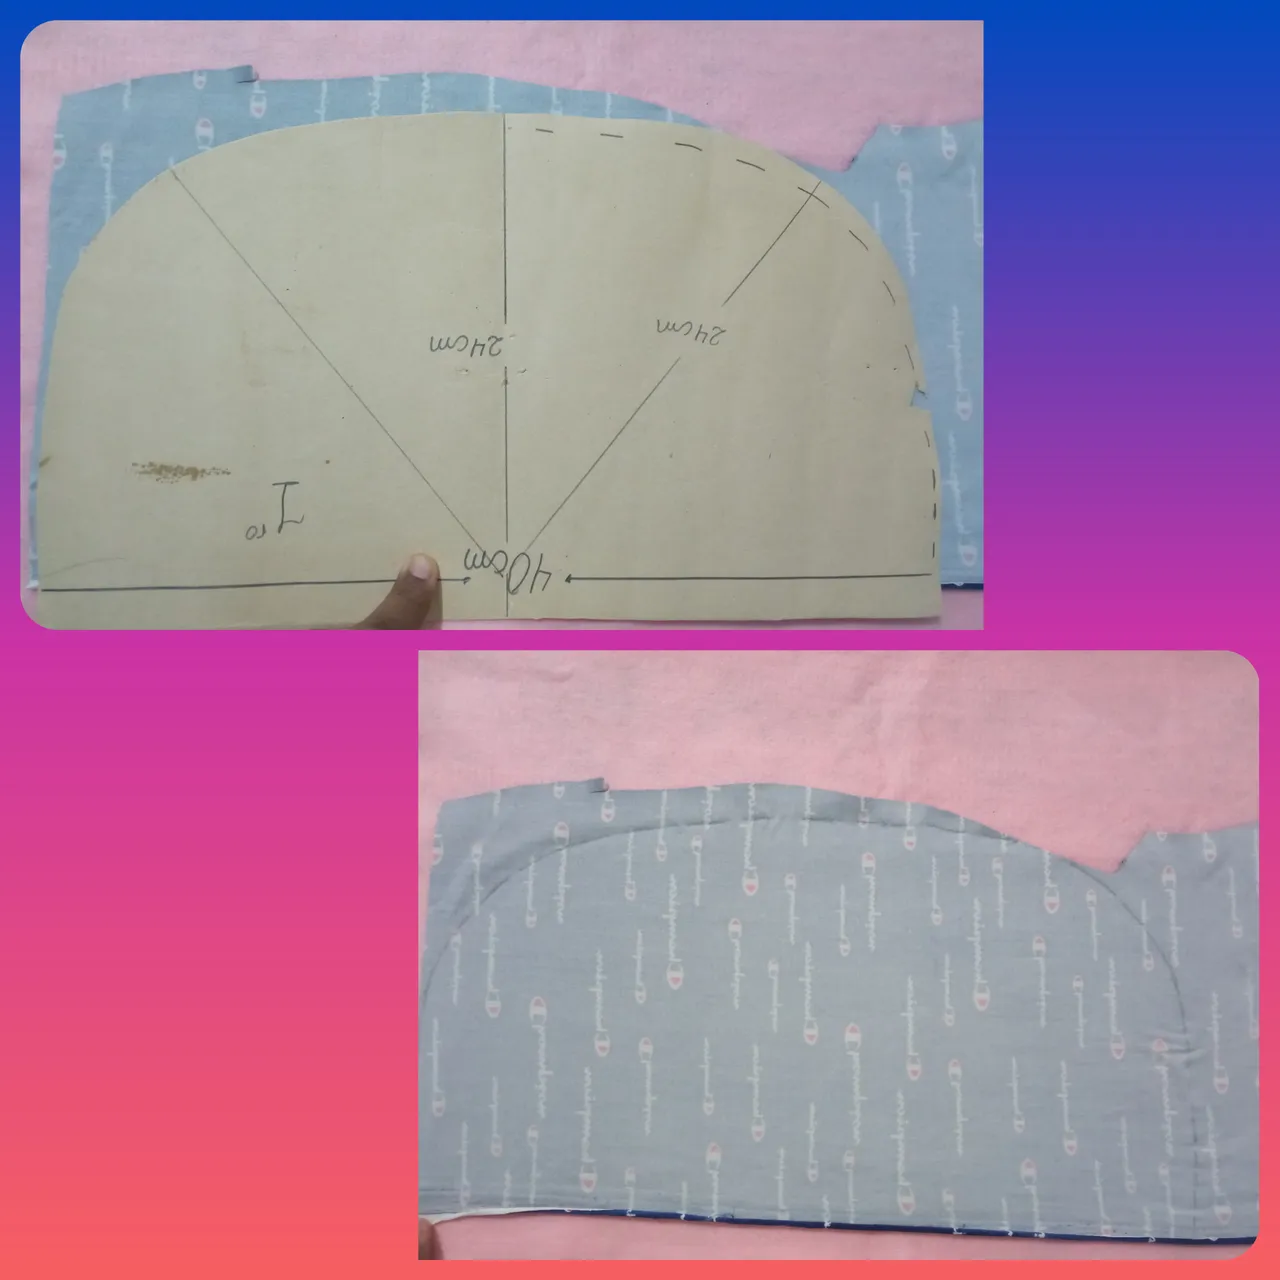
Paso 1:
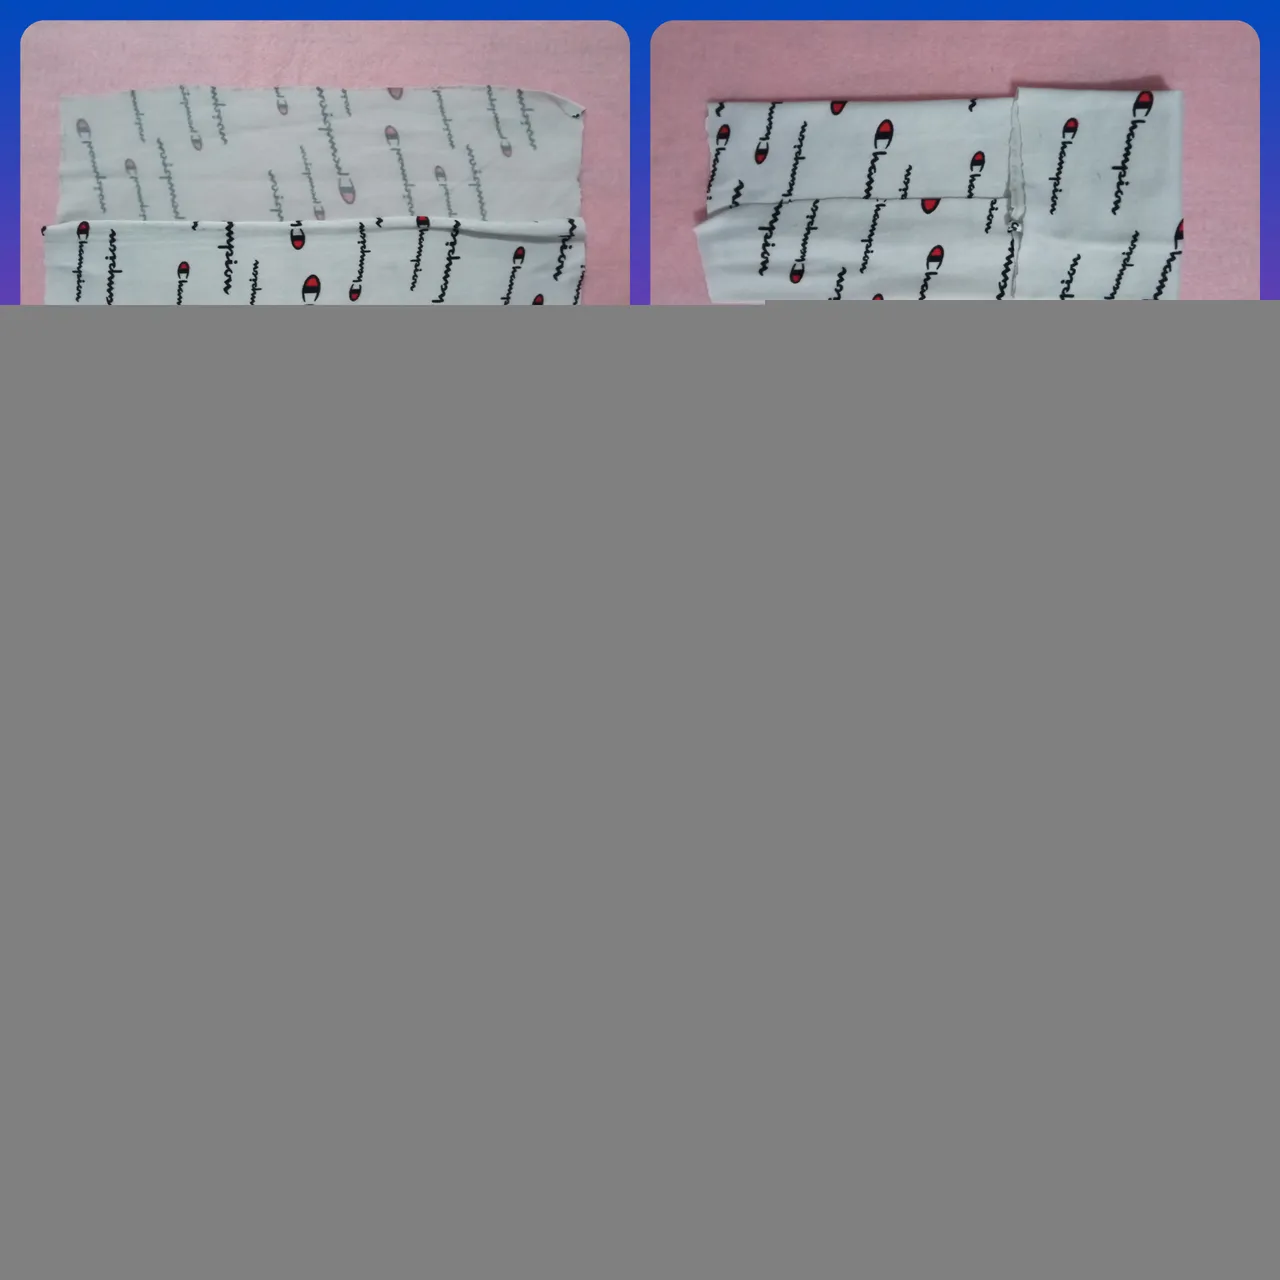
Tomamos el patrón del turbante y lo marcamos en el retazo de tela por el lado al revés.
Step 1:
We take the pattern of the turban and mark it on the fabric piece on the wrong side.
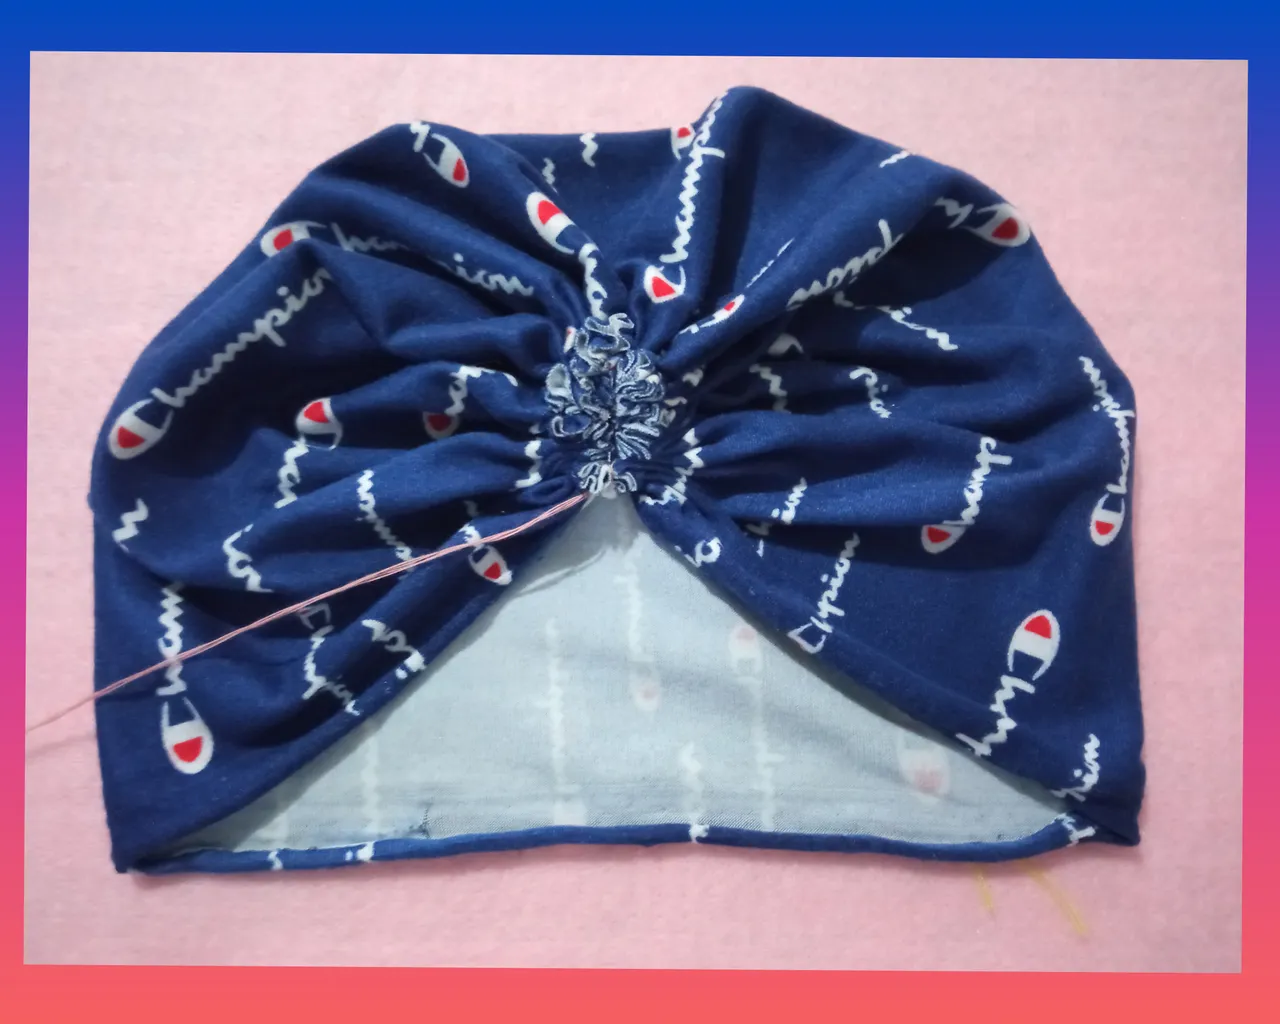
Paso 2:
Ya marcado cortamos, luego cosemos por toda la curva de la tela así como les muestro en la.primera imagen, al terminar jalamos el hilo arruchamos muy bien luego unimos y cosemos.
Step 2:
Once marked we cut, then we sew along the entire curve of the fabric as shown in the first image, when we finish we pull the thread and then we join and sew.
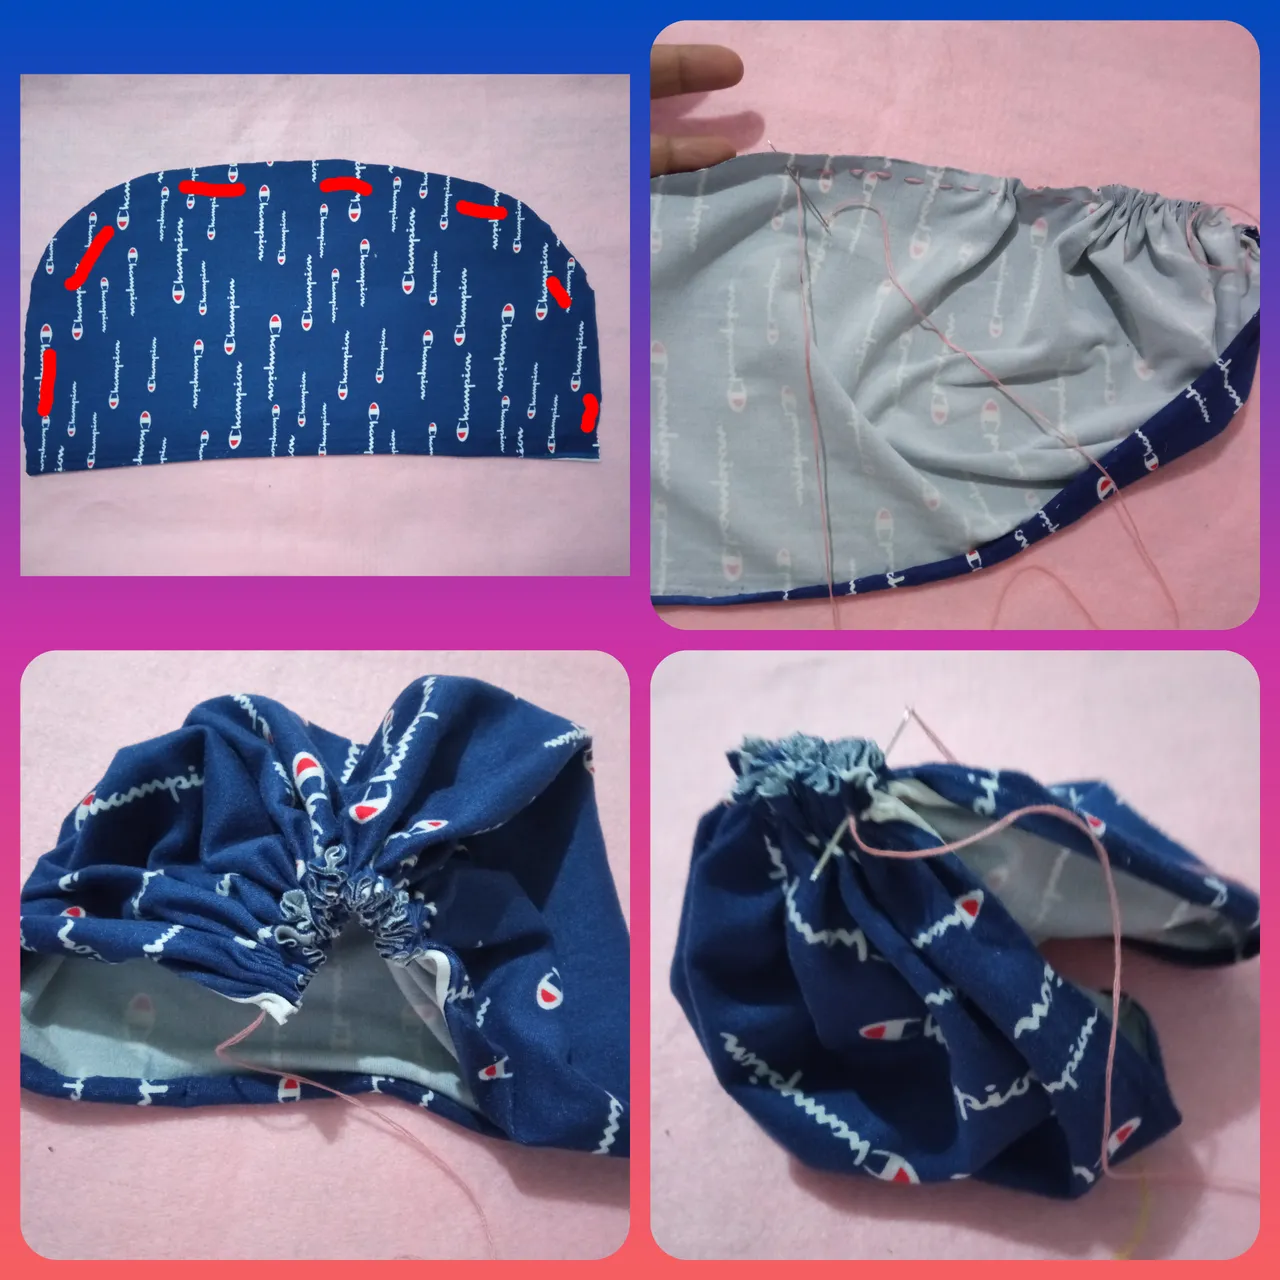
Paso 3:
Aquí les muestro como debe quedar el turbante, les aconsejo que cosan muy bien la unión para que no se descosa.
Step 3:
Here I show you how the turban should look like, I advise you to sew the union very well so that it does not unravel.
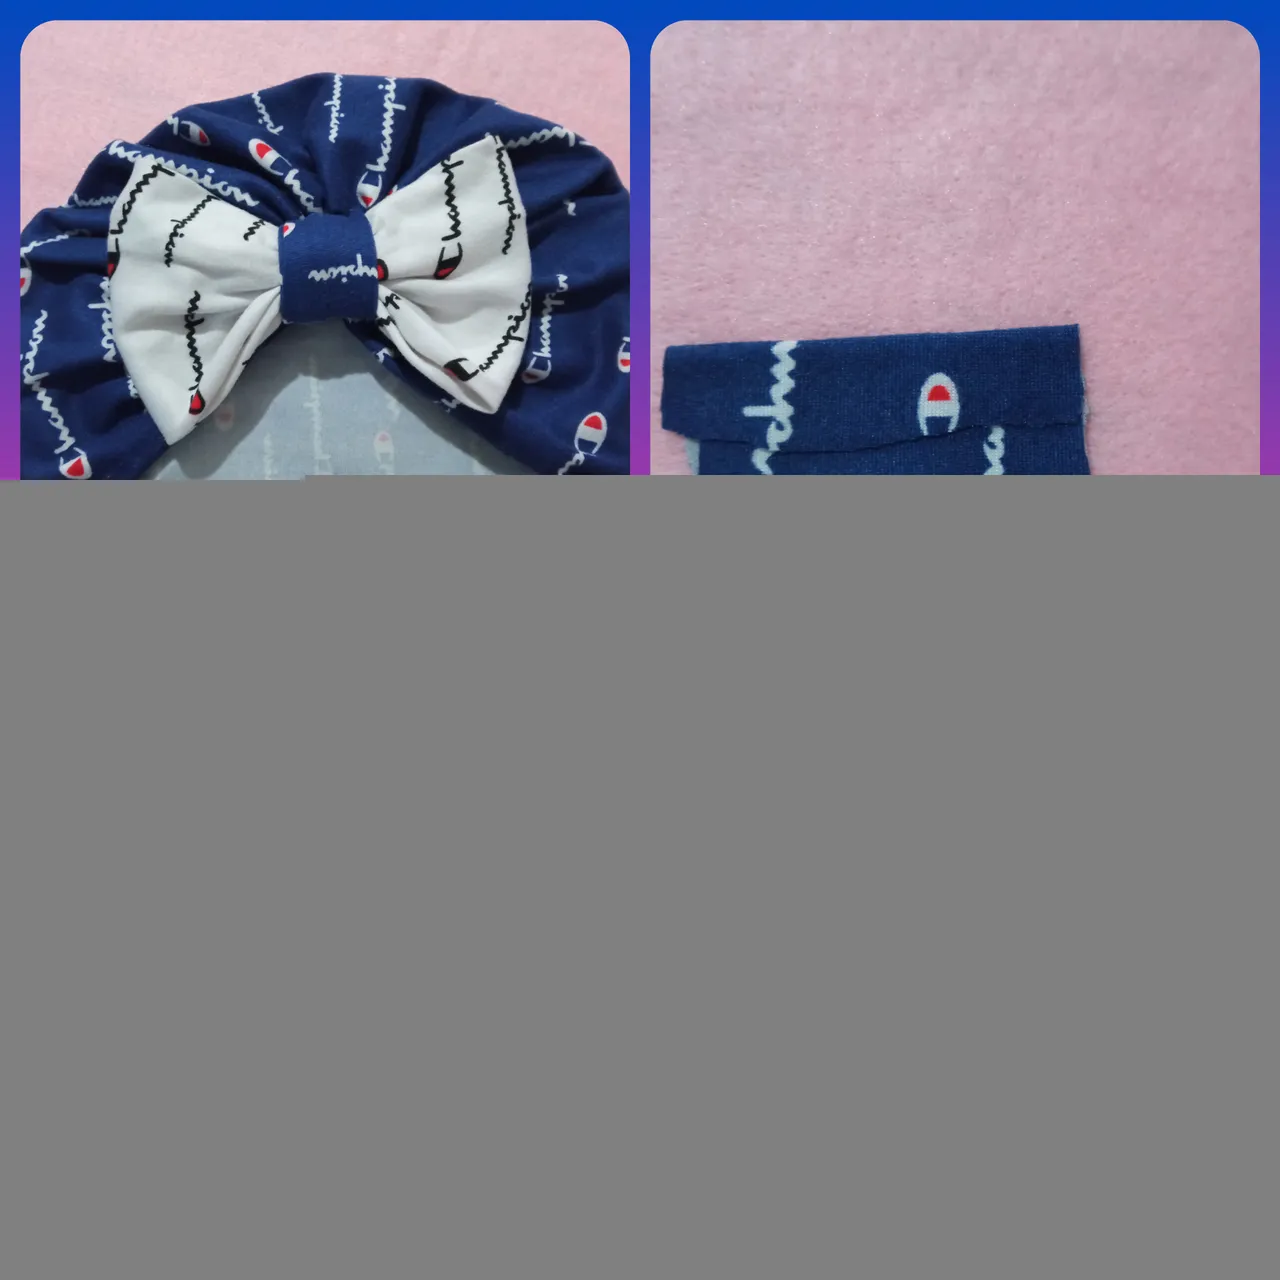
Paso 4:
Tomo patrón del rectángulo de 25 cm x 17 cm y lo corto en el retazo de tela, yo lo corte en una tela estampada blanca para que el lazo resalte, luego doble al centro y después de cada lado, después cosi en el centro jale el hilo arruchamos dando dos vueltas con el hilo y fijé la costura, tome la tira de 14 cm x 6 cm y la doble luego la cosi en el centro del lazo.
Step 4:
I took the pattern of the 25 cm x 17 cm rectangle and cut it on the piece of fabric, I cut it in a white printed fabric so that the bow stands out, then I folded it in the center and then on each side, then I sewed in the center I pulled the thread, I pulled the yarn and I fixed the seam, I took the 14 cm x 6 cm strip and folded it and then I sewed it in the center of the bow.
Paso 5:
Para finalizar cosi el lazo en el centro del turbante, luego corte el cuadro de 6 cm x 6 cm con ayuda del patrón y lo cosi por la parte de adentro de mi turbante para tapar la costura.
Step 5:
To finish I sewed the bow in the center of the turban, then I cut the 6 cm x 6 cm square with the help of the pattern and sewed it on the inside of my turban to cover the seam.
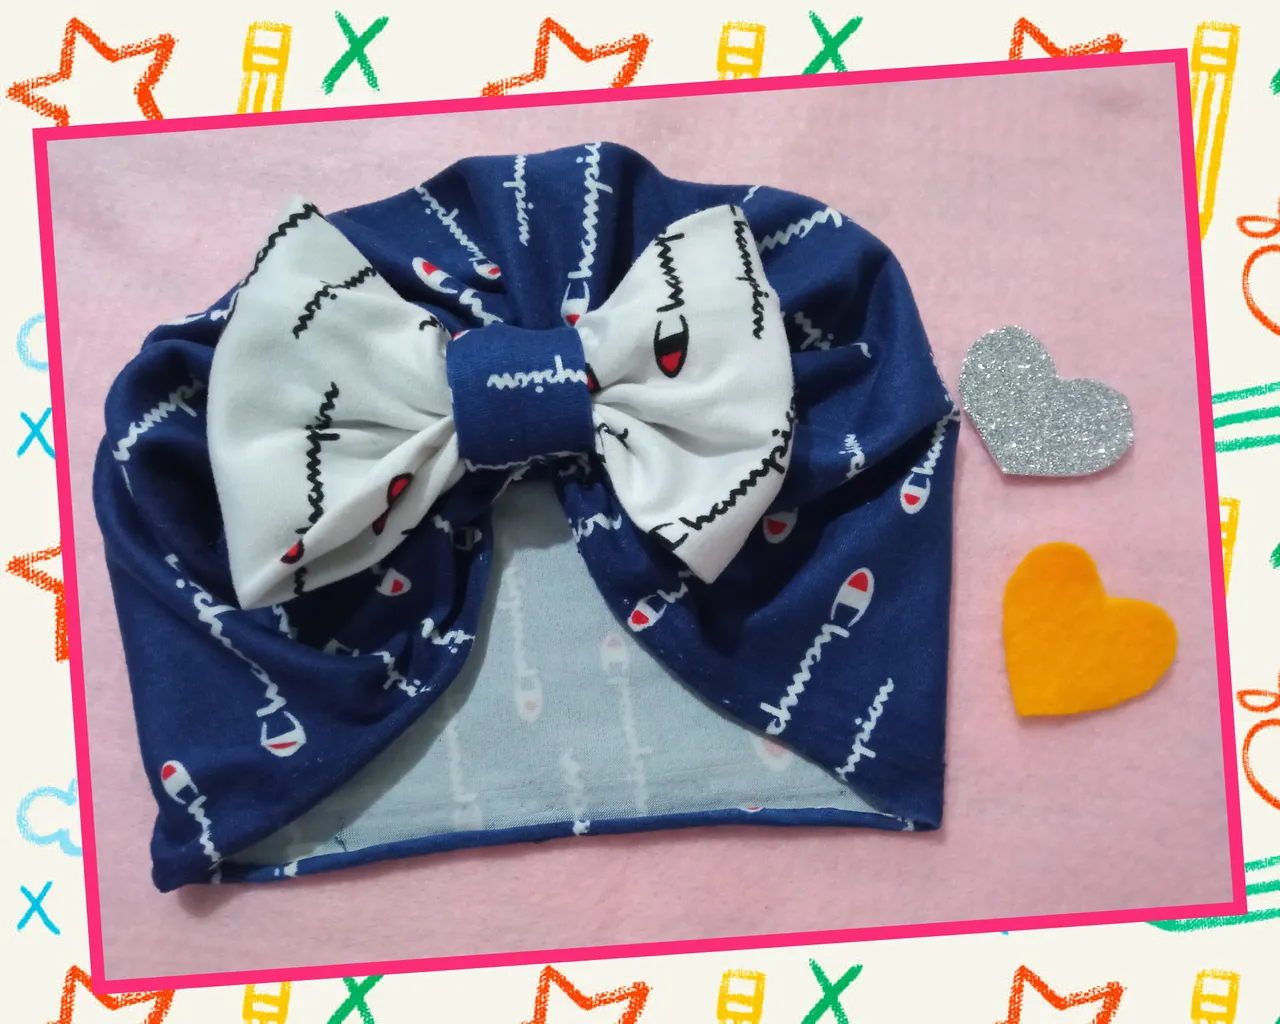
¡Ya está Terminado este Hermoso 😍Turbante 🎀! // This beautiful 😍Turbante 🎀 is finished!
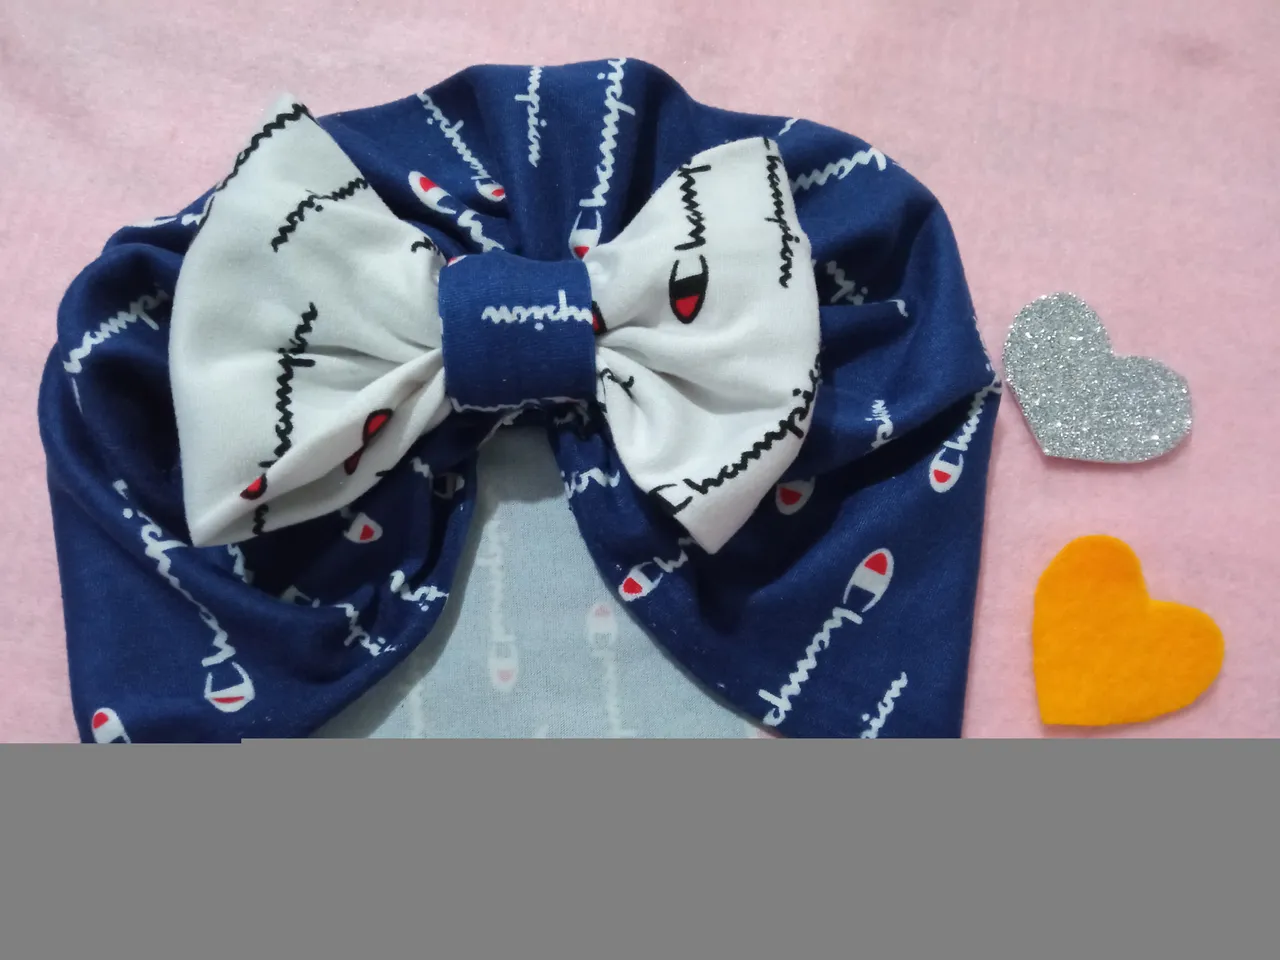
Hasta aquí les acompaño con este tutorial, gracias por acompañarme. Espero que les haya gustado como quedó este hermoso 🤩 Turbante 🎀 se que lo harán de manera fácil como.les enseñe. Agradezco el apoyo 🥰 que me ha brindado la comunidad en todos mis proyectos y a cada uno de los miembros que me brindan su apoyo.
So far I accompany you with this tutorial, thank you for joining me. I hope you liked how this beautiful 🤩 Turban 🎀 I know you will do it easily as I taught you. I appreciate the support 🥰 that the community has given me in all my projects and to each of the members who give me their support.