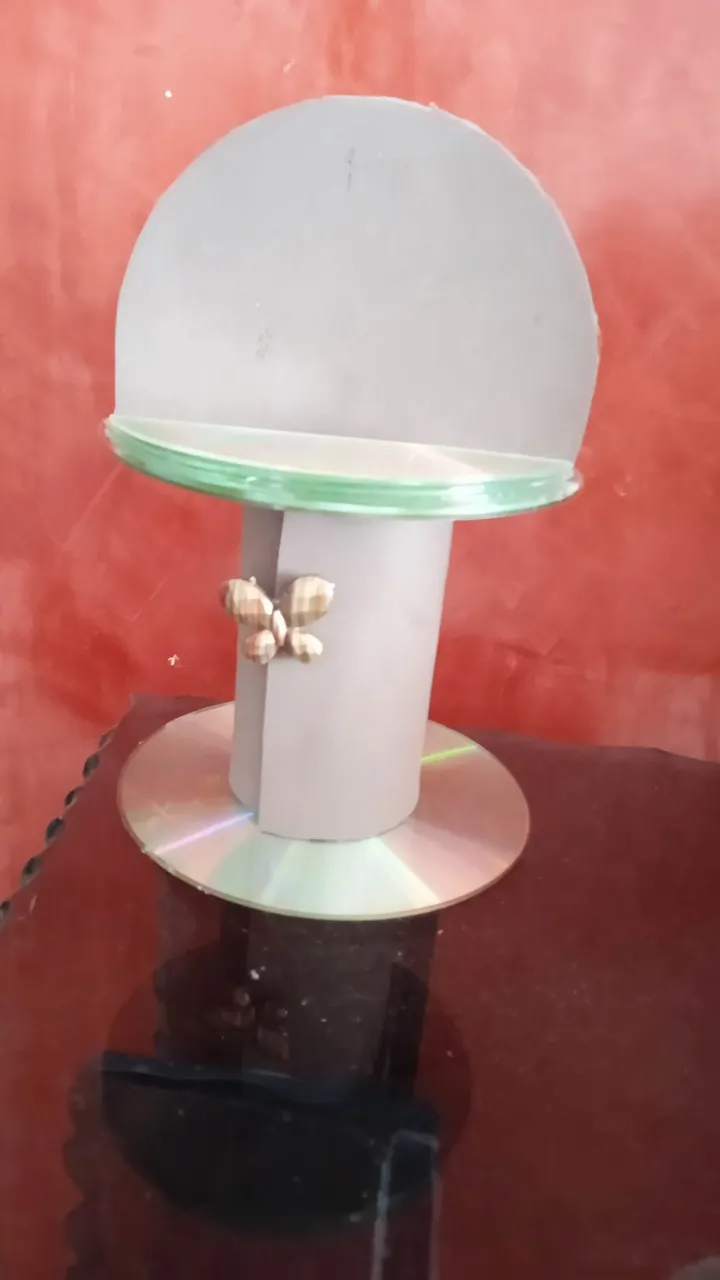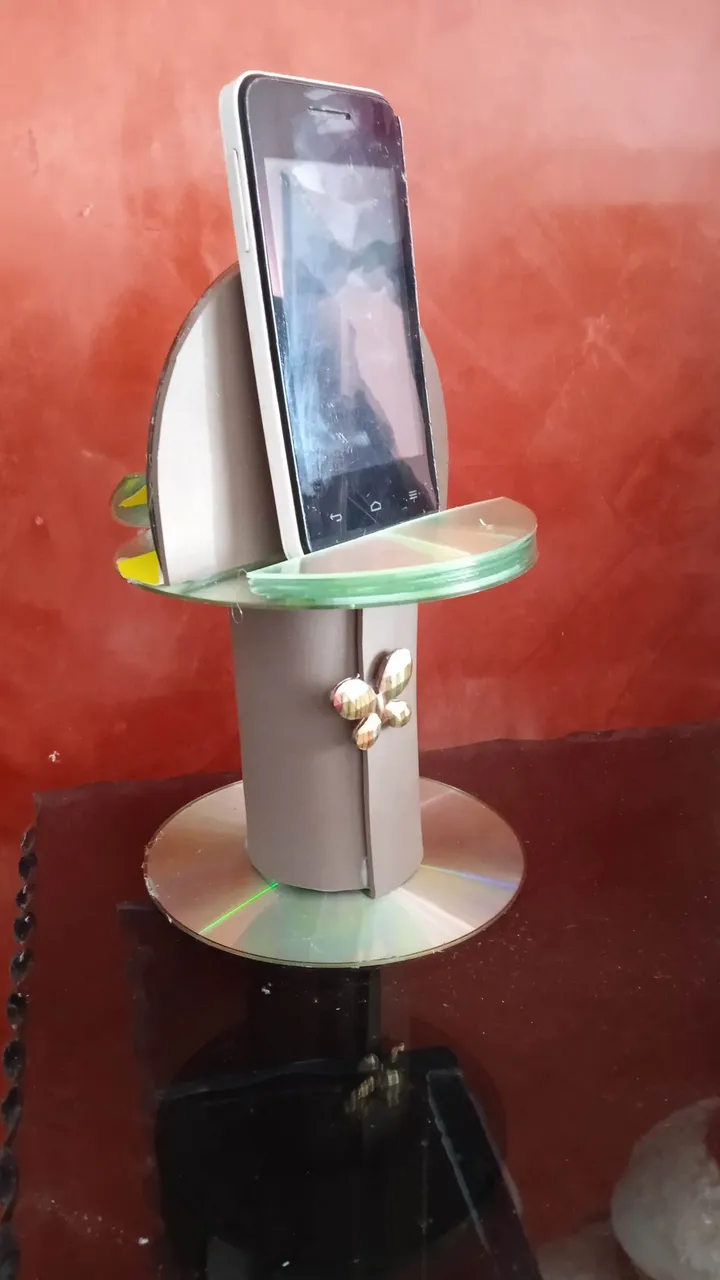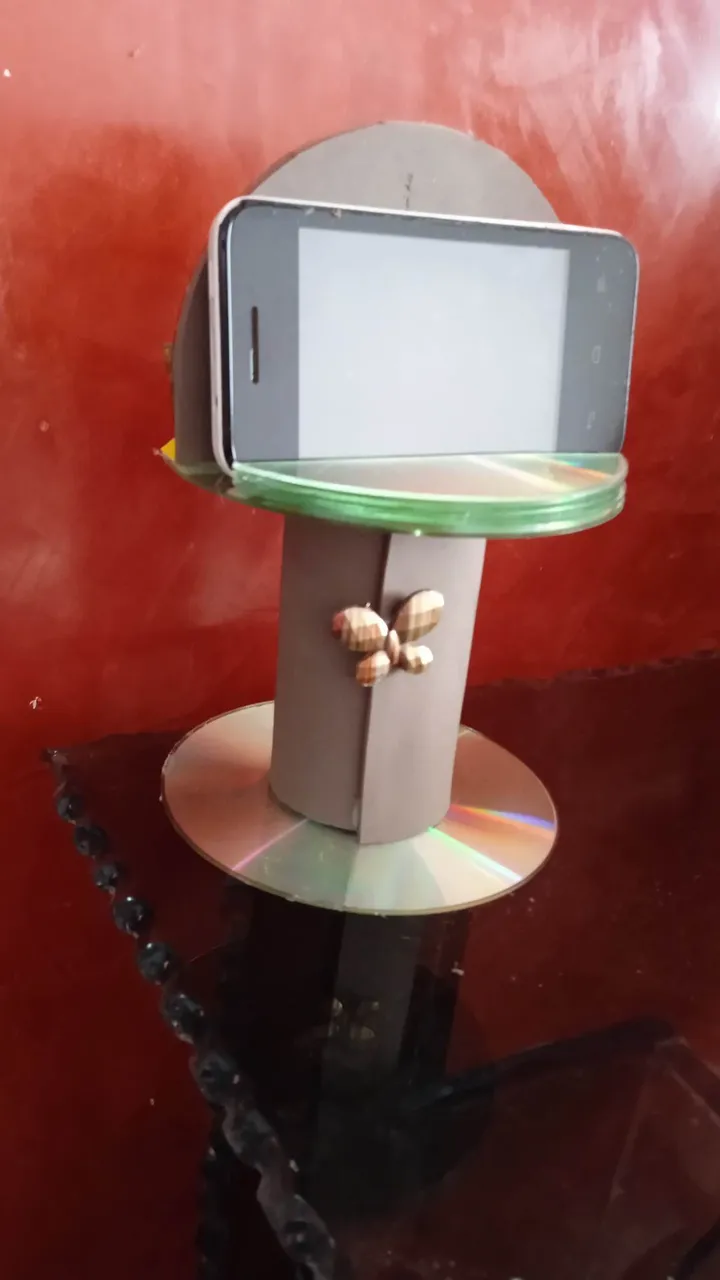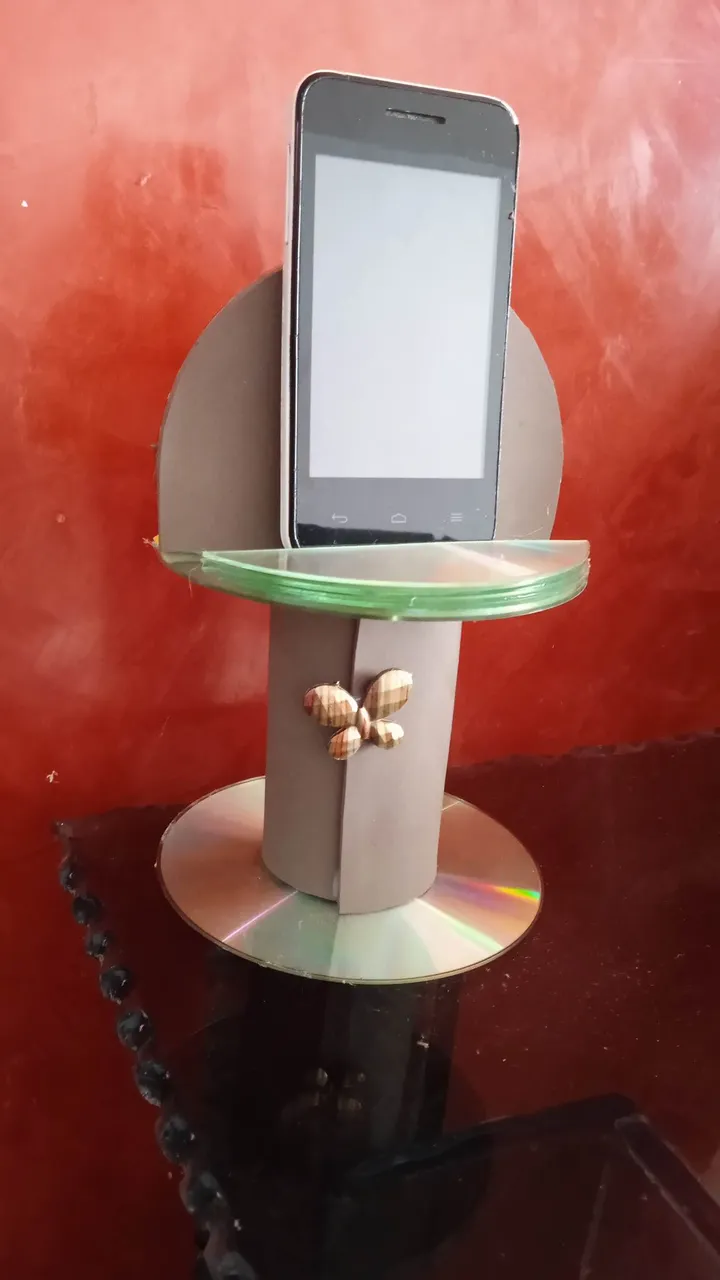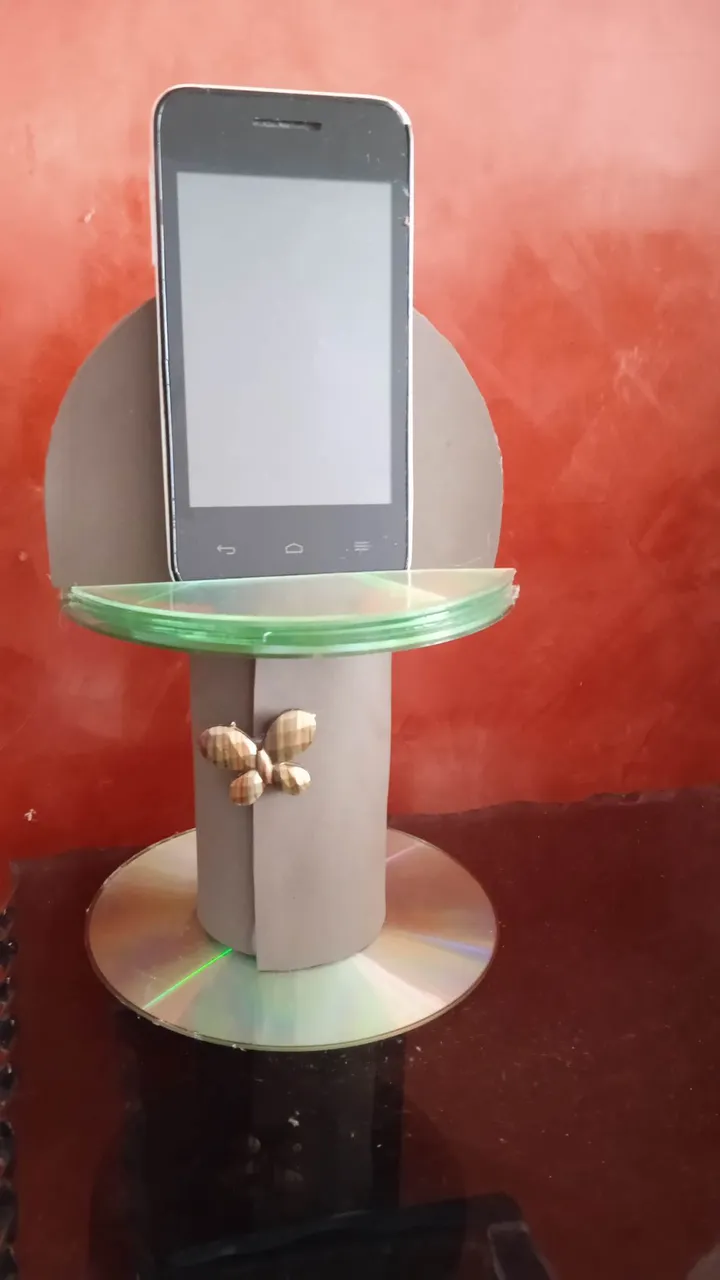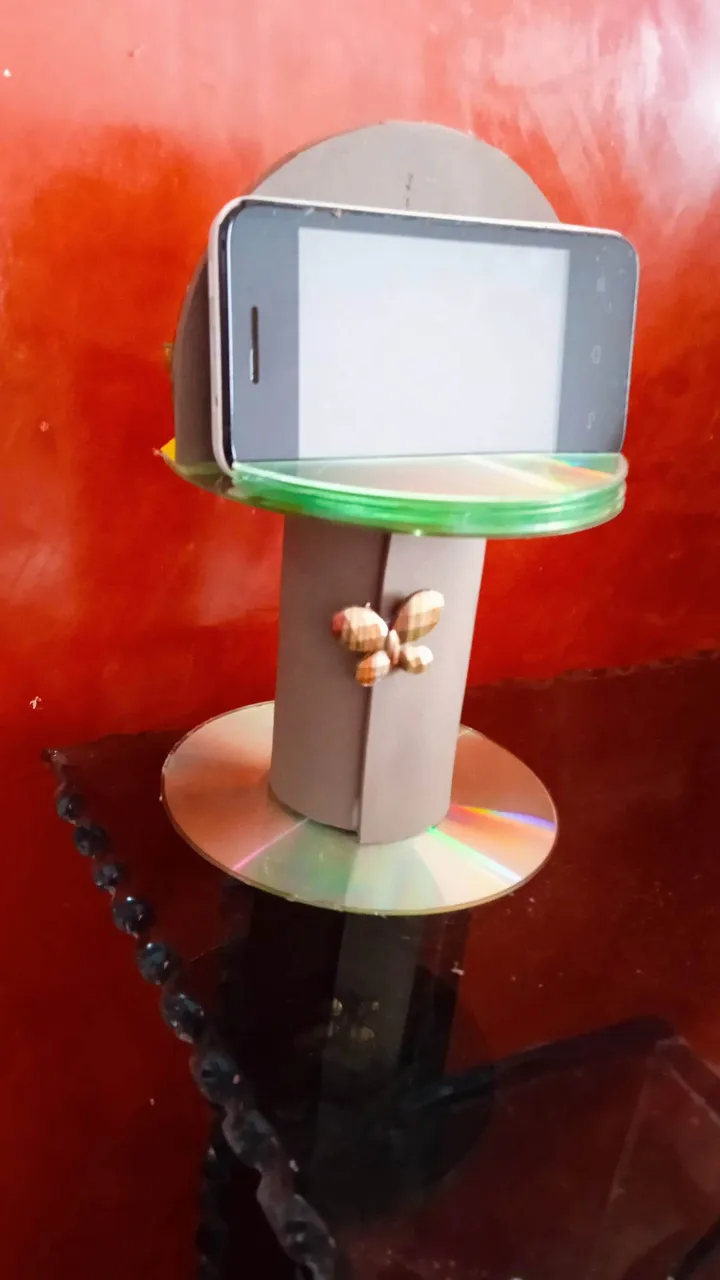
Happy start of the week everyone, may your lives be full of many blessings, I have at home several old cds that I did not want to throw away to see what I could do with them, and the truth is I have done some things, this time I want to share with you a spectacular support for the cell phone, ideal to place the phone while we are eating to watch a movie, particularly my oldest son likes to use these supports, it is a comfortable way to do something while we see anything on the phone, let's see the step by step.

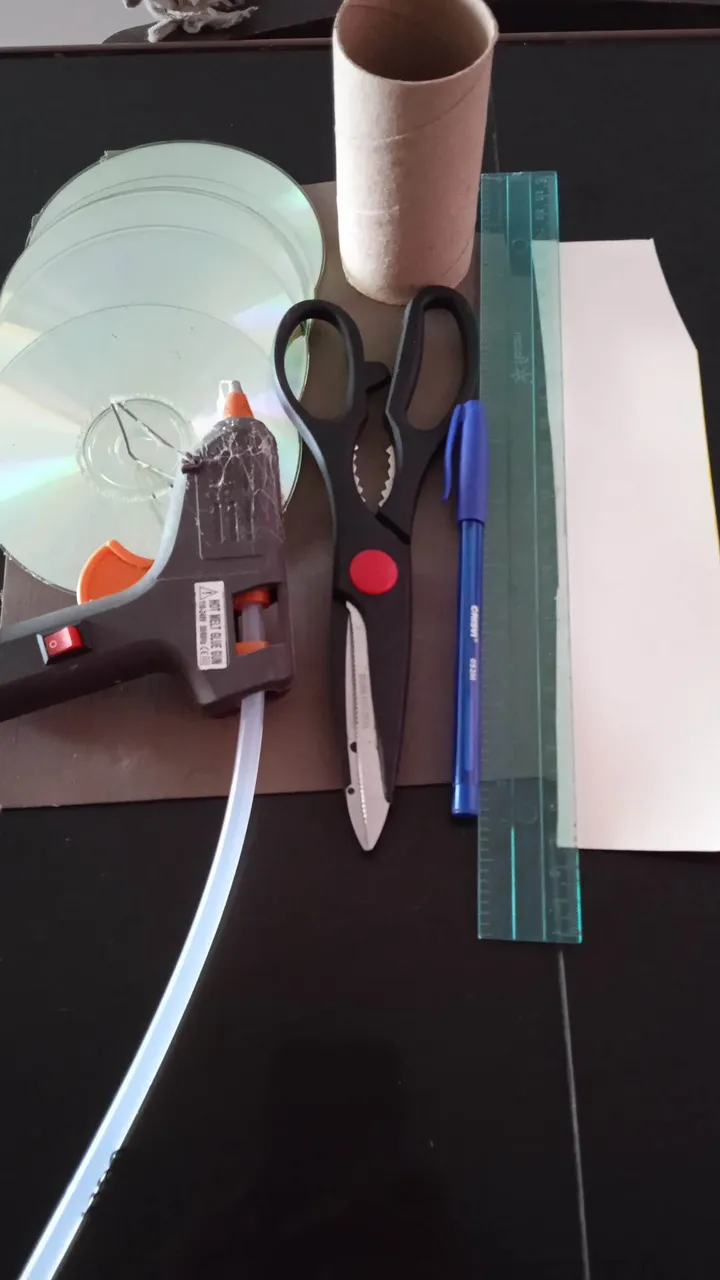
- Los materiales a utilizar son:
- Cds.
- Silicón en barra.
- Regla.
- Lápiz o marcador.
- Tijera.
- 1 tubito de papel higiénico.
- Cartulina.
- Foami.
- The materials to be used are:
- CDs.
- Silicone stick.
- Ruler.
- Pencil or marker.
- Scissors.
- 1 small tube of toilet paper.
- Cardboard.
- Foami.

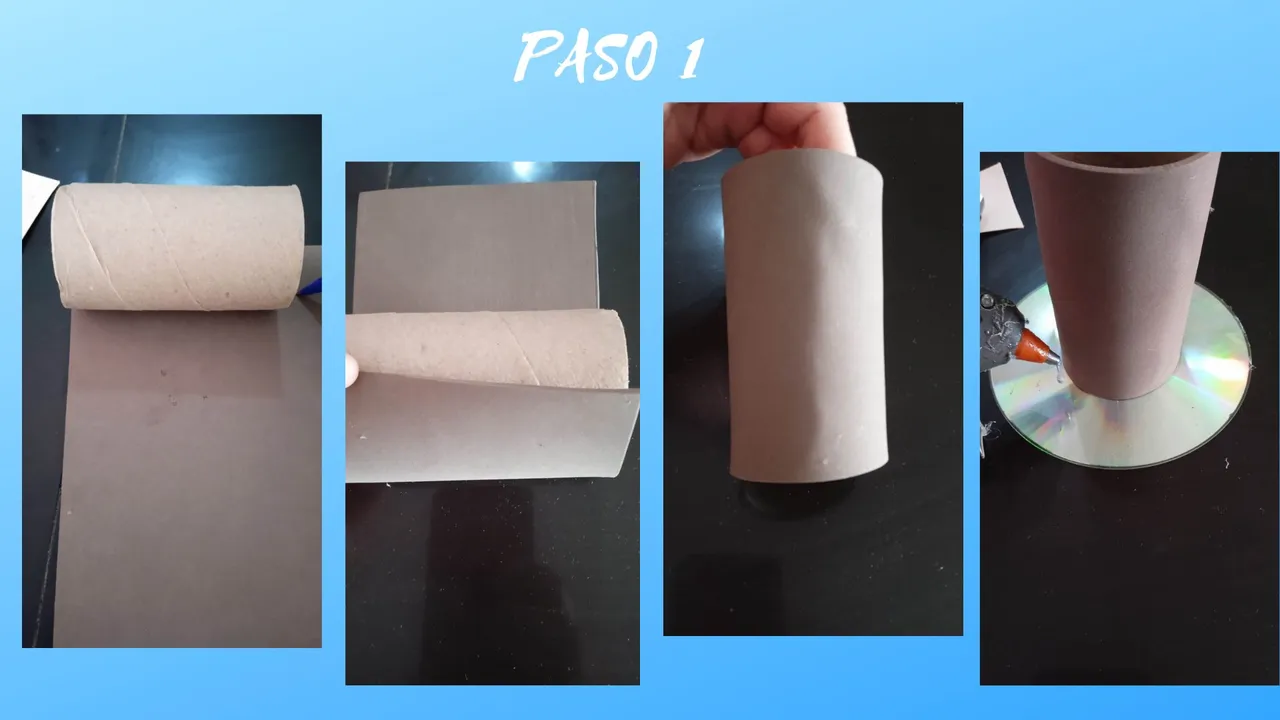
- Paso 1: Lo primero que debemos hacer es forrar con foami el tubito de papel higiénico, cabe destacar que puede usar cualquier color de foami, una vez forrado lo pegamos en el centro de un cd, tal cual muestra la última imágen.
- Step 1: The first thing to do is to line the toilet paper tube with foami, note that you can use any color of foami, once lined we glue it in the center of a cd, as shown in the last image.

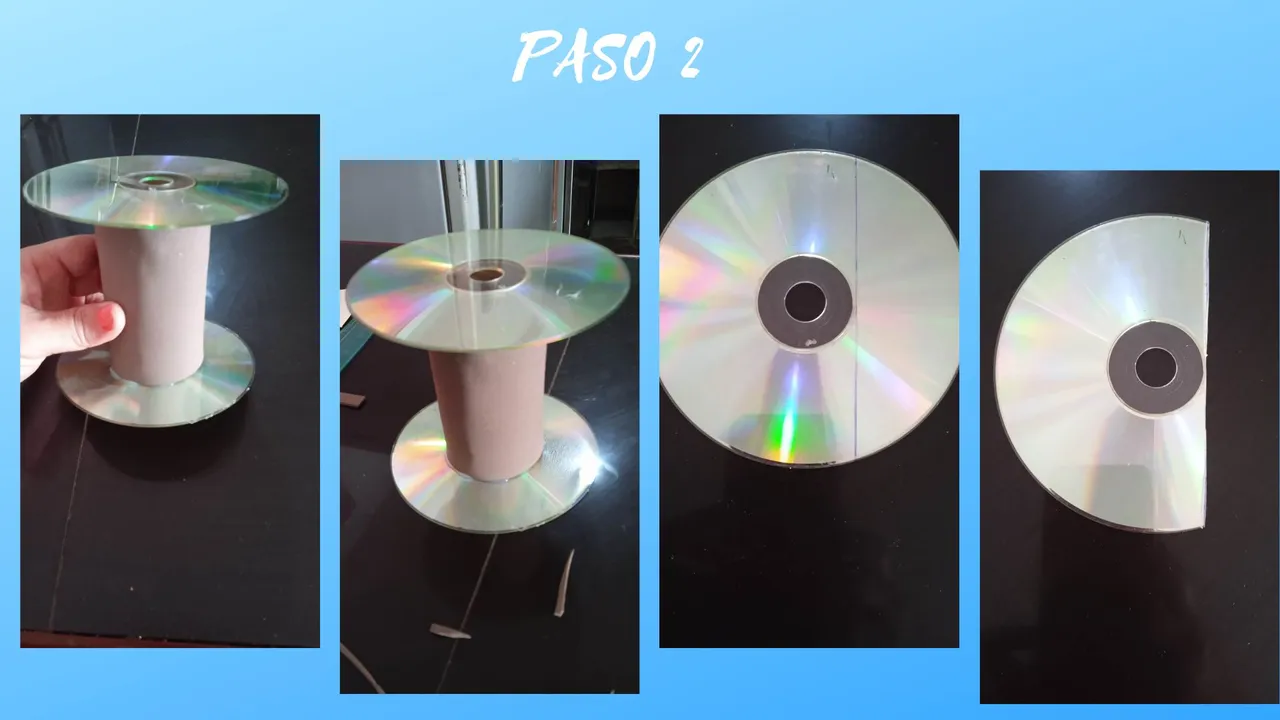
- Paso 2: Luego de pegar el primer cd en la parte de abajo del tubito, pegamos otro cd en la parte de arriba, agarramos otro cd y marcamos una recta en un extremo del mismo justo por donde está el circulo del centro del cd y luego recortamos.
- Step 2: After gluing the first cd at the bottom of the tube, we glue another cd at the top, take another cd and mark a line at one end of it just where the circle in the center of the cd is and then cut it out.

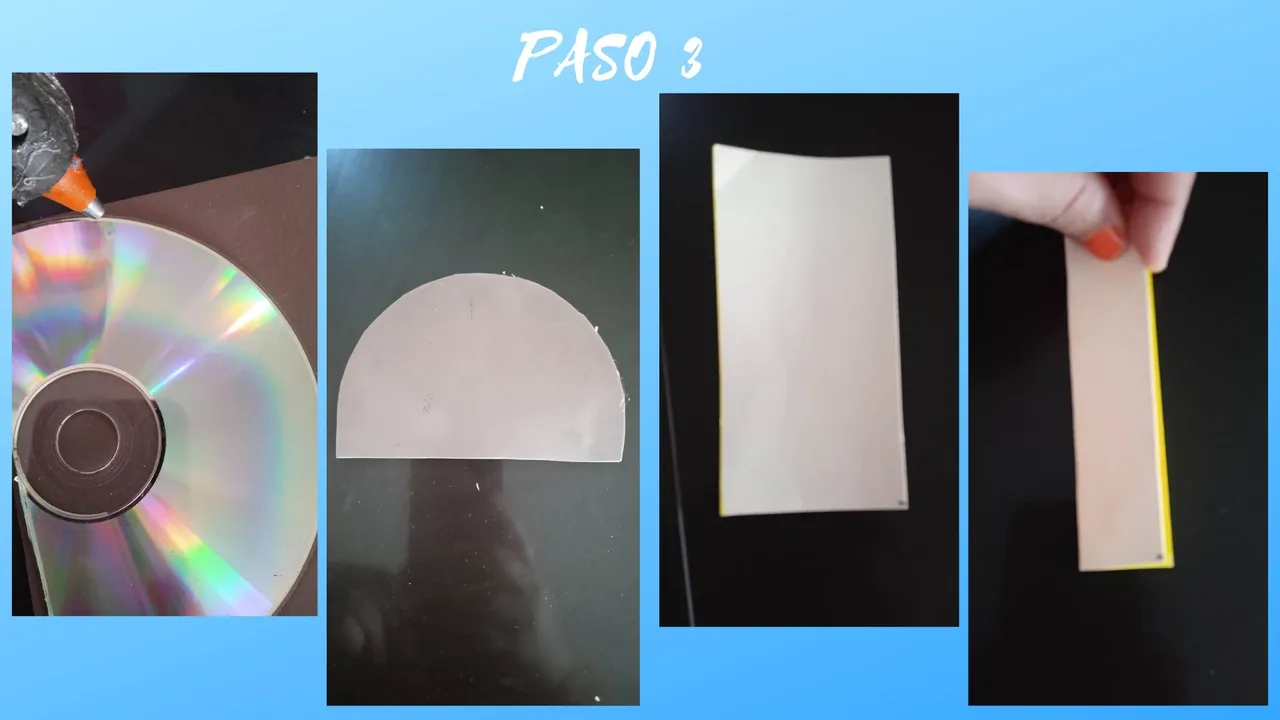
- Paso 3: Una vez recortada la parte del cd forramos con el foami, luego recortamos en cartulina las medidas de 10 cm de largo por 4 cm de ancho y doblamos a la mitad.
- Step 3: Once the part of the cd is cut out, we cover it with the foami, then we cut out the cardboard measuring 10 cm long by 4 cm wide and fold it in half.

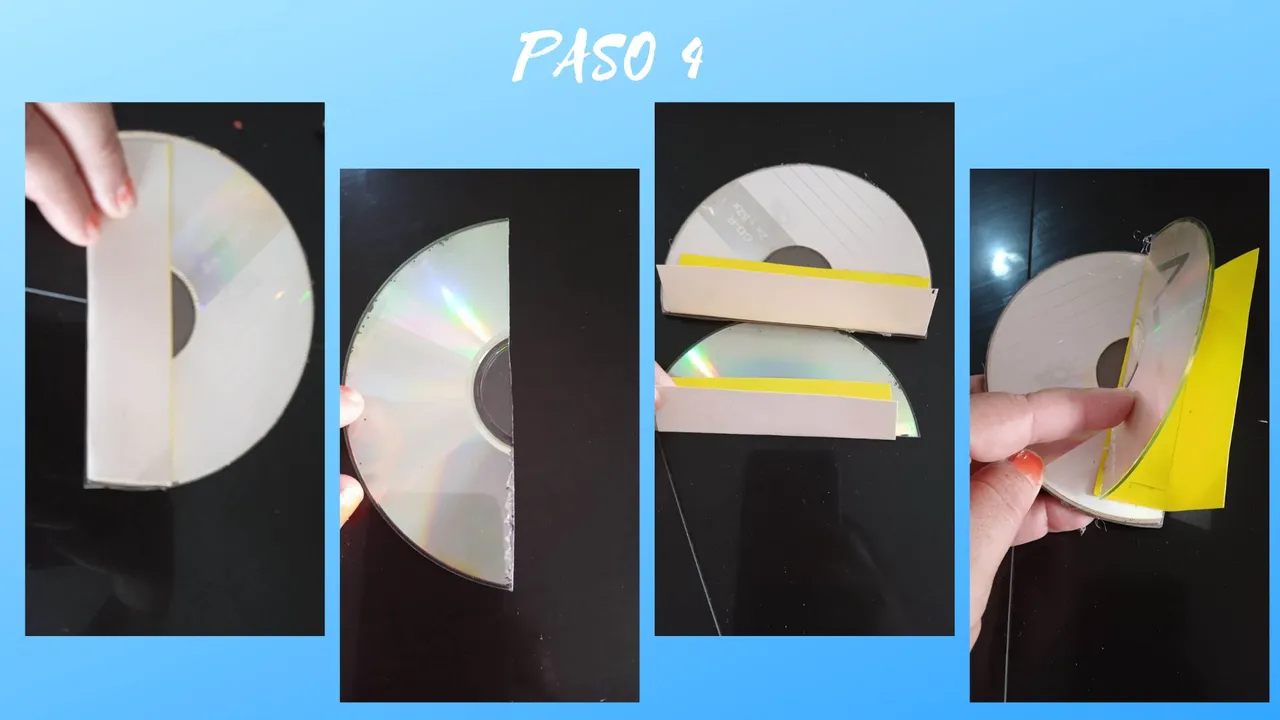
- Paso 4: Doblado el pedazo de cartulina lo pegamos en la parte de atrás del cd, luego sacamos otra parte de cd más pequeña y hacemos lo mismo pegando la cartulina del mismo modo, es decir, que debemos sacar dos partes iguales, luego colocamos el más pequeño sobre el más grande y pegamos solo las cartulinas de ambas partes.
- Step 4: Fold the piece of cardboard and glue it on the back of the cd, then take out another smaller piece of cd and do the same by gluing the cardboard in the same way, that is, we must take out two equal parts, then place the smaller one over the larger one and glue only the cardboard of both parts.

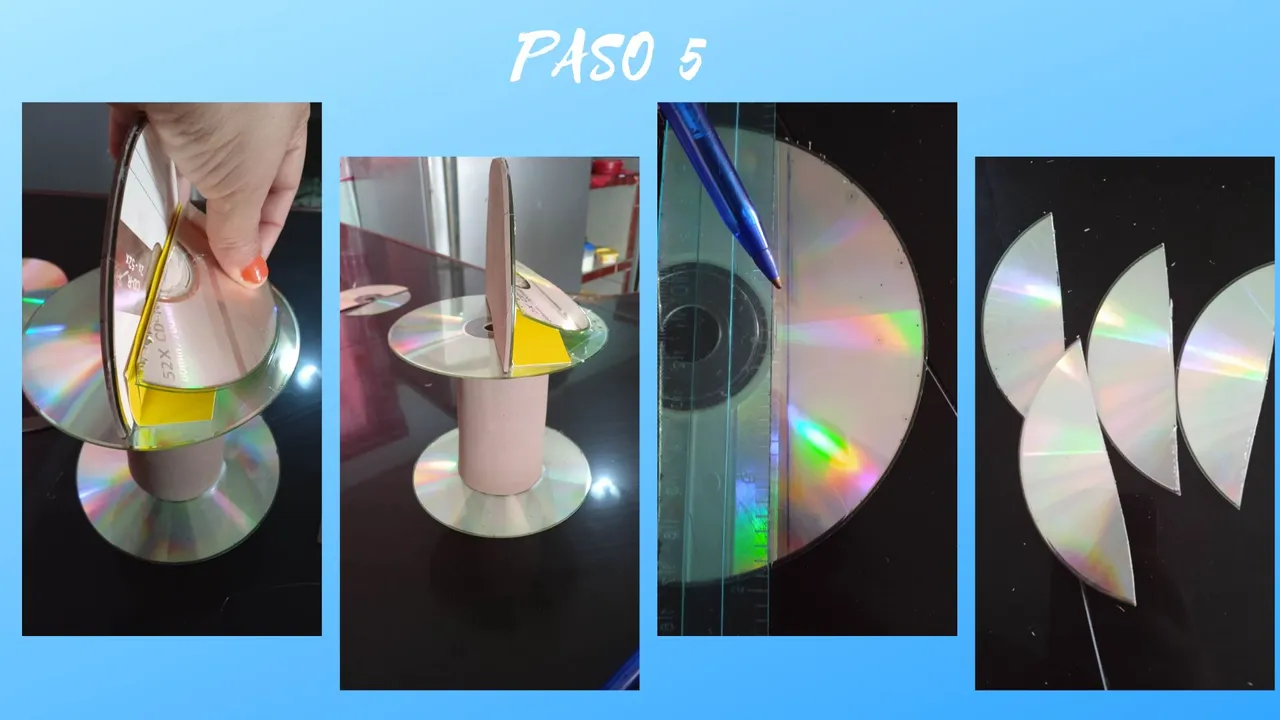
- Paso 5: Luego la pegamos sobre la base, primero en la parte de abajo y luego extremo con extremo como muestra la primera imágen, de otros cds marcamos los extremos, recortamos y sacamos 4 partes iguales.
- Step 5: Then we glue it on the base, first at the bottom and then end to end as shown in the first picture, from other CDs we mark the ends, cut and remove 4 equal parts.

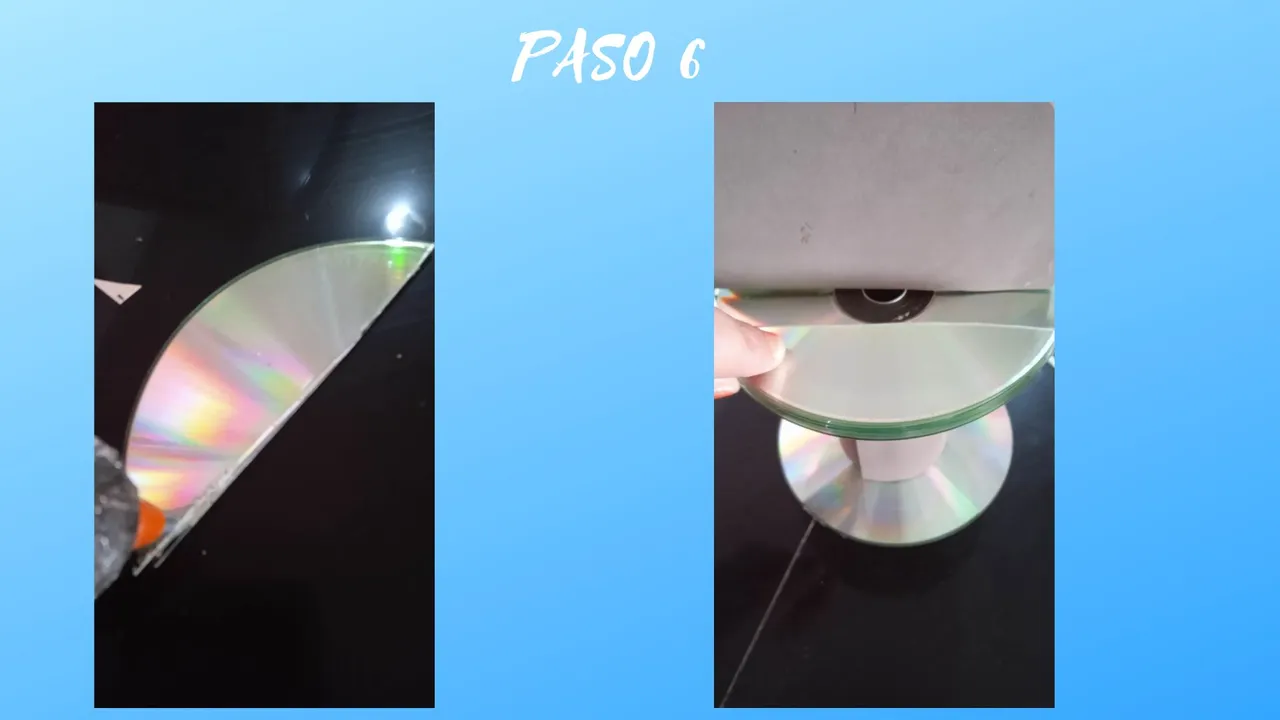
- Paso 6: De las 4 partes que sacamos pegamos una sobre otra y posteriormente pegamos en la parte de abajo del soporte, puede decorar con flores, en mi caso lo decore con una peuqeña mariposa.
- Step 6: From the 4 parts that we took out we glue one on top of the other and then glue on the bottom of the support, you can decorate with flowers, in my case I decorated it with a small butterfly.

