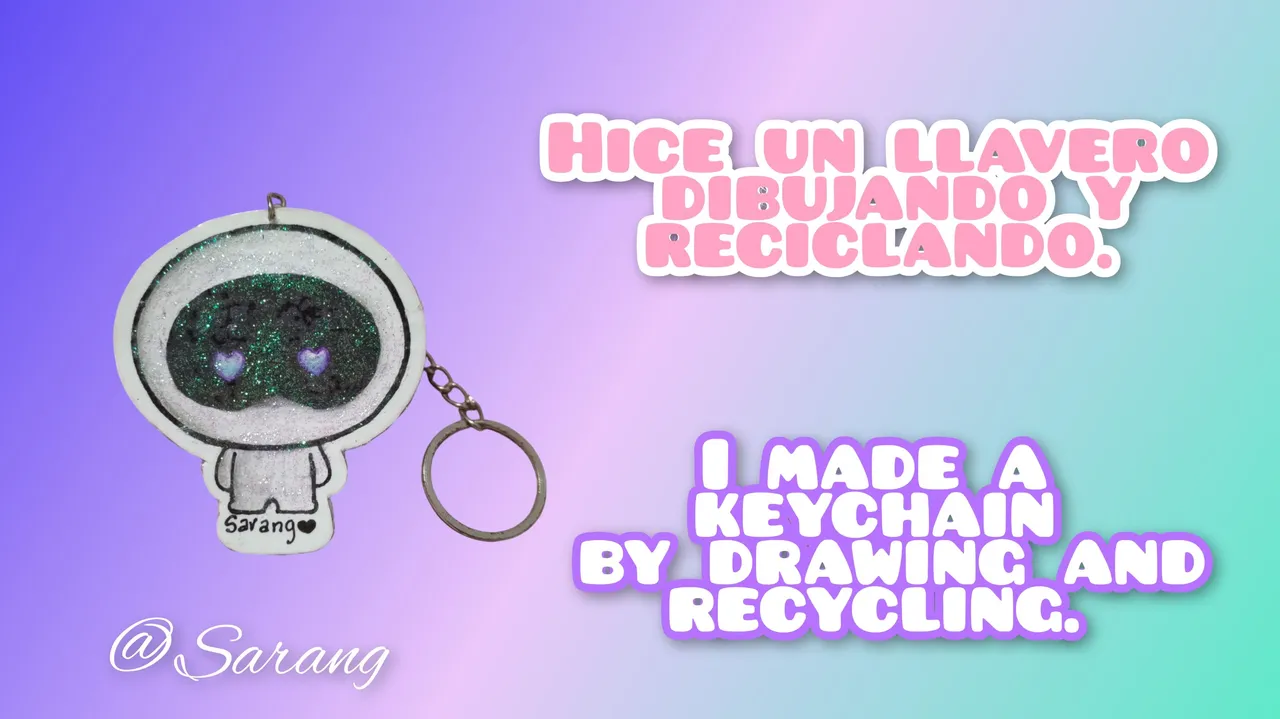
Holis mi gente creativa de @Hivediy, espero se encuentren todos muy bien 🥰 yo estoy muy feliz de estar nuevamente aca con ustedes. ☺️
Hello my creative people from @Hivediy, hope you are all doing great 🥰 I am very happy to be here with you again. ☺️
El dia de hoy les traigo un llavero muy especial para mi porque lo hice combinando dos cosas que me gustan mucho el dibujo y el reciclaje ♻️ por lo mismo es muy sencillo de hacer y super económico.
Today I bring you a very special keychain for me because I made it combining two things that I love drawing and recycling ♻️ so it is very simple to make and super economical.
Lo hice de un personaje que invento un miembro de la banda BTS llamado wooteo es un mini astronauta super tierno que me encantó y quise tener un llavero de el, pero como aca en mi país no consigo mucha mercancía de K-pop entonces decidí hacer mi propios productos, por así decirlo, de los personajes que más me gusten.
I made it from a character invented by a member of the band BTS called wooteo is a super cute mini astronaut that I loved and I wanted to have a keychain of him, but as here in my country I don't get much K-pop merchandise so I decided to make my own products, so to speak, of the characters that I like the most.
En esta ocasión no traje una lista de materiales porque siendo sincera esta manualidad la hice improvisando, cuando comencé no tenía claro que materiales iba a usar ni como lo iba a hacer, solo sabia que quería un llavero que partiera de un dibujo hecho por mi misma y que fuese resistente obviamente así que solo comencé a dibujar y en el proceso me fueron llegando las ideas, gracias a Dios.
This time I didn't bring a list of materials because to be honest I did this craft improvising, when I started I wasn't sure what materials I was going to use or how I was going to do it, I just knew that I wanted a keychain that was based on a drawing made by myself and that was obviously resistant so I just started drawing and in the process I got ideas, thank God.
Así que en esta oportunidad iremos directo al paso a paso, espero disfruten el proceso tanto como yo disfrute hacerlo.
So this time we will go straight to the step by step, I hope you enjoy the process as much as I enjoyed doing it.

🌟Step-by-step🌟
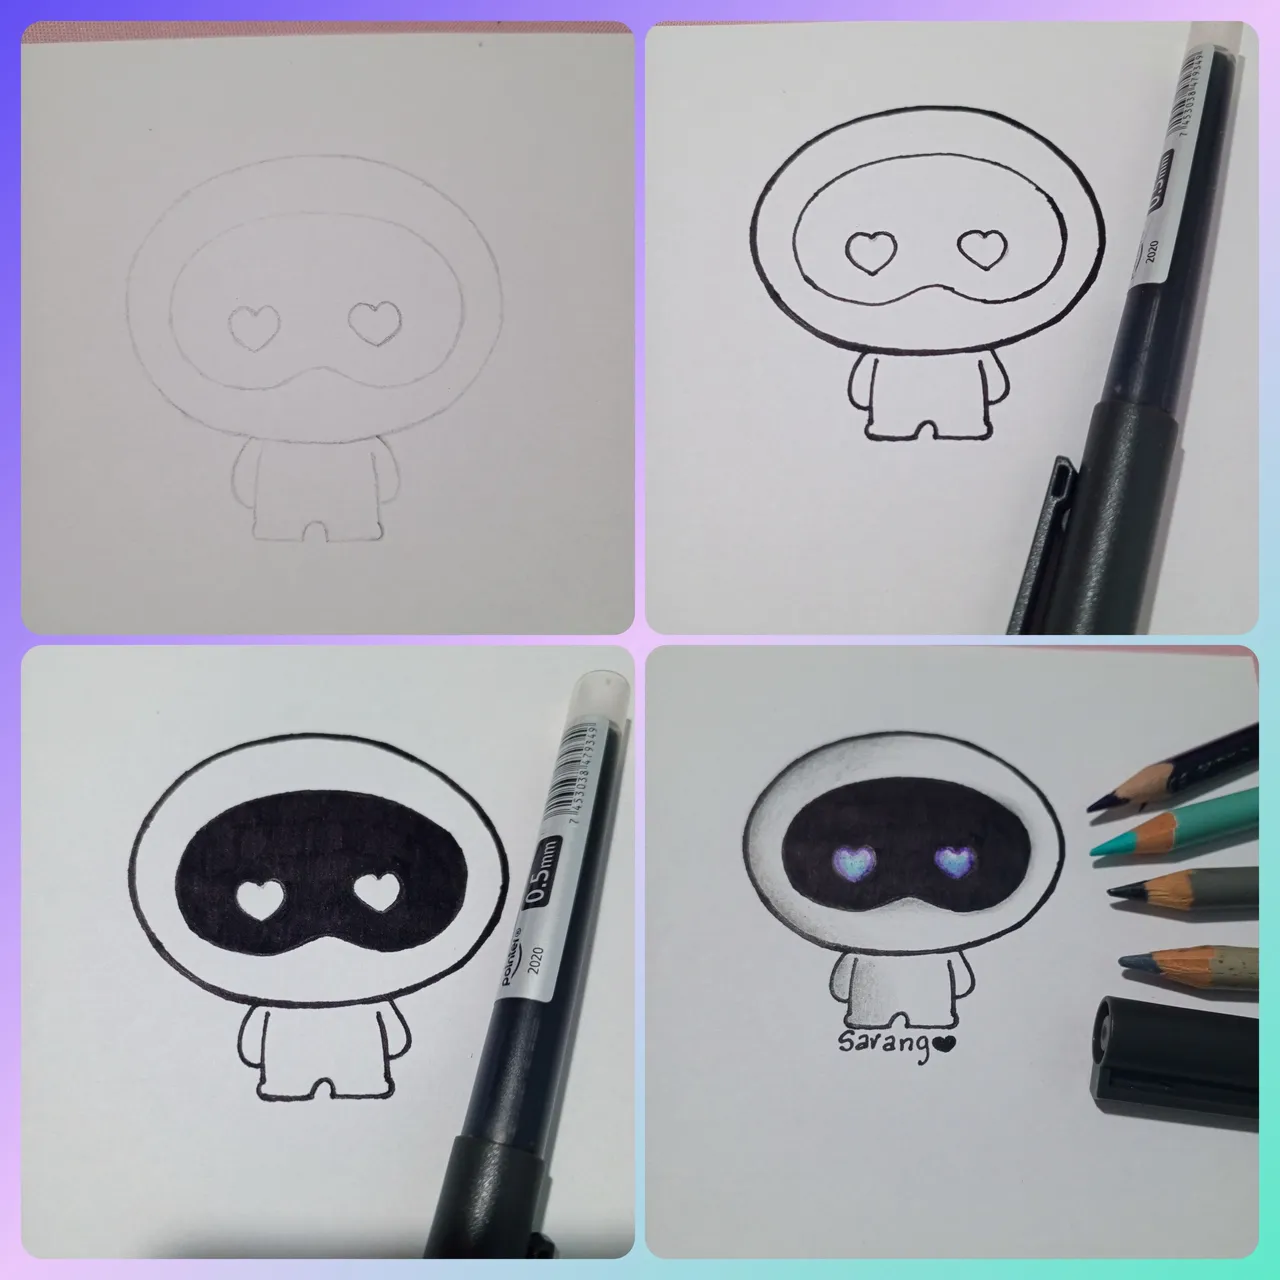
Comencé haciendo el dibujo del personaje con lápiz de grafito, lo hice bastante pequeño poque no queria que fuese un llavero muy exagerado, luego con el bolígrafo roller hice el LineArt y la parte del area de los ojos del astronauta que va en negro.
I started making the drawing of the character with graphite pencil, I made it quite small because I didn't want it to be a very exaggerated keychain, then with the roller pen I made the LineArt and the part of the astronaut's eyes area that goes in black.
Como pueden ver este personaje no tiene mucho color así que solo use gris para el cuerpo y morado con turquesa para los ojos, originalmente los ojos son redondos y turquesa pero yo quise ponerle un toque muy mio haciendolos en forma de corazón y combinado morado y turquesa.
As you can see this character doesn't have much color so I only used gray for the body and purple with turquoise for the eyes, originally the eyes are round and turquoise but I wanted to add a touch of my own by making them heart shaped and combined purple and turquoise.
La verdad fue bastante sencillo de hacer por los pocos colores que lleva y lo pequeño que es, así que tampoco me llevo mucho tiempo hacerlo.
The truth is that it was quite simple to make because of the few colors and the small size, so it didn't take me a long time to do it.

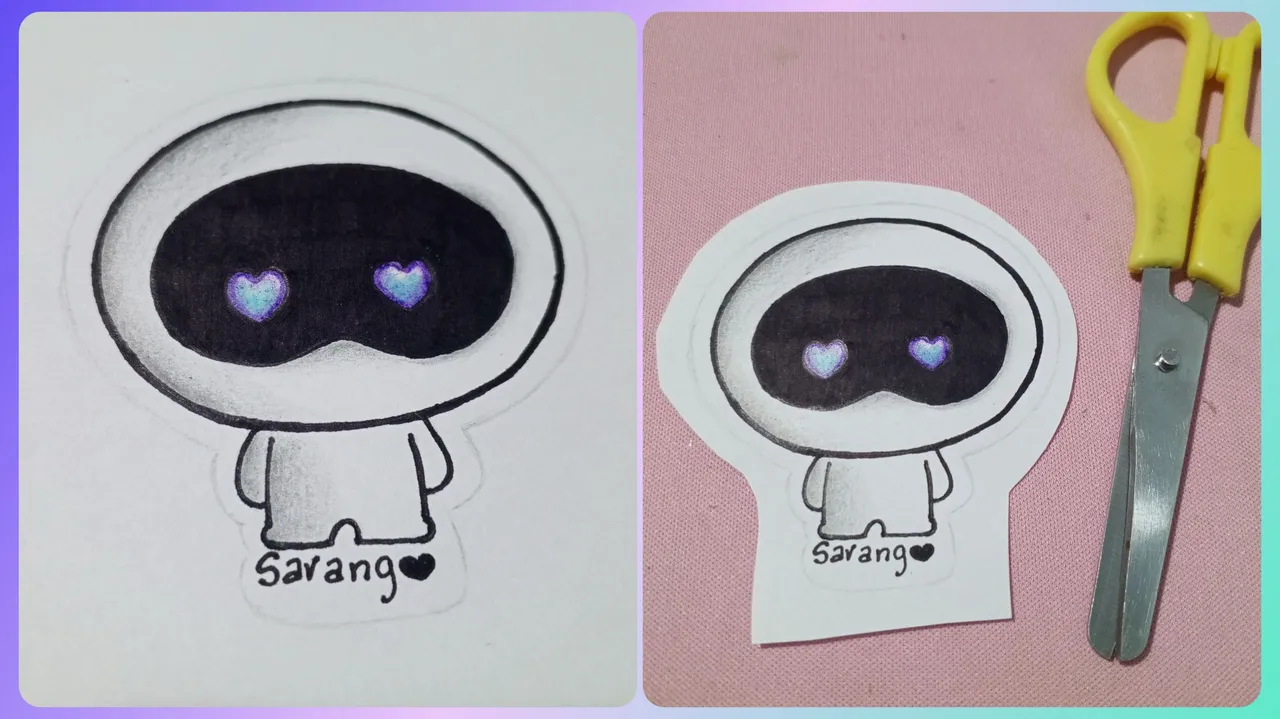
Luego como pueden ver en la imagen dibuje un contorno a su alrededor, me gusta mucho siempre que hago stickers para mi pared recortar los dibujos dejando un margen blanco, siento que lucen mas bonitos y con estilo.
Then as you can see in the image I drew an outline around it, I always like to cut out the drawings leaving a white margin, I feel that they look more beautiful and stylish.
Luego recorte el exceso de papel, pero como pueden ver no recorte guiandome del margen que hice, si siguen leyendo sabran el porqué.
Then I trimmed off the excess paper, but as you can see I didn't trim by the margin I made, if you read on you will know why.

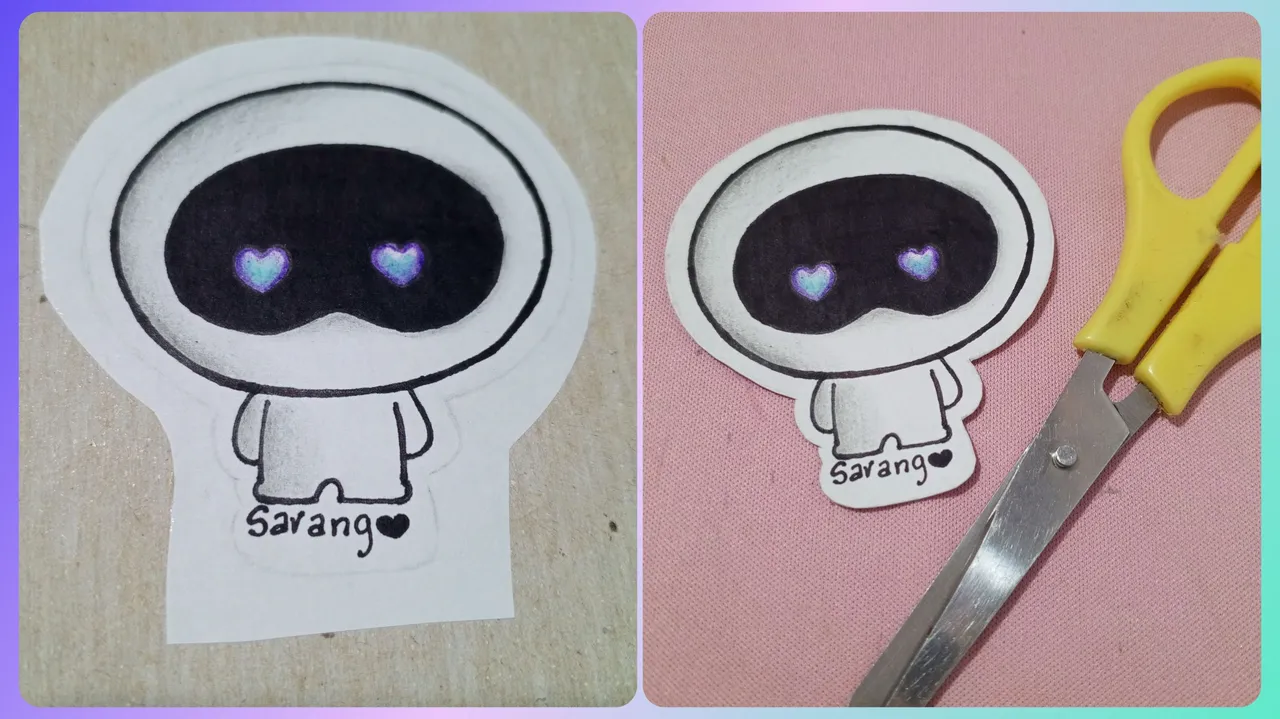
El siguiente paso fue pegar el dibujo en cartón con pega blanca, una vez pegado el dibujo al cartón procedí a recortar ahora sí guiandome del margen que traze antes.
The next step was to glue the drawing to the cardboard with white glue, once the drawing was glued to the cardboard I proceeded to cut it out, following the margin I traced before.
Antes hacia este paso de una manera diferente y al recortar la pieza del cartón el corte quedaba bastante desprolijo y descubrí que de esta manera quedaba mucho mejor.
I used to do this step in a different way and when I cut the piece of cardboard the cut was quite messy and I discovered that this way it was much better.

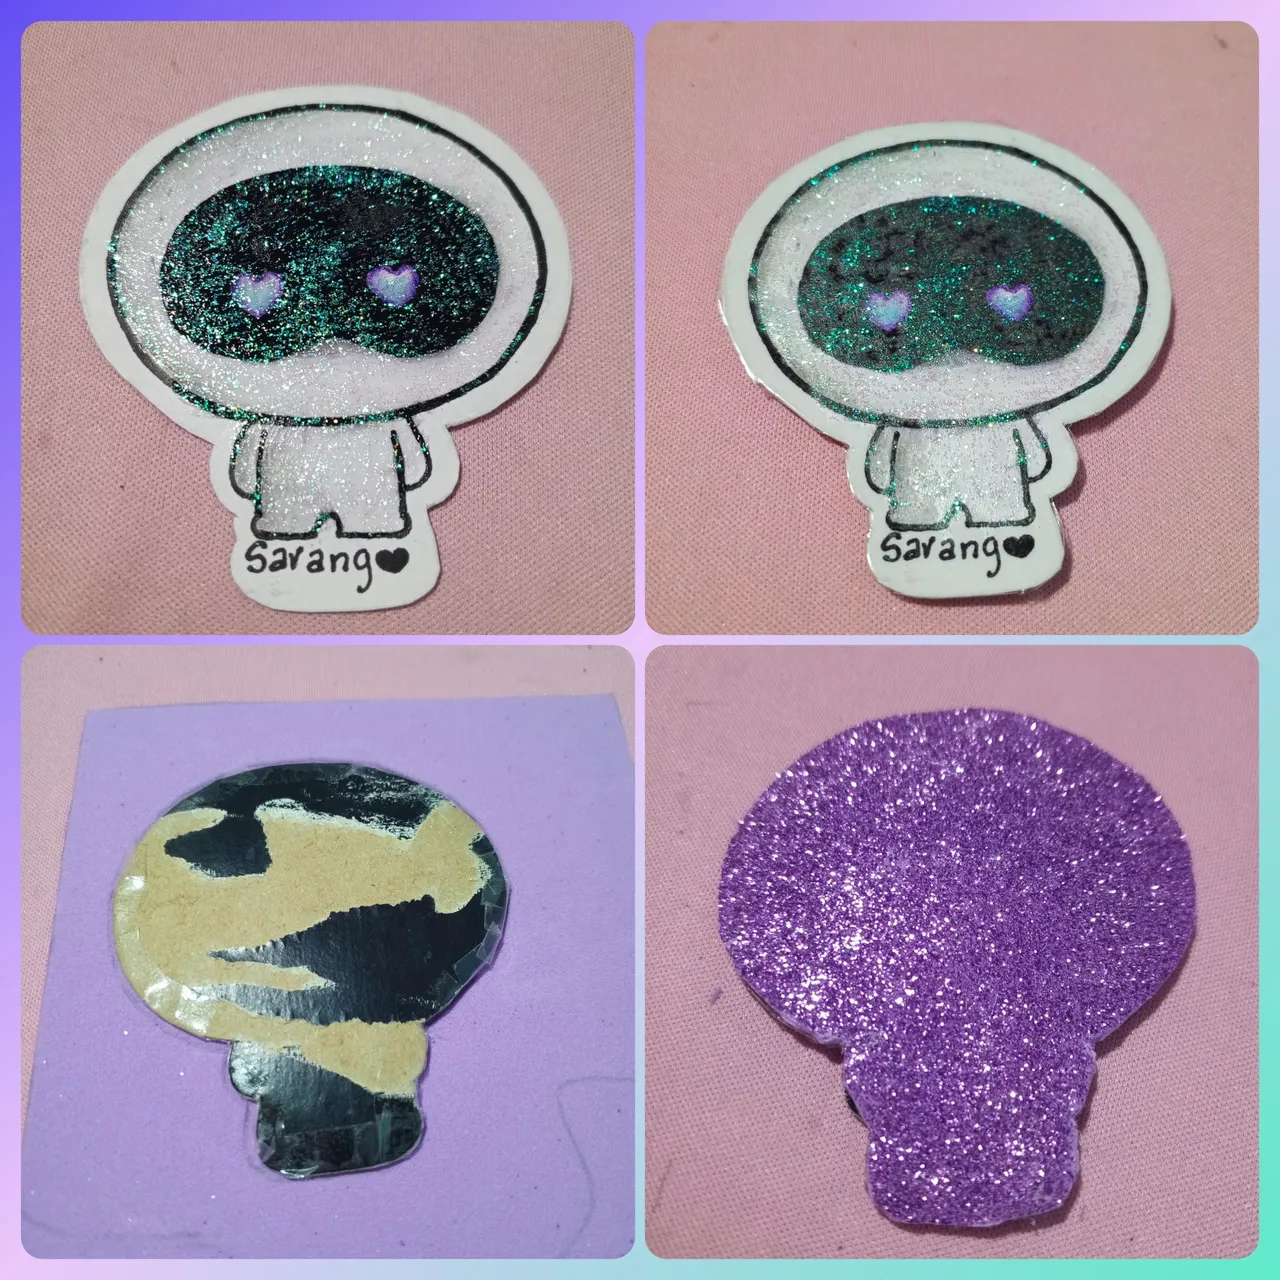
Luego decidí darle un toque mas personalizado y como amo el glitter le puse mucha escarcha en gel que por cierto habia olvidado que tenía guardada en una gaveta. 🤭
Then I decided to give it a more personalized touch and since I love glitter I put a lot of gel frosting on it, which by the way I had forgotten I had stored in a drawer. 🤭
Para conservar el color del dibujo y que quedara mas resistente lo forre con papel contac transparente.
To preserve the color of the drawing and to make it more resistant, I lined it with transparent contact paper.
Luego para hacerlo mucho mas lindo y resistente, dos en uno ☺️ le puse foami escarchado morado por la parte de atrás y así también sirvió para tapar la parte fea del cartón, así que entonces fue tres en uno.
😆🤭
Then to make it much more beautiful and resistant, two in one ☺️ I put purple frosted foami on the back and so it also served to cover the ugly part of the cardboard, so then it was three in one.
😆🤭

Por último le abrí un pequeño agujero en la parte de arriba para ponerle la argolla, busque y busque por toda mi casa 🏠 hasta que consigue esa argolla un poco vieja y le puse esa cadena ⛓️ que no se de donde salió la verdad, pero me vino de maravilla.
Finally I opened a small hole at the top to put the ring, I searched and searched all over my house 🏠 until I got that ring a little old and I put that chain ⛓️ that I do not know where it came from the truth, but it came to me wonderfully.
Y así quedo listo mi primer llavero.
And that's how my first keychain was ready.
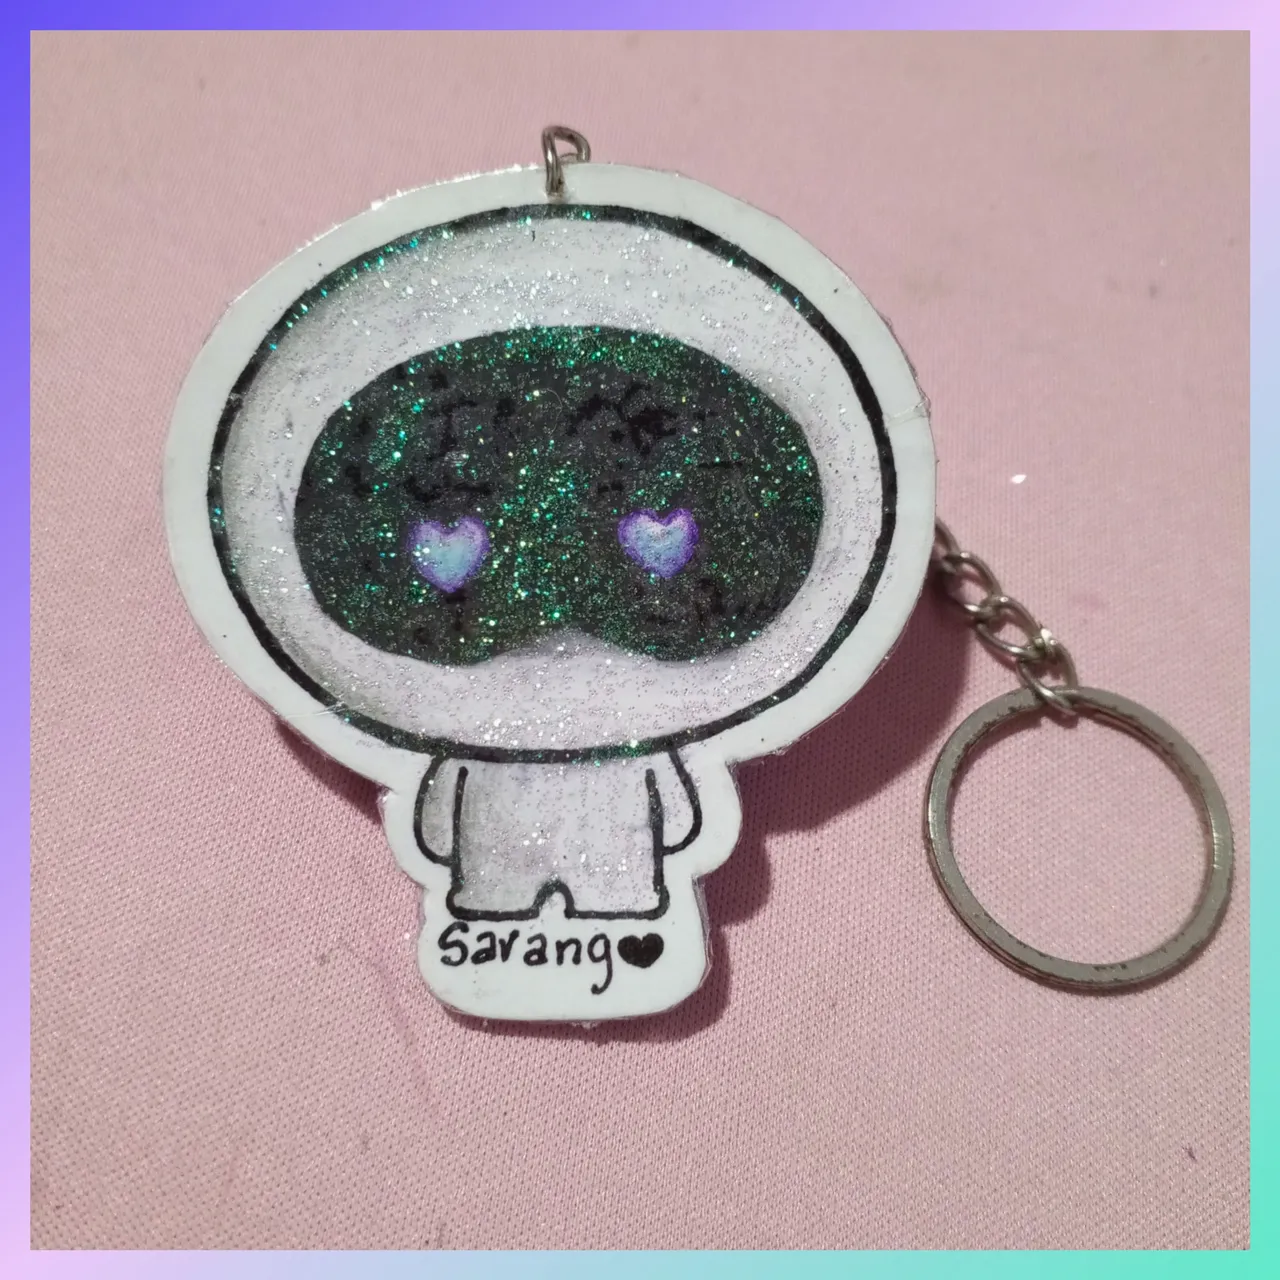
Y digo mi primer llavero porque tengo planeado hacer otros, tal vez me las ingenie para hacerlos con otra técnica para que queden mas resistentes y mucho mas bonitos.
And I say my first keychain because I plan to make others, maybe I'll manage to make them with another technique to make them more resistant and much more beautiful.
Cuando comencé a hacer este llavero pense que no me iba a salir porque normalmente busco información en internet para orientarme un poco sobre como hacer algo, pero esta vez puse a trabajar mi cerebro 🧠 para ver si se me ocurría una forma de armar un llavero y lo logré, así que esto me motivo a seguir buscando mas formas de hacer llaveros.
When I started to make this keychain I thought I was not going to get it because I usually look for information on the internet to guide me a little on how to do something, but this time I put my brain to work 🧠 to see if I could come up with a way to put together a keychain and I did it, so this motivated me to keep looking for more ways to make keychains.
Eso ha sido todo por hoy, espero que les haya gustado, como siempre muchas gracias por su apoyo y vistia a mis post. 🥰
That's all for today, I hope you liked it, as always thank you very much for your support and vistia to my posts. 🥰

Nos vemos en un próximo post, que estén bien y Dios los bendiga, bye.🥰😘💜🌹🪷
See you in a next post, be well and God bless you, bye.🥰😘💜🌹🪷

Fotografías propias, tomadas con mi Tecno Spark 10 Pro editadas en incollage/ portada creada en Canva. Traducción al inglés con DeepL.
Own photos, taken with my Tecno Spark 10 Pro edited in incollage/ cover created in Canva. Translation to English with DeepL.
