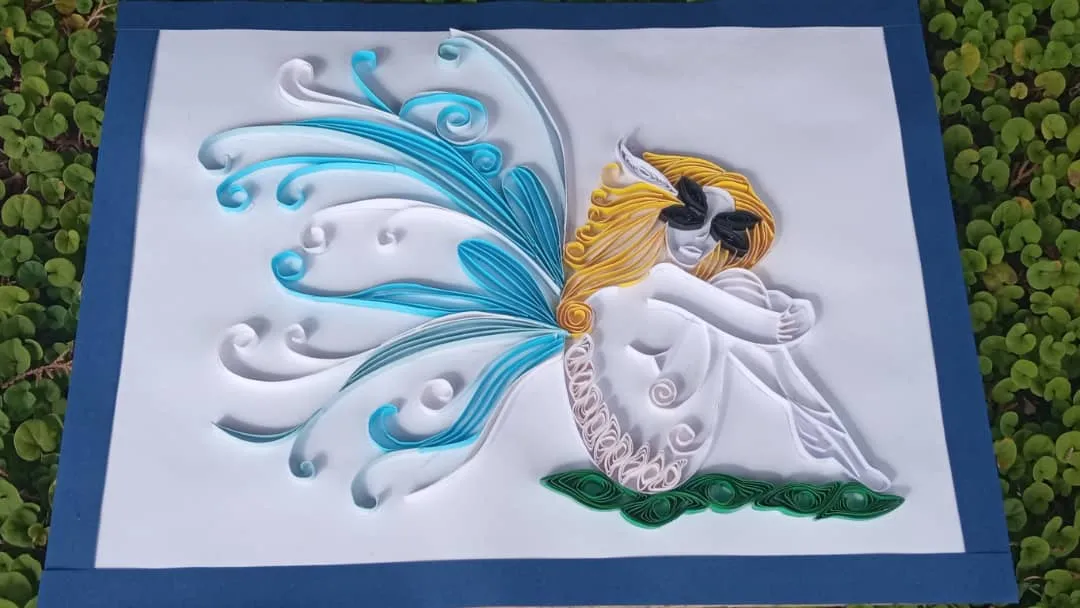
Hola queridos amigos de #hivediy 😀, espero que todos se encuentren bien al lado de sus seres amados, hoy estoy de nuevo acá en mi comunidad favorita para enseñarles un tutorial de cómo hacer una linda hada del bosque, se dice que las hadas del bosque son seres mágicos en forma de mujer con alas de mariposa, son protectoras de la naturaleza, particularmente me gusta mucho las alas de las hadas y quise colocarle tonos azules, ya que es un color que representa libertad y armonía.
Hello dear friends of #hivediy 😀, I hope you are all well next to your loved ones, today I am back here in my favorite community to teach you a tutorial on how to make a cute forest fairy, it is said that forest fairies are magical beings in the form of women with butterfly wings, they are protectors of nature, I particularly like the wings of the fairies and I wanted to put blue tones, as it is a color that represents freedom and harmony.
Me parecen muy lindas las hadas y hoy quise representar una con la técnica del filigrana que tanto me gusta y disfruto hacer, esta consiste en enrollar tiras de papel, en cada post les he mostrado una variedad de cuadros que podemos realizar con ella de manera fácil y divertida, para realizarla solo debemos tener dedicación y paciencia, lo que más me gusta de estos trabajos es que los materiales usados son muy económicos y que por lo general los tenemos en casa, este cuadro sirve para adornar nuestras paredes, para vender o simplemente para obsequiar a un ser querido, así que vamos, acompáñenme al paso a paso.
I think fairies are very cute and today I wanted to represent one with the filigree technique that I like and enjoy doing, this consists of rolling strips of paper, in each post I have shown a variety of pictures that we can do with it in an easy and fun way, to do it we just have to have dedication and patience, What I like most about these works is that the materials used are very inexpensive and we usually have them at home, this picture can be used to decorate our walls, to sell or simply to give to a loved one, so come on, join me in the step by step.
Hada del Bosque en filigrana
Fairy of the Forest in filigree
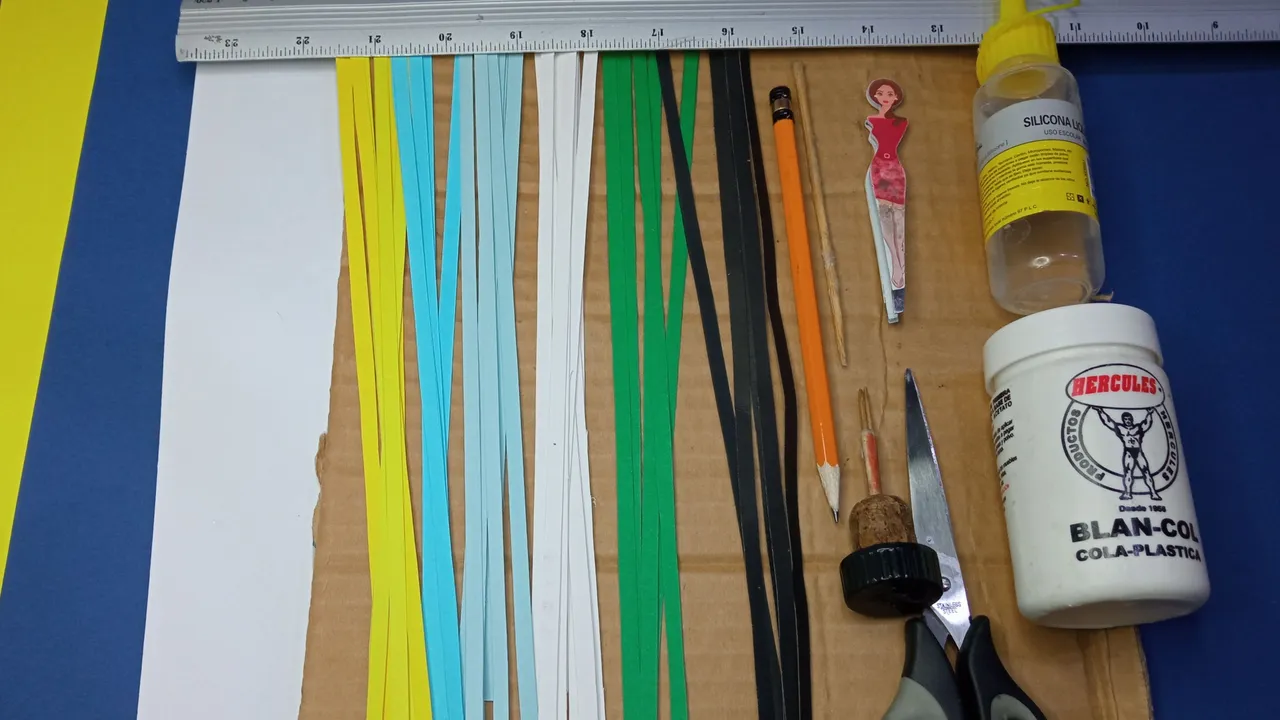
Materiales
Materials
Pasos para la elaboración
Steps for elaboration
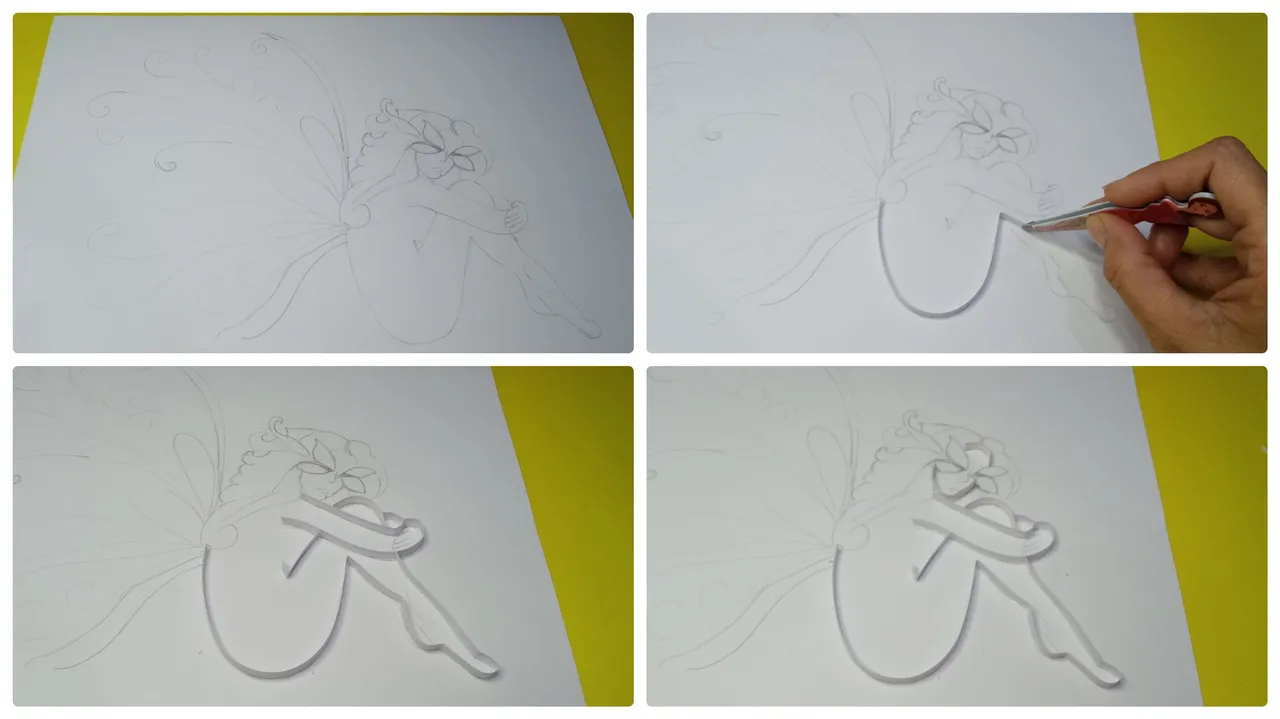
Paso 1
Lo primero que haremos será dibujar una linda hada sentada y sus alas en la cartulina blanca que será la base del cuadro, luego con una tira blanca de 0,5 cm por 43 cm bordeamos la silueta de nuestra hada, usamos pega blanca para fijarla.Step 1
The first thing we will do is to draw a nice sitting fairy and her wings on the white cardboard that will be the base of the picture, then with a white strip of 0.5 cm by 43 cm we border the silhouette of our fairy, we use white glue to fix it.
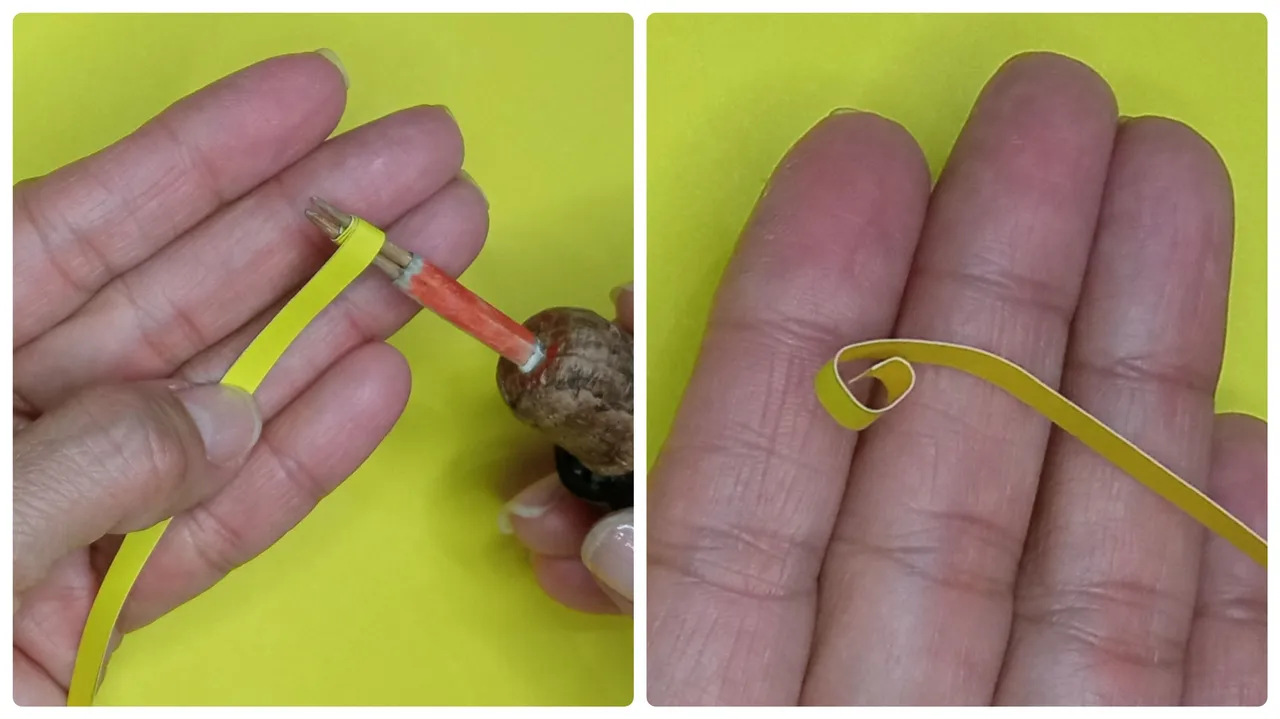
Paso 2
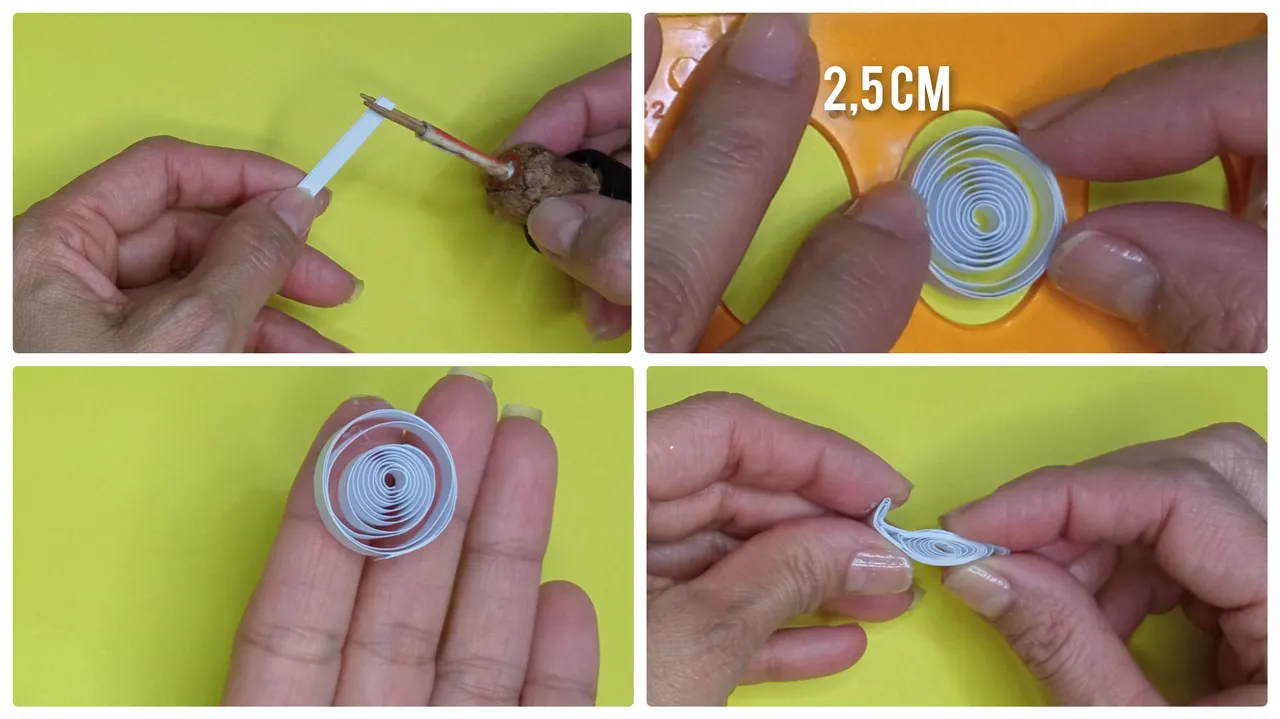
Luego con tiras amarillas haremos espirales sencillas, solo introducimos la tira en el enrollador y damos tres vueltas y así de sencillo tendremos una espiral.Step 2
Then with yellow strips we will make simple spirals, just introduce the strip in the winder and make three turns and just like that we will have a spiral.
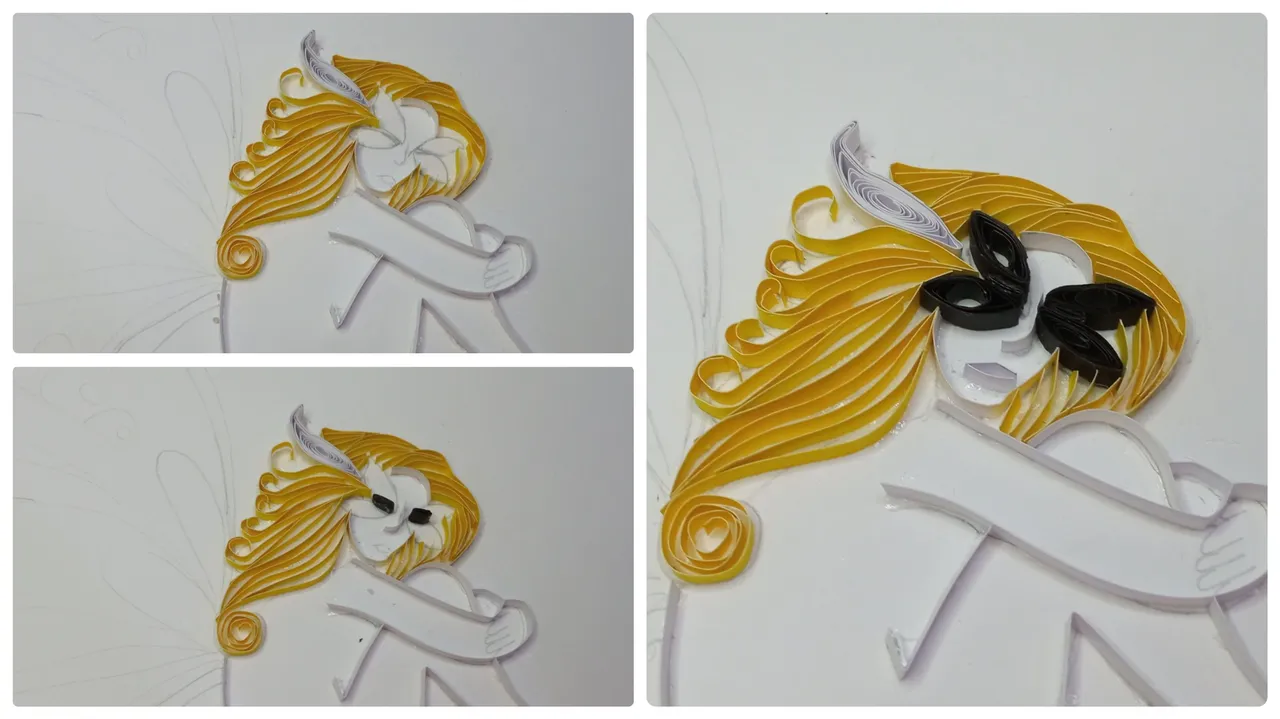
Paso 3
Seguidamente con tiras amarillas vamos bordeando toda la cabellera y pegando pequeñas tiras para rellenar, luego pegamos espirales en las puntas del cabello.Step 3
Next with yellow strips we go around the entire hair and glue small strips to fill in, then we glue spirals at the ends of the hair.
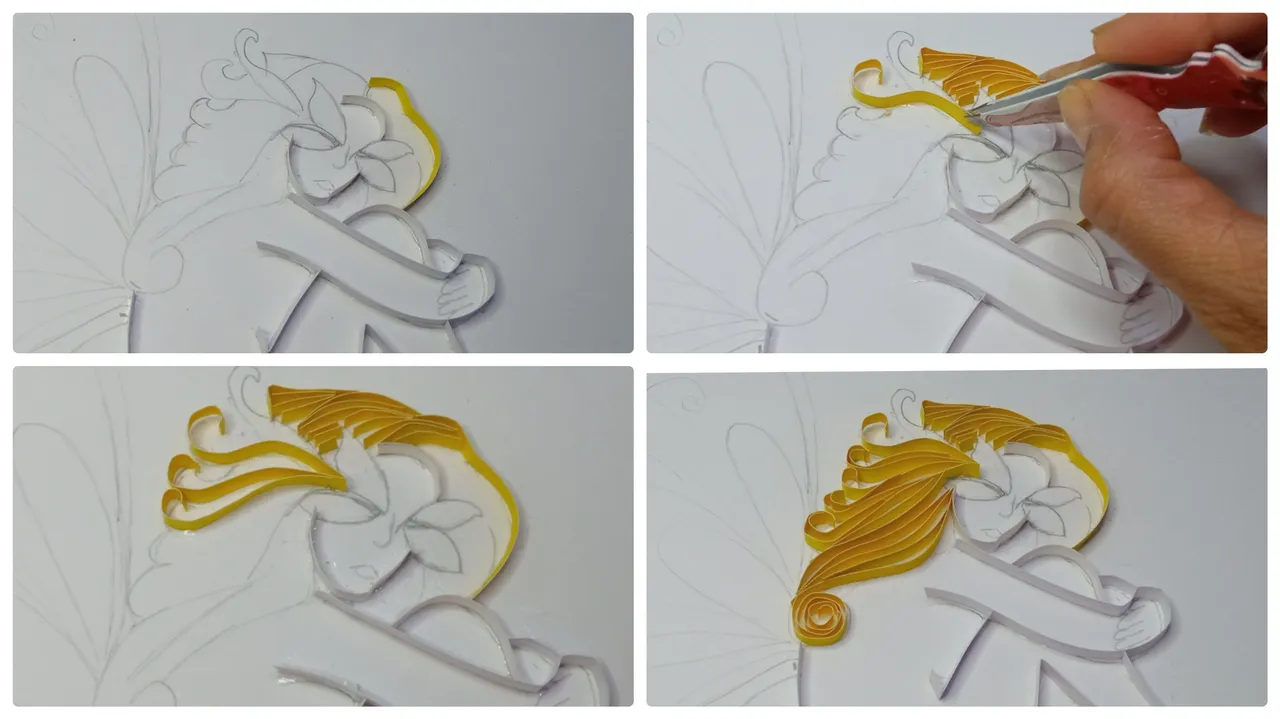
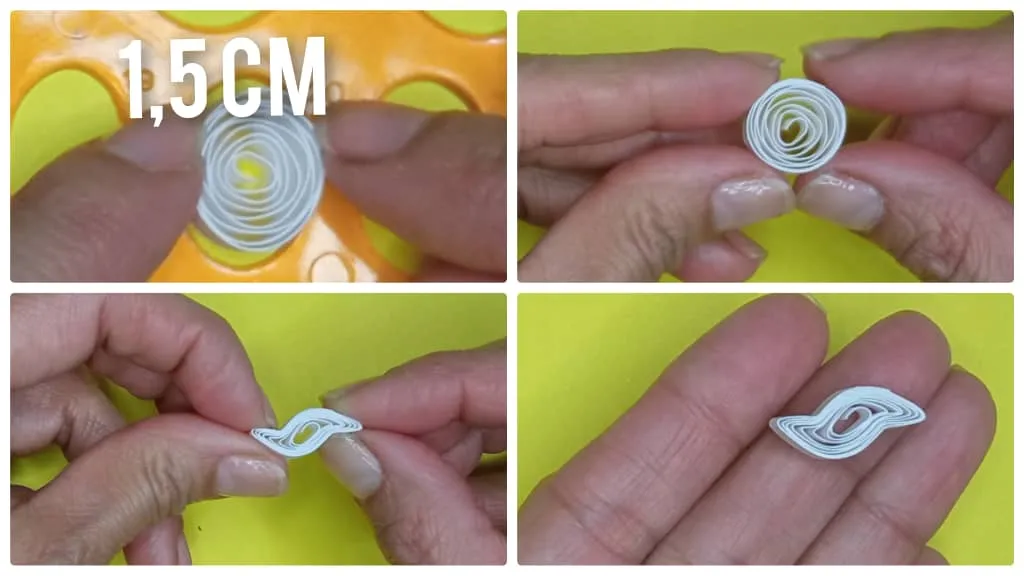
Paso 4
Después tomamos 2 tiras blancas de 0,5 cm por 43cm y hacemos un círculo abierto, introducimos la tira en el enrollador y damos vuelta sobre ella misma hasta el final, luego soltamos en la plantilla con cuidado y pegamos, ya tenemos nuestro círculo abierto, luego con los dedos índice y pulgar de ambas manos presionamos para dar forma de hoja pero dando una pequeña inclinación hacía el lado izquierdo, está será la oreja visible del hada.Step 4
Then we take 2 white strips of 0.5 cm by 43cm and make an open circle, we introduce the strip in the winder and turn over itself until the end, then we release on the template carefully and glue, we already have our open circle, then with the index finger and thumb of both hands we press to give a leaf shape but giving a small inclination to the left side, this will be the visible ear of the fairy.
Paso 5
Ahora con tiras negras de 0,5 cm por 20 cm hacemos 4 círculos abiertos.Step 5
Now with black strips of 0.5 cm by 20 cm we make 4 open circles.
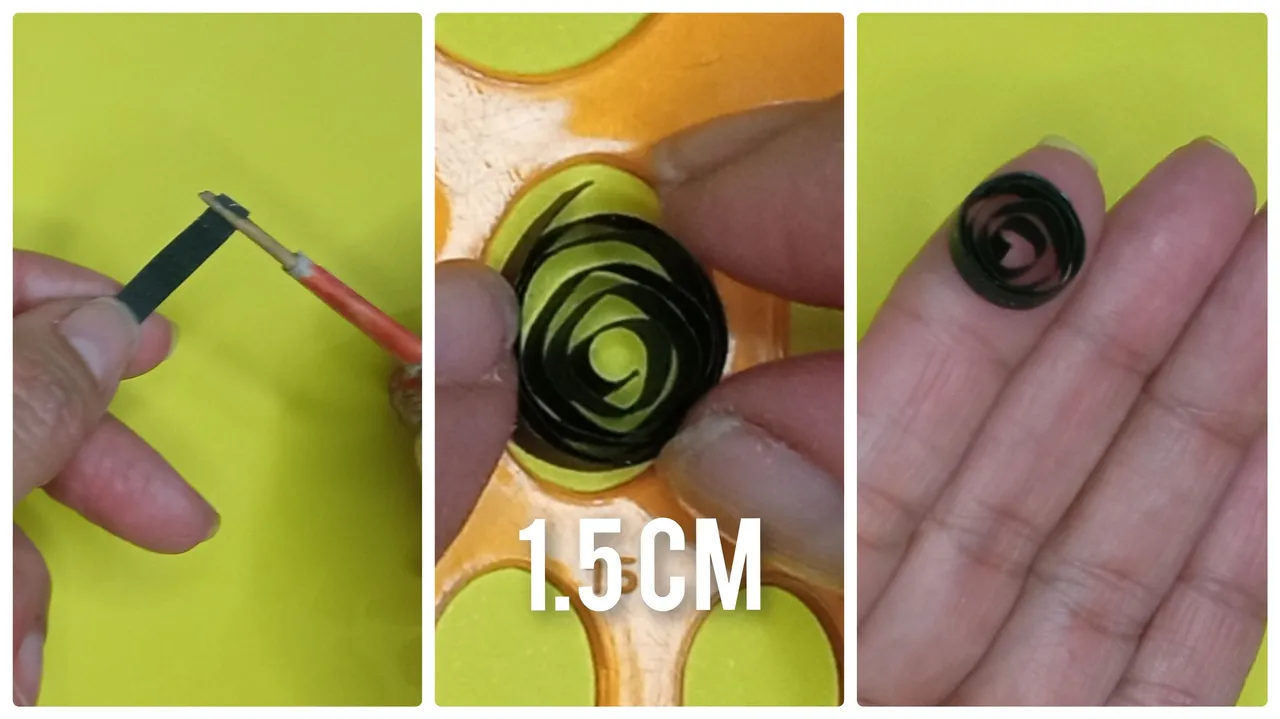
Paso 6
Luego con los círculos abiertos hacemos óvalos, los usaremos para la máscara del hada, solo presionamos con los dedos índice y pulgar de ambas manos dando forma.Step 6
Then with the open circles we make ovals, we will use them for the fairy mask, we just press with the index finger and thumb of both hands giving shape.
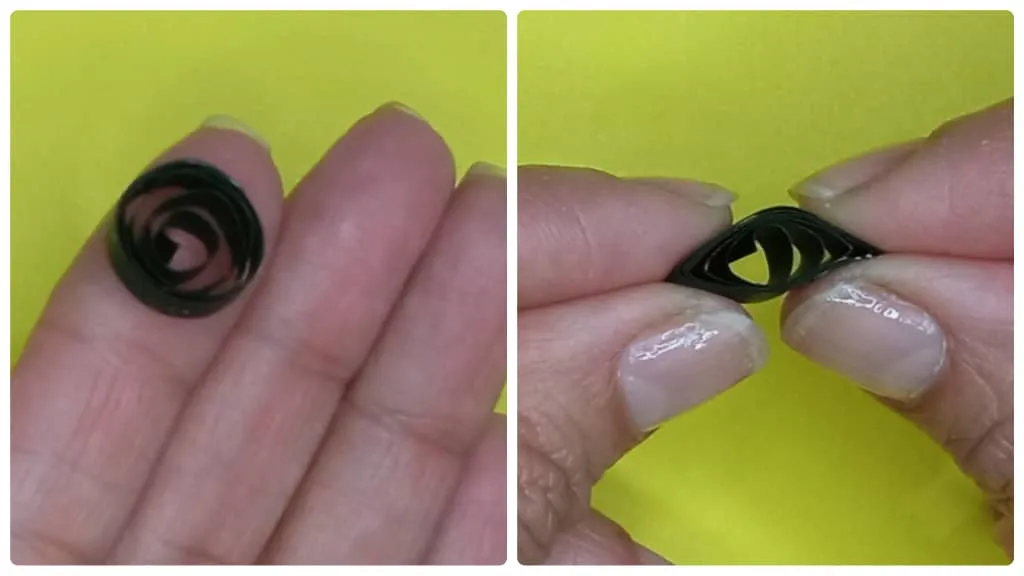
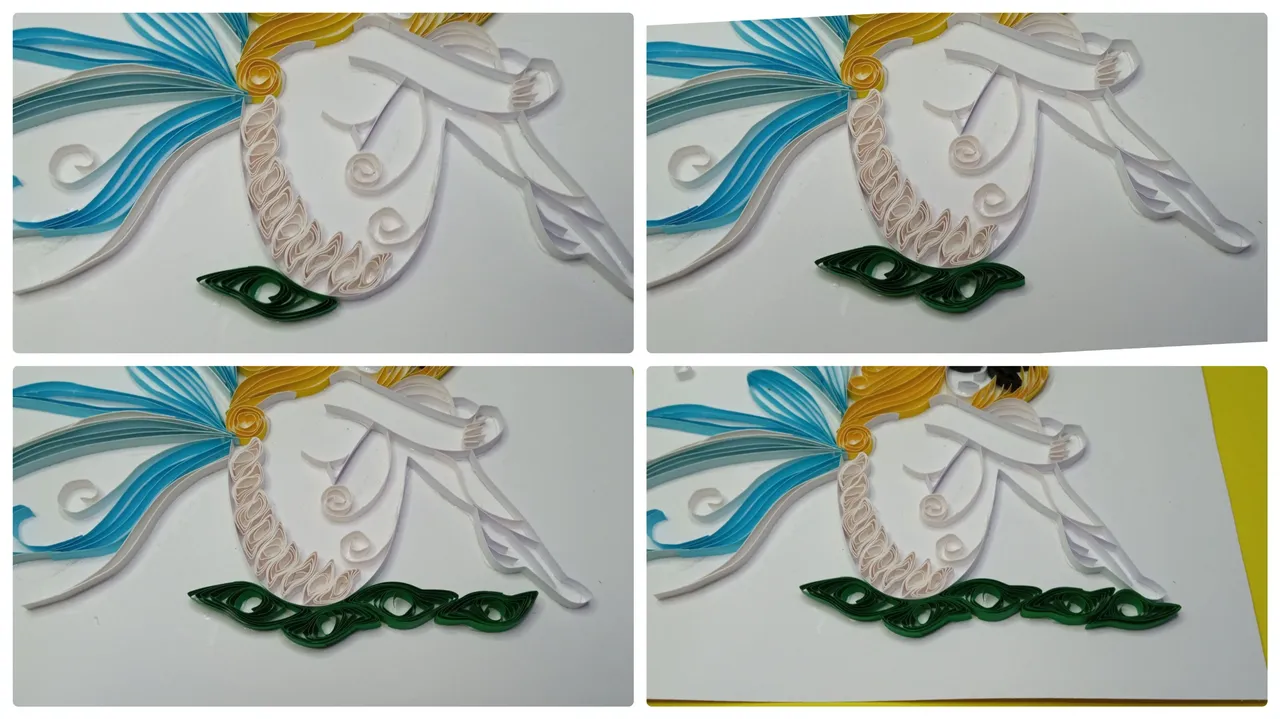
Paso 7
Ahora pegamos la oreja del hada, los ojos que simplemente son una tirita doblada y luego pegamos los óvalos alrededor dando forma de máscara, también pegamos tiritas blancas para la nariz y la boca.Step 7
Now we glue the fairy's ear, the eyes which are simply a folded strip and then we glue the ovals around it giving it the shape of a mask, we also glue white strips for the nose and mouth.
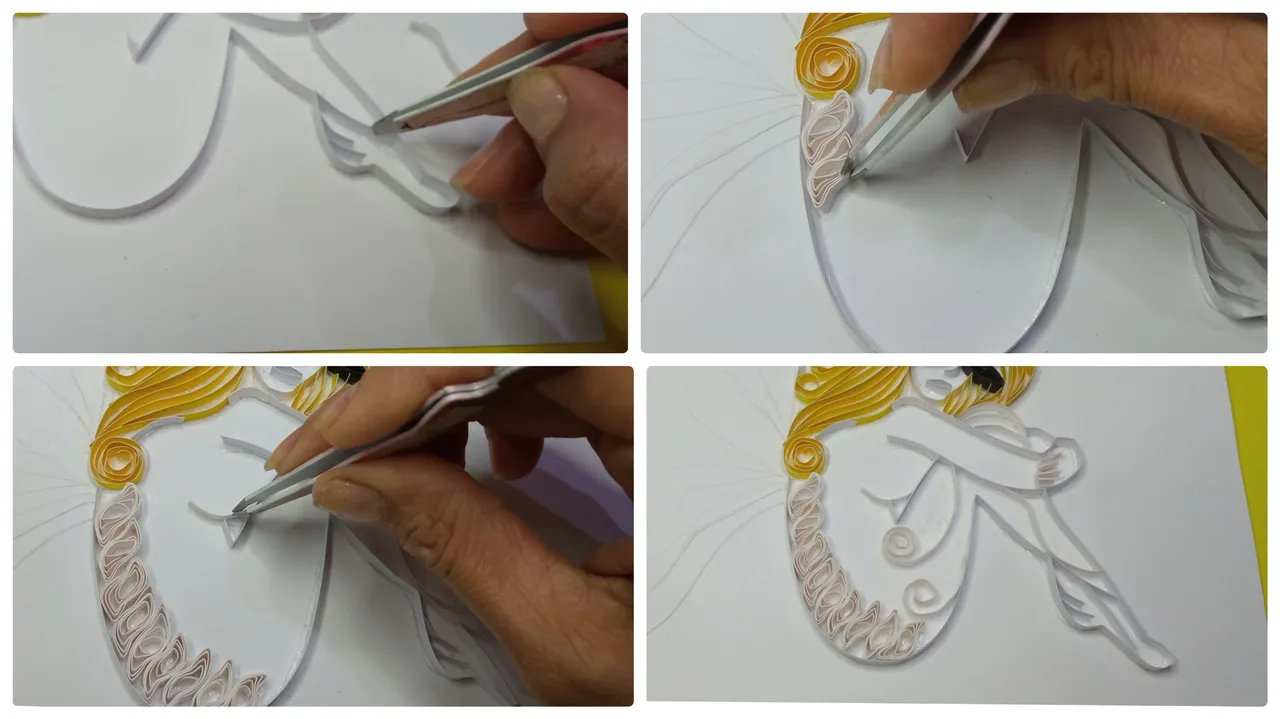
Paso 8
Después con tiras blancas de 20 cm hacemos círculos abiertos, luego haremos una de las formas básica del filigrana llamada hoja, presionando los dedos índice y pulgar de ambas manos y dando una pequeña inclinación tendremos la forma de hoja.Step 8
Then with white strips of 20 cm we make open circles, then we will make one of the basic forms of the filigree called leaf, pressing the index finger and thumb of both hands and giving a small inclination we will have the leaf shape.
Paso 9
Para el cuerpo del hada, pegamos algunas tiritas en la pierna y el pie, pegamos las hojas en el borde de la espalda, también hacemos algunas espirales de la misma manera como las hicimos en el paso 3.Step 9
For the body of the fairy, we glue some strips on the leg and foot, we glue the leaves on the edge of the back, we also make some spirals in the same way as we did in step 3.
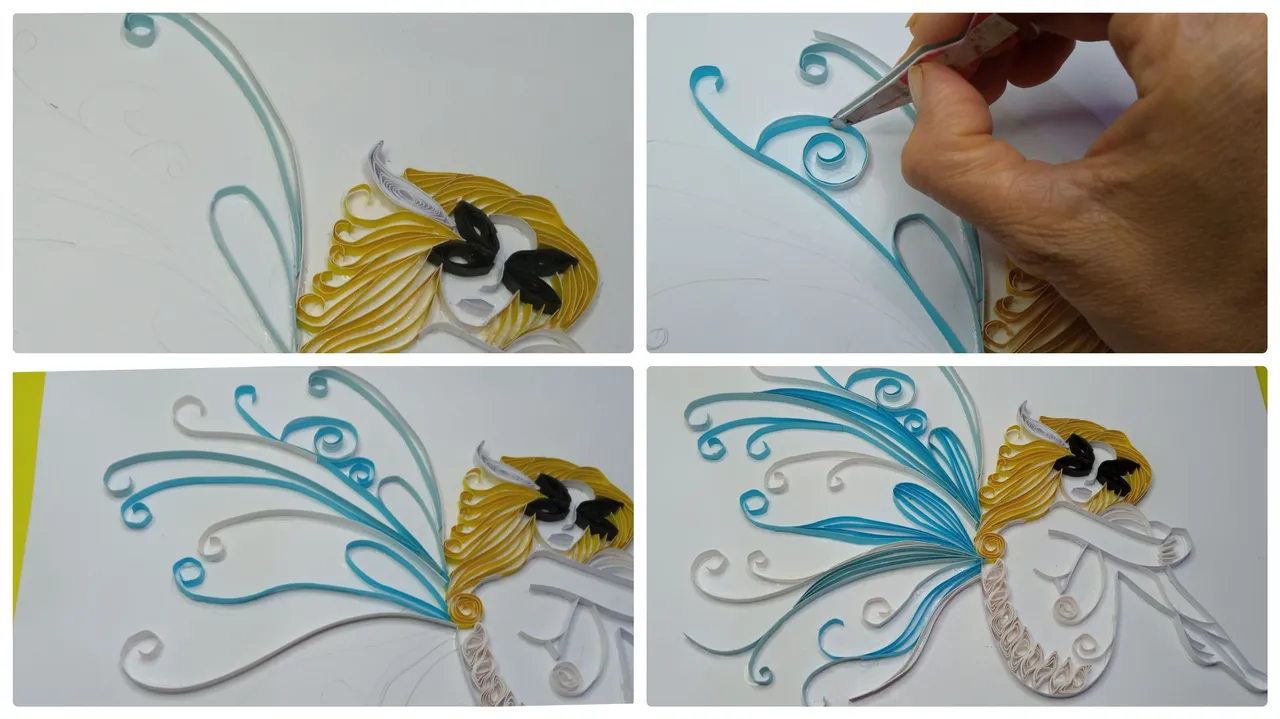
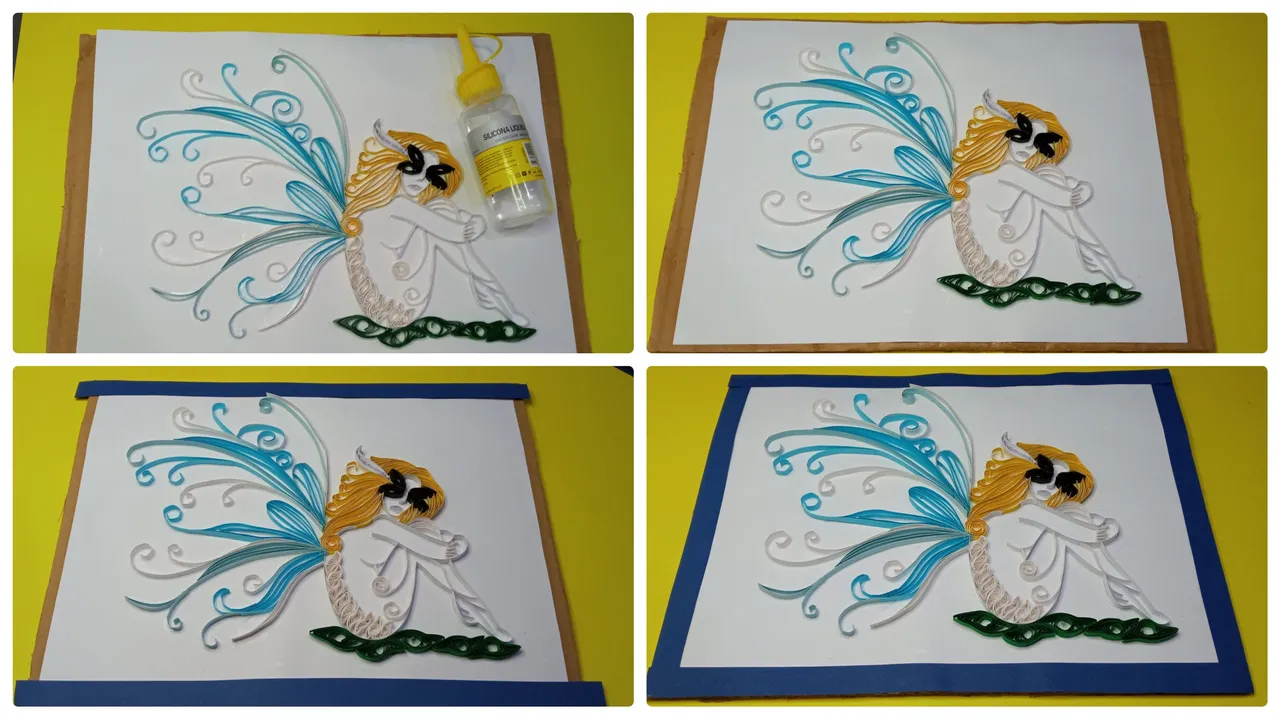
Paso 10
Para las alas del hada, pegamos tiras y espirales dando forma y alternado los colores, azules y blanco.Step 10
For the wings of the fairy, we glue strips and spirals giving shape and alternating the colors, blue and white.
Paso 11
Luego con tiras verdes de 43 cm hacemos la forma de hoja ya explicada en el paso 8, después pegamos estas hojas asemejan grama donde esta sentada el hada.Step 11
Then with green strips of 43 cm we make the leaf shape already explained in step 8, then we glue these leaves resembling grass where the fairy is sitting.
Paso 12
Por último pegamos el cuadro en el cartón con silicón líquido y con la cartulina azul hacemos un marco para darle mejor presentación y así se vera más lindo.Step 12
Lastly we glue the picture on the cardboard with liquid silicone and with the blue cardboard we make a frame to give it a better presentation and make it look nicer.
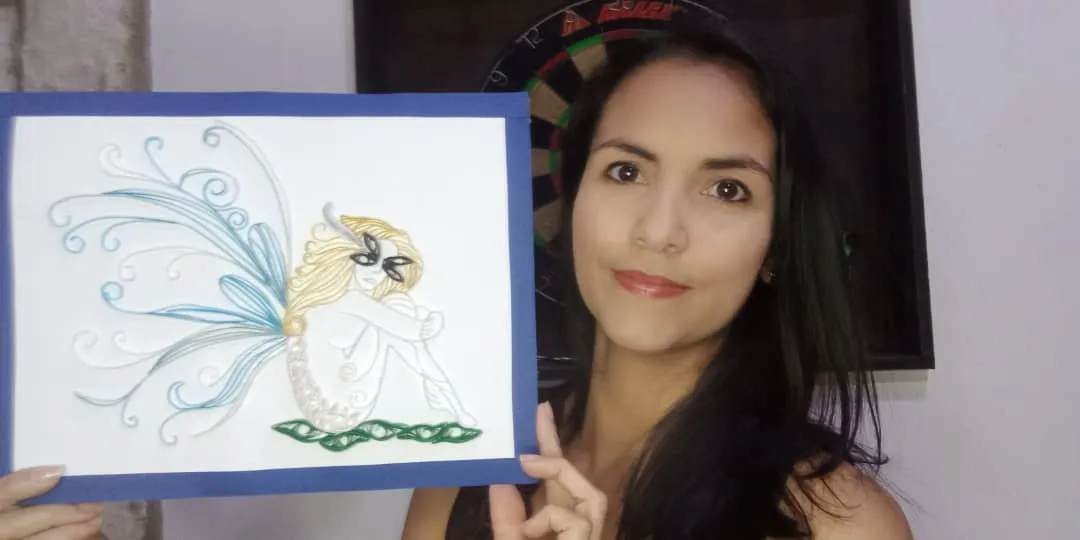
Y así de esta manera sencilla tenemos un lindo cuadro de hada, espero sea del agrado de todos ustedes.
And so in this simple way we have a nice fairy picture, I hope you all like it.

Hasta pronto amigos.
See you soon friends
Todas las fotos son tomadas de mi teléfono Redmi 9, para los collages usé la aplicación collage maker y para la traducción usé el traductor Deepl.