Hola queridos amigos de #hivediy, espero se encuentren bien y que hayan pasado una semana santa bien al lado de sus seres queridos, había estado ausente por varios días por motivos de trabajo, pero estoy de nuevo acá para compartir un tutorial con ustedes de un bello cuadro de dragones, como han podido ver en mis post anteriores me encantan estas bellas criaturas mitológicas y que mejor que expresarlo por medio de la técnica que tanto me gusta el filigrana.
Hello dear friends of #hivediy, I hope you are well and that you have spent a good holy week with your loved ones, I had been absent for several days for work reasons, but I'm back here to share a tutorial with you of a beautiful picture of dragons, as you have seen in my previous posts I love these beautiful mythological creatures and what better way to express it through the technique that I like so much the filigree.
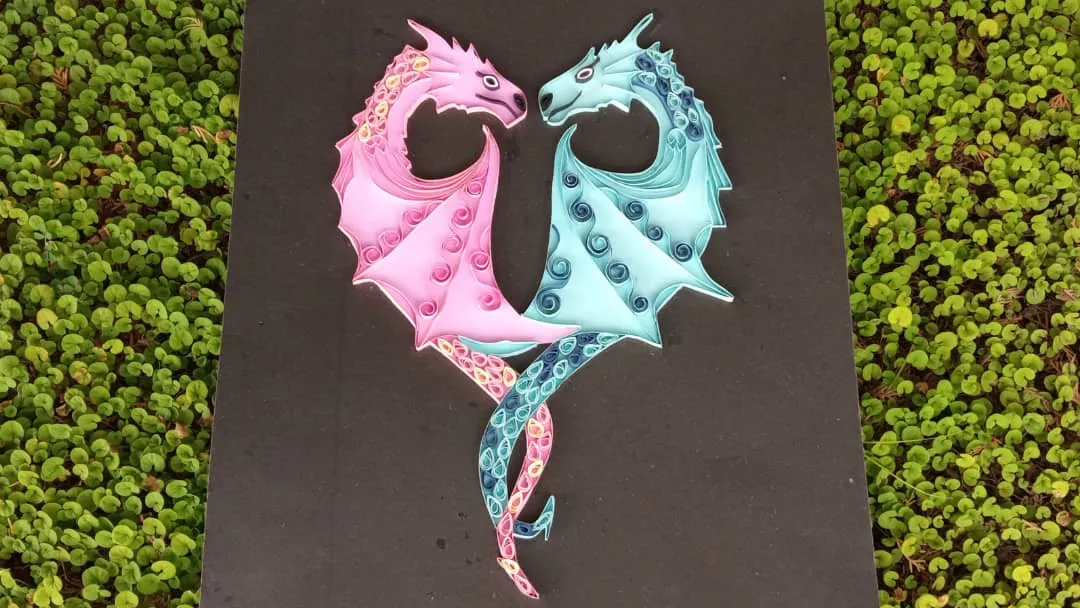
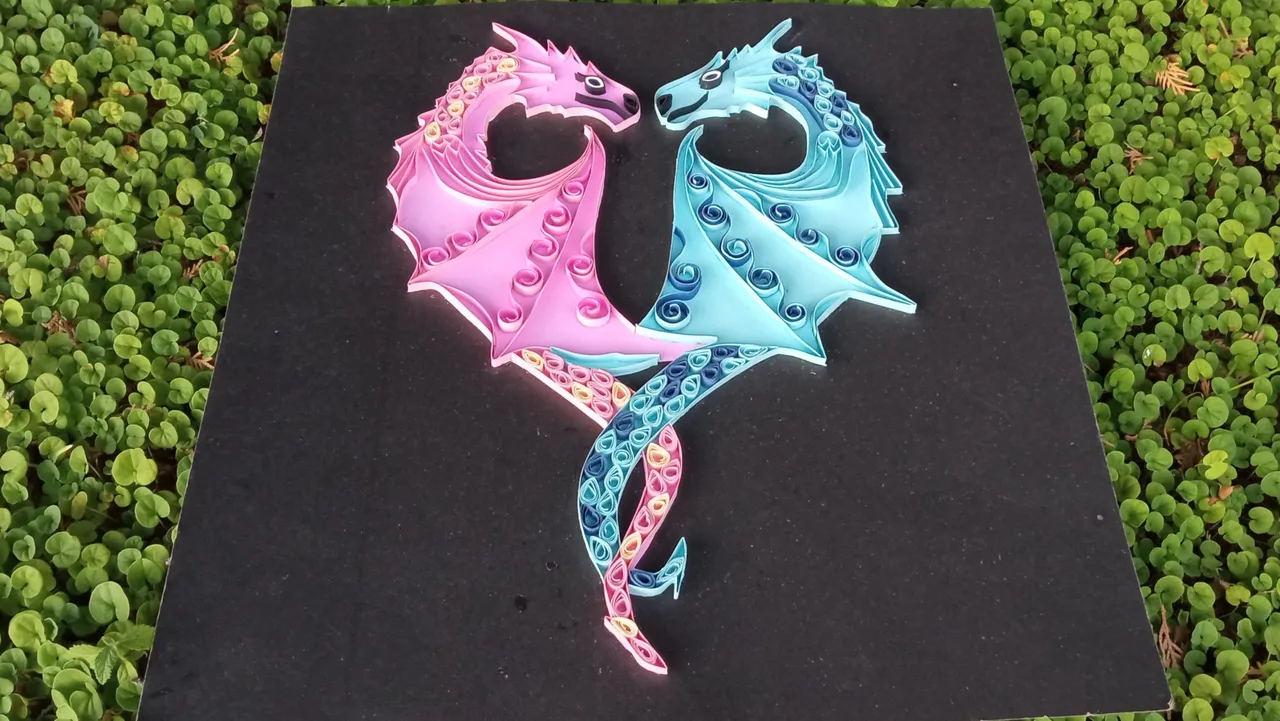
Al ver este dibujo me cautivó mucho, los dragones son poderosos, fuertes y verlos así entrelazados juntos, formando un equilibrio perfecto me hice la pregunta, ¿por qué no dibujarlos? ¿se verán lindos colocándole filigrana? y mi respuesta fue claro que si, entonces decidí hacerlos, como y les he dicho hacer estos cuadros es divertido y los materiales usados son muy económicos, el resultado siempre es lindo, así que vamos acompáñame al paso a paso.
When I saw this drawing I was captivated, dragons are powerful, strong and seeing them intertwined together, forming a perfect balance I asked myself the question, why not draw them, will they look nice by placing filigree? and my answer was of course yes, then I decided to make them, as I have told you making these pictures is fun and the materials used are very economical, the result is always nice, so come with me to the step by step.
Dragones Enamorados
Dragons in Love
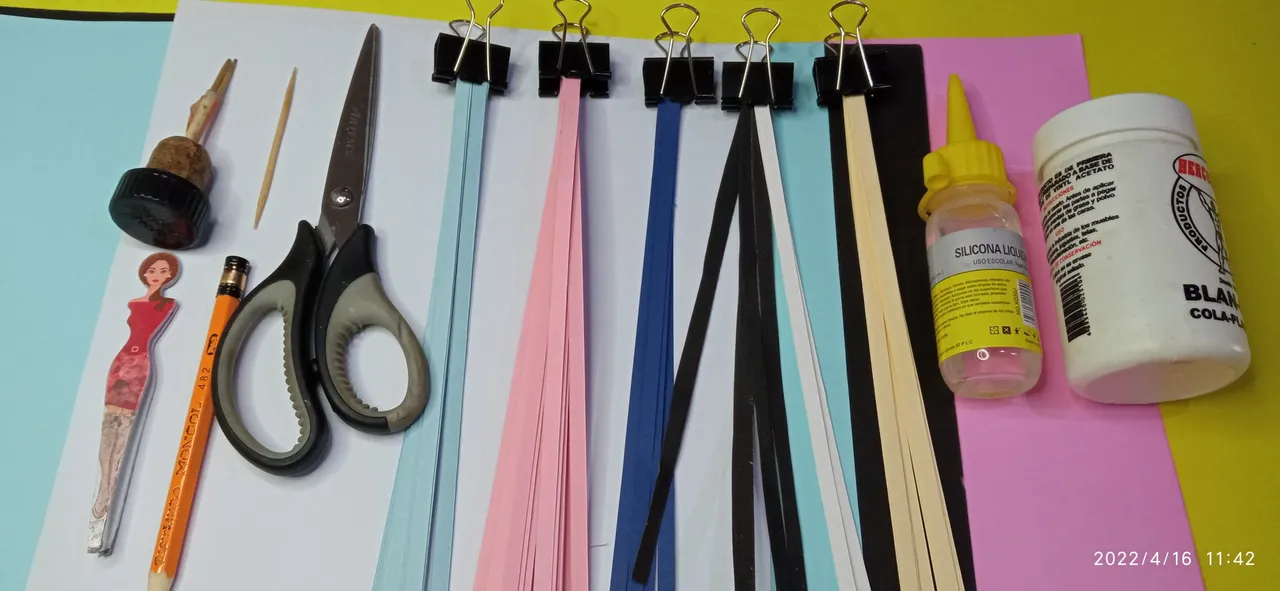
Materiales
Materials
Pasos para la elaboración
Steps for processing
Paso 1
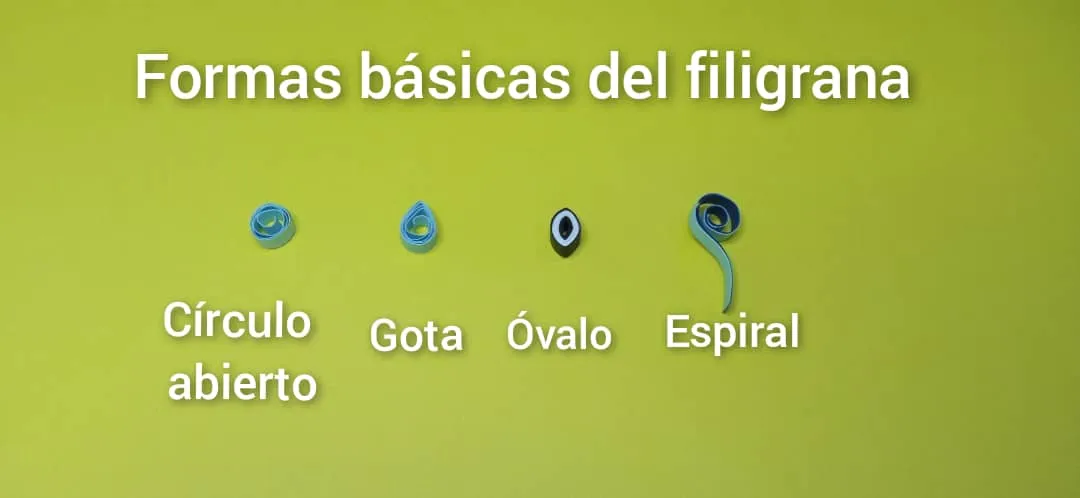
Lo primero que haremos es mostrar las formas básicas del filigrana las que usaremos para nuestro cuadro, son formas muy sencilla de elaborar, solo hay que tener paciencia a la hora de hacer estos trabajos.Step 1
The first thing we will do is to show the basic filigree shapes that we will use for our painting, they are very simple to make, you just have to be patient when doing this work.
Paso 2
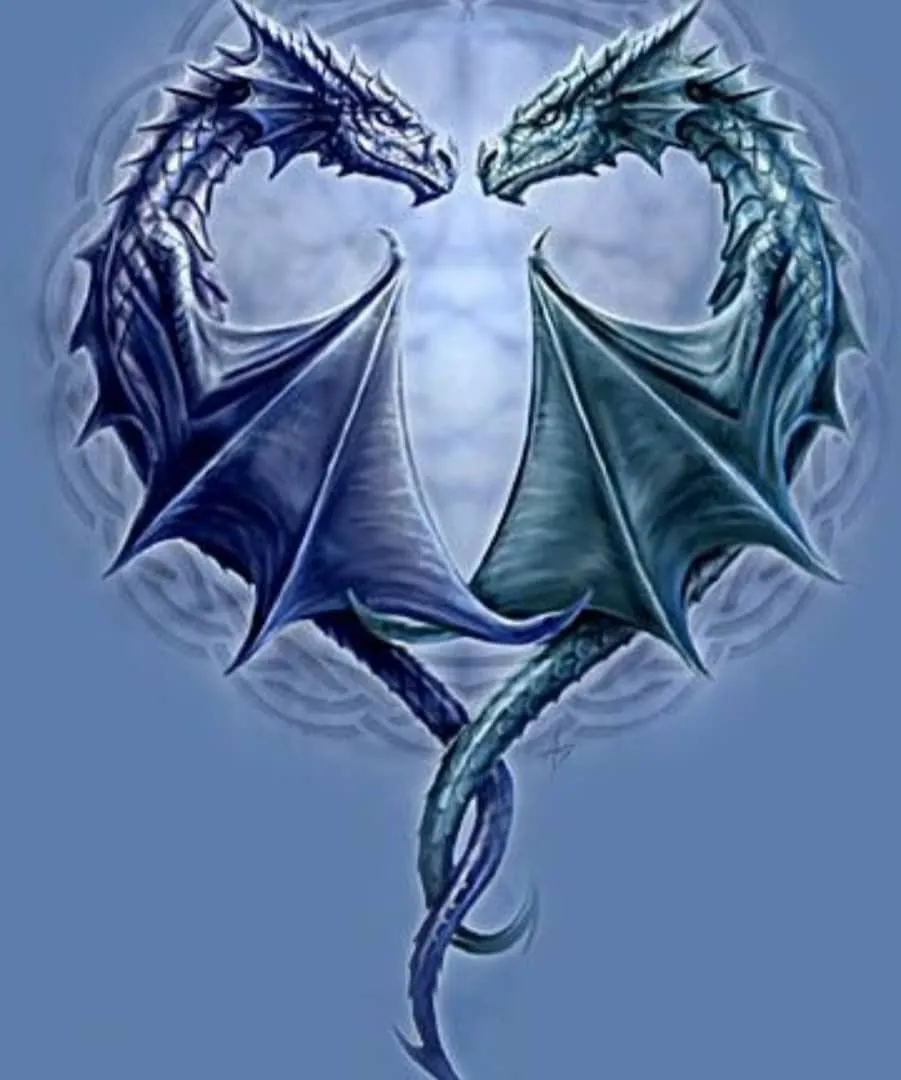
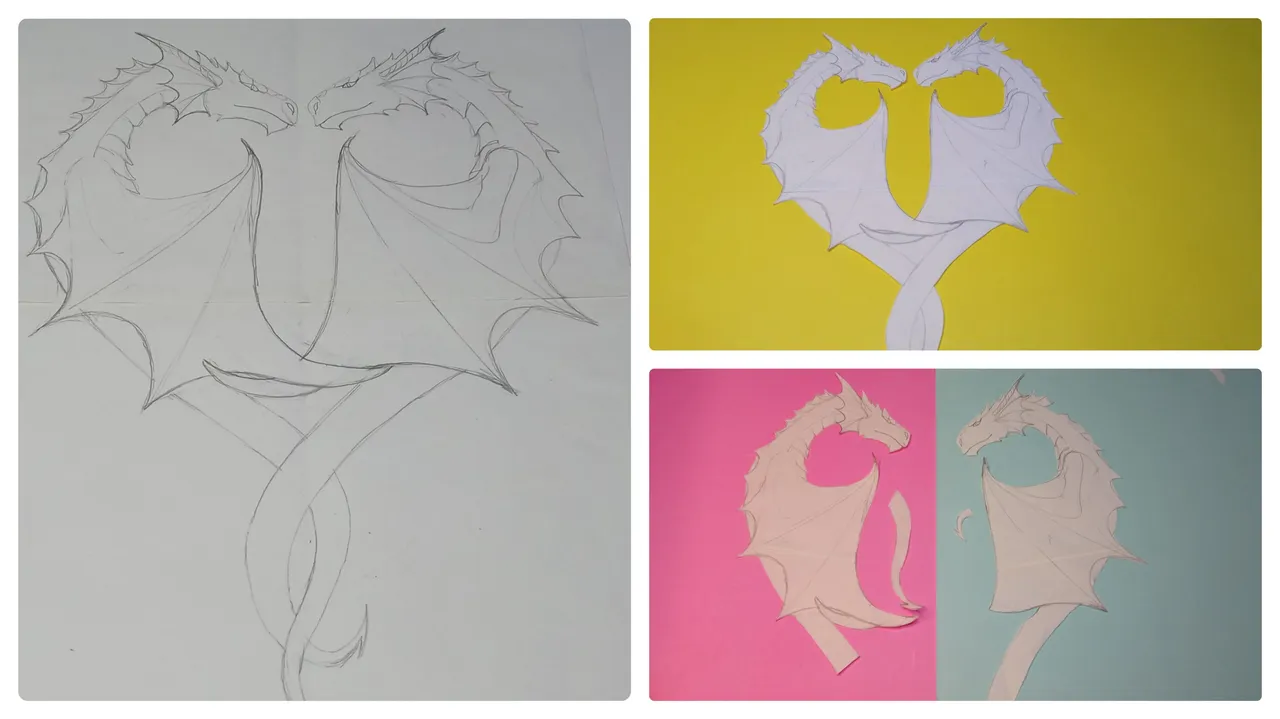
Luego dibujamos los dragones en forma de corazón, los vi en internet y me gustaron mucho, luego recortamos y separamos las siluetas, después transferimos a las cartulinas del color correspondiente para cada dragón.Step 2
Then we draw the heart-shaped dragons, I saw them on the internet and I liked them a lot, then we cut out and separate the silhouettes, then we transfer them to the cardboards of the corresponding color for each dragon.
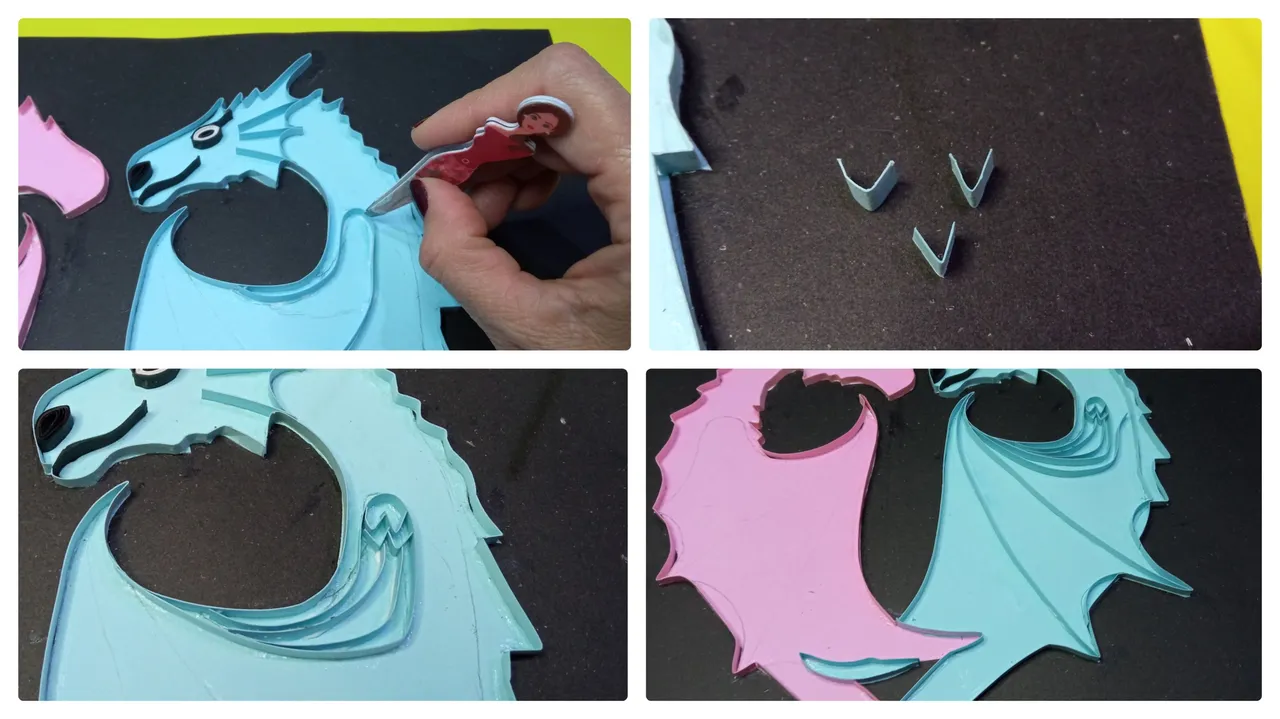
Paso 3
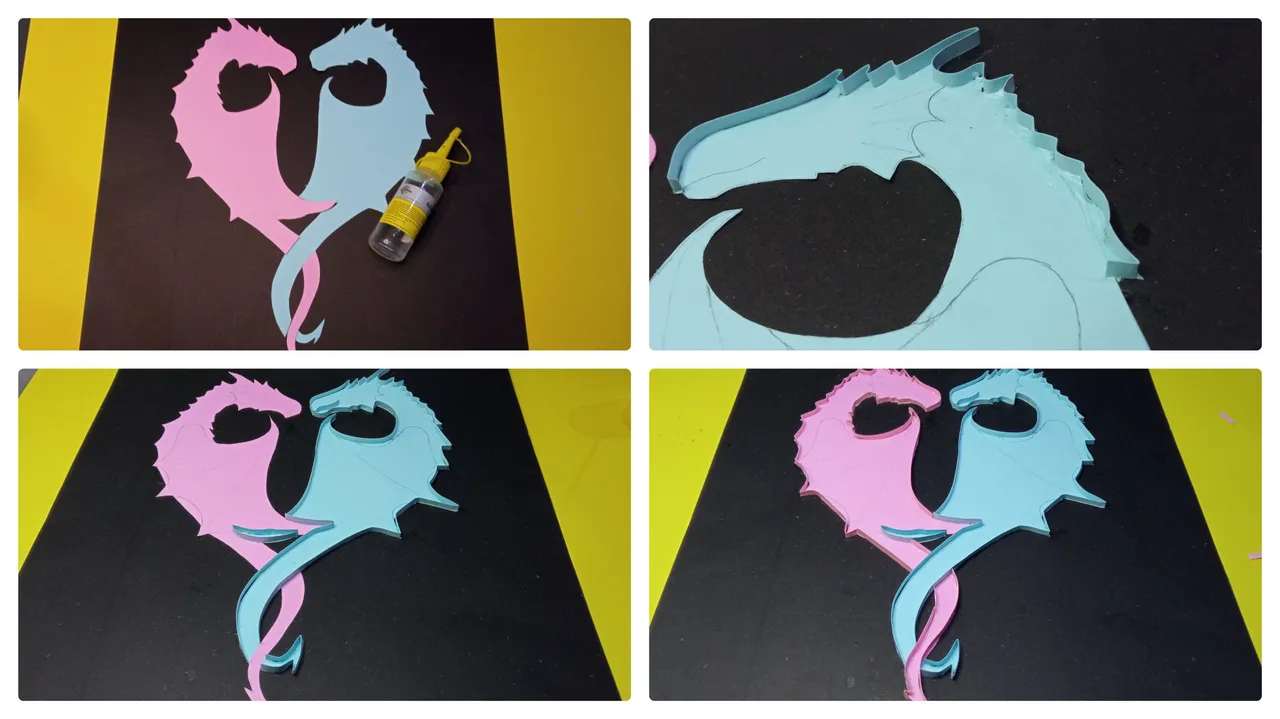
Seguidamente pegamos con silicón líquido las siluetas a la cartulina negra que será la base de nuestro cuadro y con tiras de 0.5 cm por 20 cm bordeamos la silueta de los dragones.Step 3
Next we glue with liquid silicone the silhouettes to the black cardboard that will be the base of our picture and with strips of 0.5 cm by 20 cm we border the silhouette of the dragons.
Paso 4
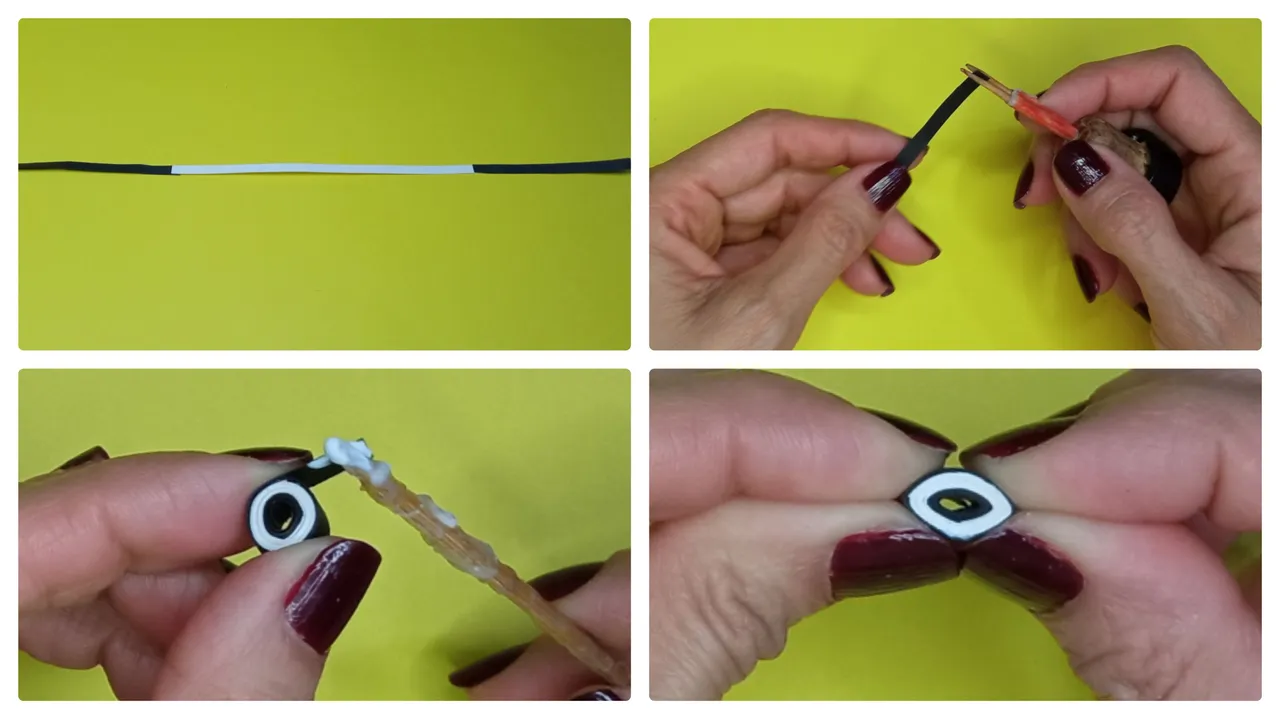
Para los ojos, usaremos 2 tiras negras de 0,5 cm por 5 cm y 1 negra de 0,5 cm por 10 cm, las pegamos para formar una sola tira y formamos un circulo cerrado enrollando la tira sobre ella misma, luego pegamos al final y presionamos con los dedos índice y pulgar de ambas manos para formar el óvalo.Step 4
For the eyes, we will use 2 black strips of 0.5 cm by 5 cm and 1 black strip of 0.5 cm by 10 cm, we glue them together to form a single strip and form a closed circle by rolling the strip over itself, then we glue at the end and press with the index finger and thumb of both hands to form the oval.
Paso 5
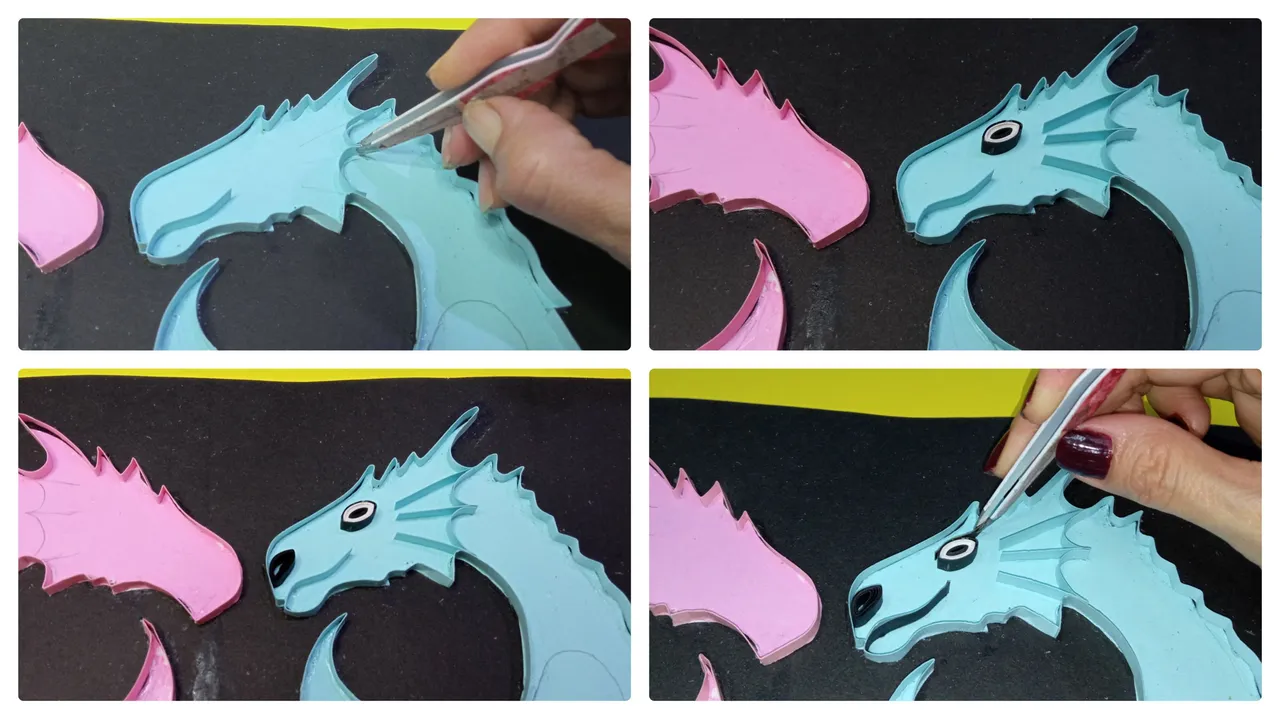
Colocamos tiras en la cabeza del dragón para dar forma , pegamos los ojos, la nariz la cual haremos con un óvalo negro y pegamos una tira en la boca dando forma.Step 5
Place strips on the head of the dragon to give it shape, glue the eyes, the nose which we will make with a black oval and glue a strip on the mouth giving it shape.
Paso 6
Ahora pegamos tiras para marcar el brazo. haremos unas pequeñas escamas doblando pedacitos de tiras y las pegamos en la parte superior del brazo, luego pegamos tiras a lo largo del ala para dar forma.Step 6
Now we glue strips to mark the arm. we will make some small scales by folding bits of strips and glue them on the upper part of the arm, then we glue strips along the wing to give it shape.
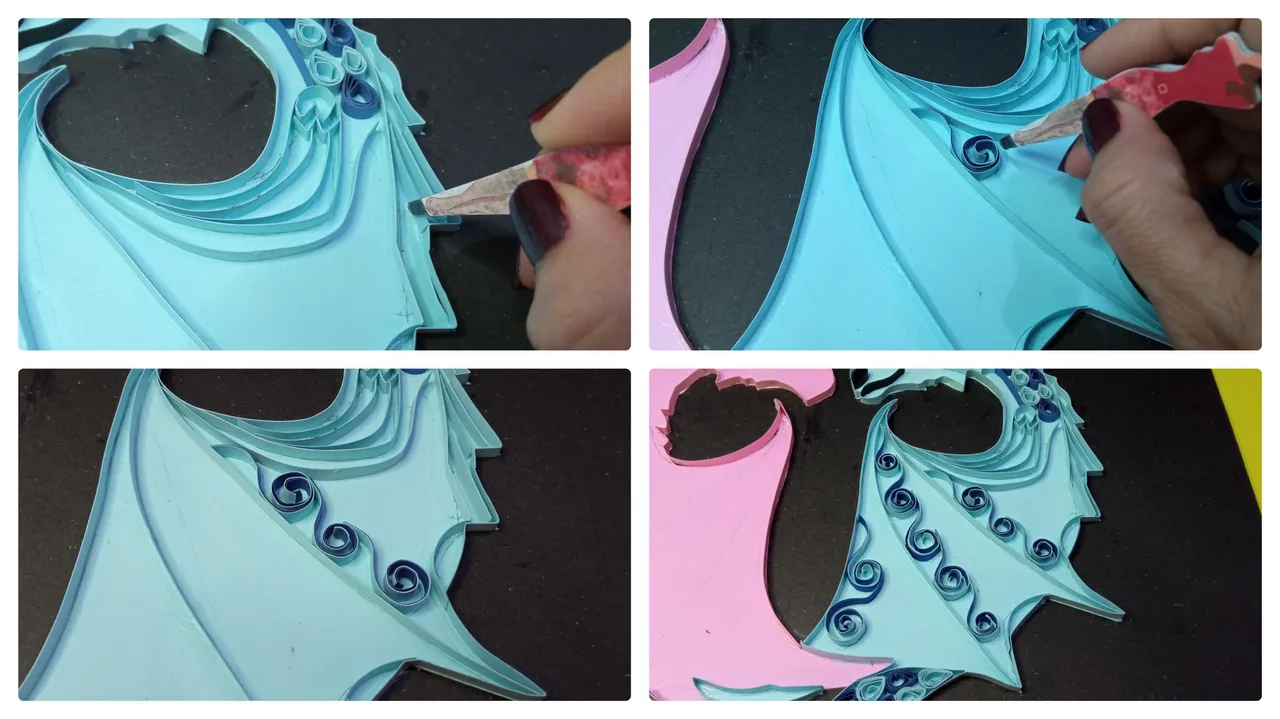
Paso 7
Después haremos la forma de hoja, para ella tomamos una tira de 0,5 cm por 15 cm y la introducimos en el enrollador, luego con cuidado vamos soltando con ayuda de nuestros dedos y pegamos al final con un punto de pega blanca, después con los dedos índice y pulgar de la mano derecha presionamos para formar la gota.Step 7
Then we will make the leaf shape, for it we take a strip of 0.5 cm by 15 cm and introduce it into the winder, then carefully we will release with the help of our fingers and glue at the end with a point of white glue, then with the index finger and thumb of the right hand we press to form the drop.
Paso 8
Ahora pondremos una pequeña tira azul en el cuello del dragón y vamos pegando las gotas intercalando los colores, primero por el cuello y luego en la cola.Step 8
Now we will put a small blue strip on the neck of the dragon and we will glue the drops alternating the colors, first on the neck and then on the tail.

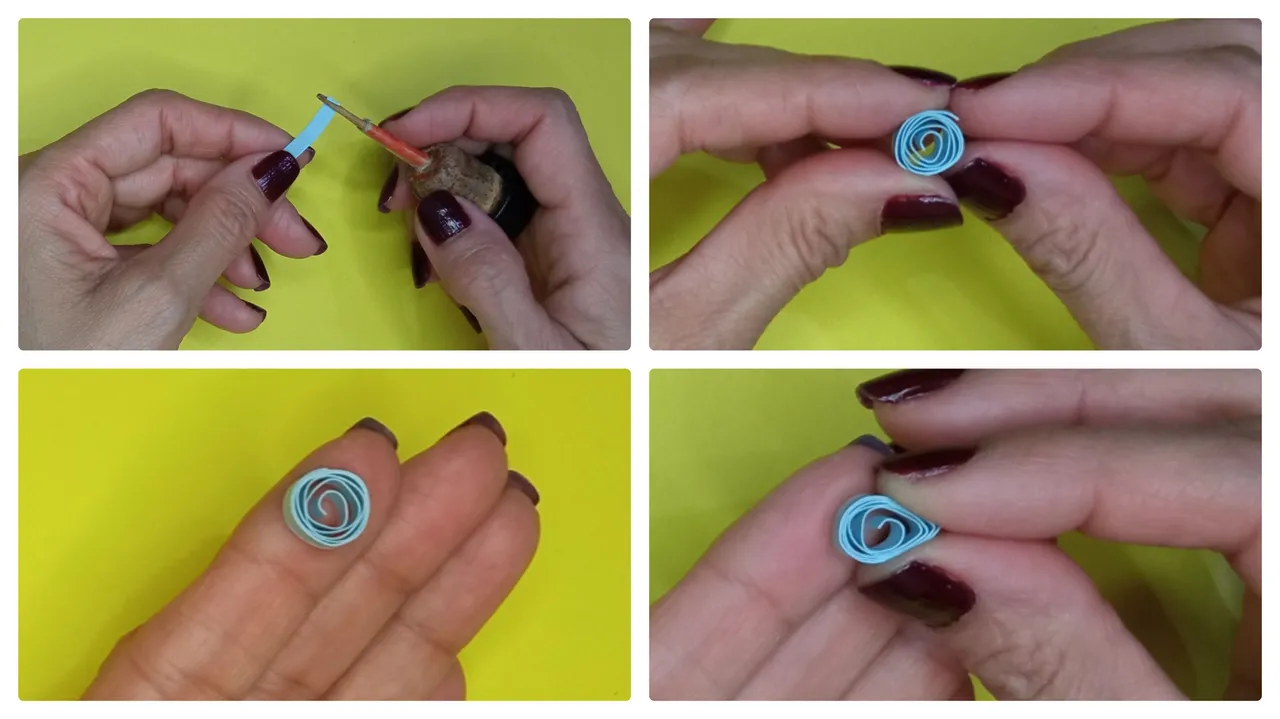
Paso 9
Después hacemos espirales, estas son muy sencillas de hacer, tomamos dos tiras de 6 cm cada una, colocamos una encima de la otra e introducimos en el enrollador damos cuatro vueltas y soltamos, luego hacemos una pequeña curva en la punta y pegamos con pega blanca y así ya tendremos una linda espiral.Step 9
Then we make spirals, these are very simple to make, we take two strips of 6 cm each, we place one on top of the other and introduce them in the winder, we make four turns and release, then we make a small curve at the tip and glue with white glue and so we will have a nice spiral.

Paso 10
Pegamos tiras en la columna del dragón, luego pegamos las espirales de manera alineada dentro del ala, estas le darán un toque lindo.Step 10
Paste strips on the column of the dragon, then glue the spirals in an aligned way inside the wing, these will give it a nice touch.
Paso 11
Para finalizar repetimos los mismos pasos para la bella dragona, y por supuesto usando tonos rosados y beige.Step 11
To finish we repeat the same steps for the beautiful dragon, and of course using pink and beige tones.
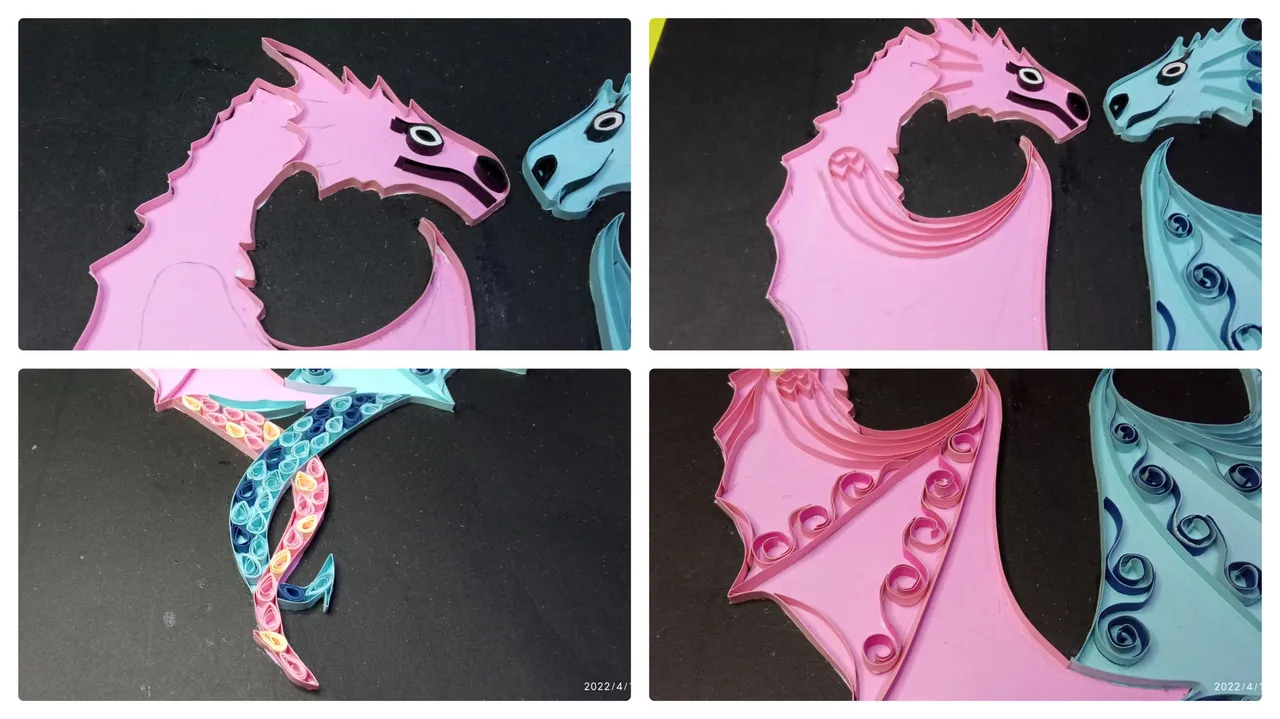
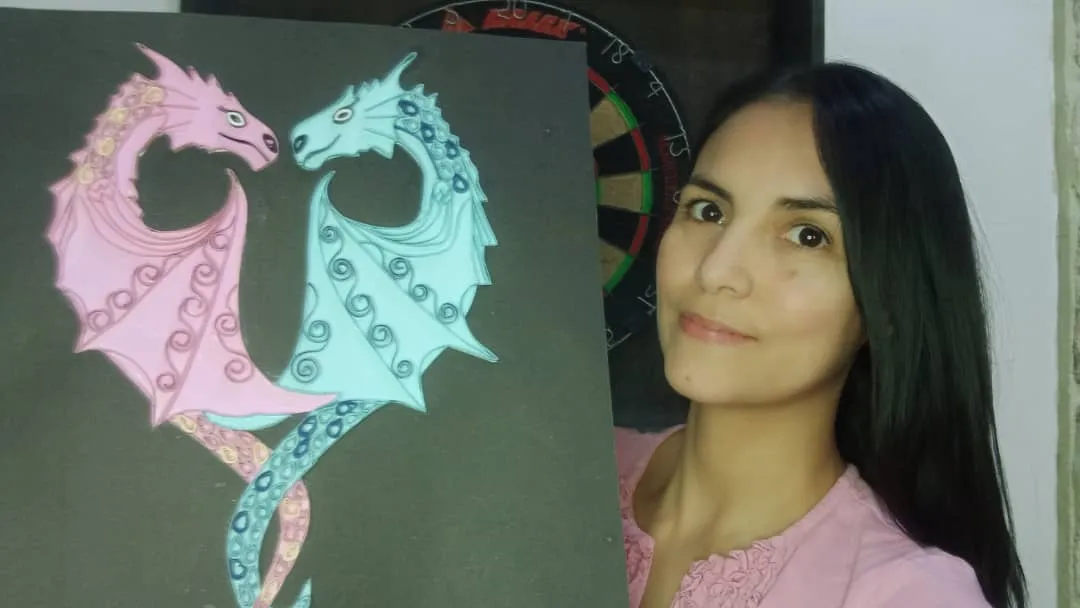
Listo amigos ya tenemos un bello cuadro de dragones enamorados, espero sea del agrado de todos.
Ready friends we already have a beautiful picture of dragons in love, I hope everyone likes it..
Todas las fotos son tomadas de mi teléfono Redmi 9, para los collages usé la aplicación collage maker y para la traducción usé el traductor Deepl.
All photos are taken from my Redmi 9 phone, for the collages I used the collage maker application and for the translation I used Deepl translator.