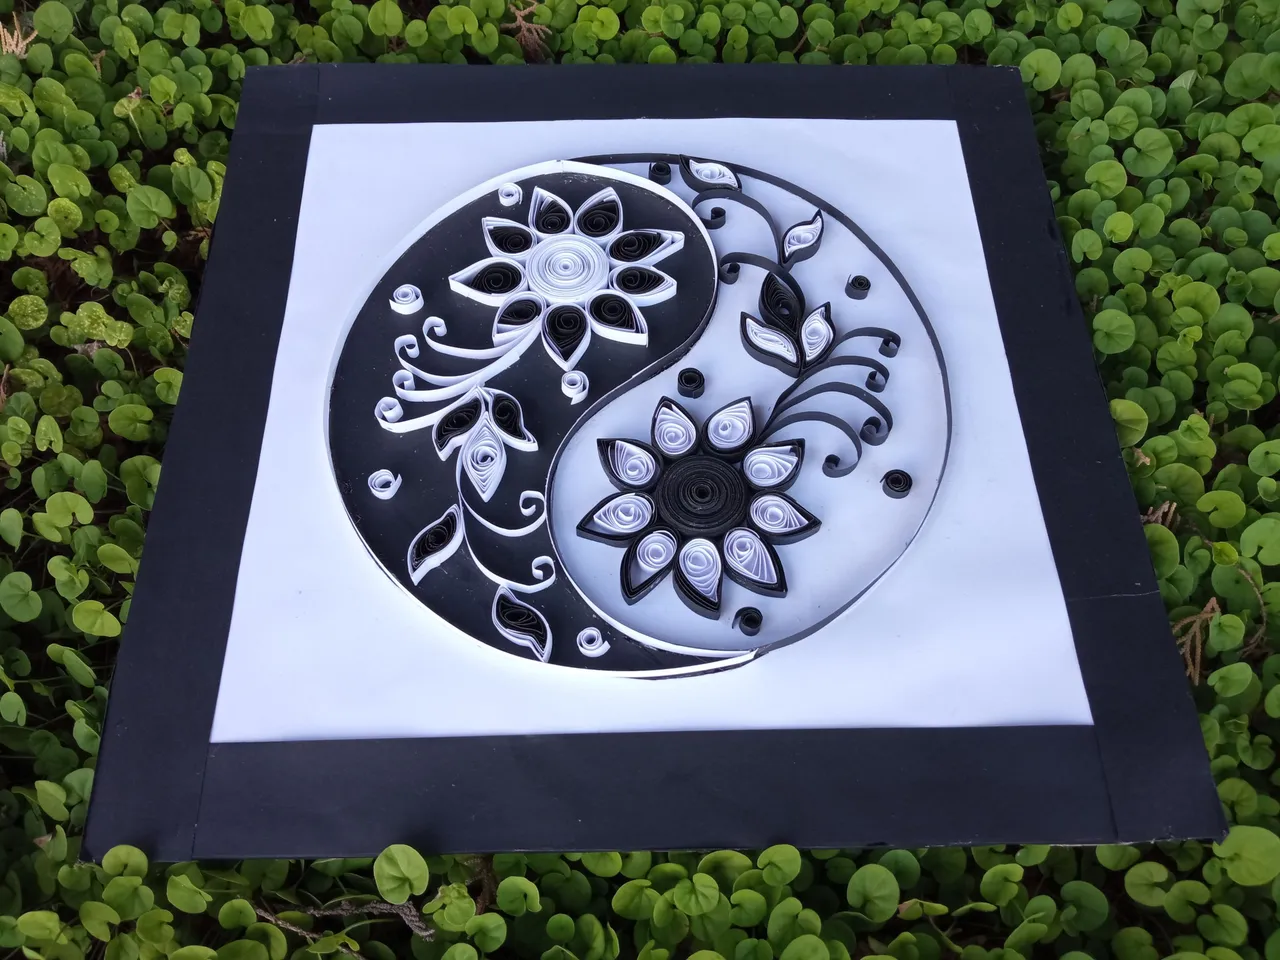
Hola queridos amigos, me complace estar nuevamente por acá para compartir con todos ustedes un bello cuadro inspirado en el Yin y Yang, como ya saben amo el arte del filigrana y me gusta crear cosas lindas con esta bella técnica que consiste en enrrollar tiras de papel, es una técnica muy sencilla y fácil de elaborar solo debemos tener dedicación y ganas para realizarla, todo lo que nos propongamos siempre saldrá bien si lo hacemos con cariño y entusiasmo.
Hello dear friends, I am pleased to be here again to share with you all a beautiful picture inspired by the Yin and Yang, as you know I love the art of filigree and I like to create beautiful things with this beautiful technique that consists of rolling strips of paper, it is a very simple and easy technique to develop only we must have dedication and desire to do it, everything we propose will always work out well if we do it with love and enthusiasm.
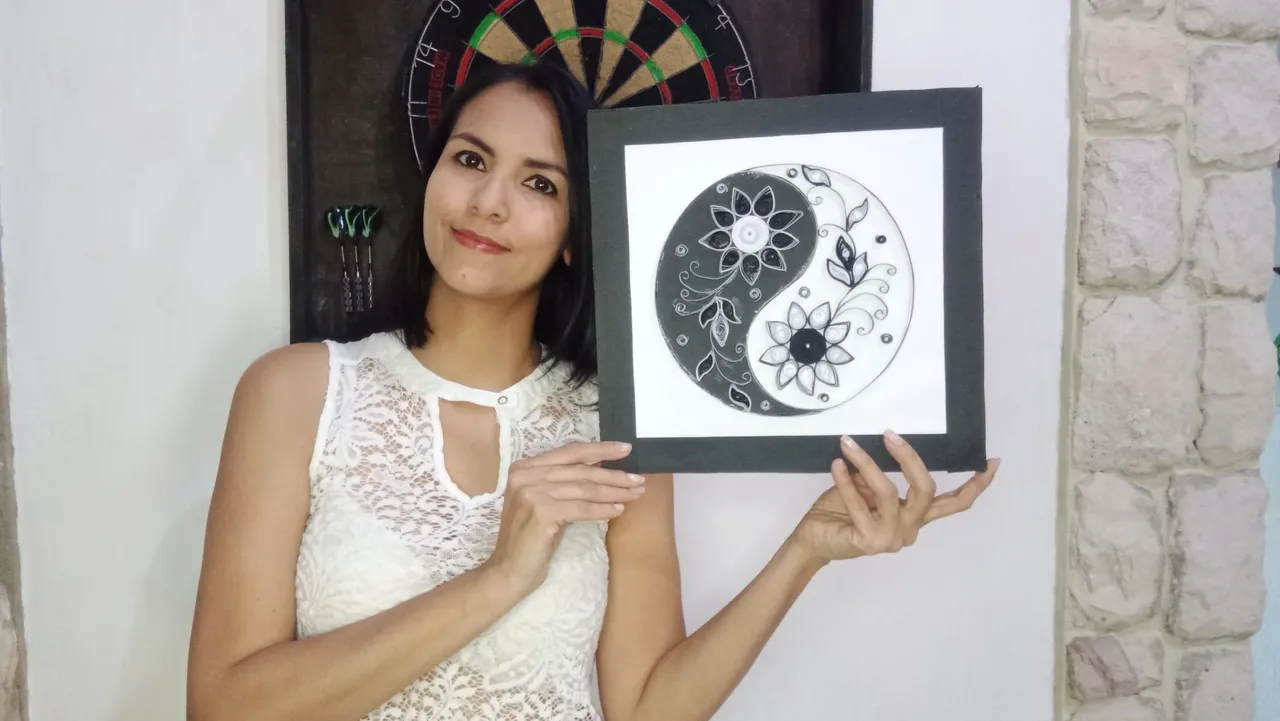
Como ya les dije me inspiré en el Yin y el Yang para esta creación, estás dos fuerzas se complementan para buscar un equilibrio perfecto. Por su lado el Yin es el aspecto oscuro, frío, femenino, tranquilo de la vida y el Yang es el aspecto, luminoso, cálido, masculino y activo de la vida. Este cuadro es un lindo detalle para adornar las paredes de nuestras casas, habitaciones, negocios, y también para las personas que son amantes del Feng shui. El Feng shui es una técnica muy usada para decorar los ambientes, busca el equilibrio de la energía de la persona.
As I told you I was inspired by Yin and Yang for this creation, these two forces complement each other to find a perfect balance. Yin is the dark, cold, feminine, calm aspect of life and Yang is the luminous, warm, masculine and active aspect of life. This picture is a nice detail to decorate the walls of our homes, rooms, businesses, and also for people who are lovers of Feng shui. Feng shui is a technique widely used to decorate environments, it seeks to balance the energy of the person.
Lo más importante a la hora de realizar este trabajo es que la mayoría de los materiales usados son muy económicos y fácil de conseguir en cualquier librería y por lo general los tenemos en casa de sobrantes de otros trabajos que ya hemos realizado. Así que vamos acompáñame a realizar este bello cuadro.
The most important thing when making this work is that most of the materials used are very inexpensive and easy to get in any bookstore and usually we have them at home from leftovers of other works we have already done. So come with me to make this beautiful painting.
Cuadro Yin y Yang
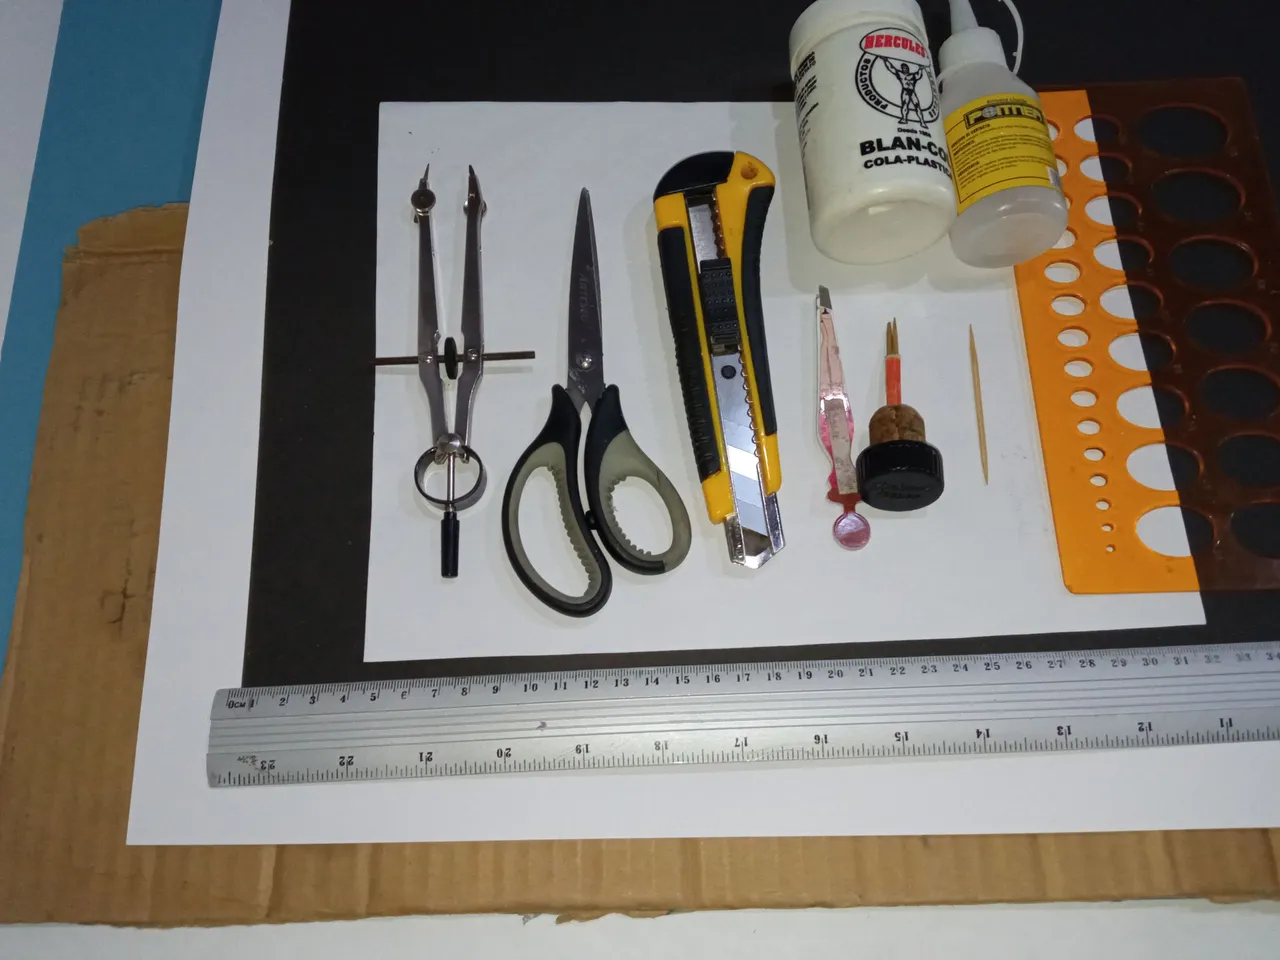
Materiales.
Yin and Yang Chart
Materials
Black and white cardboard Cardboard Compass Scissors Cutter Tweezers Rolling pin Stick Template White glue Liquid silicone Ruler Pencil Sheet
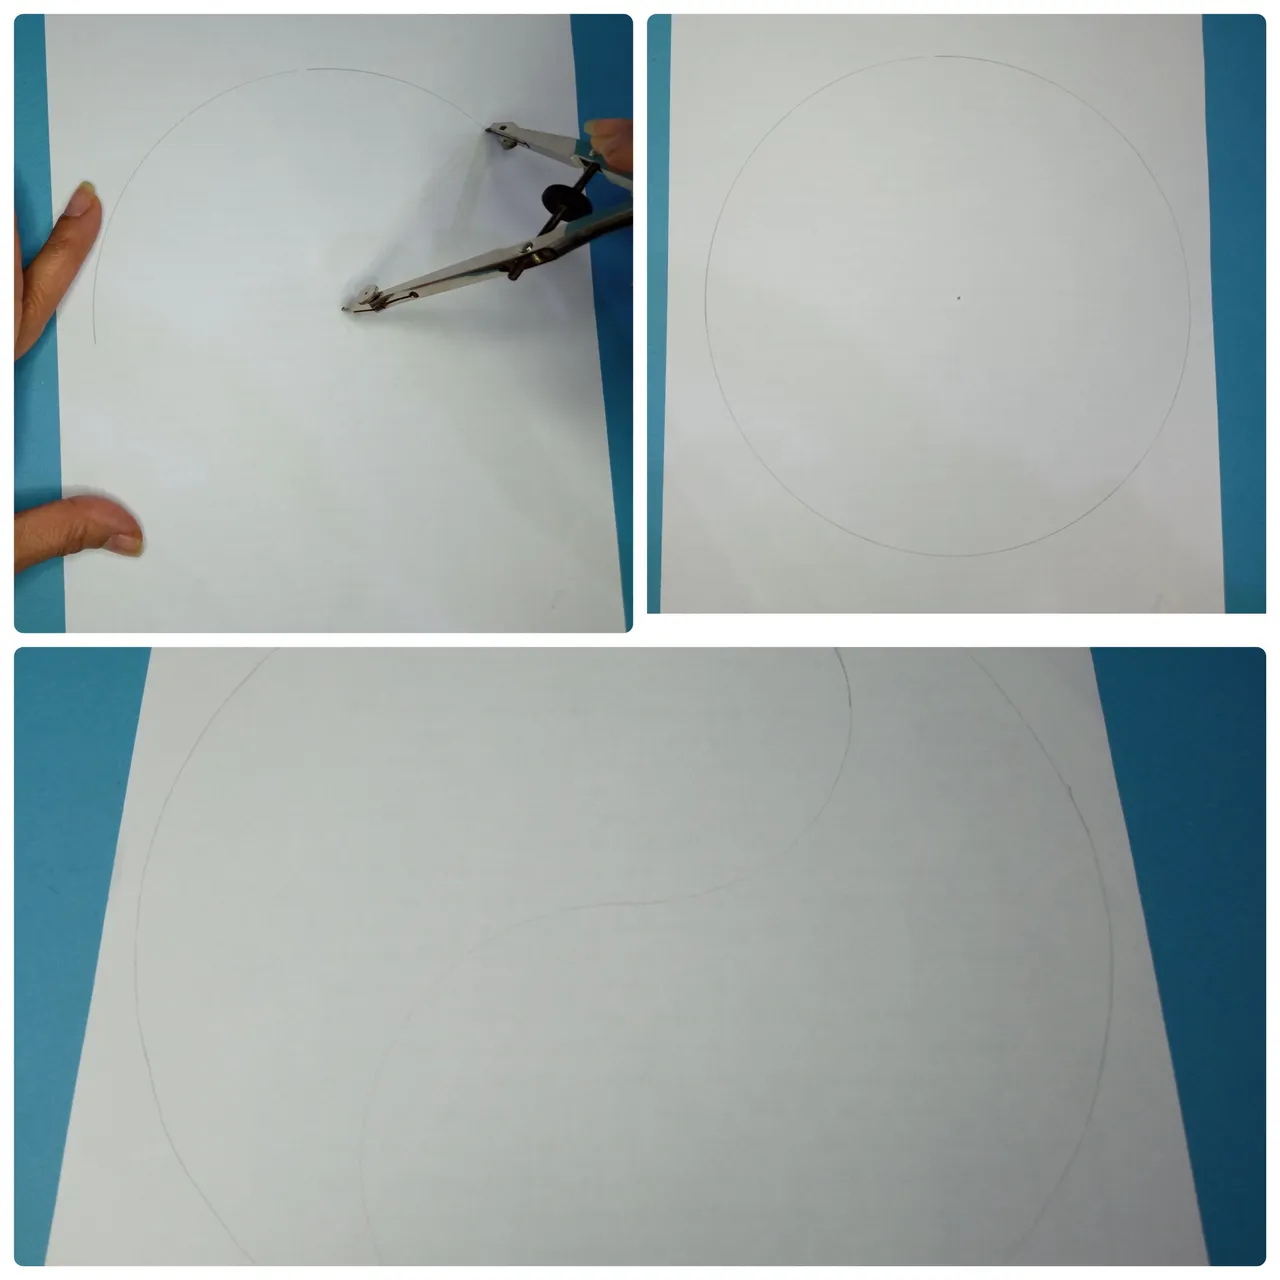
Paso 1
Lo primero que haremos es dibujar un circulo, este círculo en el yin y yang representa todo en el universo, lo haremos con un compás sobre la hoja, luego dibujamos la curva interna una S invertida que fluye, y procedemos a recortar las siluetas del Yin y Yang.Step 1
The first thing we will do is draw a circle, this circle in the yin and yang represents everything in the universe, we will do it with a compass on the sheet, then we draw the inner curve an inverted S that flows, and proceed to cut out the silhouettes of Yin and Yang.
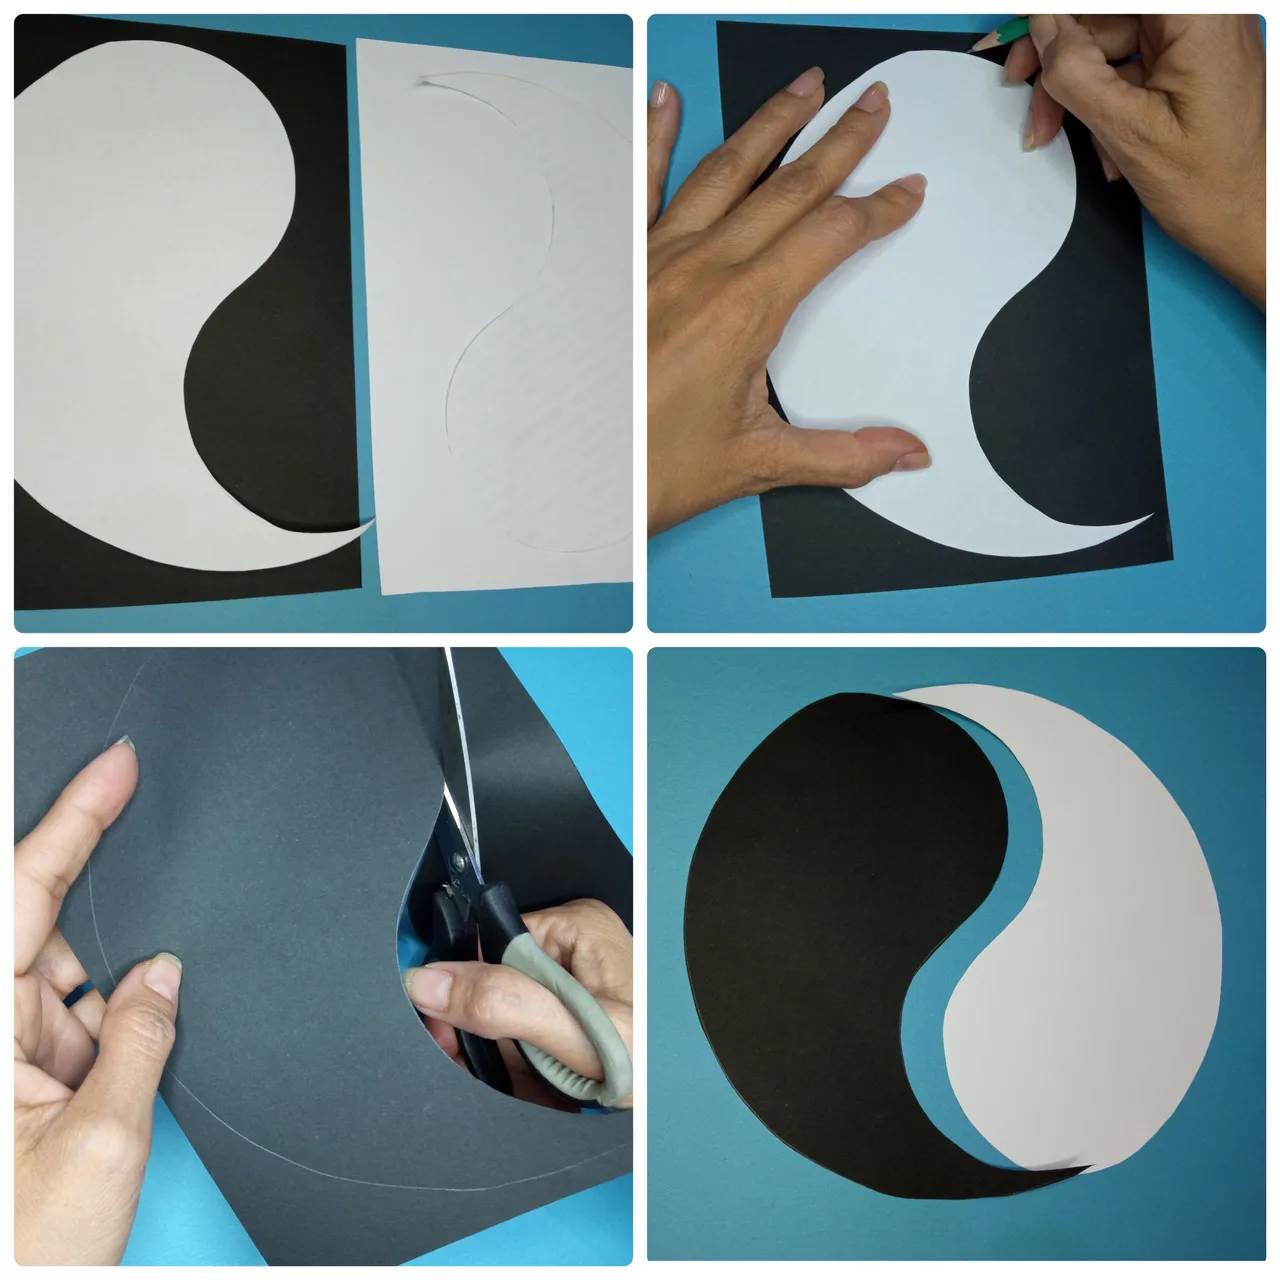
Paso 2
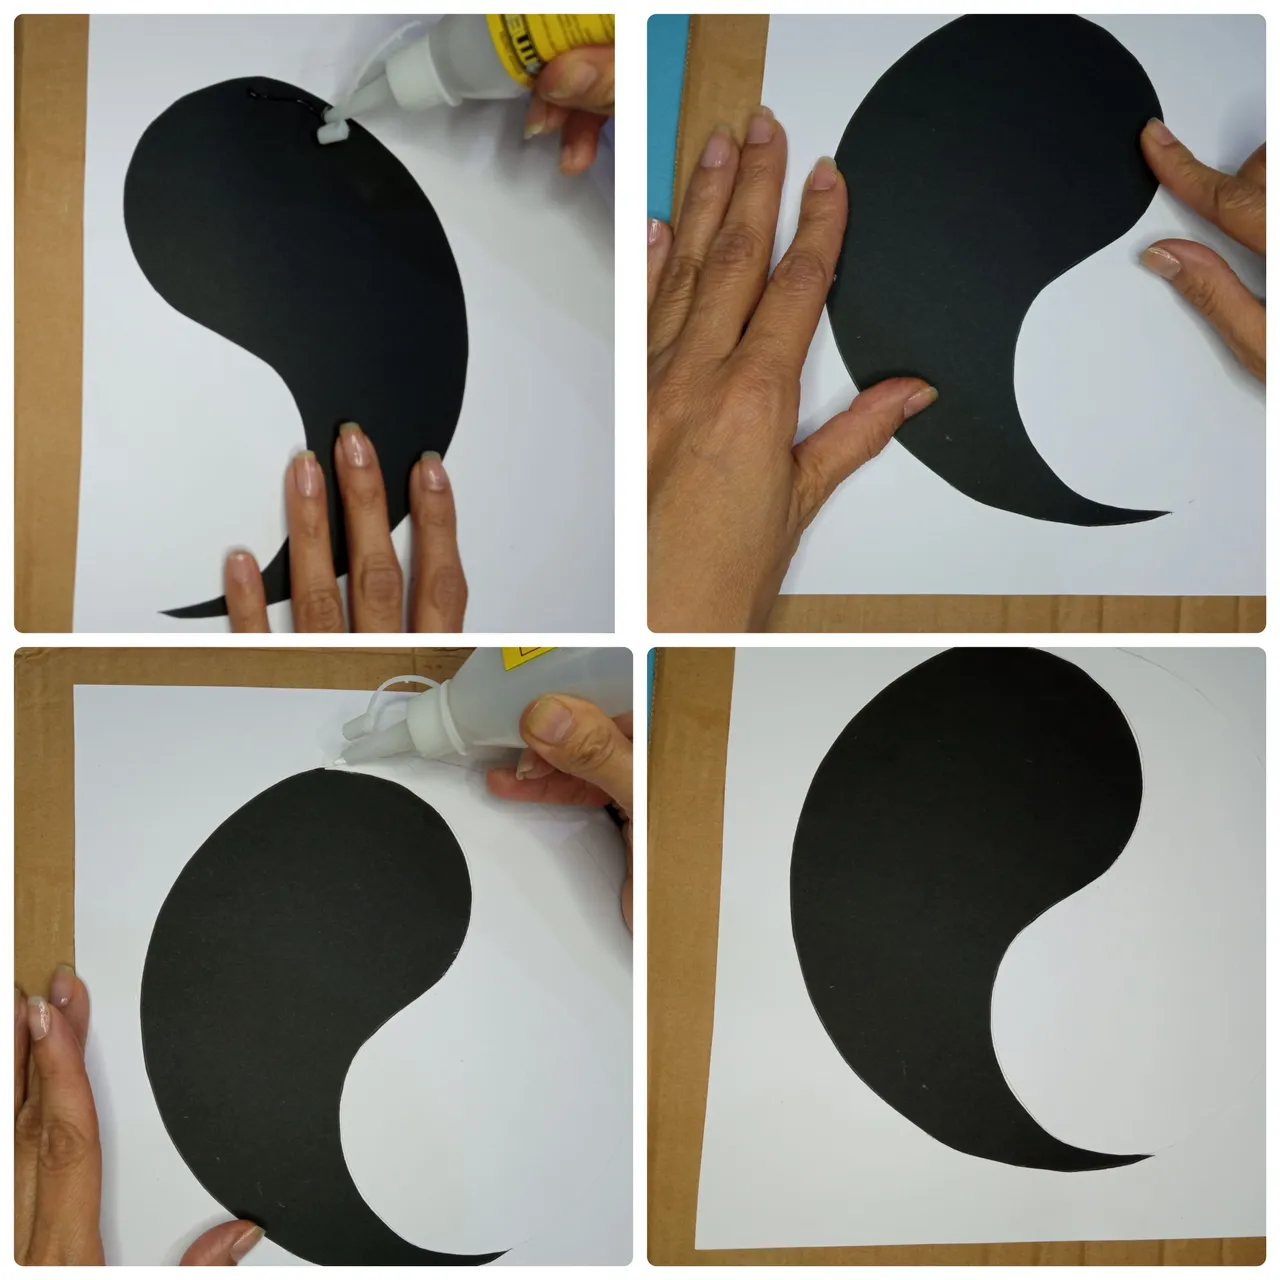
Luego transferimos los moldes de las mitades del Yin y yang a las cartulinas blanca y negra y recortamos con cuidado.Step 2
Then we transfer the molds of the Yin and yang halves to the black and white cardstock and carefully cut them out.
Paso 3
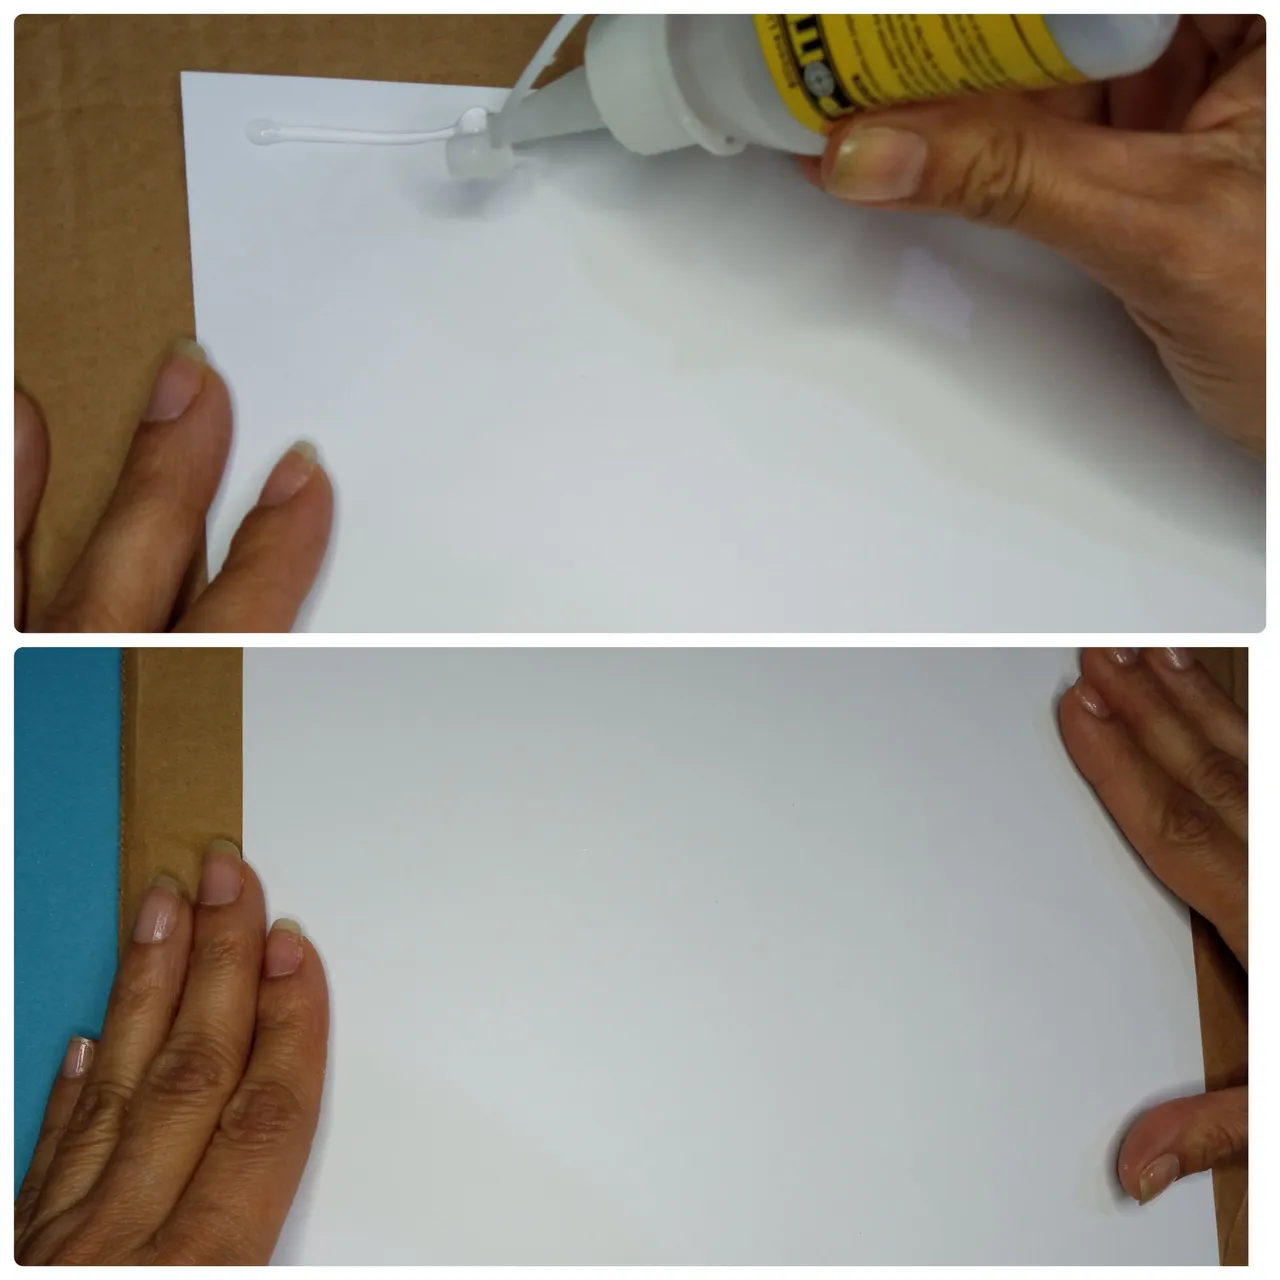
Para el cuadro usaremos un cartón, es bueno tener en casa cajas, así le daremos utilidad a la hora de hacer nuestras creaciones, y encima le pegamos una cartulina blanca de 25 cm por 25 cm, este servirá de soporte para nuestro yin y yang y así quedará mejor presentado nuestro cuadro.Step 3
For the picture we will use a cardboard, it is good to have boxes at home, so we will give utility when making our creations, and on top we glue a white cardboard of 25 cm by 25 cm, this will serve as a support for our yin and yang and so our picture will be better presented.
Paso 4
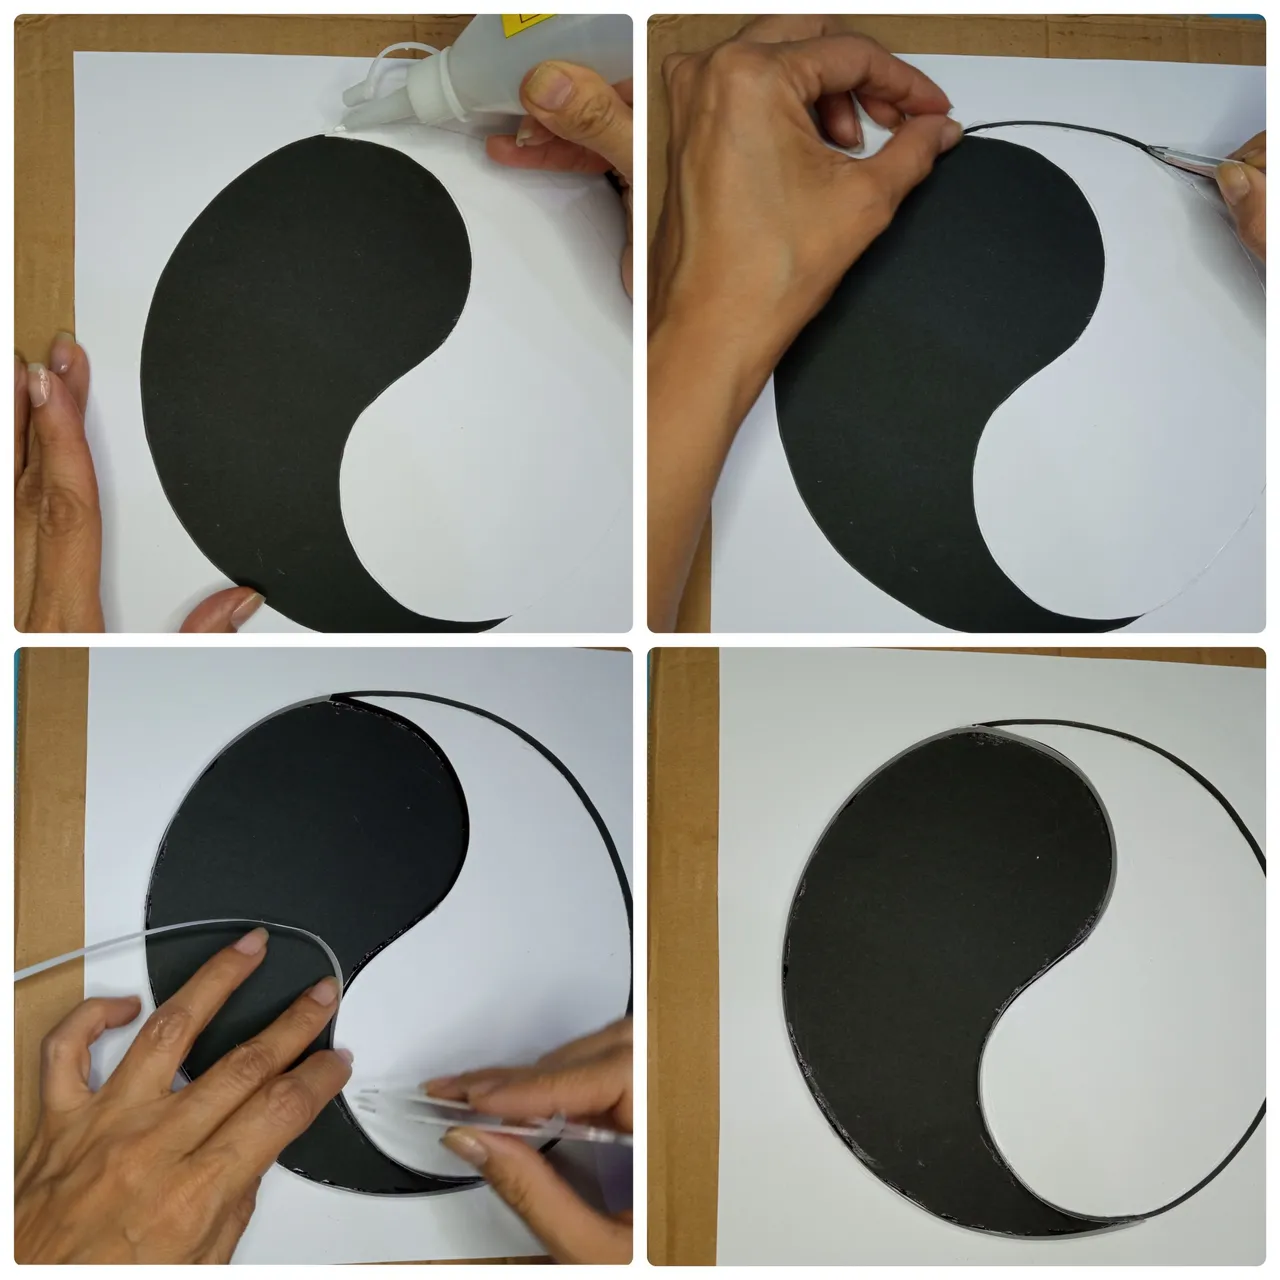
Luego con silicón líquido pegamos las figuras, el yin en el lado izquierdo que representa el lado oscuro y el yang en el lado derecho que representa el lado claro.Step 4
Then with liquid silicone we glue the figures, the yin on the left side representing the dark side and the yang on the right side representing the light side.
Paso 5
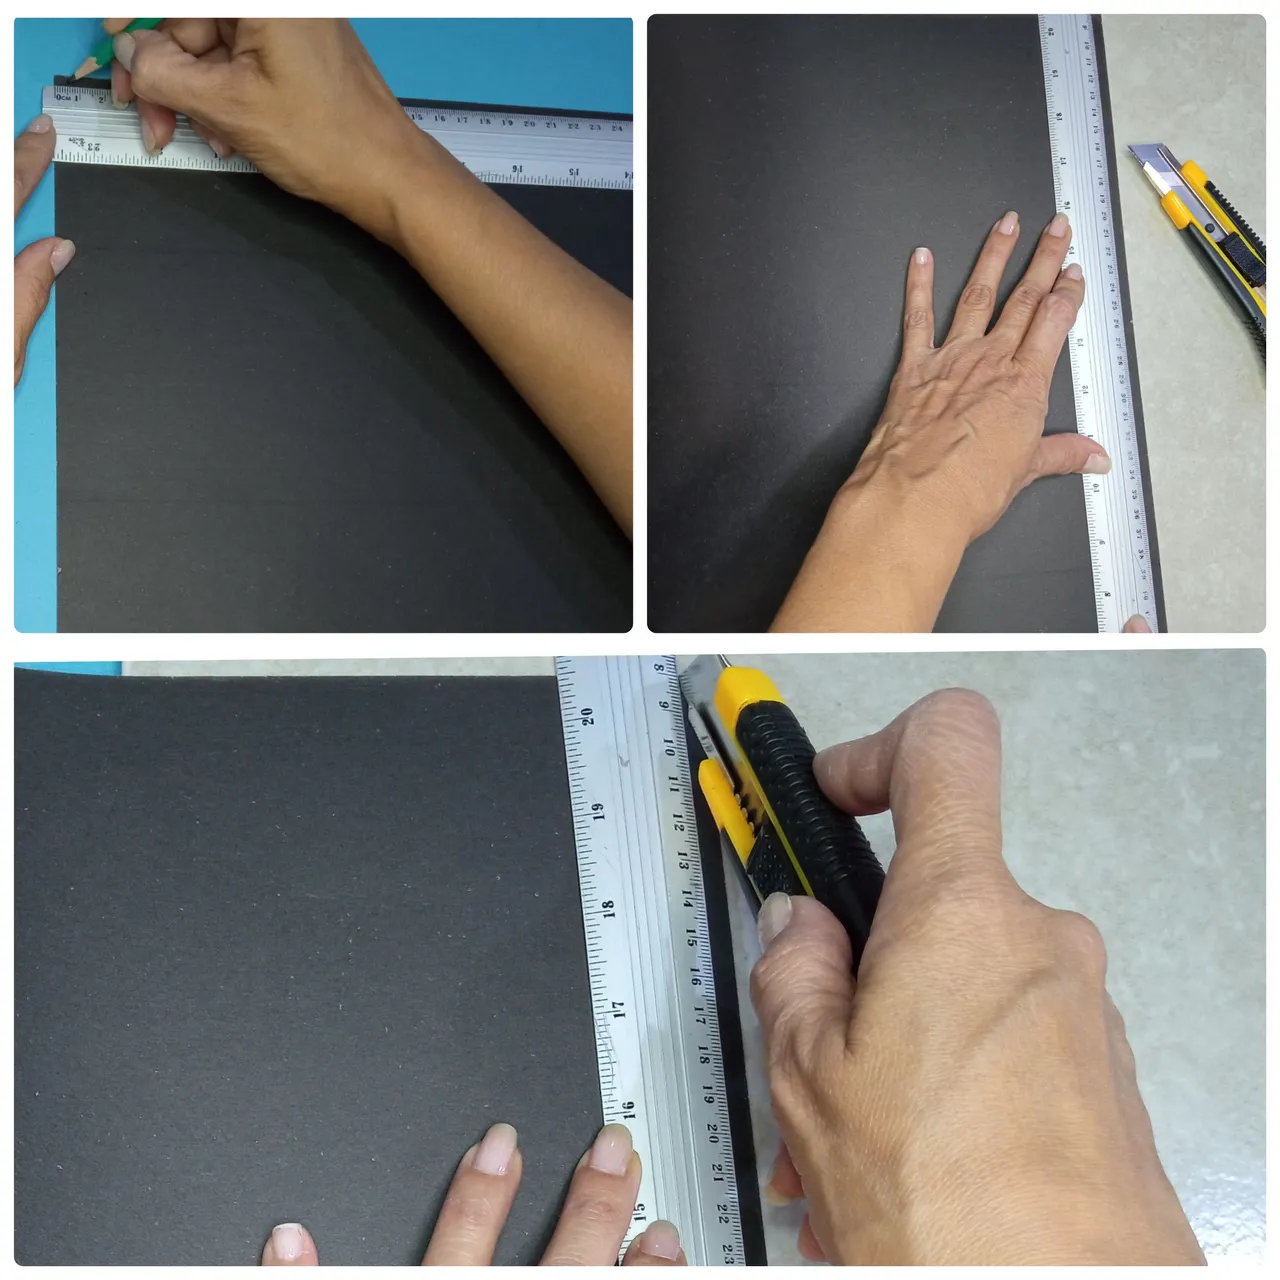
Para formar las tiras medimos en la cartulina 0,5cm por 40 cm, cortamos con el cúter las tiras que necesitamos, debemos tener mucho cuidado para no cortarnos, también podemos usar las que venden especialmente para elaborar la técnica del filigrana ya que estas vienen listas, pero siempre va a salir más económico hacerlas nosotros mismos con la cartulina, además es entretenido cortarlas.Step 5
To form the strips we measure 0.5 cm by 40 cm on the cardboard, we cut with the cutter the strips we need, we must be very careful not to cut ourselves, we can also use the ones that are sold especially to develop the filigree technique as these come ready, but it will always be cheaper to make them ourselves with the cardboard, plus it's fun to cut them.
Paso 6
Ahora comenzamos a bordear toda la figura con las tiras del color opuesto, es decir blanco en la parte negra y tiras negras en la parte blanca.Step 6
Now we start to border the whole figure with the strips of the opposite color, i.e. white on the black part and black strips on the white part.
Paso 7
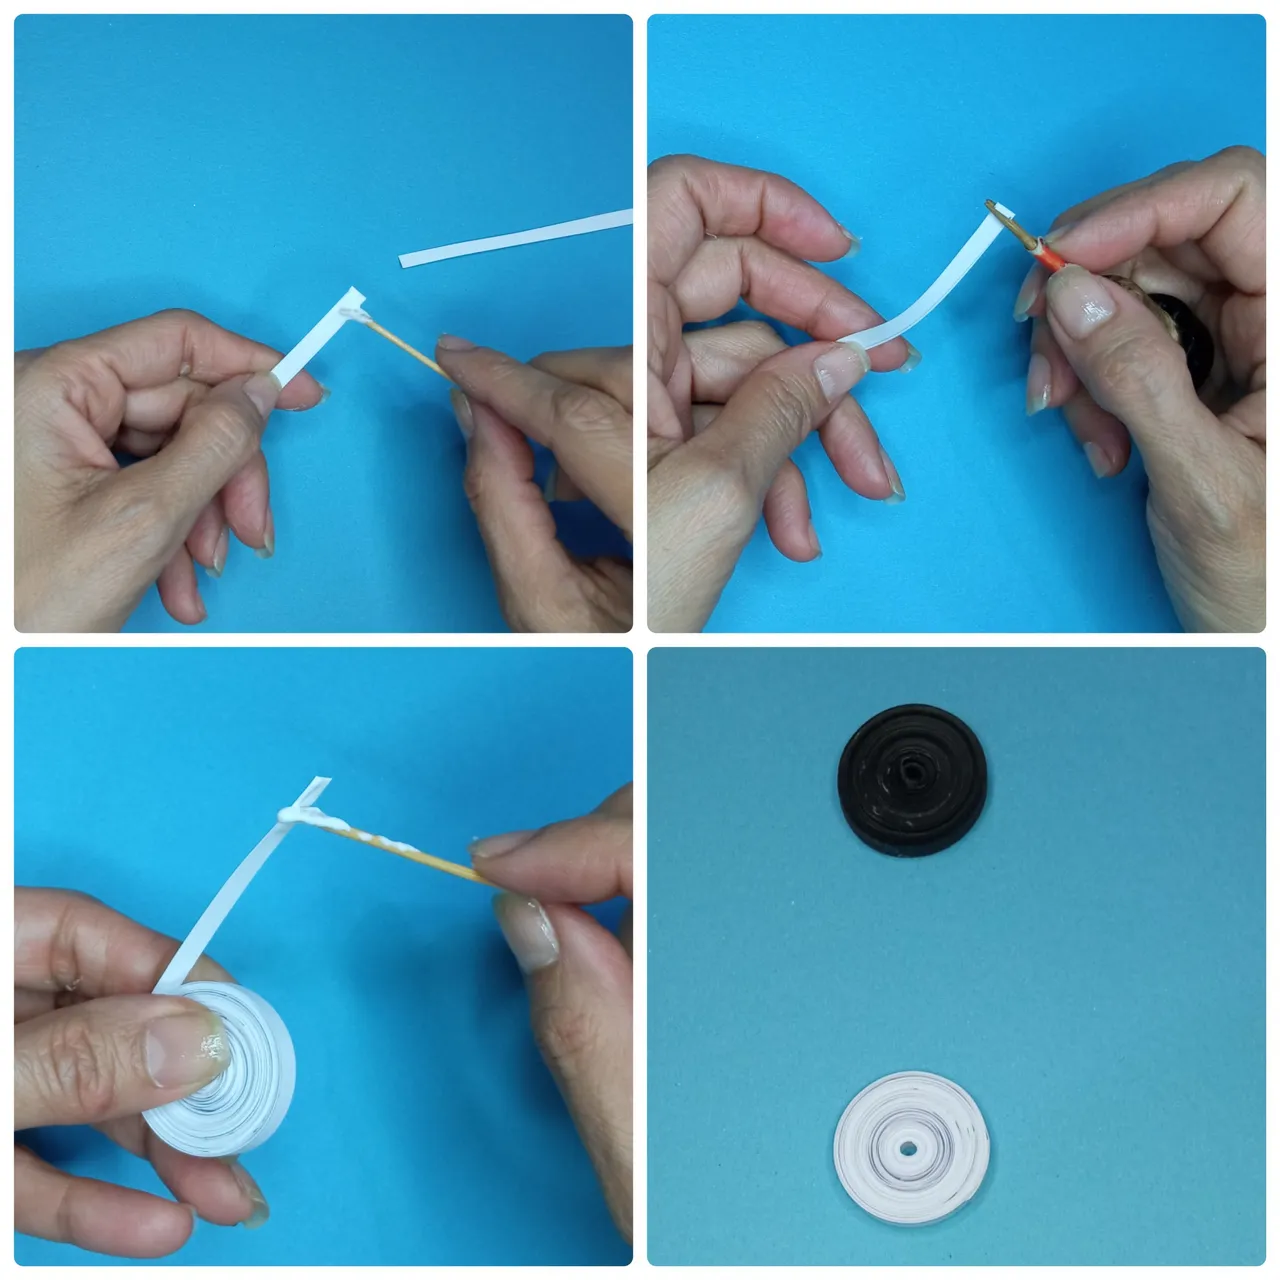
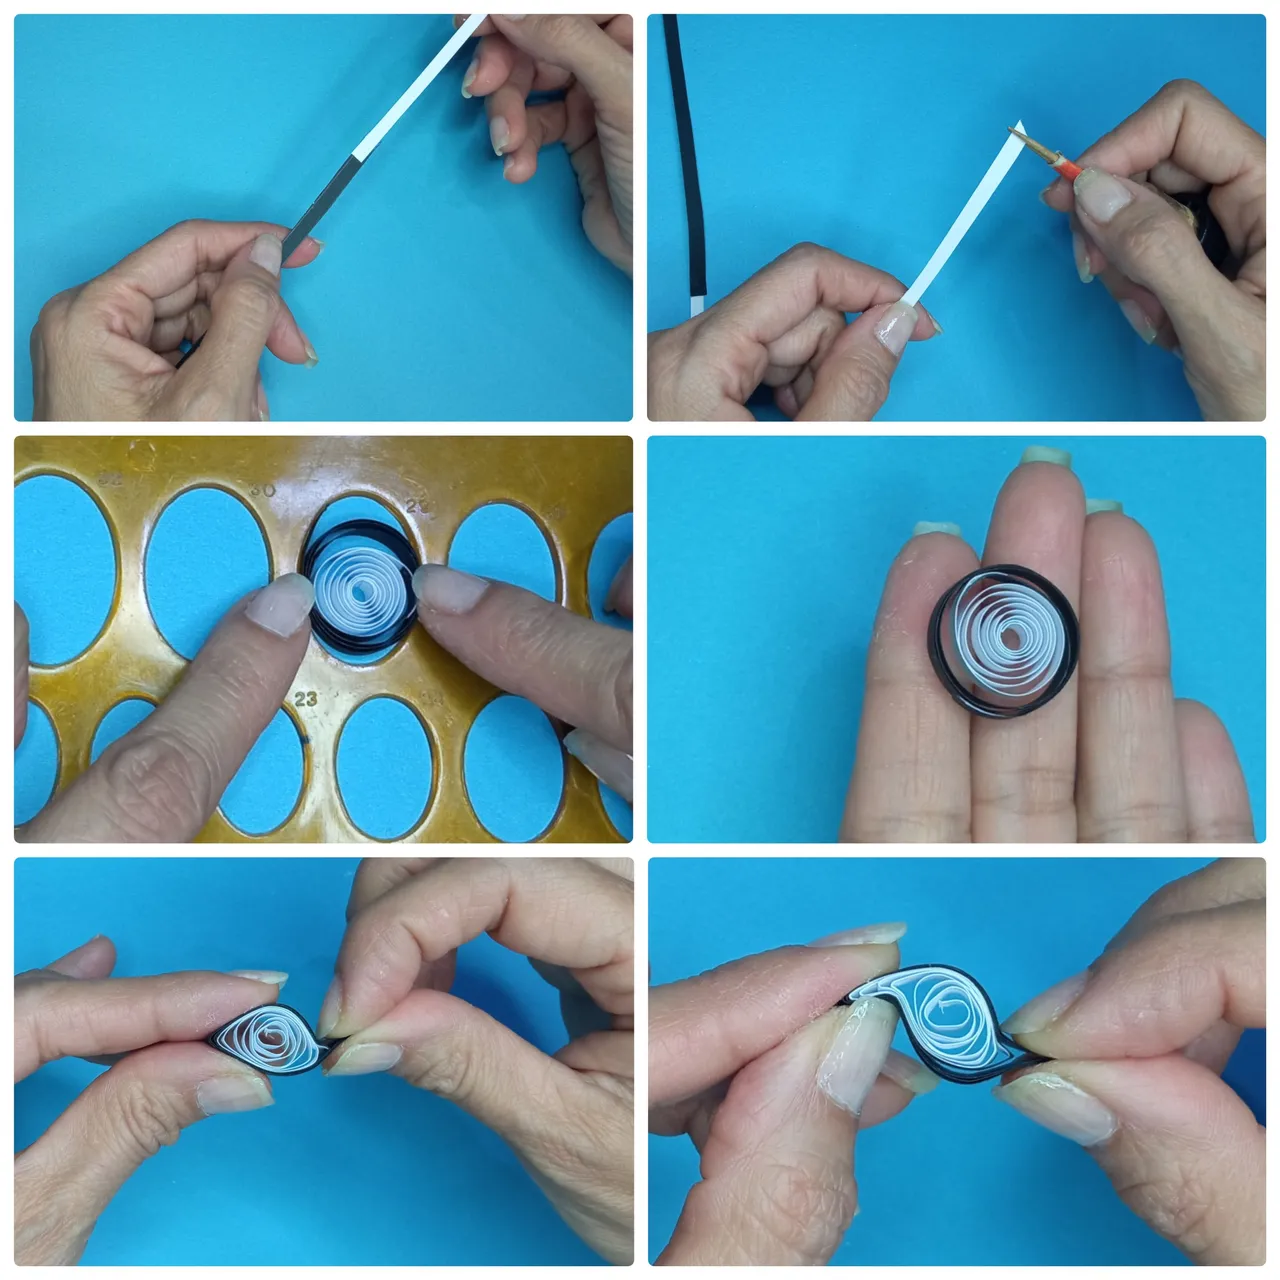
Para los círculos que van dentro del Yin y el yang, pegamos 4 tiras de 0,5 cm por 40 cm formando una tira larga, después introducimos la punta en el enrrollador y damos vueltas sobre ella misma hasta el final, luego pegamos la punta con pegamento blanco formando así un círculo cerrado, haremos dos círculos uno negro y otro blanco, el enrrollador es muy fácil de elaborar, solo necesitamos un corcho, dos palitos y tirro.Step 7
For the circles that go inside the Yin and yang, we glue 4 strips of 0.5 cm by 40 cm forming a long strip, then we introduce the tip in the roller and turn over itself until the end, then we glue the tip with white glue thus forming a closed circle, we will make two circles one black and one white, the roller is very easy to develop, we only need a cork, two sticks and tirro.
Paso 8
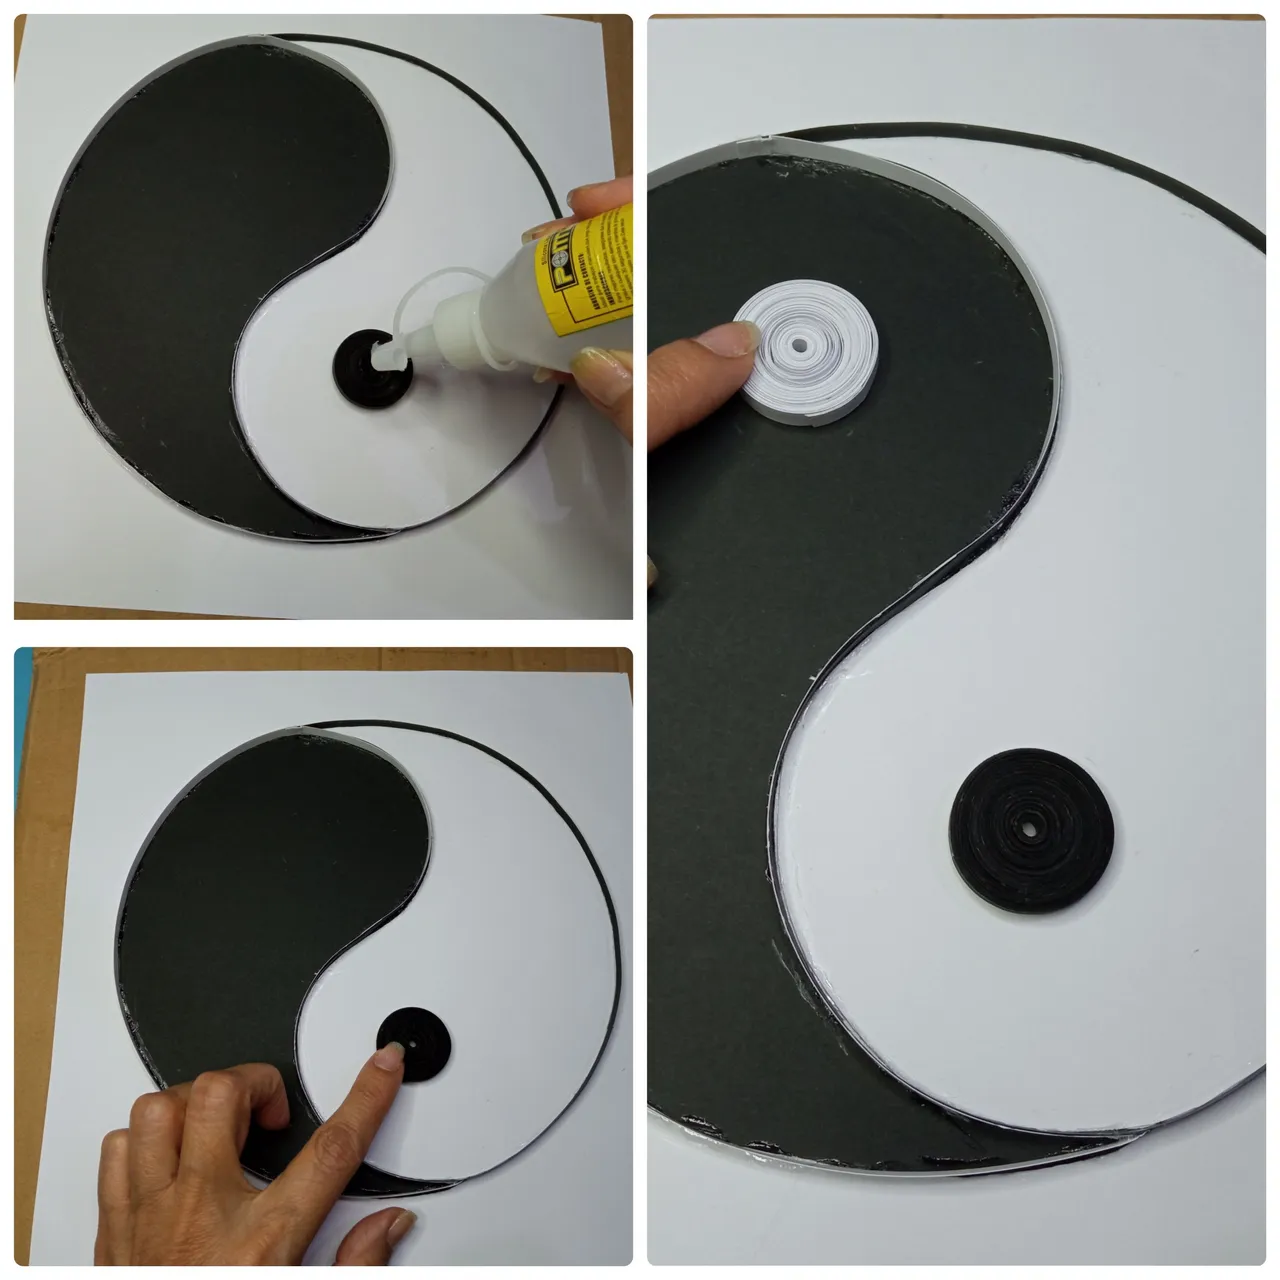
Ahora pegamos los círculos, cada uno en el lado opuesto es decir, el círculo blanco en la parte negra (Yin) y el círculo negro en la parte blanca que es el (Yang), esto debido a que siempre va a existir una parte de cada uno dentro del otro.Step 8
Now we glue the circles, each one on the opposite side, that is to say, the white circle on the black part (Yin) and the black circle on the white part which is the (Yang), this because there will always be a part of each one inside the other.
Paso 9
Mostraremos como hacer un círculo abierto que es una de las formas básicas más usadas en el filigrana ya que a partir del círculo abierto se hacen muchas otras formas, tomamos una tira y la introducimos en el enrrollador, damos vueltas sobre ella misma hasta el final, luego lo colocamos en la plantilla y soltamos, después pegamos en la punta con pegamento blanco, si no tenemos plantilla podemos hacer un círculo del tamaño deseado en un papel y este servirá de guía para los círculos, es una buena idea para que todos queden del mismo tamaño.Step 9
We will show how to make an open circle which is one of the most used basic forms in the filigree since from the open circle many other forms are made, we take a strip and introduce it in the coiler, we turn over itself until the end, then place it on the template and release, then glue the tip with white glue, if we do not have a template we can make a circle of the desired size on a piece of paper and this will serve as a guide for the circles, it is a good idea so that they are all the same size.

Paso 10
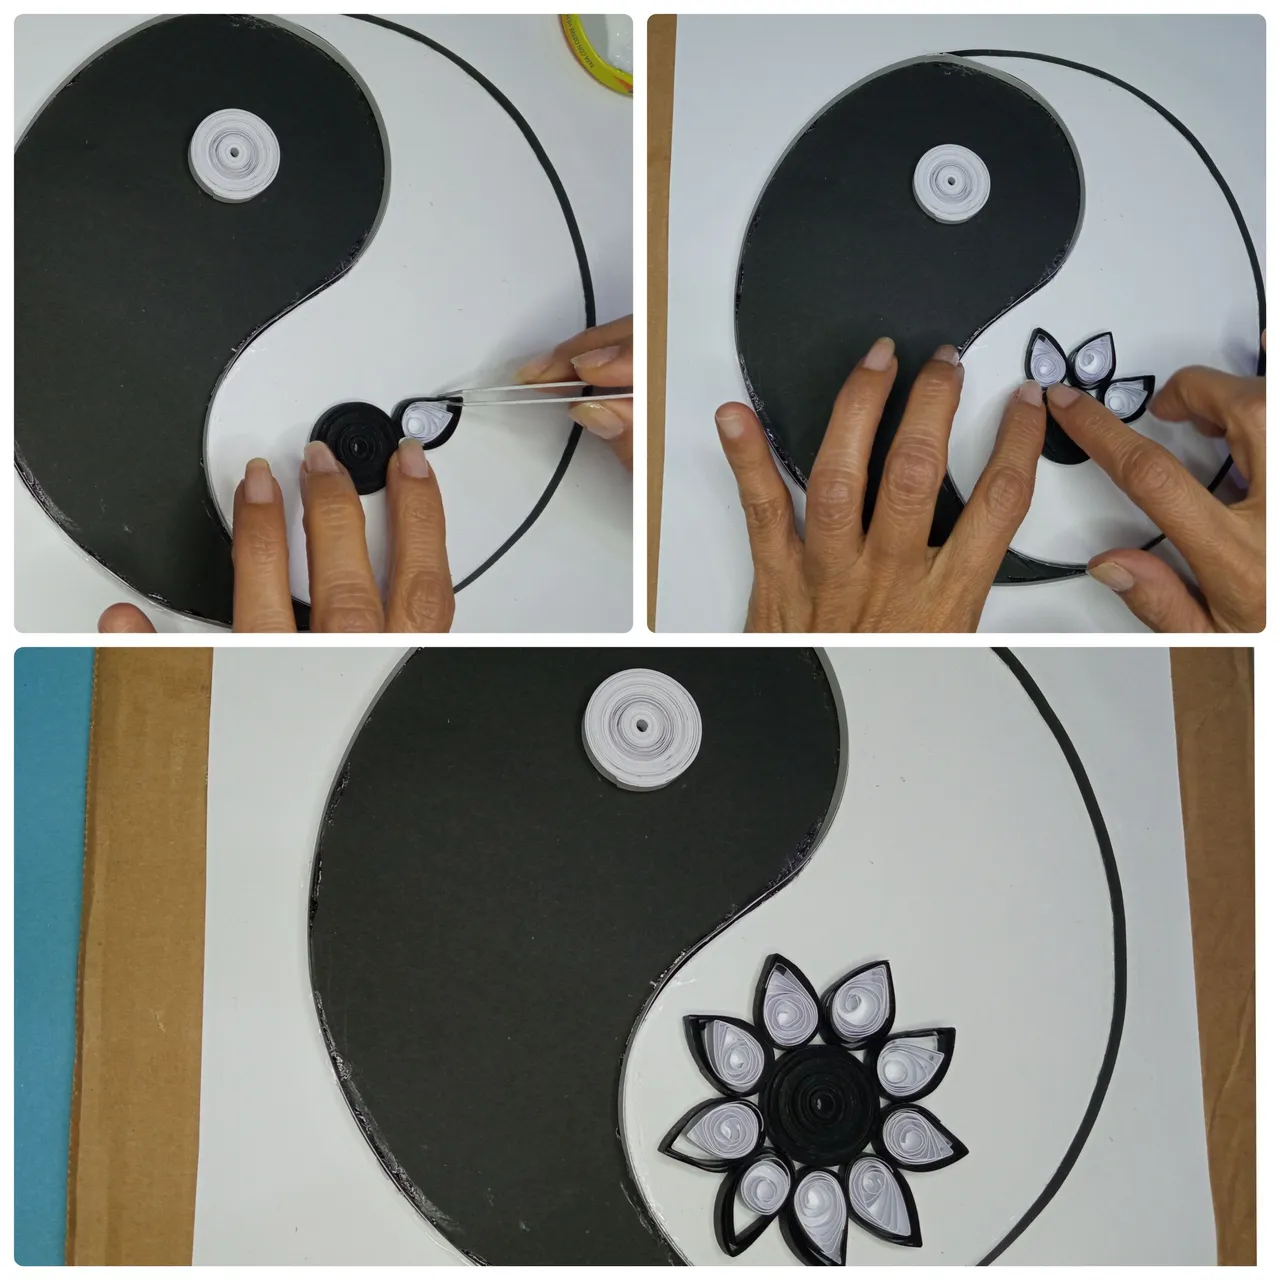
Ahora pegamos dos tiras una negra y otra blanca, formamos un círculo abierto y luego con los dedos índice y pulgar de la mano derecha hacemos presión para formar un gota.Step 10
Now we glue two strips together, one black and one white, form an open circle and then with the index finger and thumb of the right hand we press to form a drop.

Paso 11
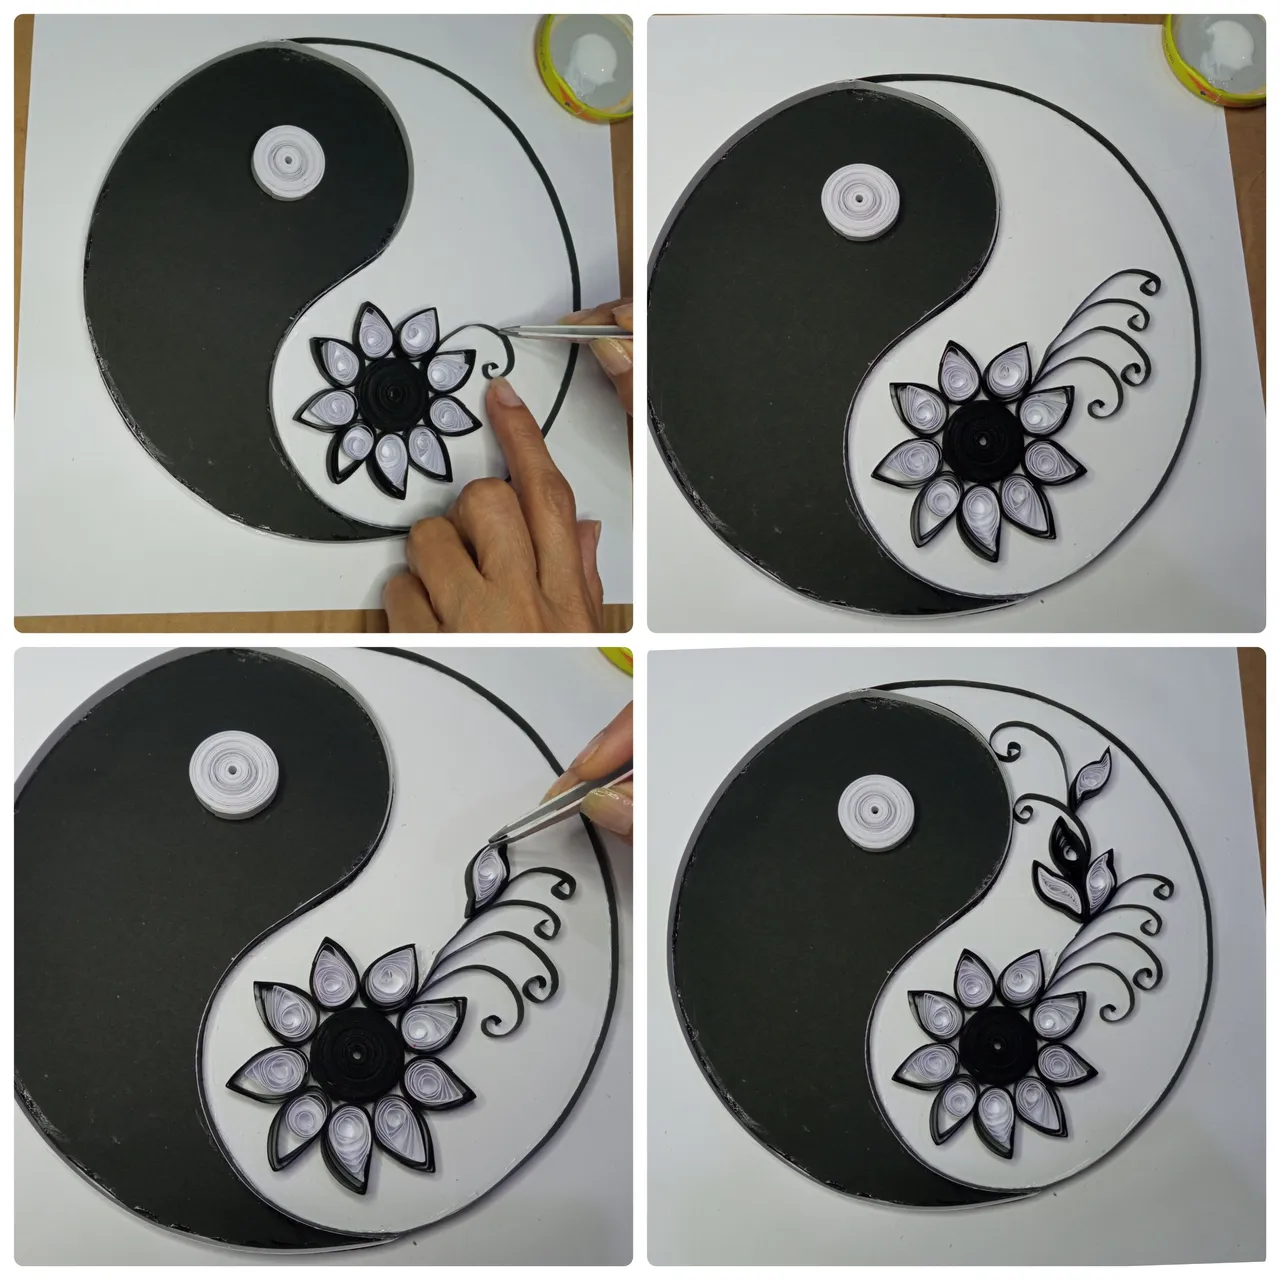
Pegamos las gotas alrededor del círculo formando una hermosa flor, iniciando por el lado yang.Step 11
Paste the drops around the circle forming a beautiful flower, starting from the yang side.
Paso 12
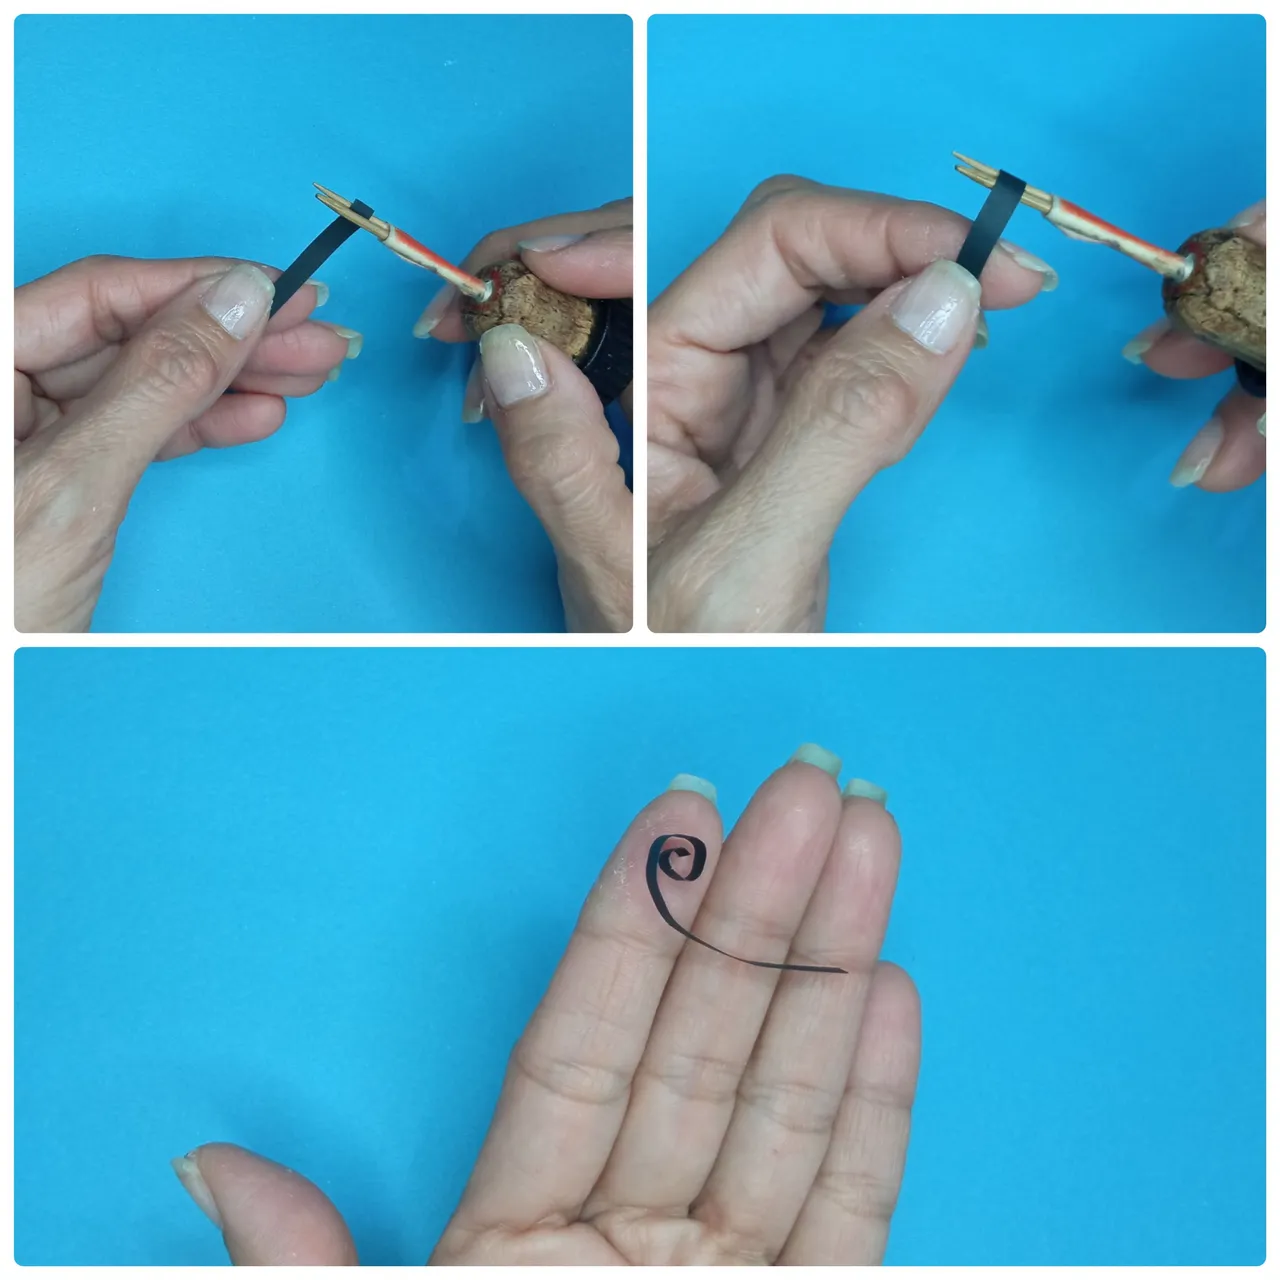
Ahora haremos espirales, son muy sencillas de elaborar, tomamos un pedacito de tira y enrollamos en la punta del enrrollador, luego lo soltamos y ya tendremos una linda espiral.Step 12
Now we will make spirals, they are very easy to make, we take a small piece of strip and roll it on the end of the winder, then we release it and we will have a nice spiral.
Paso 13
Luego haremos hojas, partiendo de un círculo abierto, tomamos el círculo abierto y con los dedos índice y pulgar de ambas manos hacemos un pequeño giro dando forma de hoja.Step 13
Then we will make leaves, starting from an open circle, we take the open circle and with the index finger and thumb of both hands we make a small twist giving a leaf shape.
Paso 14
Seguimos adornando el lado del Yang pegando espirales y luego hojas, después nuevamente espirales.Step 14
We continue decorating the Yang side by gluing spirals and then leaves, then spirals again.
Paso 15
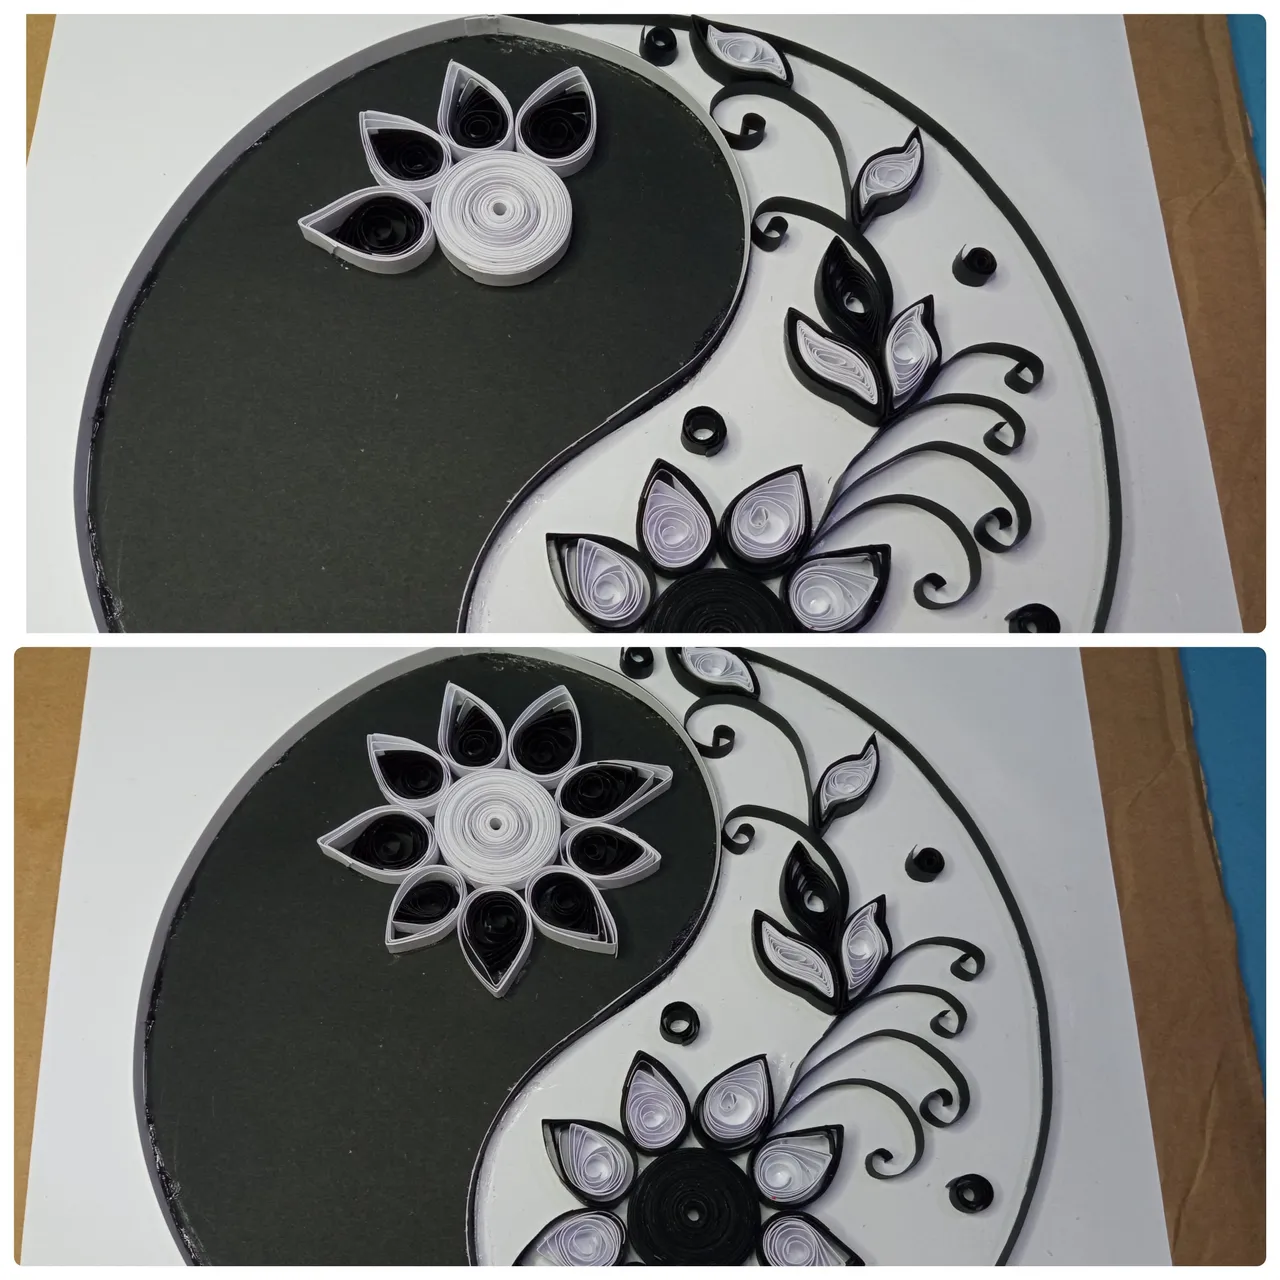
Para terminar el lado del Yang haremos unos pequeños círculos de una manera muy fácil, solo enrrollamos y soltamos, los pegamos para darle un toque más lindo, comenzamos a elaborar el lado derecho yin de la misma manera, comenzando con armar la flor.Step 15
To finish the Yang side we will make some small circles in a very easy way, just roll and release, glue them to give it a nicer touch, we begin to elaborate the right yin side in the same way, starting with assembling the flower.
Paso 16
Terminamos el lado izquierdo el yin colocando espirales y hojas, de la misma manera que lo hicimos con el lado derecho yang.Step 16
We finish the left side yin by placing spirals and leaves, in the same way as we did with the right side yang.
Paso 17
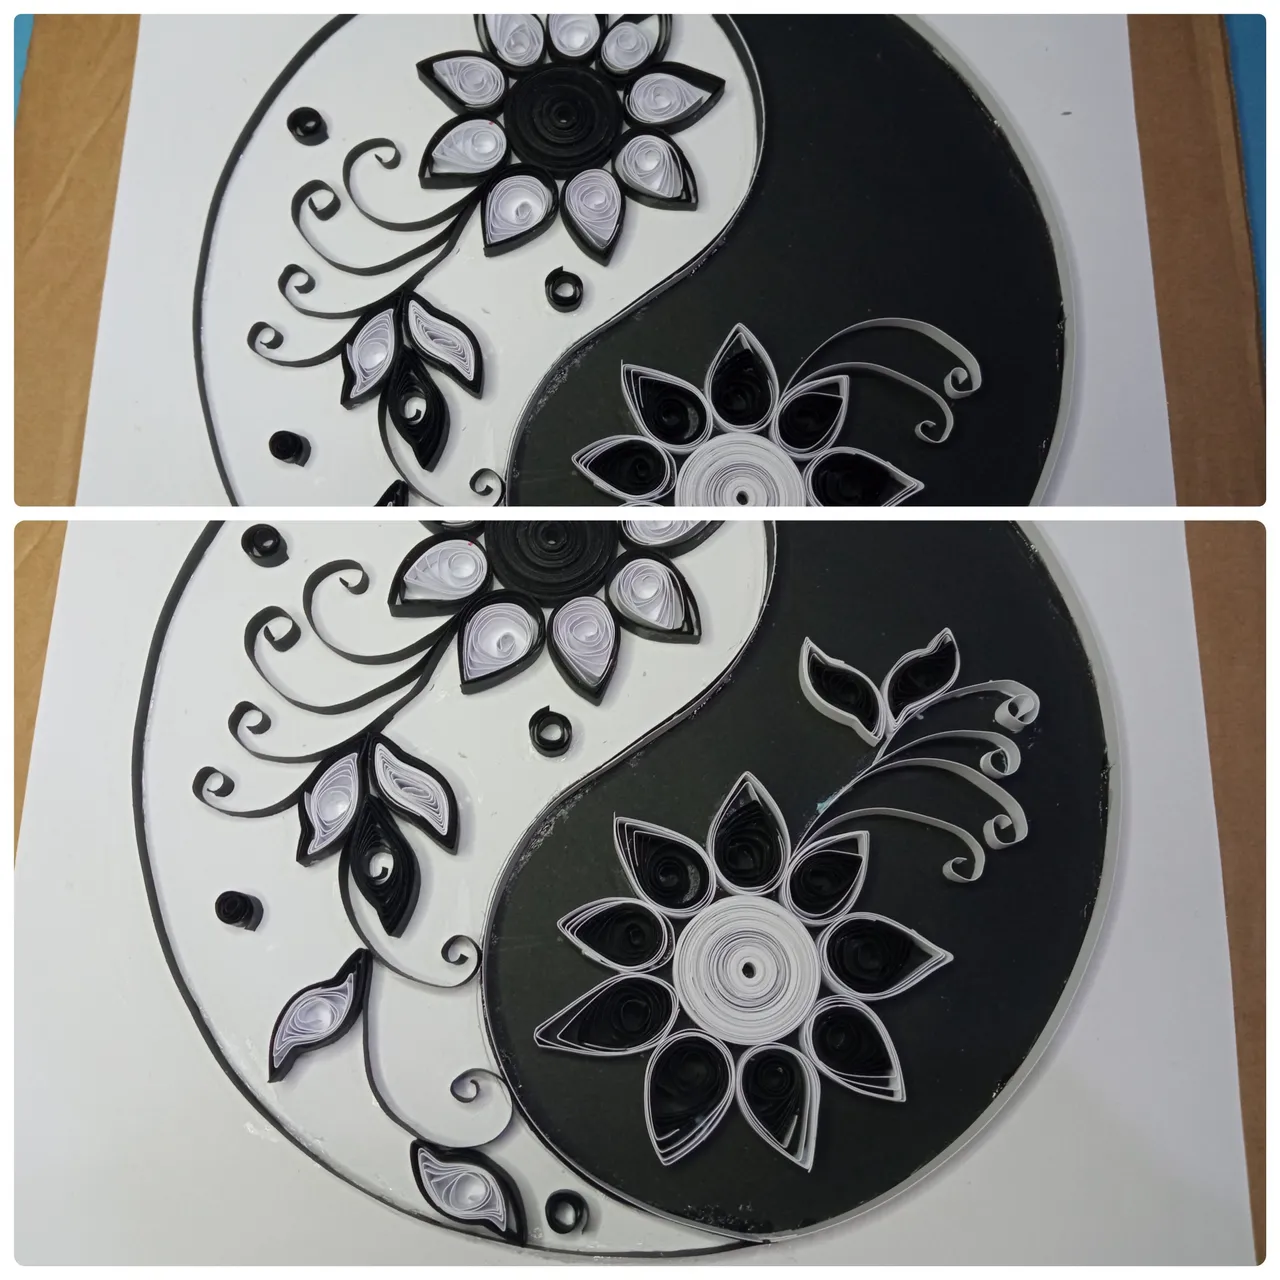
Cortamos cartulina negra para elaborar el marco del cuadro y lo pegamos con silicón, esto le dará una presentación linda y pulcra al cuadro.Step 17
Cut black cardboard to make the frame of the picture and glue it with silicone, this will give a nice and neat presentation to the picture.
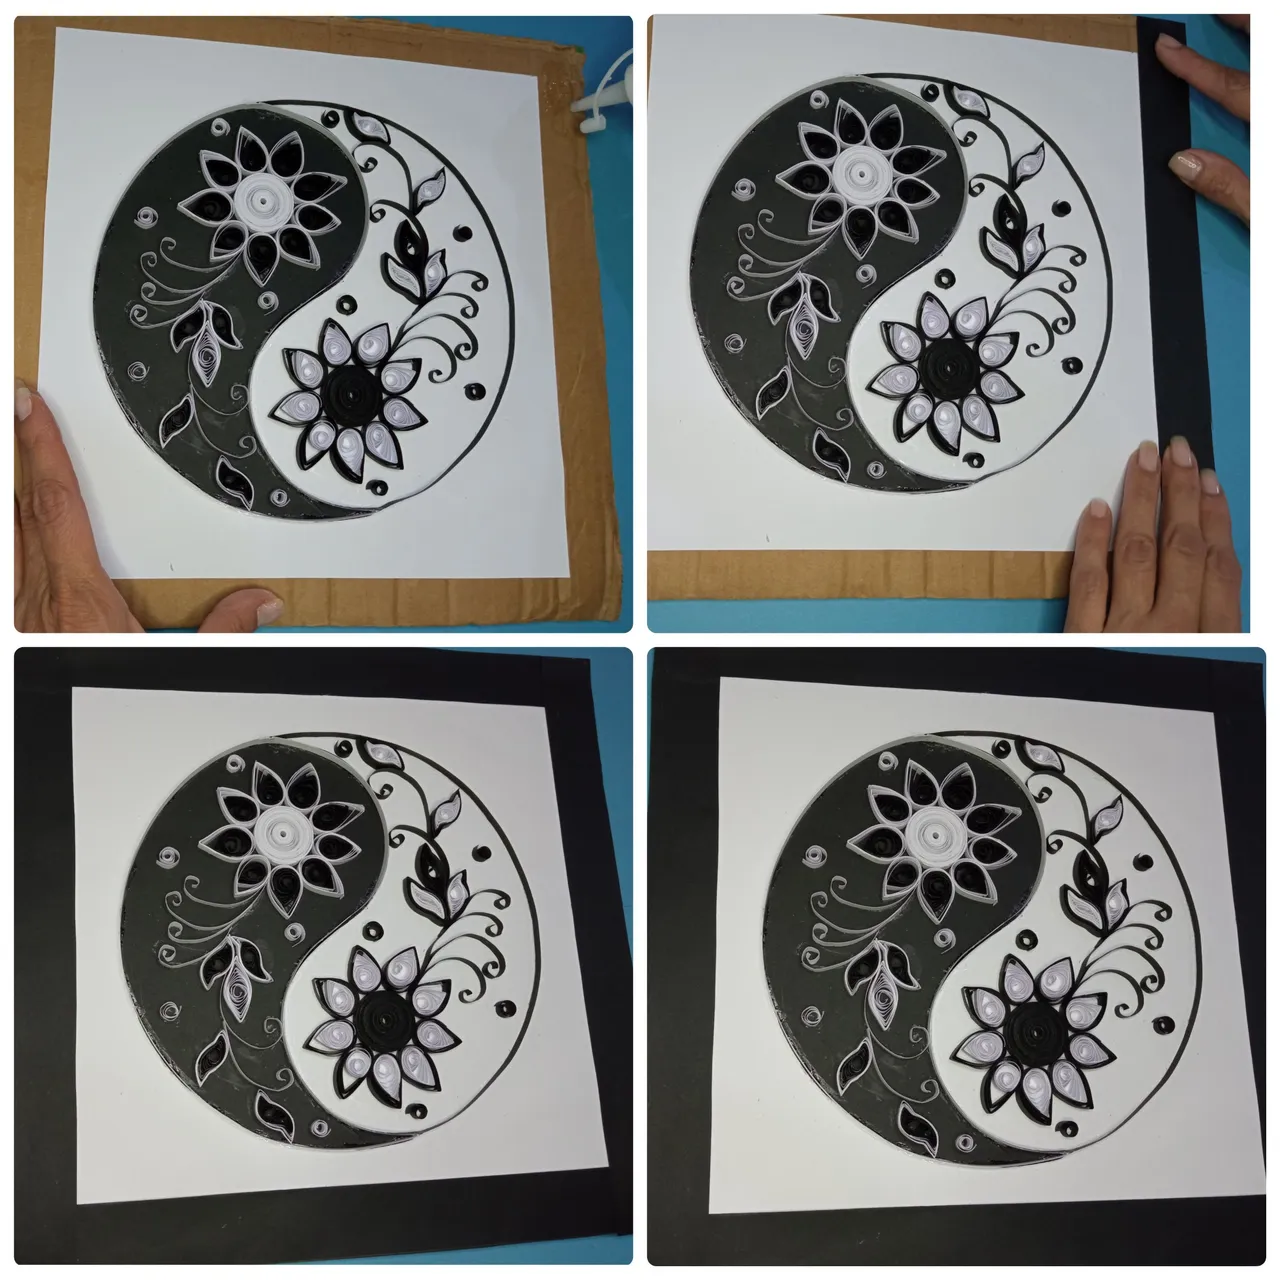
Paso 18
Para finalizar el cuadro cortamos tiras negras y las pegamos con silicón líquido, esto lo haremos para que no se note el cartón.Step 18
To finish the frame we cut black strips and glue them with liquid silicone, this we will do so that the cardboard is not noticed.

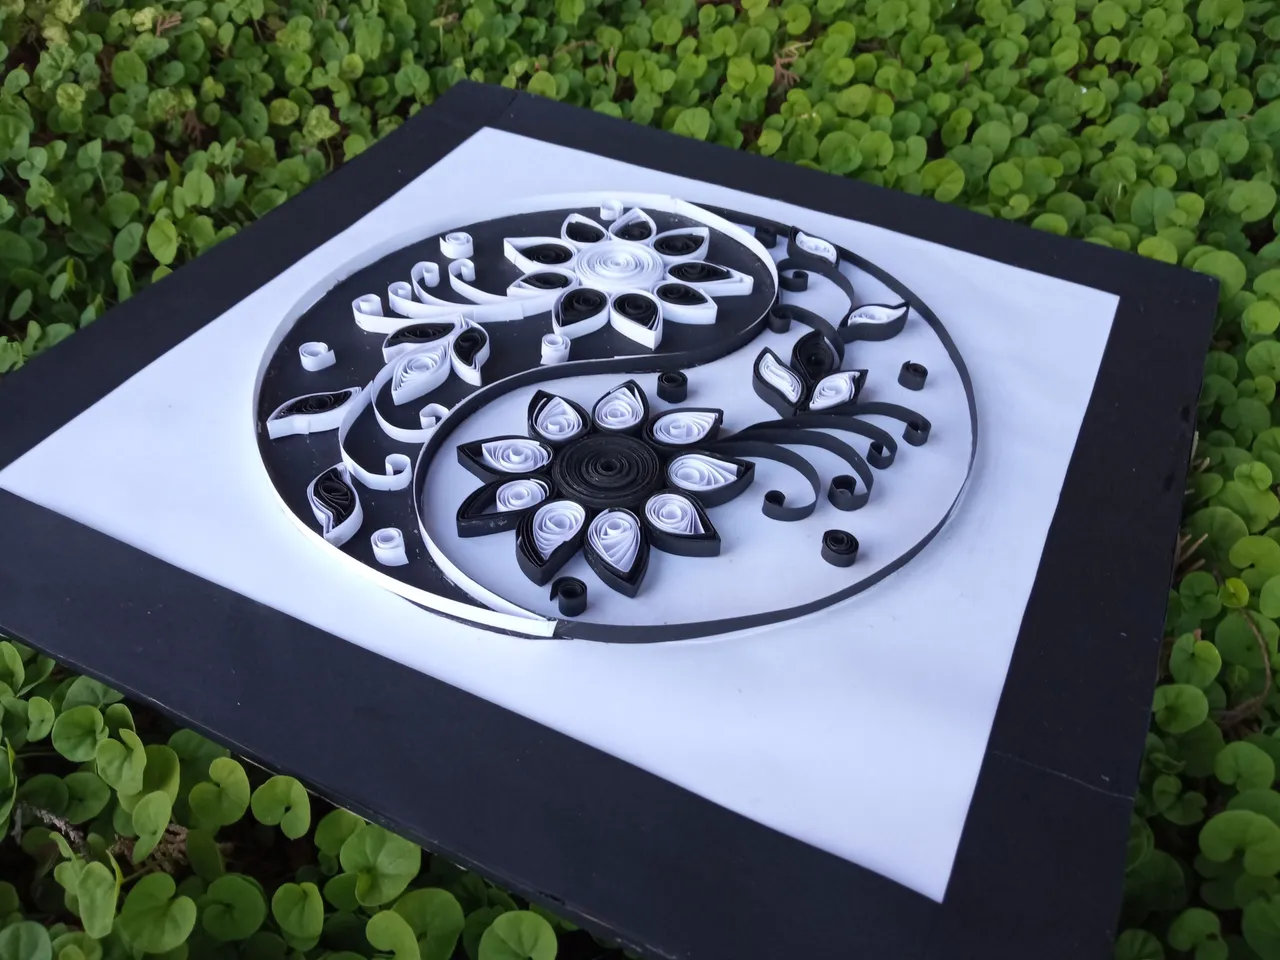
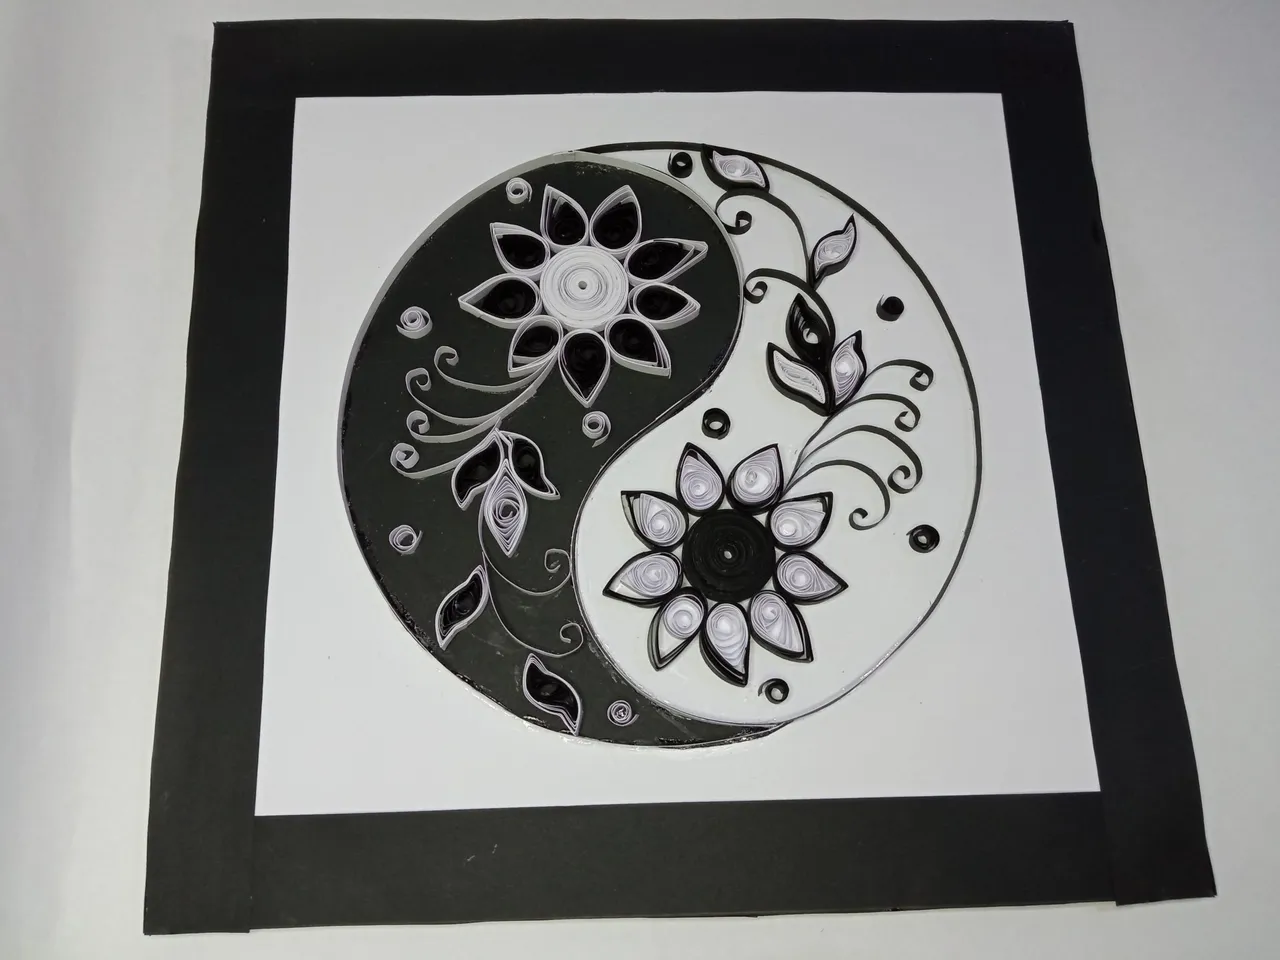
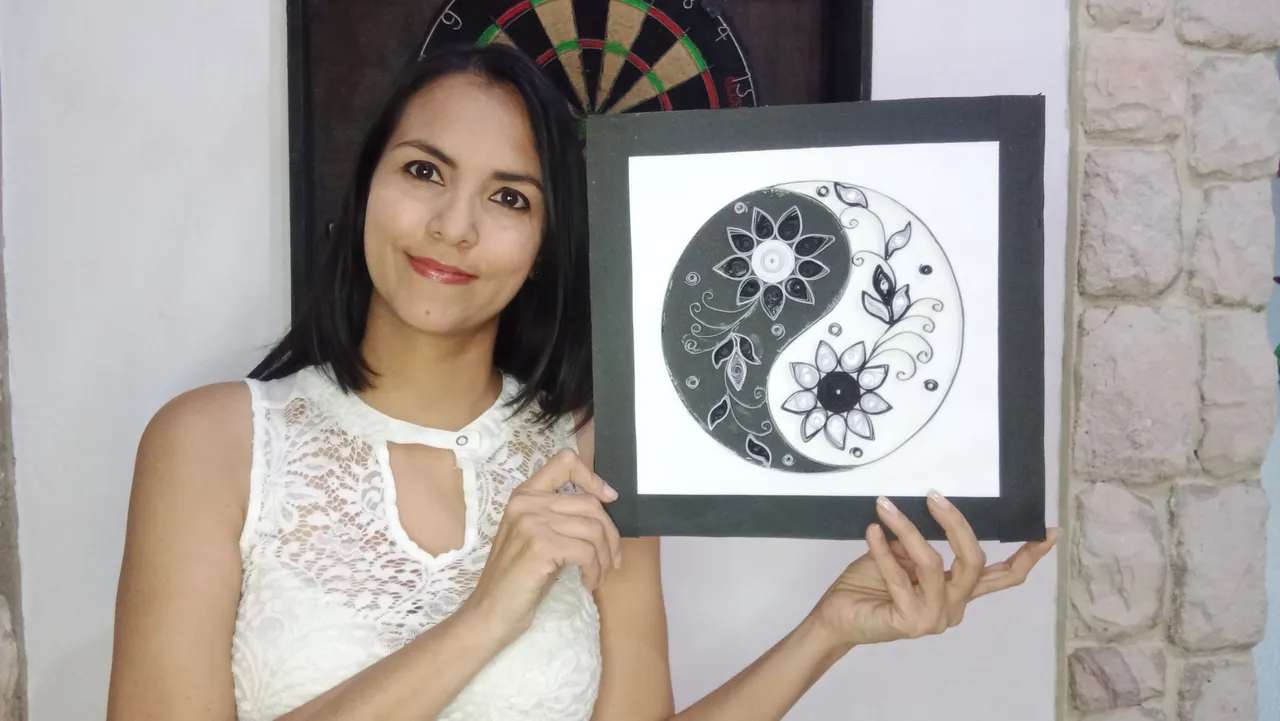
Listo amigos, así de bello quedó mi cuadro, espero sea del agrado de todos ustedes, espero sus comentarios.
Ready friends, that's how beautiful my painting was, I hope you all like it, I look forward to your comments.


Todas las fotos son tomadas de mi teléfono Redmi 9, para los collages usé la aplicación collage maker y para la traducción usé DeepL traductor.
All photos are taken from my Redmi 9 phone, for the collages I used the collage maker application and for the translation I used DeepL translator.