Feliz y bendecido jueves les deseo a todos mis amigos artesanos emocionada de compartir de nuevo con ustedes en esta nuestra comunidad @hivediy, ya se acerca la semana mayor y muchos tendremos un oportunidad de compartir con familiares y amigos y un tiempo para crear, hoy les comparto lo último que aprendí en mi taller de encuadernación.
Happy and blessed Thursday I wish all my crafter friends excited to share again with you in this our community @hivediy, the major week is coming and many of us will have an opportunity to share with family and friends and a time to create, today I share with you the last thing I learned in my bookbinding workshop.

Este cuaderno es muy especial, pues fueron muchos los recuerdos gratos que vinieron a mi mente, pues me recordó los cuadernos de área que usé en mis primeros años de colegio, esos años fueron muy especiales para mí, pues yo veía a mi hermano y mis primos con sus cuadernos y no veía la hora de tener el mío, recuerdo que cuando me dieron mi primer cuaderno dormía con él, no sé exactamente que tenían de especial aquellos cuadernos, más lo que si recuerdo es que para mí eran un tesoro.
This notebook is very special, because there were many pleasant memories that came to my mind, because it reminded me of the area notebooks I used in my first years of school, those years were very special for me, because I saw my brother and my cousins with their notebooks and I could not wait to have mine, I remember that when I got my first notebook I slept with it, I do not know exactly what was so special about those notebooks, but what I do remember is that for me they were a treasure.

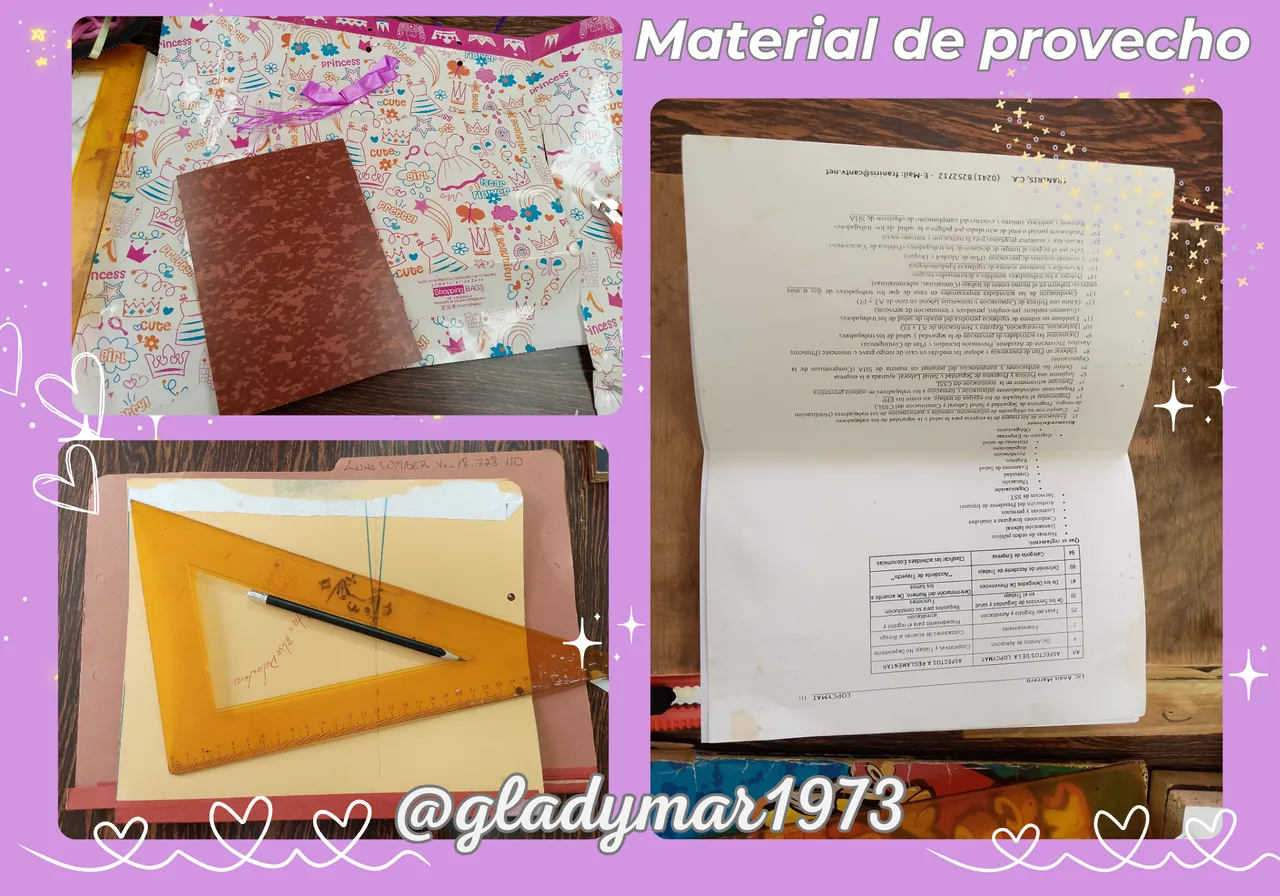
Para la elaboración de este cuaderno, utilizamos en un 95 % material de provecho, por lo que pusimos de manifiesto el arte de reciclar, busque unas guías que tenía guardada, unas carpetas que ya no se usaban, una bolsa de regalo que aunque estaba rota lo guardé, también usé pega artesanal, tijeras, hilo y aguja, mis prensas artesanales, pinzas de presión, exacto y hojas de cartulina.
For the elaboration of this notebook, we used 95% of useful material, so we showed the art of recycling, I looked for some guides that I had saved, some folders that were no longer used, a gift bag that although it was broken I kept it, I also used craft glue, scissors, thread and needle, my handmade presses, tweezers, exact and sheets of cardboard.

Procedimiento:
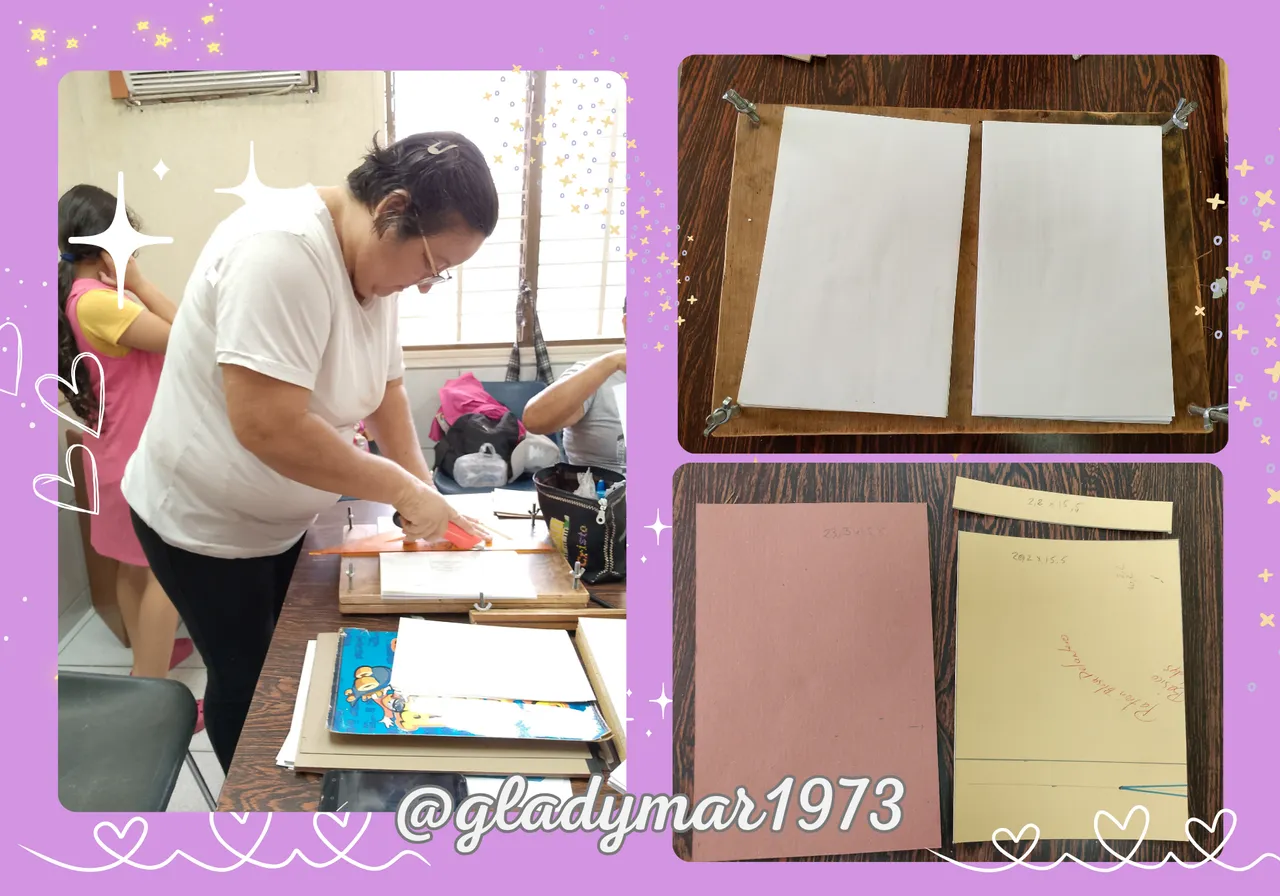
Paso 1 Lo primero que hicimos fue doblar y cortar las hojas tamaño carta por la mitad, aproveche mi prensa para apoyarme sobre ella para cortar, luego según las medidas de las hojas corté las tapas; para la tapa trasera corté con 0,5 cm de aumento de margen a cada lado, mientras que para la tapa delantera se corta en dos partes a la medida de ancho se le resta 0,5 y se corta una pieza de 2,2 cm de ancho y la otra del resto de la medida, dejando el mismo margen de la parte trasera.
Procedure:
Step 1 The first thing we did was to fold and cut the letter size sheets in half, I took advantage of my press to lean on it to cut, then according to the measures of the sheets I cut the covers; for the back cover I cut with 0.5 cm of margin increase on each side, while for the front cover is cut in two parts to the measure of width is subtracted 0.5 and cut a piece of 2.2 cm wide and the other of the rest of the measure, leaving the same margin of the back.

Paso 2 antes de perforar las hojas y las tapas, medimos el ancho de nuestras tapas y dejamos 2 cm de margen inferior y superior, del resto de la medida dividimos dependiendo de la cantidad de perforaciones que nosotros queremos ponerle a nuestro cuaderno, yo quise hacerle 6 perforaciones, dejando un espacio de 2,2 cm entre cada perforación.
Step 2 before punching the sheets and covers, we measure the width of our covers and leave 2 cm of margin at the bottom and top, the rest of the measure we divide depending on the number of holes we want to put in our notebook, I wanted to make 6 holes, leaving a space of 2.2 cm between each hole.

Paso 3 luego procedemos a forrar nuestras tapas, primeramente la tapa trasera; esta la forré con cartulina de construcción, dejando un margen de 2,5 cm a cada lado, y corte en la puntas para que al momento de pegar quede mejor ajustada, coloque pega y forré.
Step 3 then we proceed to line our covers, first the back cover; I lined it with construction paper, leaving a margin of 2.5 cm on each side, and cut at the ends so that when gluing it is better adjusted, put glue and lined.

Paso 4 seguidamente procedemos a forrar solo la parte grande de la tapa delantera, la cual forré con el papel de la bolsa de regalo la misma tenía unos bordes en rosa oscuro que los aproveché para darle más color a mi portada.
Step 4 then proceed to line only the large part of the front cover, which I lined with the paper of the gift bag, which had some dark pink edges that I used to give more color to my cover.

Paso 5 ya con ambas tapas forradas, procedimos a colocar la lomera de nuestro cuaderno esta puede ser en cartulina decorada al gusto y puede ser del ancho deseado yo lo hice de 8 cm de ancho marcando el centro de la misma; seguido pegamos primero la parte trasera, luego medimos el grosor de nuestras hojas y dejamos ese medida y procedemos a pegar la pestaña de 2,2 cm, dejamos un margen de 0,5 cm entre esta pestaña y la tapa delantera y pegamos.
Para ajustar las hojas cortamos una pestaña en cartón con la medida del grosor de las mismas y ajustamos las hojas a la tapa trasera con la ayuda de las pinzas y le colocamos pega a los bordes de las hojas y pegamos la pestaña de cartón y cerramos nuestro cuaderno, ajustamos y dejamos secar.
Step 5 already with both covers lined, we proceed to place the spine of our notebook this can be in cardboard decorated to taste and can be the desired width I did it 8 cm wide marking the center of it; then we first glue the back, then we measure the thickness of our leaves and leave that measure and proceed to paste the tab of 2.2 cm, leave a margin of 0.5 cm between this tab and the front cover and glue.
To adjust the sheets we cut a cardboard tab with the measure of the thickness of the same and adjust the sheets to the back cover with the help of the tweezers and we put glue to the edges of the sheets and glue the cardboard tab and close our notebook, adjust and let dry.

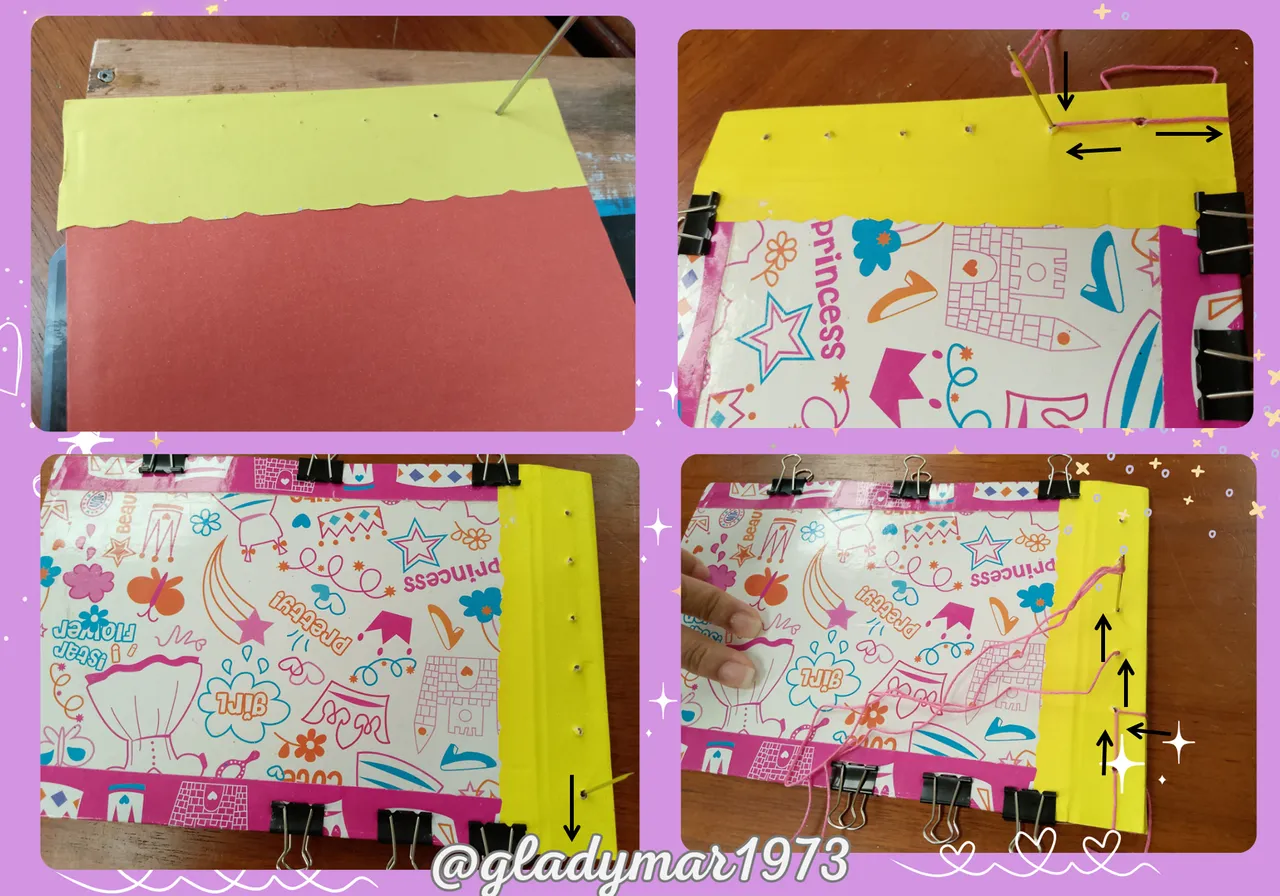
Paso 6 después de pegado las tapas precedemos a rectificar las perforaciones y a coser, introducimos la aguja con hilo en la primera perforación desde la parte trasera dejando una hebra larga, sacamos la aguja y la volvemos a introducir por el mismo orificio y seguí cociendo según indican las flechas, las negras son costuras por encina y las rojas costuras por debajo.
Step 6 after gluing the covers precede to rectify the perforations and sew, we introduce the needle with thread in the first hole from the back leaving a long strand, remove the needle and reinsert it through the same hole and continued cooking as indicated by the arrows, the black ones are seams by encina and red seams underneath.

Paso 7 al llegar al final de la primera costuraos devolvemos siguiendo la guía de las flechas, al llegar al primer orificio, hice doble lazada para ajustar los extremos de los hilos, corte y le coloqué un punto de pega, luego para adornar le pegue unas estrellas.
Step 7 when we get to the end of the first seam we return following the guide of the arrows, when we get to the first hole, I made a double loop to adjust the ends of the threads, cut and put a glue stitch, then to decorate I glued some stars.

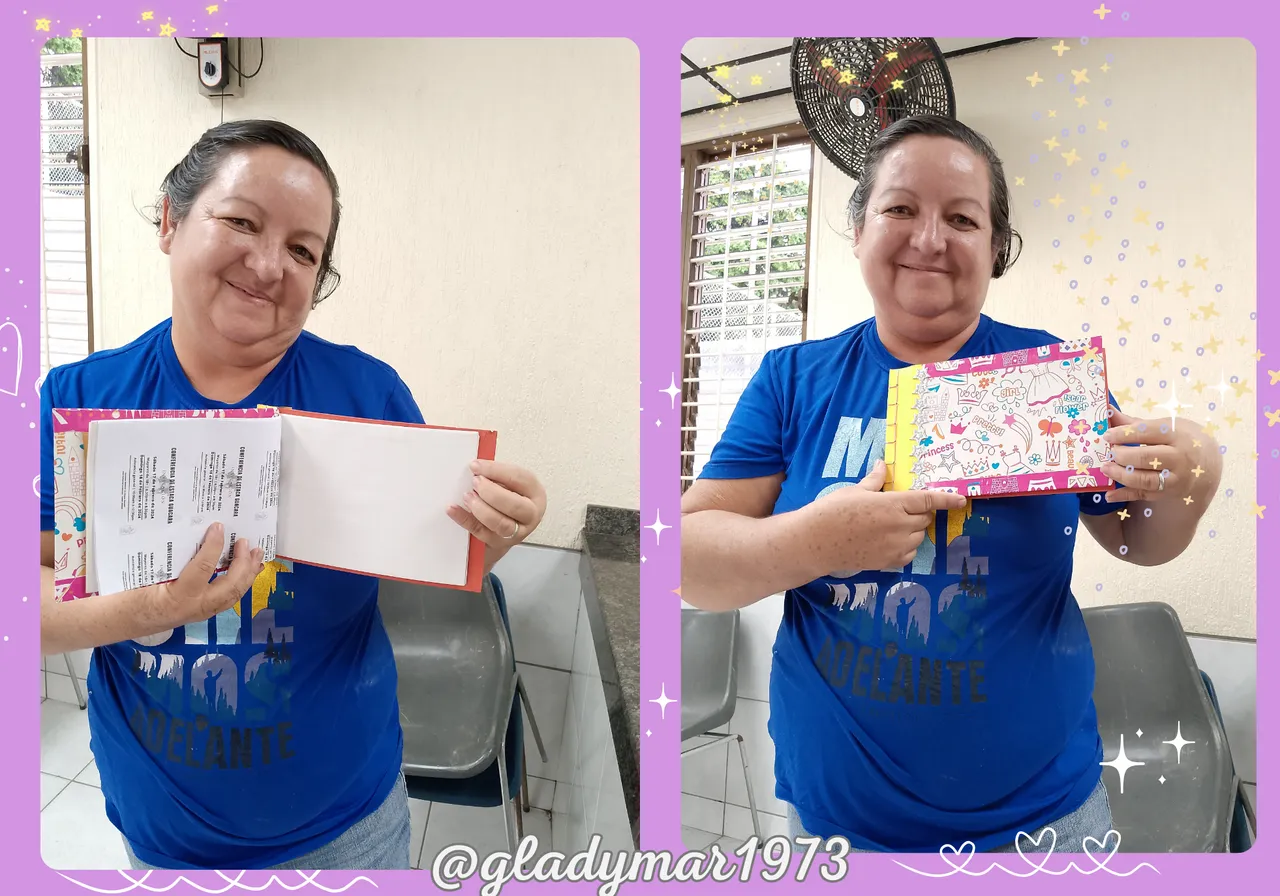
Listo ya tengo una libreta de notas, la próxima que quiero hacer de manera personal es para diseñar diagramas para dibujos en crochet, que es algo que me está llamando mucho la atención y estoy practicando para ello.
Now I have a notebook, the next one I want to make personally is to design diagrams for crochet drawings, which is something that is catching my attention and I am practicing for it.

Cuan grato es poder ver como lo que muchos dirían es basura, con algo de ingenio le puedas dar una segunda oportunidad, agradecida porque has llegado hasta aquí saludos y feliz noche o día, jeje.
How nice it is to be able to see how what many would say is garbage, with some ingenuity you can give it a second chance, thankful because you have come this far, greetings and happy night or day, hehe.

Contenido original.
Imagen principal tomada con mi Celular Moto E6I y editadas en Canvas.
Los banner fueron creados por mí en Canvas.
La traducción fue a través de www.DeepL.com,Translator (versión gratuita).
Original content.
Photos taken with my Moto E6I cell phone and edited in Canvas.
The banners were created by me in Canvas.
The translation was through www.DeepL.com,Translator (free version).