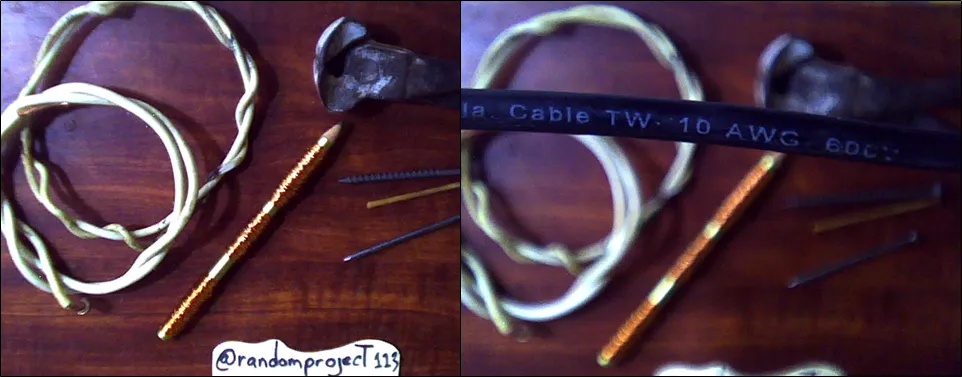
Vamos rapido porque tenemos mucho trabajo por delante, aunque tengo que decir que todo es completamente facil y muy entretenido. Para empezar necesitamos cable de electricidad del numero 10, en mi caso pongo el de forro negro porque es donde se ve el numero, pero estaré utilizando los que se ven en el fondo, son dos trozos que estaban por ahi tirados, la idea es reutilizar, porque siempre decimos "guardalo para algo sirve" y al final se queda guardado hasta que se termina perdiendo.
We are going fast because we have a lot of work ahead of us, although I have to say that everything is completely easy and very entertaining. To start we need electricity cable number 10, in my case I put the black one because that is where the number is seen, but I will be using the ones that are seen in the background, they are two pieces that were lying around, the idea is to reuse , because we always say "save it for something it serves" and in the end it stays saved until it ends up being lost.
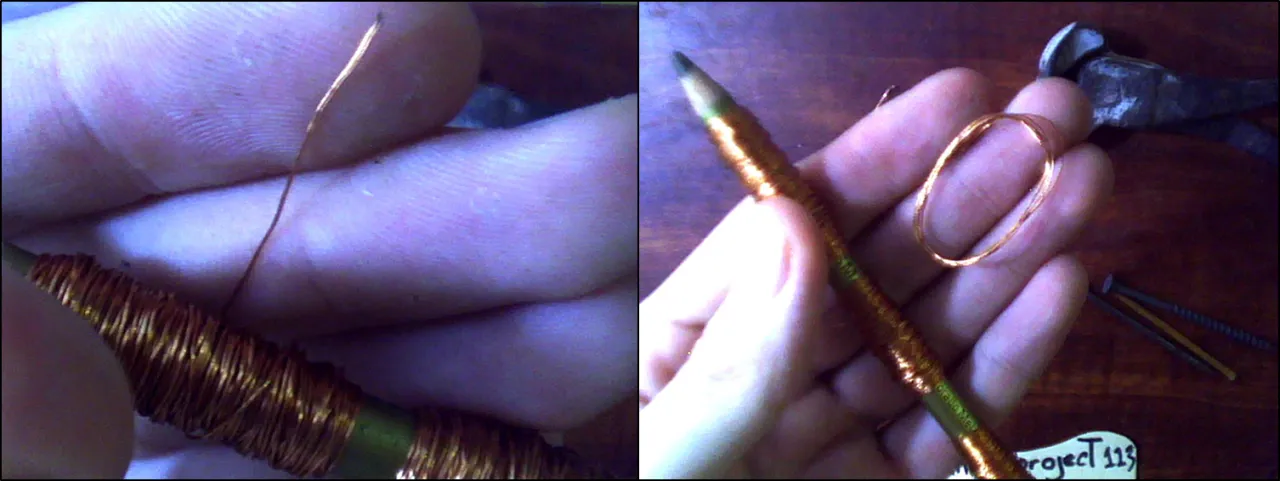
Lo otro que vamos a necesitar va a ser cable mucho mas fino, en este caso no pude mostrarlo porque fue hace mucho tiempo, estos cablesitos son el bobinado de un ventilador que se quemó y antes de botarlo yo dije "es cobre, deja guardo el sano que para algo sirve", casi 2 años despues ahora es que va a servir. Cortaremos 9 tiras de unos 30 o 40 cm cada una aproximadamente.
The other thing that we are going to need is going to be a much thinner cable, in this case I could not show it because it was a long time ago, these little cables are the winding of a fan that burned out and before throwing it away I said "it's copper, let me keep the healthy that for something it serves ", almost 2 years later now is that it is going to serve. We will cut 9 strips of about 30 or 40 cm each approximately.
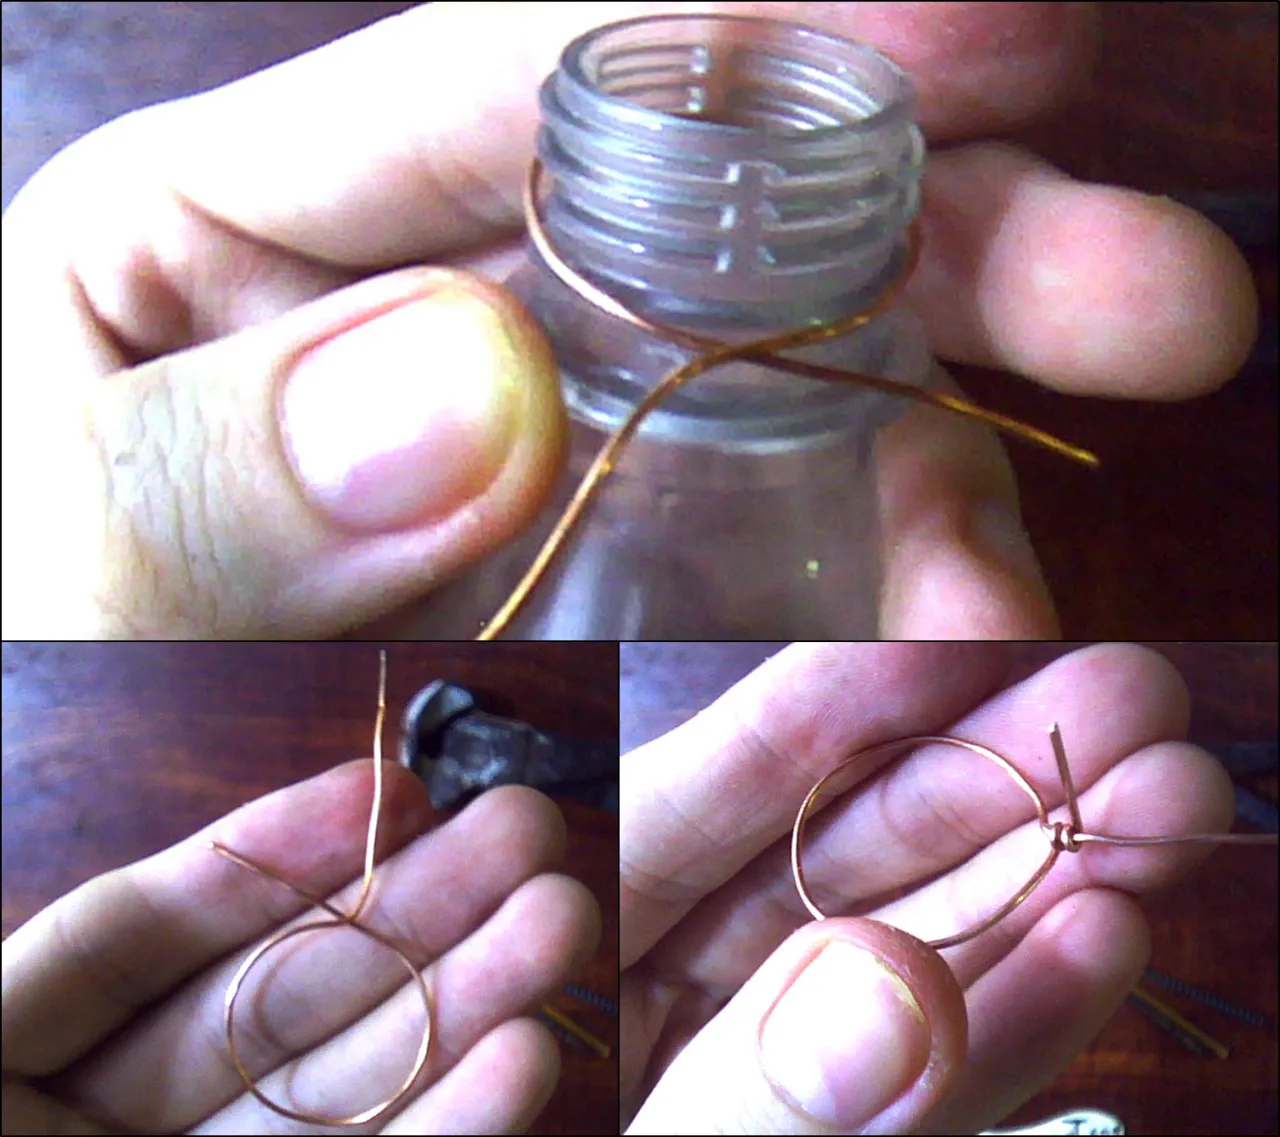
Empezamos a trabajar, con nuestros alicates, tenazas o lo que cada quien buenamente pueda, vamos a cortar un trozo de aproximadamente 20 cm y lo enrollamos en algo circular, yo tenia a la mano una botella plastica y me resultó bastante bien, aunque cualquier otra cosa puede funcionar. Solo daremos dos o 3 vueltas como maximo.
We started to work, with our pliers, pliers or whatever each person can, we are going to cut a piece of approximately 20 cm and roll it into something circular, I had a plastic bottle at hand and it turned out quite well, although any other thing can work. We will only do two or 3 laps at most.
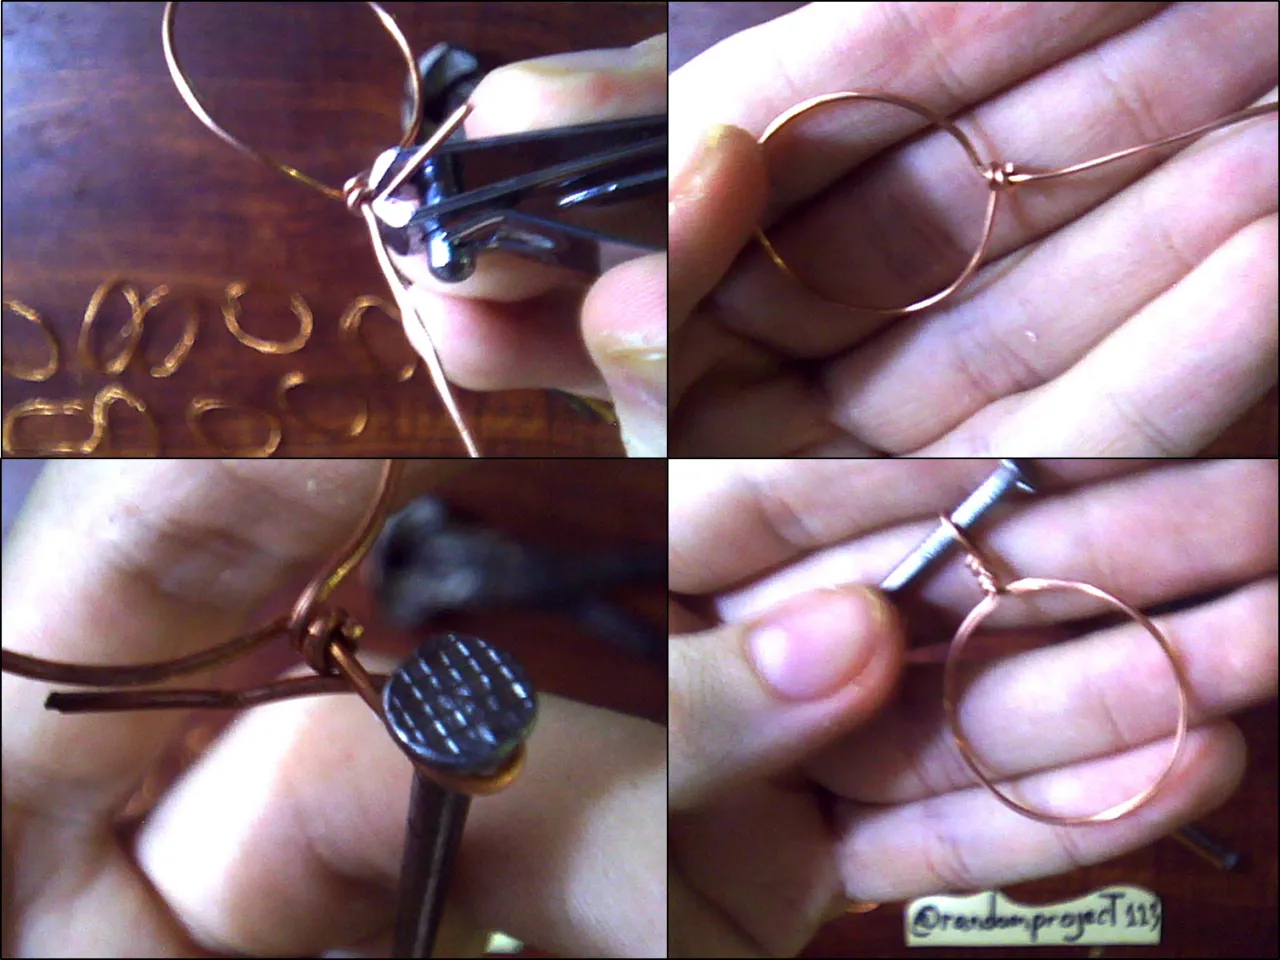
Cortamos y con ayuda de un clavo, palo de madera o lapiz, hacemos un aro que es por donde vamos a colocar la cadena que haremos mas adelante. Si notan en la imagen donde se ve el clavo de cerca, pueden notar que el giro de esa punta del alambre es en sentido contrario a la otra punta, esto con la idea de que ambas puntas queden en el mismo sitio y asi disimular mejor las puntas, valga la redundancia.
We cut and with the help of a nail, wooden stick or pencil, we make a ring that is where we are going to place the chain that we will do later. If you notice in the image where the nail is seen closely, you may notice that the turn of that tip of the wire is in the opposite direction to the other end, this with the idea that both ends are in the same place and thus better hide the tips, forgive the redundancy.
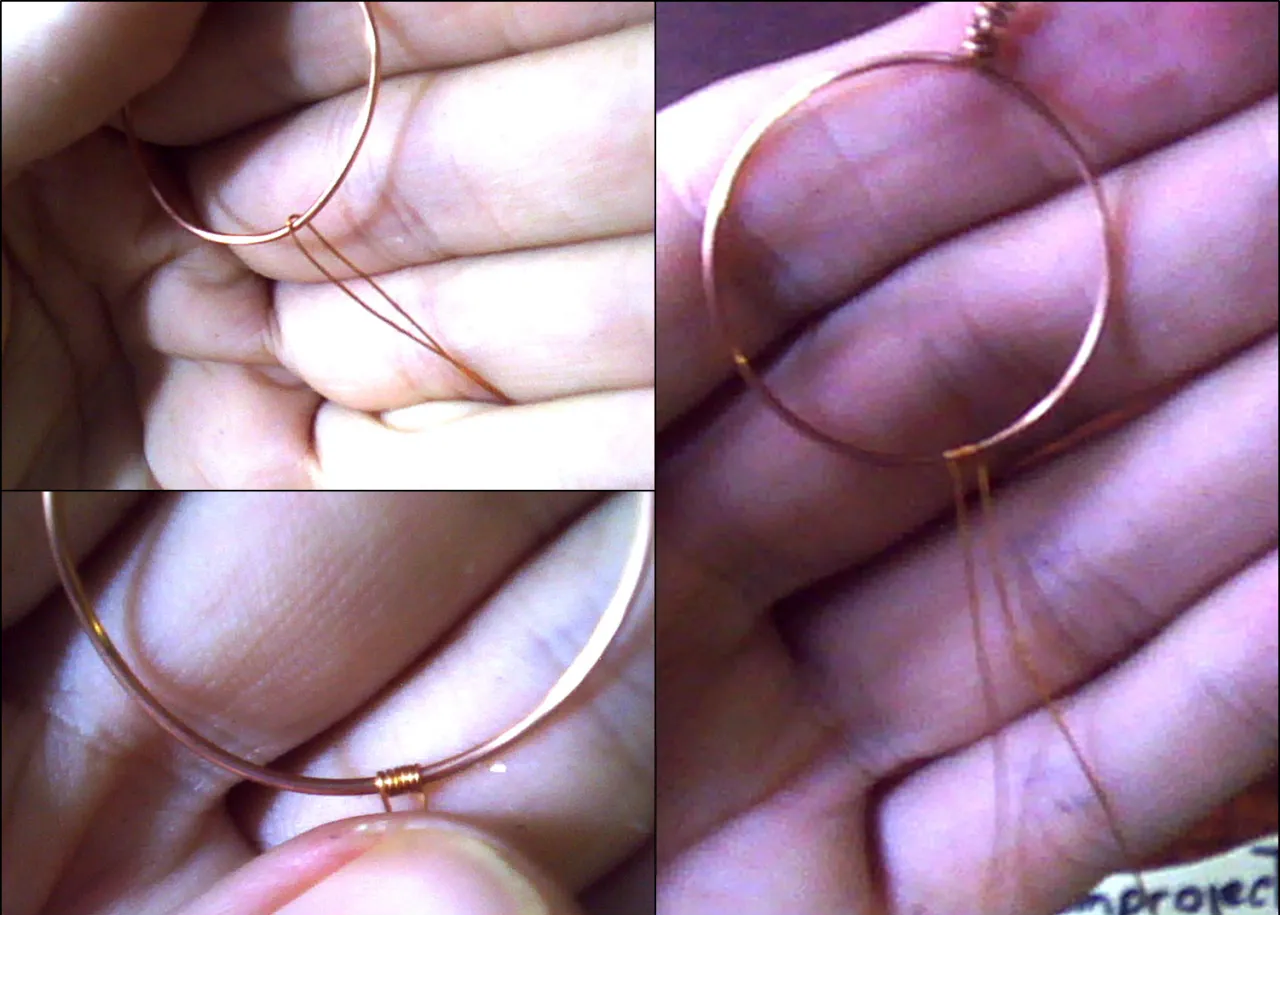
Luego, con nuestro alambre mas fino vamos a dar 5 vueltas al rededor de nuestro aro, como vemos en la imagen empezamos metiendo una de las puntas del cable, luego acomodamos ambas puntas para que nos queden iguales y empezamos nuestras vueltas con solo una punta, en mi caso la del lado derecho.
Then, with our finest wire we are going to make 5 turns around our ring, as we see in the image we start by putting one of the ends of the cable, then we arrange both ends so that they are equal and we start our turns with only one end, in my case the one on the right side.
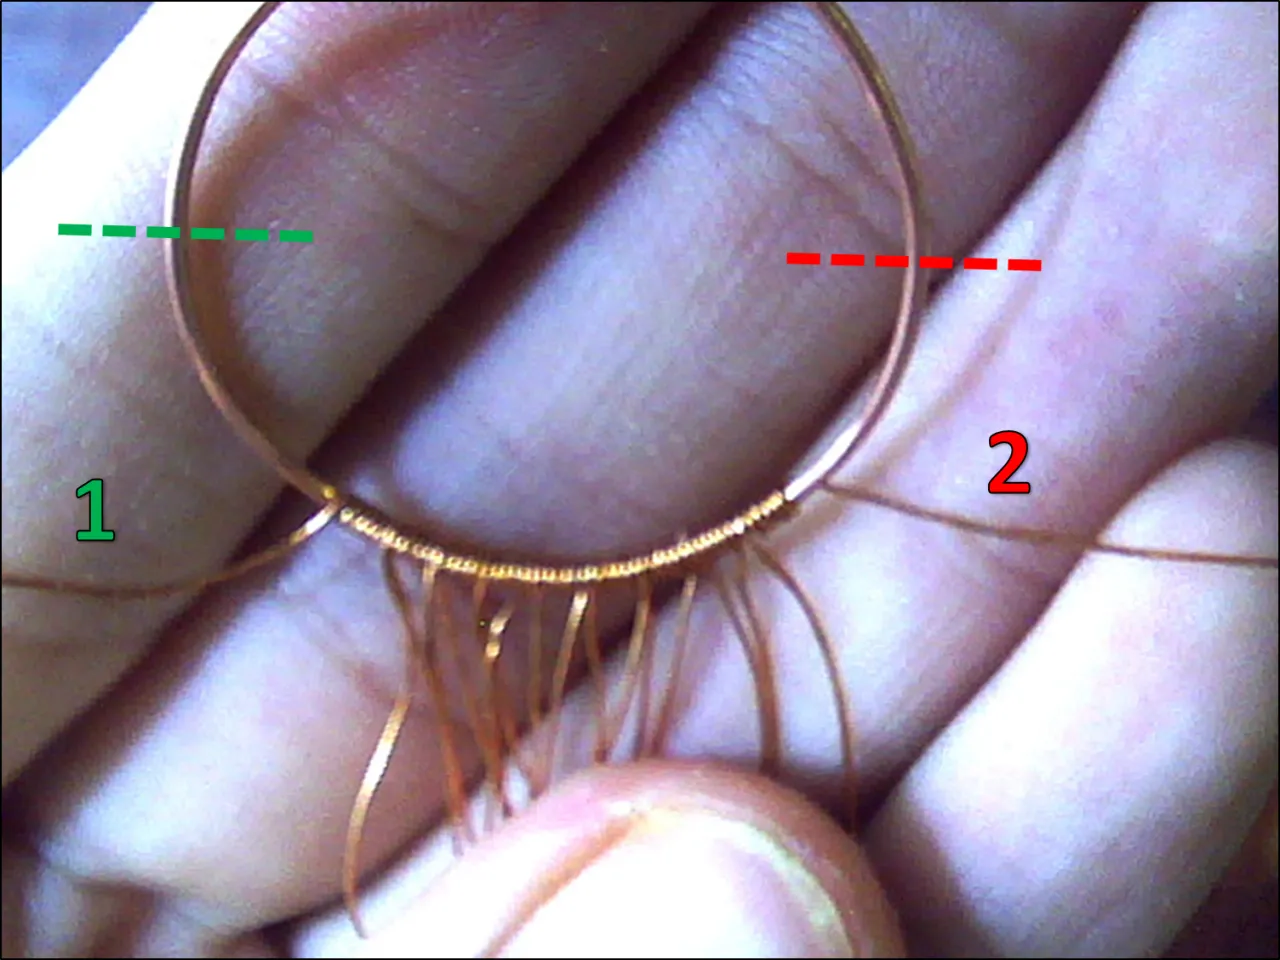
Luego que tengamos nuestros 9 alambres trenzados con 5 vueltas cada uno, las puntas que nos quedan a los laterales (1 y 2 en la imagen)las seguimos trenzando hasta llegar a la mitad de nuestro aro aproximadamente.
After we have our 9 wires braided with 5 turns each, the ends that we have on the sides (1 and 2 in the image) we continue braiding until we reach the middle of our ring approximately.
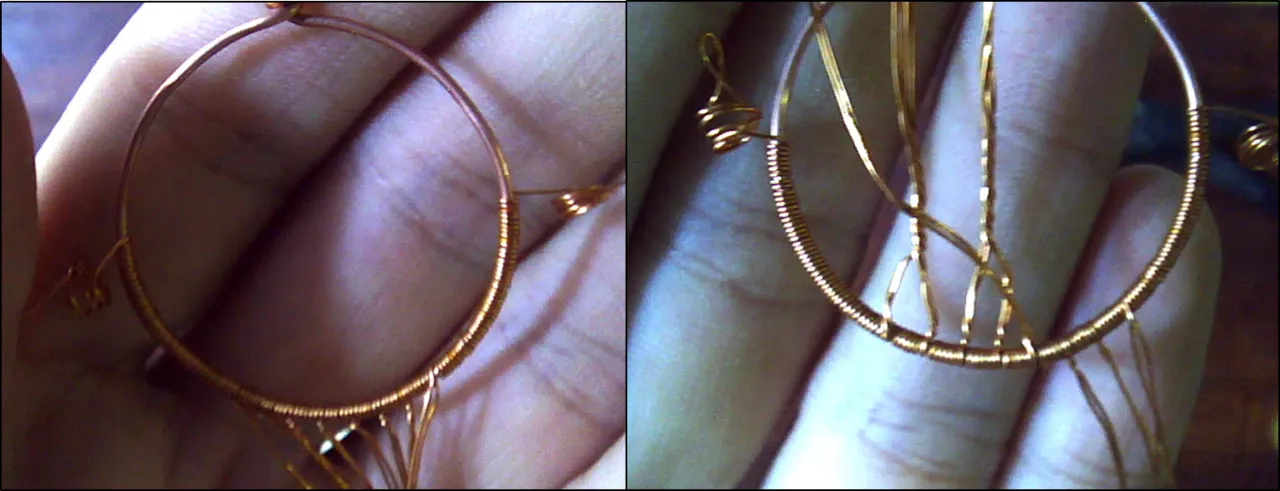
A este punto ya habiendo subido nuestros hilos laterales hasta la mitad de nuestro aro, podemos empezar a formar nuestro arbol, aqui ya es de cada quien, repito esto es muy instintivo y para el arte no debe haber reglas, solo una pequeña guia. Como dato, aqui estaremos formando las raices del arbol.
At this point, having already raised our lateral threads to the middle of our hoop, we can begin to form our tree, here it belongs to each person, I repeat this is very instinctive and for art there should be no rules, only a small guide. As data, here we will be forming the roots of the tree.
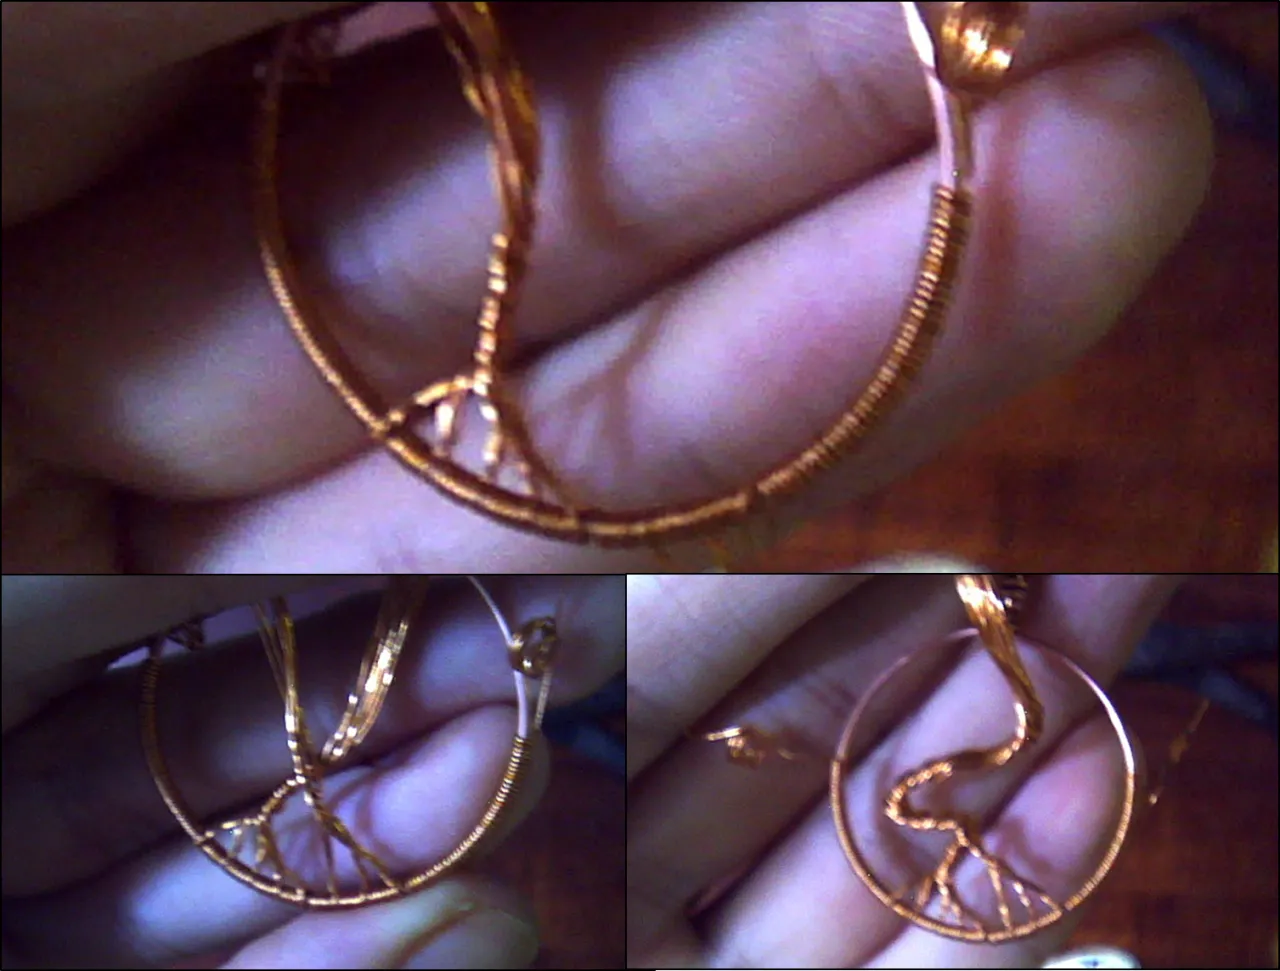
En mi caso mi arbol va a tener solo dos raices principales de las cuales saldran varias pequeñas hacia abajo, mientras que hacia arriba iremos formando el tronco del arbol.
In my case, my tree will have only two main roots from which several small ones will come down, while upwards we will form the trunk of the tree.
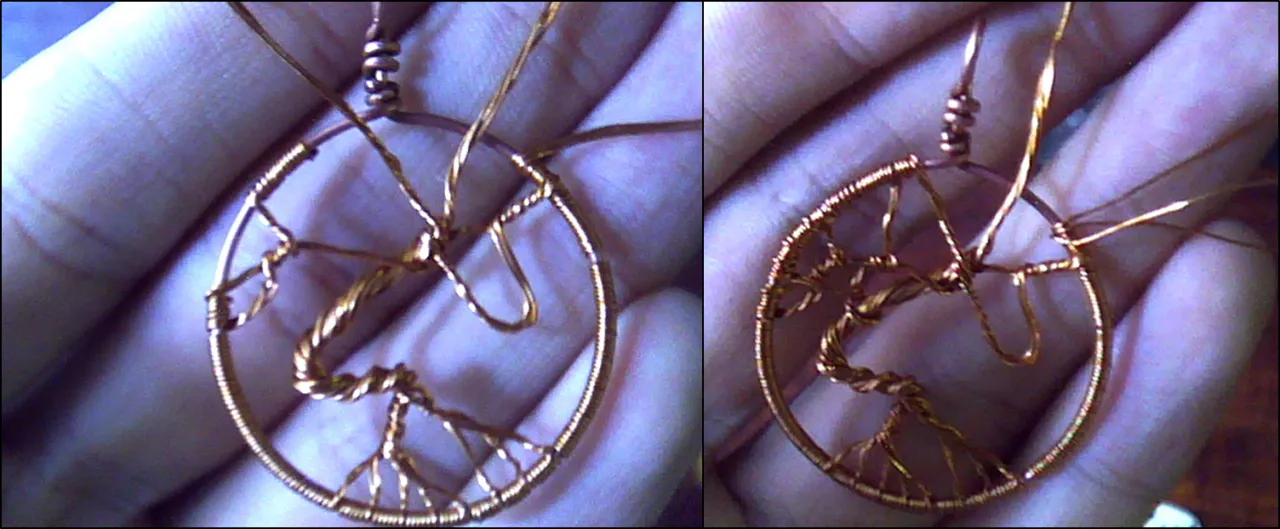
Aqui ya empezariamos a realizar las ramas, a este punto debes dejarte llevar y empezar a trenzar, un arbol no es perfectamente uniforme, asi que simplemente deja que salga lo que tenga que salir. Lo que si vamos a intentar a la medida de lo posible es que cada vez que lleguemos a los limites de nuestro aro, los giros queden lo mas ajustados posibles y sin montarse uno al otro. Tambien es buena idea colocar algun tipo de decoracion a las ramas para que hagan el papel de hojas, yo a la mano tenia muchas pequeñas pelotas plasticas, aunque no me quise arriesgar a colocarlas por algo que iba a hacer mas adelante. Seguimos.
Here we will begin to make the branches, at this point you must let yourself go and start braiding, a tree is not perfectly uniform, so simply let what has to come out. What if we are going to try as much as possible is that every time we reach the limits of our hoop, the turns are as tight as possible and without mounting each other. It is also a good idea to place some type of decoration on the branches to make the paper leaves, I had many small plastic balls at hand, although I did not want to risk placing them for something I was going to do later. We continue.
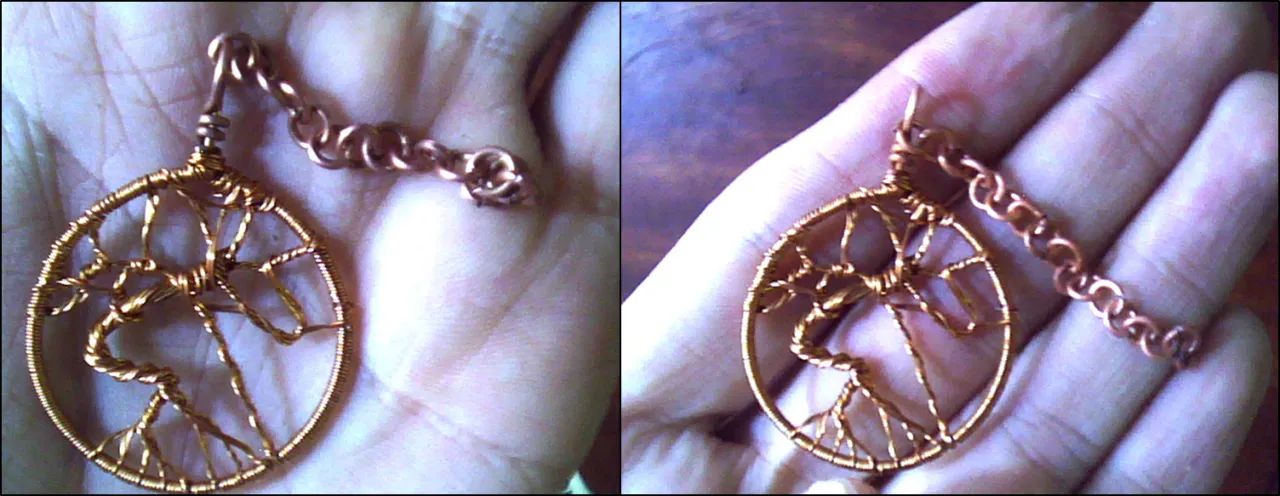
Basicamente luego de un rato de estar trenzando una y otra vez, algo asi quedó mi arbol. Aqui ya tenemos una pequeña cadena y como pueden ver en la imagen de arriba, hay una imagen donde se ve oscura la cadena y en la otra un color mas brillante, no es efecto de la camara, es de mala calidad asi que no hace brillar cosas. Mas adelante les enseño como hice para que brillara tanto, por ahora aprendamos a hacer la cadena, es lo mas facil de hacer.
Basically after a while of braiding over and over, something like that was my tree. Here we already have a small chain and as you can see in the image above, there is an image where the chain is dark and in the other a brighter color, it is not the effect of the camera, it is of poor quality so it does not shine things. Later I will show you how I made it shine so much, for now let's learn how to make the chain, it is the easiest thing to do.
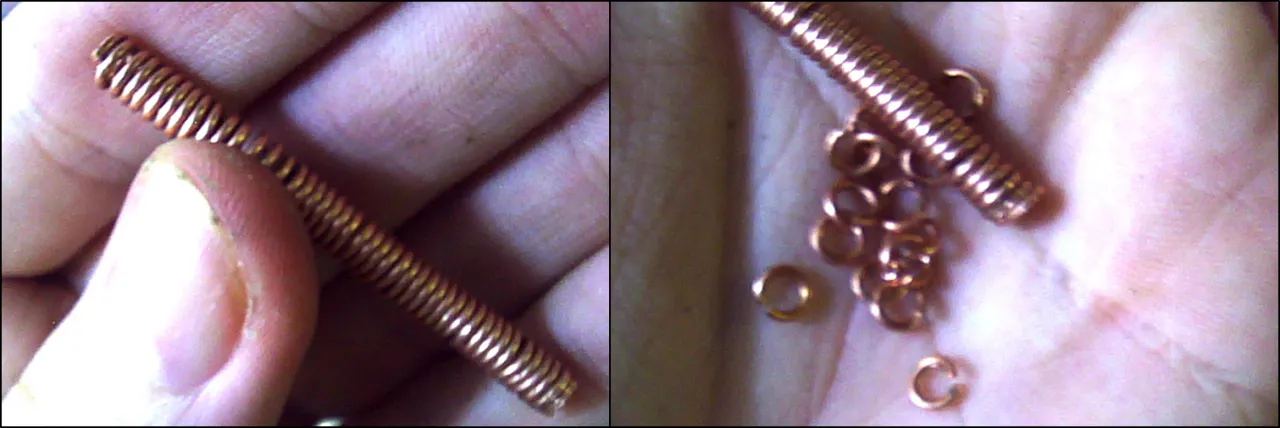
Para la cadena, debemos agarrar otro trozo de cable numero 10 y lo enrollamos firmemente sobre el clavo para luego sacar pequeños circulos que serán nuestros eslavones. La cantidad de cable aqui varia mucho dependiendo del largo que necesitemos y de lo grande que sean nuestro eslavones, como guia puedo decir que con 16 eslavones hice casi 10 cm de cadena.
For the chain, we must grab another piece of cable number 10 and wrap it firmly on the nail to then remove small circles that will be our links. The amount of cable here varies a lot depending on the length we need and how big our links are, as a guide I can say that with 16 links I made almost 10 cm of chain.
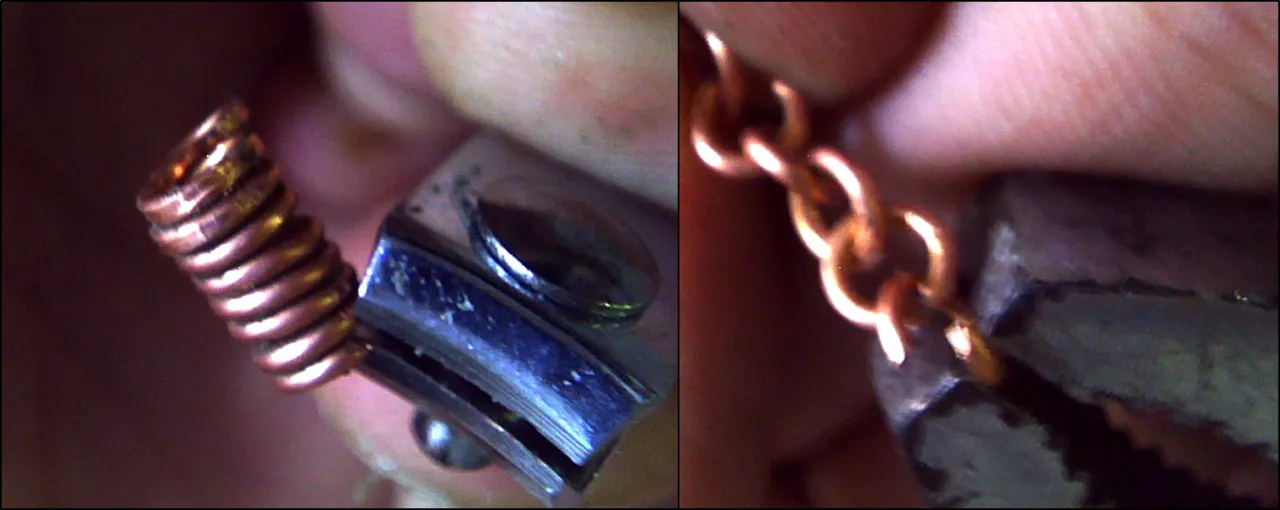
Los eslavones los hice cortando cada pequeño aro con un corta uñas, lo ideal seria pasar una mini cierra dremel por todo el resorte digamos y asi poder hacer muchos a la vez. Aunque ya digo que uno a uno tampoco se tarda tanto, lo siguiente seria ir abriendolos y metiendo uno en el otro para luego cerrarlos.
I made the links by cutting each small ring with a nail clipper, the ideal would be to pass a mini dremel clasp through the entire spring, let's say, and thus be able to do many at the same time. Although I already said that one by one does not take that long, the next thing would be to open them and put one in the other and then close them.
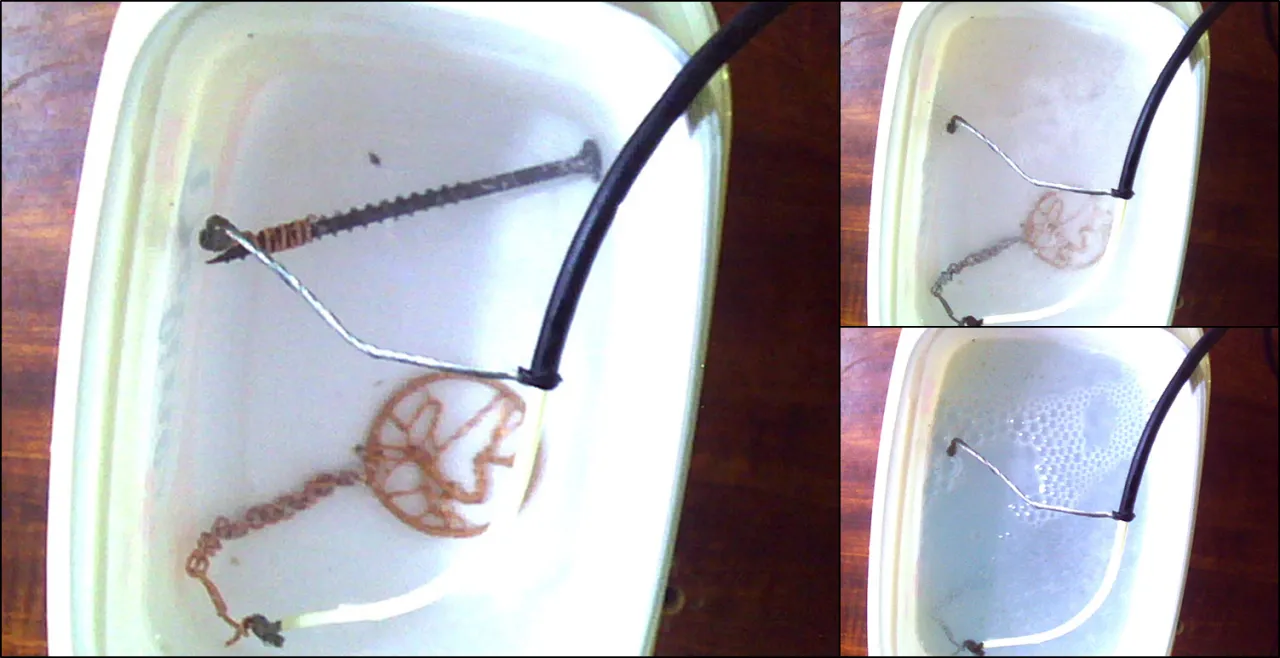
Aqui viene la parte interesante, Electrolisis. Agarramos nuestro tornillo o cualquier trozo de metal o incluso unas vueltas de alambre puede funcionar y le conectamos el polo NEGATIVO del cable (Mas adelante explico mas en detalle) y en el polo POSITIVO conectamos nuestra cadena. Metemos todo el conjunto en agua con sal sin que lleguen a tocarse y conectamos a la corriente.
Here comes the interesting part, Electrolysis. We take our screw or any piece of metal or even a few turns of wire can work and we connect the NEGATIVE pole of the cable (I will explain more in detail later) and in the POSITIVE pole we connect our chain. We put the whole set in salted water without touching each other and connect to the current.
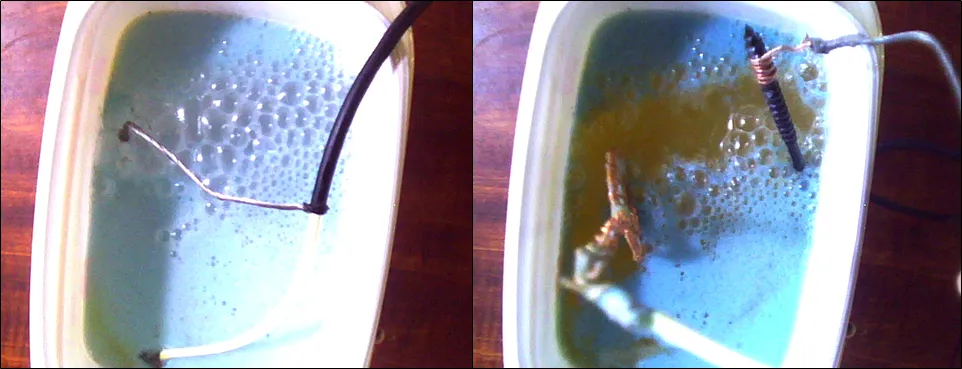
Justo luego de conectar empezaremos a ver una reaccion bastante fuerte, ADVIERTO, los gases que salen de esta reaccion son inflamables y toxicos, entonces hazlo cerca de una ventana y lejos de una flama. Lo que está pasando es que la energia del polo POSITIVO está viajando atraves del agua hacia el polo NEGATIVO, llevando consigo todo el oxido que tenia en este caso nuestra cadena. Cuando la reaccion se detenga desconectamosla corriente, sacamos y lavamos muy bien todo el conjunto.
Right after connecting we will begin to see a quite strong reaction, WARNING, the gases that come out of this reaction are flammable and toxic, so do it near a window and away from a flame. What is happening is that the energy from the POSITIVE pole is traveling through the water towards the NEGATIVE pole, taking with it all the oxide that our chain had in this case. When the reaction stops we disconnect the current, remove and wash the whole assembly very well.
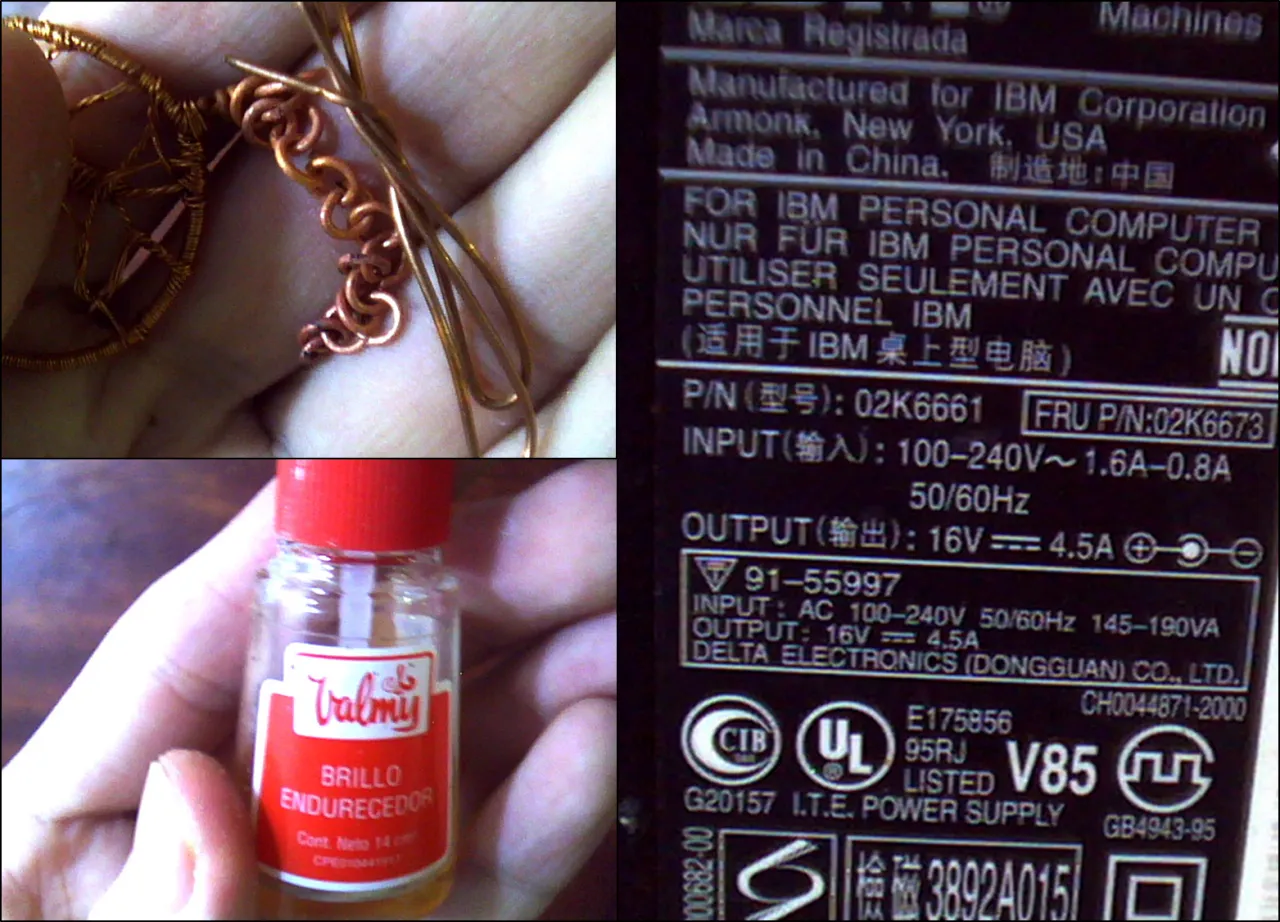
Luego de haber lavado podemos ver una diferencia en el color, es un poco mas mate y mas claro, ese es el verdadero color del cobre. Es un metal que se oxida muy facil oscureciendose y luego poniendose incluso verde. Para mantenerlo sin oxido debemos eliminar si contacto con el oxigeno, en mi caso utilicé un barniz de uñas, fué mas que suficiente. Yo utilicé un cargador de 16 voltios de una laptop ya dañada, aunque puedes utilizar un cable usb conectado al cargador de un telefono o incluso una bateria. Lo importante es que se corriente continua (CC) para que puedas jugar con el polo positivo y negativo.
After having washed we can see a difference in the color, it is a little more matte and lighter, that is the true color of copper. It is a metal that rusts very easily, darkening and then turning even green. To keep it without rust we must eliminate if contact with oxygen, in my case I used a nail varnish, it was more than enough. I used a 16 volt charger from an already damaged laptop, although you can use a usb cable connected to a phone charger or even a battery. The important thing is that it is direct current (DC) so that you can play with the positive and negative pole.
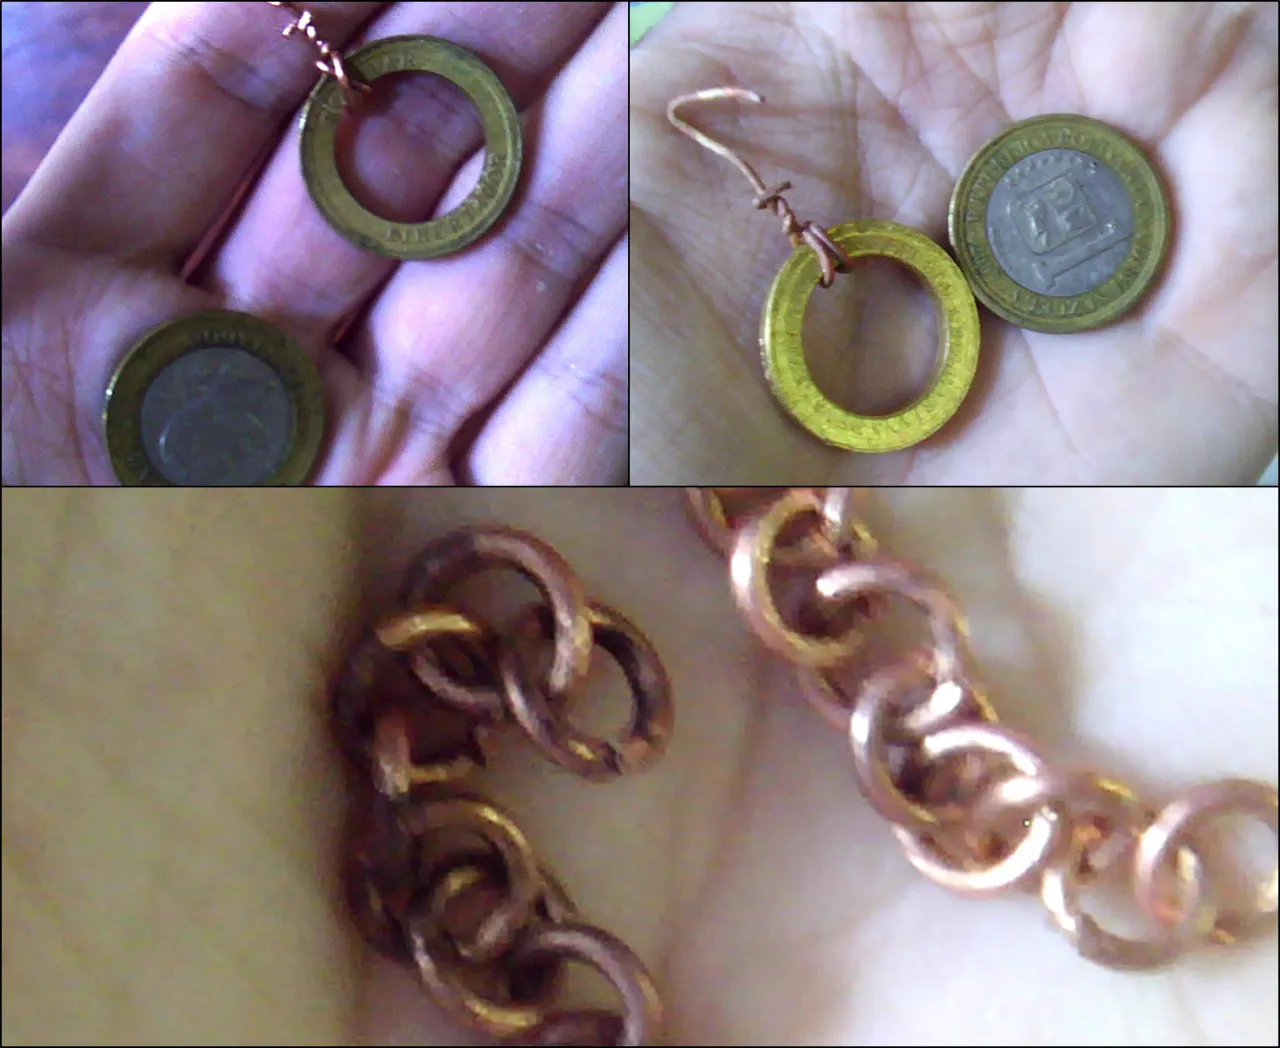
Aqui podemos apreciar mejor la diferencia, lo mismo hice con el aro de la moneda. En este caso como yo estoy utilizando 16 voltios bastaron 5 minutos, aunque esto puede variar mucho, no solo depende del voltaje, sino tambien de que tipo de oxido estemos quitando o si estamos añadiendo una capa de algun material, de hecho la idea original era hacer toda la pieza de color negro, para ello la idea de limpiar el oxido y luego vendria el proceso de teñido, aunque al final a mi compañera de aventuras le gustó color cobre y asi quedó. De ahi mi temor de colocarle hojas al arbol, tenia miedo de que el plastico no resistiera el proceso.
Here we can better appreciate the difference, I did the same with the ring of the coin. In this case, since I am using 16 volts, 5 minutes were enough, although this can vary a lot, not only depends on the voltage, but also on what type of oxide we are removing or if we are adding a layer of some material, in fact the original idea was make the entire piece black, for this the idea of cleaning the rust and then the dyeing process would come, although in the end my companion liked copper color and that is how it remained. Hence my fear of placing leaves on the tree, I was afraid that the plastic would not resist the process.
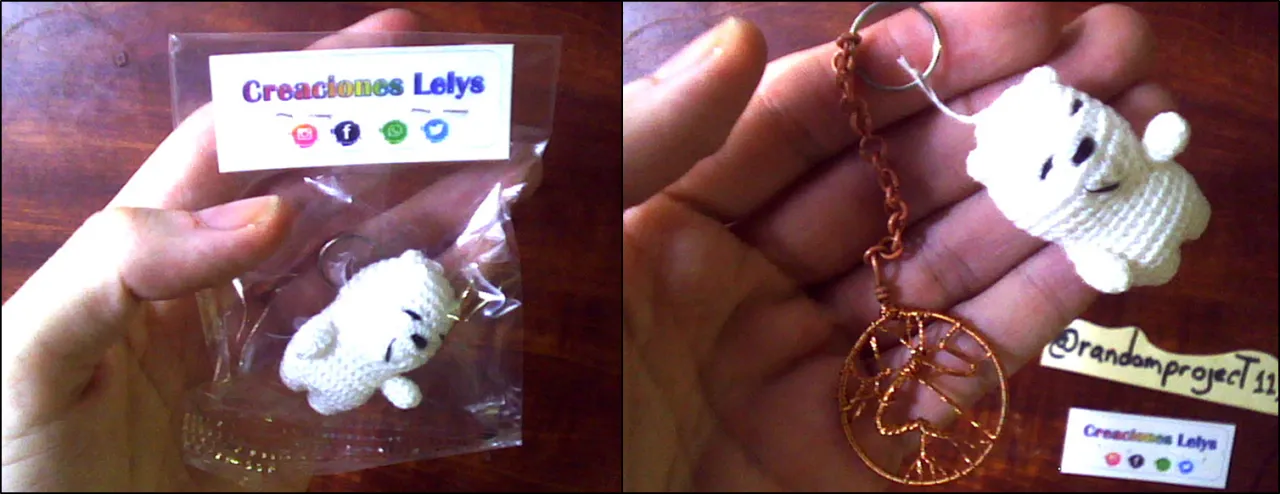
Repito, la electrolisis no es un proceso peligroso si se toman los cuidados necesarios y a pesar de que con mas electricidad el proceso se hace mas rapido, no recomiendo utilizar mas de 12 voltios, ya que el agua está electrificada y se vuelve un poco mas peligroso por si por error metes la mano sin desconectar o algo por el estilo, asi que lo mejor es no pasarse de 12 voltios. Al final terminé comprando este pequeño oso a @creacioneslelys y lo hice un llavero aun mas especial. Tengo que ser honesto y decir que el aro de llavero que yo tenia era de color negro y no tenia donde guindar el arbolito que hicimos, asi que de momento que se quede haciendole compañia a este hermoso oso tejido.
I repeat, electrolysis is not a dangerous process if the necessary care is taken and despite the fact that with more electricity the process becomes faster, I do not recommend using more than 12 volts, since the water is electrified and it becomes a little more dangerous. in case by mistake you put your hand without disconnecting or something like that, so it is best not to go over 12 volts. In the end I ended up buying this little bear from @creacioneslelys and made it an even more special keychain. I have to be honest and say that the key ring I had was black and I had nowhere to hang the little tree we made, so for now, let him keep company with this beautiful knitted bear.
Mas adelante con un poco mas de tiempo, voy a estar extendiendome un poco mas sobre el proceso de electrolisis y como utilizarlo para dar un baño de algun material a nuestras piezas, con la intencion de hacer imitacion plata o imitacion oro o simplemente oscurecer o limpiar piezas oxidadas
Later with a little more time, I will be extending a little more about the electrolysis process and how to use it to give a bath of some material to our pieces, with the intention of making imitation silver or imitation gold or simply darken or clean rusty parts