Here is a secret I have been keeping for a few years. This will be quite the feast for the eyes to see.
Today I am revealing the creation of my biggest ceramic pot during my time at the ceramic studio a couple years ago.
Not just any old pot. A bonsai pot, of coarse! One unlike any other ever made. A bonsai pot in the shape of a fantastical ship, with three living trees growing from its decks instead of masts. Instead of sails, it will have bright red fluttering maple leaves to catch the wind.
Bonsai or not, this unique design would showcase the beauty of the trees in a whimsical fantasy setting, completely unnatural for where we would expect trees to grow. After all, if a bonsai master can root trees to grow in a shallow tray, then why can't I grow them somewhere just as unlikely. 🚢 ⛵ ⚓

Photo from Pixabay. AI generated by artist Roy Snyder.
https://pixabay.com/illustrations/pirates-ship-adventure-sea-fantasy-8726523/
For inspiration I began by researching various designs for classical ships with sails. The style of ships I seemed to gravitate towards the most was the mighty Caravel. A low middle deck between two upper decks. Very much in the style of a pirate ship, yet more like a pleasure vessel with a grand room under the main deck for the Captain's Quarters.
A Structured Start

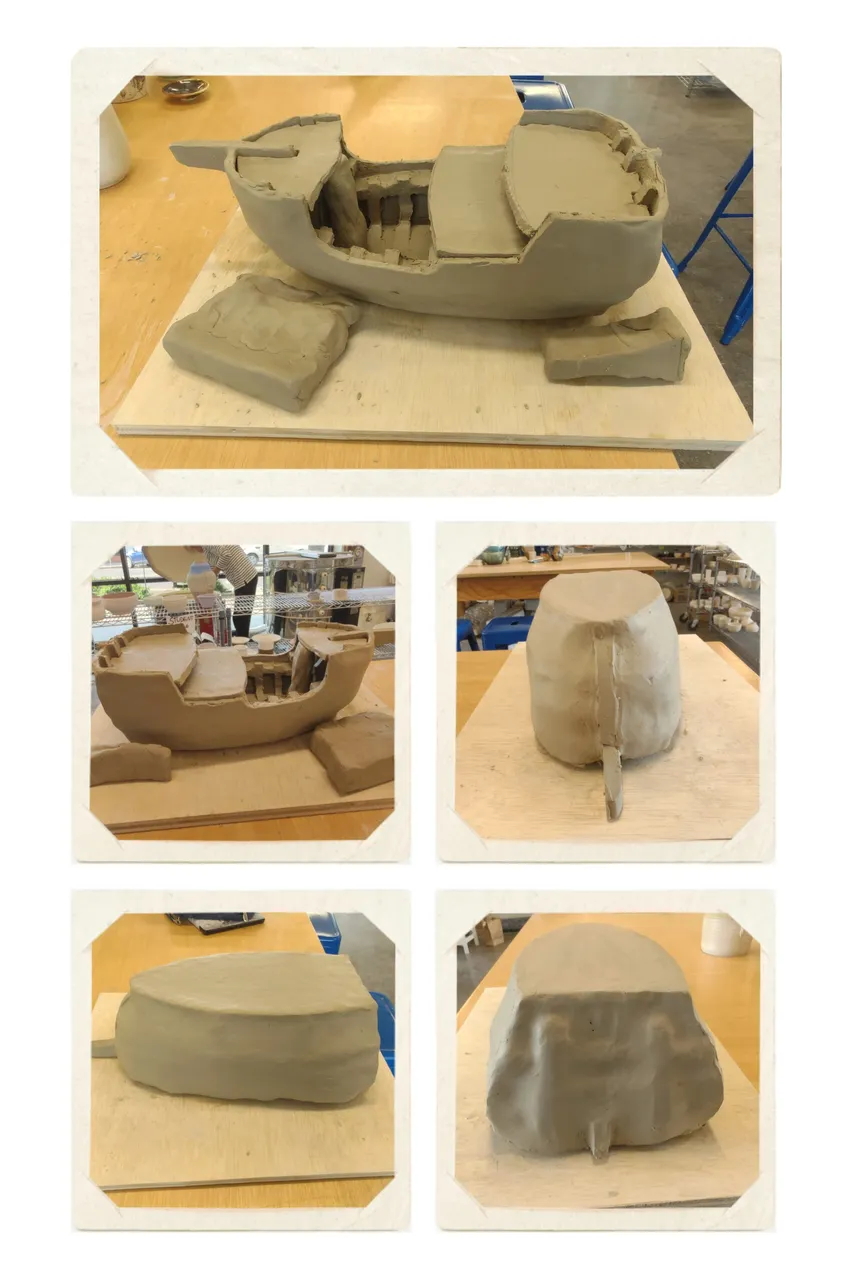
To start the construction, slabs were made of thick clay. Initially a vertical spine and and a floor base were cut to define the overall size and shape profile.
Pieces I call the ribs were cut and joined to the base first. These will be essential to provide strength to hold the spine upright, and eventually to attach the hull walls onto.
Every joining piece was made with various dovetail type cuts to lock joints together tight.
It really felt like I was building an old Viking ship at this point.
Building Upside Down

The whole thing had to be constructed upside down, from now on.
Primarily, because I did not want these many U-shaped support ribs to sag outward when the clay was soft. By assembling upside down, gravity would help force the ship sides to press in towards the center, making things stronger. Support pillars were set inside to suspend the entire ship, so nothing was ever pressing down directly on the ship walls.
The strategy for construction was now really showing off my best talents at this point. Maybe a gifted person can carve a ship out of a lump of clay, but fewer can plan how to assemble a hollow interior with ideal structural integrity.
The second phase became very advanced, and attracted quite a bit if attention from others at the ceramics studio. It involved fully fleshing out the entire inner skeleton of the ship, which looked pretty awesome.
Two more more horizontal side beams were added around each side. Each made with an appropriate curve and length to support different heights of upper and lower decks.
It is very hard to predict the shape each new piece will need to be before setting it in. Often times I will attach a large diagonal slab piece, and then eyeball from the side and above where to trim off excess clay from the inner and outer curve. Pre-measured pieces often do not fit exactly as planned, so it is better to join a big lopsided piece perfectly plumb, and then trim edges later.
Having a single, solid slab of clay for each beam will provide the best structural strength. It would be easier to glom clay wads on as I go, but that would not have the same molecular strata (to resist cracks) as a pressed slab beam.
Extra beams at offset locations made the back of the ship extra sturdy behind the corners, another place for potential weaknesses.
Frosting The Cake
A blanket of clay was molded around the outside to form the hull. This, I call frosting the cake, because it was so much like stretching a thin layer of fondant to a delicate layer cake.
From the outside I can only pinch the clay to the base, back corner beams, and the front beam. Everything attached to the inner ribs is only weakly joined by a few light pats here and there, since I cannot reach the inside of the upside down ship.
At this point, all this work had to be carefully flipped over.
Upper wall edges were trimmed to approximate height to match the upper and lower decks.
Much of the interior skeleton was carved out. Temporary support pillars were placed to hold up the new deck floors, to keep everything flat. The floor decks are lowered in as oversized slabs, then eyeball cut from above to fit perfectly around the inner beams so they won't slide around.
Interior Decorations
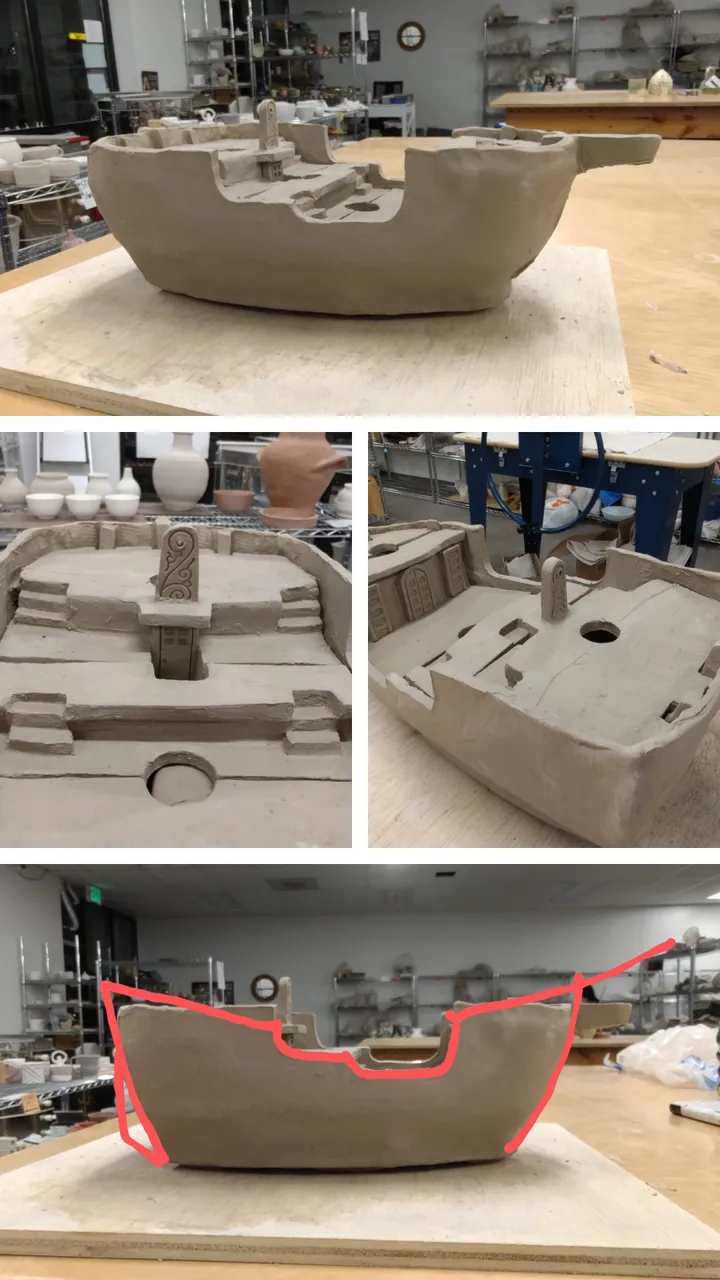
Deck floors are given circular holes for the masts, one for each deck. Some of the decks are cut in half to make it easier to disassemble and reassemble without anything getting stuck.
All of the deck panels are being designed so they can be fully removable, so that the bonsai trees can be planted underneath the main levels. So they are essentially free floating floors, with the illusion they are attached to the ship.
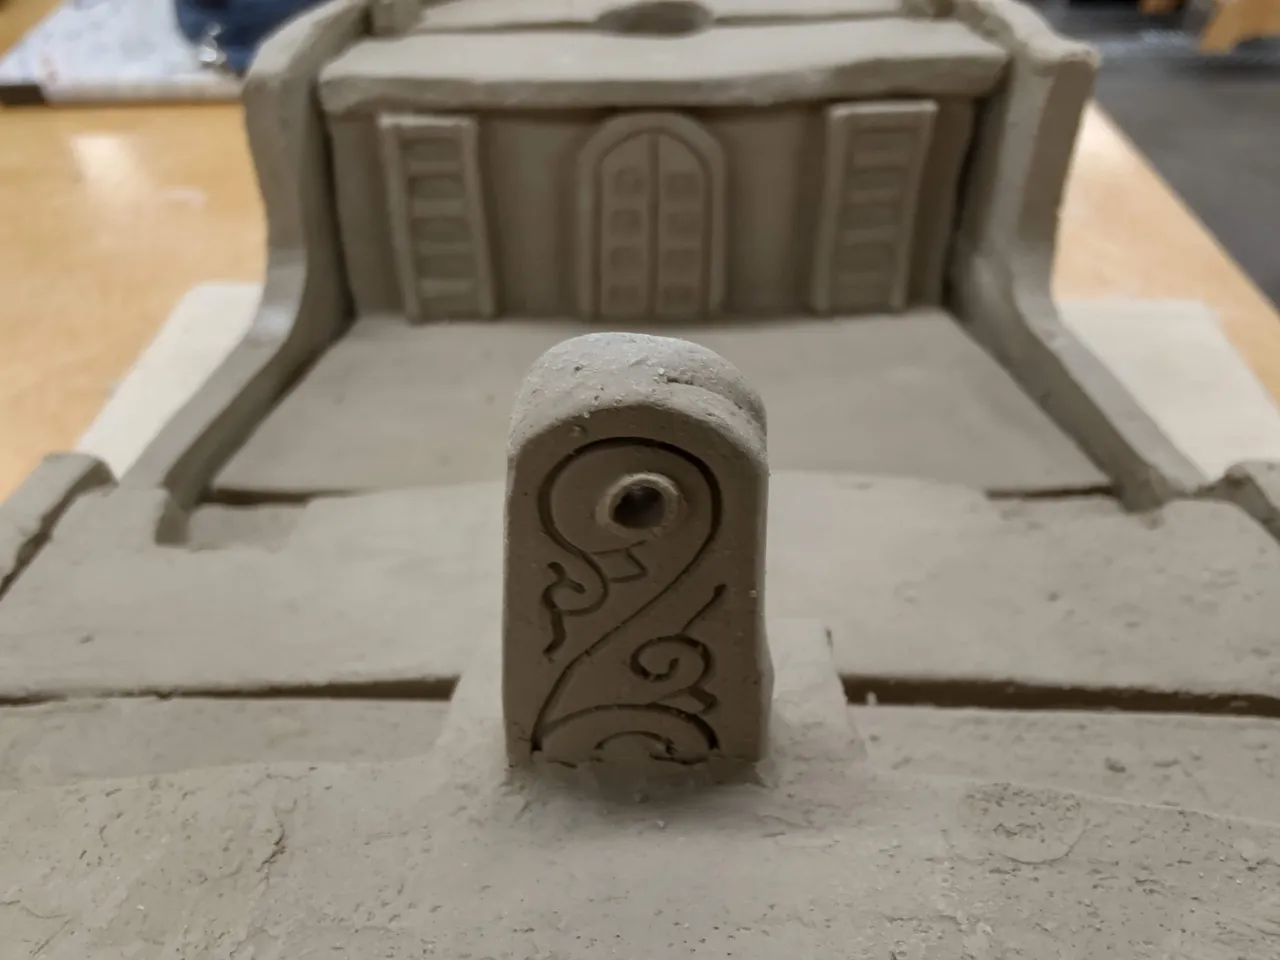
Stairs, ladders, a stamped box for the steering wheel, a lower deck door, and a captain's door were added.
A drawing was made over the profile photo to help guide me where I want to adjust the shape of the ship. The upward curving walls would have been impossible in the upside down construction, but now it can be adjusted.
Up Close
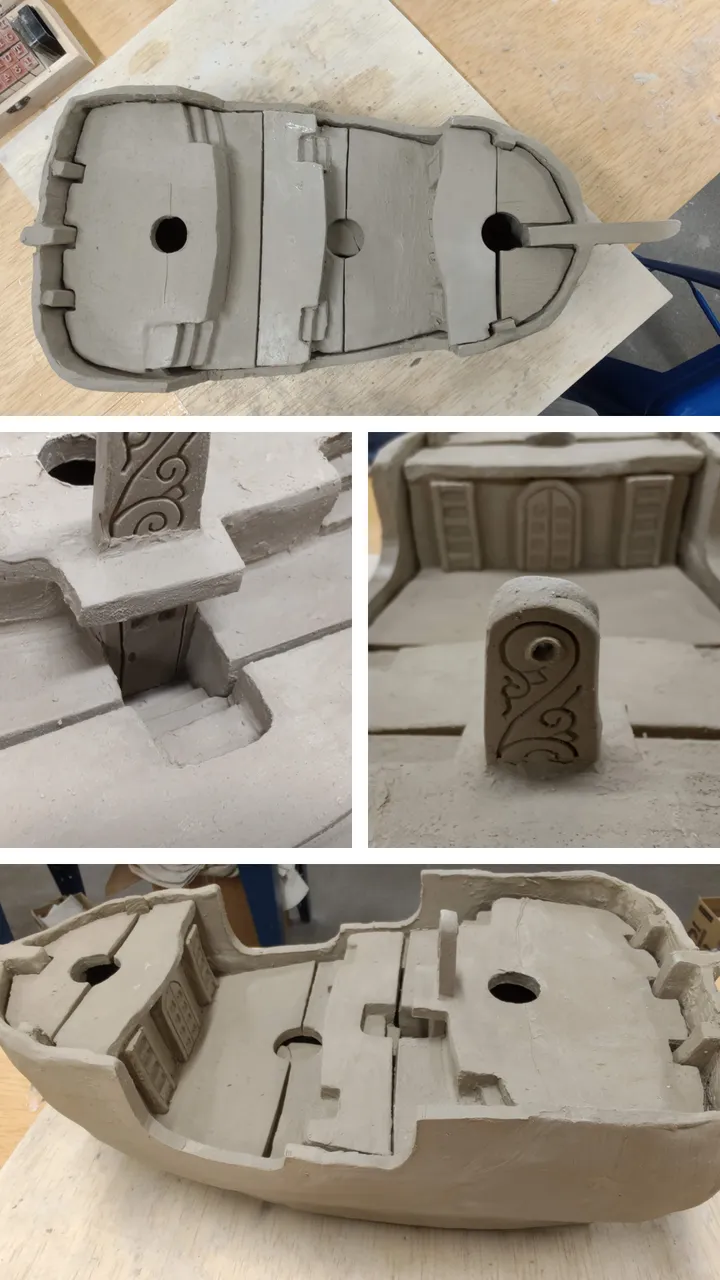
Here are some close up details.
Expansion and Renovations
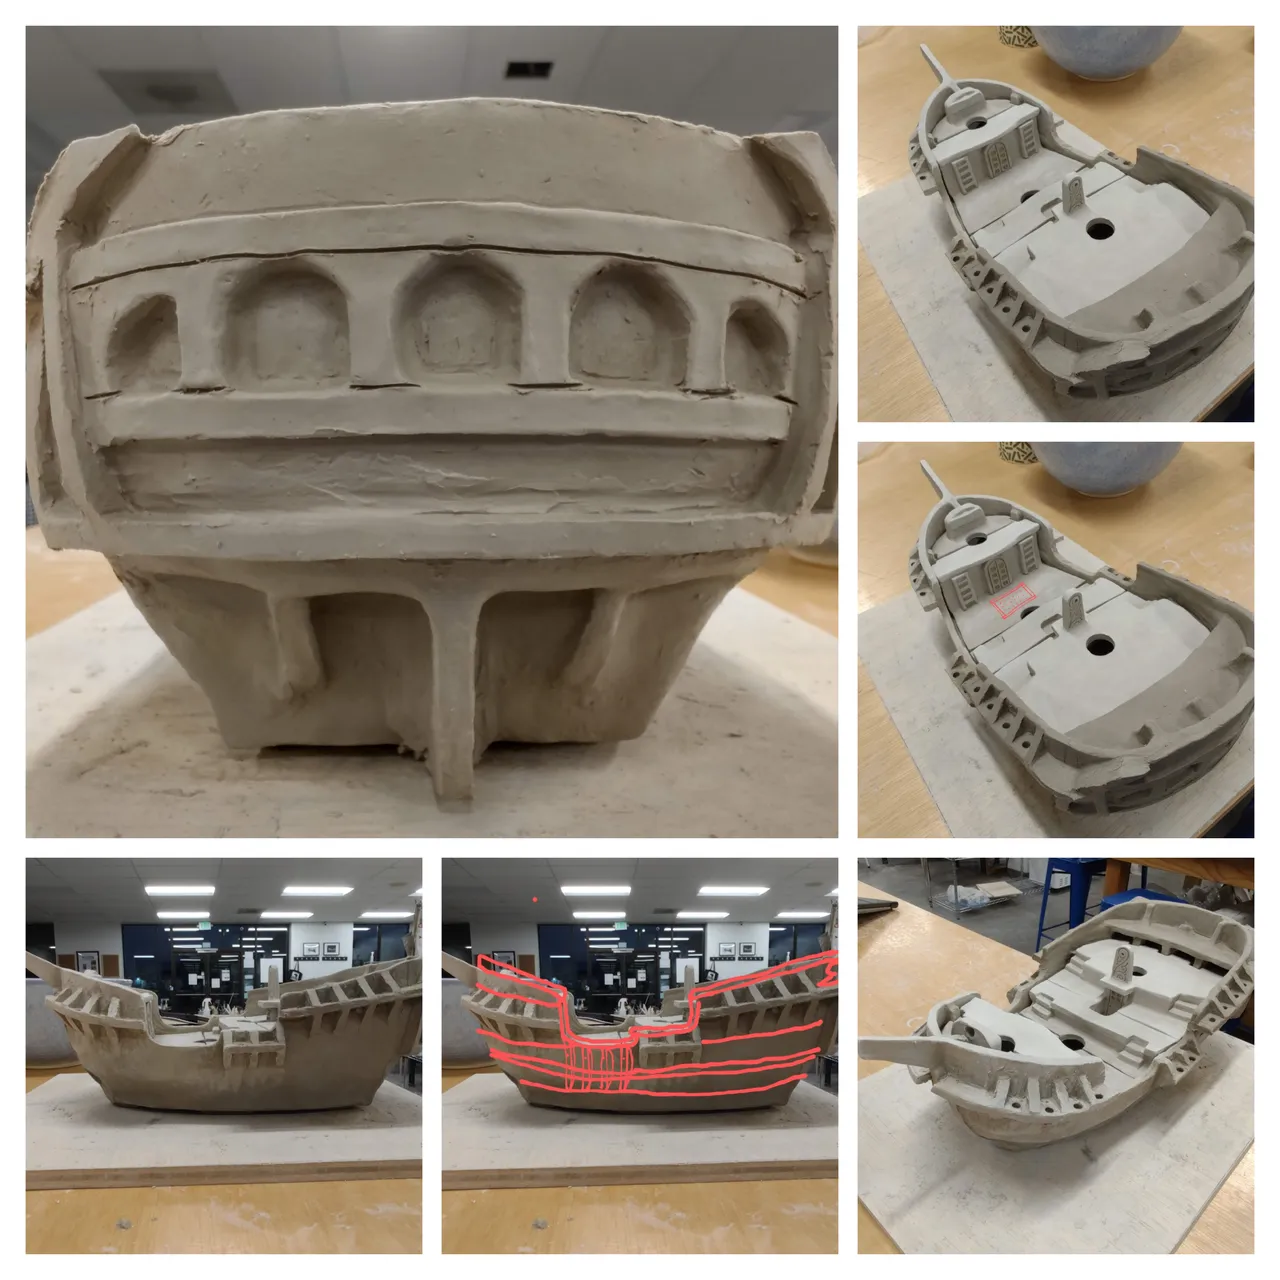
A new profile to the ship. A whole additional space was added to the back to make the captain's cabin more realistic in size (nevermind the fact a huge tree mast will be driven straight down the center).
Lots of windows and arching beams were added for architectural aesthetics. An upper balcony was added, along with a rudder, and a new upward nose.
Around the sides I added rigging supports. They are extra large to ensure the 1/4 inch holes are wide enough to support real string or wire supports for training the bonsai trees to grow upright like real ship masts.
A photo was traced over to help me to visualize at what levels horizontal beams can be added as details outside the ship walls. Also I felt a curved railing would help to define the edge of the walls, and perhaps strengthen the slabs from stretching and cracks.
Last Chance For Changes
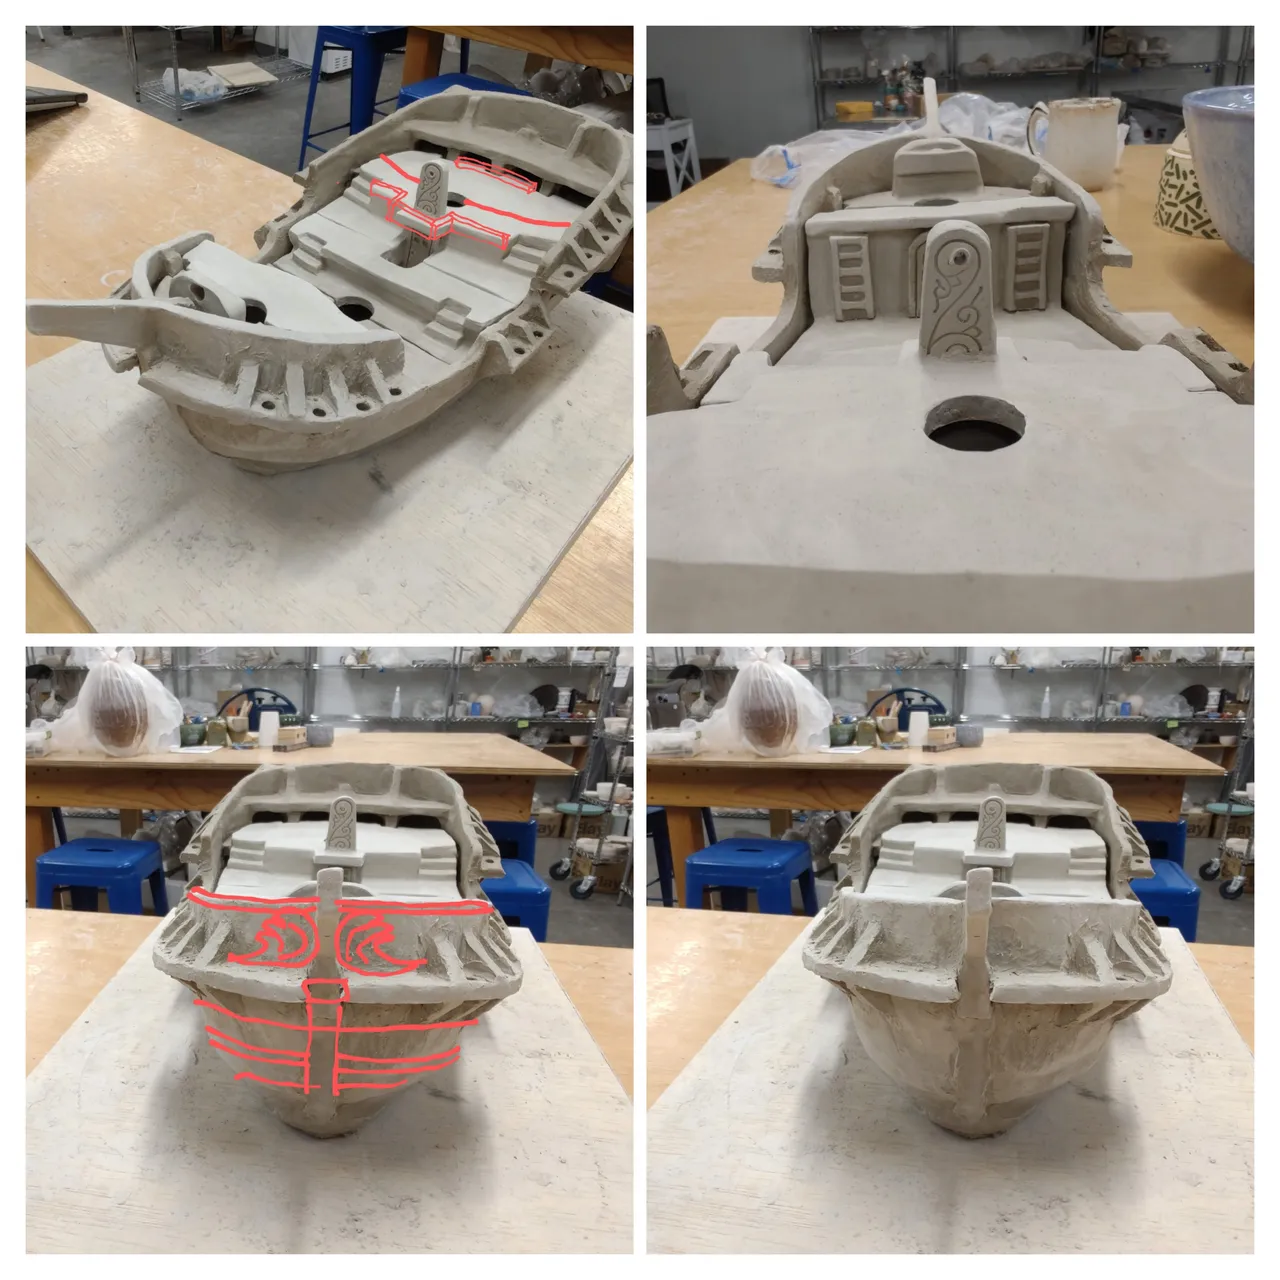
A few more details were traced out.
The back balcony needed some steps, and the upper deck needed a railing, so I drew those out.
My peers really wanted me to make a mermaid sculpture for the front, but I did not think I could make something that small and detailed look good. Instead I traced out a couple of crashing waves designs, which would later evolve into something else.
A Few Holes, A Few Cracks

Holes were added to the base for water to drain through.
Red alert! The first cracks were starting to form. This was to be expected as the clay dries and shrinks differently in all areas.
To fill cracks, I usually press bits of semi-hard clay and slurry in, then burnish with a hard tool until it turns dry and glossy.
The interior was carved and smoothed as much as possible, leaving just enough skeleton to provide structure to the heavy walls that want to warp and crack from their stacked weight.
Beware The Krackin'

Most everything is finished, but more cracking continues to appear each day. Everything is kept semi-moist under plastic before I leave for the day, and I use a water bottle to lightly spritz everything I don't want dried out completely.
The wood grain details were made by slathering on some darker clay as a slurry. To repair the cracks, I have to press in some tacky clay and burnish over some of the wood grain textures. I also tried using some vinegar and clay slurry, a smelly solution for joining clay so it dries out quickly to match the adjoining surface dryness.
Bone Dry
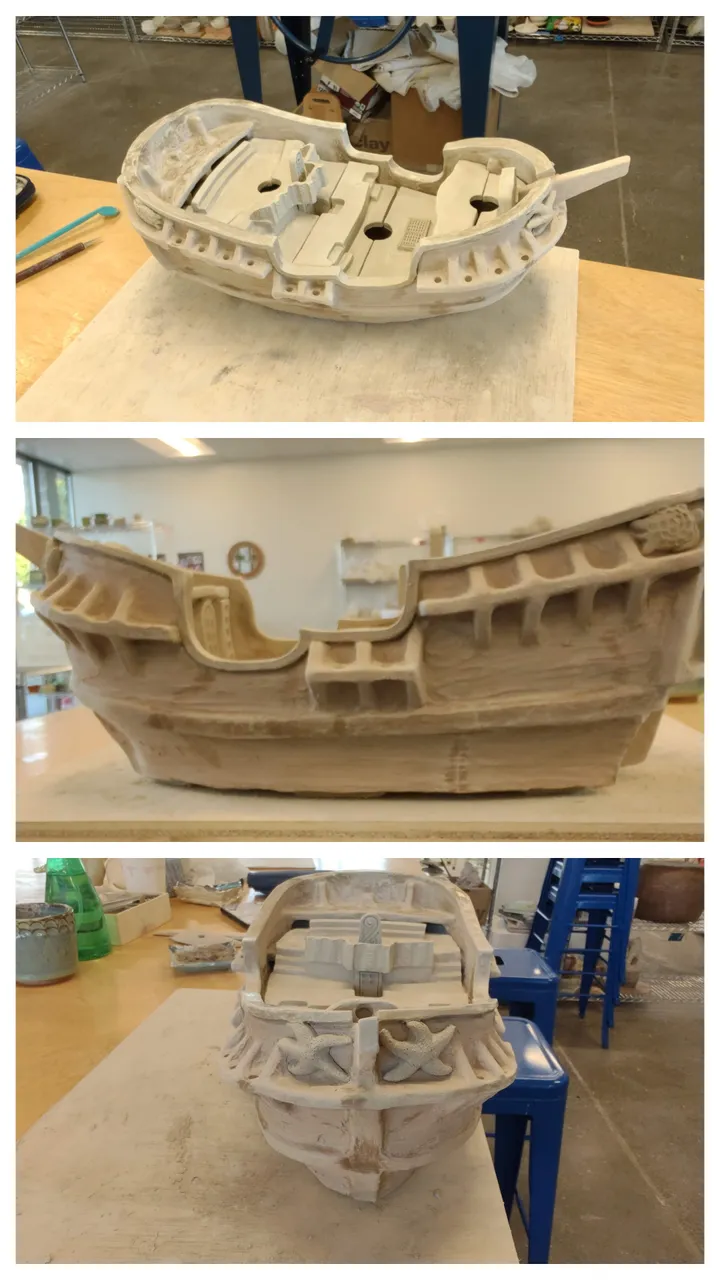
The upper deck now has a railing.
The last details to appear were a couple decorations. Sea turtles in the back were made by dimpling the shells, and starfish in the front were textured with a needle head.
Everything is bone dry and the cracks have all been repaired.
It is now ready for the bisque kiln.
Stay tuned for the finished product in my next blog post, here on Hive.
#ship #caravel #boat #patience #slab #handbuilding
Photos in this post are all #originalworks by @creativetruth, unless stated otherwise.