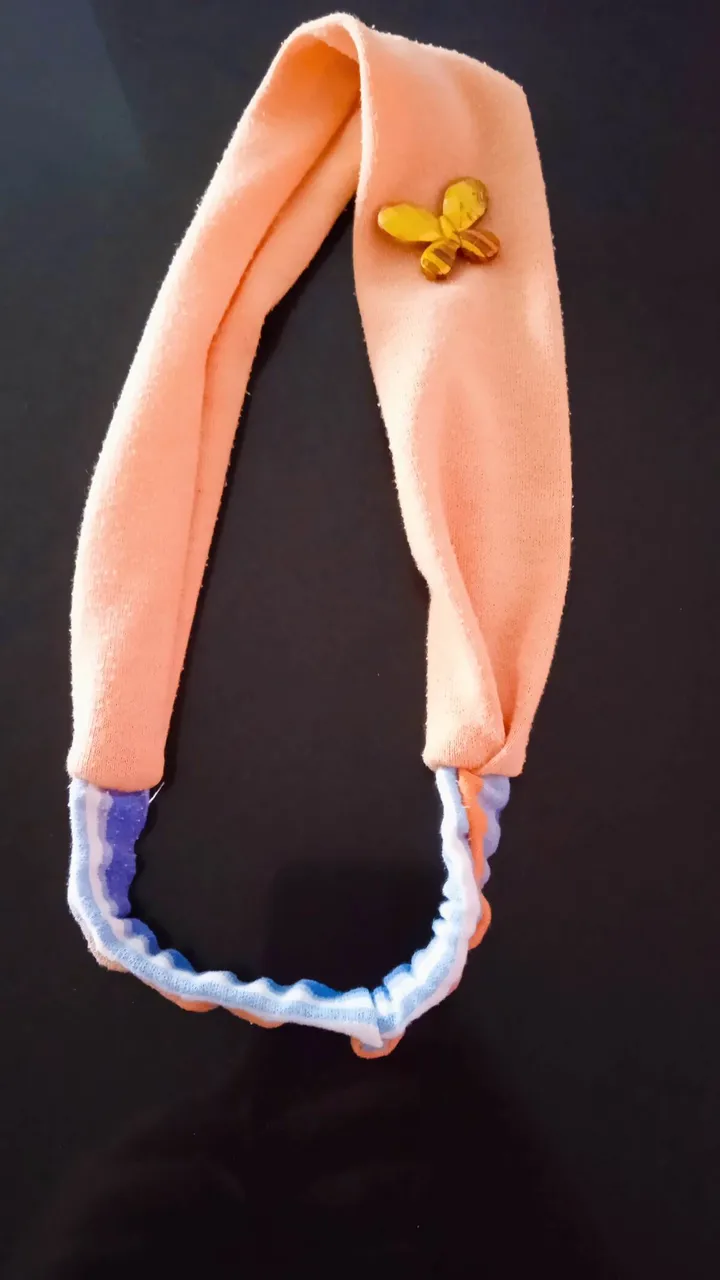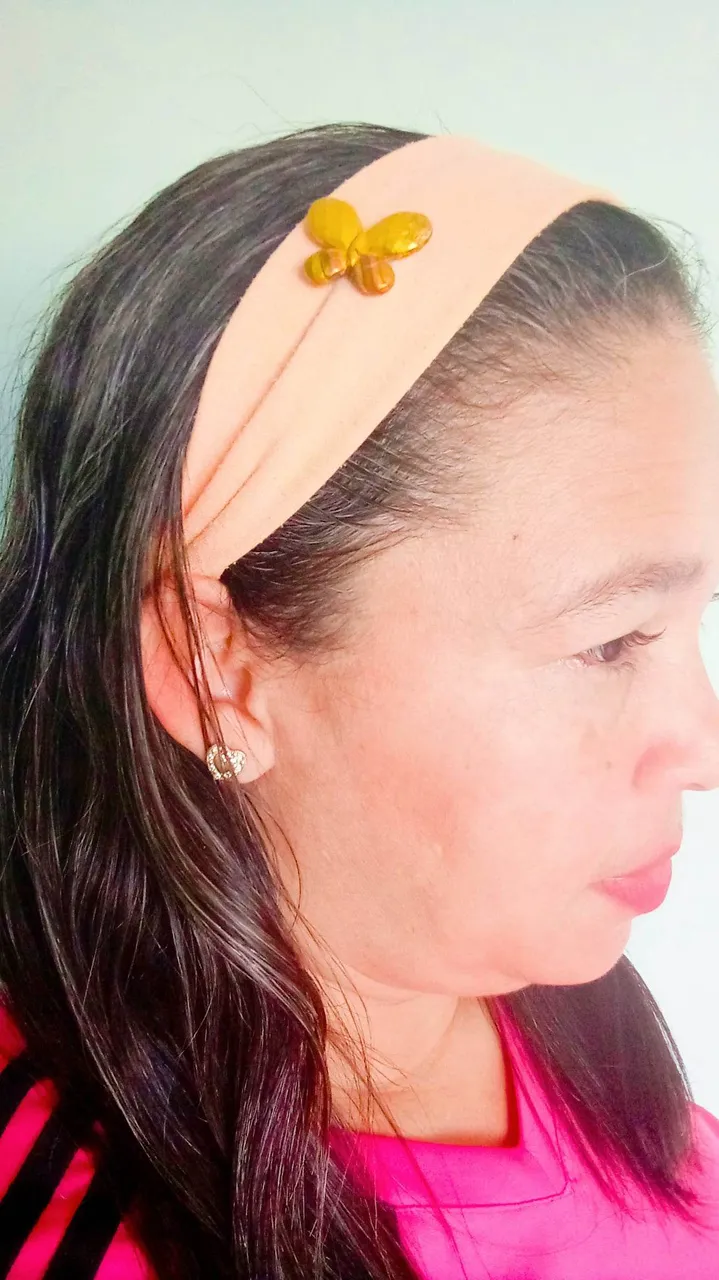
Hello everyone, I am pleased to greet you and be again sharing with you all, this time I made a nice fabric headband for me, it is ideal for use at home or to go out to do simple things, it does not require much material and the steps are very simple in addition to this we can decorate it to our liking, let's see the step by step.

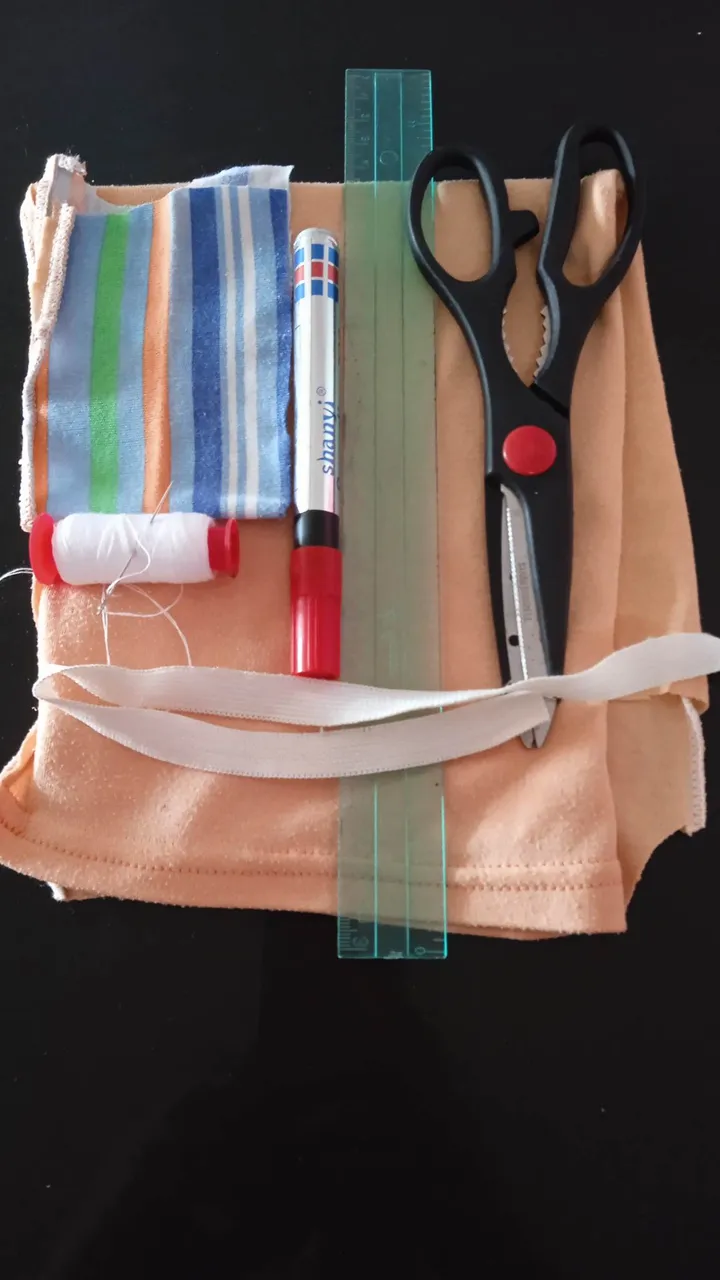
- Los materiales a utilizar son:
- Retazos de tela de cualquier color.
- Tijera.
- Hilo u auja de coser.
- Regla o cinta métrica.
- Marcador.
- Elástica.
- The materials to be used are:
- Fabric scraps of any color.
- Scissors.
- Thread or sewing needle.
- Ruler or tape measure.
- Marker.
- Elastic.

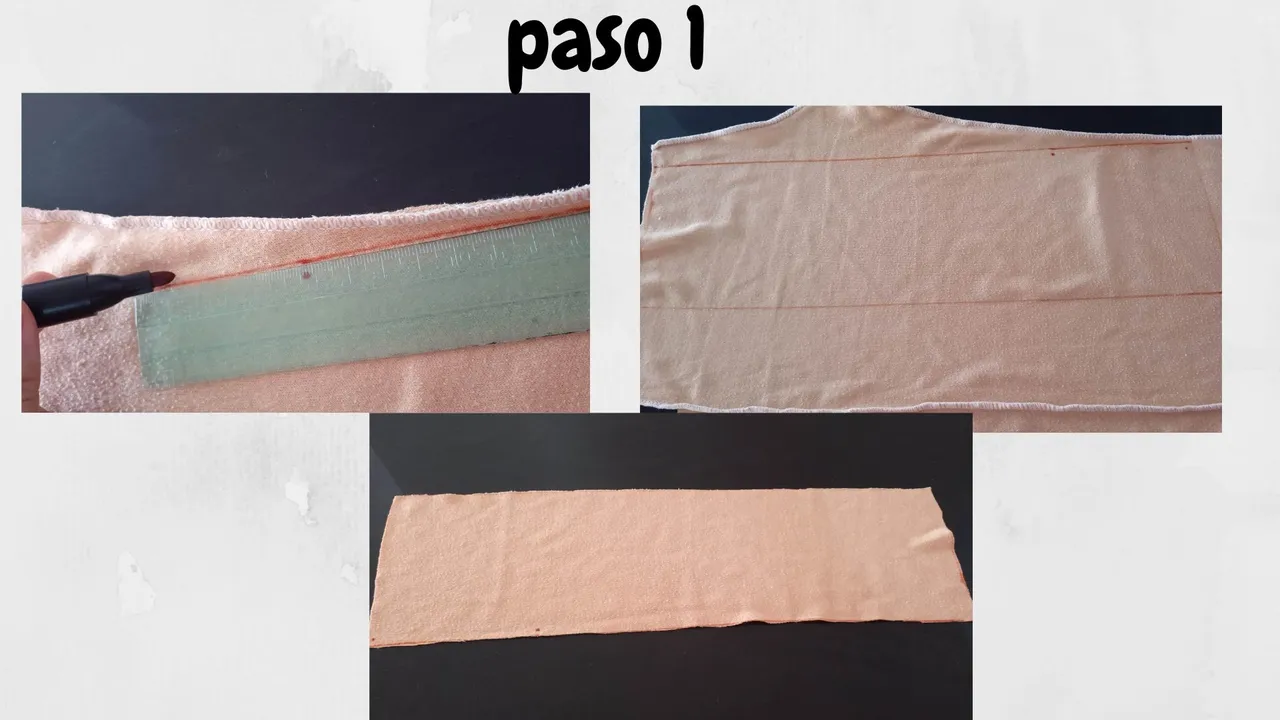
- Paso 1: Marcamos con el marcador en la tela las medidas de 38 cm de largo por 11 cm de ancho, una vez marcadas procedemos a recortar.
- Step 1: We mark with the marker on the fabric the measures of 38 cm long by 11 cm wide, once marked we proceed to cut.

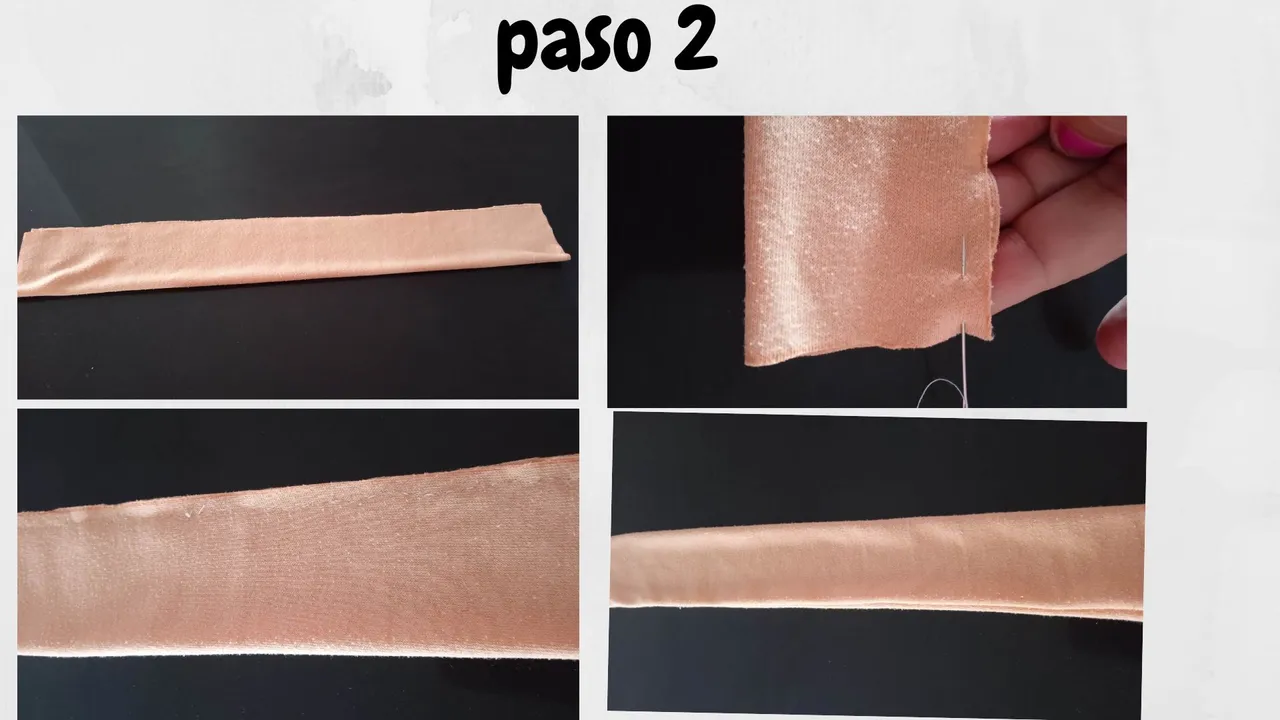
- Paso 2: Luego doblamos la pieza a la mitad y cosemos por la parte más larga, dejando sin coser ambos extremos y dejando un centimetro para la costura, luego doblamos la pieza y deberá quedar tal cual como muestra la cuarta imágen.
- Step 2: Then fold the piece in half and sew along the longest part, leaving both ends unstitched and leaving a centimeter for the seam, then fold the piece and it should look as shown in the fourth image.

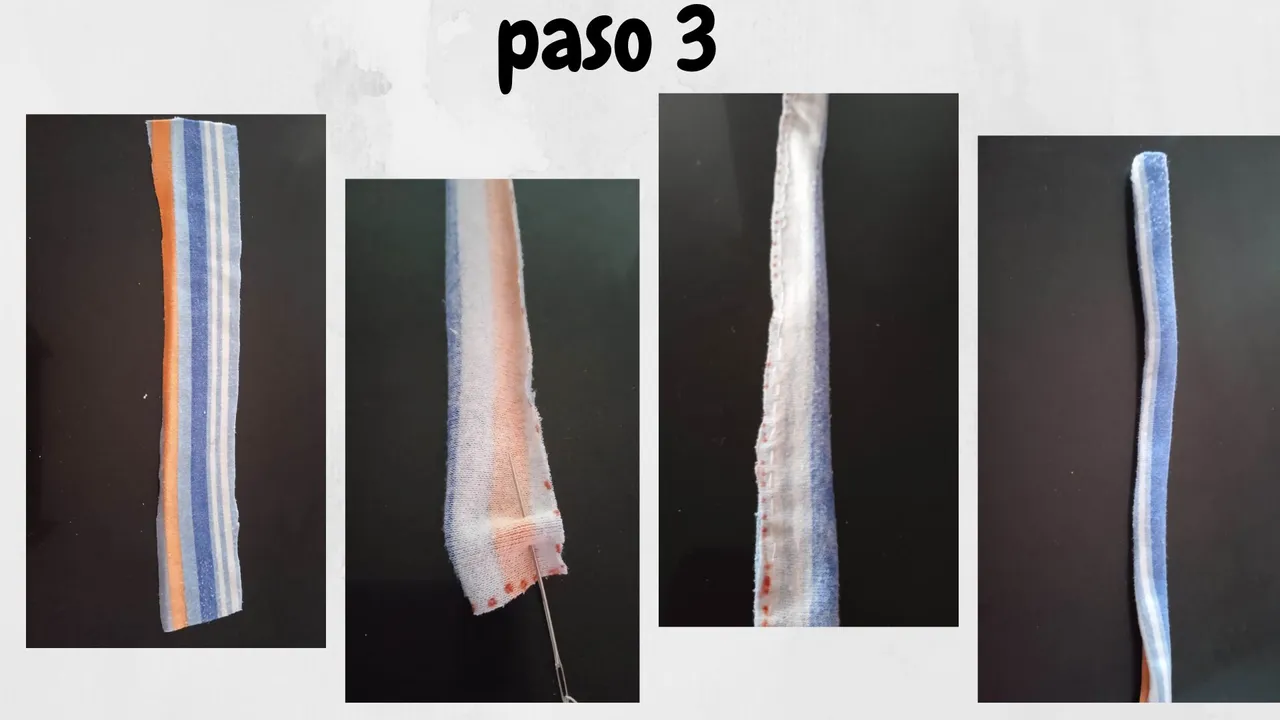
- Paso 3: Para sacar la parte de abajo del cintillo, marcamos en otro color de tela o en el mismo ( como usted lo desee) las medidas de 23 cm de largo por 4 cm de ancho, doblamos a la mitad y cosemos por la parte más larga sin coser los extremos, luego volteamos del lado derecho.
- Step 3: To remove the bottom of the headband, we mark in another color of fabric or in the same (as you wish) the measures of 23 cm long by 4 cm wide, fold in half and sew the longest part without sewing the ends, then turn right side out.

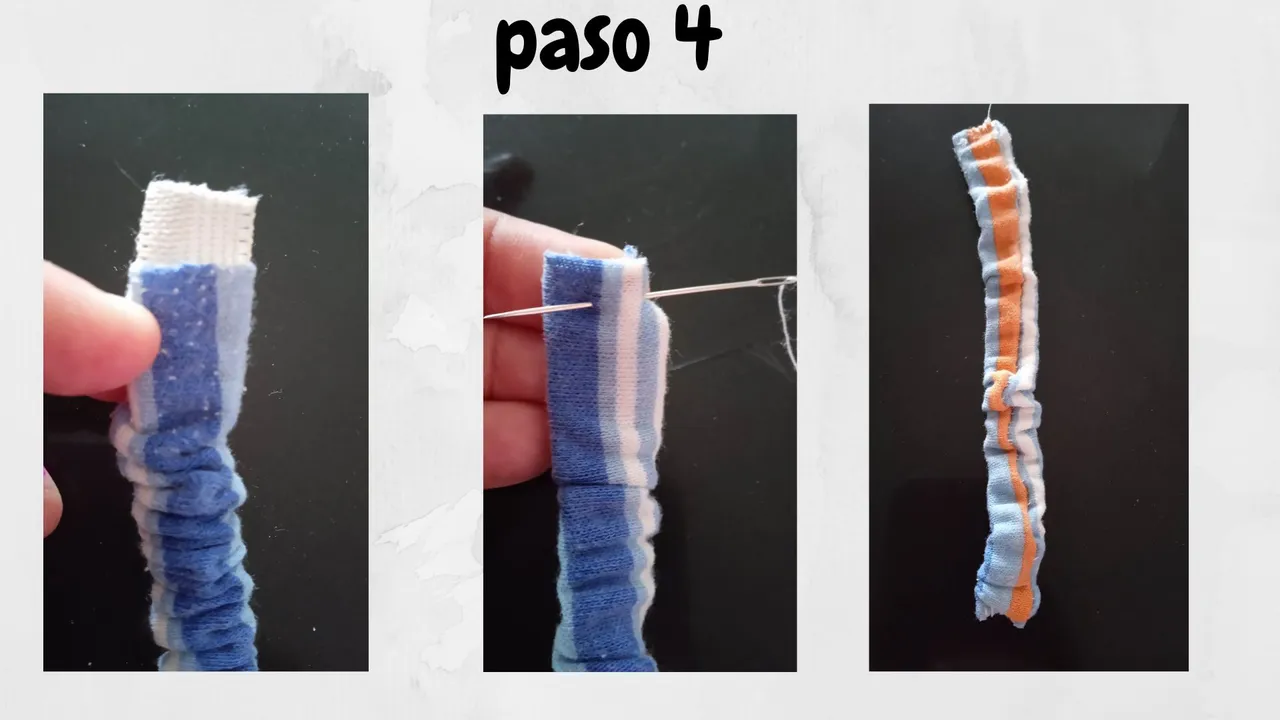
- Paso 4: Luego de haber volteado la tira más pequeña, introducimos la elástica (15 cm), nos tiene que quedar un poco arruchada y cosemos ambos extremos de la tira.
- Step 4: After turning over the smaller strip, we introduce the elastic (15 cm), it must be a little crumpled and we sew both ends of the strip.

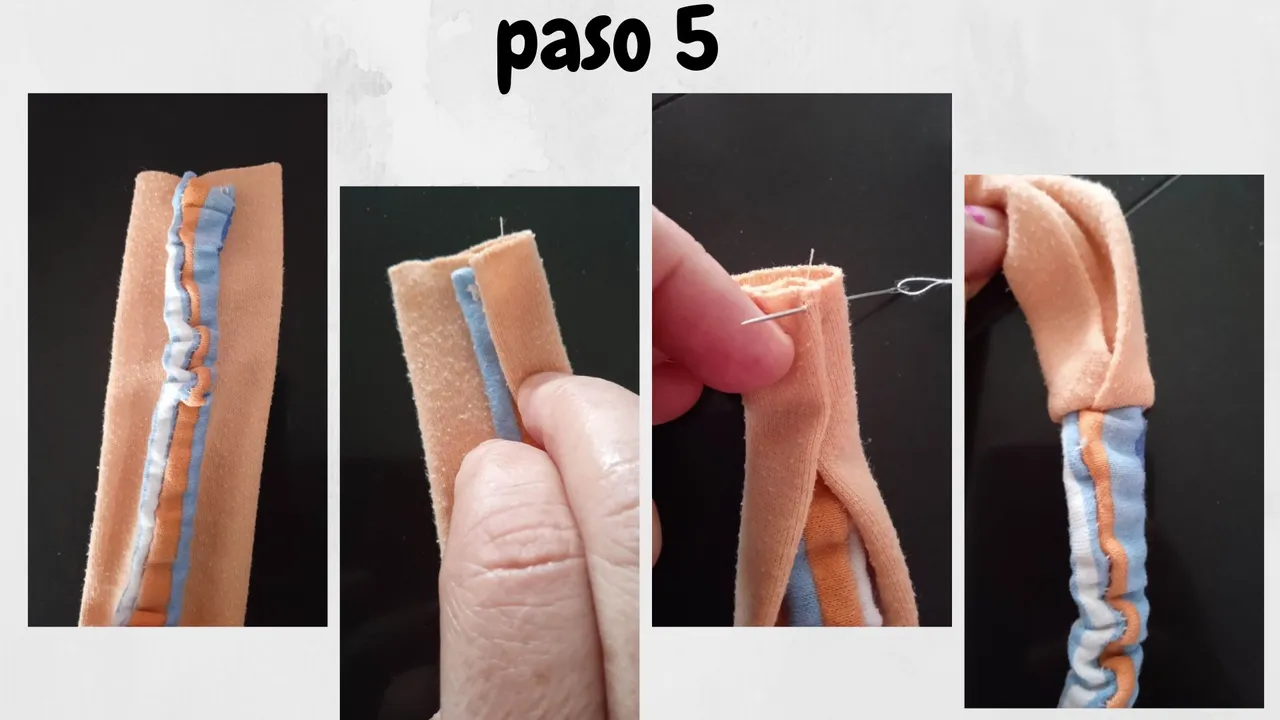
- Paso 5: Luego colocamos la tira pequeña sobre la tira mas grande, doblamos un extremo y luego doblamos el otro, que la tira pequeña quede como arropada, luego cosemos en la orilla, este mismo procedimiento lo debemos hacer con el otro extremo, luego volteamos y nos deberá quedar como la cuarta imágen.
- Step 5: Then we place the small strip on the larger strip, fold one end and then fold the other, the small strip is like tucked, then sew on the edge, this same procedure should be done with the other end, then flip and we should be like the fourth image.

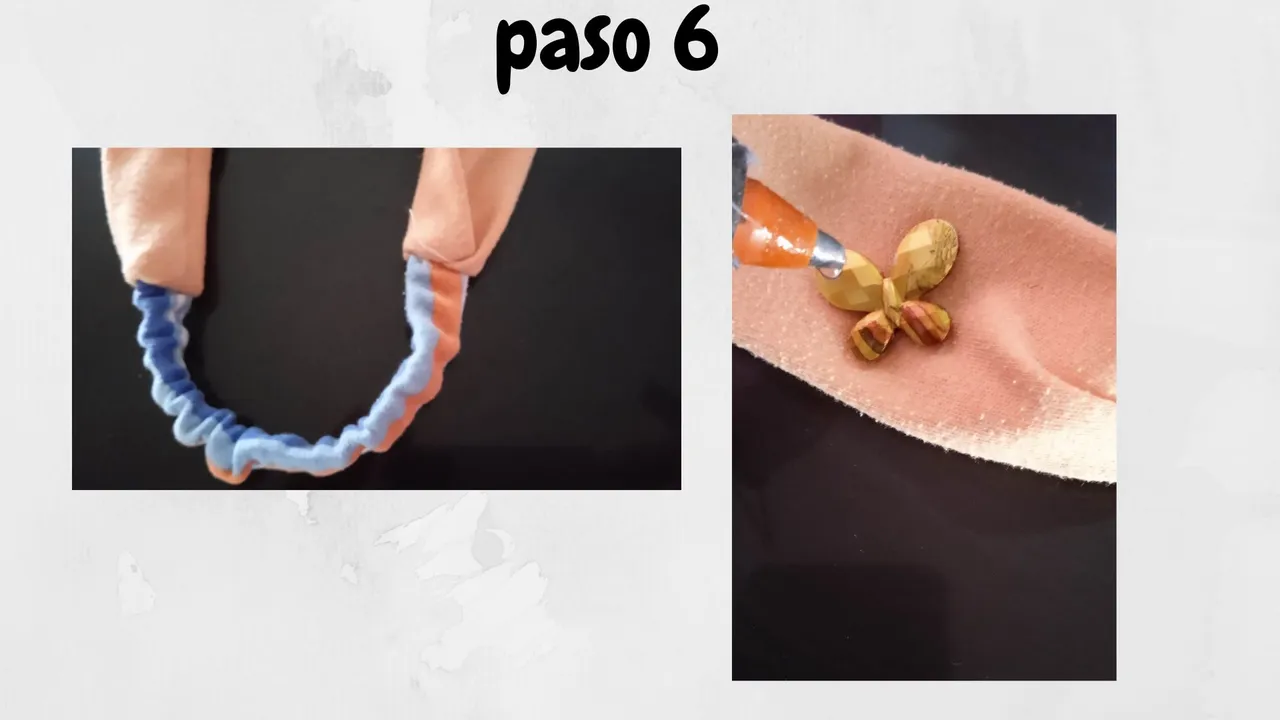
- Paso 6: Luego de haber cosido ambos extremos, procedemos a decorar el cinillo a nuestro gusto en mi caso lo decoré con una linda mariposa.
- Step 6: After sewing both ends, we proceed to decorate the ribbon as we like, in my case I decorated it with a beautiful butterfly.

