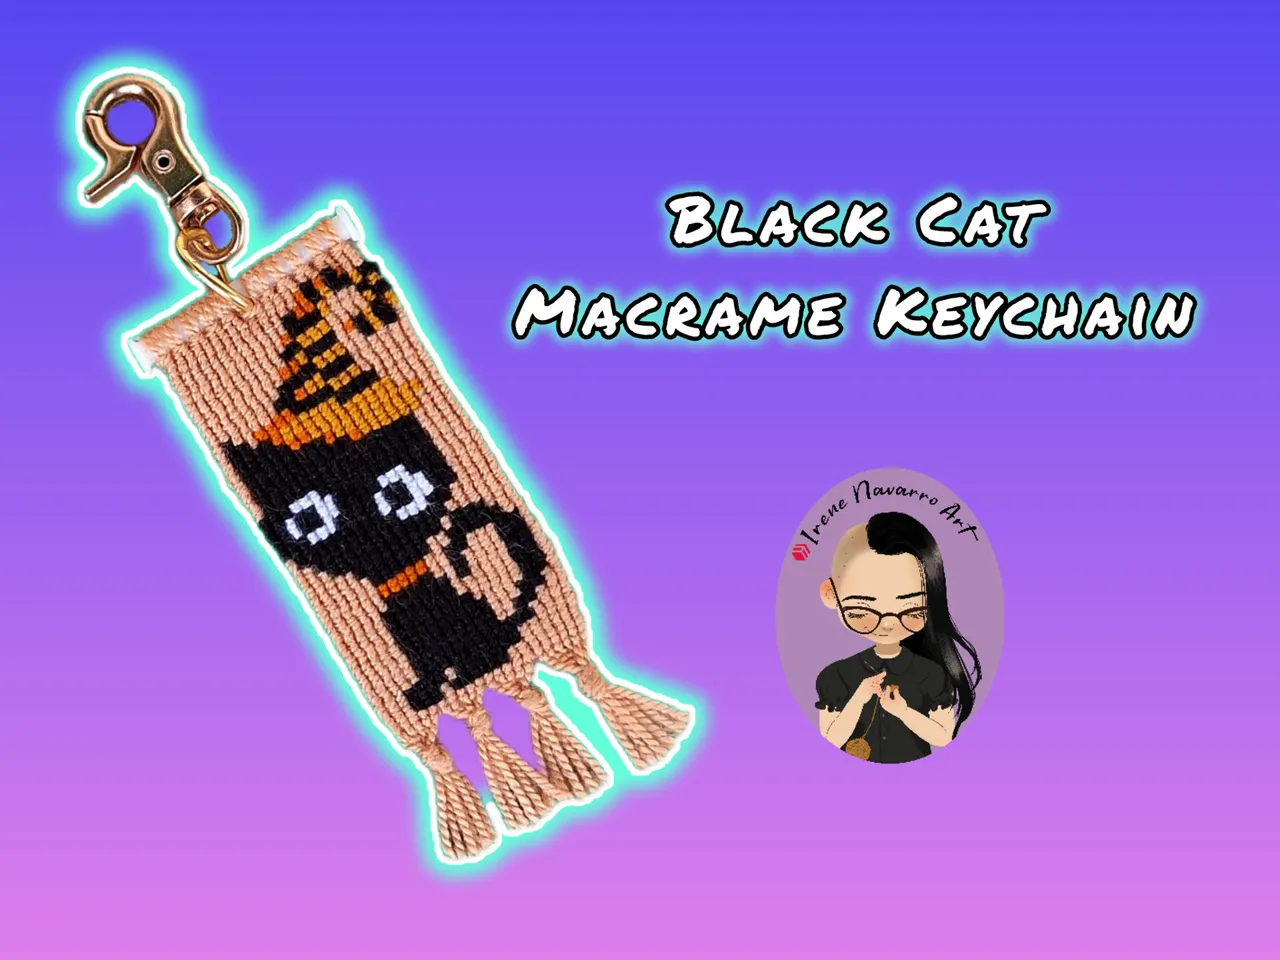
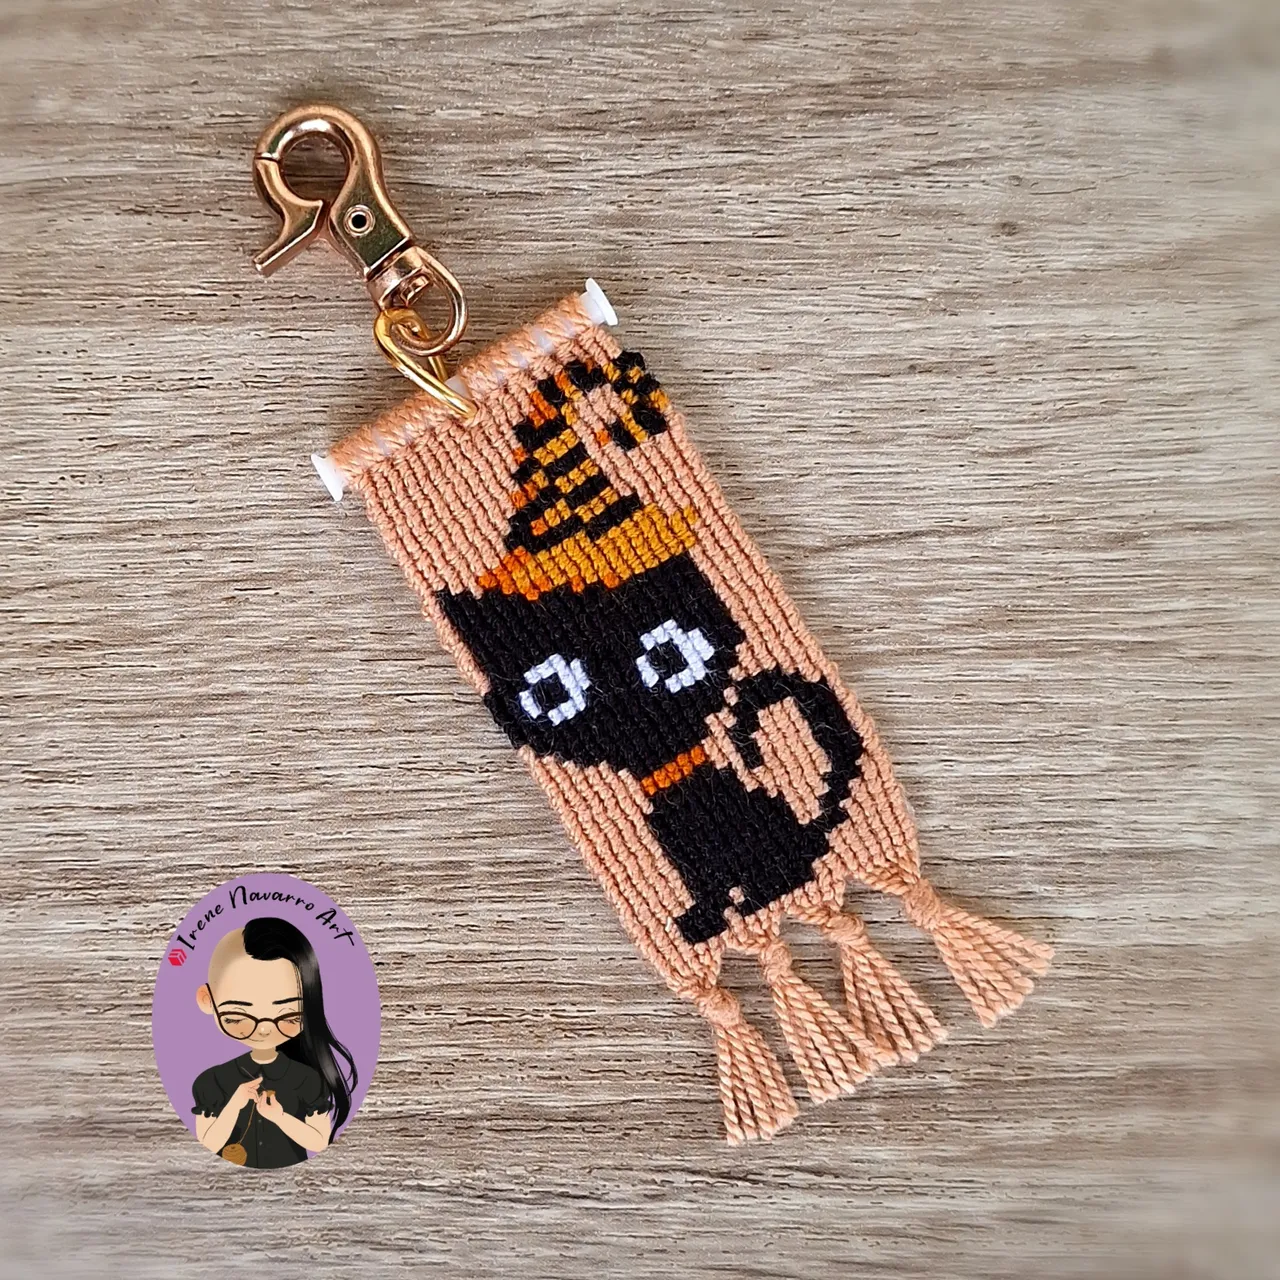
Saludos querida comunidad, como saben Halloween es mi época favorita del año porque puedo hacer muchos tejidos dedicados a la temática y sentirme como pez en el agua porque me encanta, así que hoy comparto con ustedes la realización de un llavero en macramé con la figura de un gato negro con sombrero de bruja, el patrón lo encontré en Internet y me pareció muy lindo, amo los gatos aunque nunca he tenido uno de ese color, en realidad me gustan los gatos de todos los colores pero sin duda los negros llaman mucho mi atención. Espero les guste 😊
Greetings dear community, as you know Halloween is my favorite time of the year because I can make many fabrics dedicated to the theme and feel like a fish in water because I love it, so today I share with you the making of a macramé keychain with the figure of a black cat with a witch’s hat, I found the pattern on the Internet and I thought it was very cute, I love cats although I have never had one of that color, I actually like cats of all colors but without a doubt the black ones catch my attention a lot. I hope you like it 😊

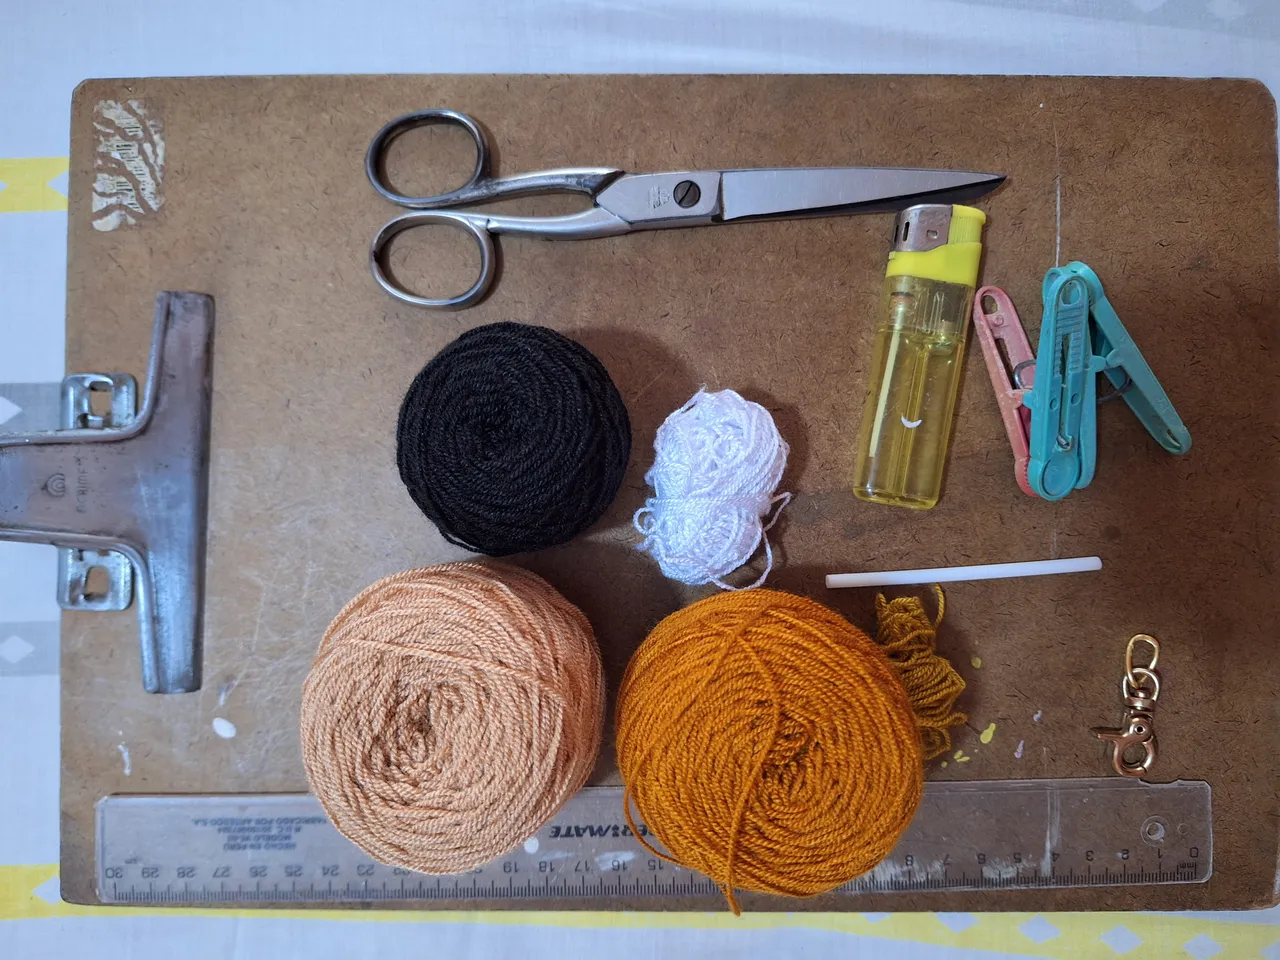
Materiales / Materials
- Hilo acrílico para crochet: beige, ocre, naranja, negro, blanco.
- Palito de plástico
- Garfio para llavero
- Encendedor
- Tabla
- Dos pinzas para ropa
- Retazo de tela
- Silicón
- Regla
- Tijera
- Patrón
- Acrylic crochet thread: beige, ochre, orange, black, white.
- Plastic stick
- Keyring hook
- Lighter
- Board
- Two clothespins
- Scrap of fabric
- Silicone
- Ruler
- Scissors
- Pattern
Proceso / Process
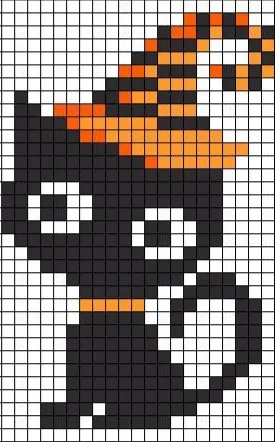
Para hacer ese llavero utilicé una imagen que encontré en la web, se pueden adaptar trabajos en pixel art o patrones que sean tanto para punto cruz, intarsia crochet, dos agujas y patrones alpha. Este patrón se hace con 21 hilos guía y 34 hileras de nudos.
To make this keychain I used an image I found on the web. You can adapt pixel art works or patterns for cross stitch, intarsia crochet, two needles and alpha patterns. This pattern is made with 21 guide threads and 34 rows of knots.
Source
Con el hilo beige cortar 10 hebras de 30 cm y una hebra adicional unida al ovillo, tomar las hebras por la mitad y anudar al palito de plástico, anudar la hebra unida al ovillo de primera a la izquierda de modo que nos sirva para hilo anudador, de ese modo se obtienen 21 hilos guía y el hilo anudador de color de fondo unido al ovillo, colocar el garfio para llavero en el centro del palito.
With the beige thread, cut 10 strands of 30 cm and an additional strand attached to the ball, take the strands in half and knot them to the plastic stick, knot the strand attached to the ball first on the left so that it serves as a knotting thread, in this way you get 21 guide threads and the background color knotting thread attached to the ball, place the keychain hook in the center of the stick.
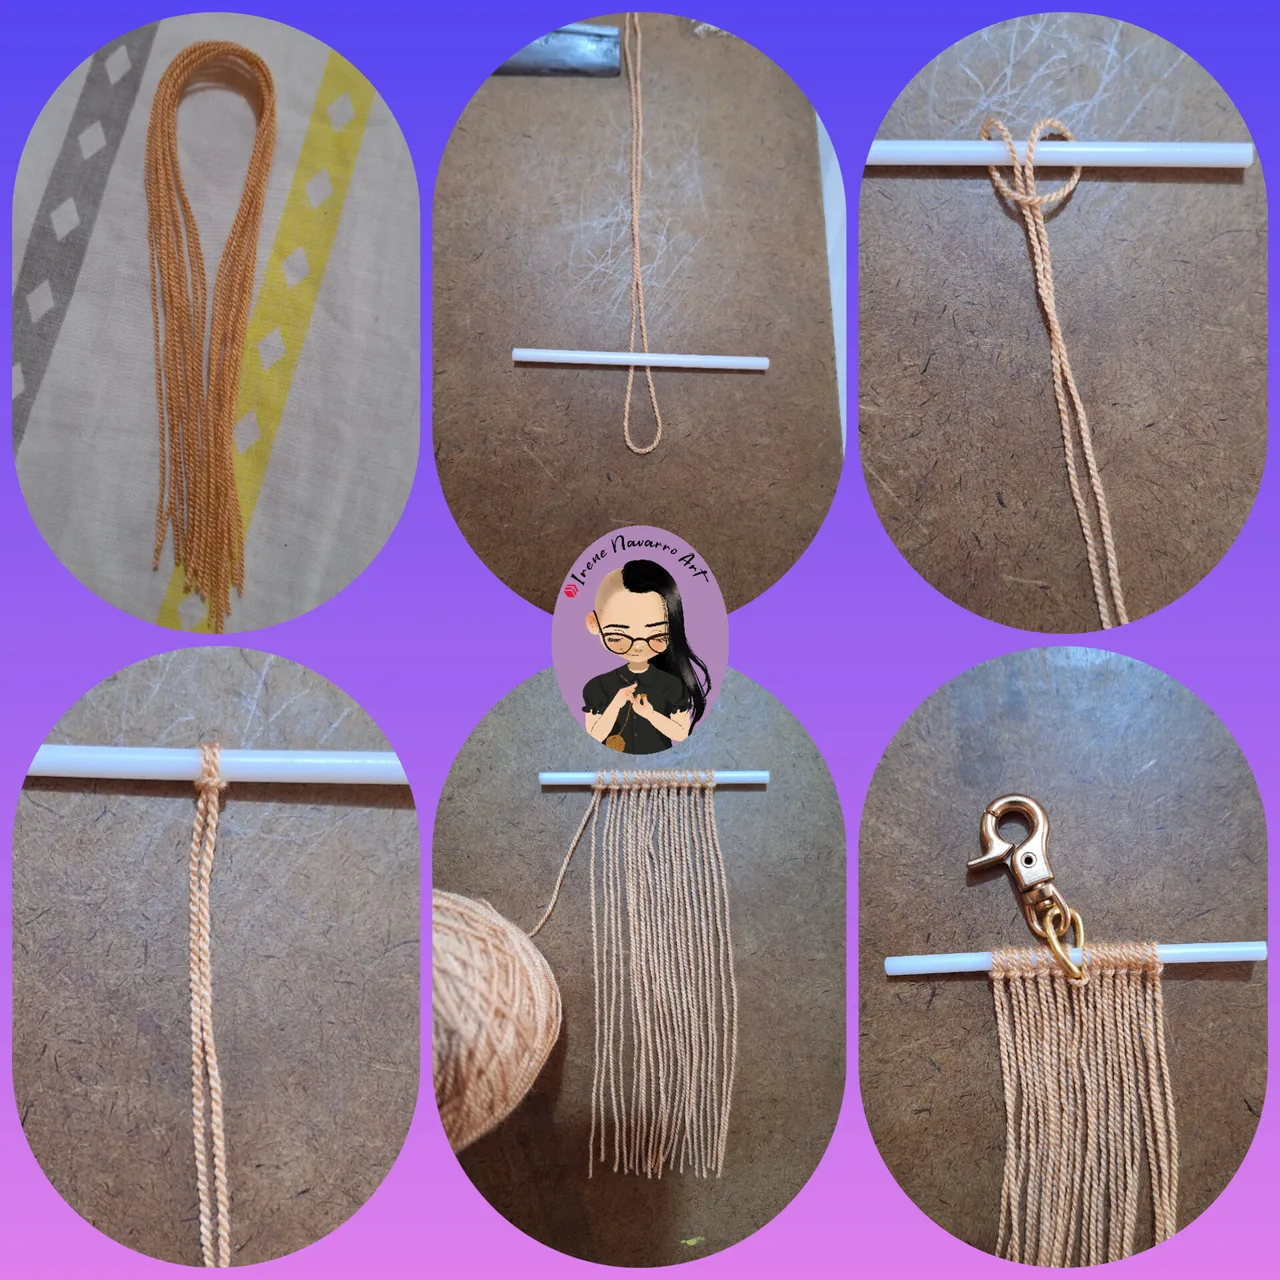
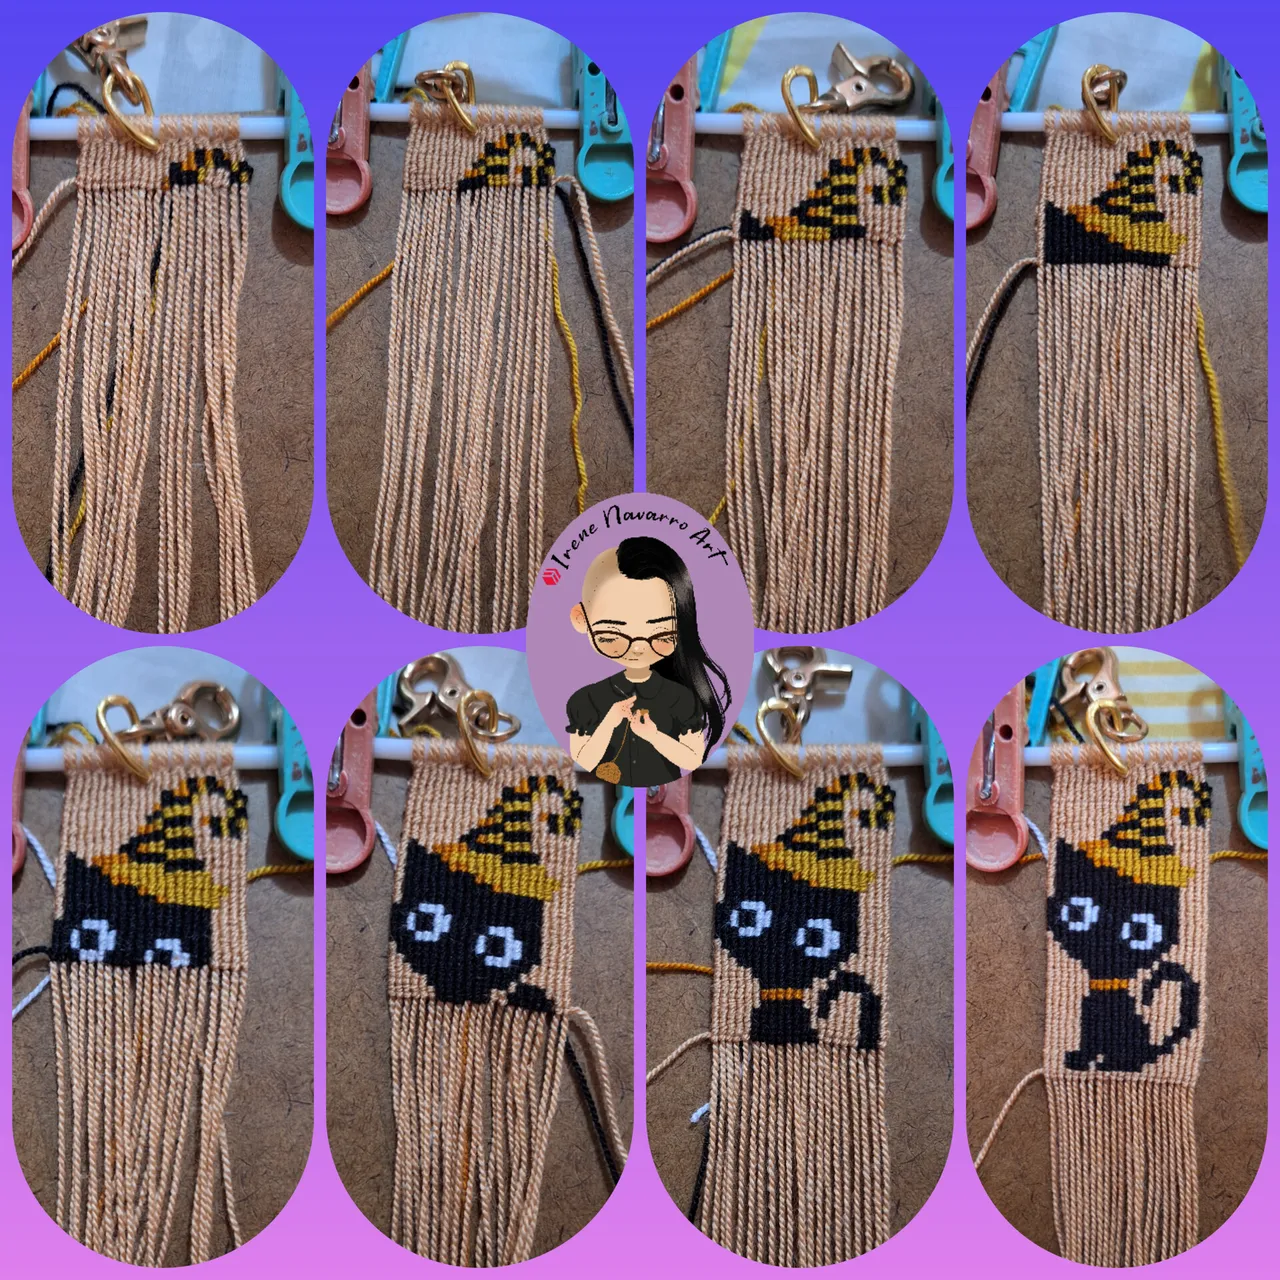
Hacer la primera hilera de nudos solo con el hilo beige, en esta técnica el hilo anudador envuelve dos veces cada uno de los hilos guía, de izquierda a derecha en las hileras impares y de derecha a izquierda en las hileras pares, agregar los hilos anudadores según corresponda en el patrón, cada cuadro representa un nudo, los cambios de color de hilo anudador se hacen cruzando las hebras por detrás. Al finalizar la figura del gato hacer nuevamente una hilera de nudos solo con el hilo anudador beige.
Make the first row of knots only with the beige thread. In this technique, the knotting thread wraps twice around each of the guide threads, from left to right in the odd rows and from right to left in the even rows. Add the knotting threads as appropriate in the pattern. Each square represents a knot. The knotting thread color changes by crossing the strands from behind. When you finish the cat figure, make another row of knots only with the beige knotting thread.
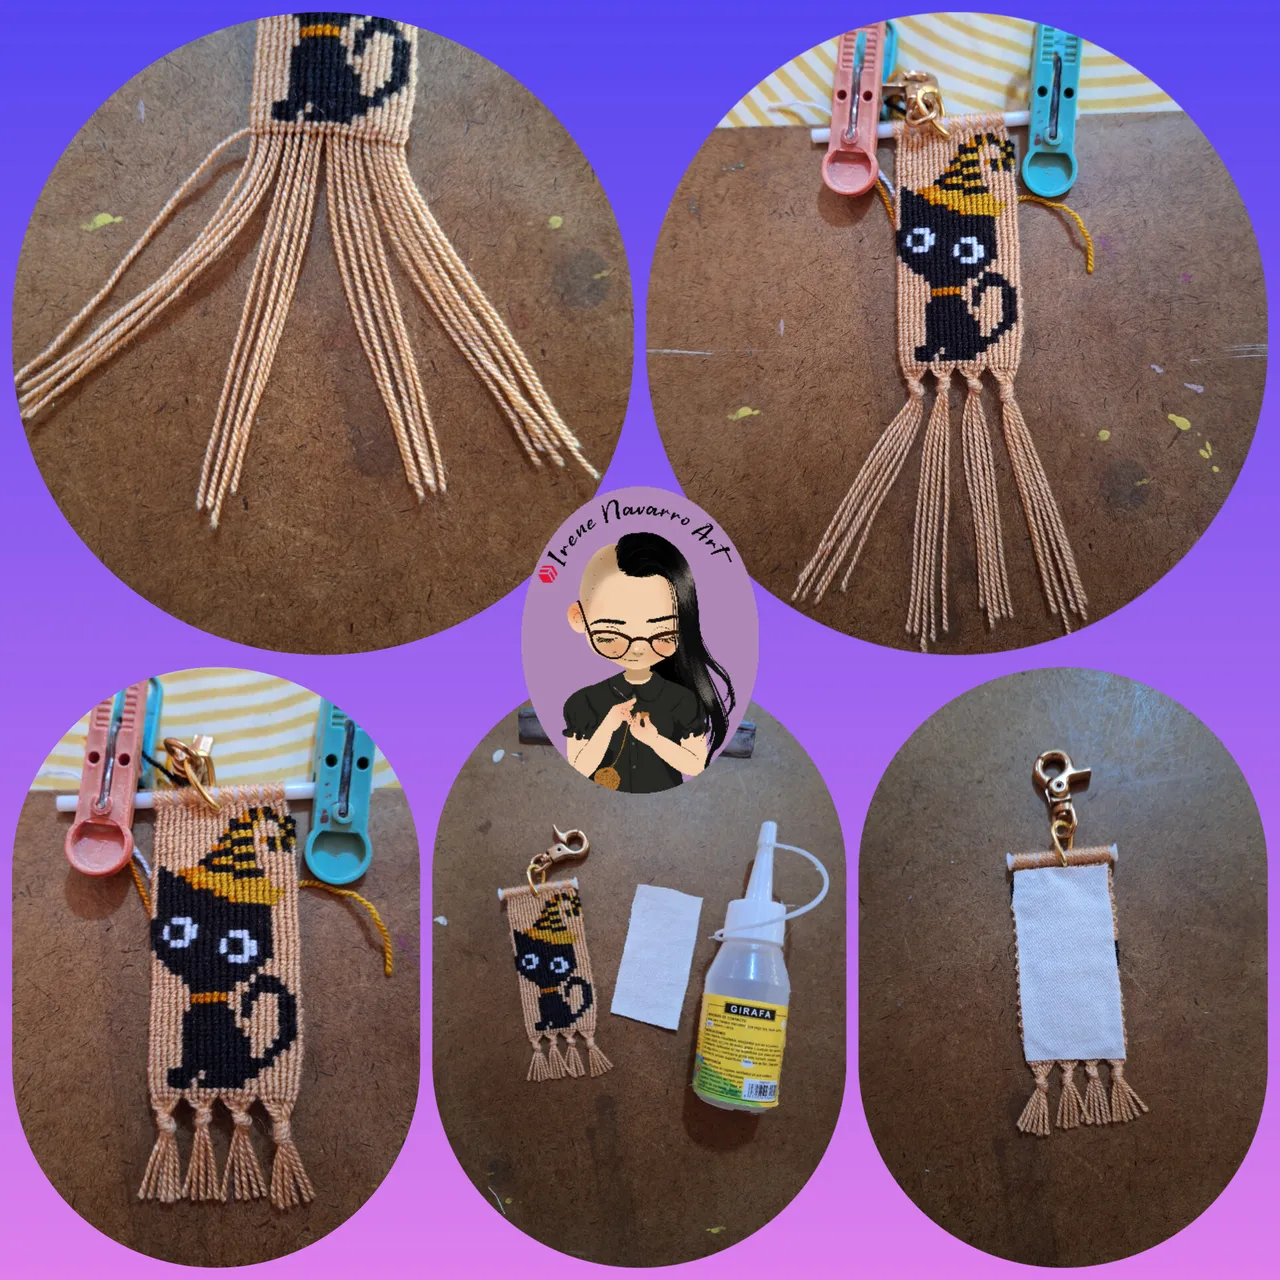
Agrupar las hebras en 4 partes y hacer 4 nudos , cortar para hacer flecos. Cortar los extremos del palito de plástico y quemar con el encendedor. Pegar un trozo de tela por el reverso para obtener un mejor acabado.
Group the strands into 4 parts and tie 4 knots, cut to make fringes. Cut the ends of the plastic stick and burn with the lighter. Glue a piece of fabric to the back for a better finish.
Imágenes tomadas con dispositivo Samsung A54. Portada editada en Inshot
Pictures taken with Samsung A54 device. Cover edited in Inshot

Espero les haya gustado. Les invito a leer mis próximas publicaciones y siempre estaré dispuesta a responder sus preguntas y comentarios, también pueden seguirme y contactarme en cualquiera de mis redes sociales. ¡Muchas gracias!
I hope you liked it. I invite you to read my next publications and I will always be willing to answer your questions and comments, you can also follow me and contact me on any of my social networks. Thank you!
Facebook
Twitter
Instagram
Ko-Fi
Discord: irenenavarroart#0361