


Feliz noche amigos de esta hermosa comunidad donde podemos crear y hacer algún sueño realidad, como es mi caso con esta cartuchera doble cierre, mi nieto dice que las cartucheras que hace su abuela son las mejores y le dijo a su mamá que quería una con su nombre por que usaba la que yo le hice a su hermano y la maestra lo llamaba por el nombre de su hermano 🙈, ya eso no pasará más porque su abuela hizo una cartuchera para él con su nombre, se que cuando la vea será muy feliz y ese será mi mejor regalo. Sin más que decir paso a los materiales y al paso a paso.
Happy evening friends of this beautiful community where we can create and make some dream come true, as is my case with this double zipper pencil case, my grandson says that the pencil cases that his grandmother makes are the best and he told his mom that he wanted one with his name because he used the one I made for his brother and the teacher called him by his brother's name 🙈, that will not happen anymore because his grandmother made a pencil case for him with his name, I know that when he sees it he will be very happy and that will be my best gift. Without more to say I will go to the materials and the step by step.

Un retazo de loneta negra
Hilo negro
Pinturas de tela
Pinceles
2 slider
2 pedazos de cierre de 16 cms de largo
Patrones
Cinta métrica
Alfileres
Vivo
Un pedazo de loneta fucsia
A piece of black canvas
Black thread
Fabric paints
Brushes
2 slider
2 pieces of zipper 16 cms long
Patterns
Tape measure
Pins
Vivo
A piece of fuchsia canvas


Empecé por cortar 6 piezas de las piezas central y laterales( de 23 cms de largo por 11 cms de ancho) , 2 de cada una, yo las corte todas en loneta y las cosí alrededor para que sea más fácil al armar la cartuchera.
I started by cutting 6 pieces of the center and side pieces (23 cm long by 11 cm wide), 2 of each, I cut them all in canvas and sewed them all around to make it easier to assemble the pencil case.
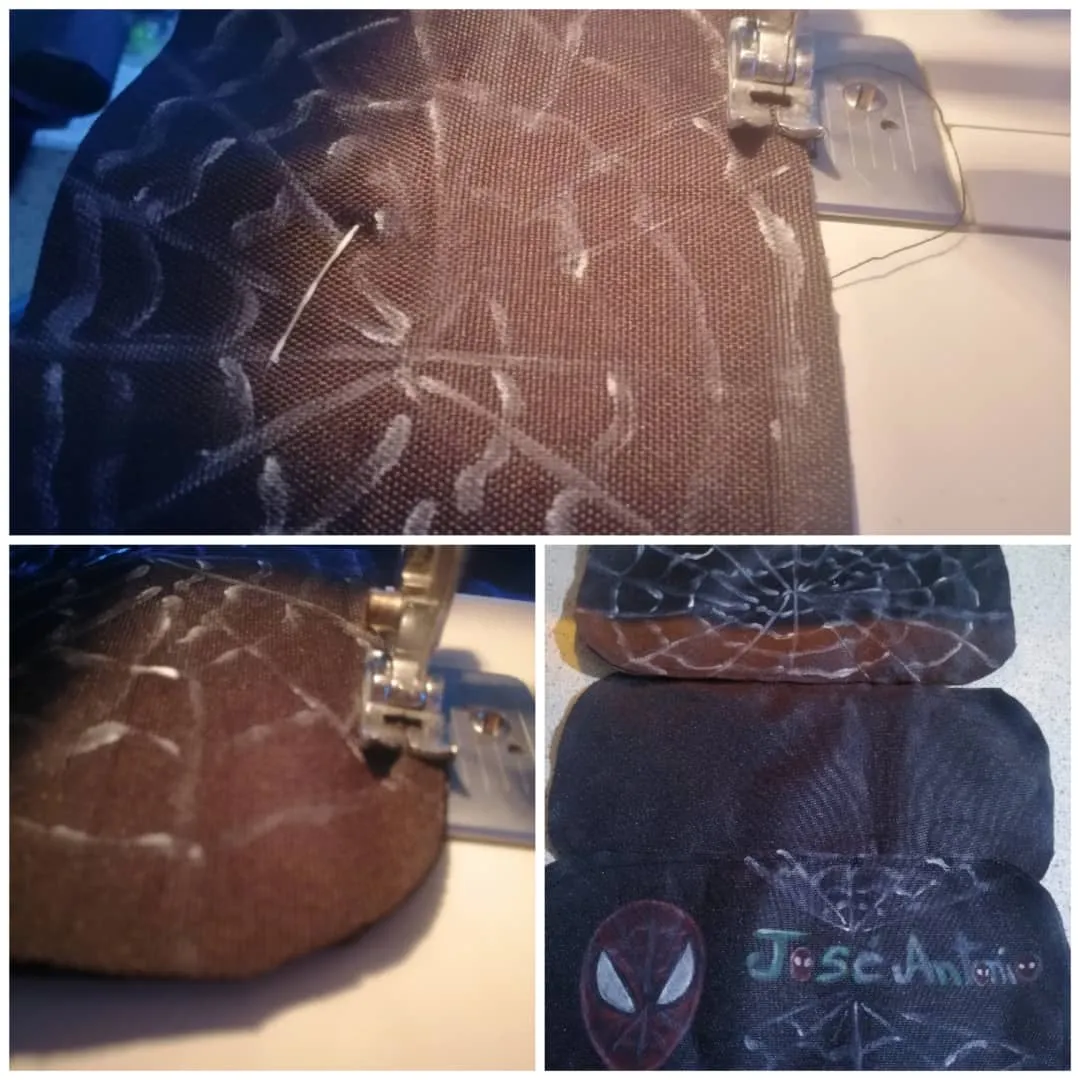
Corte 8 piezas de 16 cms de largo por 2.5 cms de ancho donde irán los cierres y 4 piezas de 16 cms de ancho por 2,5 cms de alto, que será la pieza del medio junto a la pieza del cierre.
Cut 8 pieces of 16 cm long by 2.5 cm wide where the fasteners will go and 4 pieces of 16 cm wide by 2.5 cm high, which will be the middle piece next to the fastener piece.

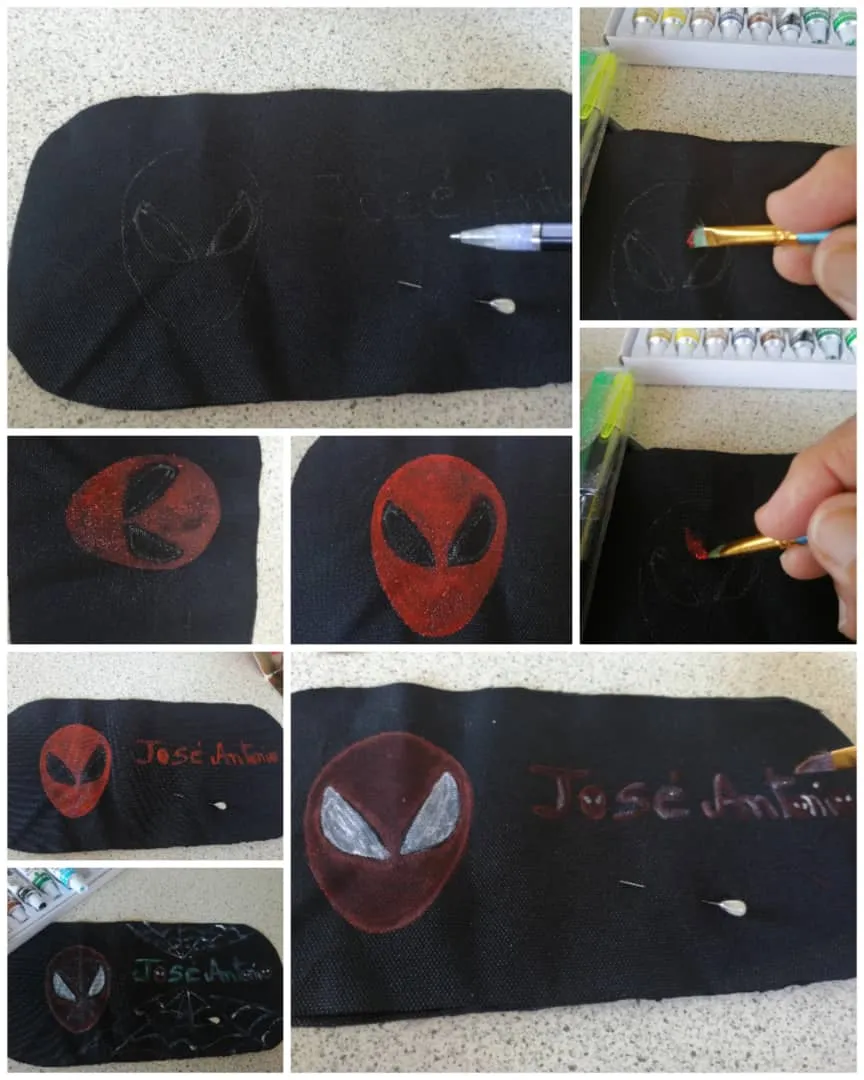
Pinte la cara de spiderman, el nombre de mi nieto y la telaraña, la cara con pintura roja, use 2 tipos de rojo pero esos colores no son muy fuertes así que le eche varias manos y deje se secara al sol.
I painted the spiderman face, my grandson's name and the spider web, the face with red paint, I used 2 types of red but those colors are not very strong so I applied several coats and let it dry in the sun.
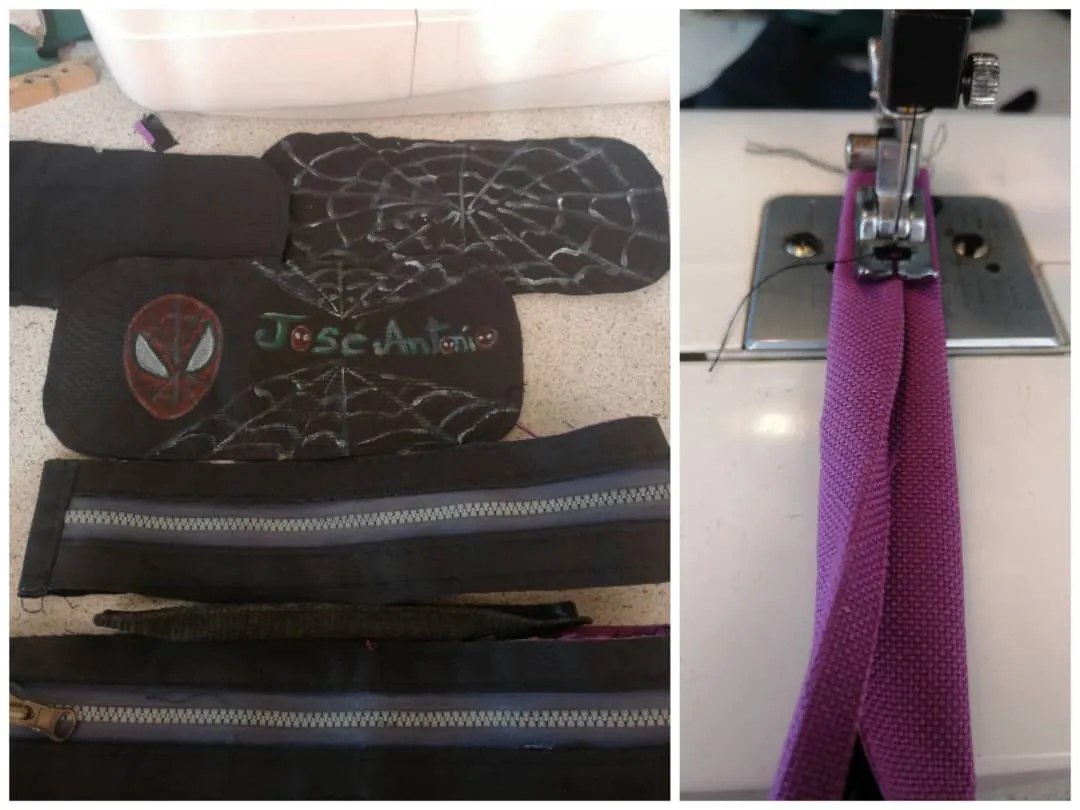
Me dedique a armar la pieza del cierre puse derecho con derecho y metí el cierre en el medio, voltee por el derecho y repise por donde va el cierre y luego uní las dos piezas para, que sea más fácil a la hora de armar, hago el mismo procedimiento y luego con el otro cierre, luego pongo la otra pieza derecho con derecho y meto la pieza del cierre coso volteo por el derecho y repiso y uno por el otro lado haciendo el mismo procedimiento formando un aro y hago el mismo procedimiento con la otra pieza.
Echo esto pongo las 2 piezas derecho con derecho cuidando que los cierres abran para el mismo lado y que coincidan las costuras de las uniones para que se vea bonito, echo esto se unen las 2 piezas.
I put the zipper piece right to right and put the zipper in the middle, flip it right side up and repeat where the zipper goes and then join the two pieces so that it is easier to assemble, I do the same procedure and then with the other zipper, then I put the other piece right to right and put the zipper piece sewing flip it right side up and repeat and one on the other side doing the same procedure forming a ring and do the same procedure with the other piece.
Then I put the 2 pieces right side together taking care that the zippers open to the same side and that the seams of the joints coincide so that it looks nice, then I join the 2 pieces.

Luego que tengo todo listo empiezo a armar la cartuchera.
After I have everything ready, I start to assemble the pencil case.
Luego se le hace un piquete en el centro de abajo y arriba y a la pieza del centro y se empieza a coser por los piquetes y luego se le pone vivo alrededor para que tenga un mejor acabado, se voltea al revés por un lado abriendo un cierre y se pega la otra pieza siguiendo el mísmo procedimiento, pero se pega primero el asa de 20 cms de largo y 2 cms de ancho en la unión de los cierres de cada lado, se pega la pieza del frente y después la del otro lado siguiendo el mismo procedimiento y listo.
Then you make a picket in the center of the bottom and top and the center piece and start sewing through the pickets and then you put live around it to have a better finish, turn it upside down on one side opening a zipper and glue the other piece following the same procedure, but first glue the handle of 20 cm long and 2 cm wide at the junction of the zippers on each side, glue the front piece and then the other side following the same procedure and that's it, and that's it.
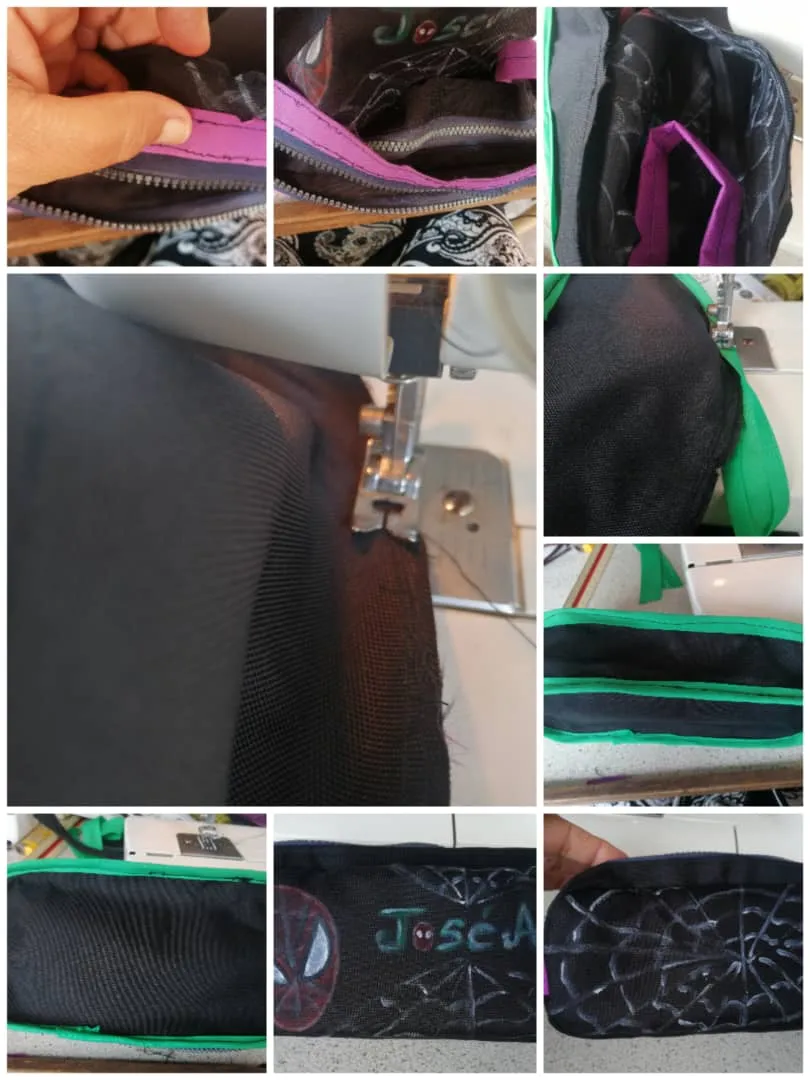

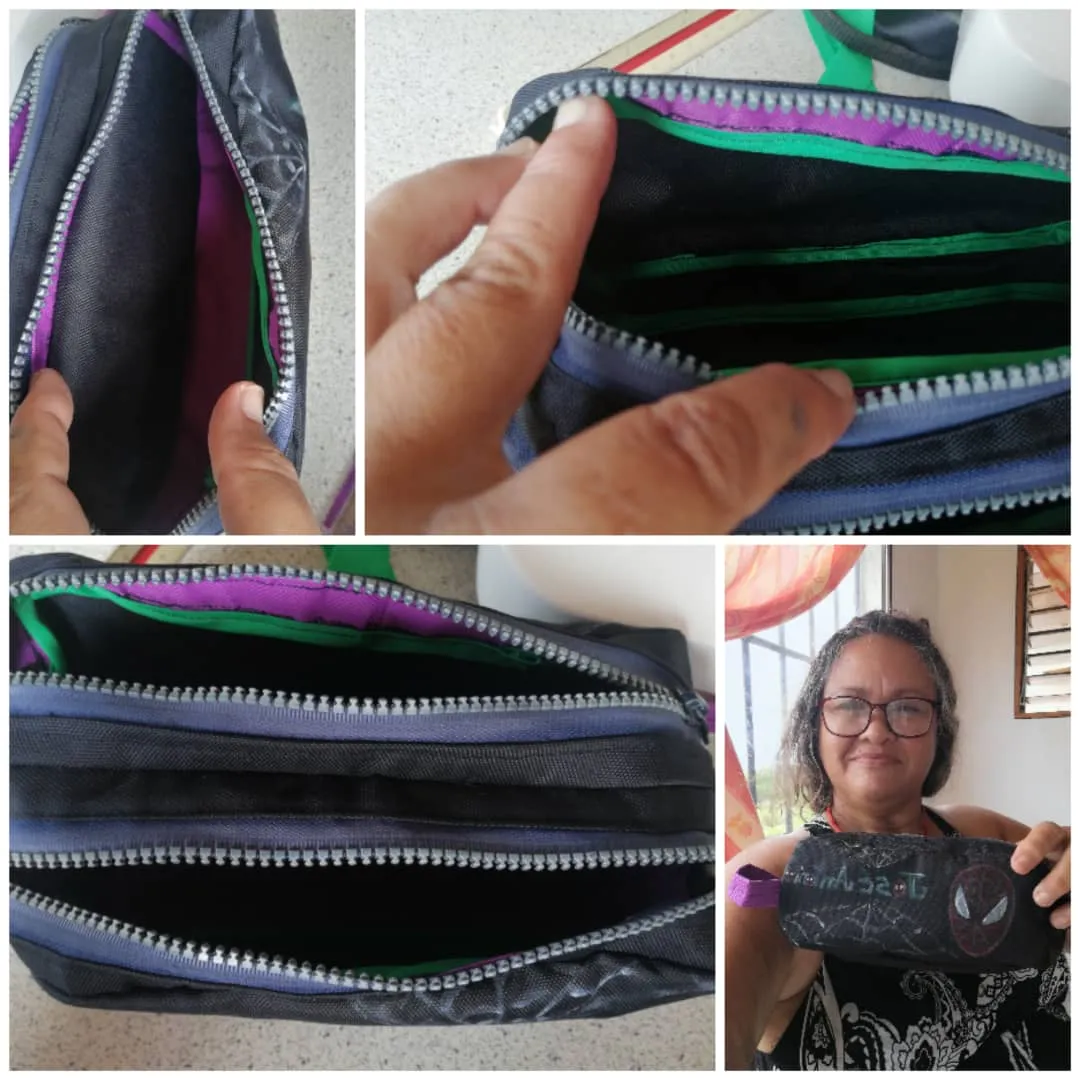
Disfrute mucho haciendo esta cartuchera y quede satisfecha con el resultado, se que mi nieto será muy feliz.
Hasta aquí mi post de hoy espero les guste, gracias por su visita y apoyo.
Las fotos aquí utilizadas fueron tomadas por mi con mi celular huawei mate lite20 use Deelp traductor, imagen editada en canva, baner y separador realizado por mi en canva, use cool text
I really enjoyed making this pencil case and I am satisfied with the result, I know my grandson will be very happy.
So far my post today I hope you like it, thank you for your visit and support.
The photos used here were taken by me with my cell phone huawei mate lite20 use Deelp translator, image edited in canva, banner and separator made by me in canva, use cool text.
