
ENGLISH 🪡🧵ESPAÑOL
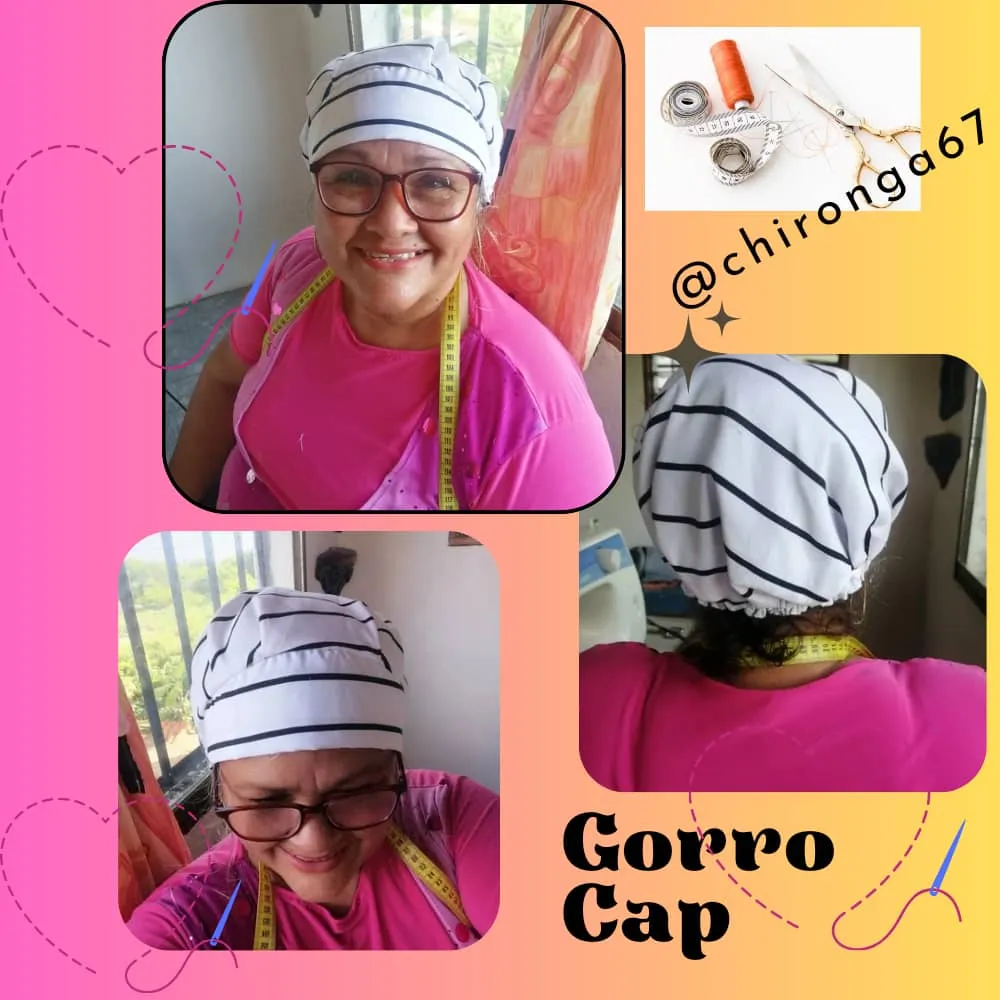
Happy day friends craft lovers and friends of NeedleWorkMonday, today I want to show you a simple hat but it is very nice and quick to make, I have many scraps and I have to give it a use and I started with this hat that I wanted to make for a long time.
Feliz dia amigos amantes de las manualidades y amigos de NeedleWorkMonday, hoy les quiero mostrar un sencillo gorro pero que es muy bonito y rápido de hacer, tengo muchos retazos y debo darle utilidad y empecé con este gorro que desde hace tiempo quería hacer.

🧵 White fabric scraps with black stripes.
🧵 White thread
🧵 Scissors
🧵 Tape measure
🧵 Pattern
🧵 Pins
🧵 Sewing machine
🧵 Pencil
🧵 Retazos de tela blanca con rayas negras
🧵 Hilo blanco
🧵 Tijera
🧵 Cinta métrica
🧵 Patron
🧵 Alfileres
🧵 Maquina de coser
🧵 Lápiz


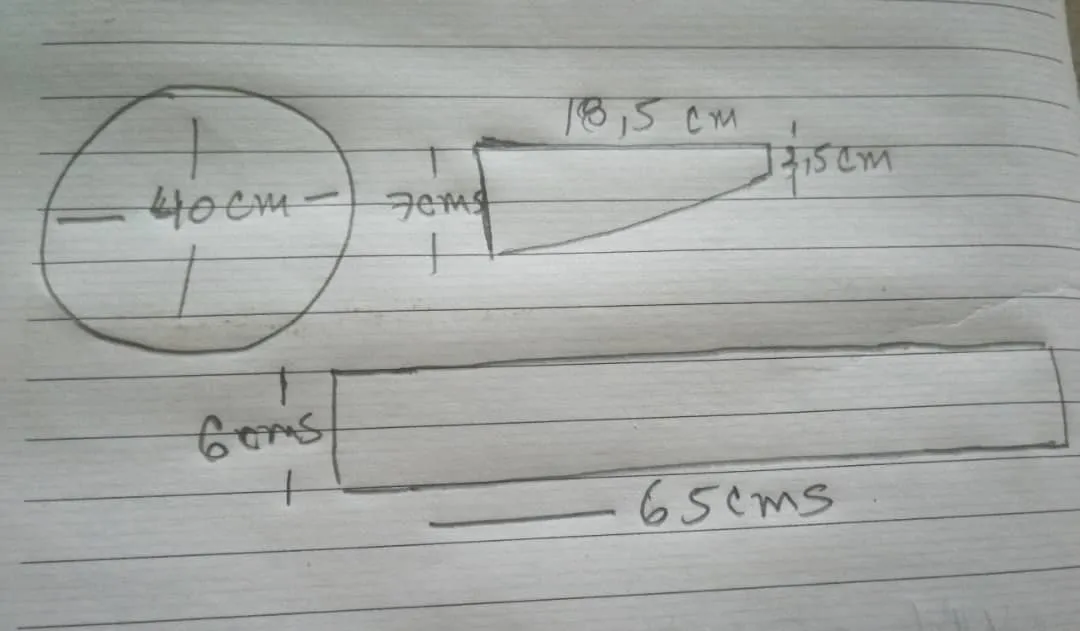
🧵 I made the pattern on paper, I made half of the circumference 40 cm wide by 20 cm high.
Then I made the front piece which measures 18.5 cm x 7 cm wide and 2.5 cm around the edge, the back is a strip of 65 cm long x 6 cm wide.
🧵Hice el patrón en papel, hice la mitad de la circunferencia 40 cms de ancho por 20cms de alto.
Luego hice la pieza de adelante que tiene una medida de 18,5 cms x 7 cms de ancho y 2,5 cms por el borde, la parte de atrás es una tira de 65 cms de largo x 6 cms de ancho.
🧵 I put the circle pattern on the double fabric, pinned it and cut it out, then I marked the middle and from the middle to the right side I measured 4.5 cms which will be the center of the hat and then I measured 7 times 4 cms, then I went to the left side and repeated the same procedure.
🧵 Puse el patrón del circulo sobre la tela doble, lo fije con Alfileres y lo recorte luego marque la mitad y de la mitad hacia el lado derecho medí 4.5 cms qué será el centro del gorro y después medí 7 veces 4 cms, hecho esto me fui al lado izquierdo y repetí el mismo procedimiento.

🧵 Then I start sewing the clamps on each side from right to left leaving 4 cm of separation between clamp and clamp and then on the other side from left to right, that will be the front of the hat, I reserve while I cut and sew the 2 missing pieces.
🧵 Luego empiezo a coser las pinzas de cada lado de derecha a izquierda dejando 4 cms de separación entre pinza y pinza y luego del otro lado de izquierda a derecha, ese será el frente del gorro, reservo mientras corto y coso las 2 piezas que faltan.
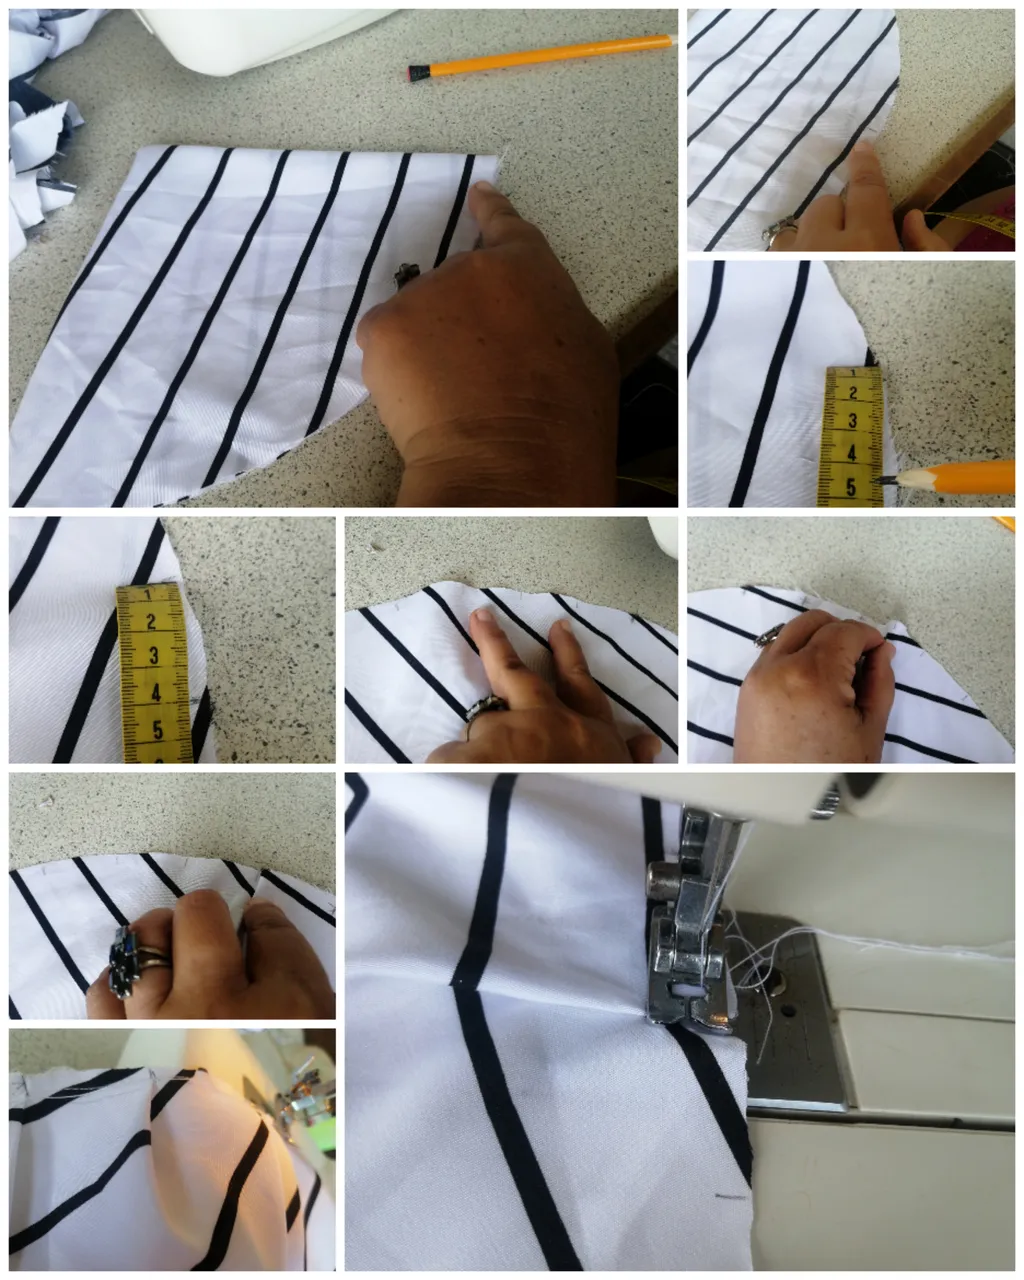
🧵 For the front piece I fold the fabric from top to bottom from right to left in 4 parts, place the pattern, secure with pins and cut.
🧵 Para la pieza del frente doblo la tela de arriba hacia abajo de derecha a izquierda quedara en 4 partes, pongo el patrón, aseguro con alfileres y corto.

🧵Then I cut a strip 65 cm long by 6 cm wide, fold in half and sew, with the help of a pin I put the piece of elastic, I put it thin but if it is 2 cm wide better, I secure both sides and put the front piece on the back and on each side I sew the strip with the elastic and I have the edge of the hat.
🧵 Luego corto una tira de 65 cms de largo por 6 cms de ancho, doblo a la mitad y coso, con la ayuda de un alfiler meto el pedazo de elástica, yo lo puse fino pero si es de 2 cms de ancho mejor, aseguro de los dos lados y pongo la pieza del frente por el revés y en cada lado coso la tira con la elástica y ya tengo el borde del gorro.

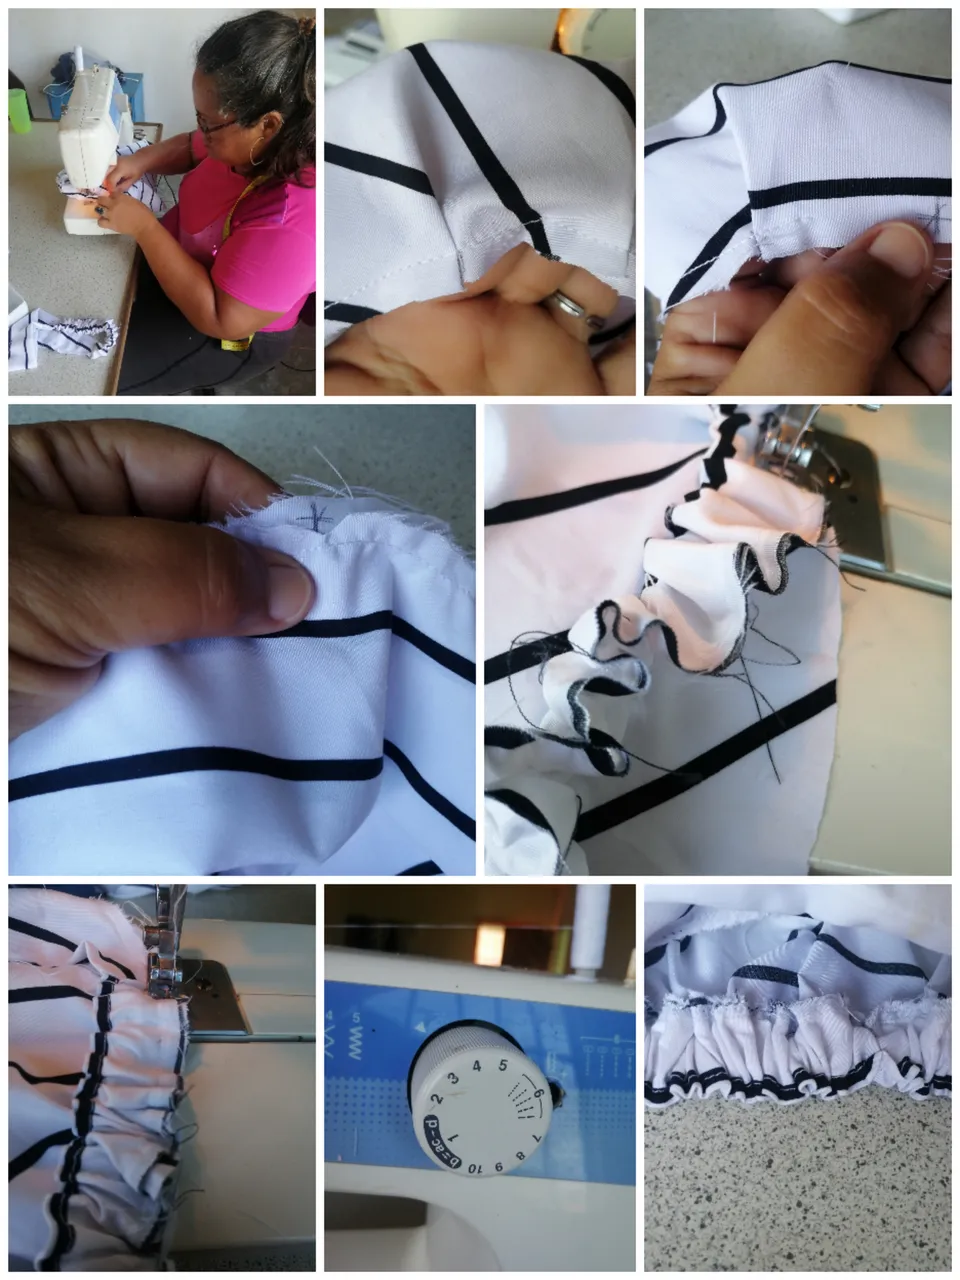
🧵I fold the front piece and make a picket and in the circle where I mark the middle I put them right sides together and start sewing taking care to stretch the fabric where the elastic is, I sew all around and finish off the edges in zig-zag, then I sew on the right side and that's it.
🧵 Doblo la pieza delantera y hago un piquete y en el círculo donde marque la mitad los pongo derecho con derecho y empiezo a coser cuidando de estirar la tela donde esta la elástica, coso todo el alrededor y remato los bordes en zig-zag después repiso por el derecho y listo.

There is nothing more satisfying than being able to make with our hands something we want to have, in my case this hat, since I saw it I said I would do it and I was very satisfied with the result, I hope you understand well my step by step and are encouraged to do it and it is very beautiful, dare to create letting your imagination fly and you will see all the beautiful things you can do.
No hay nada más satisfactorio que poder realizar con nuestras manos algo que deseamos tener, en mi caso este gorro, desde que lo vi me dije que lo haría y quede muy satisfecha con el resultado, ojala entiendan bien mi paso a paso y se animen a hacerlo y les quede muy hermoso, atrevanse a crear dejando volar la imaginación y verán todas las cosas hermosas que lograrán hacer.
🧵🧵🧵🧵🧵🧵🧵🧵🧵🧵🧵🧵🧵🧵
So far my post today I hope you like it, thank you for your visit and support.
Photos of my property taken with my cell phone huawei mate lite20. use Deelp translator. images edited in canva, banner made in canva, use cool text.
🧵Hasta aquí mi post de hoy espero les guste, gracias por su visita y apoyo.
Fotos de mi propiedad tomadas con mi celular huawei mate lite20. use Deelp traductor. imágenes editadas en canva, baner realizado en canva, use cool text.
