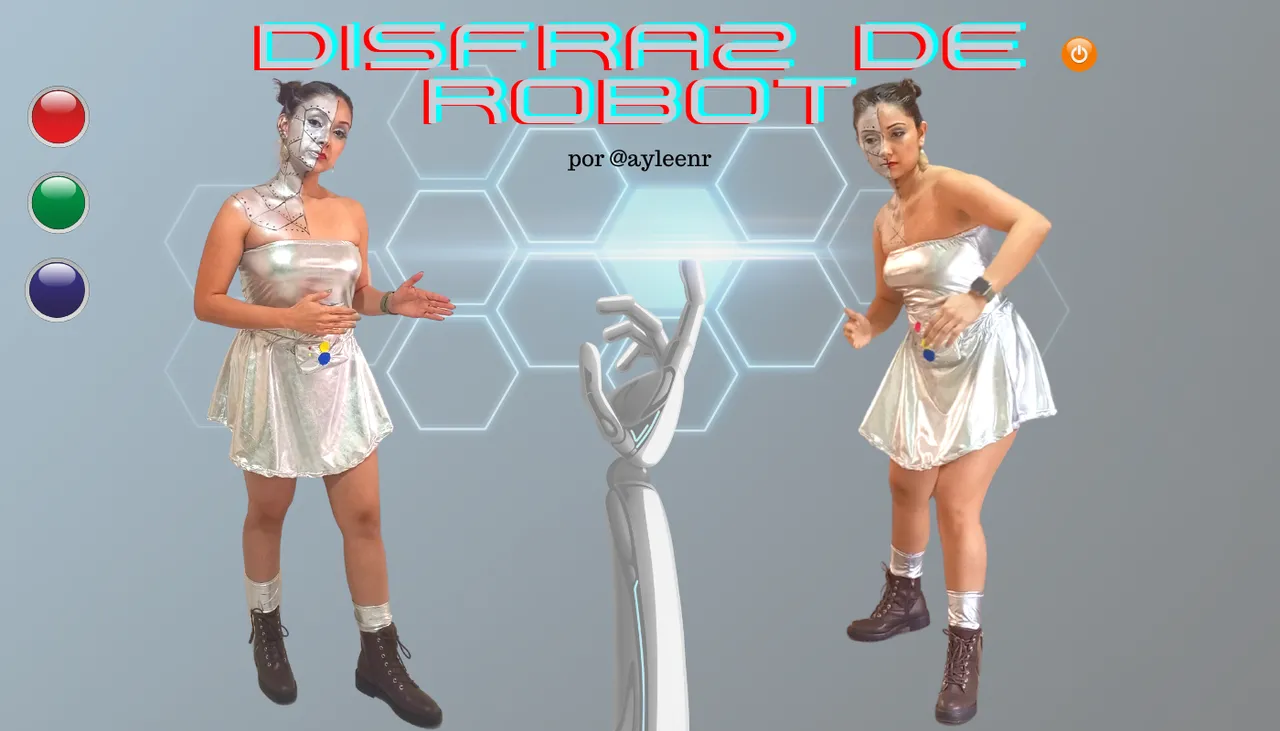
Llegó Carnavales, momento de muchas actividades y diversión, en mi país se disfrazan tanto niños como adultos, entre pelucas, maquillajes, atuendos de personajes reconocidos o aquellos que perduran desde la infancia, en conversaciones con unas amigas, tomamos la decisión de disfrazarnos, así que dije, "manos a la costura"✂️👯, observé muchos diseños de disfraces como egipcio, vaquera, ángel y maléfica, sin embargo en mi cabeza rondaba un estilo original, así que dije: que tal de robot 🤖...Empezaron a aparecer miles de ideas 💡 en mi cabeza. Fui a un sitio donde vende telas muy conocido aquí llamado "El Castillo", busque una tela plateada, al salir de allí, me sentí feliz tal como una niña 😅.
Empecé con la elaboración, quería un diseño que pudiese usar en cualquier otro momento, así que comencé con realizar un body plateado, muy sexy 😍, les explicaré como lo realicé y mas abajo les diré que otras piezas se me ocurrieron.

Materiales a utilizar:
Maquina de coser
Aguja
Tela Plateada foil
Hilo blanco
Tiza
Regla
Cinta métrica
Elástico de 0,5 milímetro
Elástico de 3 centímetros
Tijera para cortar telas
Foamy
Nailon Transparente
Guata
Alfileres
Elaboración primera pieza: body
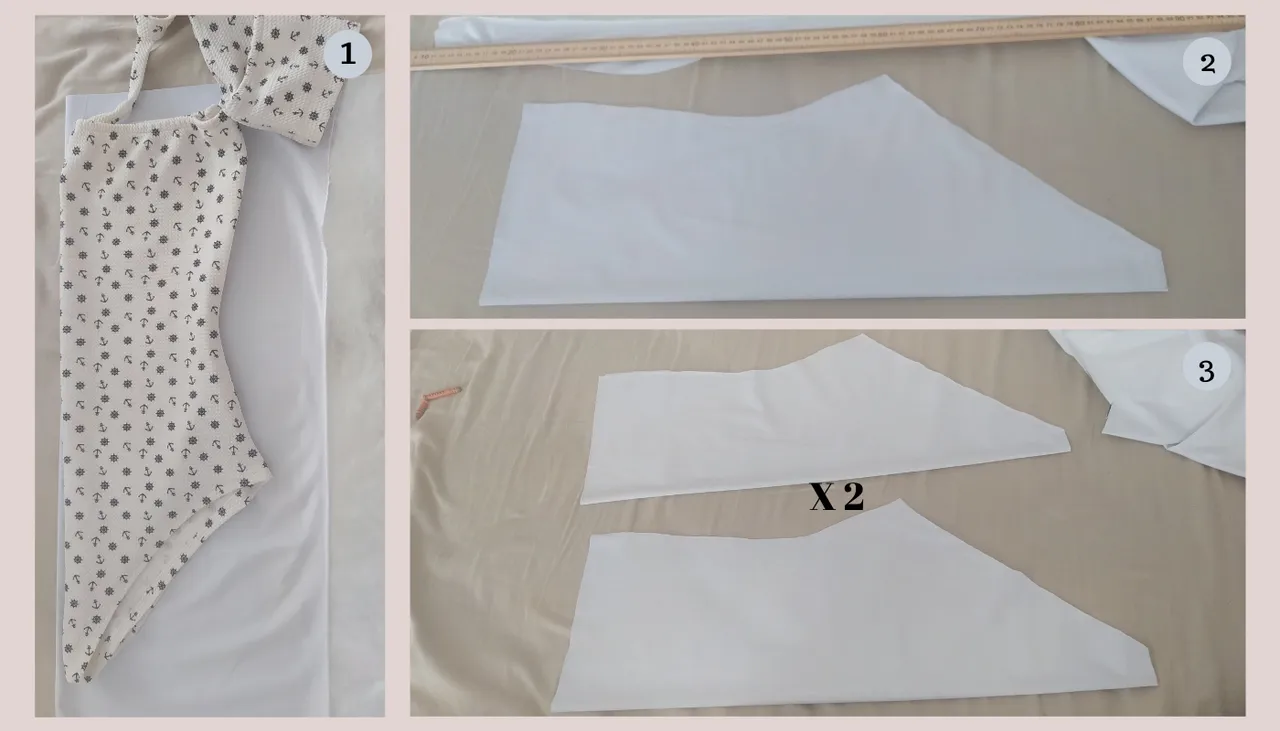
Observé que en mi armario tenia un body a mi medida y dije que tal si utilizo el mismo modelo para el que voy a realizar, así hice, coloqué encima de la tela y comencé a crear la pieza.
Paso 1
Doble la tela plateada por el reverso, transferí el modelo del body a la tela y saqué dos piezas, la delantera y trasera del body, recorté a 1 centímetro para la costura. Recomiendo en caso de no tener algún body de guía, puede hacer el patrón con las medidas de ancho de espalda, busto, cintura, cadera y tiro, en el patrón se divide entre dos para pasar a la tela.
Paso 2
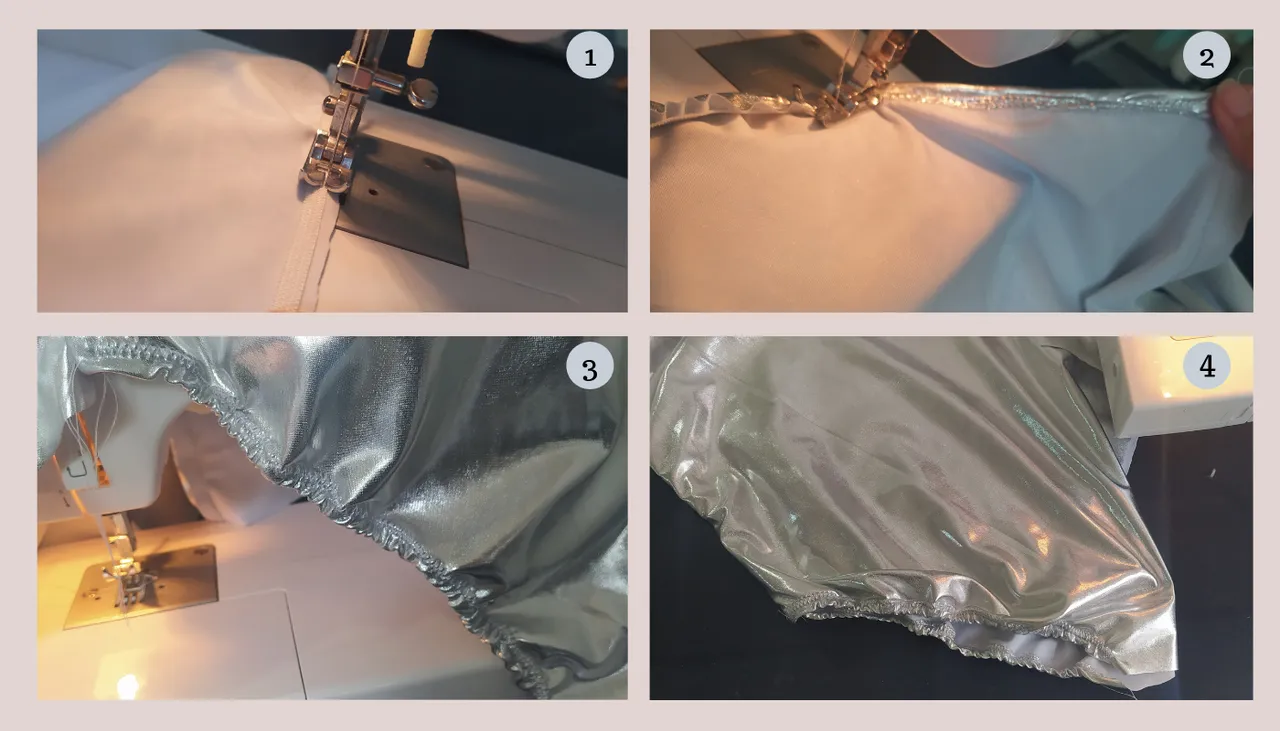
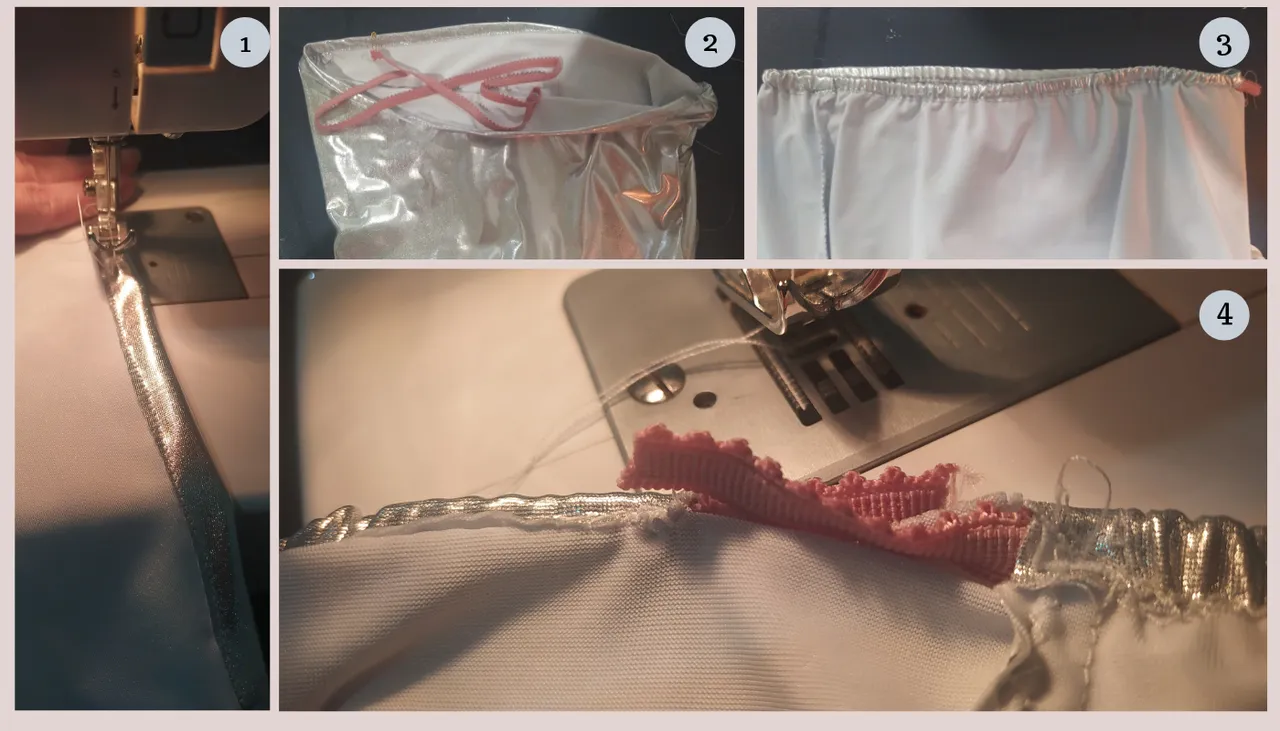
En la parte inferior, justo donde van las piernas, coloqué un elástico de 0,5 milímetro, cosí con puntada recta estirando un poco el elástico, para hacer fruncir la tela, luego doble y cerré la costura con puntada zig zag para un mejor acabado.
Paso 3
Uní el reverso de las piezas, cosí con puntada recta, luego la parte abajo doble a 1 centímetro aproximadamente y cerré con puntada zig zag al igual que los laterales, es importante este paso para que la costura no se salga y evitar accidente a la hora de colocar el body.
Paso 4
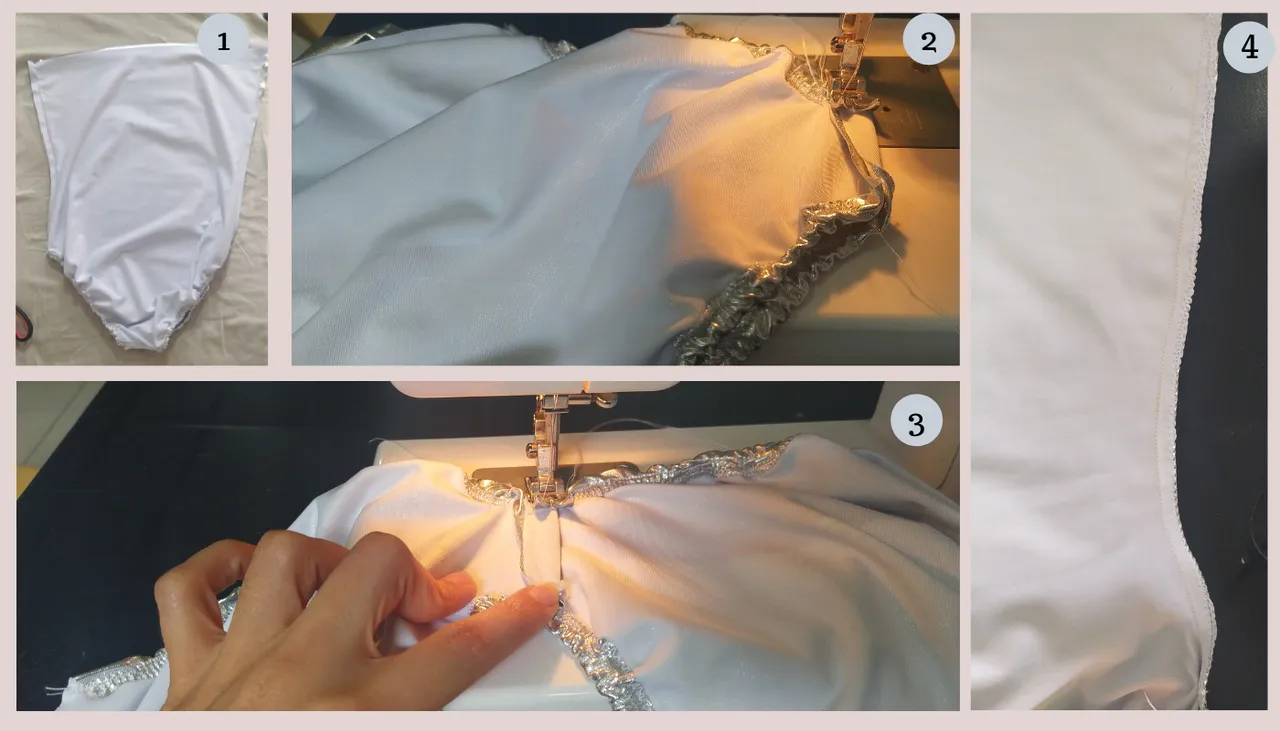
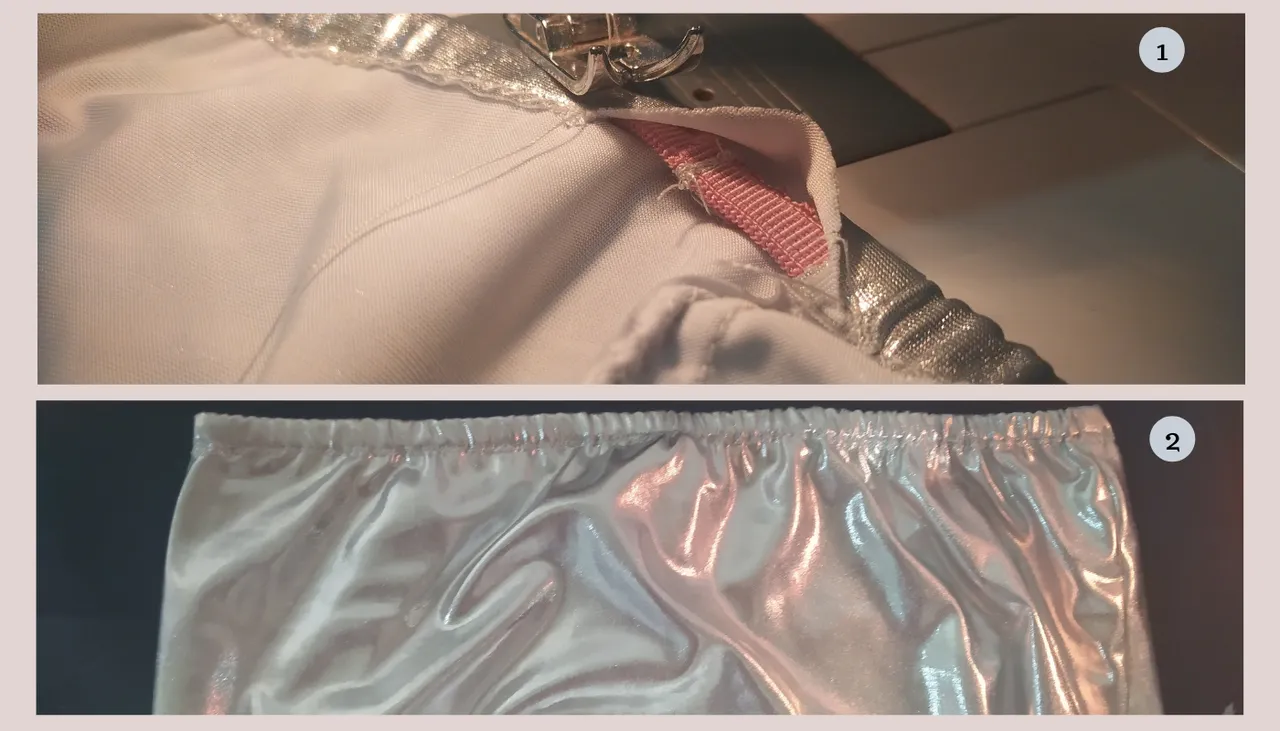
En la parte superior del body doble la tela a 0.5 milímetro , dejé un espacio para introducir el elástico, con la ayuda de un alfiler comencé desde la punta y finalmente ajusté, reduciendo 3 centímetros en la linea del busto.
Paso 5
Uní ambos puntas de los elásticos con puntada recta, luego cerré el espacio que había dejado para introducir el elástico y culminé el diseño del body realizando puntada zig zag para asegurar la costura.
Elaboración segunda pieza: short
Paso 1
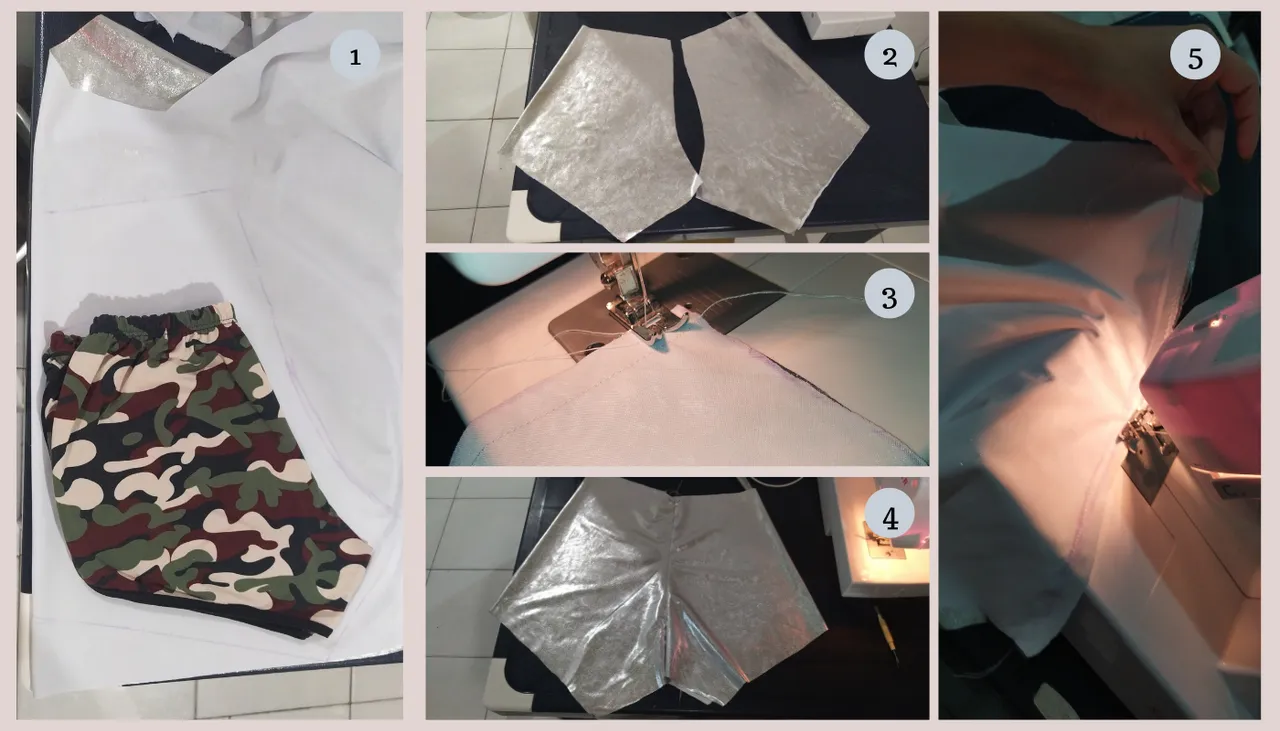
Con la ayuda de un short tomé las medidas dejando 1 centímetro de costura y en l parte superior debe 6 centímetros para luego colocar el elástico, recorté dos piezas iguales, cosí con puntada recta, uniendo ambas piezas por el reverso de la tela y cerré con puntada zig zag para un mejor acabado.
Paso 2
Realicé el ruedo de 1 centímetro aproximadamente, en la parte superior cosí a 3 centímetros con puntada recta dejando una abertura para el elástico, luego coloqué el alfiler en el elástico para introducirlo finalmente cerré el elástico y culminé la costura con puntada zig zag.
Elaboración tercera pieza: falda
Paso 1
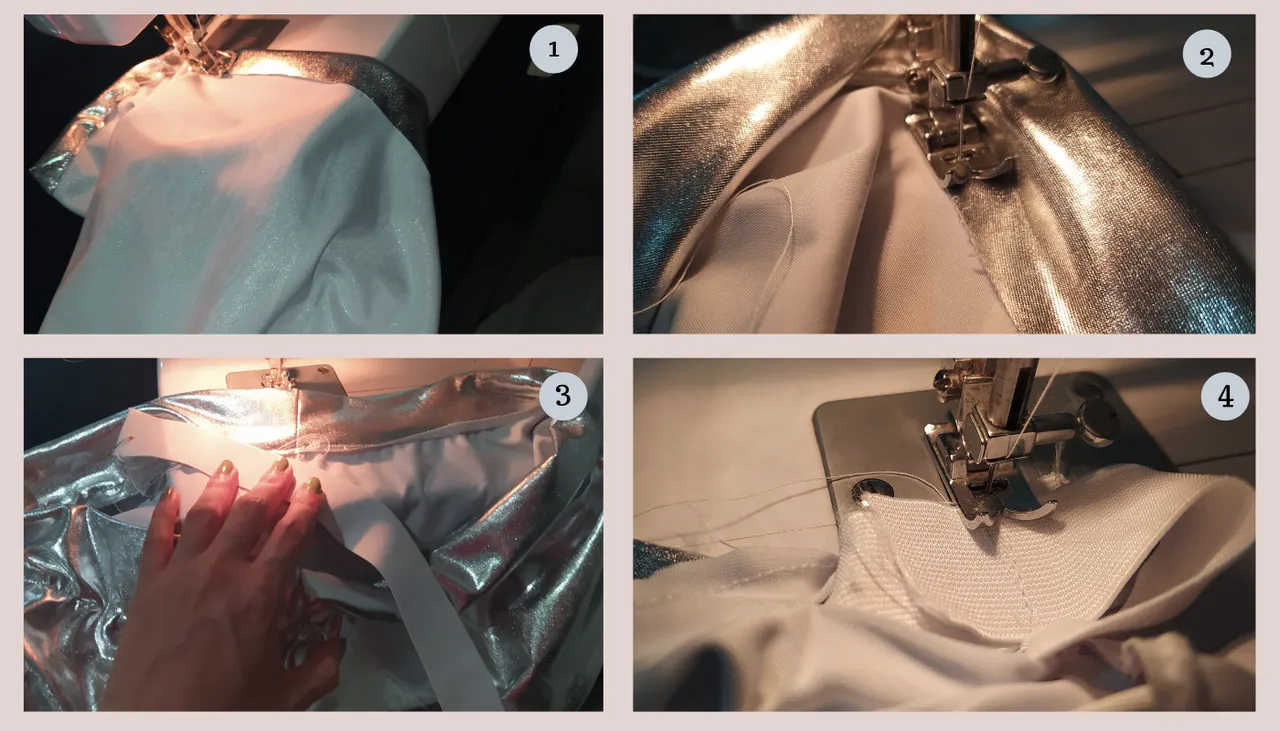
Antes de colocarle el elástico, tome la medida de la cintura, dejando 1 centímetro de cada lado para la costura y cierre de los laterales, el largo lo deje a 42 centímetros, que sería 40 de largo mas 2 centímetros del ruedo de la falda. Cerré los laterales con puntada recta luego abrí la costura y cosí con puntada zig zag para un mejor acabado.
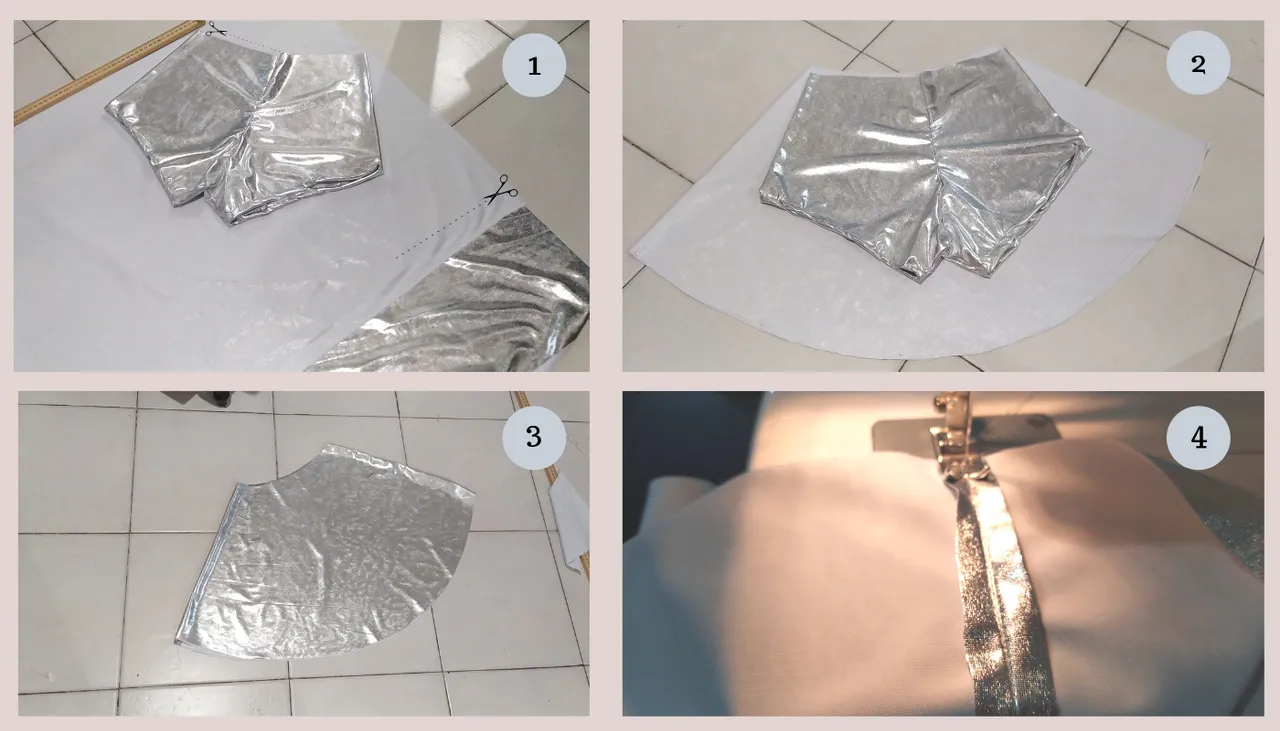
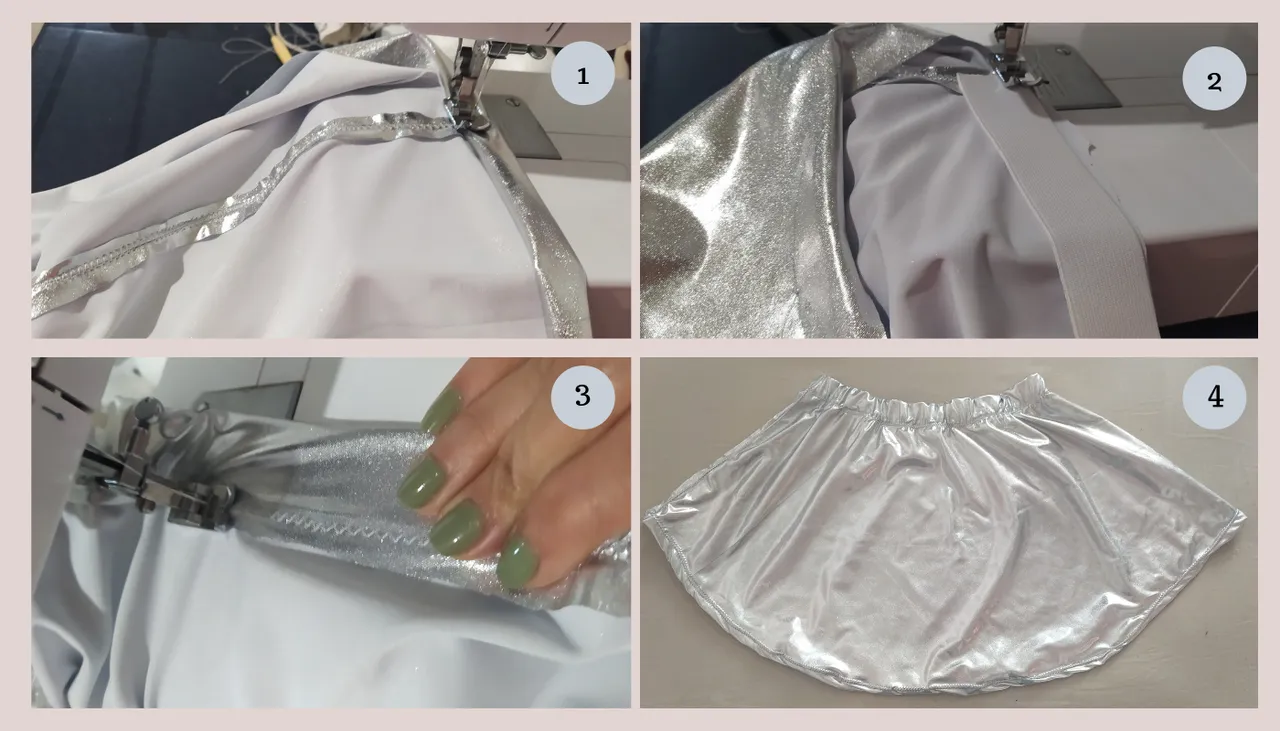
Paso 2
Cosí el ruedo de la falda con puntada recta y zig zag, coloqué el elástico al borde de la tela, en la parte superior, cosí con puntada recta estirando un poco el elástico para fruncir la falda, finalmente cerré la costura con puntada zig zag y listo.
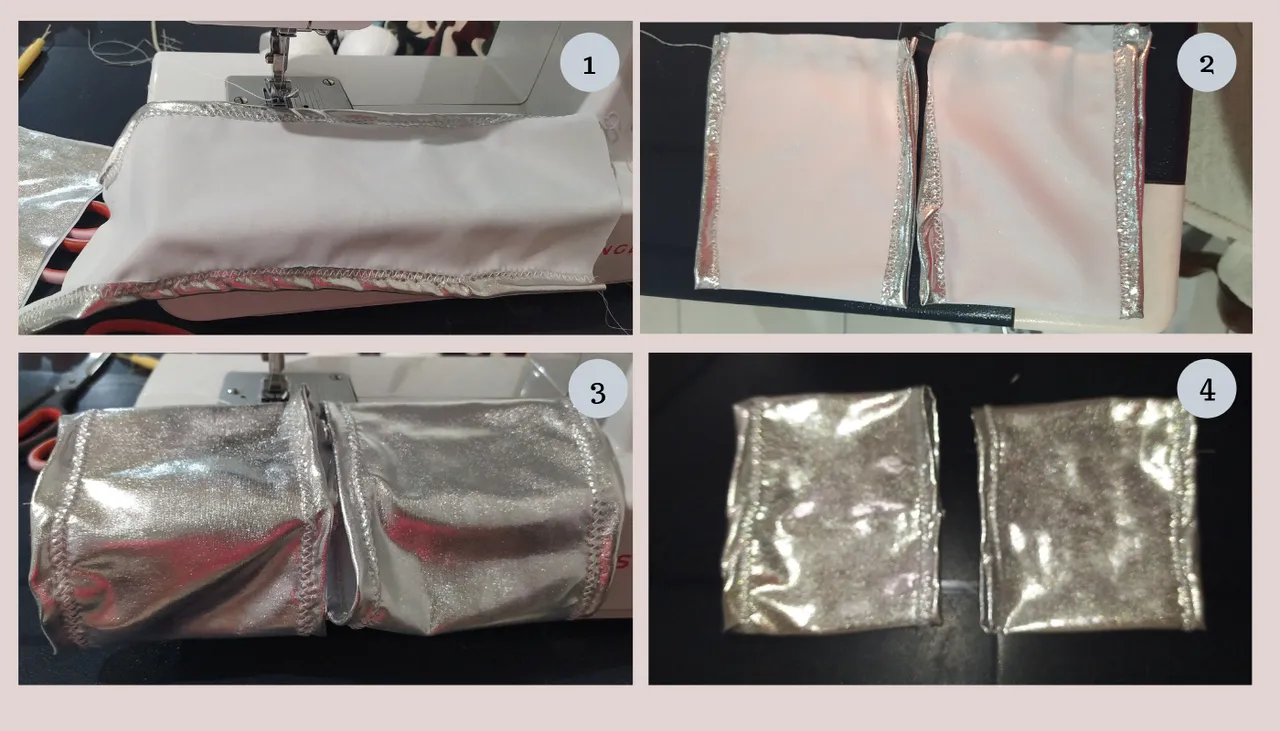
Accesorio del disfraz
Accesorio del disfraz
Pieza para la parte superior de las botas: Corté dos rectángulos con las medidas de la pierna, cosí en los bordes con puntada recta y luego zig zag, cerré ambas piezas y listo.
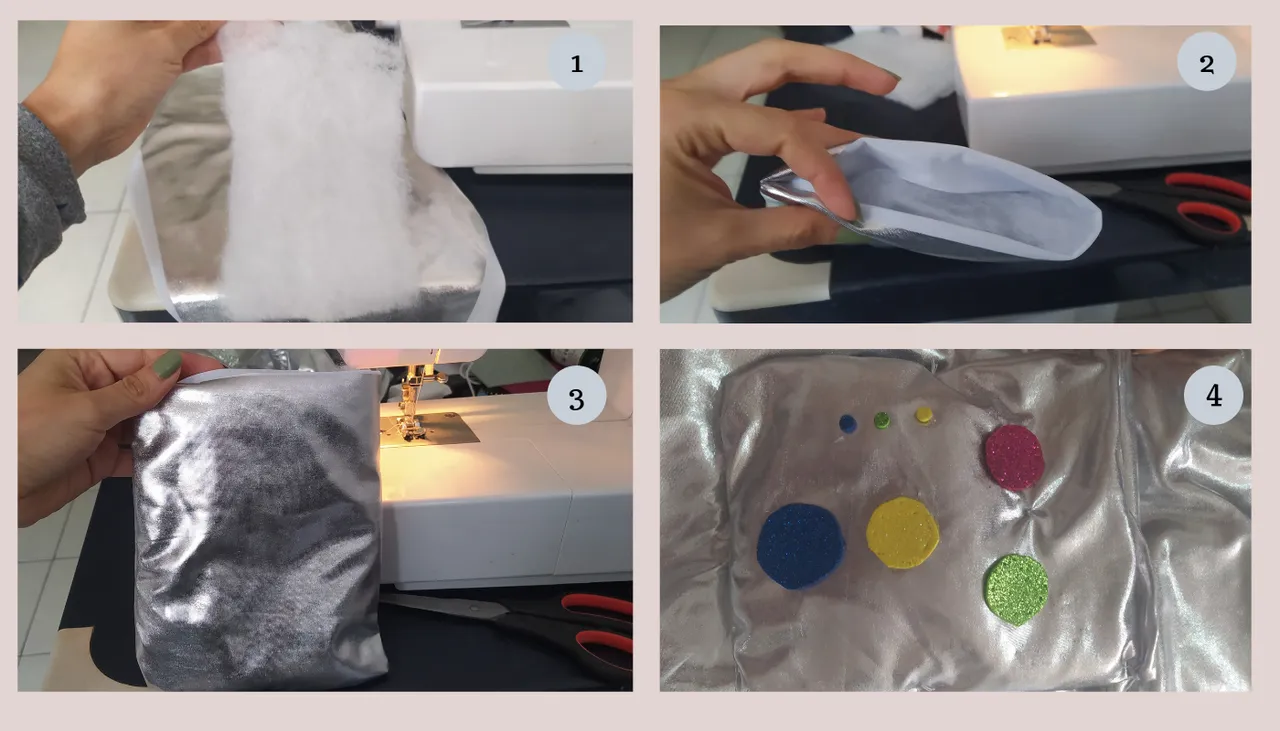
Pieza para los botones del robot: Realice un rectángulo con guata, luego con la tela plateada realicé la pieza, la cosí con puntada recta y zig zag, dejando un lado abierto para introducir la guata, finalmente recorté círculos de foamy, distintos tamaños y cosí con nailon transparente.
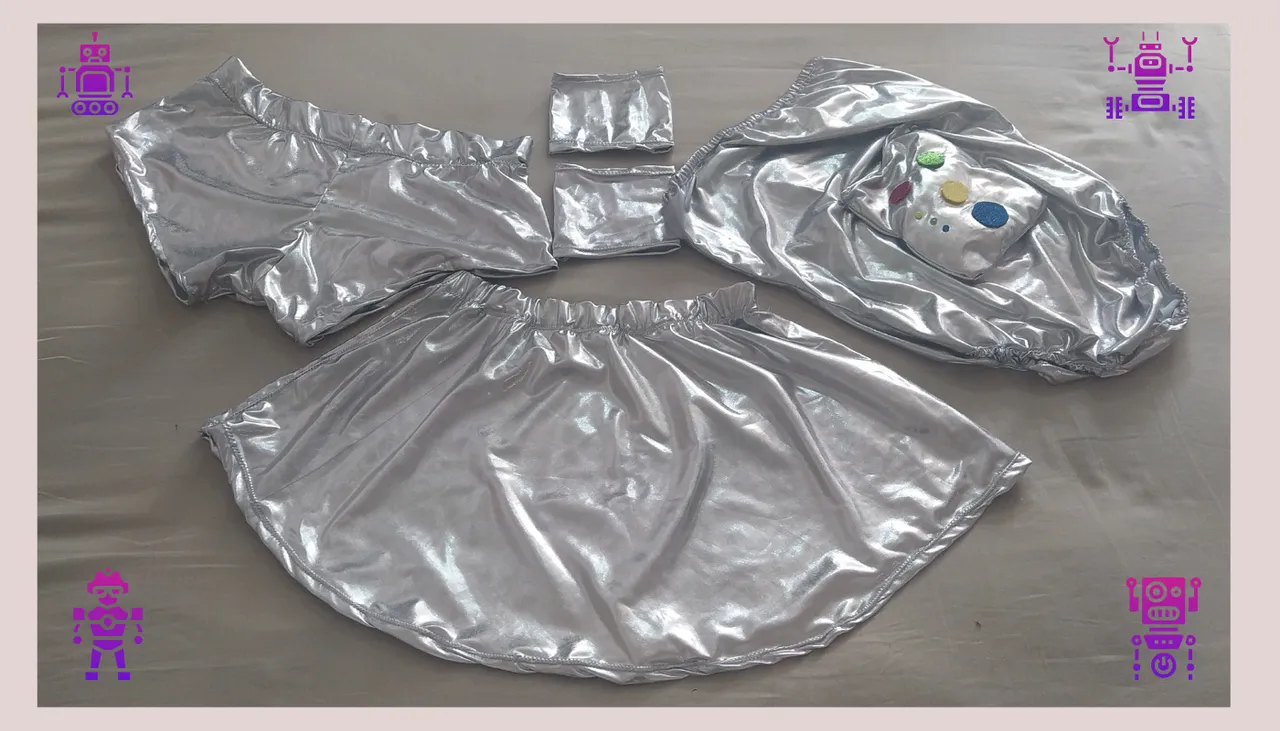
Finalmente terminé con el disfraz de robot, las piezas que realicé, son para utilizarlas en otro momentos, como la falda o short, incluso para una fiesta en la playa.
Espero les haya gustado mi diseño, si te gusto, déjame tu comentario en este post. Gracias por leerme.

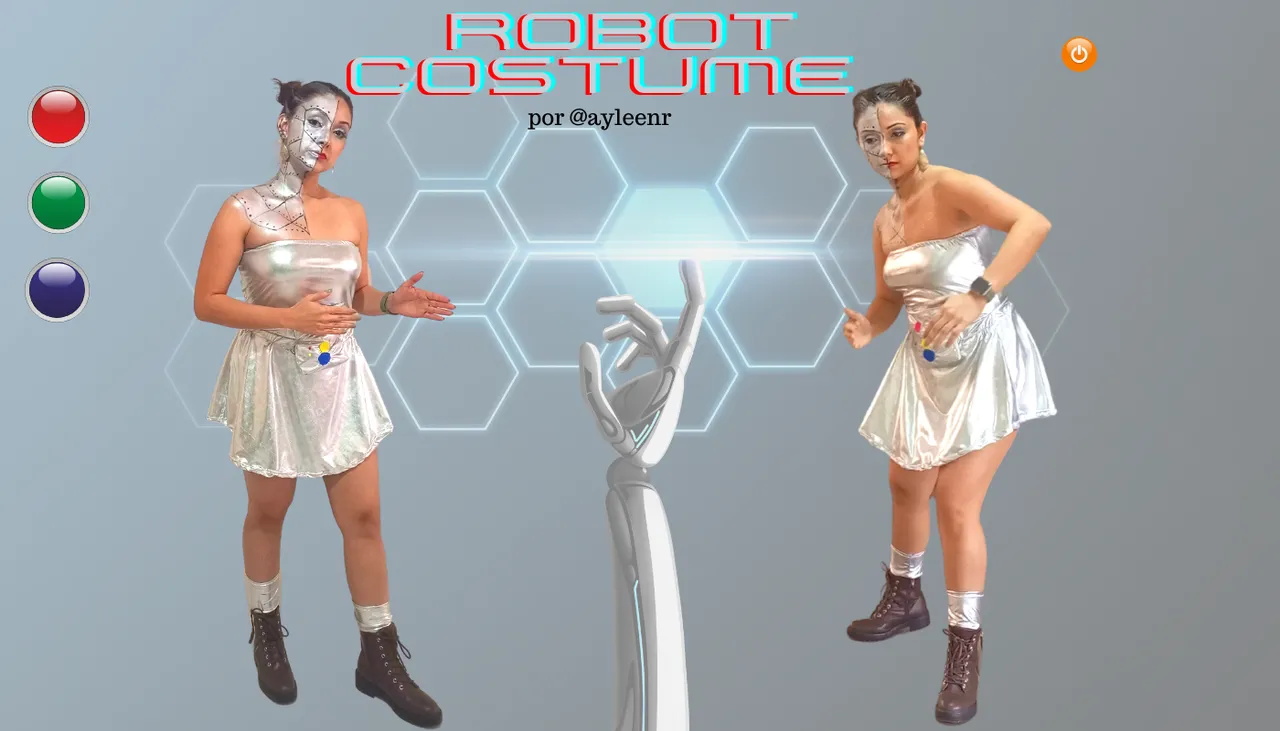
𝘚𝘦𝘱𝘢𝘳𝘢𝘥𝘰𝘳 𝘺 𝘣𝘢𝘯𝘯𝘦𝘳: 𝘥𝘪𝘴𝘦ñ𝘢𝘥𝘰 𝘱𝘰𝘳 @𝘢𝘺𝘭𝘦𝘦𝘯𝘳 𝘦𝘯 𝘊𝘢𝘯𝘷𝘢 || 𝘾𝙤𝙡𝙡𝙖𝙜𝙚: 𝙧𝙚𝙖𝙡𝙞𝙯𝙖𝙙𝙤 𝙚𝙣 𝘊𝘢𝘯𝘷𝘢 || 𝘐𝘮á𝘨𝘦𝘯𝘦𝘴: 𝘗𝘳𝘰𝘱𝘪𝘢𝘴 𝘦𝘥𝘪𝘵𝘢𝘥𝘢𝘴 𝘦𝘯 𝘊𝘢𝘯𝘷𝘢 || 𝘊𝘰𝘴𝘵𝘶𝘳𝘦𝘳𝘢: @𝘢𝘺𝘭𝘦𝘦𝘯𝘳 || 𝘍𝘰𝘵𝘰𝘨𝘳𝘢𝘧𝘪𝘢 𝘵𝘰𝘮𝘢𝘥𝘢 𝘱𝘰𝘳: 𝘈𝘣𝘦𝘭 𝘙𝘰𝘫𝘢𝘴 𝘮𝘪 𝘦𝘴𝘱𝘰𝘴𝘰 || 𝘛𝘳𝘢𝘥𝘶𝘤𝘵𝘰𝘳: 𝘋𝘦𝘦𝘱𝘓|| 𝘓𝘰𝘤𝘢𝘭𝘪𝘻𝘢𝘤𝘪ó𝘯: 𝘌𝘯 𝘮𝘪 𝘢𝘱𝘢𝘳𝘵𝘢𝘮𝘦𝘯𝘵𝘰 𝘶𝘣𝘪𝘤𝘢𝘥𝘰 𝘦𝘯 𝘊𝘢𝘳𝘢𝘤𝘢𝘴-𝘝𝘦𝘯𝘦𝘻𝘶𝘦𝘭𝘢.
ℕ𝕆𝕎 𝕀ℕ 𝔼ℕ𝔾𝕃𝕀𝕊ℍ
ℕ𝕆𝕎 𝕀ℕ 𝔼ℕ𝔾𝕃𝕀𝕊ℍ
Carnival came, time for many activities and fun, in my country both children and adults dress up, between wigs, makeup, costumes of recognized characters or those who endure from childhood, in conversations with some friends, we decided to dress up, so I said, "hands to the sewing"✂️👯, I saw many costume designs such as Egyptian, cowgirl, angel and evil, however in my head I was thinking about an original style, so I said: how about robot 🤖. ...Thousands of ideas 💡 started to appear in my head. I went to a place that sells fabrics very well known here called "El Castillo", I looked for a silver fabric, when I left there, I felt happy just like a little girl 😅.
I started with the elaboration, I wanted a design that I could wear at any other time, so I started with making a silver bodysuit, very sexy 😍, I will explain how I made it and below I will tell you what other pieces I came up with.
Materials to be used
Sewing machine
Needle
Silver foil fabric
White thread
Chalk
Ruler
Tape measure
0.5 millimeter elastic
3 centimeter elastic
Fabric cutting scissors
Foamy
Transparent Nylon
Wadding
Pins
First part: body
.I noticed that in my closet I had a bodysuit to my size and I said what if I use the same model for the one I am going to make, so I did, I placed it on top of the fabric and began to create the piece.
Step 1
Fold the silver fabric on the back, transfer the pattern of the bodysuit to the fabric and cut out two pieces, the front and back of the bodysuit, cut to 1 centimeter for sewing. If you don't have a bodysuit as a guide, you can make the pattern with the measurements of the width of the back, bust, waist, hips, and waistline, in the pattern it is divided by two to transfer it to the fabric.
Step 2
At the bottom, just where the legs go, I placed a 0.5 millimeter elastic, sewed with a straight stitch stretching the elastic a little, to make the fabric pucker, then folded and closed the seam with a zig zag stitch for a better finish.
Step 3
I joined the back of the pieces, sewed with straight stitch, then I folded the bottom part at about 1 centimeter and closed with zig zag stitch as well as the sides, it is important this step so that the seam does not come out and avoid accidents when placing the bodysuit.
Step 4
At the top of the bodysuit I folded the fabric to 0.5 millimeter, left a space to introduce the elastic, with the help of a pin I started from the tip and finally adjusted, reducing 3 centimeters at the bust line.
Step 5
I joined both ends of the elastic with a straight stitch, then I closed the space I had left to insert the elastic and finished the bodysuit design with a zig zag stitch to secure the seam.
Second piece: short
.
Step 1
With the help of a shorts I took the measurements leaving 1 centimeter seam allowance and 6 centimeters at the top to place the elastic, I cut two equal pieces, sewed with a straight stitch, joining both pieces on the back of the fabric and closed with a zig zag stitch for a better finish.
Step 2
I sewed the hem of approximately 1 centimeter, at the top I sewed 3 centimeters with a straight stitch leaving an opening for the elastic, then I placed the pin in the elastic to insert it, finally I closed the elastic and finished the seam with a zig zag stitch.
Third piece: skirt
Step 1
Before attaching the elastic, take the waist measurement, leaving 1 centimeter on each side for sewing and closing the sides, the length was 42 centimeters, which would be 40 centimeters long plus 2 centimeters from the hem of the skirt. I closed the sides with a straight stitch, then I opened the seam and sewed with a zig zag stitch for a better finish.
Step 2
I sewed the hem of the skirt with straight stitch and zig zag stitch, placed the elastic at the edge of the fabric, at the top, sewed with straight stitch stretching a little the elastic to gather the skirt, finally I closed the seam with zig zag stitch and that's it.
Costume accessory
Costume accessory
Piece for the top of the boots: I cut two rectangles with the measurements of the leg, sewed on the edges with straight stitch and then zig zag, closed both pieces and ready.
Piece for the robot buttons: I made a rectangle with wadding, then with the silver fabric I made the piece, sewed it with straight stitch and zig zag, leaving one side open to introduce the wadding, finally I cut foamy circles, different sizes and sewed with transparent nylon.
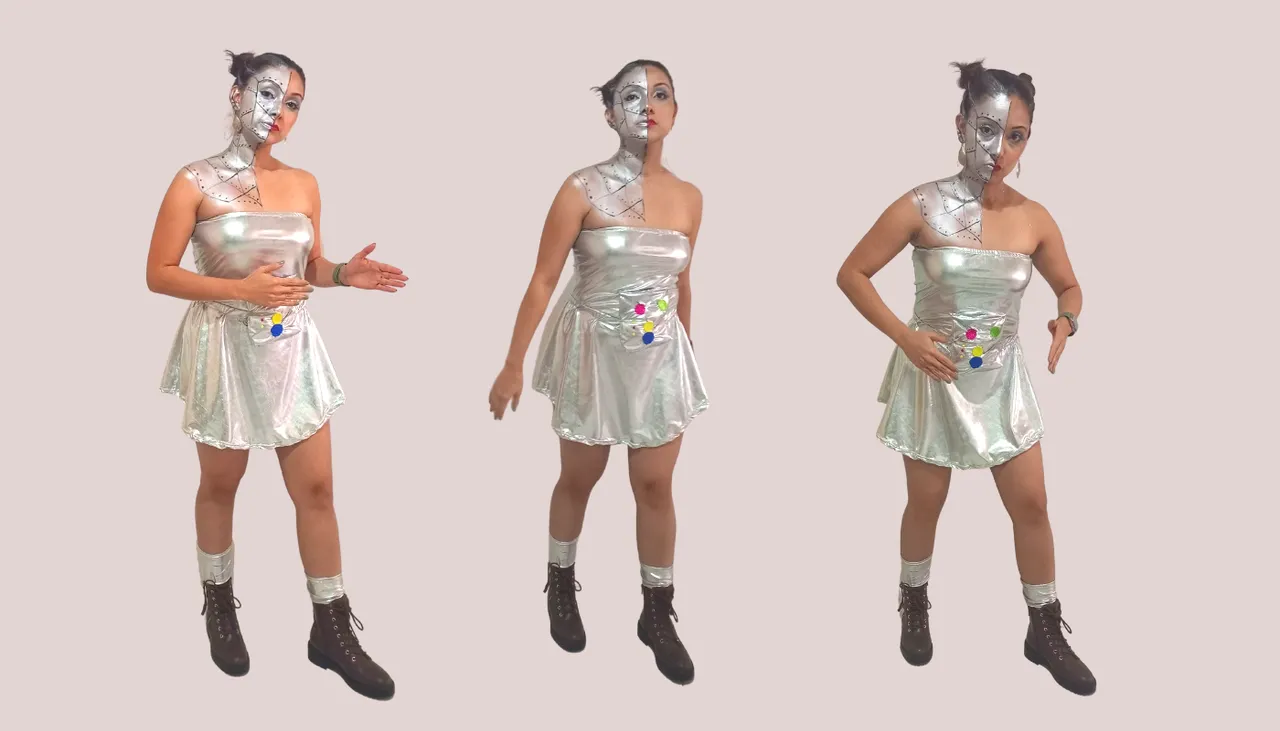
Finally I finished with the robot costume, the pieces that I made, are to use them in other moments, like the skirt or shorts, even for a beach party.
I hope you liked my design, if you liked it, leave me your comment in this post. Thanks for reading.
𝘚𝘦𝘱𝘢𝘳𝘢𝘵𝘰𝘳 𝘢𝘯𝘥 𝘣𝘢𝘯𝘯𝘦𝘳: 𝘥𝘦𝘴𝘪𝘨𝘯𝘦𝘥 𝘣𝘺 @𝘢𝘺𝘭𝘦𝘦𝘯𝘳 𝘢𝘵 𝘊𝘢𝘯𝘷𝘢 || 𝘾𝙤𝙡𝙡𝙖𝙜𝙚: 𝘮𝘢𝘥𝘦 𝘢𝘵 [𝘊𝘢𝘯𝘷𝘢](𝘩𝘵𝘵𝘱𝘴://𝘸𝘸𝘸. 𝘤𝘢𝘯𝘷𝘢.𝘤𝘰𝘮/) || 𝘐𝘮𝘢𝘨𝘦𝘴: 𝘖𝘸𝘯 𝘦𝘥𝘪𝘵𝘦𝘥 𝘢𝘵 𝘊𝘢𝘯𝘷𝘢 || 𝘚𝘦𝘢𝘮𝘴𝘵𝘳𝘦𝘴𝘴: @𝘢𝘺𝘭𝘦𝘦𝘯𝘳 || 𝘗𝘩𝘰𝘵𝘰𝘨𝘳𝘢𝘱𝘩𝘴 𝘵𝘢𝘬𝘦𝘯 𝘣𝘺: 𝘈𝘣𝘦𝘭 𝘙𝘰𝘫𝘢𝘴 𝘮𝘺 𝘩𝘶𝘴𝘣𝘢𝘯𝘥 || 𝘛𝘳𝘢𝘯𝘴𝘭𝘢𝘵𝘰𝘳: 𝘋𝘦𝘦𝘱𝘓|| 𝘓𝘰𝘤𝘢𝘵𝘪𝘰𝘯: 𝘪𝘯 𝘮𝘺 𝘢𝘱𝘢𝘳𝘵𝘮𝘦𝘯𝘵 𝘭𝘰𝘤𝘢𝘵𝘦𝘥 𝘢𝘵 𝘊𝘢𝘳𝘢𝘤𝘢𝘴-𝘝𝘦𝘯𝘦𝘻𝘶𝘦𝘭𝘢. 𝘛𝘳𝘢𝘯𝘴𝘭𝘢𝘵𝘦𝘥 𝘸𝘪𝘵𝘩 𝘸𝘸𝘸.𝘋𝘦𝘦𝘱𝘓.𝘤𝘰𝘮/𝘛𝘳𝘢𝘯𝘴𝘭𝘢𝘵𝘰𝘳 (𝘧𝘳𝘦𝘦 𝘷𝘦𝘳𝘴𝘪𝘰𝘯)