Hello, my beautiful people of @foodiesbeehive en Hive! I hope you all are doing great and ready to give always the best.
I had not been able to bring you this video before because I had not had time to edit it and all that goes with it and well, it also coincided with my birthday and my husband's vacation. So I relaxed a bit, but now we are back.

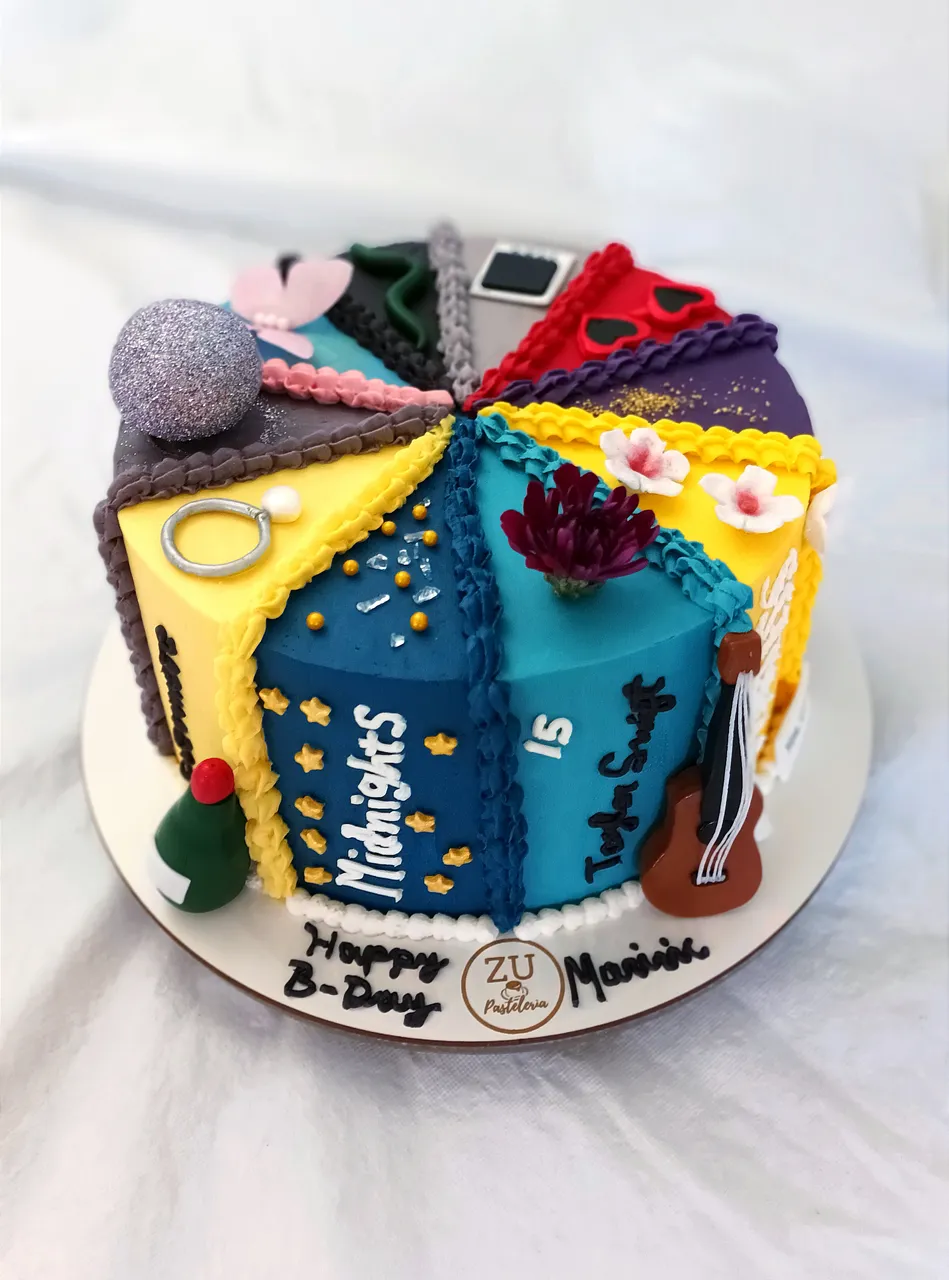
This is a cake that I was commissioned for the sister of our dear Hiver @marvic-1194, my most creative clients and also with each cake they make me overcome my limits, because each decoration is more complex than the previous one! Hahahahahaha!
The thing is that when the guys ordered me this cake, I had no idea how I was going to make this particular decoration, because one of the things that worried me the most was how I would cover each division without staining the sides of the others.
In this sense, I was searching and researching to see if I could get a guide, but I couldn't find anything, not even a video tutorial. So, I had to figure it out and come up with my own system, but I wasn't sure if it would work, since it was the first time I was doing this complex decoration.
Fortunately, everything went as planned and the technique I implemented worked perfectly, which left me with a heart full of happiness and triumphant***.

Therefore, today I want to share with you a video that I made with much love where I show you the scoop of how I decorated this cake.
Materials I used to mark the cake in 10 equal parts in a circle of 18 cm in diameter:

Parchment paper.
Scissors.
Pencil.
A ruler.
Mold of 18 cm in diameter.
Image that I used to make the 10 angles of 36 degrees each .
For the filling of each of the portions:

White chocolate ganache with the 10 colors of the cake decoration. For each color I used 60 gms, approximately, of chocolate ganache.
10 disposable piping bags.
A small spatula.
A stainless steel cake scraper.
No. 481 nozzle.

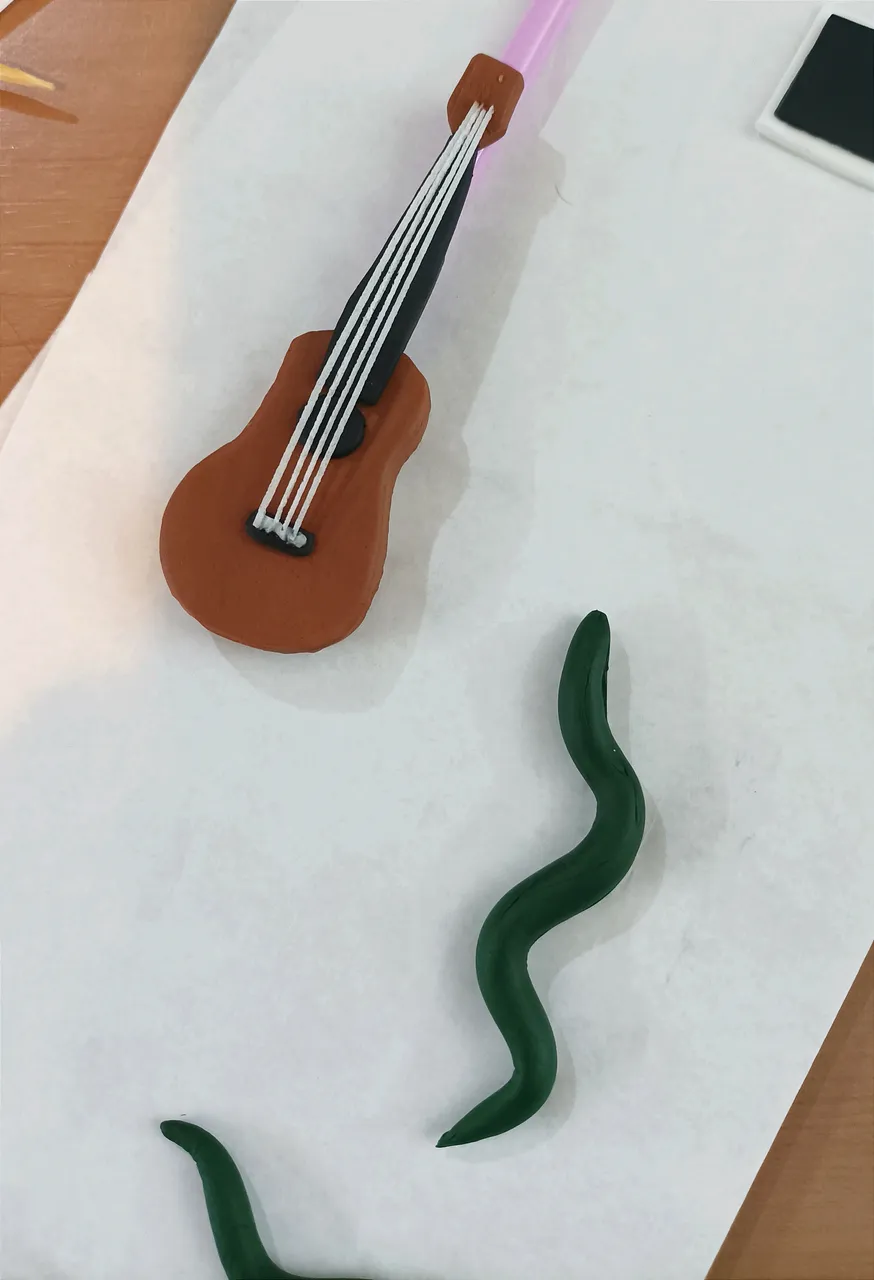
These are some of the figures I made in fondant.
I hope you enjoy this video and if so, don't forget to leave your valuable comment. On the other hand, if you think this tutorial can be useful to some of your friends or family, do not hesitate to share it.
Thanks for joining me and for all your support.

Your friend, Zuuu!

You can also find me on instagram as: @zu_pasteleria, @tayiitos and on RedBubble in my clothes and products store.
All photos and videos in this post were taken with my Xiaomi Redmi 10 cell phone.
Resources: Gifty application, Capcut, Pixaby Music and Deepl Translator.
Music by: Lesfm

¡Hola, mi linda gente de @foodiesbeehive en Hive! Espero se encuentren muy bien y siempre dispuestos a dar lo mejor.
No había podido traerles este video antes porque no había tenido tiempo de editarlo y todo lo que conlleva hacer dicha labor y bueno, además coincidió con mi cumpleaños y las vacaciones de mi esposo. Así que me relajé un poco, pero ya estamos de vuelta.

Esta es una torta que me encargaron para la hermana de nuestra querida Hiver @marvic-1194, mis clientes más creativos y que además con cada torta me hacen superar mis limites, pues cada decorado es más complejo que el anterior! Jajajajaja!
El tema es que cuando los chicos me encargaron esta torta, no tenía ni la más mínima idea de cómo iba a hacer esta particular decoración, pues una de las cosas que más me preocupaba era cómo cubriría cada división sin manchar los lados de las otras.
En este sentido, estuve buscando e investigando para ver si conseguía una guía, pero no encontré nada, ni un video tutorial. Por lo tanto, tuve que ingeniármelas y crear mi propio sistema, pero no estaba segura si funcionaría, pues era la primera vez que realizaba este complejo decorado.
Afortunadamente, todo salió como lo había planificado y la técnica que implementé funcionó a la perfección lo que me dejó con el corazón llenito de felicidad y triunfante.

Por lo tanto, hoy quiero compartir con ustedes un video que hice con mucho cariño donde les muestro la primicia de cómo decoré esta torta.
Materiales que usé para marcar la torta en 10 parte iguales en un
círculo de 18 cm de diámetro:

Papel vegetal.
Tijeras.
Lápiz.
Una regla.
Molde de 18 cm de diámetro.
Imagen con la que me guié para hacer los 10 ángulos de 36 grados cada uno.
Para el relleno de cada una de las porciones:

Ganache de chocolate blanco con los 10 colores del decorado de la torta. Para cada color usé 60 gms, aproximadamente, de ganache de chocolate.
10 mangas pasteleras desechables.
Una espátula pequeña.
Un alisador de metal.
Una boquilla nº 481.

Estas son algunas de las figuras que hice en fondant.
Espero disfruten de este video y si es así, no olviden dejar su valioso comentario. Por otro lado, si creen que este tutorial les puede ser de utilidad a algunos de sus amigos o familiares, no duden en compartirlo.
¡Gracias por acompañarme y por todo tu apoyo!

¡Tu amiga, Zuuu!

También me puedes encontrar en instagram como: @zu_pasteleria, @tayiitos y en RedBubble en mi tienda de ropas y productos.
Todas las fotos y videos de esta publicación fueron realizadas con mi celular Xiaomi Redmi 10.
Recursos: Aplicación Gifty, Capcut, Pixaby Música y Deepl Translator.
Música de: Lesfm
▶️ 3Speak

