(All photos taken by @paradigm42)
One of my main creative outlets for the past couple of years has been photography with a focus on macro shots. I love getting out in nature, taking pictures and sharing them here on steemit. Posting here has also peaked my interest in writing again which I have always enjoyed.
The thing is, winter in the northeast can be pretty hardcore, and (as I have said more than once on here lol), I am NOT a cold weather person. I become a complete homebody / hermit when I'm not at work or walking my puppers this time of year. Without the motivation to go outside, and the cold dreary weather affecting my mood, I find myself without much motivation to post anything, and not a whole lot to post about..
This year I decided to try something different. Rather than allowing myself to become blah and depressed, I have started a completely different type of (semi lol) creative project to keep me motivated and give me something to post about.
When I was 9 or 10 years old my grandma taught me to cross-stitch and got me a beginners printed pattern to start with. I remember picking up fairly easily how to do the different types of stitches needed and that I enjoyed the project. I never did continue with cross-stitching as I was rather easily distracted from such hobbies as a child, and spent most of my time reading or playing video games.

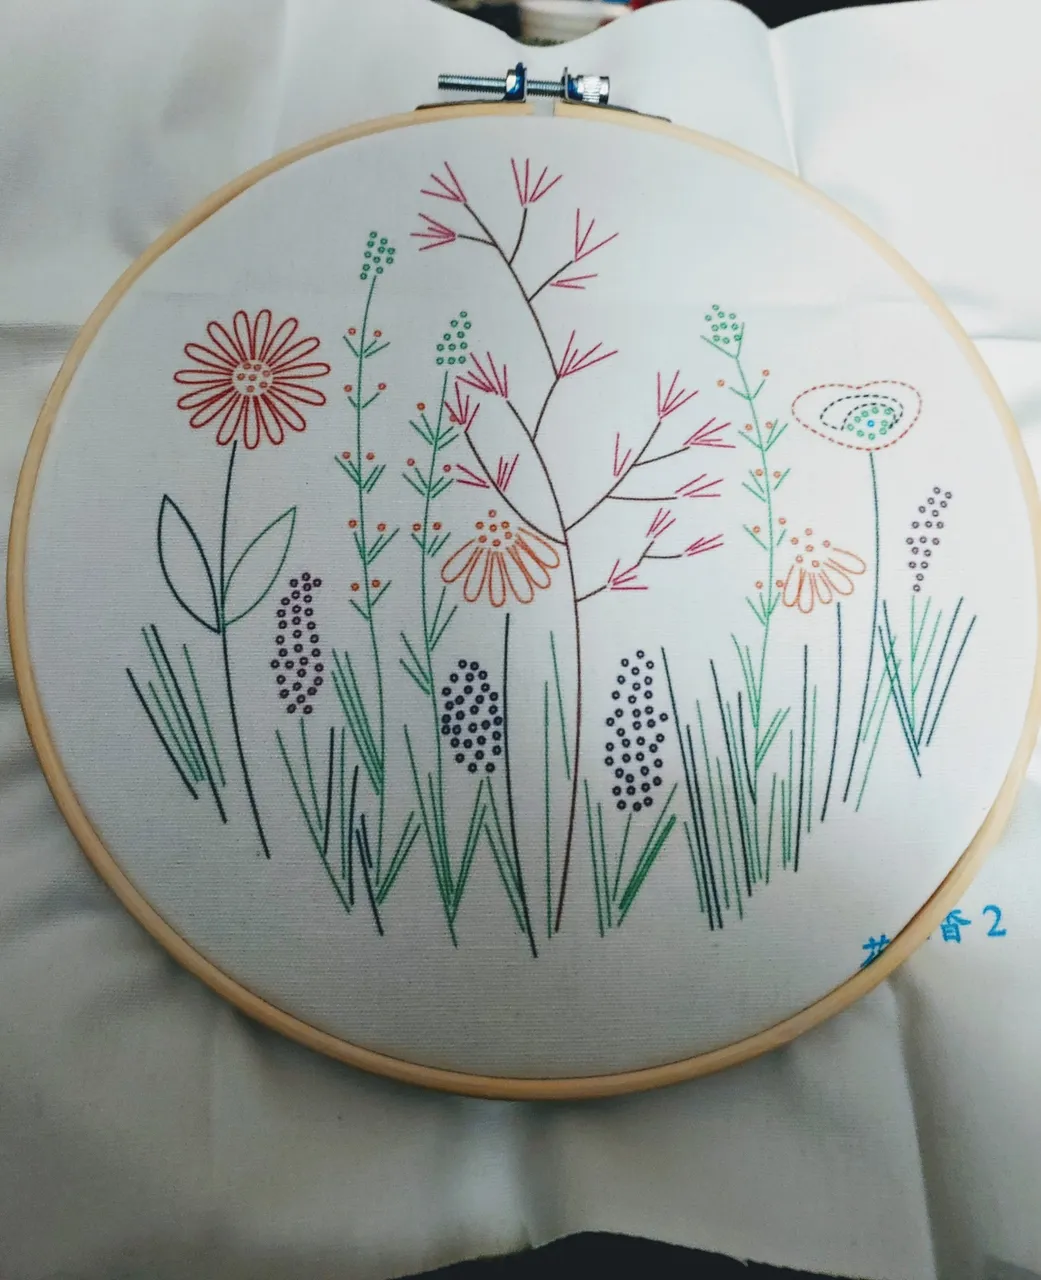
Fast forward around thirty years and here I am with this new project in front of me, inspired by my experience as a kid that I often thought of as an adult. I found this on Amazon since I had not been able to find this type of beginners project in any local store. It comes with everything you need to complete it, including the embroidery frame, and instructions.
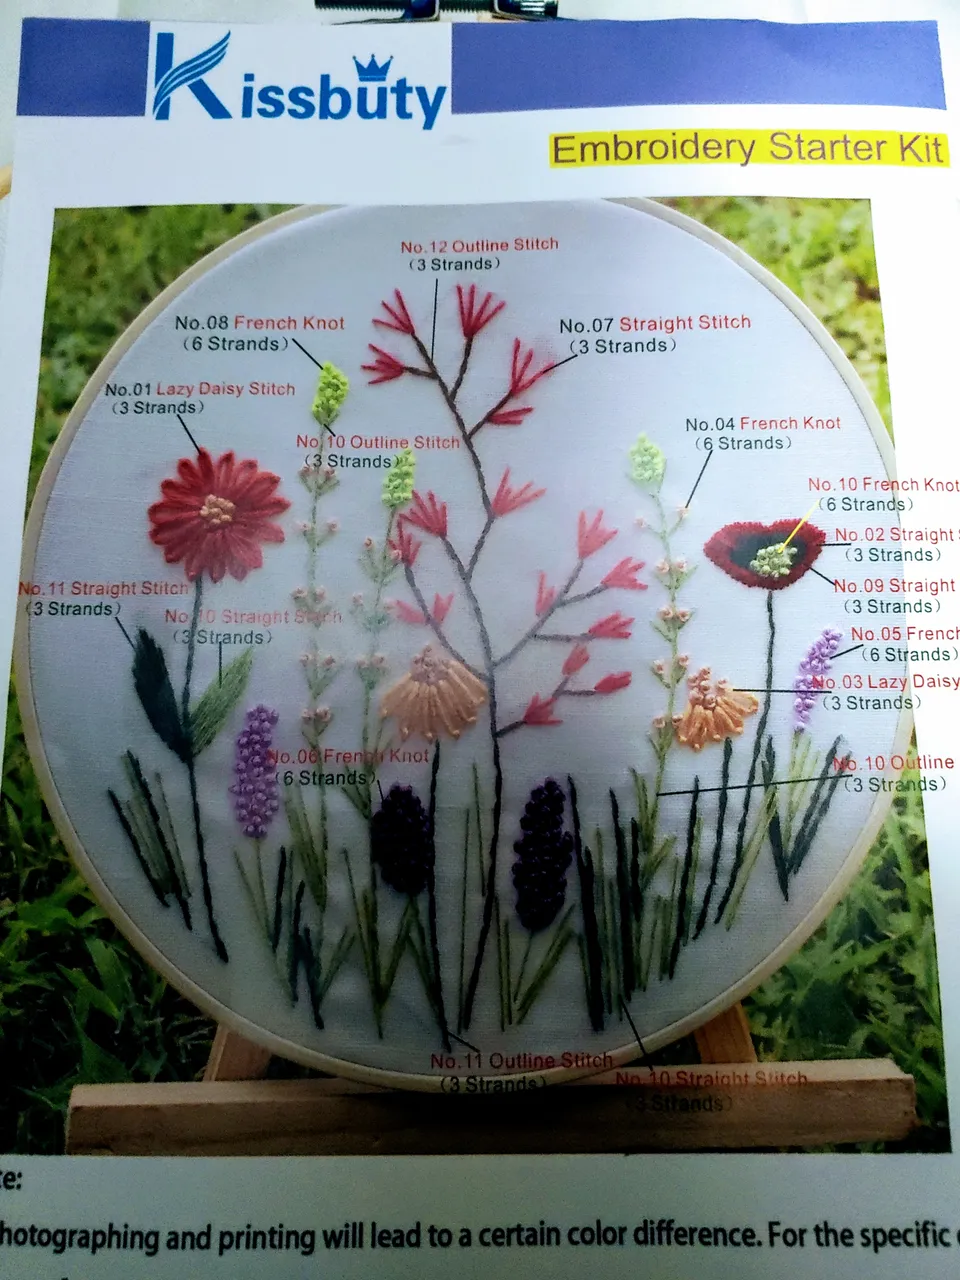
The front page not only indicates what the finished project will look like, it tells you what colors and stitches you will need for each part. It also tells you how many strands of embroidery floss you will need for each stitch.
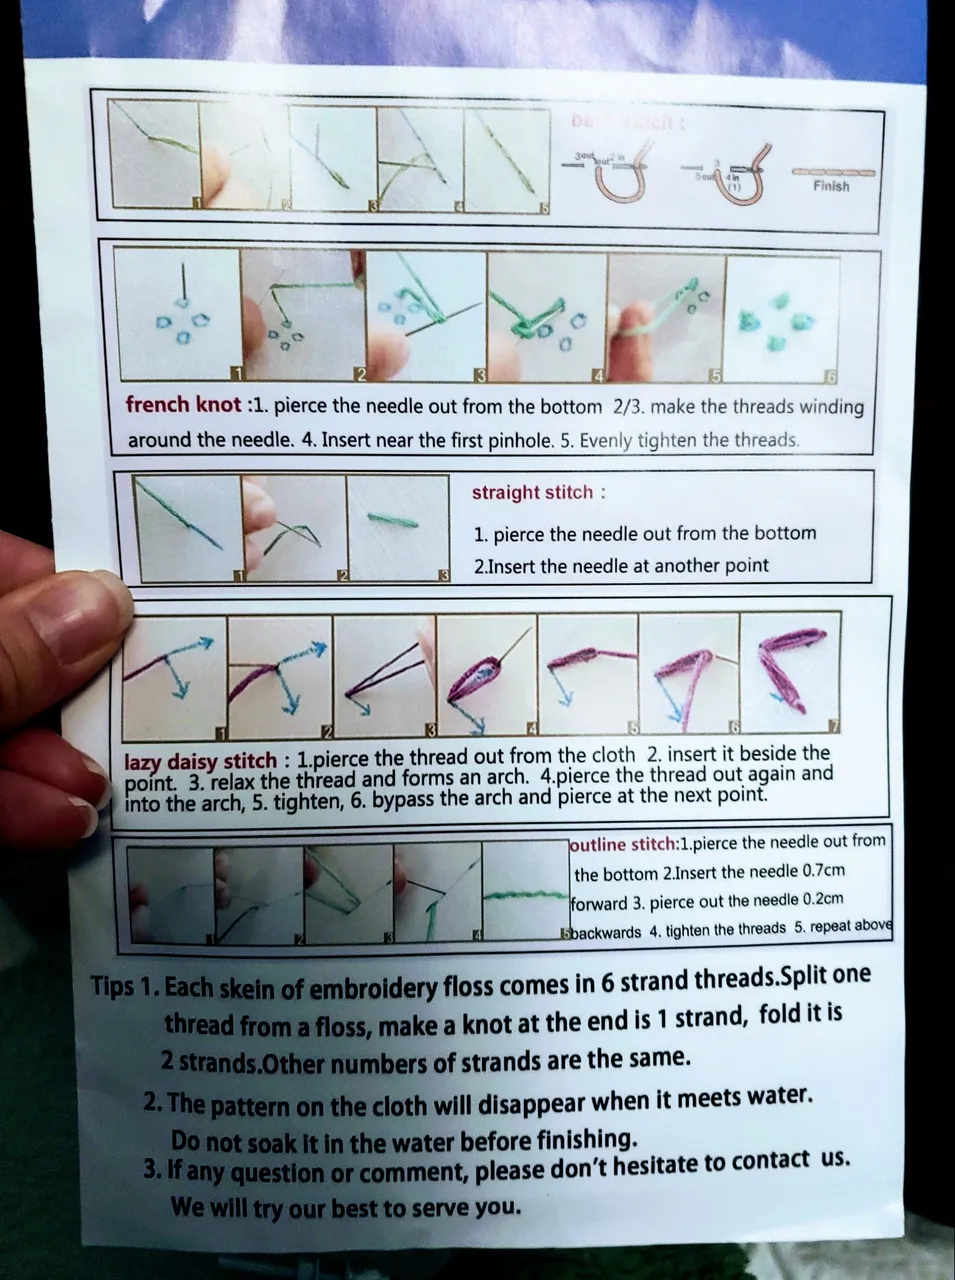
The back page gives instructions for each type of stitch including photos, as well as how to handle and use the skeins of embroidery floss. So far I have found the instructions easy to follow from this page alone, though I am admittedly a bit intimidated by the French Knot stitch, and will most likely find myself checking out the suggested youtube videos about how lol..
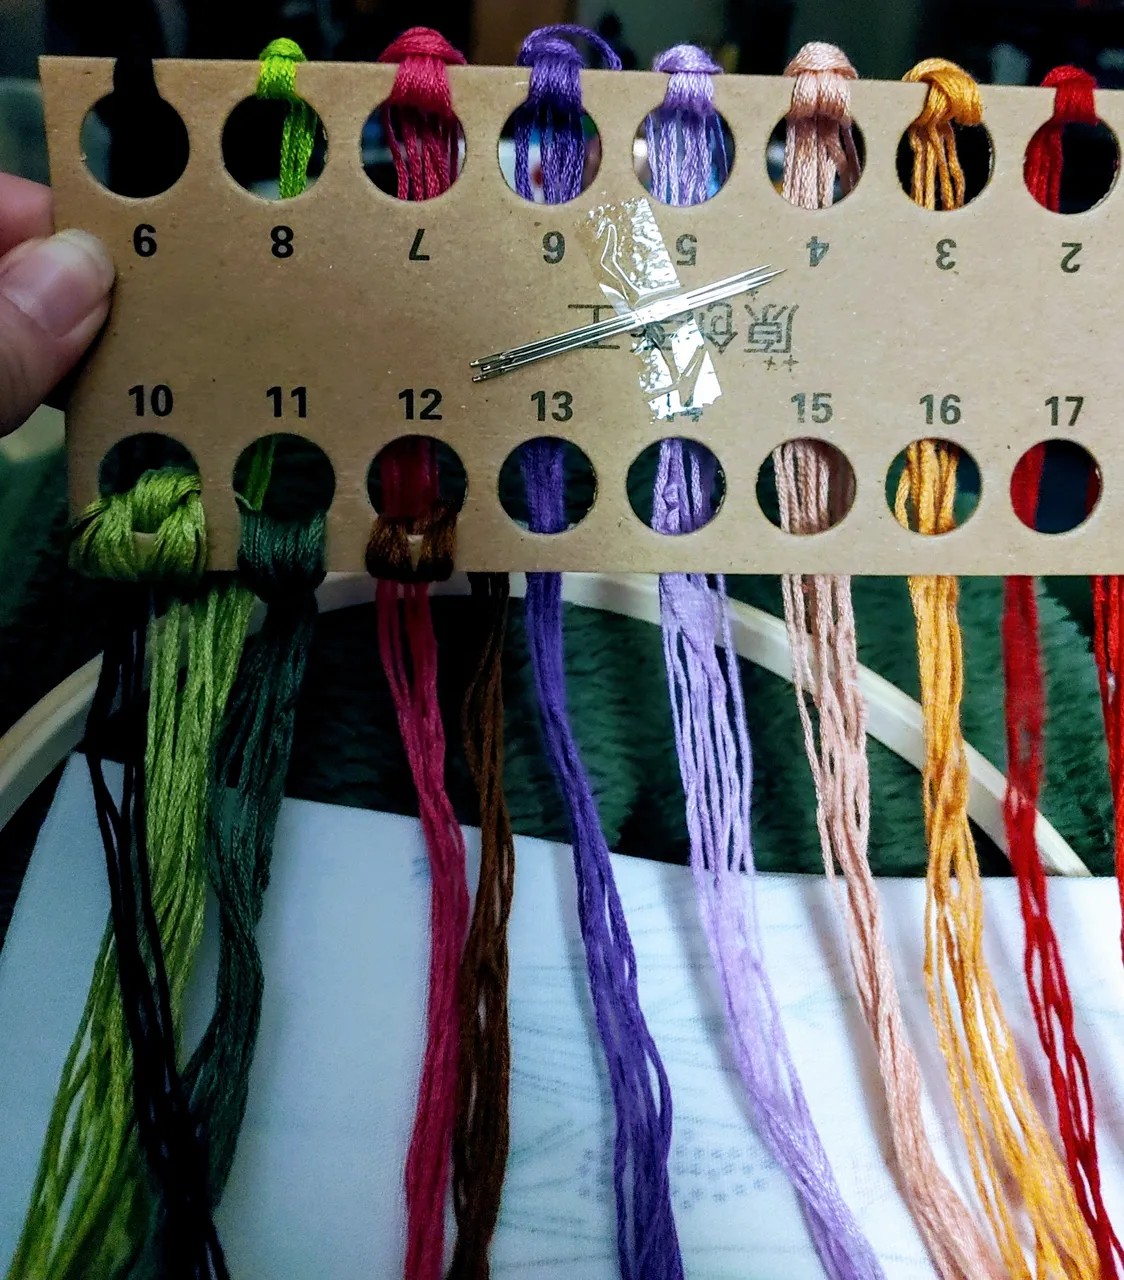
All the embroidery floss needed comes neatly organised by color in numbered holes in the cardboard holder, with three embroidery needles taped to the side. The numbers correspond with the front page to show the correct colors needed in each area.
So the first thing I had to do was set up the fabric pattern in the embroidery frame. The frame is made up of an inner and outer ring. You center the pattern flat on the inner ring, then place the outer ring over both. I then pulled the fabric tight and flat in the frame and tightened the screw on the top. You may find from time to time that the fabric will loosen in the frame as you sew. All you do is tighten the fabric in the frame again and adjust as needed.
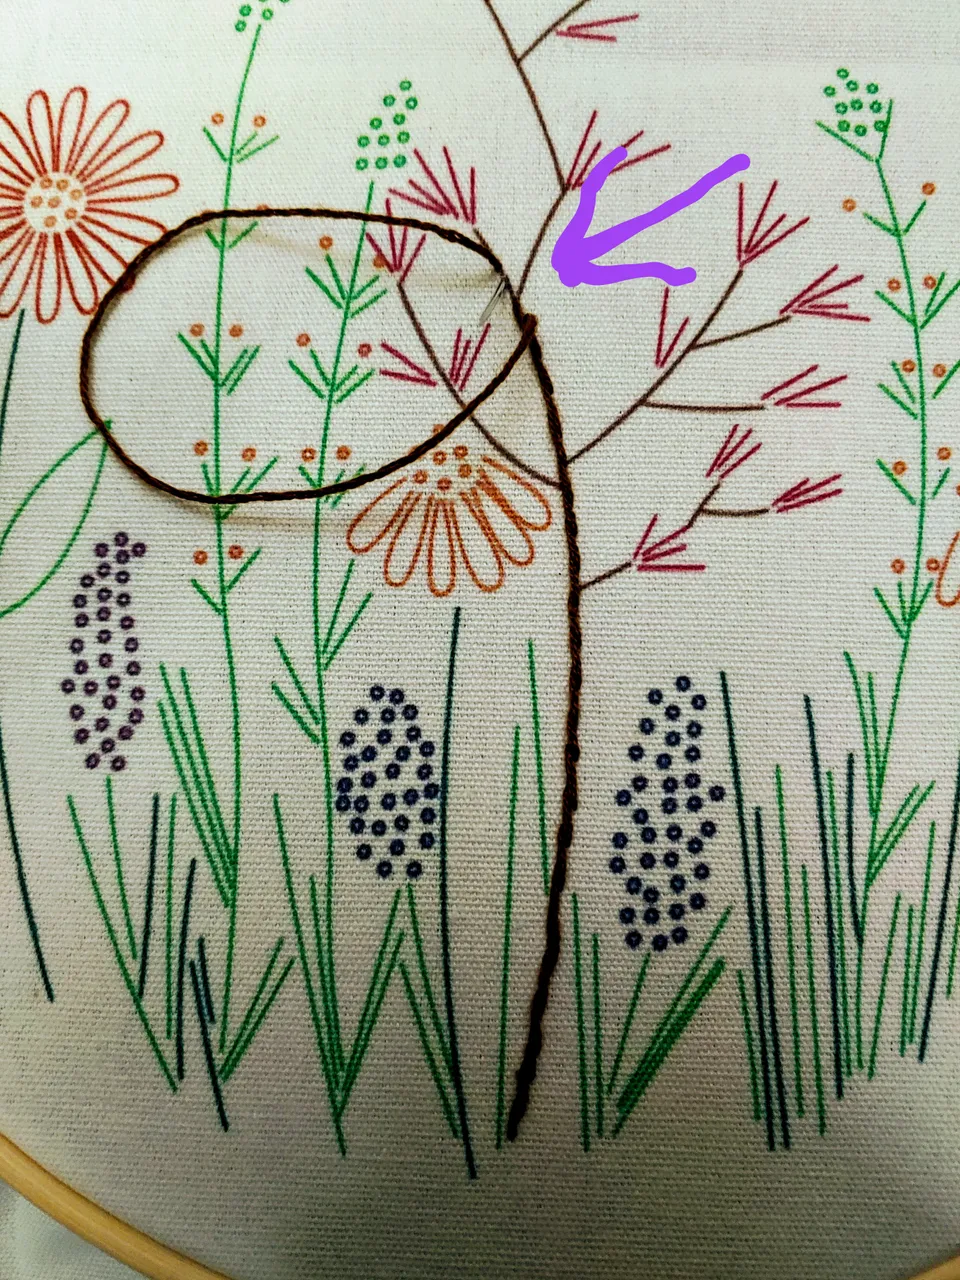
Now I do have some very basic sewing knowledge which is a bit helpful, however I little to no memory of any of the stitches I learned as a kid. So as ultimately as a beginner again at this, I thought it would be best to focus on learning one type of stitch at a time. The stitch I decided to focus on learning first is the outline stitch.
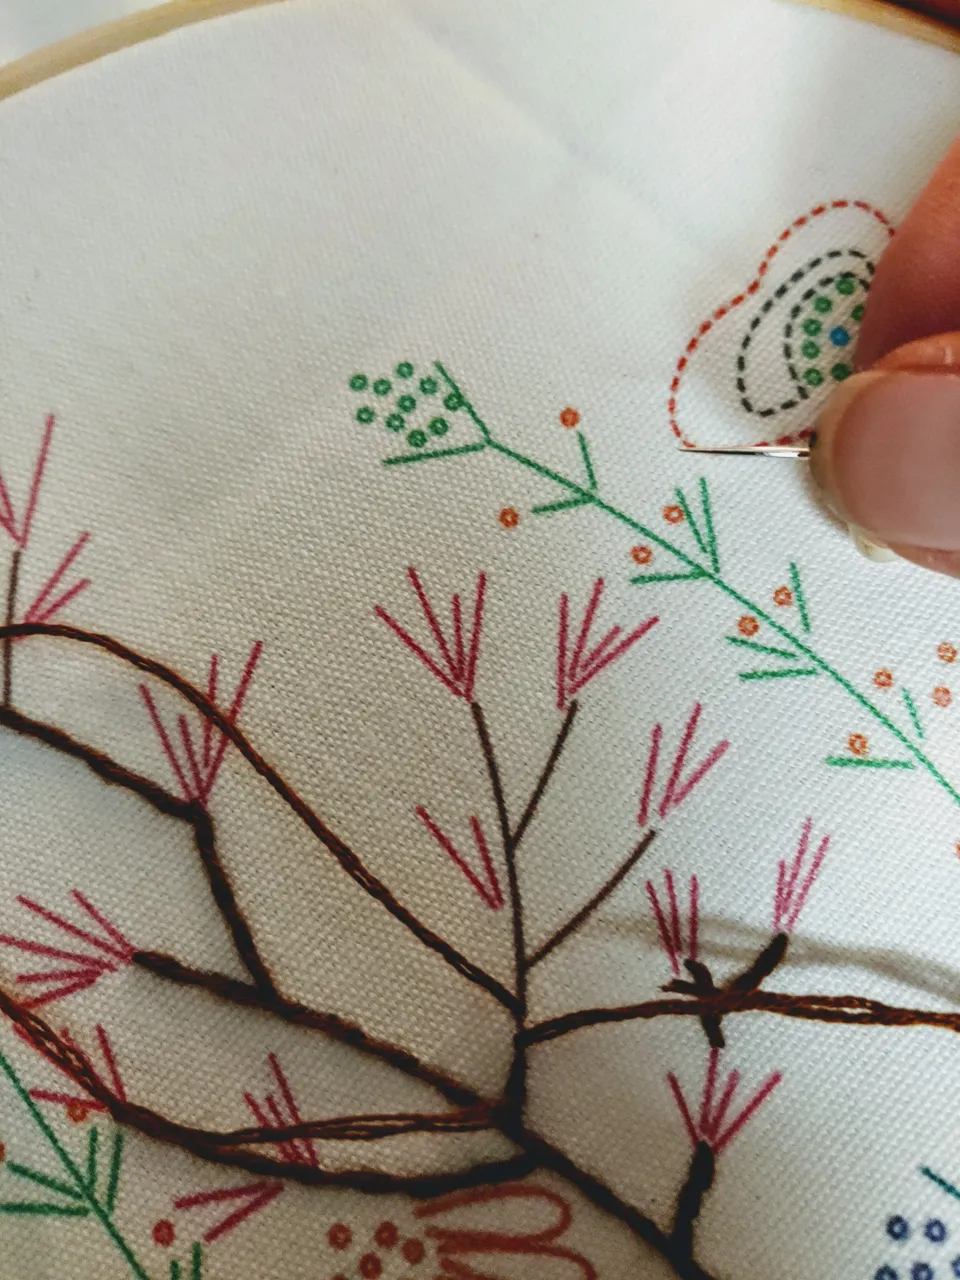
The outline stitch requires three stands of embroidery floss (each skein of floss contains six separate strands), thread through the needle. The stitch begins by bringing the needle and floss up through the bottom of the pattern where you want to start the stitch. You then bring the needle back down through a bit less than a centimeter from where you came up through originally. Now you start to pull the floss through, but not completely, leaving a visible loop. Once this is done, you bring the needle up through within your stitch about .2cm from where you just pulled down through.
To finish the outline stitch, you pull the stitch tight, being careful to keep the loop to the left of your needle and floss until completely tightened down. The stitch is completed as seen here and you can begin the stitch again.
*Beginners tip: On your first stitch, make sure you pull your floss completely through so that your knot at the end of your floss is tight to the back of the fabric. Be sure to keep it from loosening away from the fabric again before you set your first one or two stitches.
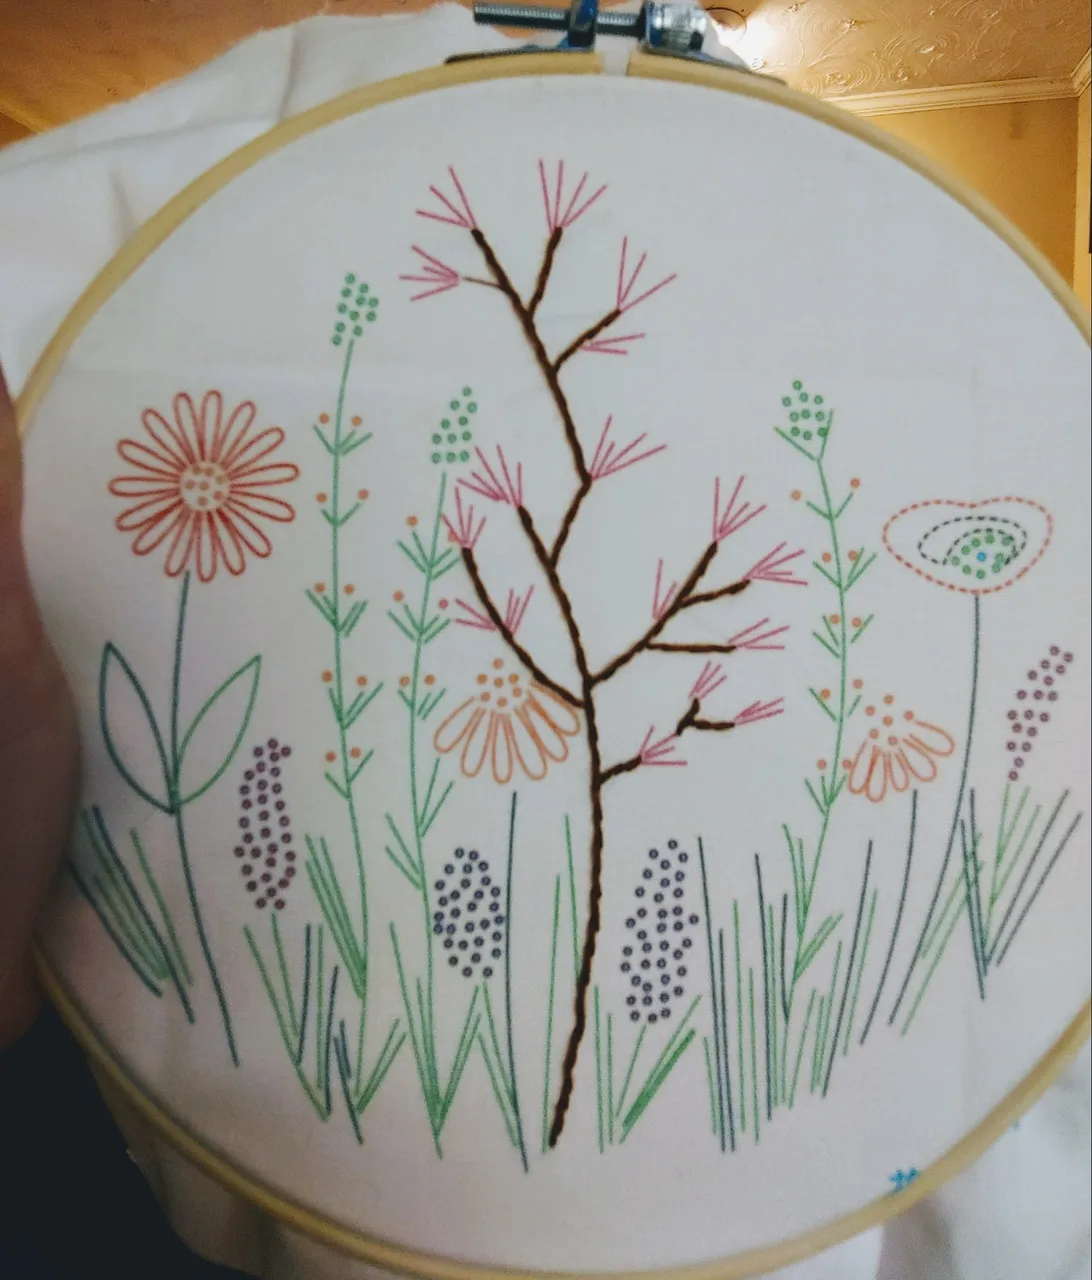
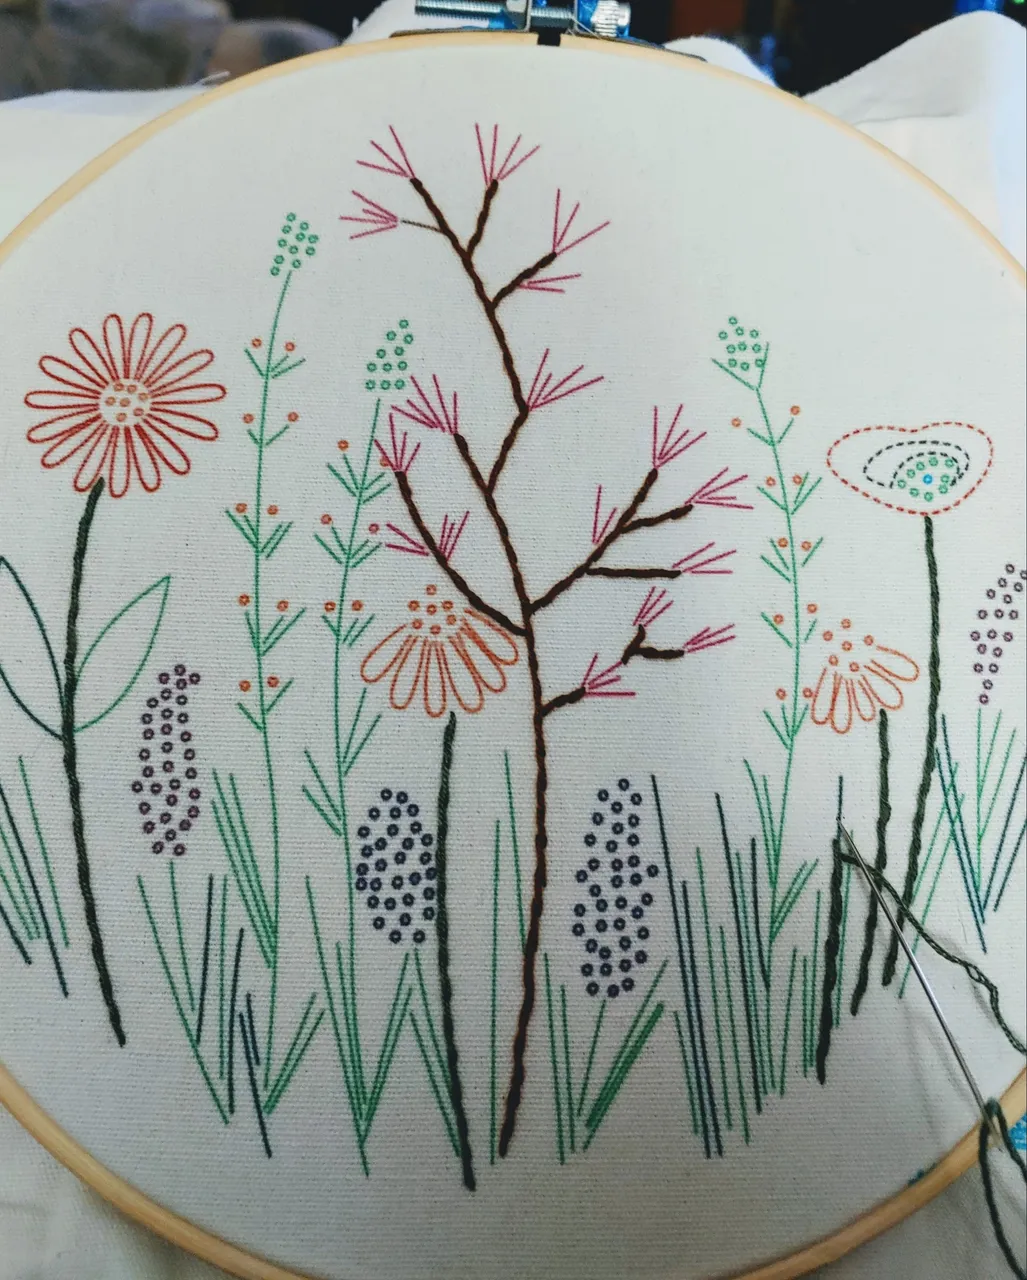
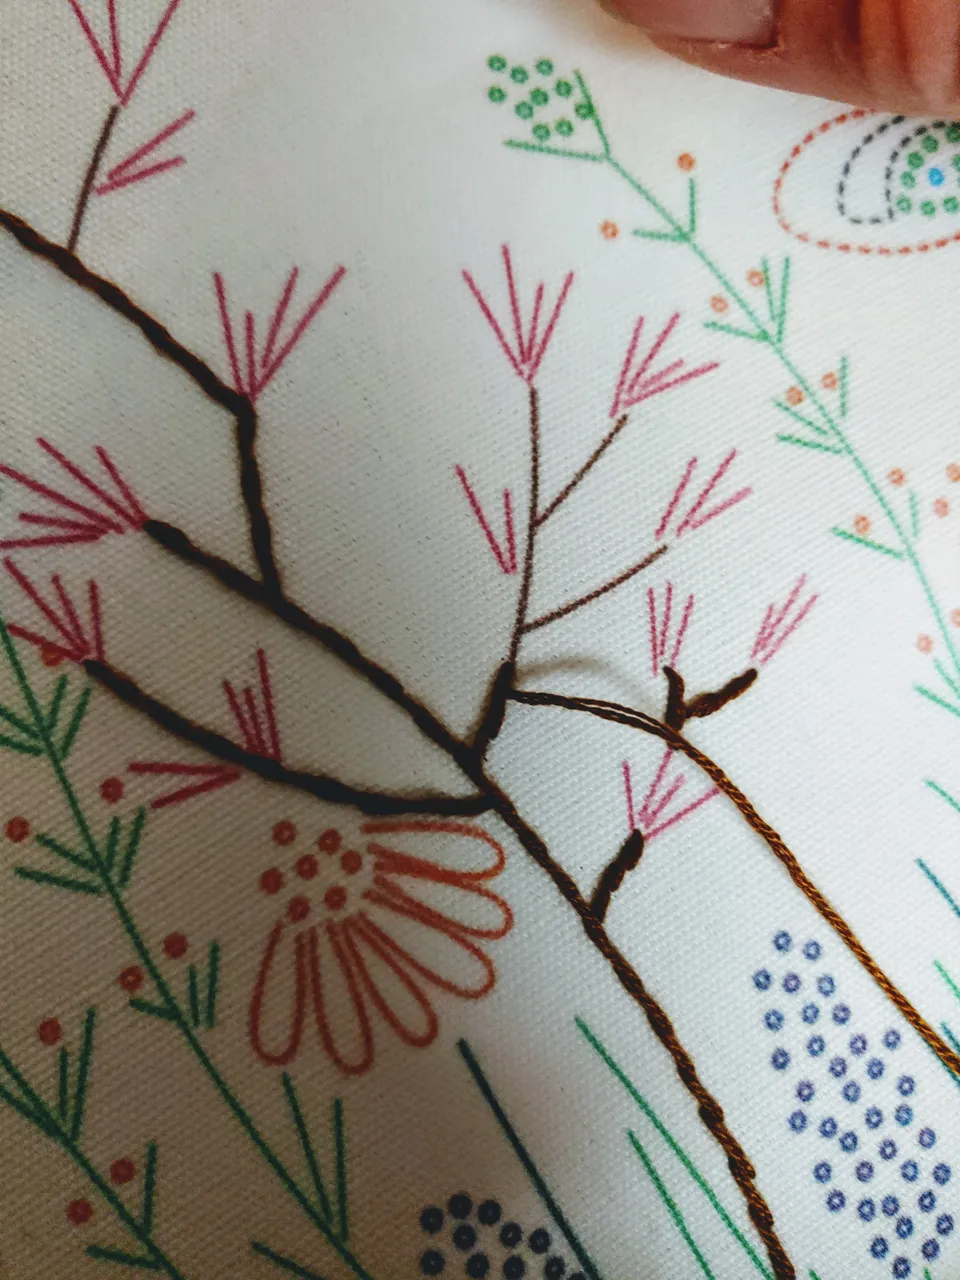
This is the main flower branch almost completed. I am rather proud of this considering I have not done this since I was 10 lol! ;)
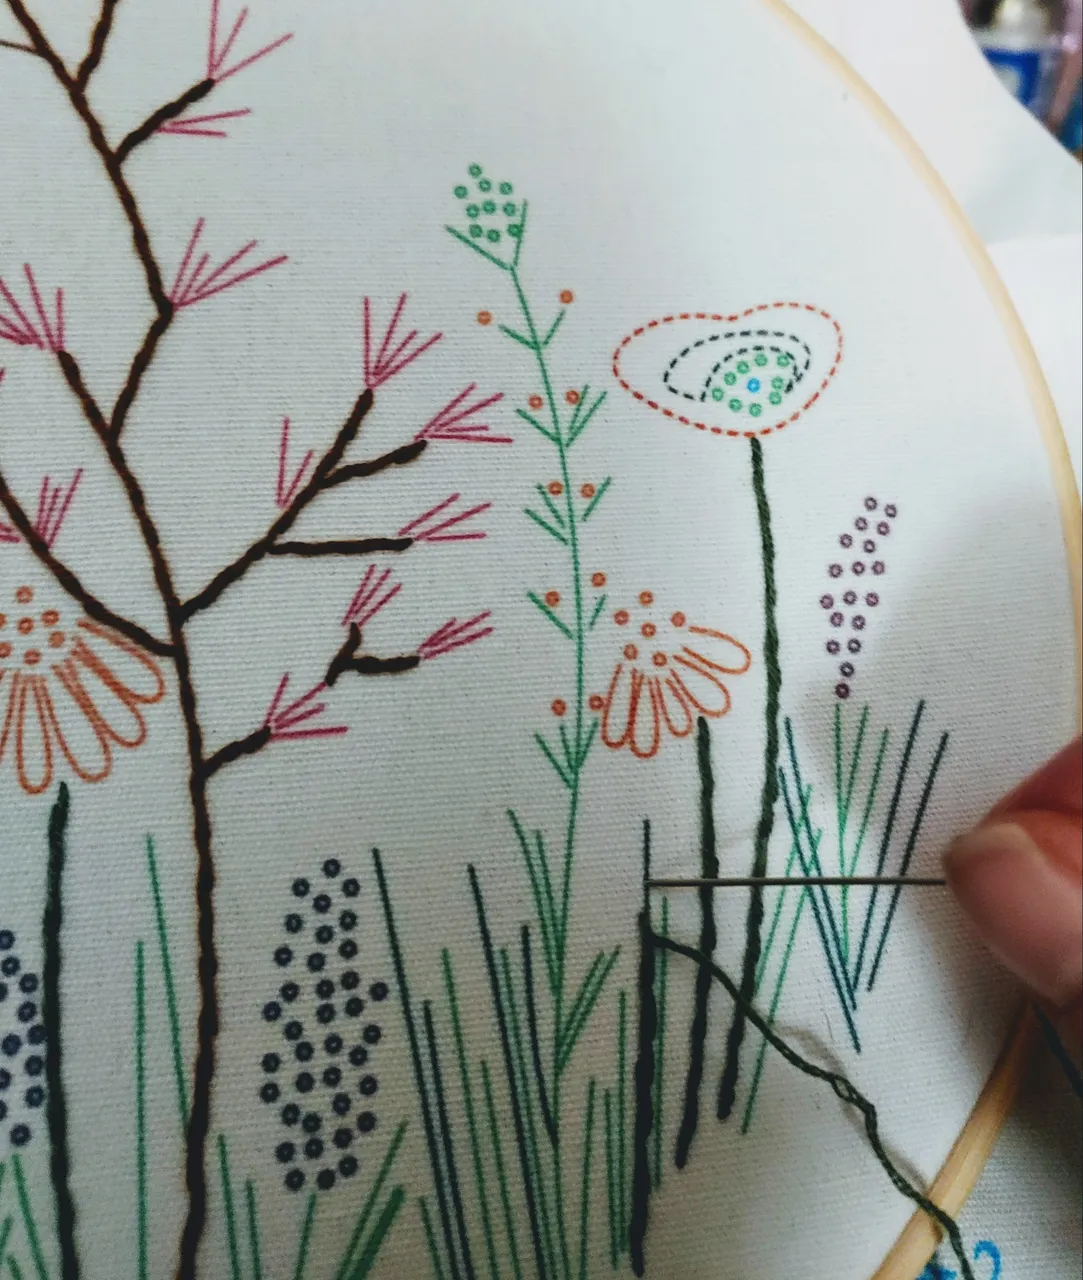
Now that I have done everything that I needed the brown floss for, I have moved on to everything to be done in the outline stitch using this dark green thread. There is quite a bit of the pattern that uses this stitch, which is one of the main reason I choose it to start with.
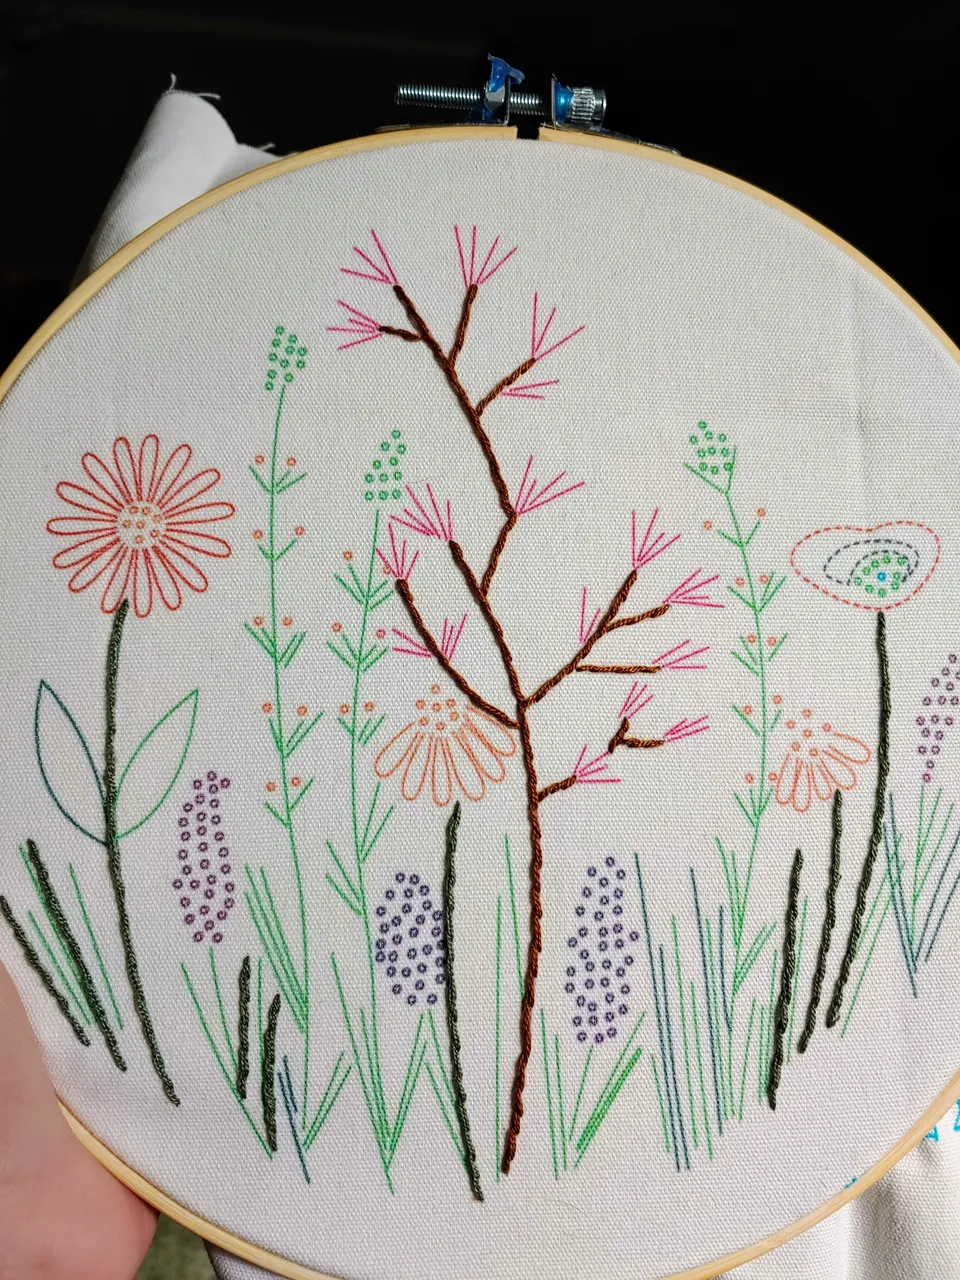
Here is what I have completed up until now, including a bit I did today. I will plan another post once I have moved on to a new type of stitch (Which may take a while lol..). I hope you have enjoyed, and found interesting this beginners look a embroidery as a creative craft project.
As always remember that it is all about the little things in life, and thanks for looking in! :)