Introduction
This guide will walk you through setting up an SPK Testnet node. SPK is a decentralized file storage network built on the Hive blockchain.
Prerequisites
- Have TEST LARYNX Tokens
- Follow @spknetwork on any Hive frontend to obtain TEST LARYNX tokens (unfollow and refollow for additional tokens).
Simple SPK Storage Node
This is the base model for the SPK ecosystem. It allows anybody with a computer and an internet connection to participate. This setup is extremely simple but requires you to have Docker, which is a way to run compartmentalized virtual machines. Get Docker
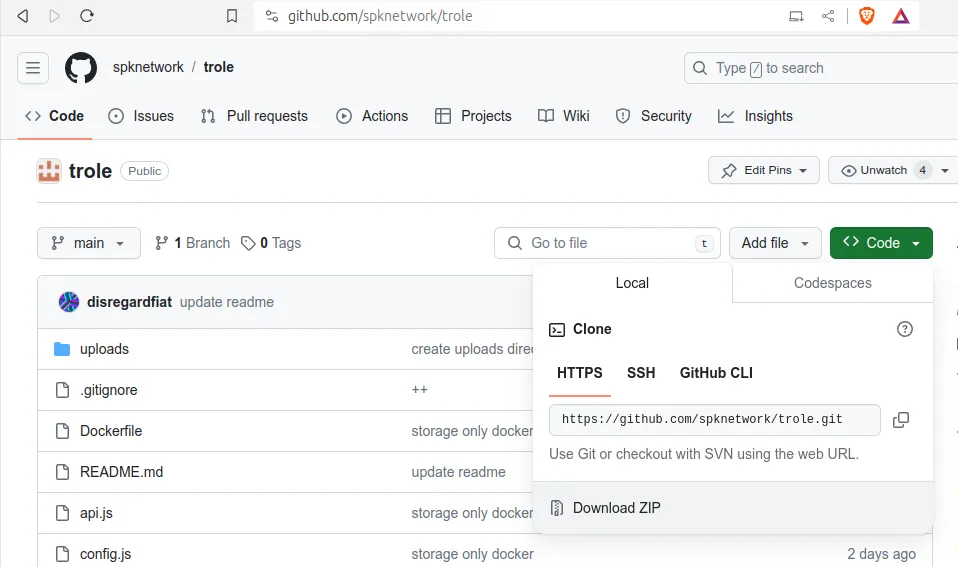
- Then download Trole
Next, copy env.sample to .env and write your spknetwork hive account and active key in the coppied file.
- copy and paste the env.sample file, open it with a text editor like Notepad, and fill in the account information.
- Make sure you rename this file to
.env- This might make the file invisible on your computer
Now run the build and up
docker-compose builddocker-compose up
You should now be able to store the files in contracts you might see around Hive.
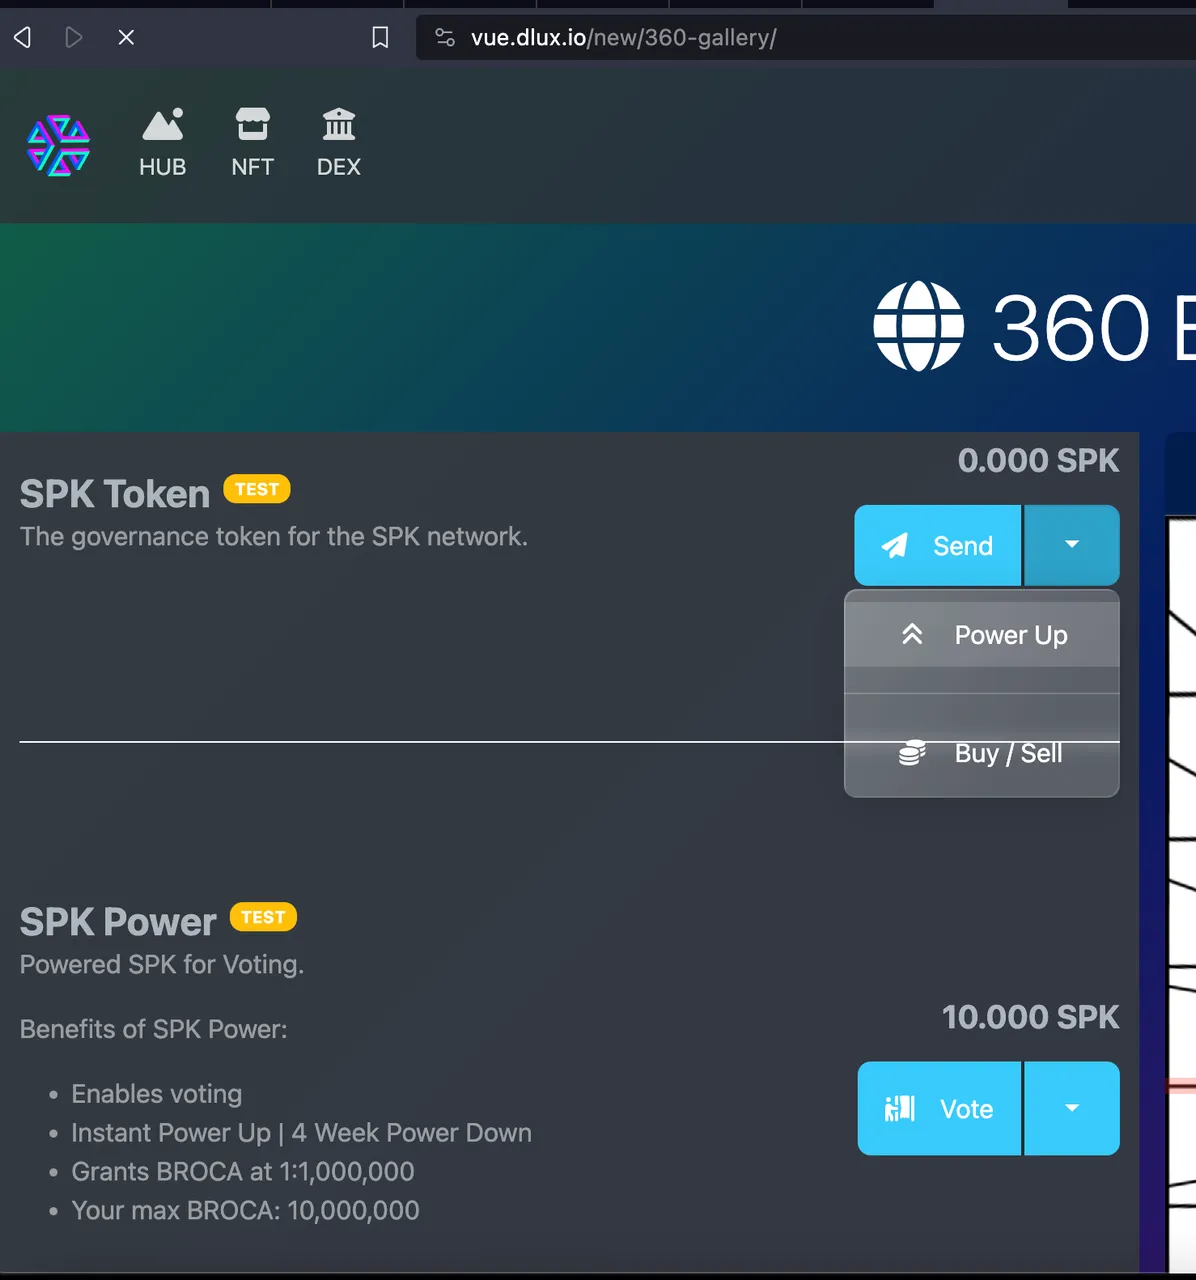
To Earn Test BROCA and Test SPK
To manage your node, you can follow this link: localhost:5050
- This link will only work from a computer with the software running on it.
- Ports 4000(IPFS), 5001(IPFS), 5050(Trole), 8000(PoA), and 8080(IPFS) will be used.
Full Install Step-by-Step Instructions (Including Validator Node)
This install path is for developers who want to test the whole ecosystem. In addition to the above software, it will run a validator and an SPK Network node. This validator MUST be on a public address so the rest of the network can talk to it. You will also be able to accept uploads to the SPK Network and have the first chance at grabbing a lucrative spot on a storage contract. If you run any server, this should be easy; if you're capable with a computer, it shouldn't be too hard.
Full Install Prerequisites
- Ubuntu Server
- Domain name (stick to poa, spk, ipfs subdomains)
1. Set Up Your Server
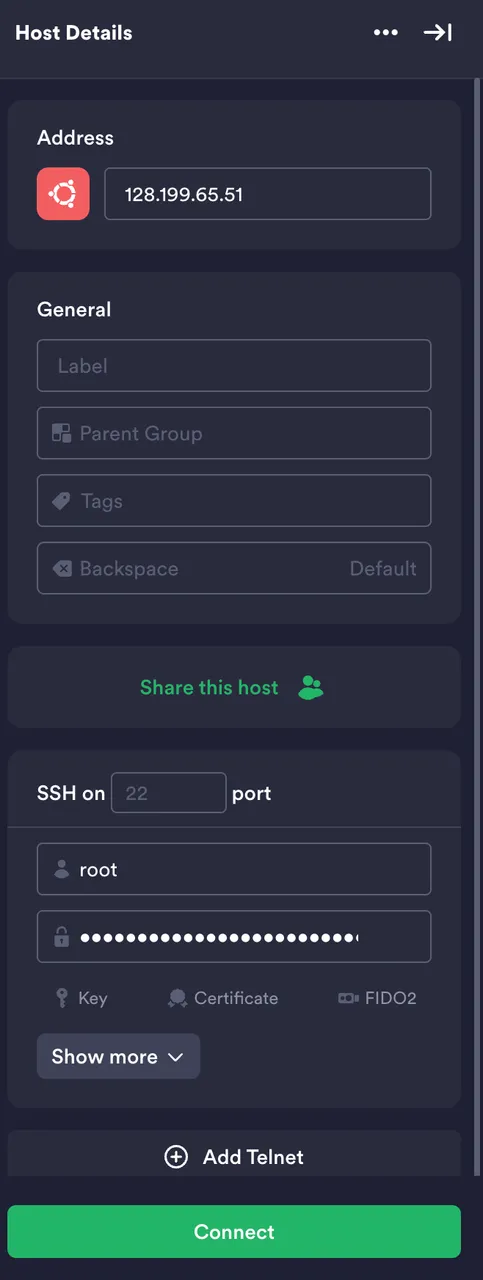
- Create a Server: Use Ubuntu 20.04 LTS on a service like DigitalOcean.
- SSH Access: Log in to your server using Terminus or any SSH terminal.
2. Create User
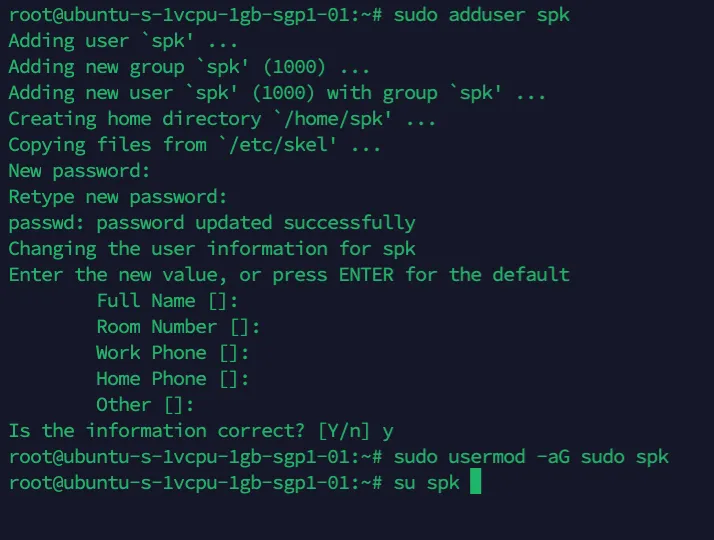
- Add User:
sudo adduser spk - Set Password: Follow the prompts to set a new password.
- Grant Permissions:
sudo usermod -aG sudo spk - Switch User:
su spk
3. Domain Configuration
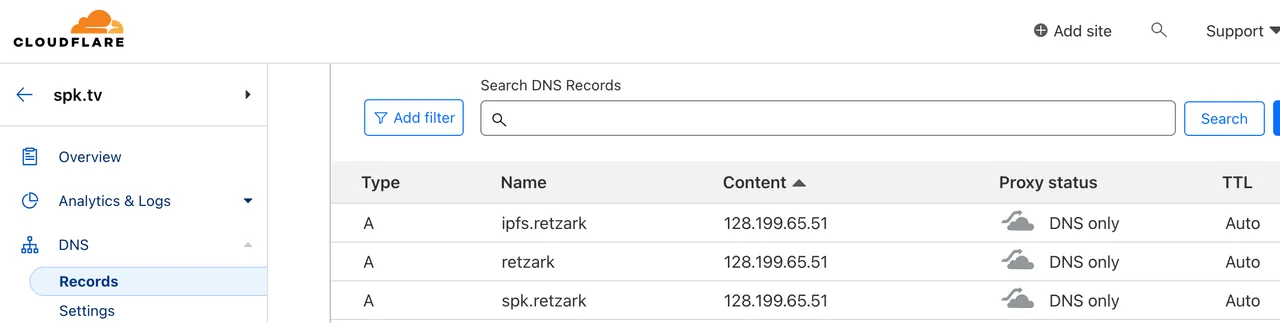
- DNS Setup: Configure your domain's subdomains with Cloudflare or your DNS provider. A records should be set for:
- spk.retzark.spk.tv
- ipfs.retzark.spk.tv
- poa.retzark.spk.tv
- The install script will register poa ipfs and spk subdomains to your domain. We recommend sticking to these presets.
4. Install SPK
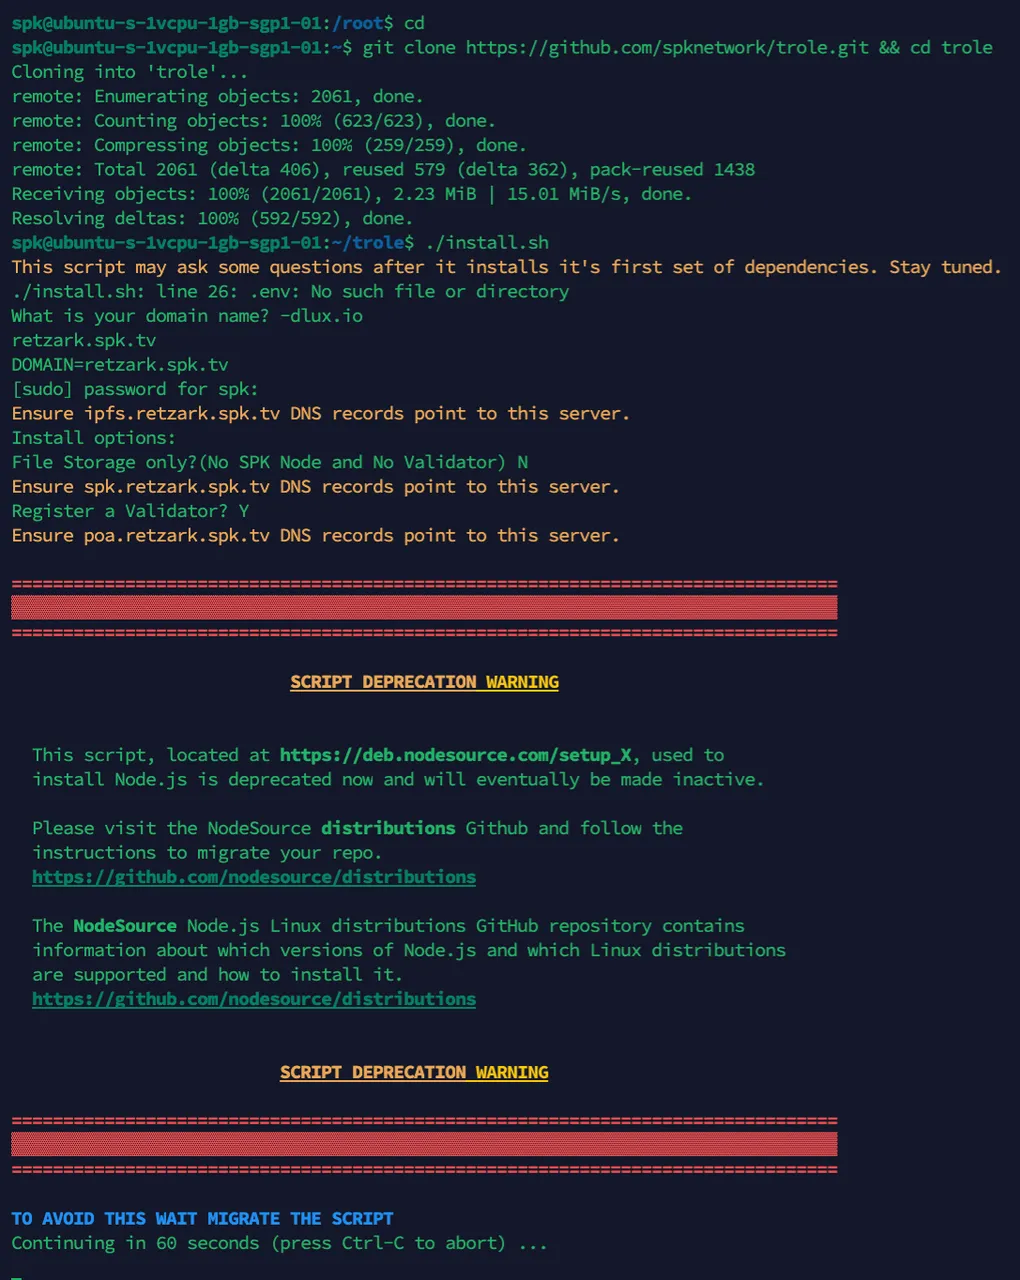
- Navigate to Home Directory:
cd - Clone Repository:
git clone https://github.com/spknetwork/trole.git && cd trole - Run Installer:
./install.sh
5. Configuration
- When prompted for a domain name, enter retzark.spk.tv.
- Choose your installation options:
- File Storage only (No SPK Node and No Validator): Respond with
N. - Register a Validator: Respond with
Y.
- File Storage only (No SPK Node and No Validator): Respond with
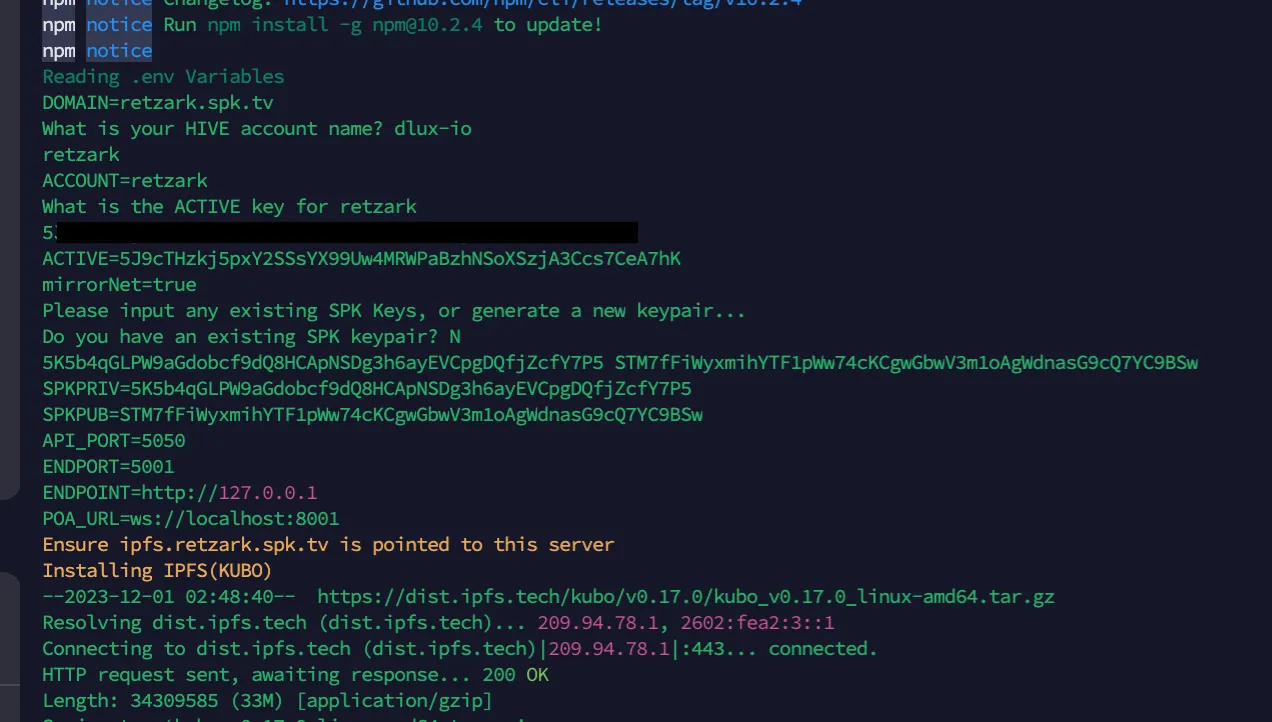
6. Hive Account Setup
- Enter your Hive account name and active key when prompted.
- For SPK keypair, select
Nto generate a new one.
7. Service Status Check
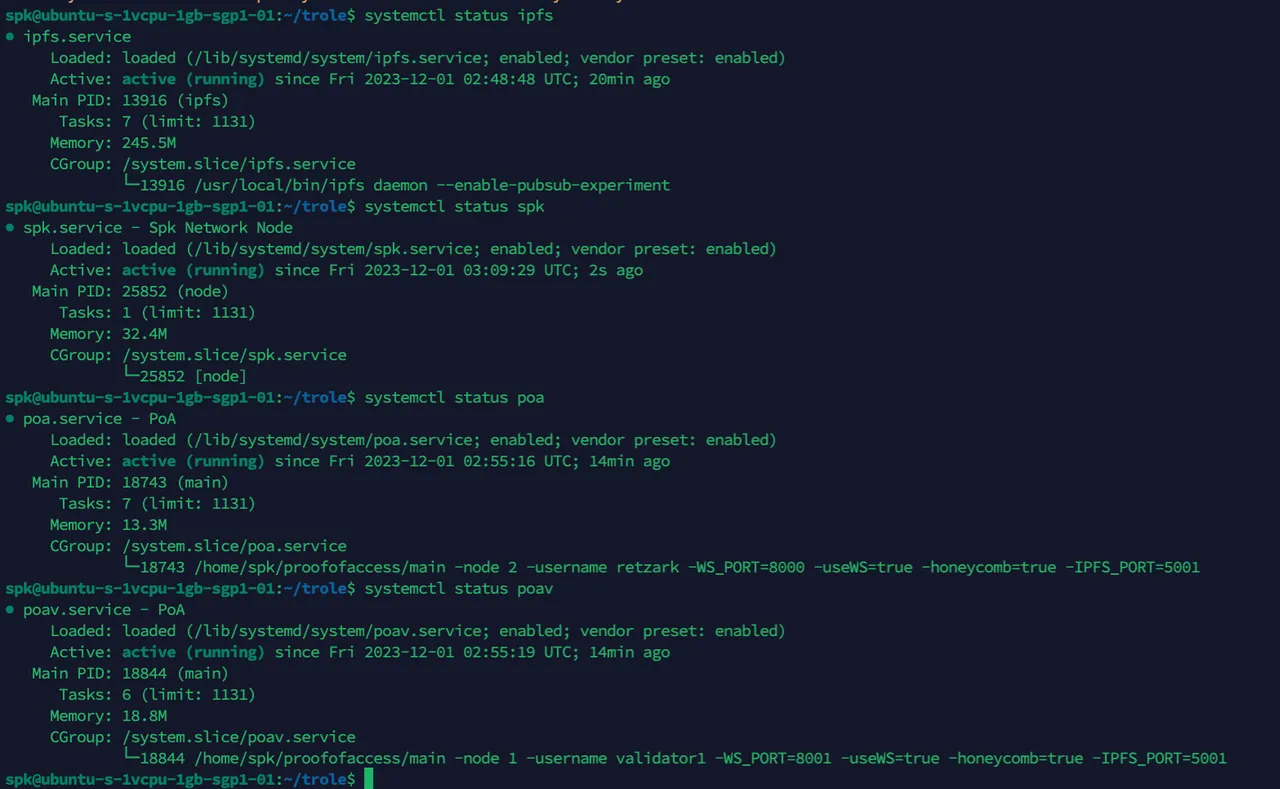
- Verify services are running with:
systemctl status ipfs systemctl status spk systemctl status poa systemctl status poav - If any services aren't running, restart them using:
systemctl restart [service_name]
8. Uploading Files to SPK Network
- Visit Dlux.
- Power up SPK and create a contract.
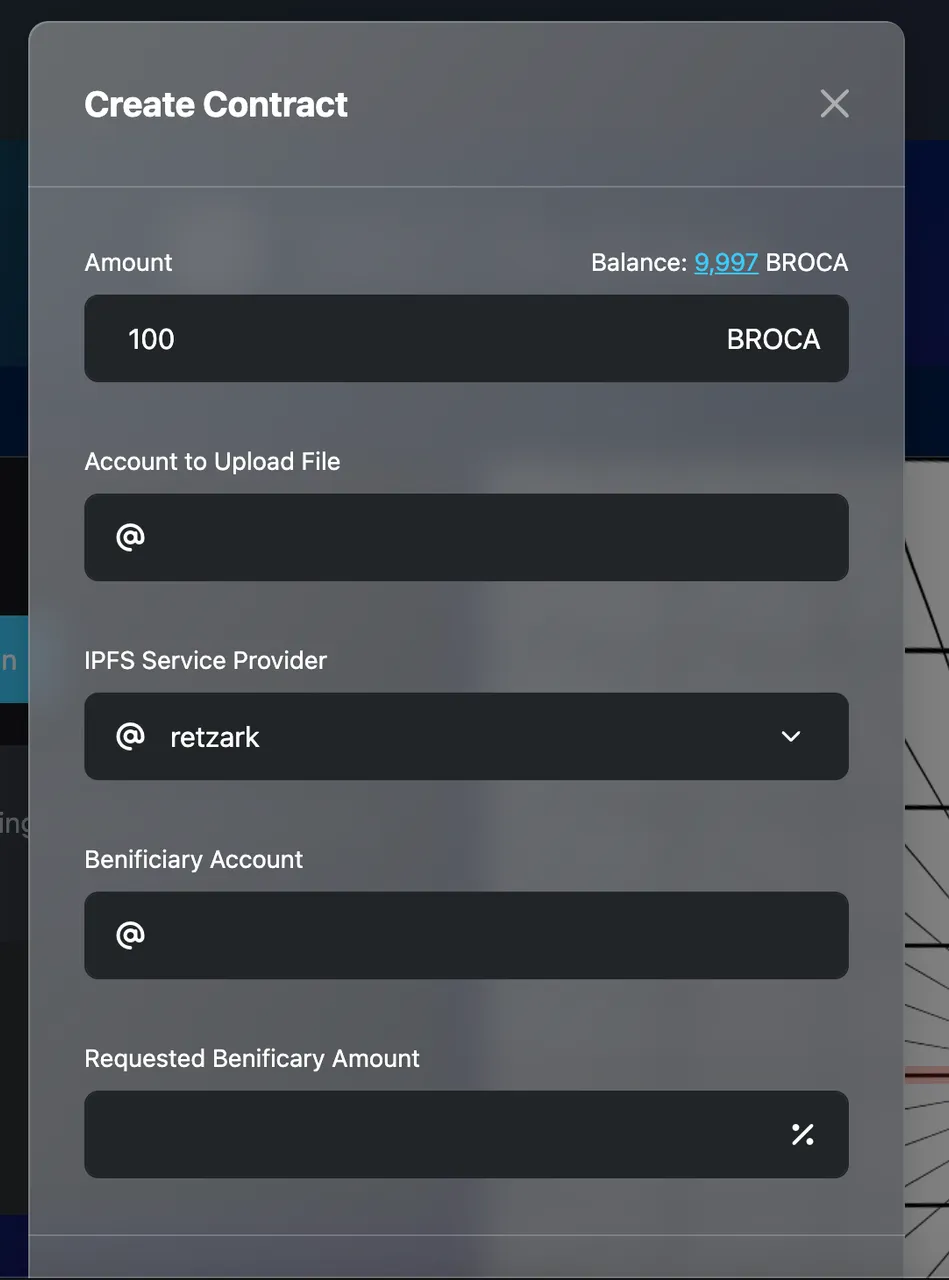
- Wait for the contract to be built, then add and upload files.
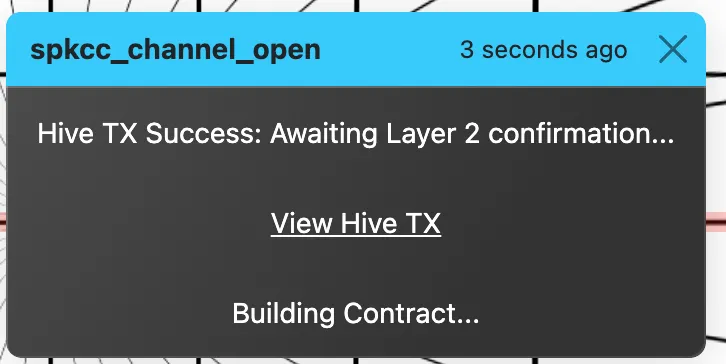
- Sign and upload
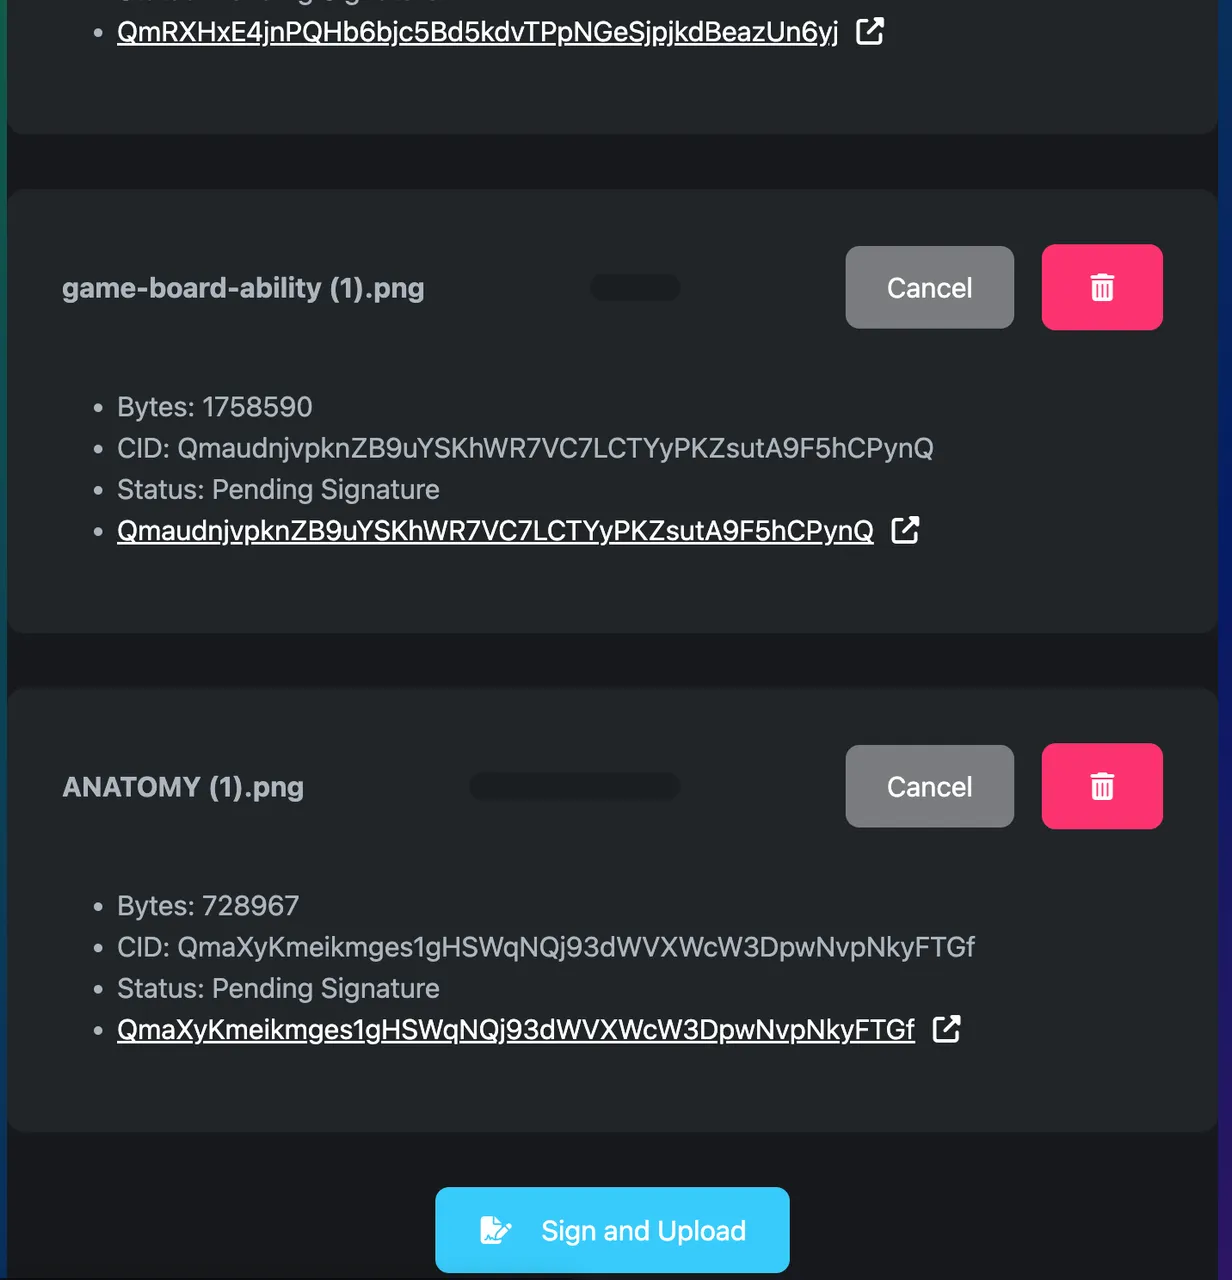
- Wait then refresh the page after the image is successfully uploaded
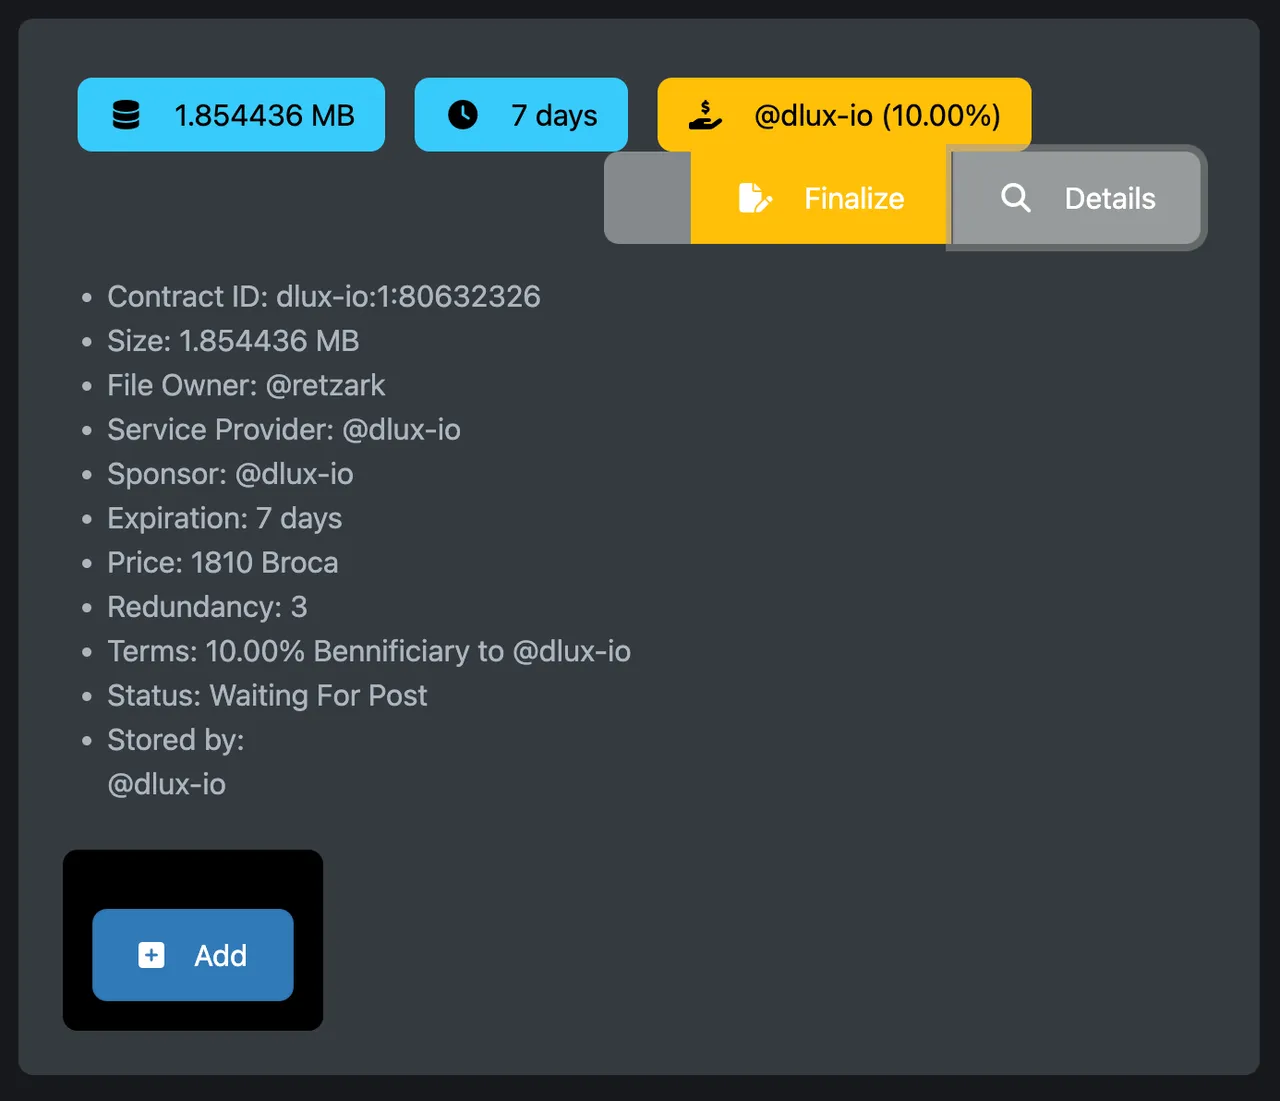
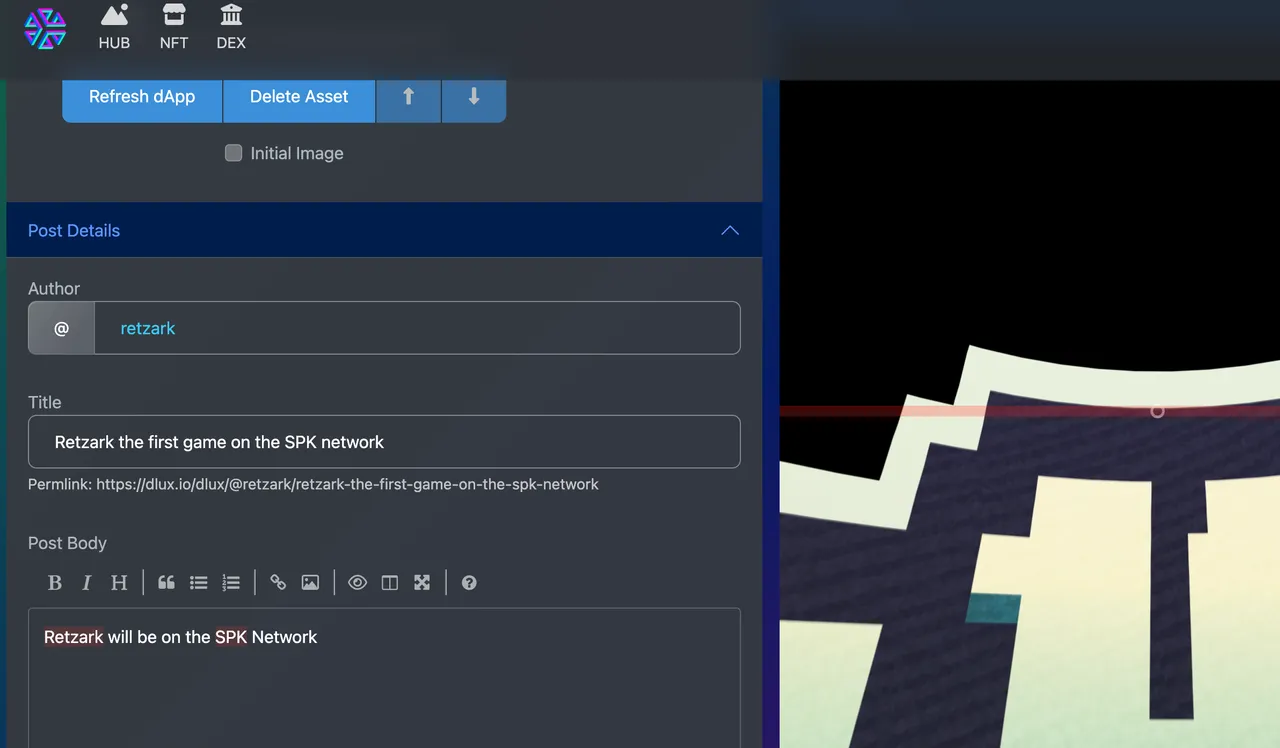
- Create a post that with you’re uploaded image
SPK Storage Dashboard
At spk.your.domain you should find the storage node panel. This panel allows limited storage management with your hive keys and keychain. You can for example: store newfound contracts, explore and remove existing contracts (files), and see your SPK network balances.
Conclusion
After following these steps, your SPK Testnet node should be up and running. For any issues or further assistance, refer to the SPK Network Discord Server or Telegram Group, you can find the links below.
About the SPK Network:
The SPK Network is a decentralized Web 3.0 protocol that rewards value creators and infrastructure providers appropriately and autonomously by distributing reward tokens so that every user, creator, and platform can earn rewards on a level playing field.
Check out the SPK Network Light Paper: @spknetwork/spk-network-light-paper
Visit our website: https://spk.network/
Telegram Group: https://t.me/spknetwork
Discord Server: https://discord.gg/JbhQ7dREsP