This weekend I finally managed to take a makeup course, I had wanted to do it for a while but the truth is that it had been a little complicated for me. As I've been telling you for some time now, makeup has become a kind of therapy for me, and although I have made an effort to learn on my own as much as I can, I knew I had to invest a little if I wanted to learn more and improve my techniques.
So I enrolled in a course that was really great, who taught the course did it in a very simple and easy to understand way, so it was not difficult for me to understand what he was teaching me, and although the course was online and I had my doubts, I was glad I did it because I really took advantage of it.
Although I understood well that the preparation of the skin is fundamental, in the course I was given more complete information about it and I was also recommended very good products that I hope to be able to buy little by little, and that will allow me to improve more and more the finish of my makeup, as well as the makeup itself.
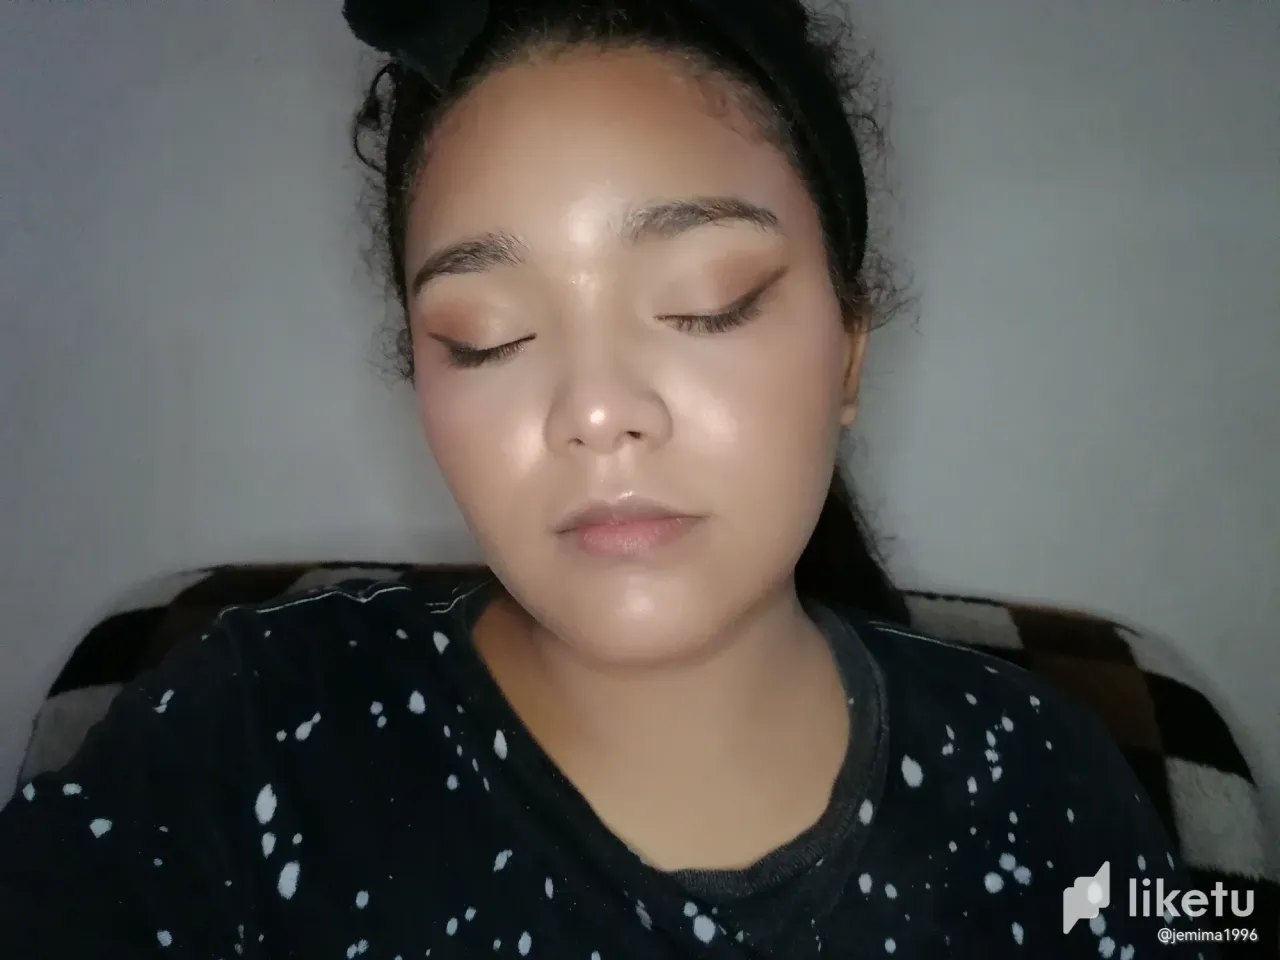
So today I share with you the result of putting into practice a great part of the self-makeup course I attended. I started by taking the necessary time to prepare my skin, I realized in one of the classes that sometimes it took very little time to apply one product over another, and other times I waited too long. So, based on my skin type which is oily and acne-prone, niacinamide was recommended before applying makeup.
I used niacinamide and applied it giving small touches to my skin, very gently, sometimes I did not use moisturizer because it is too greasy, but there is a great option that I met a while ago which is the gel moisturizer that came to save my life from shine, so after waiting a little here in the niacinamide was well absorbed I applied my gel cream that contains vitamin E.
After these two glasses I applied my sunscreen I spread it very well, and this time I waited the appropriate time and to my face did not look as white as usual. Now to start with the makeup I applied my primer that helps me to reduce pores and here the makeup lasts a lot, meanwhile I put as much paper as I could in my beauty blender to squeeze it and make it smooth (something I didn't do).
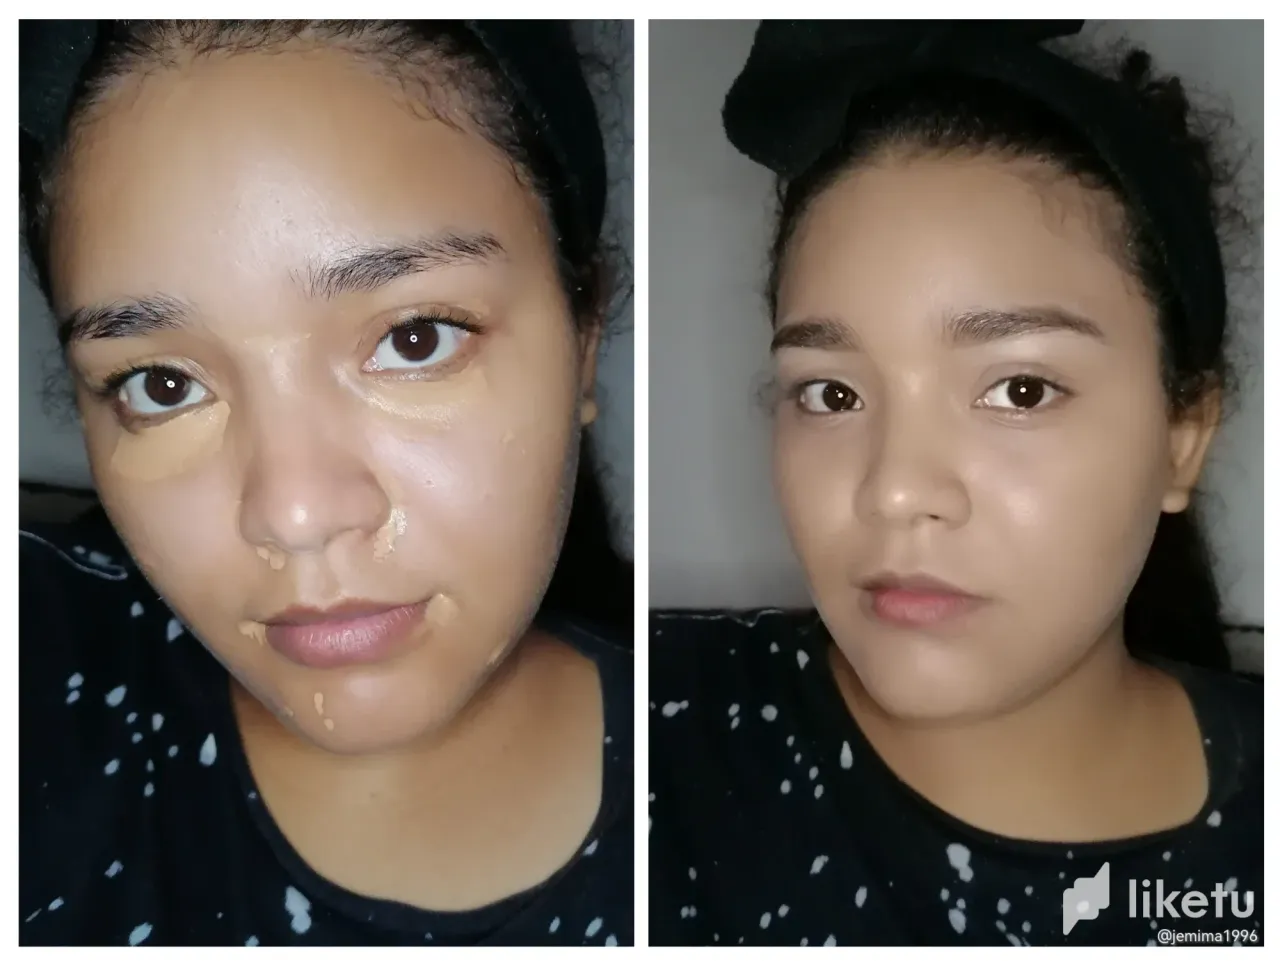
I applied concealer a tone darker than my skin tone on my dark circles and on some imperfections, like sun spots and pimples, a technique that I thought was great and that I had never thought of, being a little darker makes it cover completely and then you don't notice that it is darker. I waited a few seconds for my skin to absorb the concealer and then I spread it well with my sponge.
I continued with my eyebrows, the truth is that for me there is nothing more problematic in my face than my eyebrows, because they are very different one from the other and also I have like a lot of empty spaces and a weird shape, it may be simply that I still don't know how to make them up well, but I keep trying. I used some dark brown pomade to shape and fill in the gaps and combed them with some gel, then corrected it with a concealer if now a bit lighter than my shade.
In my case I never get my tone in any foundation, maybe I have a skin tone too strange, and also when I have a lot of contact with the sun it darkens too fast and when you spend many days without wearing sun it also lightens too fast, it's a problem so since I can remember I've had to mix two different ones, this time I did it again but using a technique that allowed me to get one that was really similar to my tone.
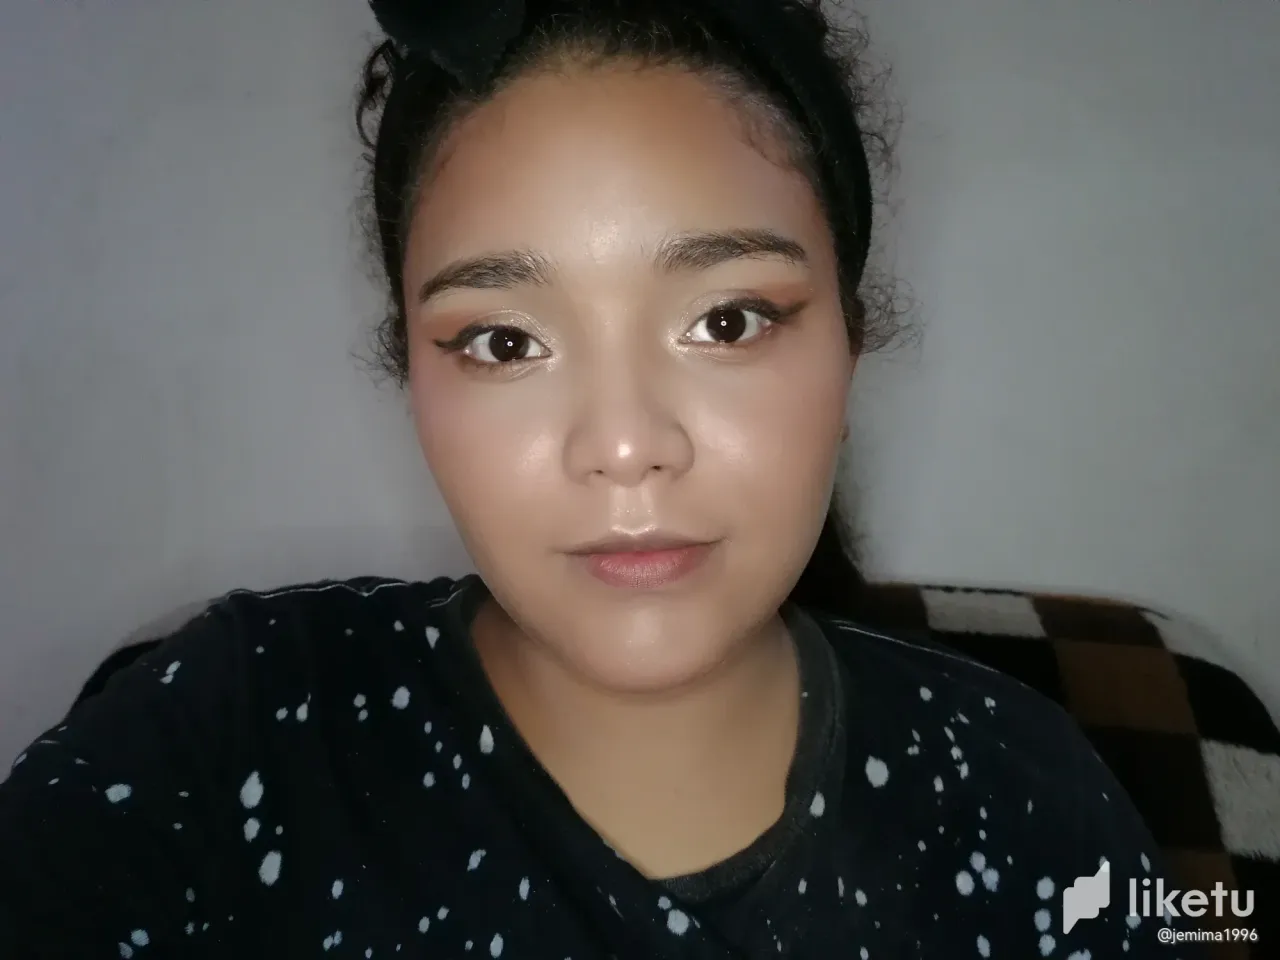
I applied it on my face over the concealer I had already applied and this way it completely covers the dark tone, I was surprised to see at this point that already my face was looking super nice, obviously the texture is going to be the same as I have on my skin but no imperfections in the makeup that would make it look cracked or cramped.
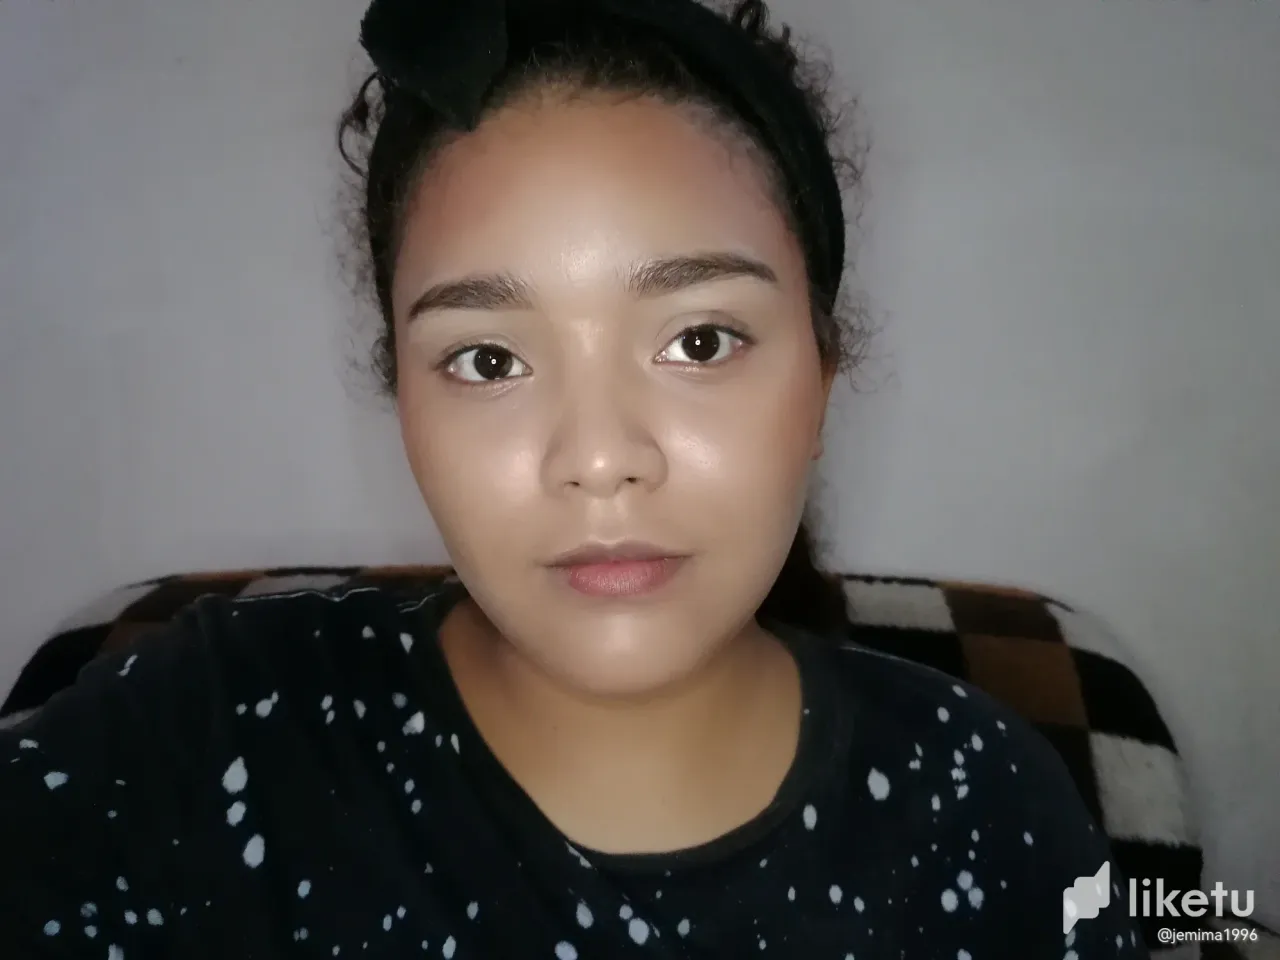
Before applying my powder, I applied something I had a love/hate relationship with, bronzer, when I applied bronzer I felt like my face looked kind of dirty and it ruined the whole color of my makeup, so I stopped using it. This time I learned a technique so it didn't look like that plus the specific places where I could apply it, with a brush I applied it over my cheekbones upwards, and also a little bit on my forehead to give dimension to my face.
Now I applied the powder, to seal the makeup completely and over the bronzer I applied a little more bronze powder to seal it too, also on my cheekbone but a little higher almost reaching the water line of my eye I applied my blush also with a brush and upwards, and to give a little more color to my face I applied a little on my chin and nose.
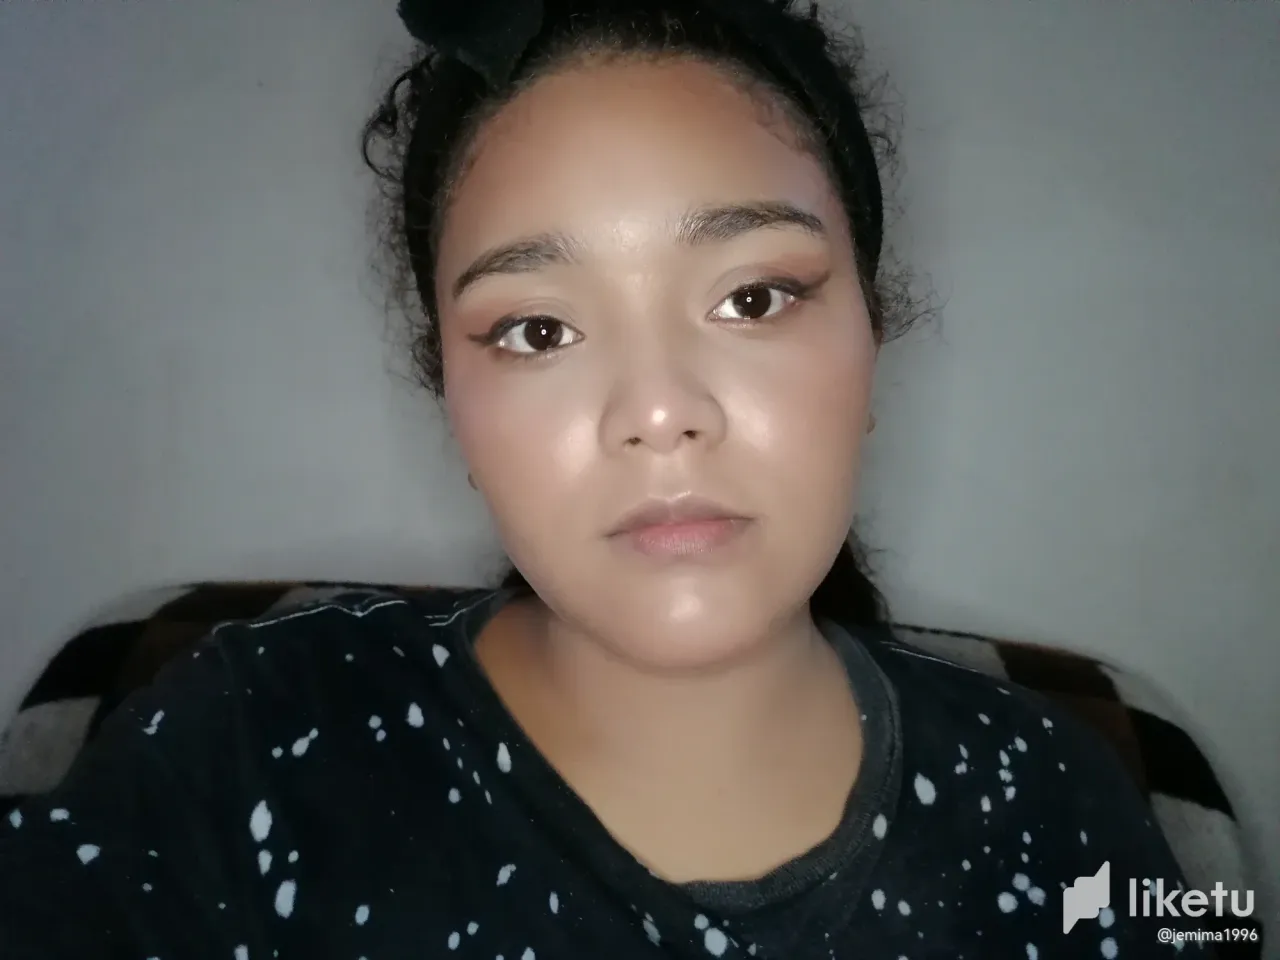
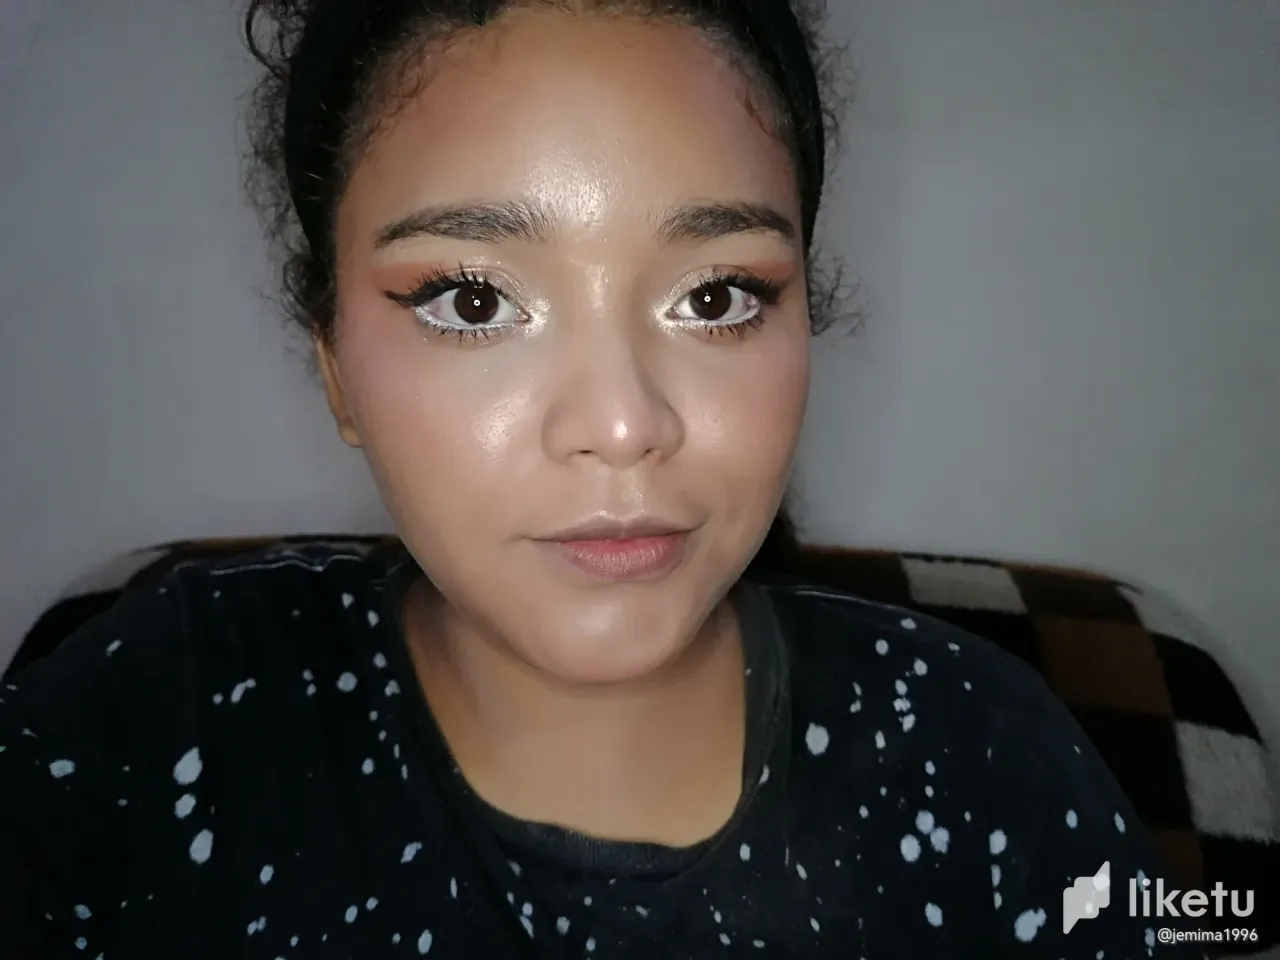
To start with my eyes, I had already applied some foundation on them since I don't have primer for shadows, with the beauty blender I removed the excess and the marks that were made and applied the darkest brown I have in shadows, with the small cat tongue brush I spread it from the center to the outside of my eye to make it look more elongated, then I took a black shadow and with a thinner brush I made the thinnest line I could to outline my eye also from the center to the outside.
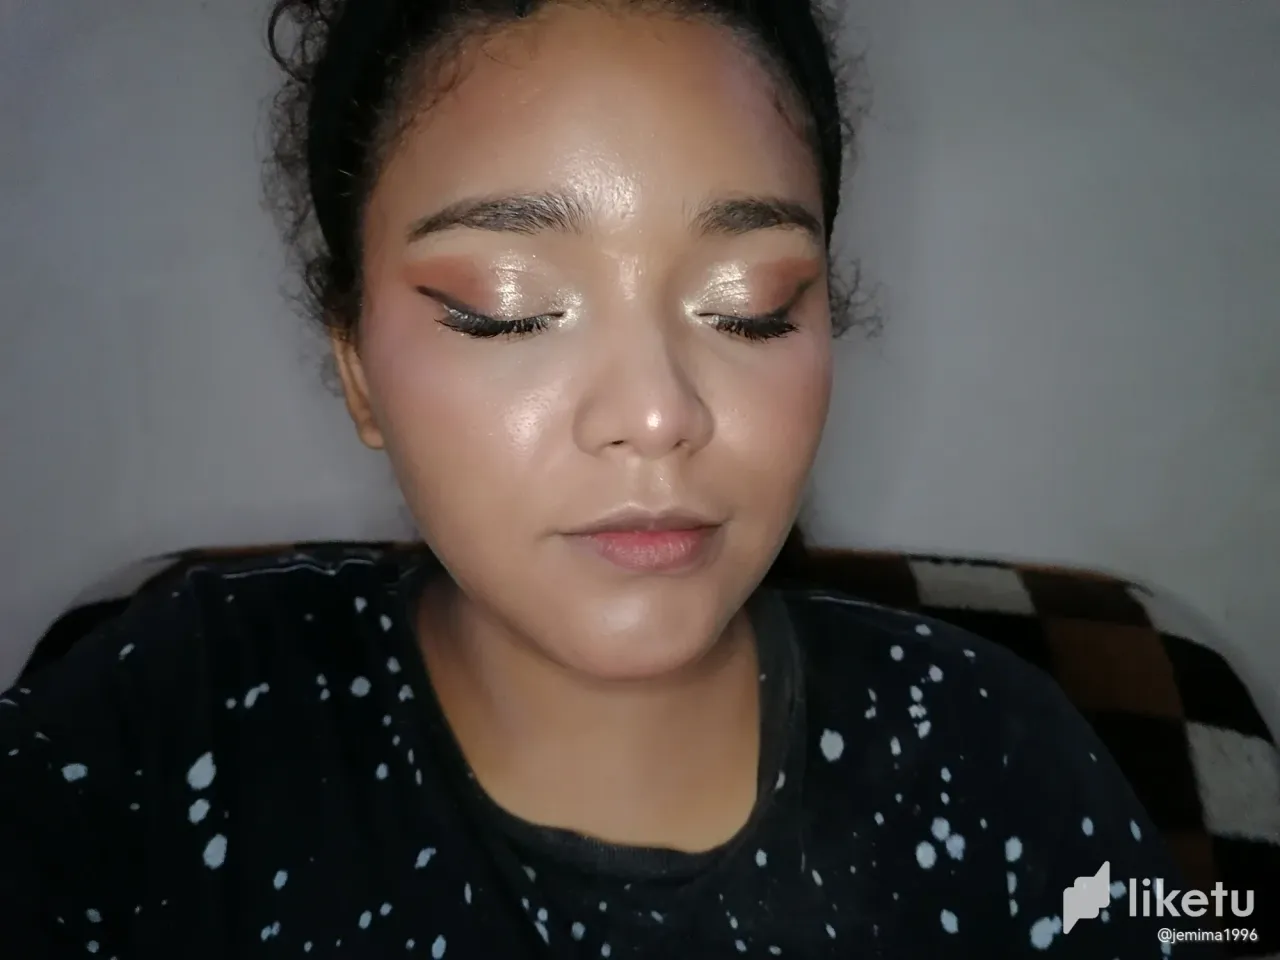
In the inner eyelid and tear area I applied a shimmery gold shadow, I did it with small touches since dragging the only thing that I achieved is that the shimmer doesn't show as I want it to. Then with a brush I blurred as much as I could so that the dark male shadow and the shimmery gold shadows would blend together and no line or mark would be seen dividing them.
To finish I applied with a white eyeliner in the water line of my eye an eyeliner to make my eyes look a little bigger, and for a little more shine I added in the tear area a little bit of highlighter that is more or less golden and combined very well with the makeup, this highlighter record of using it at that time also on my cheekbones nose and above my lips as well.
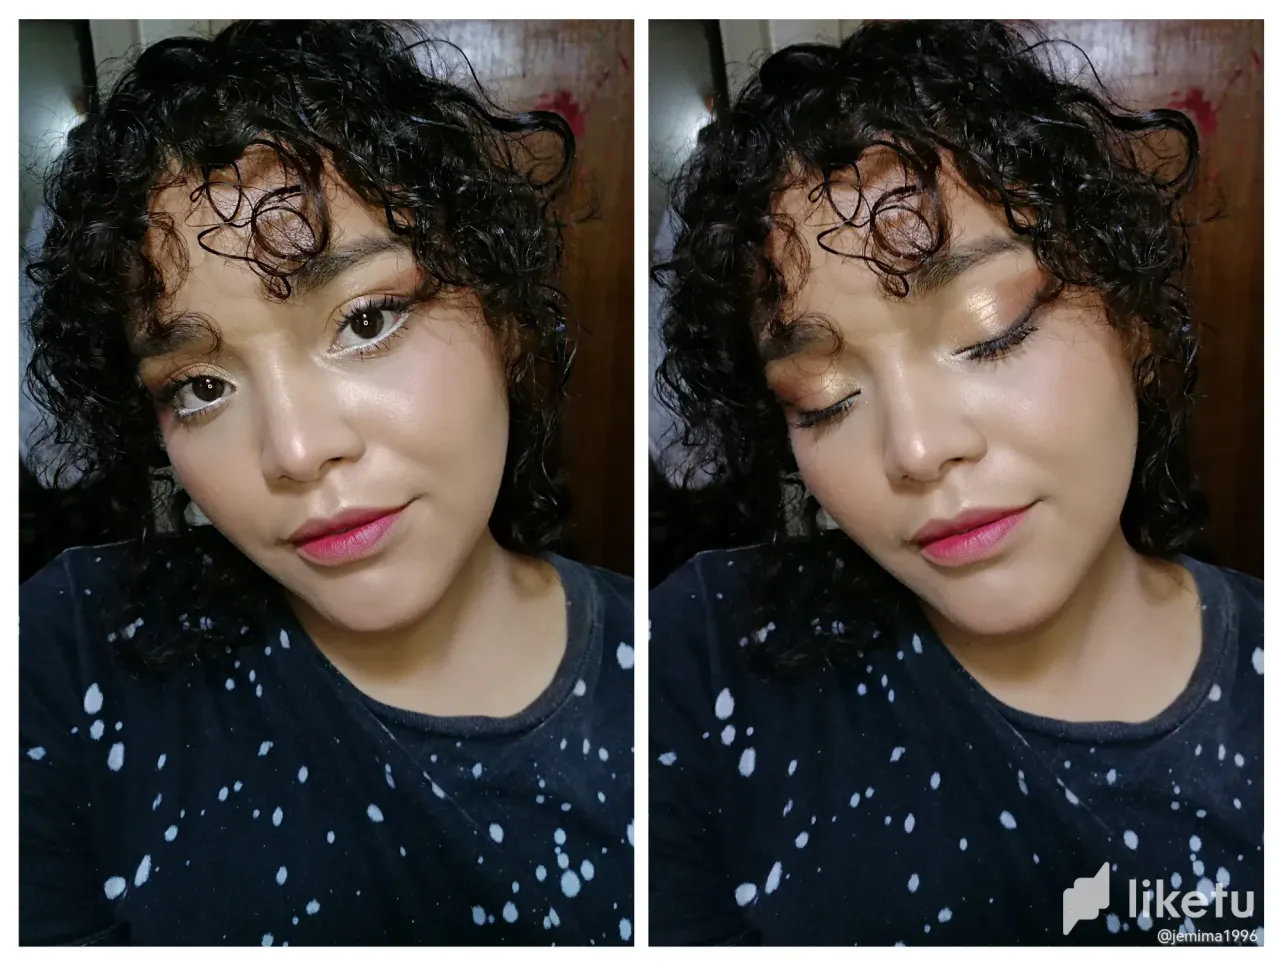
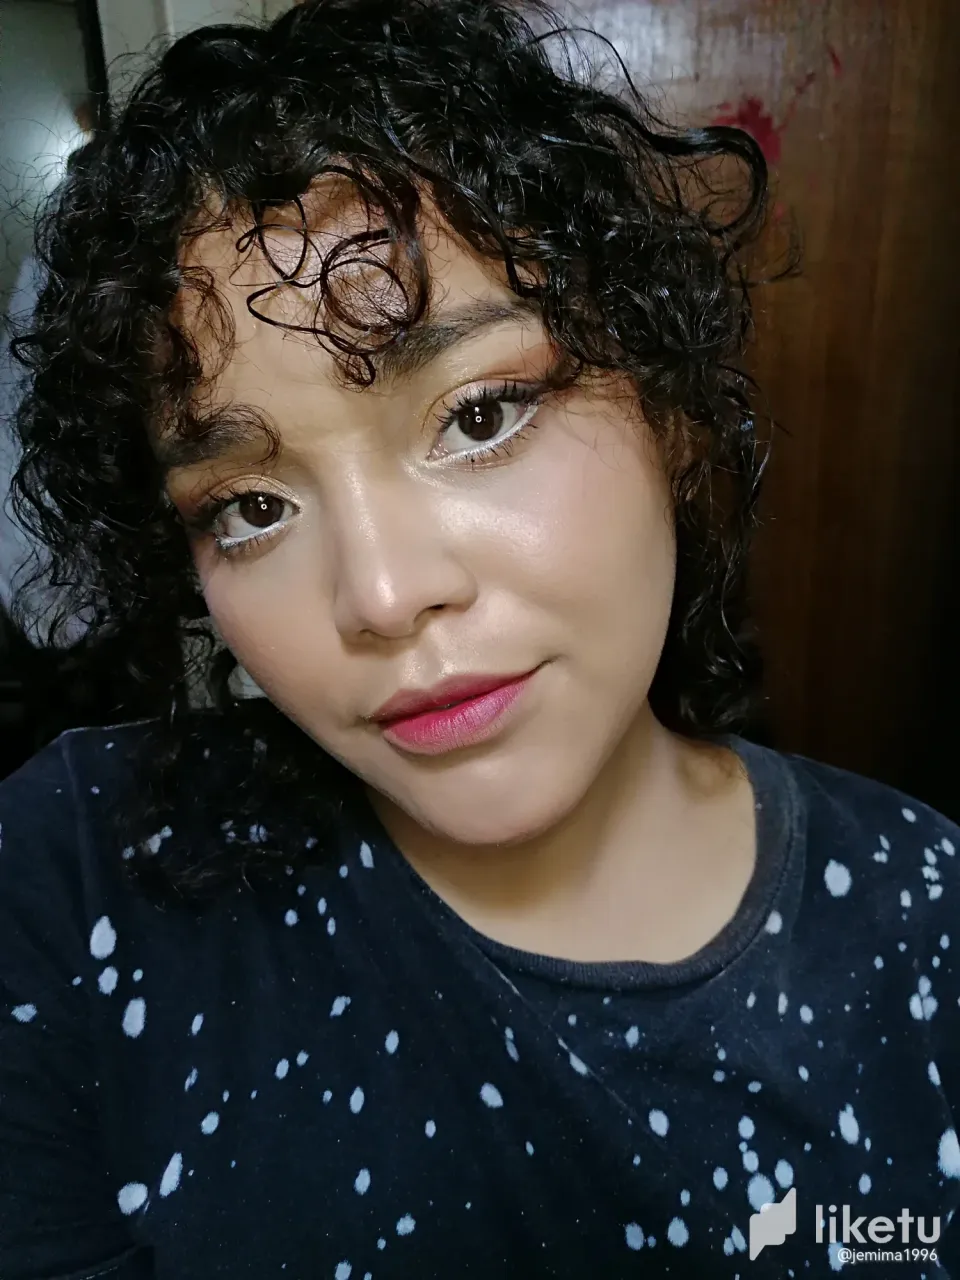
And the last detail that I think was fundamental to make the makeup look nice, was to apply enough mascara to make my eyelashes look abundant and beautiful both above and below, I put a little lipstick and in the center a little red lipstick because I don't have inks and I wanted to give that effect, I feel that this last one looked good but I didn't love it.
The makeup was very simple as it doesn't look heavy at all, but it has its technique and takes time. The result I liked a lot, I was happy to see that those classes I saw were very useful and I don't think I will ever forget what I learned again. It's always great to keep learning to improve what you like to do.
Thank you very much for reading my publication, I hope you liked it, but most of all that it helped you in some way. See you soon friends, we will read each other next time.
-Content entirely of my authorship and inspiration.
-Original text in Spanish, translated at DeepL.
-Personal photographs, taken with my Huawei p30 Lite phone.
Este fin de semana al fin logré realizar un curso de maquillaje, hacía un tiempo que quería hacerlo pero la verdad se me había complicado un poco. Como les he contado desde hace un tiempo para acá el maquillaje se ha convertido para mí en un tipo de terapia, y aunque me he esforzado por aprender por mi cuenta lo más que puedo, sabía que debía invertir un poco si quería saber más y mejorar mis técnicas.
Así que me inscribí en un curso que la verdad estuvo genial, quién dictó el curso lo hizo de una manera súper sencilla y fácil de entender, así que no me costó para nada comprender lo que me estaba enseñando, y aunque el curso era online y tenía mis dudas, me alegró de haberlo hecho pues si que le saqué provecho.
Aunque comprendía bien el que la preparación de la piel es fundamental, en el curso se me compartió información más completa sobre eso además de que me recomendaron productos buenísimos que espero poder ir comprando poco a poco, y que me permitirán mejorar cada vez más tanto el acabado de mi maquillaje, como el maquillaje en si.
Así que hoy les comparto el resultado de poner en práctica gran parte del curso de automaquillaje en el que estuve. Inicié tomándome el tiempo necesario para la preparación de mi piel, comprendí en una de las clases que a veces tardaba muy poco tiempo aplicar un producto sobre otro, y que otras veces esperaba demasiado tiempo. Así que, según mi tipo de piel que es grasa y con tendencia a acné, me recomendaron la niacinamida antes de aplicar el maquillaje.
Utilicé niacinamida y la apliqué dando pequeños toques a mi piel, muy suavemente, a veces no utilizaba crema hidratante porque es demasiado grasosa, pero hay una opción genial que conocí hace un tiempo que es el hidratante en gel que llegó para salvarme la vida del brillo, así que luego de esperar un poco aquí en la niacinamida fuera bien absorbida apliqué mi crema en gel que contiene vitamina E.
Luego de estos dos vasos apliqué mi protector solar lo esparcí muy bien, y esta vez esperé el tiempo apropiado y a mi rostro no se vio tan blanco como de costumbre. Ahora sí para iniciar con el maquillaje apliqué mi primer que me ayuda a disminuir poros y aquí el maquillaje me dura un montón, Mientras tanto en papel lo más que pude en mi beauty blender para exprimirla y que quedara suavecita (algo que no hacía).
Apliqué corrector un tono más oscuro que el tono de mi piel en mis ojeras y en algunas imperfecciones, cómo manchas por el sol y granitos, una técnica que me pareció genial y en la que nunca había pensado, al ser un poco más oscuro hace que se cubra por completo y ya después no se nota que es más oscuro. Espero unos segundos a que mi piel absorbiera un poco el corrector y luego lo esparcí bien con mi esponjita.
Continúe con mis cejas, la verdad es que para mí no hay nada más problemático en mi rostro que mis cejas, pues son muy diferentes una de la otra y además tengo como muchos espacios vacíos y una forma rara, puede ser simplemente que todavía no sé cómo maquillarlas bien, pero sigo intentándolo. Utilicé un poco de pomada marrón oscuro para darle forma y rellenar los espacios y las peiné con algo de gel, para luego corregirla con un corrector si ahora un poco más claro que mi tono.
En mi caso nunca consigo mi tono en ninguna base, quizá tengo un tono de piel demasiado extraño, y también cuando tengo mucho contacto con el sol se oscurece demasiado rápido y cuando pasas muchos días sin llevar sol se aclara también demasiado rápido, es un problema así que desde que tengo uso de razón he tenido que mezclar dos distintos, esta vez volví a hacerlo pero utilizando una técnica que me permitió conseguir un que de verdad era similar a mi tono.
Lo apliqué en mi rostro sobre el corrector que ya había aplicado y así se cubre por completo el tono oscuro, me sorprendió ver en este punto que ya mi rostro estaba quedando súper lindo, obviamente la textura va a ser la misma que tengo en la piel pero ninguna imperfección en el maquillaje que haga que se vea agrietado o acartonado.
Antes de aplicar mi polvo, apliqué algo con lo que tenía una relación de amor/odio, el broncer, cuando me aplicaba bronzer sentía que mi rostro se veía como algo sucio y arruinó el color completo mi maquillaje, así que dejé de usarlo simplemente. Esta vez aprendí una técnica para que no se viera así además los de lugares específicos en donde podía aplicarlo, con una brocha lo apliqué por sobre mis pómulos hacia arriba, y también un poco en mi frente para dar dimensión a mi rostro.
Ahora sí apliqué el polvo, para sellar el maquillaje por completo y por sobre el broncer aplica un poco más de bronce en polvo para sellarlo también, también en mi pómulo pero un poco más arriba casi llegando a la línea de agua de mi ojo apliqué mi rubor también con una brocha y hacia arriba, y para dar un poquito más de color a mi rostro apliqué un poco en mi barbilla y nariz.
Para comenzar con mis ojos, ya había aplicado un poco de base en ellos ya que por ahora no tengo primer para sombras, con la beauty blender quité los excesos y las marcas que se hacían ya apliqué el marrón más oscuro que tengo en sombras, como la pequeña brocha de lengua de gato lo fui esparciendo desde el centro hacia fuera de mi ojo para que este se viera más alargado, luego tomé una sombra negra y con una brocha más delgada hice una línea lo más delgada que pude para delinear mi ojo también desde el centro hacia afuera.
En la zona interna del párpado y lagrimal apliqué una sombra dorado brillante, lo hice dando pequeños toques ya que al arrastrar lo único que logró es que no se vea el brillo como quiero. Luego con una brocha difumine lo más que pude para que la sombra varón oscuro y las sombras dorado brillante se mezclarán entre sí y no se viera ninguna línea o marca que las dividirá.
Ya para terminar apliqué con un delineador blanco en la línea de agua de mi ojo un delineado para hacer que mis ojos se vieran un poco más grandes, y para un poquito más de brillo agregué en la zona de lagrimal un poco de iluminador que es más o menos dorado y combinaba muy bien con el maquillaje, este iluminador récord de utilizarlo en ese momento también en mis pómulos nariz y por encima de mis labios también.
Y lo último detalles que creo que fue fundamental para que quedaran bonito el maquillaje, fue el aplicarme suficiente rimel para que mis pestañas se vieran abundantes y bonitas tanto las de arriba como las de abajo, puse un poco de labial y en el centro un poco de labial rojo ya que no tengo tintas y quería dar ese efecto, siento que esto último quedó bien aunque no me encantó.
El maquillaje por su parte fue muy sencillo ya que no se ve para nada cargado, pero lo tiene su técnica y lleva su tiempo. El resultado a mi me gustó mucho, fui feliz el ver que esas clases que vi me sirvieron un montón y que no creo olvidar lo aprendido nunca más. Siempre es genial seguir aprendiendo para mejorar aquello que te gusta hacer.
Muchísimas gracias por leer mi publicación, espero que les haya gustado, pero más que nada que les haya servido de alguna manera. Hasta pronto amigos, nos leeremos la próxima ocasión.
-Contenido completamente de mi autoria e inspiración.
-Texto original en español, traducido en DeepL.
-Fotografías personales, tomadas con mi teléfono Huawei p30 Lite.