Hello everyone! In this blog post, we're excited to share the latest official updates from our platform, @xpay.stream. We encourage you to engage with us transparently by commenting or reaching out with any questions or feedback. Our dedicated team is committed to supporting you and meeting your business needs.
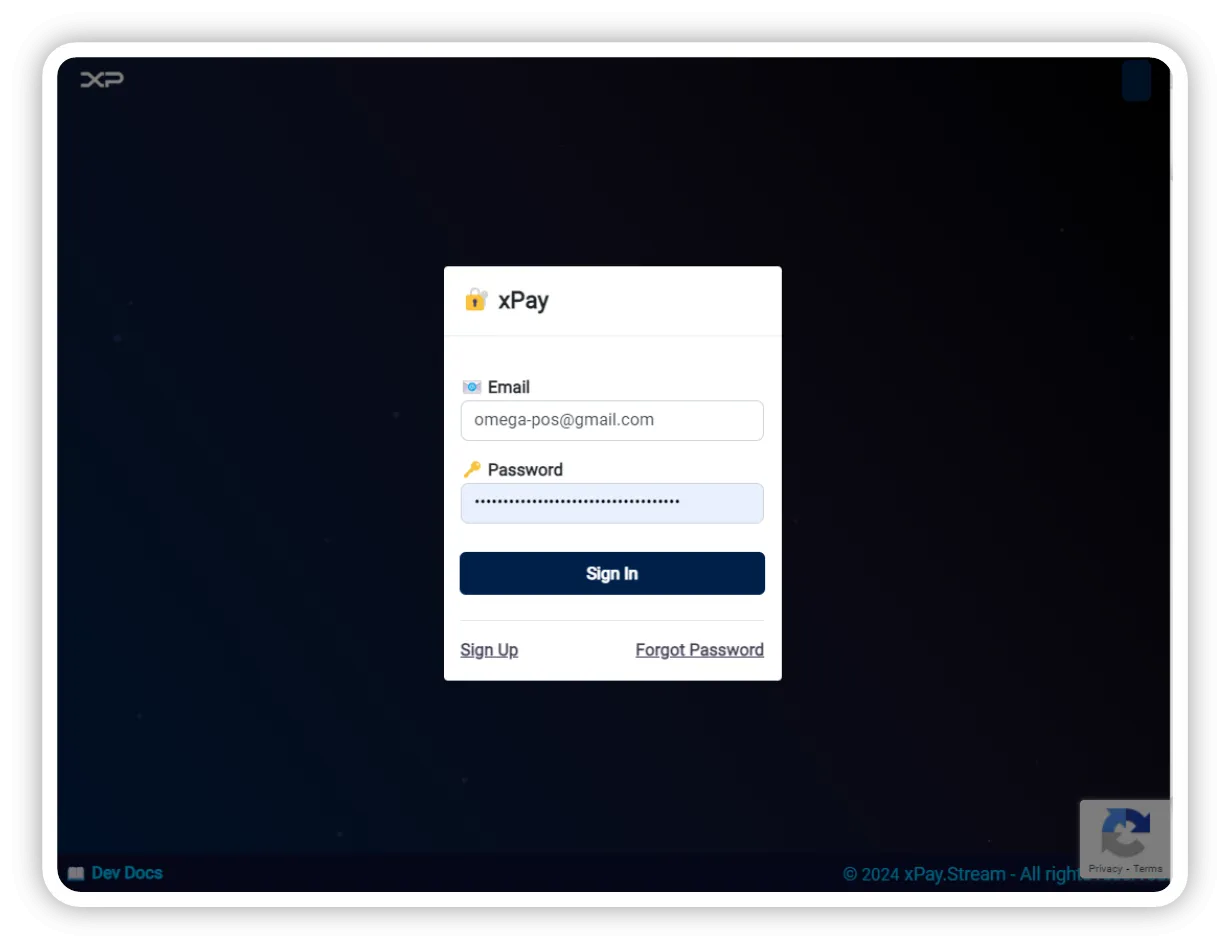
1. 👤🔑 Login / Signup / Reset Screen
Register today with your email, you will receive the invitation code. Once verified you will set your password. Your can request for a password anytime, a reset code will be sent to your email.
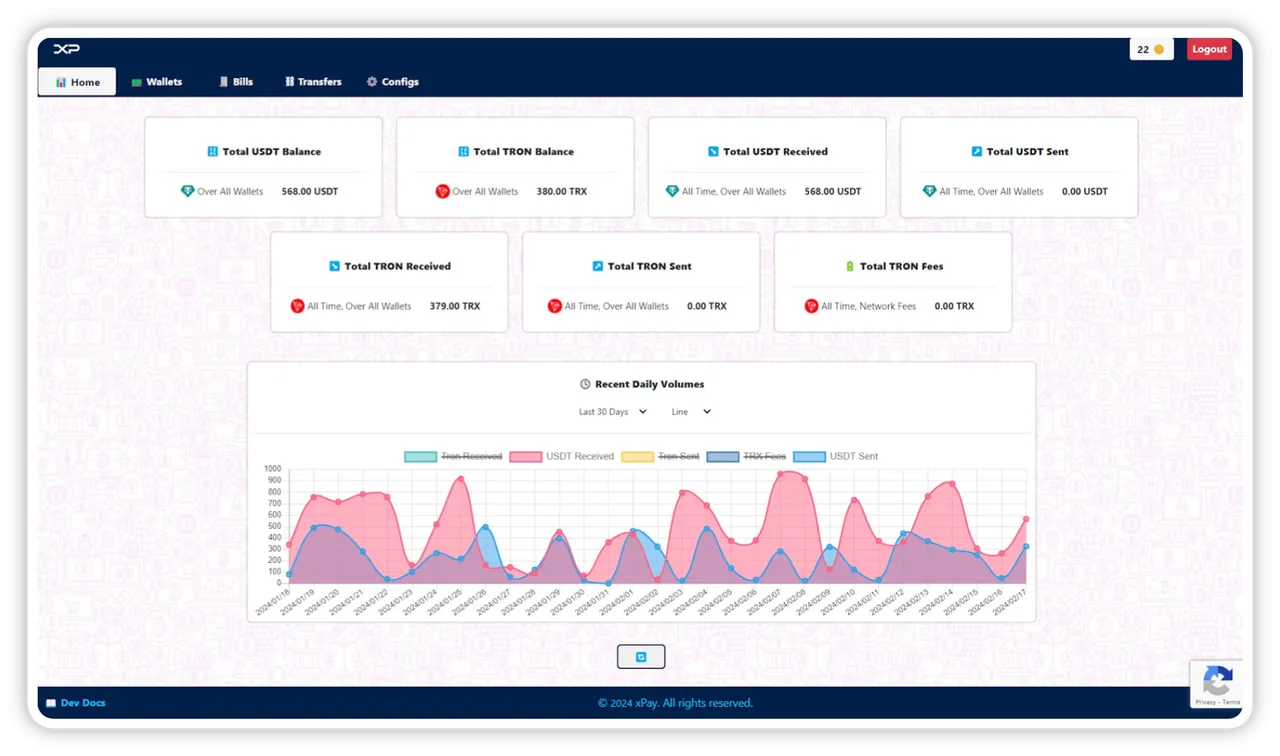
2. 📊 Dashboard - Stats
Once logged in, the default screen is your Dashboard. From there you will see your Overall numbers:
- Current Total Wallets Balances - USDT and Tron.
- All Time Total Received - USDT and Tron.
- All Time Sent - USDT and Tron.
- All Time Total Paid Fees.
3. 🪙 Credit Points
Once you register with xPay, you will be gifted a generous welcoming 5 Credit Points. The Credit points allow you to operate over xPay you will need to create your wallets and bills. You can topup your credit points at any time at a rate of 1 Credit Point per 1 USDT. With One Credit Point You can Create or Bind an external wallets, or create up to 10 bills.
So The Credit Points can be used for:
- Dedicated Crypto Wallets
For example if you are an Internet Service Provider, having a recurring customers base, xPay allows you to create a dedictated wallet for each customer, on which he deposits monthly USDT to pay his subscriptions. - Billing Purpose Wallets
For example if you have an e-commerce website or vending kiosk, and you are willing to issue multiple invoices a day, you may not need to create a dedicated deposit wallet for each time you want to get paid (saving withdrawal and network fees, while collecting multiple payments to a pre-set of shared addresses). You should note that the more you have wallets, the more you can create simultaneous bills at a same period of time. - Externally Linked Wallets
xPay allows you to link your external wallets, without the need to trust us. So you can create bills, get paid and receive notifications and alerts, while you maintain your external wallets: "Not your keys, not your coins".

4. 📟 Wallets Management
The Wallets management section allows you to create or bind a new wallet.
Click on "New Wallet" to select your wallet details:
- Tag: fee field can be useful for searches, grouping and notifications.
- External Tron Wallet: checkbox indicating if that's an external wallet.
- When selected, you will enter the external wallet address.
- You will be asked to sign 🗝 a message to proof your ownership over the address.
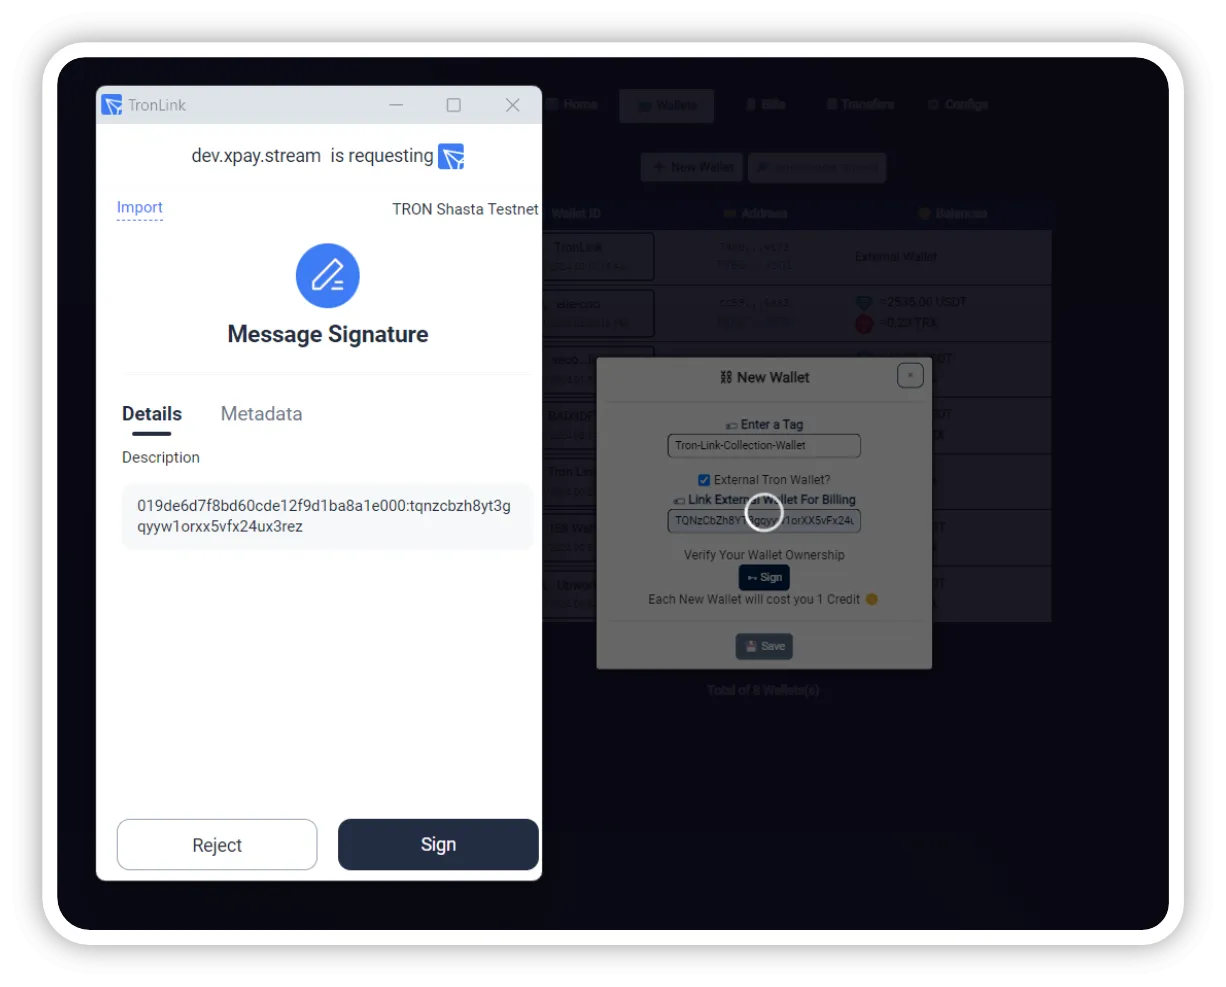
- Managing External Wallets is done through your externally owned wallet (Tronlink, Trustwallet...)
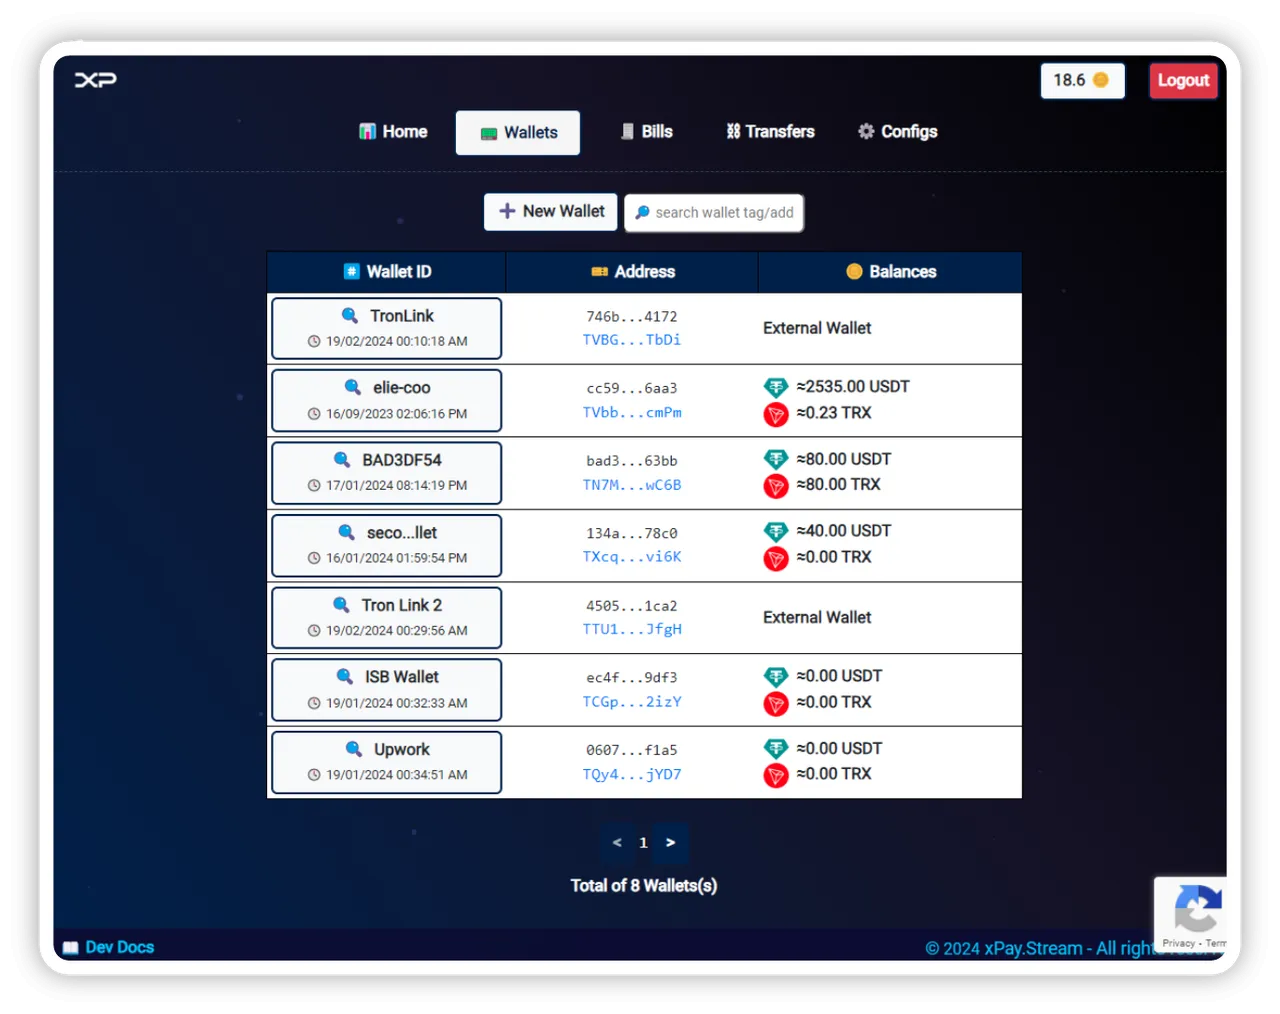
- Managing Internal xPay Wallets is direct:
🔍 View Wallet:
click on view to see the wallet details, deposit QR address

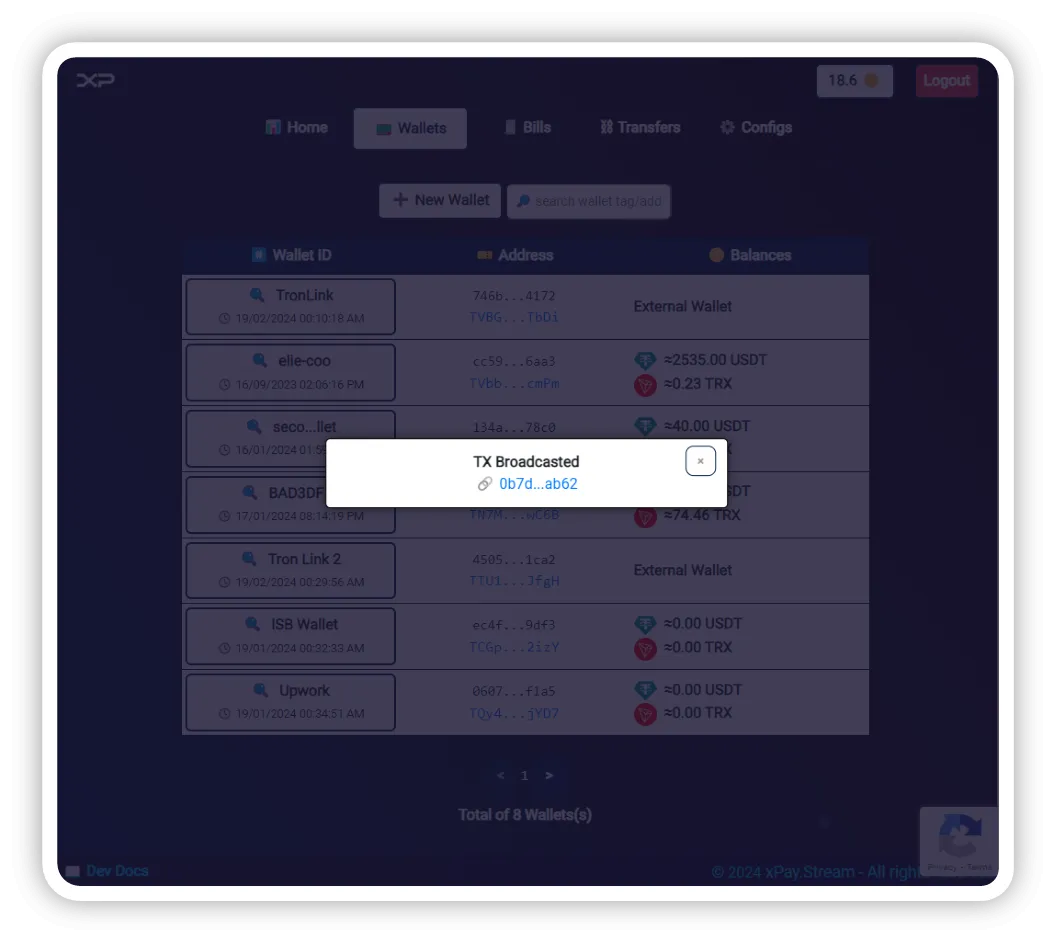
↗️ Transfer USDT / TRX:
click on ↗️ to initiate a crypto withdrawal. You can preview the operations and network fees prior confirming the transaction.
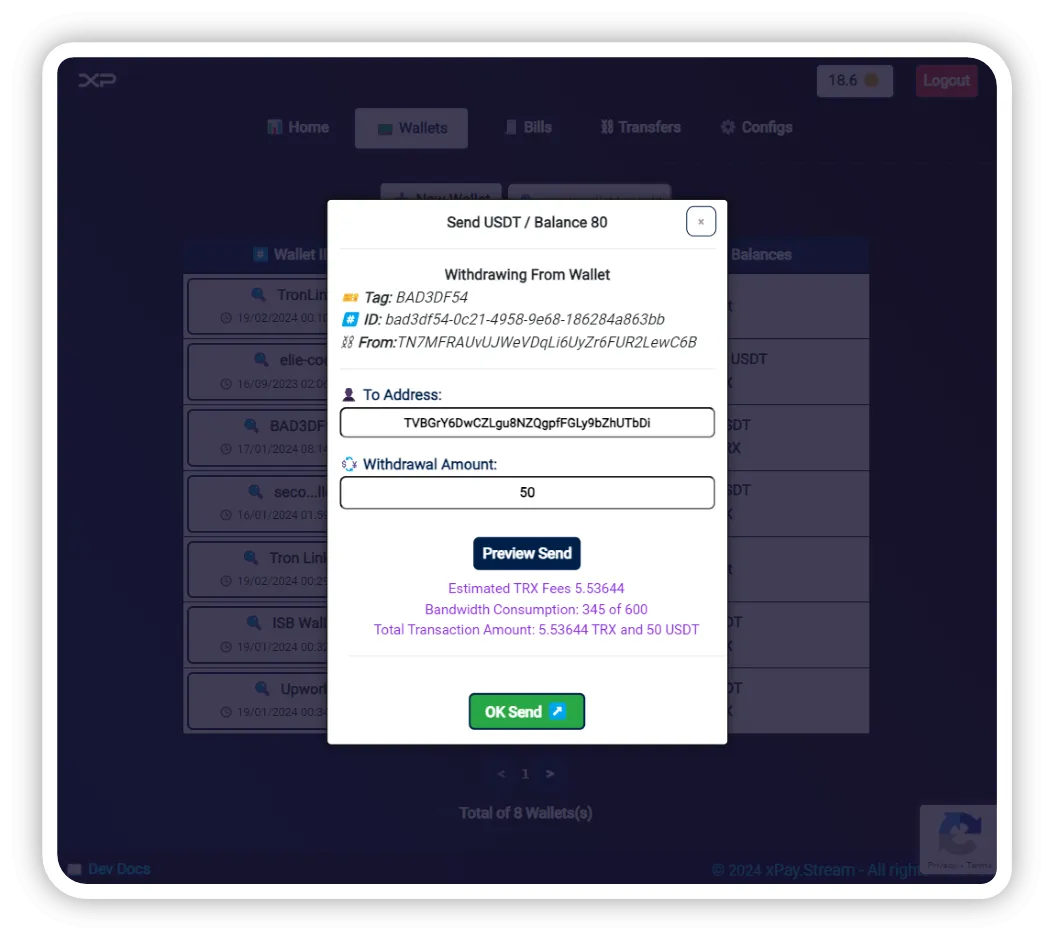
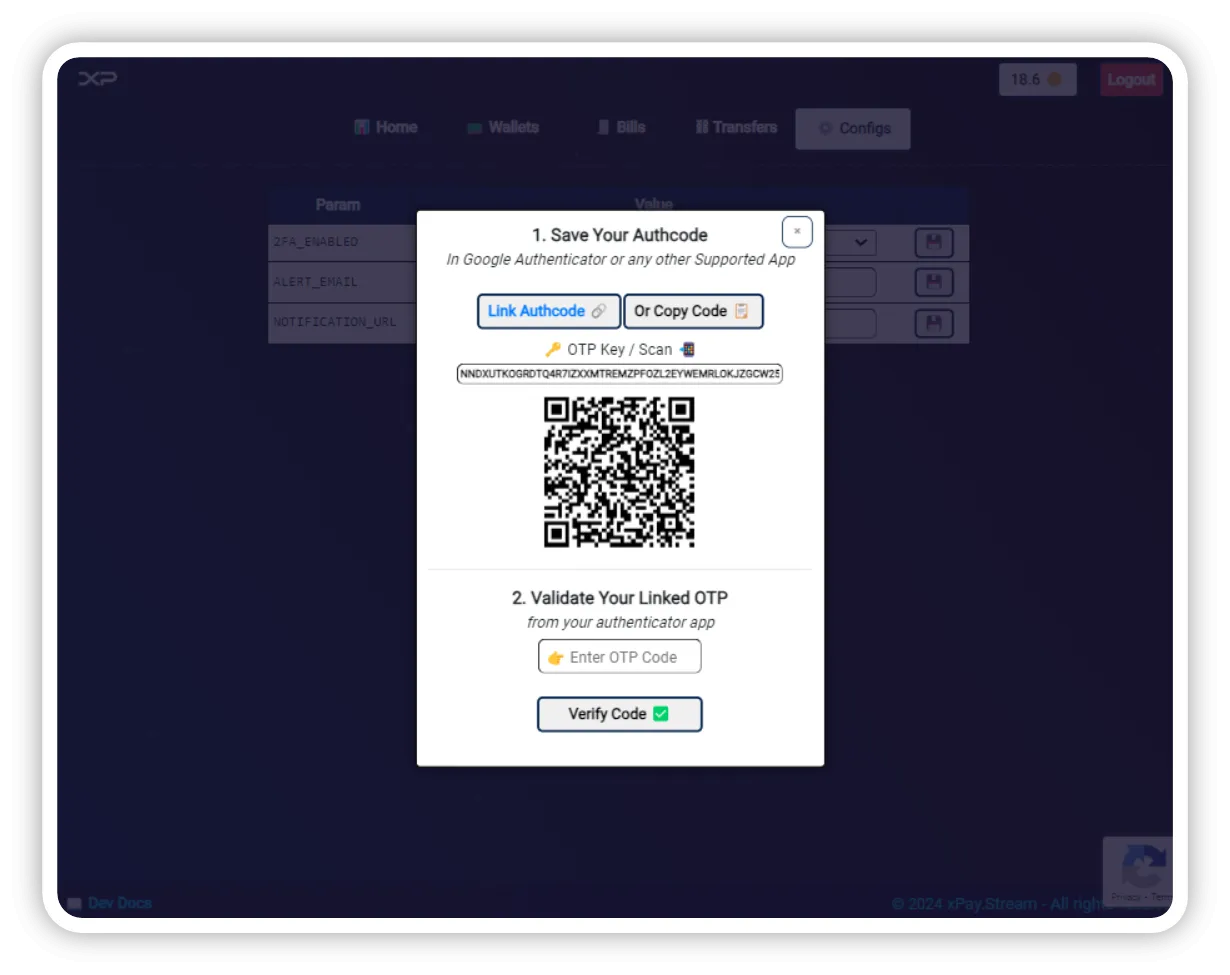
Note that if you enabled the in the configs 2FA_ENABLED ⚙️ (google authenticator, microsoft authenticator, authy...) an OTP code will be requested to approve every transfer.
5. 🧾Bills Management
From this section you will be able to issues and manage your bills:
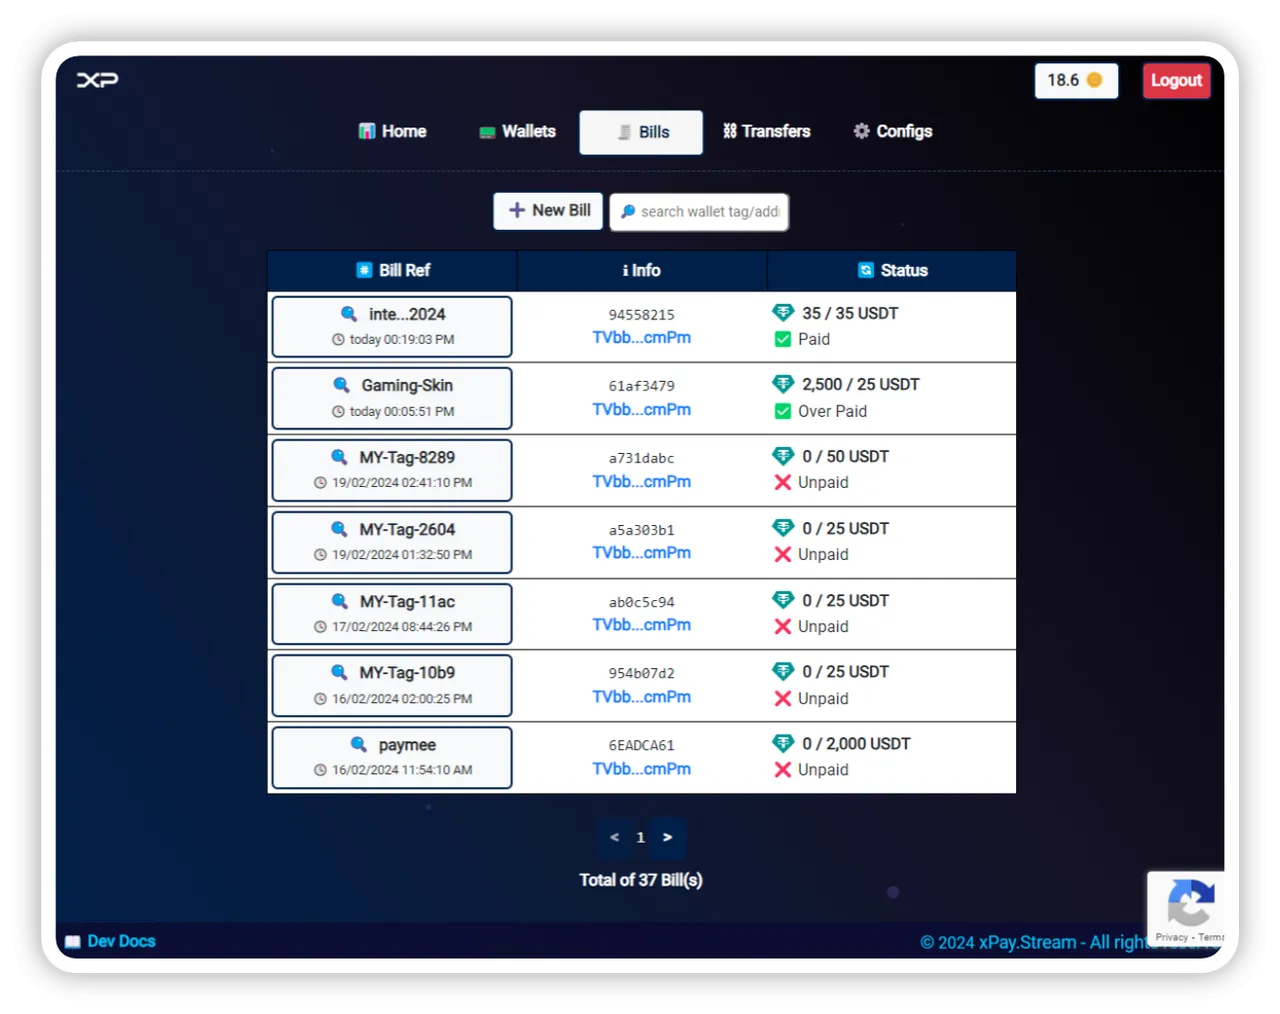
A Bill has many attributes:
- Bill Tag: or note, useful for searches, tracing and groupings.
- USDT Bill Amount: the bill requested amount. payments can be done partial.
- Expiry Minutes: until what time bill is valid to be considered paid or not.
- Optional Redirect: when you share the bill URL, a webcheckout will open, when the bill is paid, an additional redirect can be assigned, so your customer can proceed to you web page or system.
- Payment Reference: useful for search and tracking, this is a unique input field that can be autogenerated from your external services and systems.
- Bill Wallet: you can select on which wallet (internal or external wallet, or any of the both) the bill will be linked until its expiry.
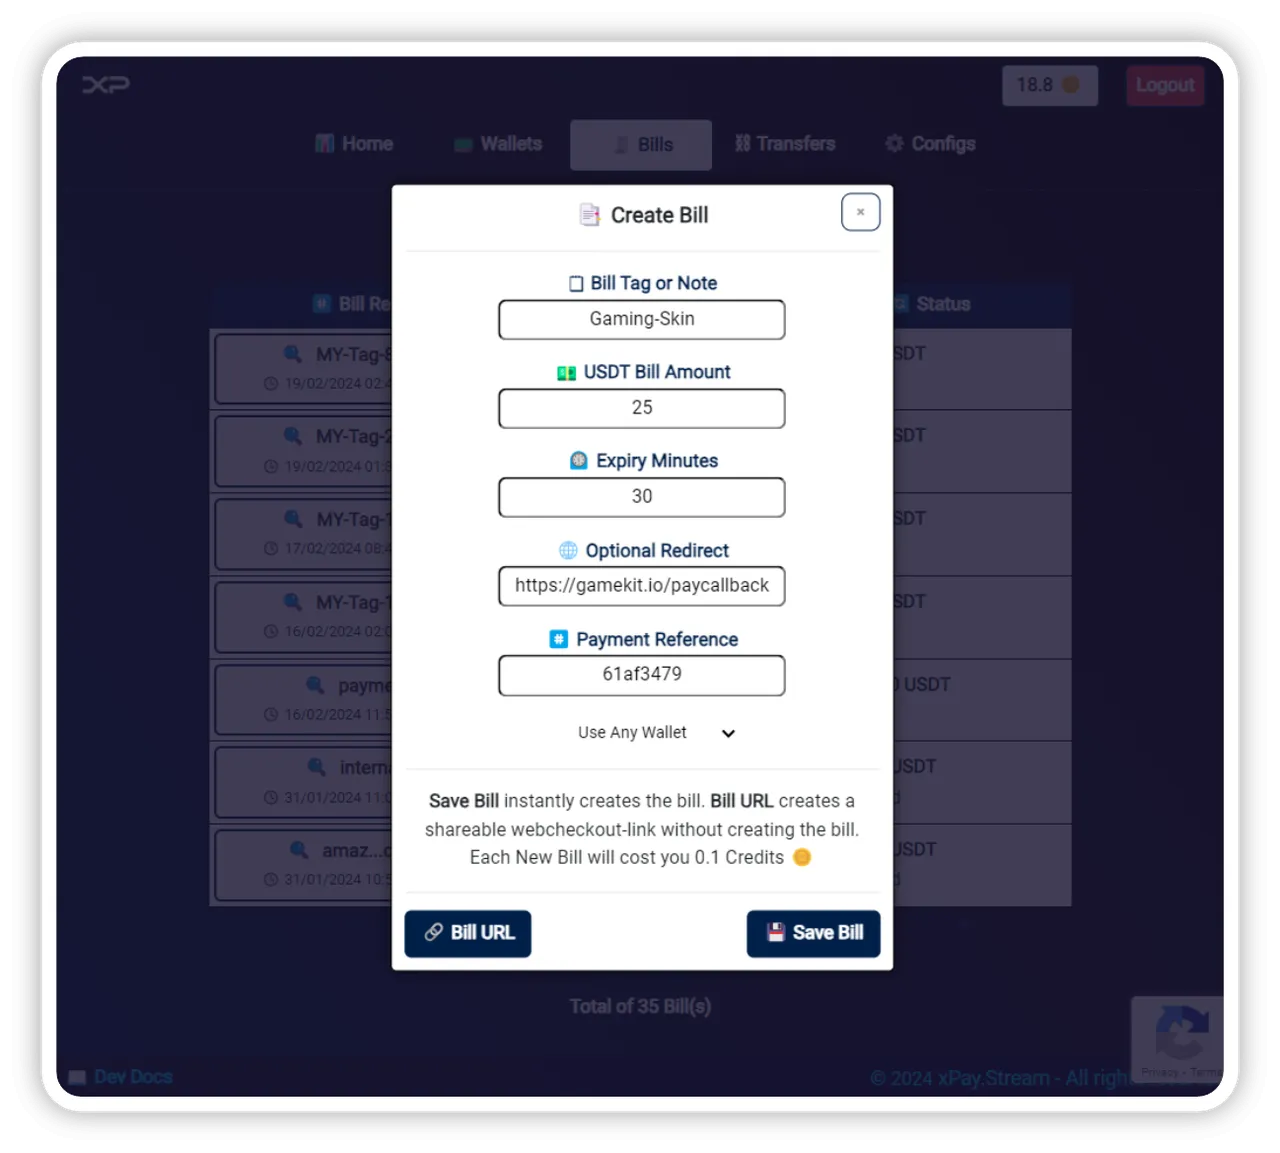
You can directly create the bill by click on "💾 Save Bill", Or just get a shareable bill link that can be used once by clicking on "🔗 Bill URL".
Once created you can see all bills, their statuses, and check their details.
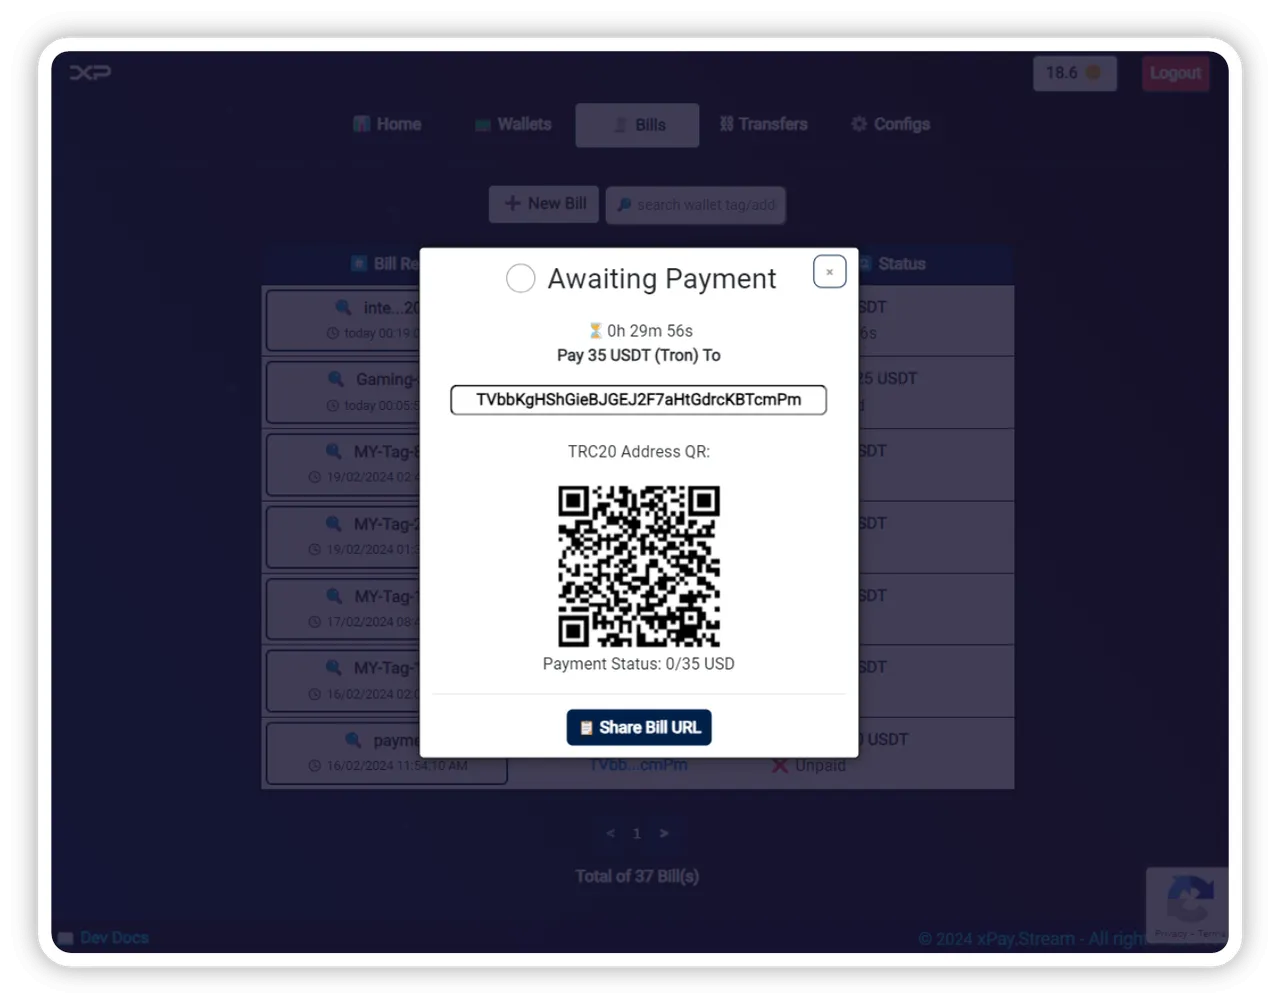
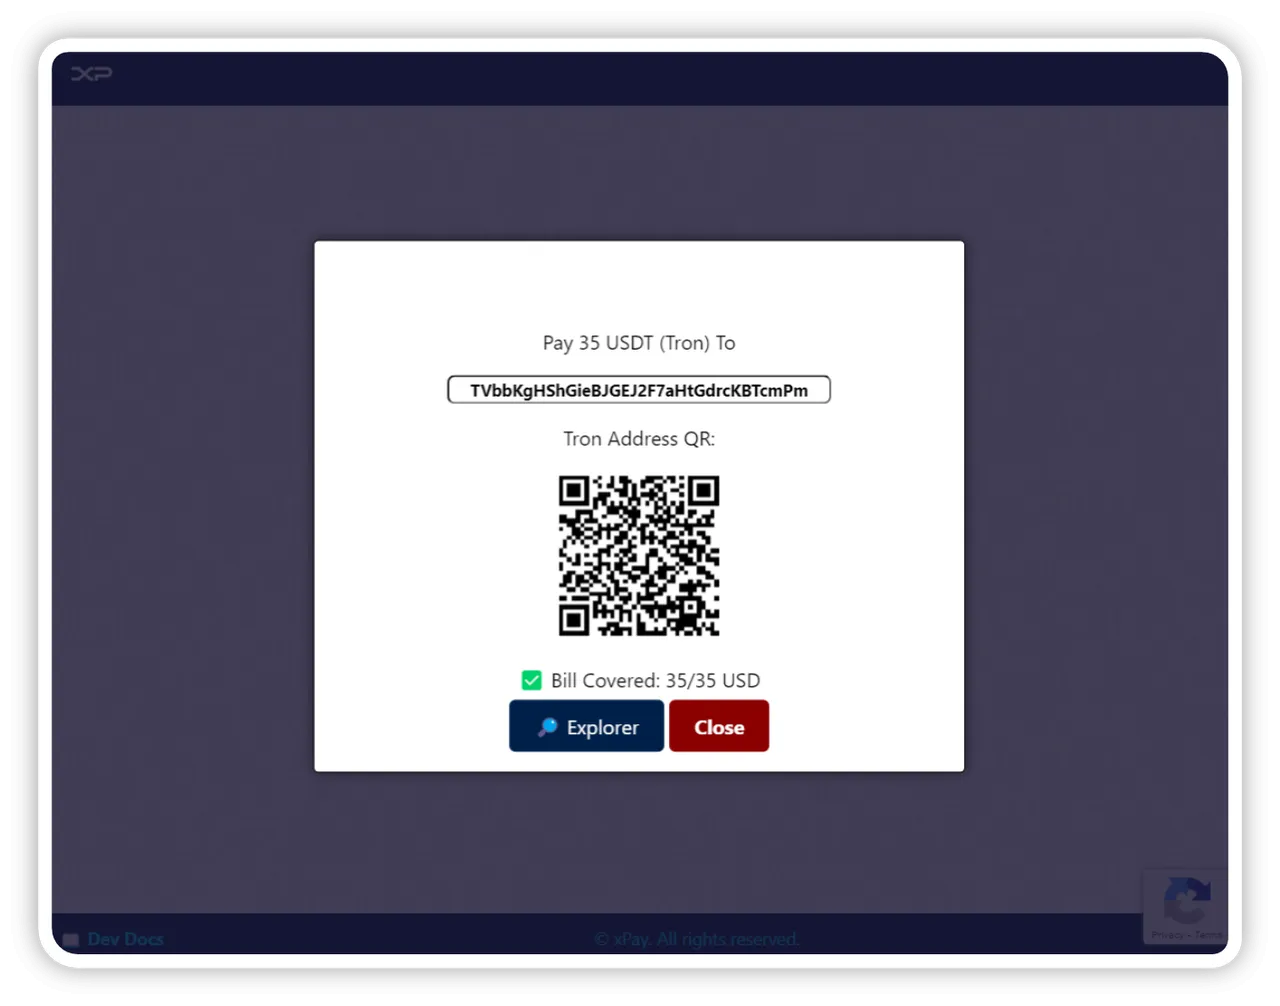
The shareable link opens a web checkout page for your customers:

Customers can scan an pay:
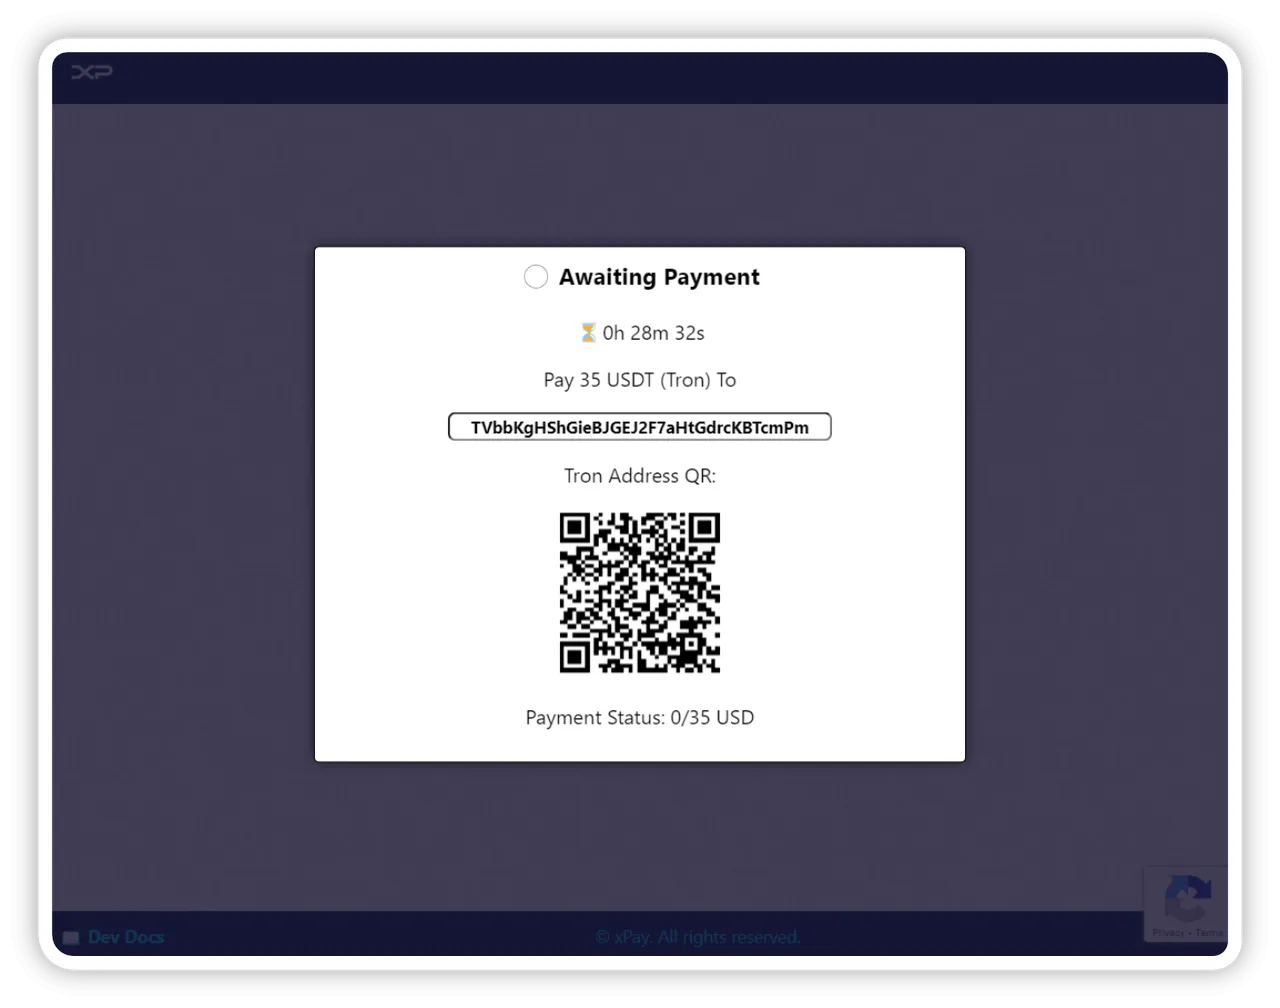
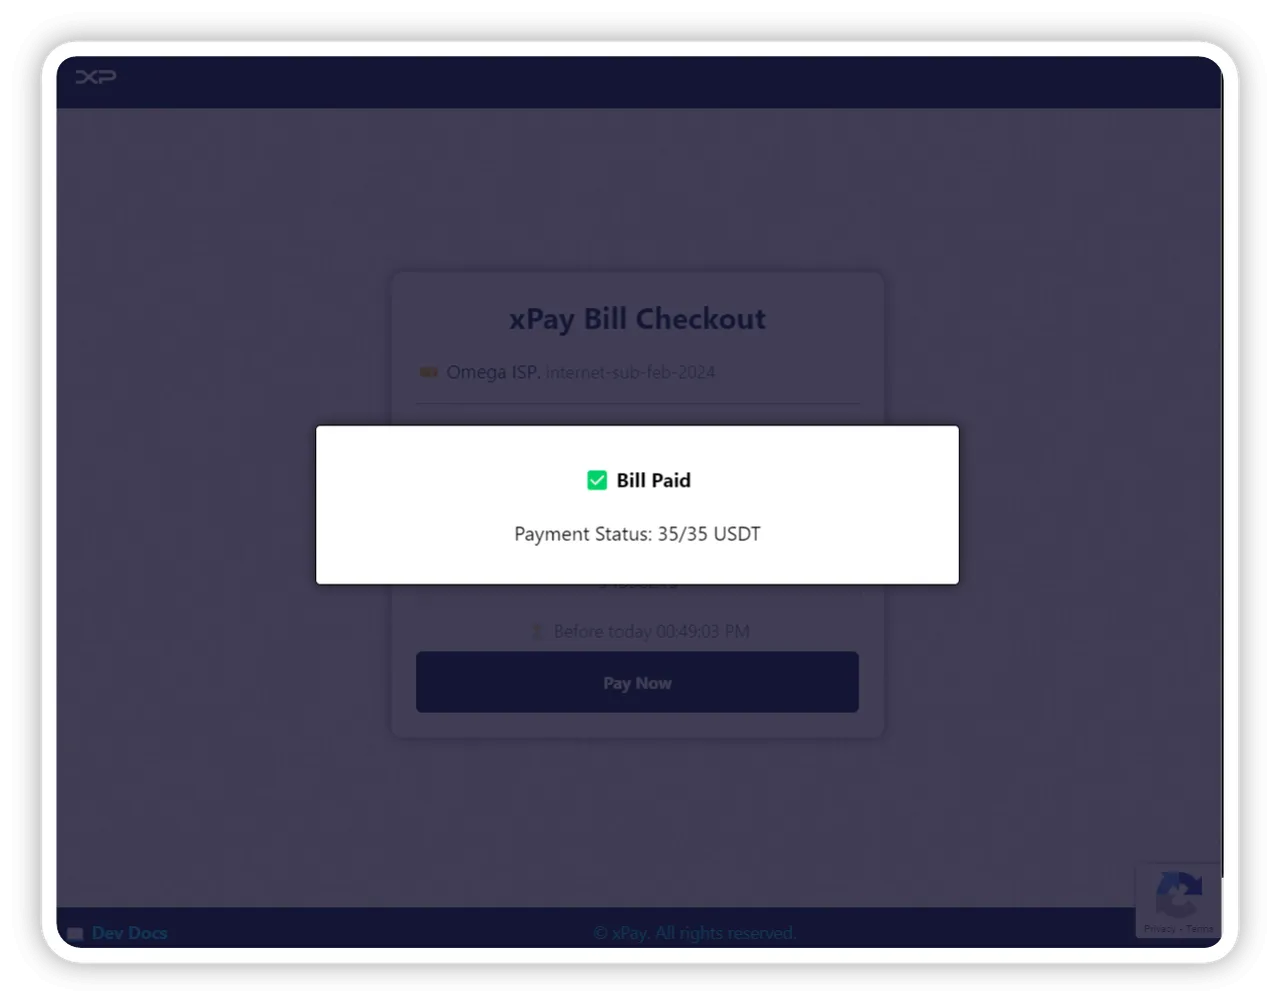
Customers can see the payment status, a redirect follows when it is set:
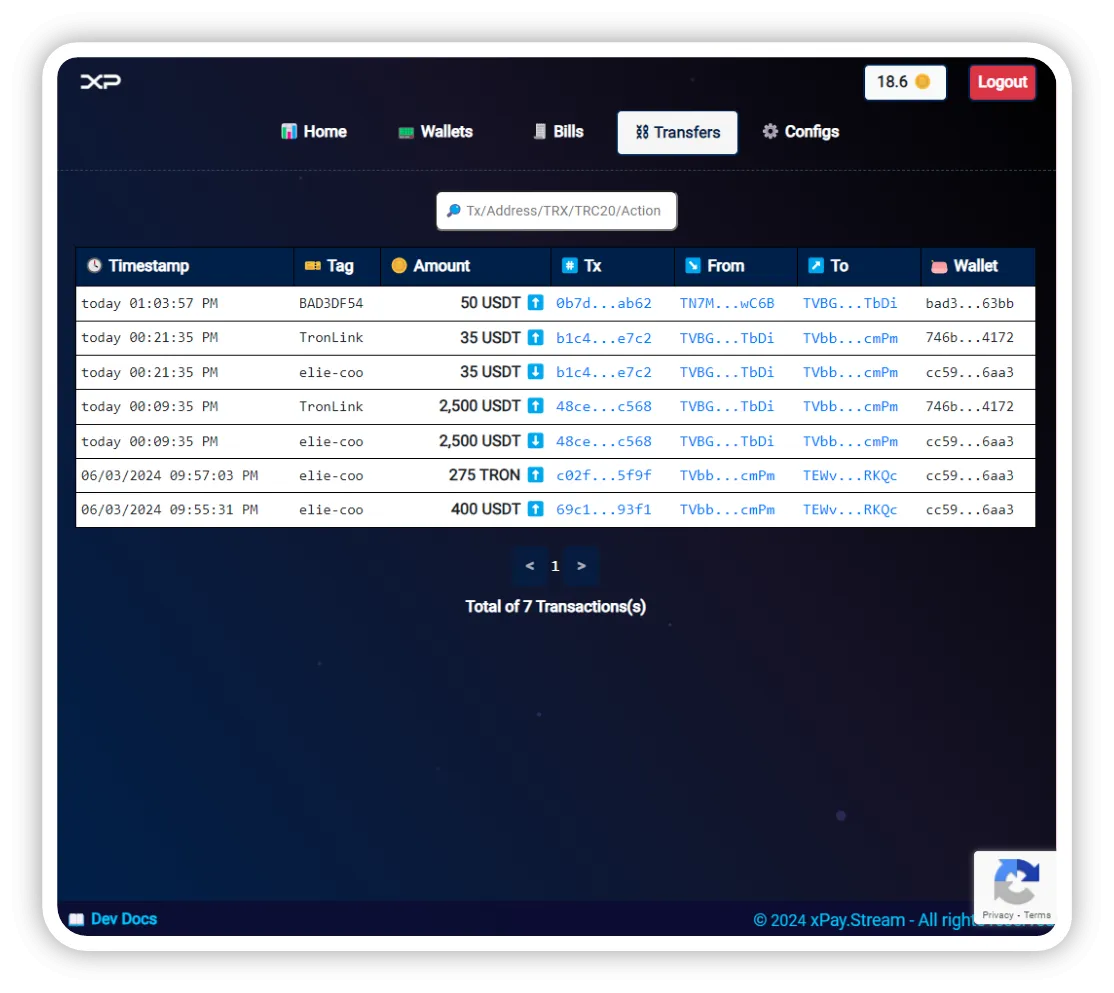
6. Transactions
In the transactions section you will all deposits and withdrawals happening over your wallet.
You can search or filter over some fields:
- "TRX" for tron, "TRC20" for USDT
- "sent" for withdrawals
- "received" for deposits
- by Tag, Tron Address From and To
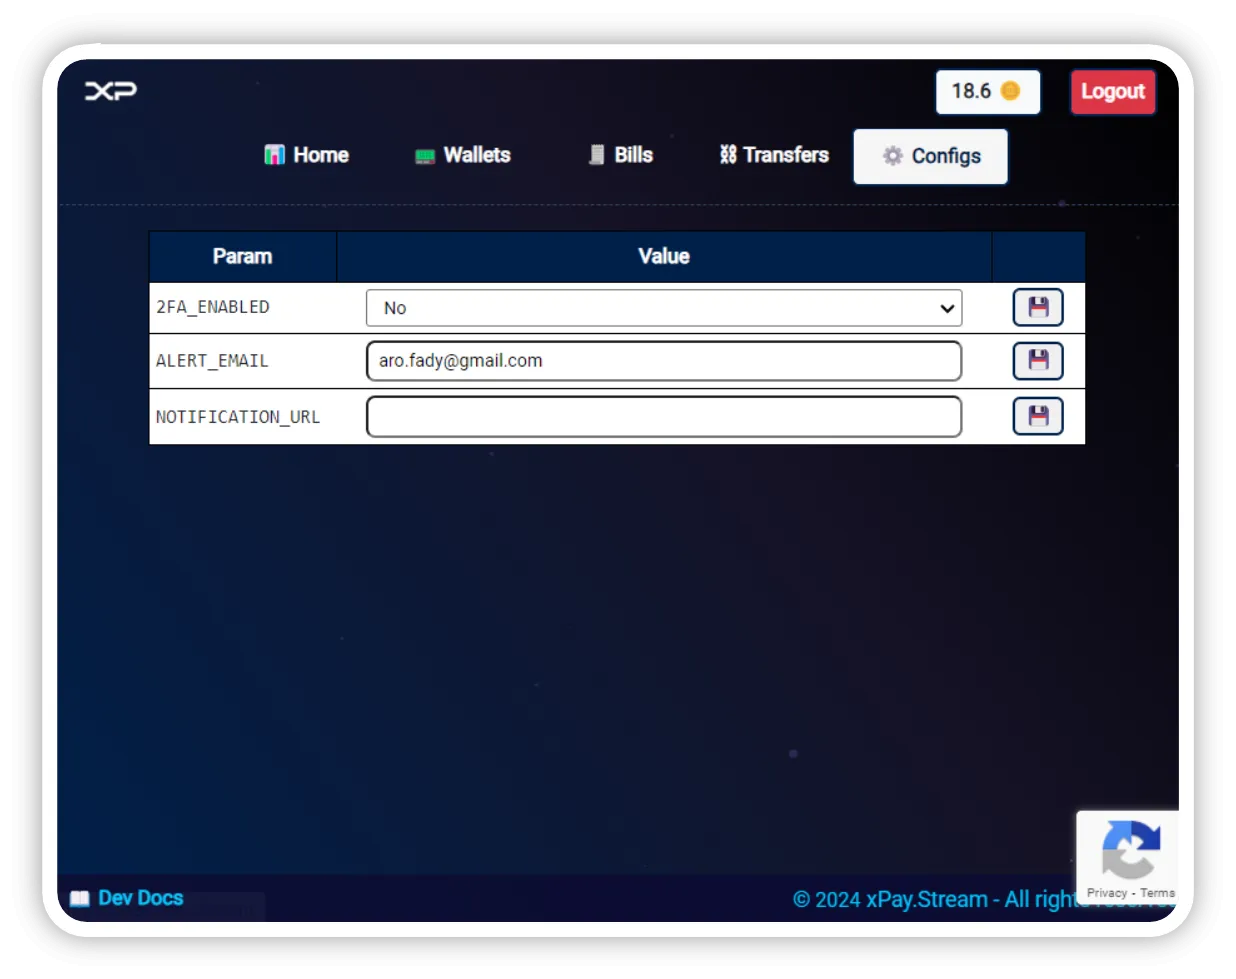
7. ⚙️Configs
In the configs section you can simply set:
- 2FA_ENABLED: allows you to activate 2nd factor authentication used for withdrawals authorizations.
- ALERT_EMAIL: readonly for the moment, your email recipient for notifications and alerts.
- NOTIFICATION_URL: refer to the developer docs, to see how you can get notification for deposits, withdrawals and bills on your backend systems.